Managing Documents
Managing Administrator Documents involves overseeing and organizing various documents, guides, or resources intended for administrators or users within the application. This may include tasks such as uploading new documents, updating existing ones, categorizing content for easy navigation, setting access permissions, and ensuring that the information remains relevant and up-to-date. The goal is to provide administrators with a centralized and accessible repository of documents that assist them in effectively managing and utilizing the application's features and functionalities.
To add a new document to the document repository,
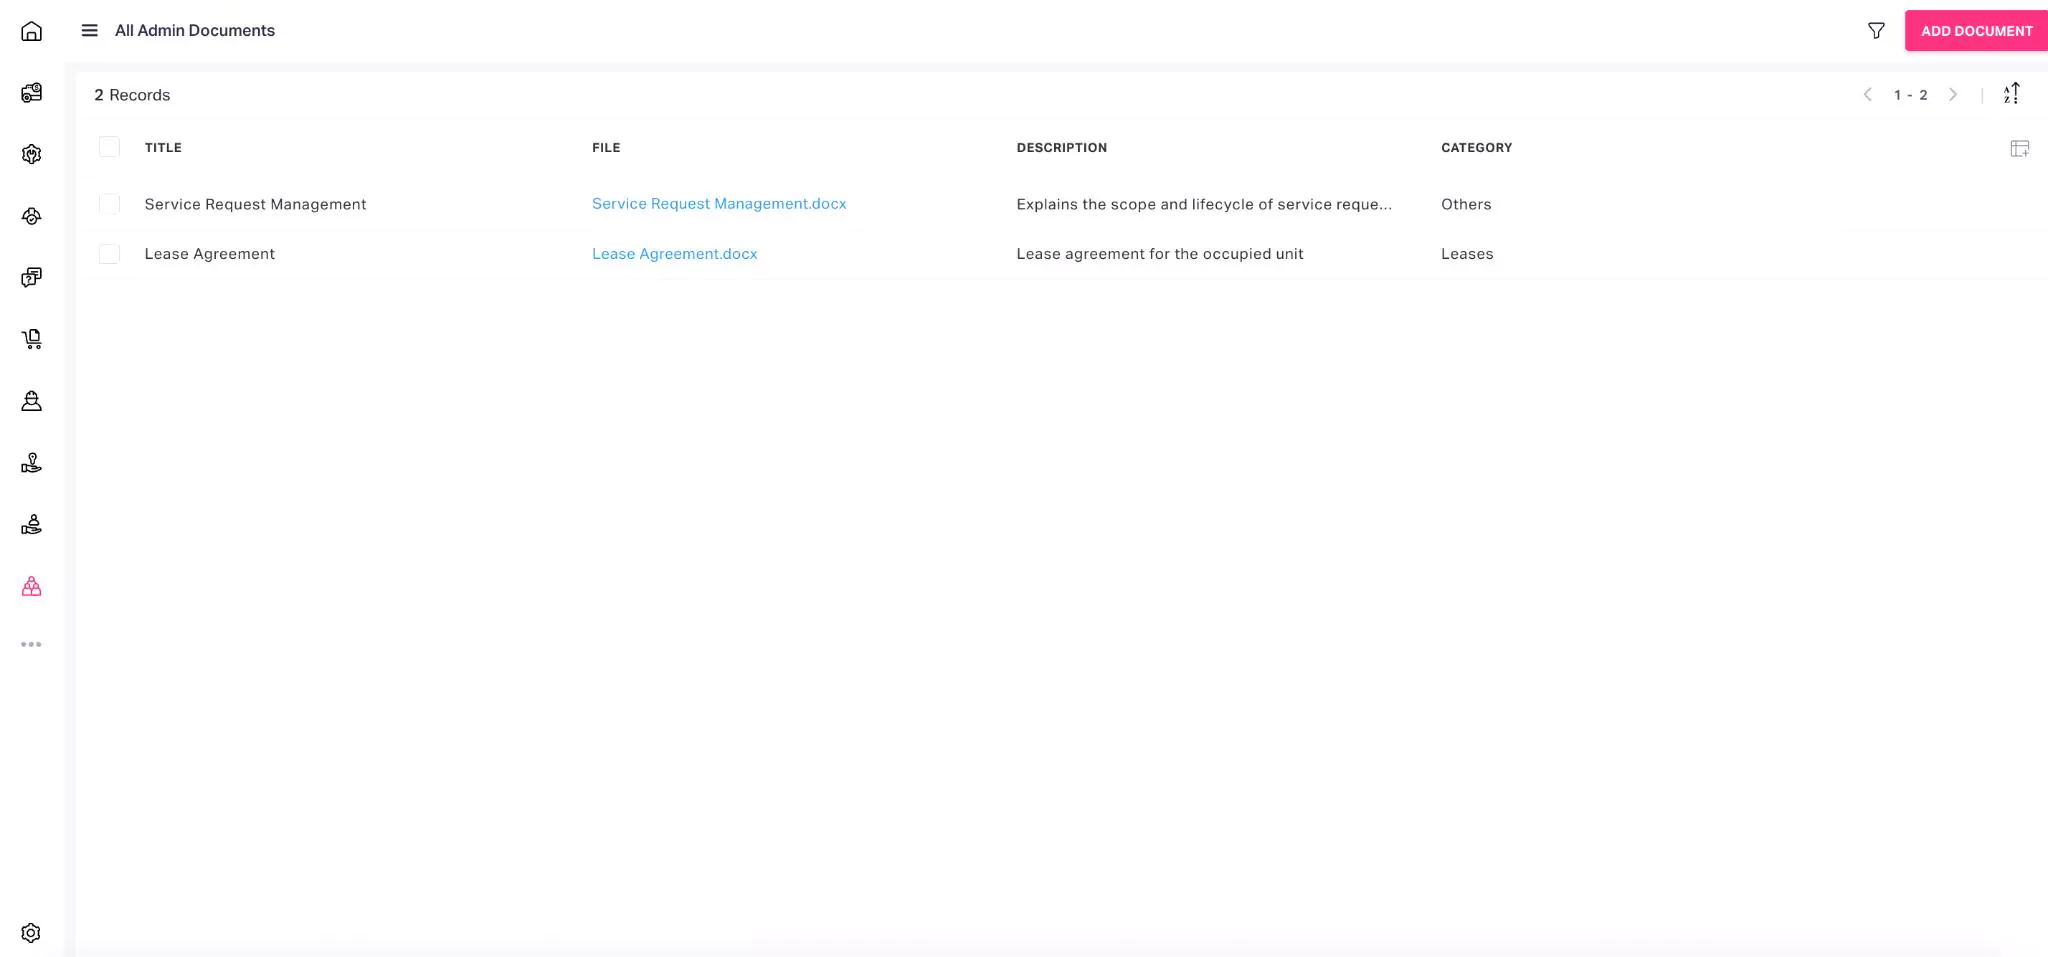
Navigate to the DOCUMENTS section under Help Center Services. All admin documents are displayed by default, as shown below.
Click ADD DOCUMENT. The Create Document window appears as shown below.
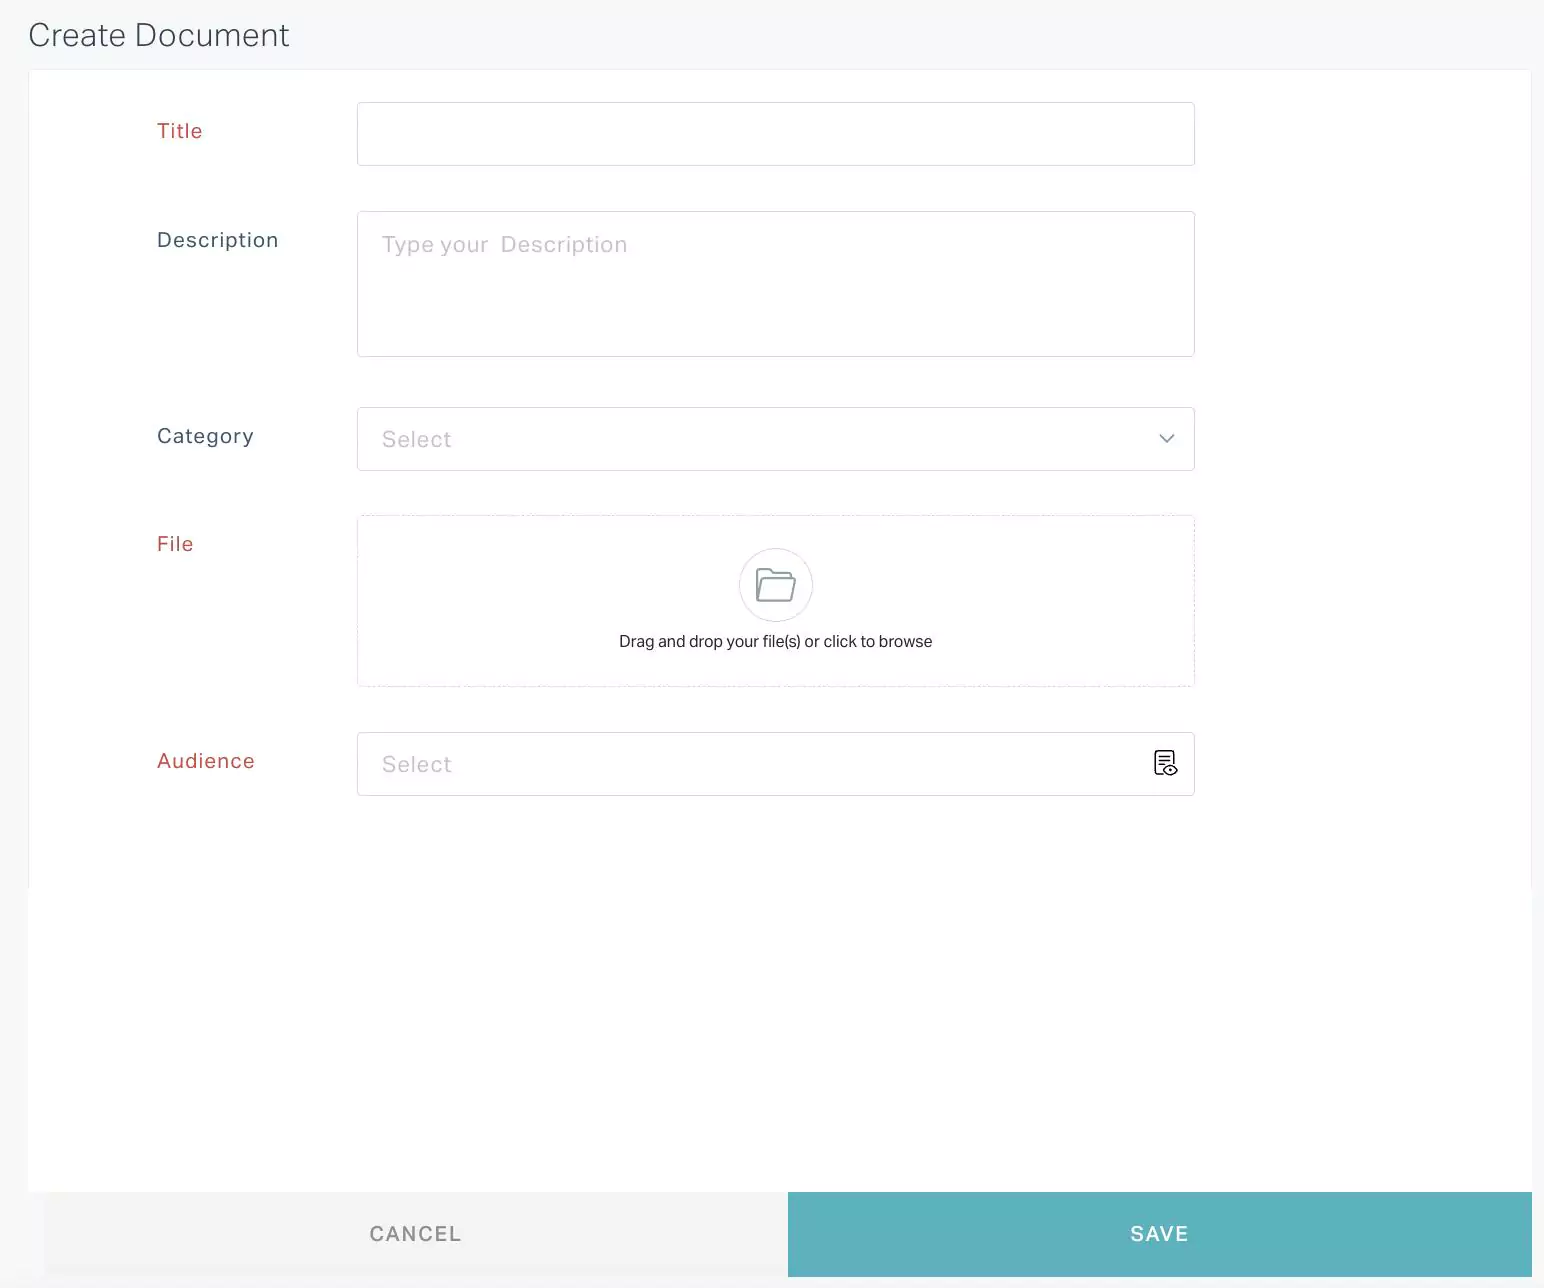
Update the required fields in this screen:
Title - A label to identify the content or purpose of the document
Description - A brief summary or explanation providing additional context or details about the document
Category - The assigned classification or group that helps organize and categorize the document
File - The actual document file or attachment, containing the content and information intended for distribution
Audience - The users or the group of users who can access the document
Note: You can also configure the new set of audience for the document, using the icon in the Choose Audience window. Read the Adding Audience section for more information.
Click SAVE. The document is now successfully uploaded.
The contact created is published into the respective user portals based on the configured audience, making it accessible for users from the Help Center section of the application.