Accessing the Approved Bills
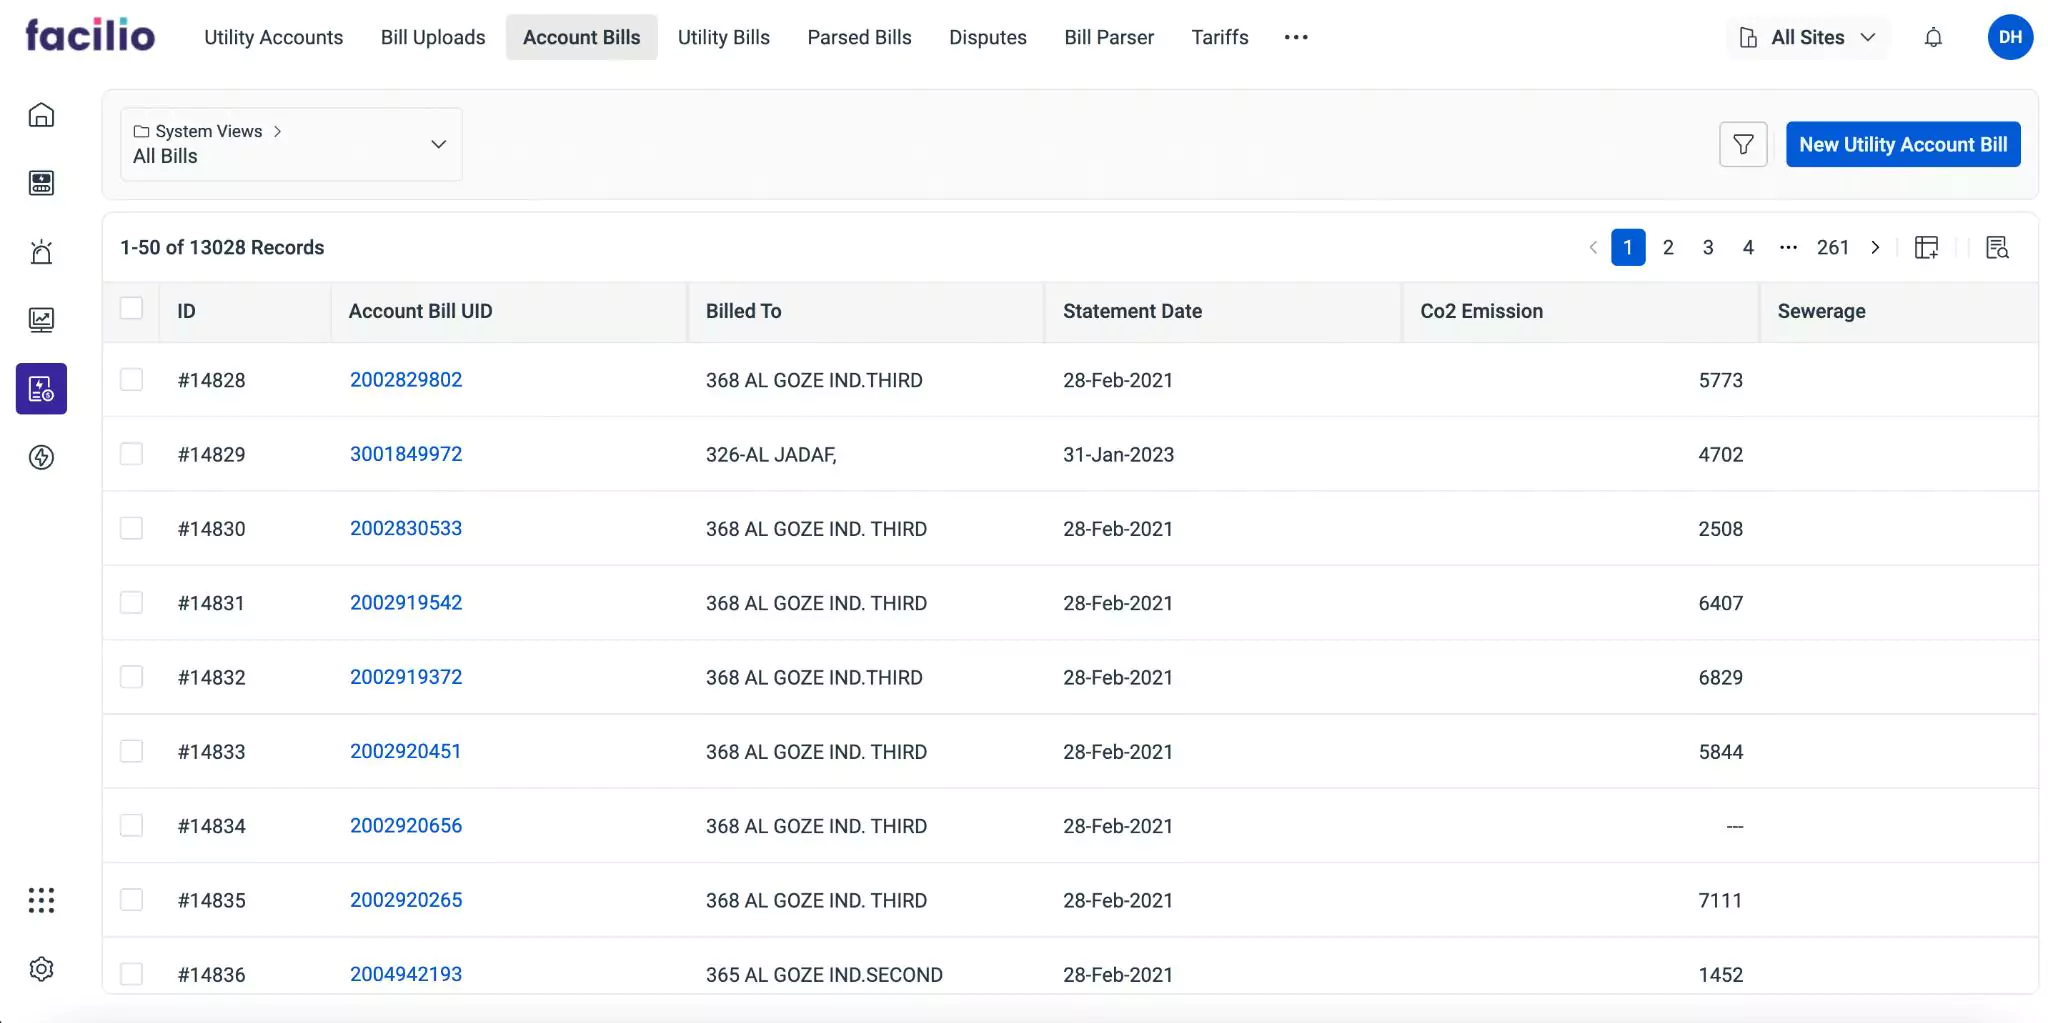
The application offers a streamlined interface to oversee approved parsed accounts and utility bills. Once the bill is approved, the parsed data is organized into the Account Bills and Utility Bills sections, where it is added as a new record based on its classification (utility type). The list of parsed bills can be viewed in the relevant sections, as shown below.
Clicking on a record in these sections will bring up the details screen for that particular record. The upcoming sections will provide detailed information about what you can view within the respective details screen.
Viewing the Account Bill Details
In the Account Bills section, you can access the information extracted from uploaded bills based on the parsing logic configured for the utility type 'Account'. This section provides a comprehensive view of the parsed data, showcasing the relevant details populated after approval. You can click on a record to access the corresponding details screen.
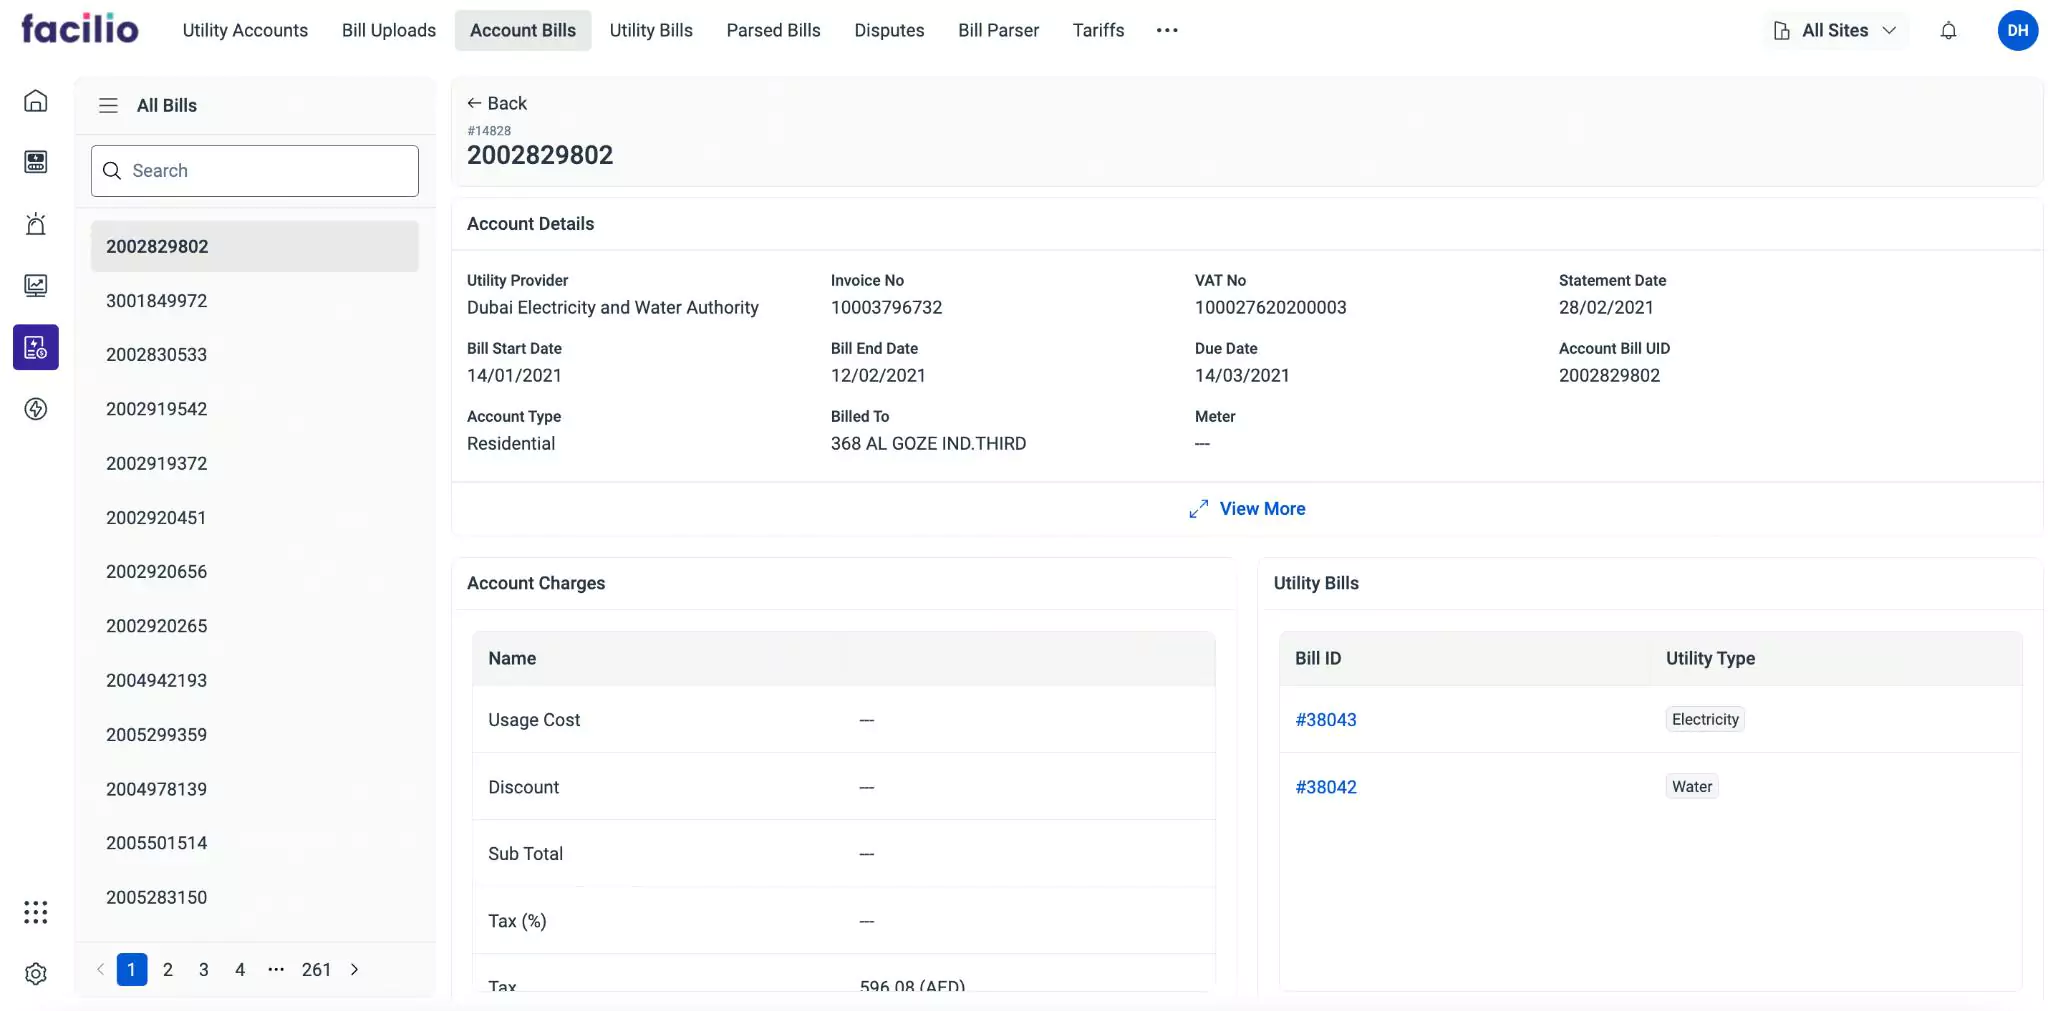
This summary provides a comprehensive overview of the account and charges associated with the selected account invoice. It includes key details such as account information, billing dates, usage costs, taxes, adjustments, and current dues. Additionally, the details screen displays a list of utility bills associated with this account, providing quick access to them directly from this screen.
Viewing the Utility Bill Details
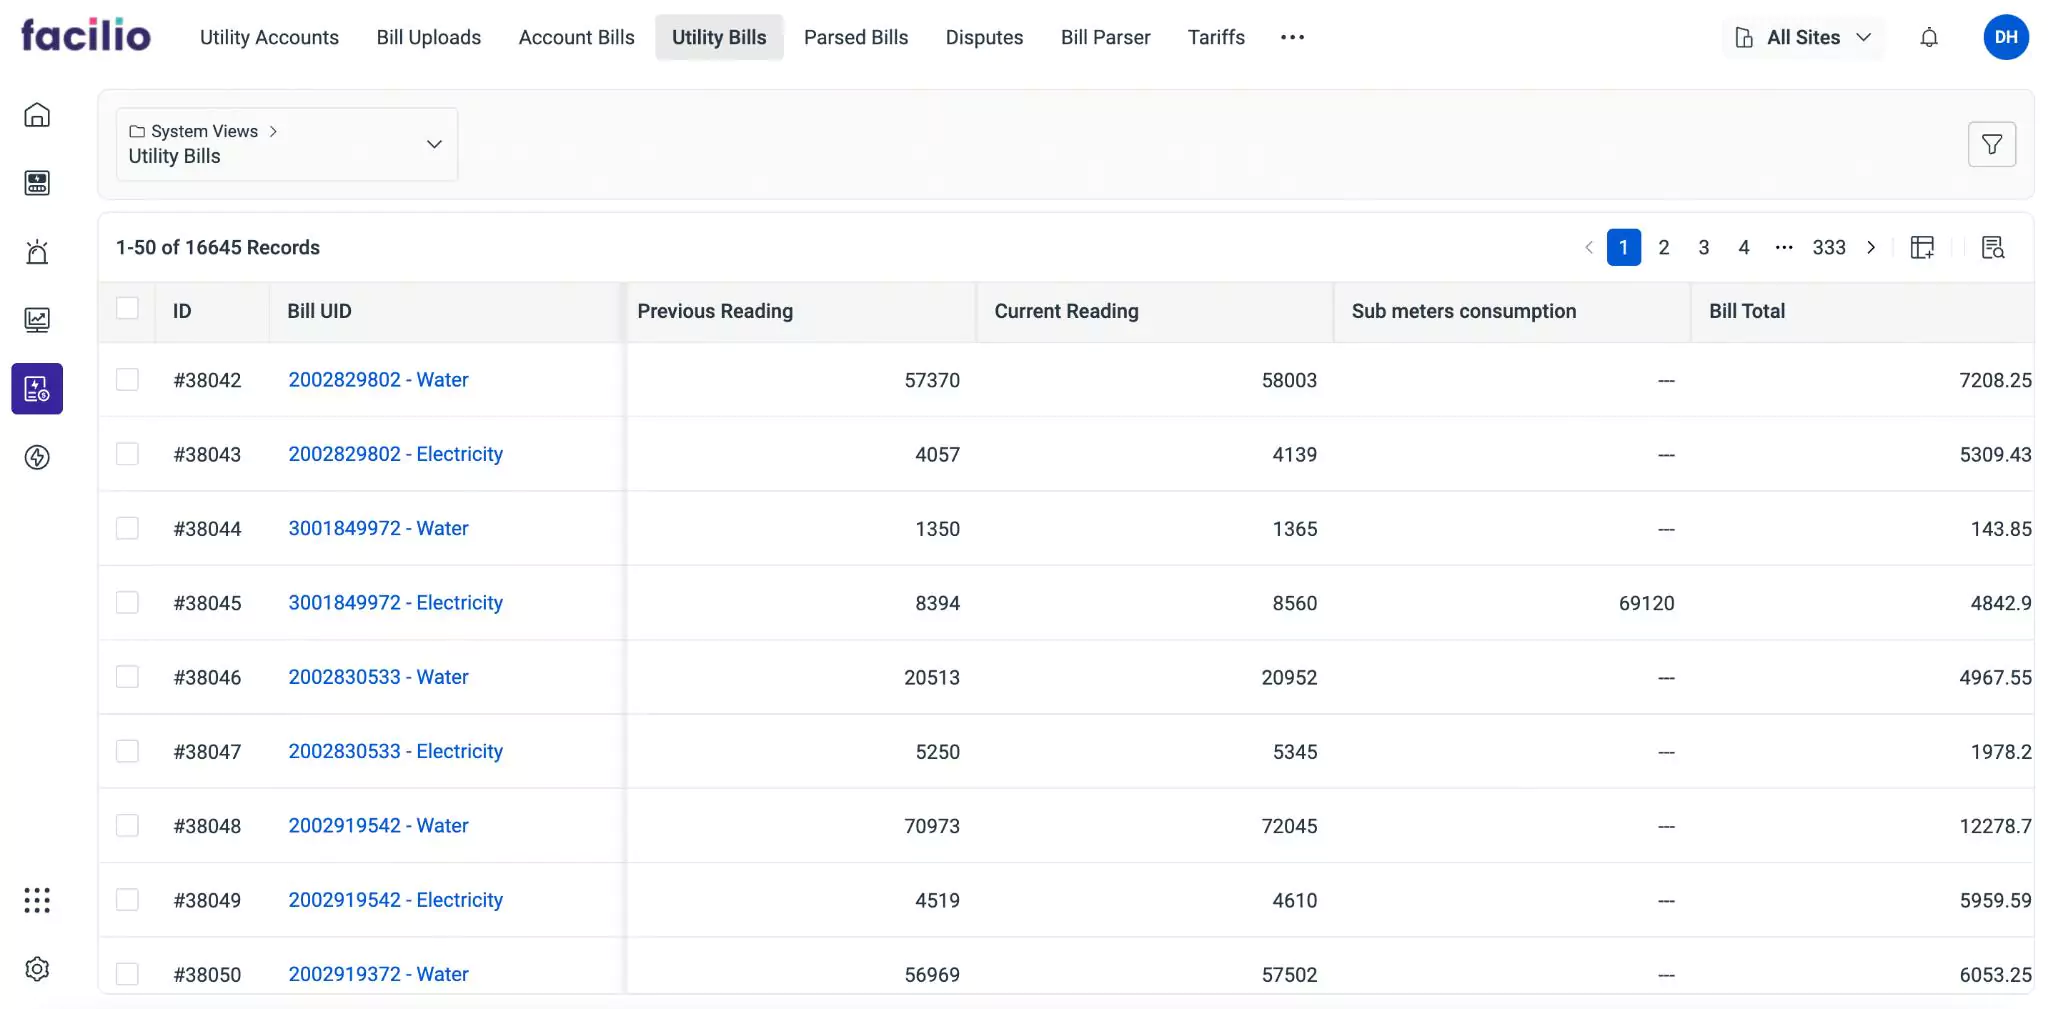
In the Utility Bills section, you can access the information extracted from uploaded bills based on the parsing logic configured for various utility types, such as Electricity, Water, Gas, and more. This section collectively displays all utility bills, providing a centralized access point. You can click on a record to access the corresponding details screen, where the displayed information is categorized into the following sections.
- Summary
- Account Details
- Related
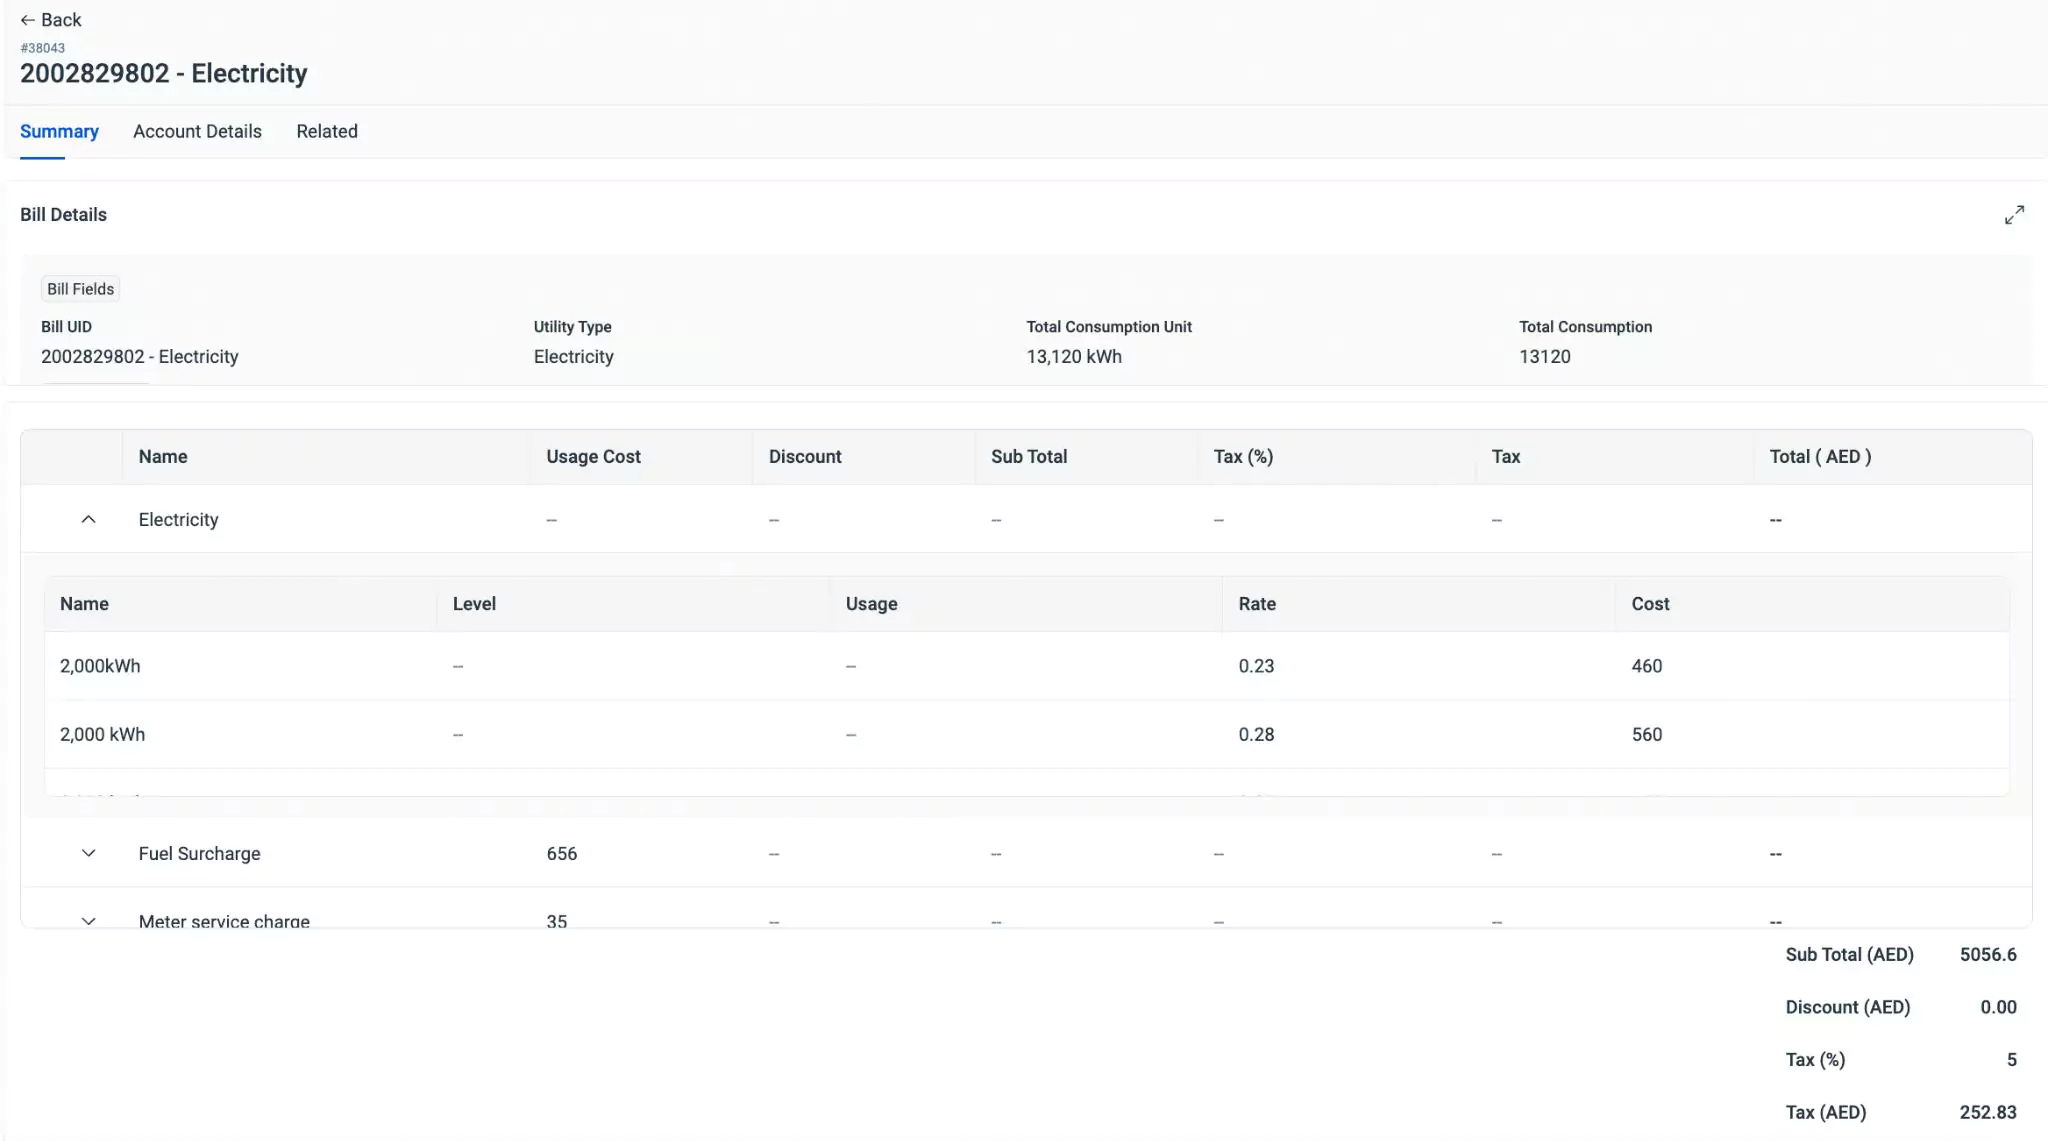
The Summary section encompasses billing-related details such as the utility type, consumed units, consumption charges, and other pertinent information. Additionally, it showcases output information derived from the configured line item mappings as part of the parsing logic.
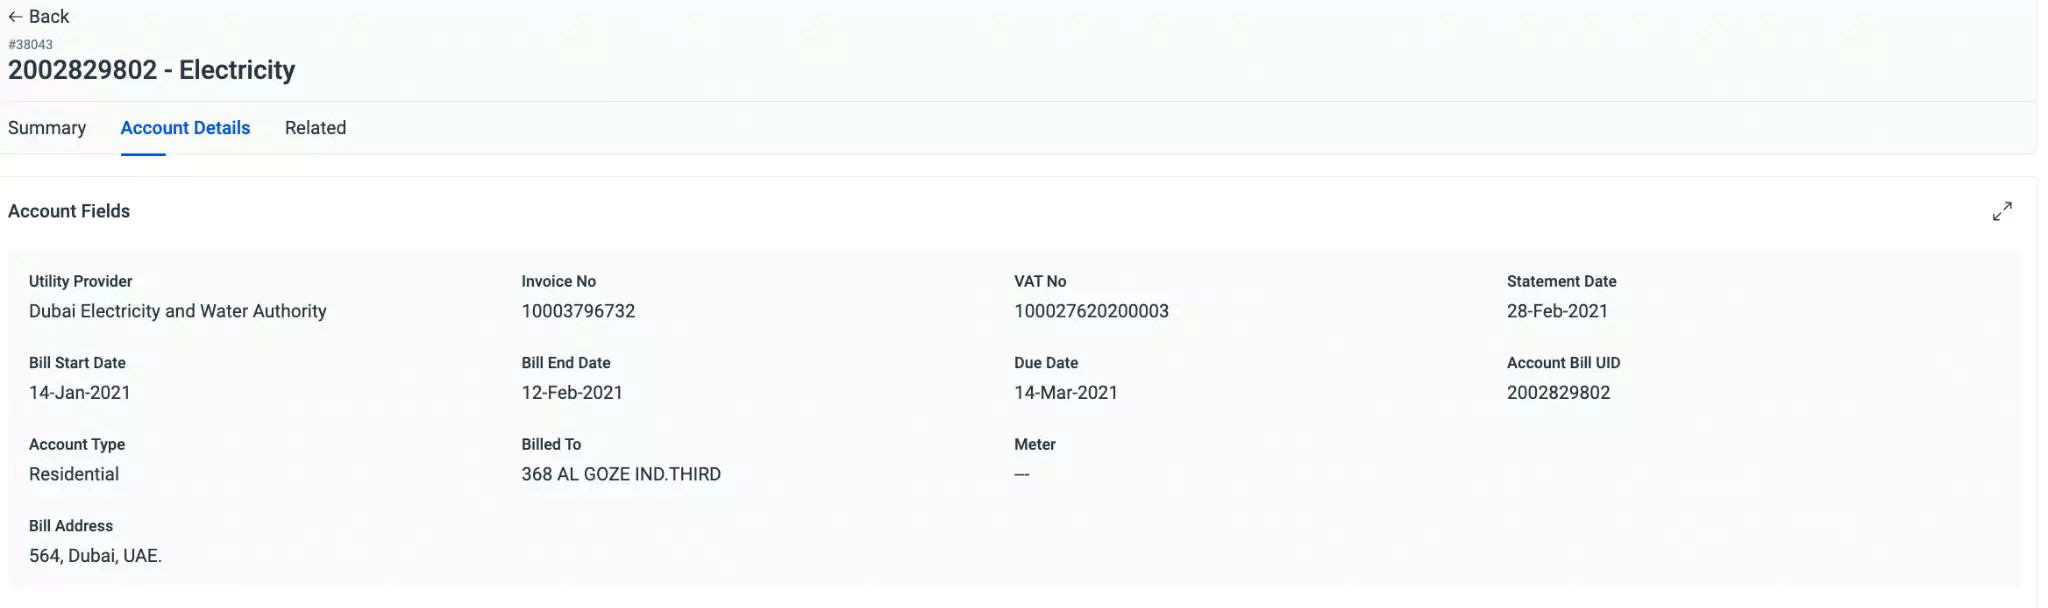
The Account Details section provides comprehensive information related to the account, including details such as the utility provider, invoice number, VAT number, statement date, billing period dates, due date, account ID, account type (residential or commercial), billing address, and meter details. Additionally, it includes the billed address for reference.
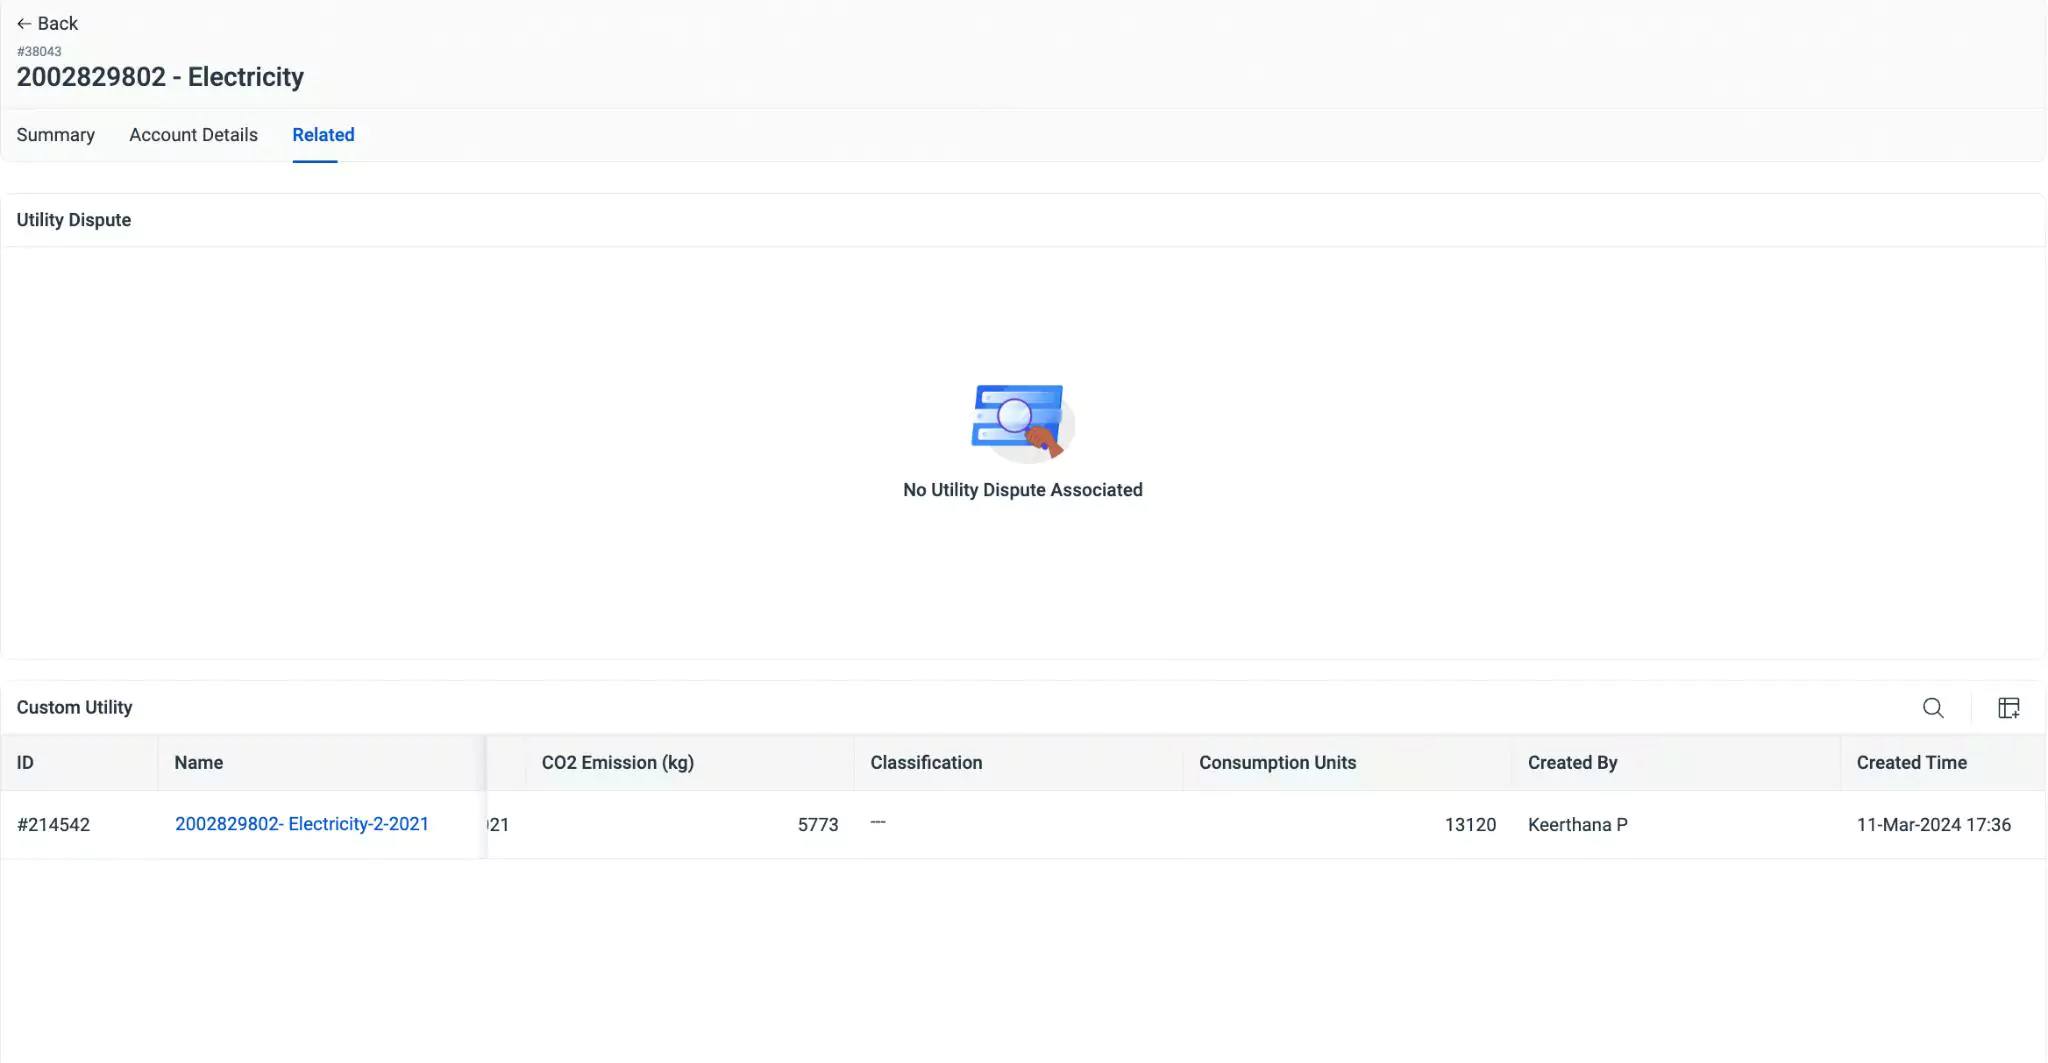
The Related section encompasses integrated details associated with the selected utility, covering various aspects such as costs, tier items, supplier items, Time-of-Use (TOU) details, demand charges, power consumption, dispute information, and other related utilities. This section provides a holistic view of interconnected elements and associated data relevant to the selected utility, facilitating comprehensive analysis and management.
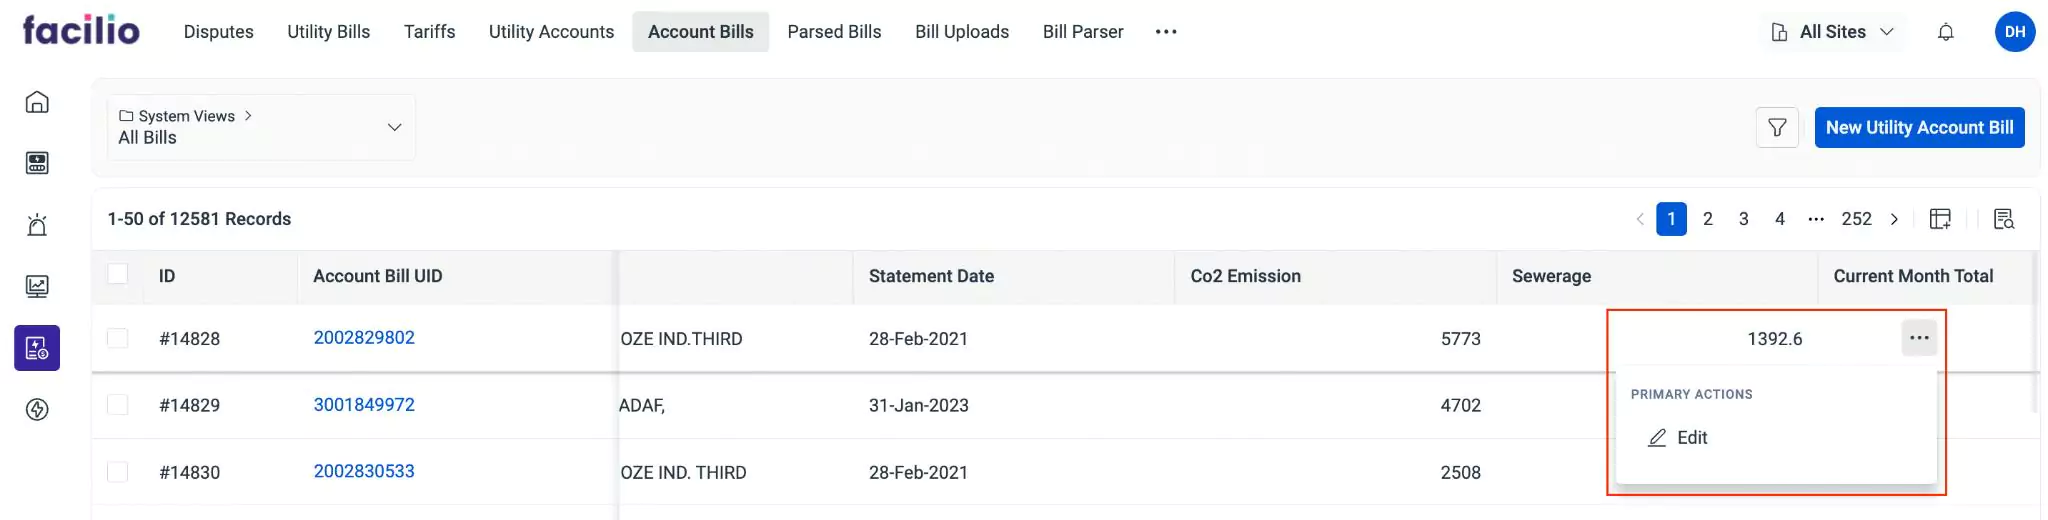
You can click the ![]() icon corresponding to an existing record and select Edit to directly make changes to it.
icon corresponding to an existing record and select Edit to directly make changes to it.