Tenant Management
Tenants are the residents occupying certain spaces in a building. Tenant management is the process of handling residents and their living spaces in a facility that are commonly referred to as tenants and tenant units.
Introduction
The Tenant module of the application ensures that the facility management team has track of all details of the tenants residing in the building. In Facilio, tenant management includes activities such as creating tenants, adding occupants to the tenants, associating tenant units, providing access to the tenant and occupant portal and so on
Basic Components
This module revolves around the following components:
| Component | Description |
|---|---|
| Tenant | The resident occupying particular tenant unit in the building |
| Occupants | The people occupying the tenant unit along with the tenant, who are usually referred to as tenant contacts |
| Tenant Unit | The space in a building occupied by the tenant |
| Tenant Portal | An exclusive interface that allows the tenants to access live details and perform various activities (for example, raising work order, booking facility and so on) |
| Work Order | The requests raised for any maintenance activity (that is, preventive and reactive) in a facility |
Working with Tenants and Tenant Units
This section explains how the application allows you to manage the tenants and associated occupants and tenant units of a building. From the Tenants module you can,
- Create a new tenant
- Add tenant contacts to an existing tenant
- Modify the status of a tenant
- Associate and disassociate tenant units
- Enable access to the tenant/occupant portal
Managing Tenants
This section explains how to create a new tenant, associate tenant contacts, change the status, and modify or delete an existing tenant or tenant contact.
Creating a Record
The application allows you to create a tenant and associate contacts to it. Typically, a tenant is a resident of the building and tenant contacts are the people sharing the space along with the tenant (usually the family members).
Creating a Tenant
Click the
 (Tenants) icon in the sidebar menu. The TENANTS section is displayed by default.
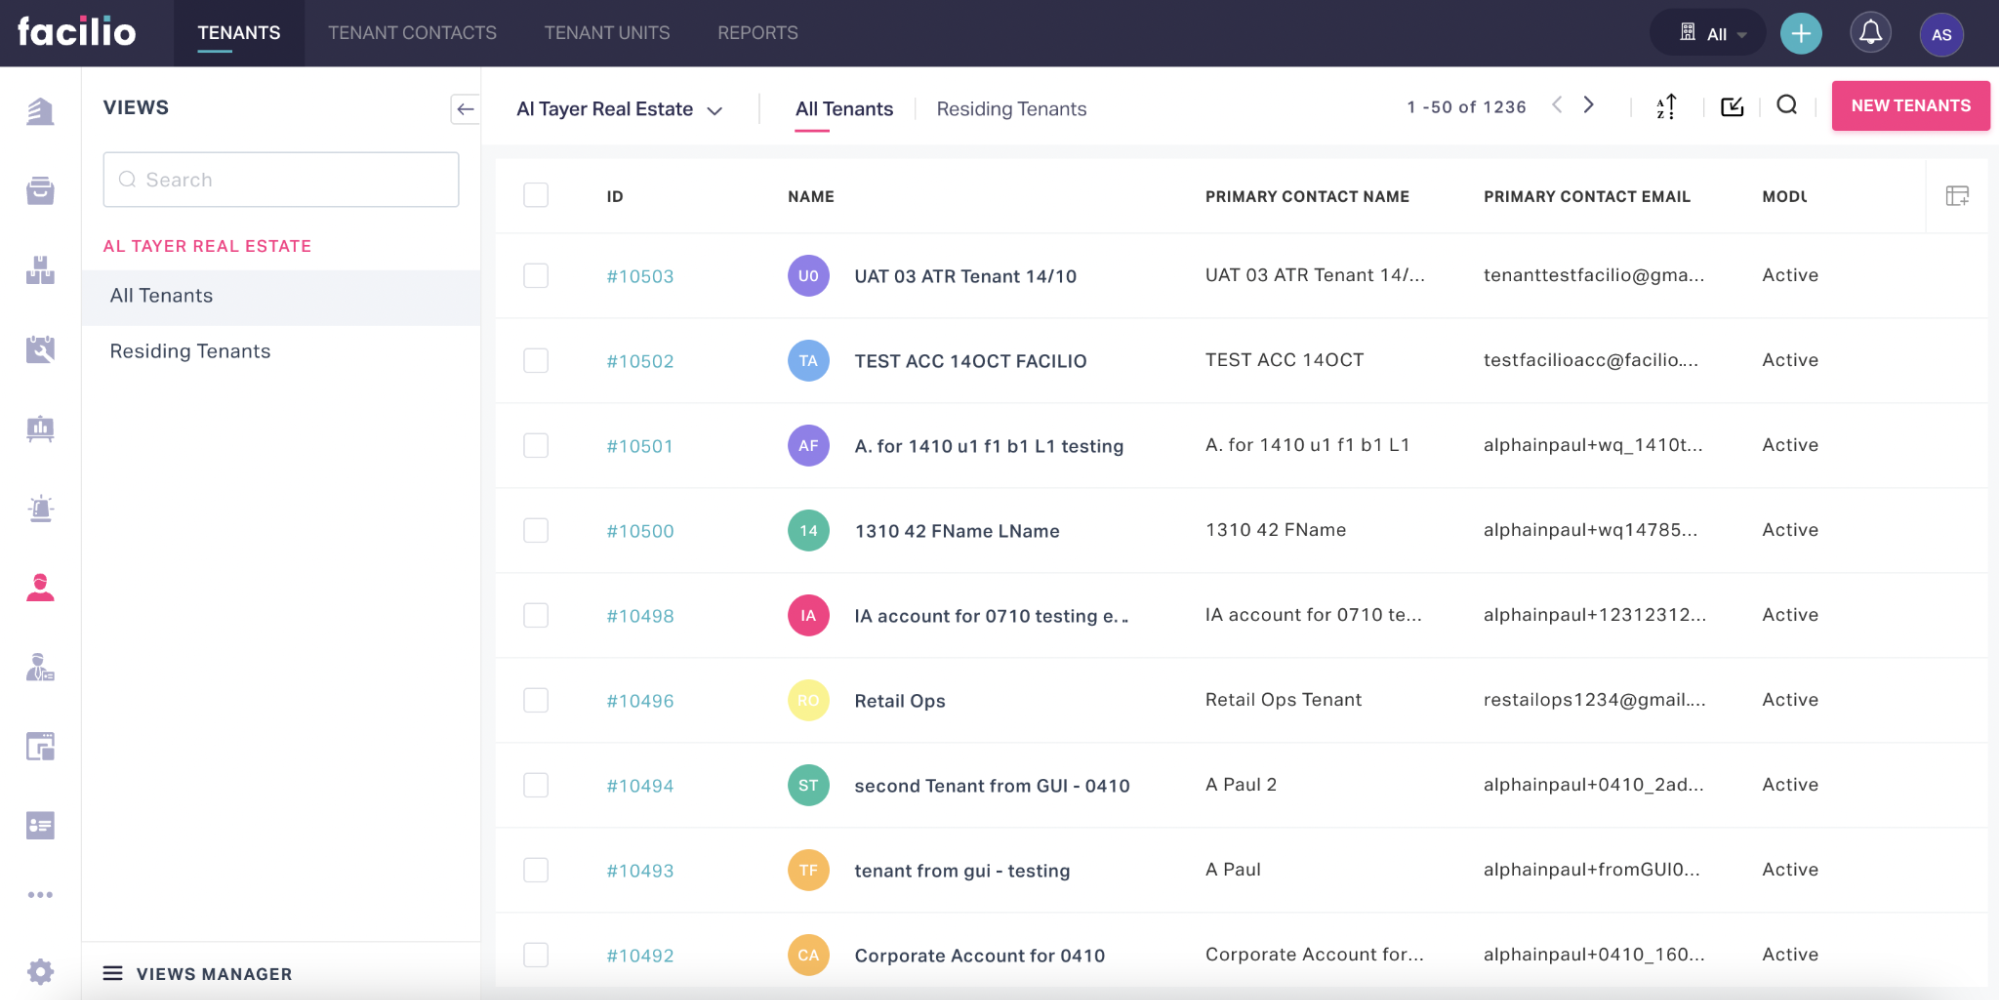
Click NEW TENANTS at the top right. The Create Tenant screen appears as shown below.
Update the required fields in this screen.
Note: The primary contact indicates the first point of contact for any notification or clarification.
Click SAVE. The tenant is now added to the dashboard.
Adding a Tenant Contact
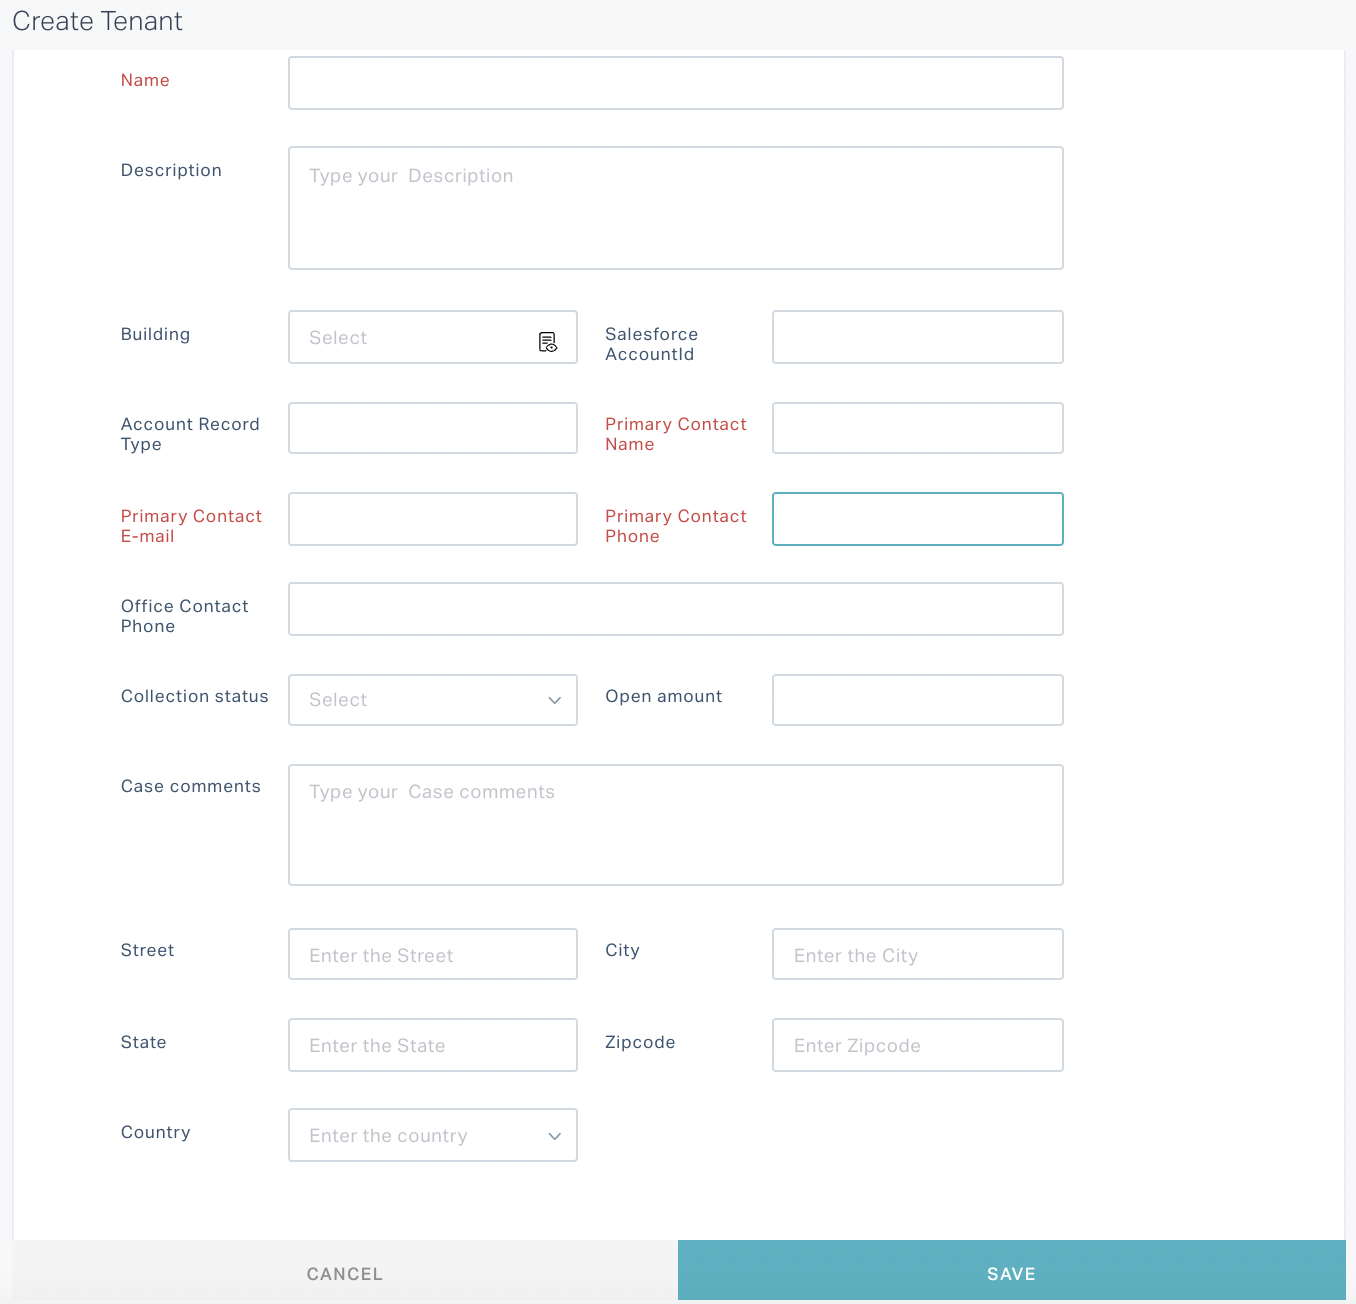
Click the
(Tenants) icon in the sidebar menu. The TENANTS section is displayed by default.Navigate to the TENANT CONTACTS section. All tenant contacts are displayed as shown below.

Click NEW TENANT CONTACT. The Create Tenant Contact screen appears as shown below.
Update the required fields in this screen.
Note: If portal access is enabled for the tenant contact in the future, the Email provided in this screen will serve as the user id. So it is advised to enter an email in the defined format. That is, if abc@xyz.com is your mail, you can enter the Email as abc+tenant@xyz.com, so that the activation email will be sent to your email id (abc@xyz.com).
Check the Primary Contact field to make the contact as the first point of contact for the tenant unit.
Click SAVE. The new contact is now associated with the selected Tenant.
Note: You can navigate to the RELATED RECORDS section of the respective tenant details screen to view the associated tenant contacts

You can also add tenant contacts to a tenant in the following ways:
You can use the
 (vertical ellipsis) icon at the top right of the tenant details screen and select Add Tenant Contact to directly associate contacts to the tenant.
You can add contacts from the tenant portal, which will be automatically associated with the vendor in the application. Read the XXX section in the Tenant Portal document for more information.
Modifying Details
To make changes to the attributes of an existing tenant or tenant contact,
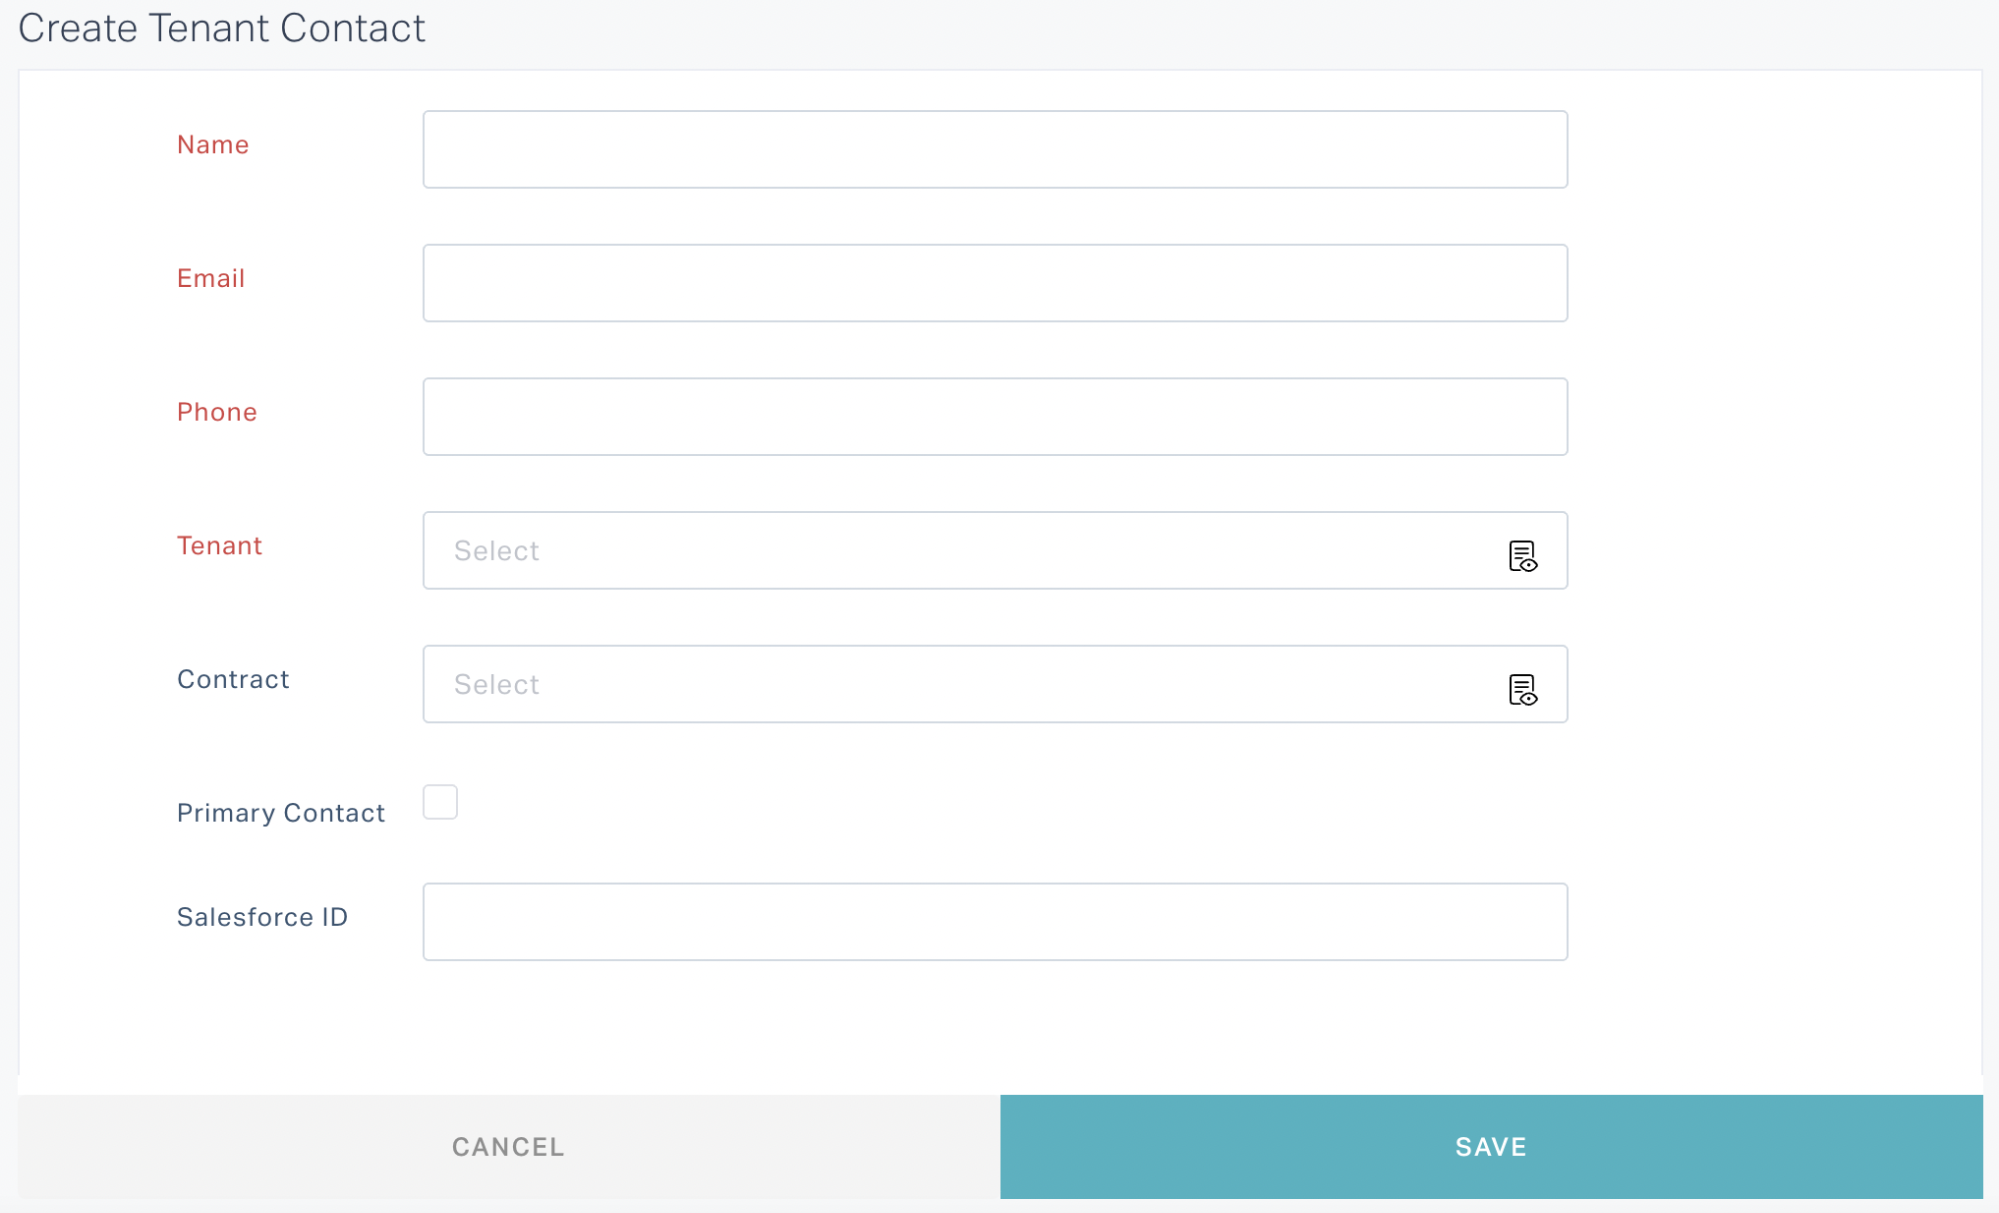
Click the
(Tenants) icon in the sidebar menu. The TENANTS section is displayed by default.Select the tenant from the dashboard. The details are displayed as shown below.
Click the
 (edit) icon at the top right of the screen.
Update the required fields in the Edit Tenant screen that appears.
Click SAVE. The changes are saved against the tenant in the dashboard.
Note: Alternatively, you can use icon respective to the tenant in the dashboard to modify the details.
The same procedure applies for modifying the tenant contact details. You must navigate to the TENANT CONTACT section to select the tenant contact that has to be modified.
Changing Tenant Status
To change the status of a tenant,
Click the
(Tenants) icon in the sidebar menu. The TENANTS section is displayed by default.Select the tenant from the dashboard. The details are displayed as shown below.

Click MAKE EXPIRE or MAKE ACTIVE to inactivate or activate the tenant, respectively.The status of the tenant is updated to INACTIVE or ACTIVE accordingly.
Note: The option displayed varies with respect to the current status of the vendor.
Deleting a Record
Click the
(Tenants) icon in the sidebar menu. The TENANTS section is displayed by default.Click the
 (Delete) icon respective to the tenant in the dashboard to delete it. A confirmation window appears to confirm the deletion.
Click DELETE. The selected tenant is removed from the dashboard.
The same procedure applies for deleting a tenant contact. You must navigate to the TENANT CONTACT section to select the tenant contact that has to be deleted.
Managing Tenant Units
The tenant units are the residential spaces in a building that can be occupied by the tenants. The spaces that are defined as Tenant Units in the PORTFOLIO section are listed in the TENANT UNITS section of the Tenants module. Read the Space Management section for more information. The TENANT UNITS section of the application allows you to associate tenant units to the available tenants to indicate that the space is being occupied by them. You can also disassociate tenant units from the tenants as and when required.
Associating and Disassociate Tenant Unit
To associate a tenant unit to a tenant,
Click the
(Tenants) icon in the sidebar menu. The TENANTS section is displayed by default.Select the tenant from the dashboard. The SUMMARY of the tenant details are displayed as shown below.
Click the
 (Add Spaces) icon in the Tenant Units section. The CHOOSE TENANT UNITS window appears that displays the list of unoccupied units.
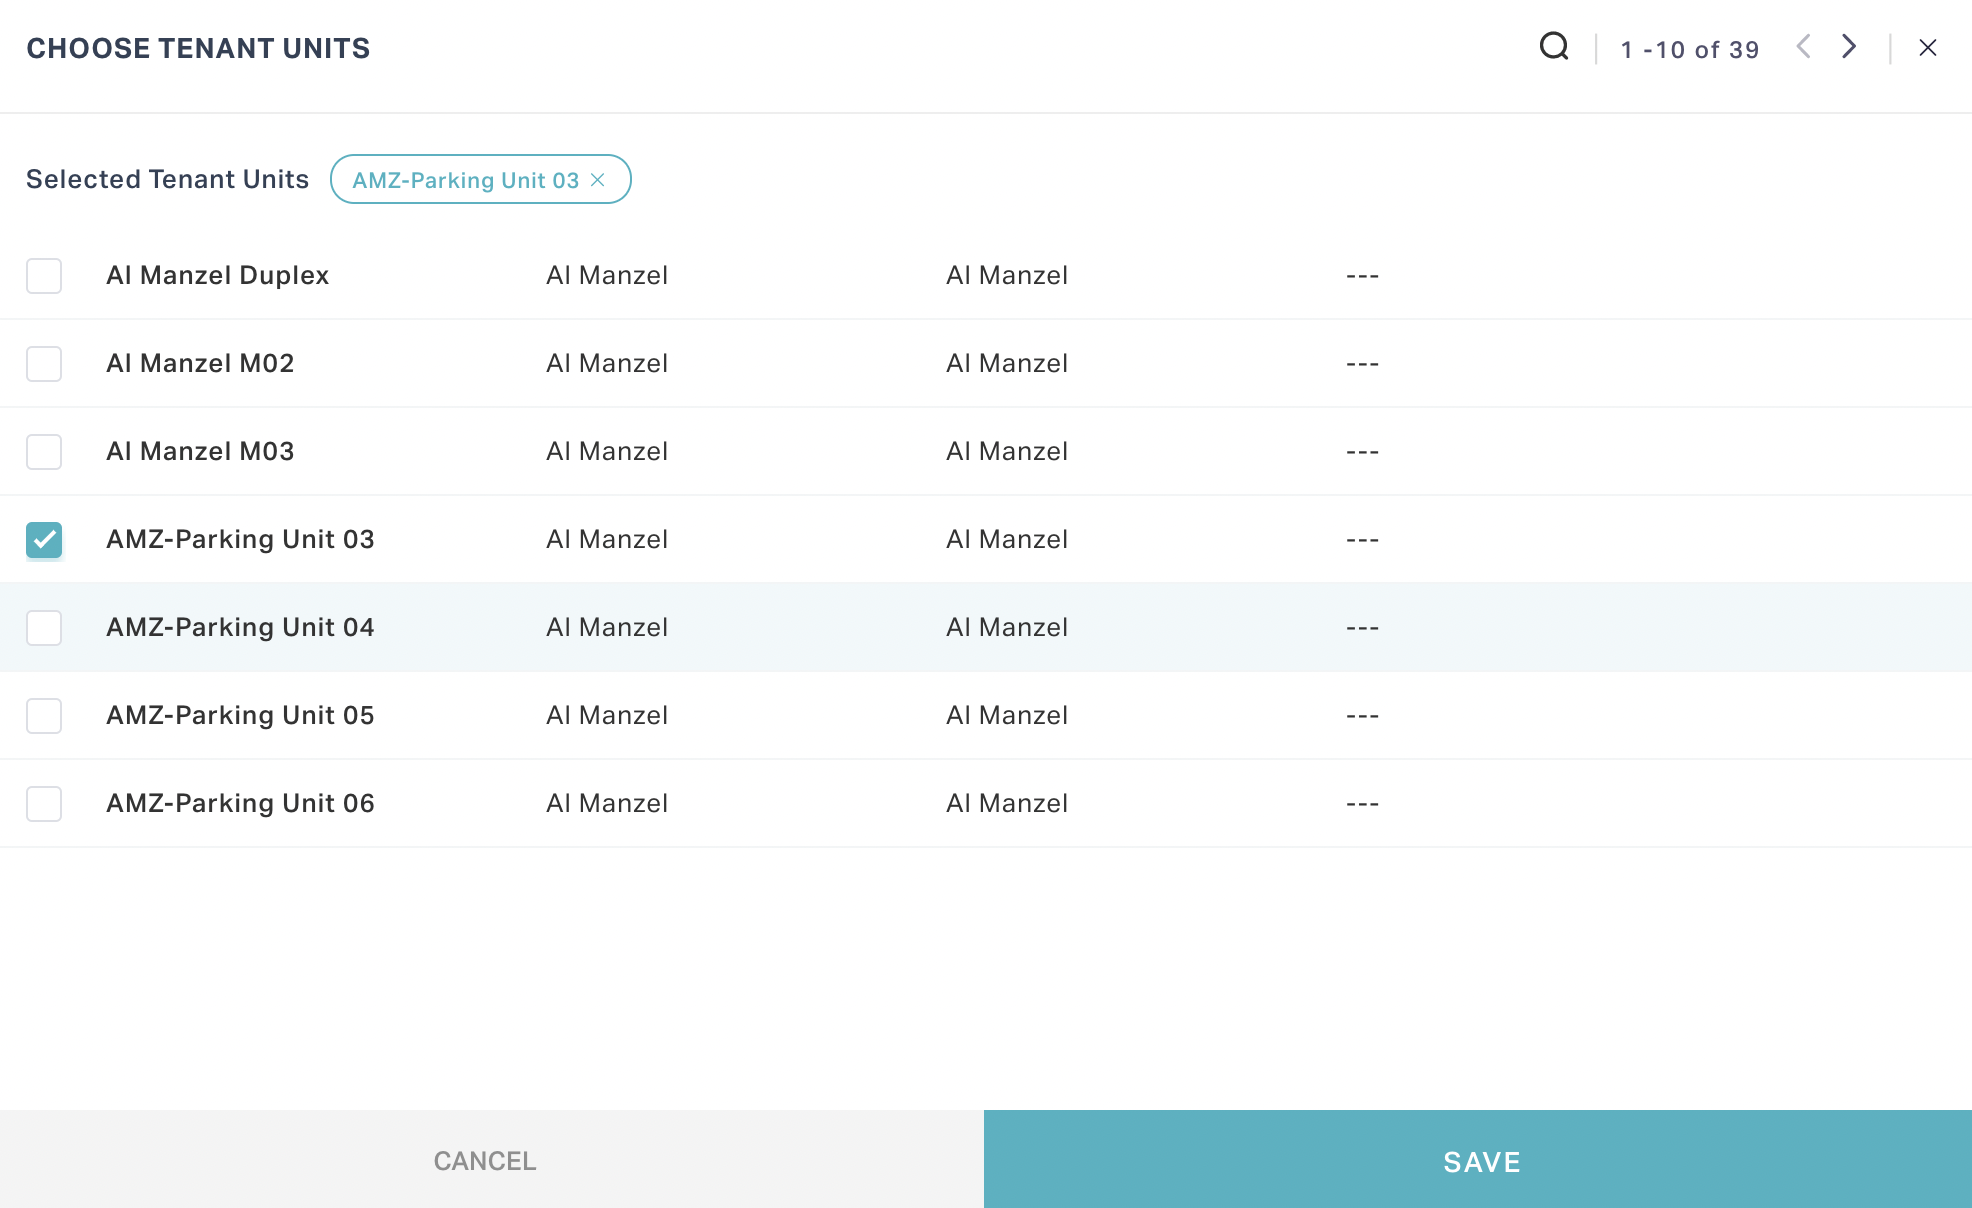
Select the required space(s) and click SAVE. The selected unit is associated with the tenant as shown below.
You can click the ![]() icon respective to the unit to disassociate it from the tenant.
icon respective to the unit to disassociate it from the tenant.
Note: The OCCUPANCY STATUS of the tenant unit in the dashboard is updated with respect to the tenant unit being occupied or not.
Modifying Details
Click the
(Tenants) icon in the sidebar menu. The TENANTS section is displayed by default.Navigate to the TENANT UNITS section. All the tenant units are displayed.
Click the
 icon respective to the tenant unit in the dashboard to modify the details.
Update the required fields in the respective screen that appears.
Click SAVE. The changes are saved against the tenant unit in the dashboard.
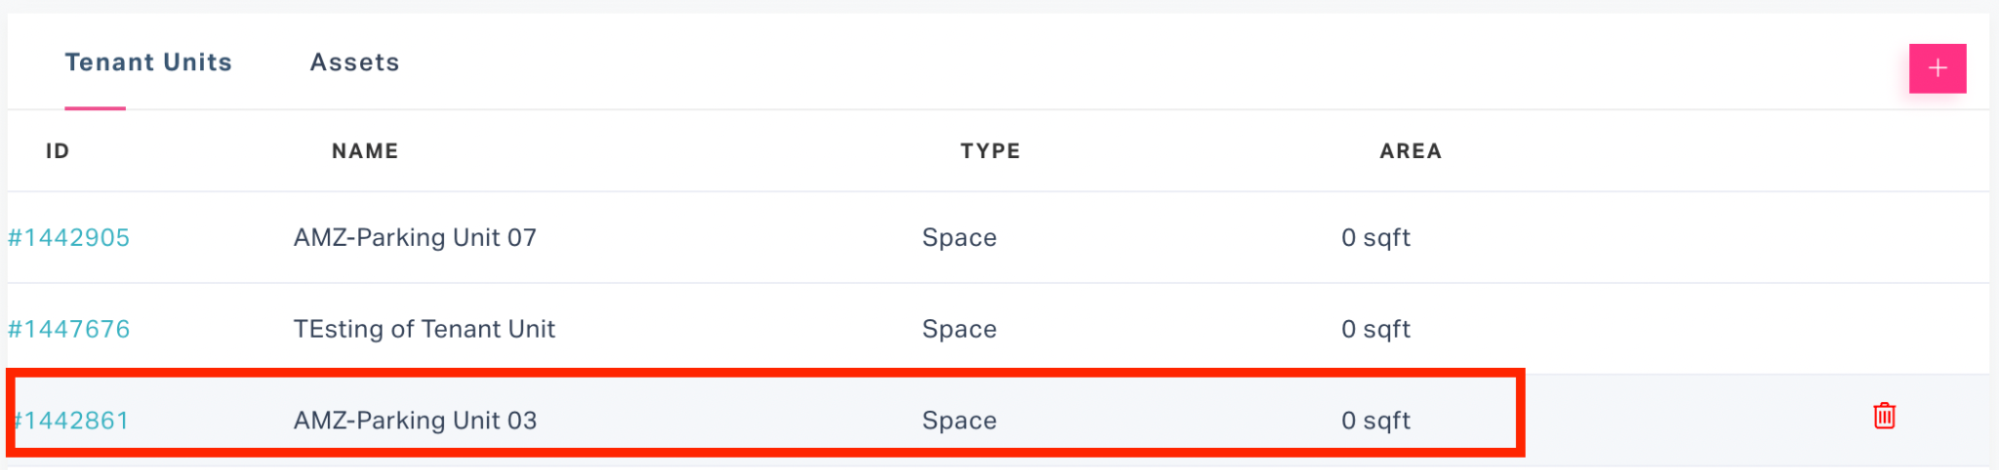
Deleting a Tenant Unit
Click the
(Tenants) icon in the sidebar menu. The TENANTS section is displayed by default.Navigate to the TENANT UNITS section. All the tenant units are displayed.
3.Click the ![]() (Delete) icon respective to the tenant unit in the dashboard to delete it. A confirmation window appears to confirm the deletion.
(Delete) icon respective to the tenant unit in the dashboard to delete it. A confirmation window appears to confirm the deletion.
- Click DELETE. The selected tenant unit is removed from the dashboard.
Enabling Portal Access
A facility administrator is solely authorized to enable portal access to a tenant or tenant contact. To enable portal access,
Login to the application.
Navigate to the TENANT CONTACT section and select the tenant contact for which portal access has to be enabled.
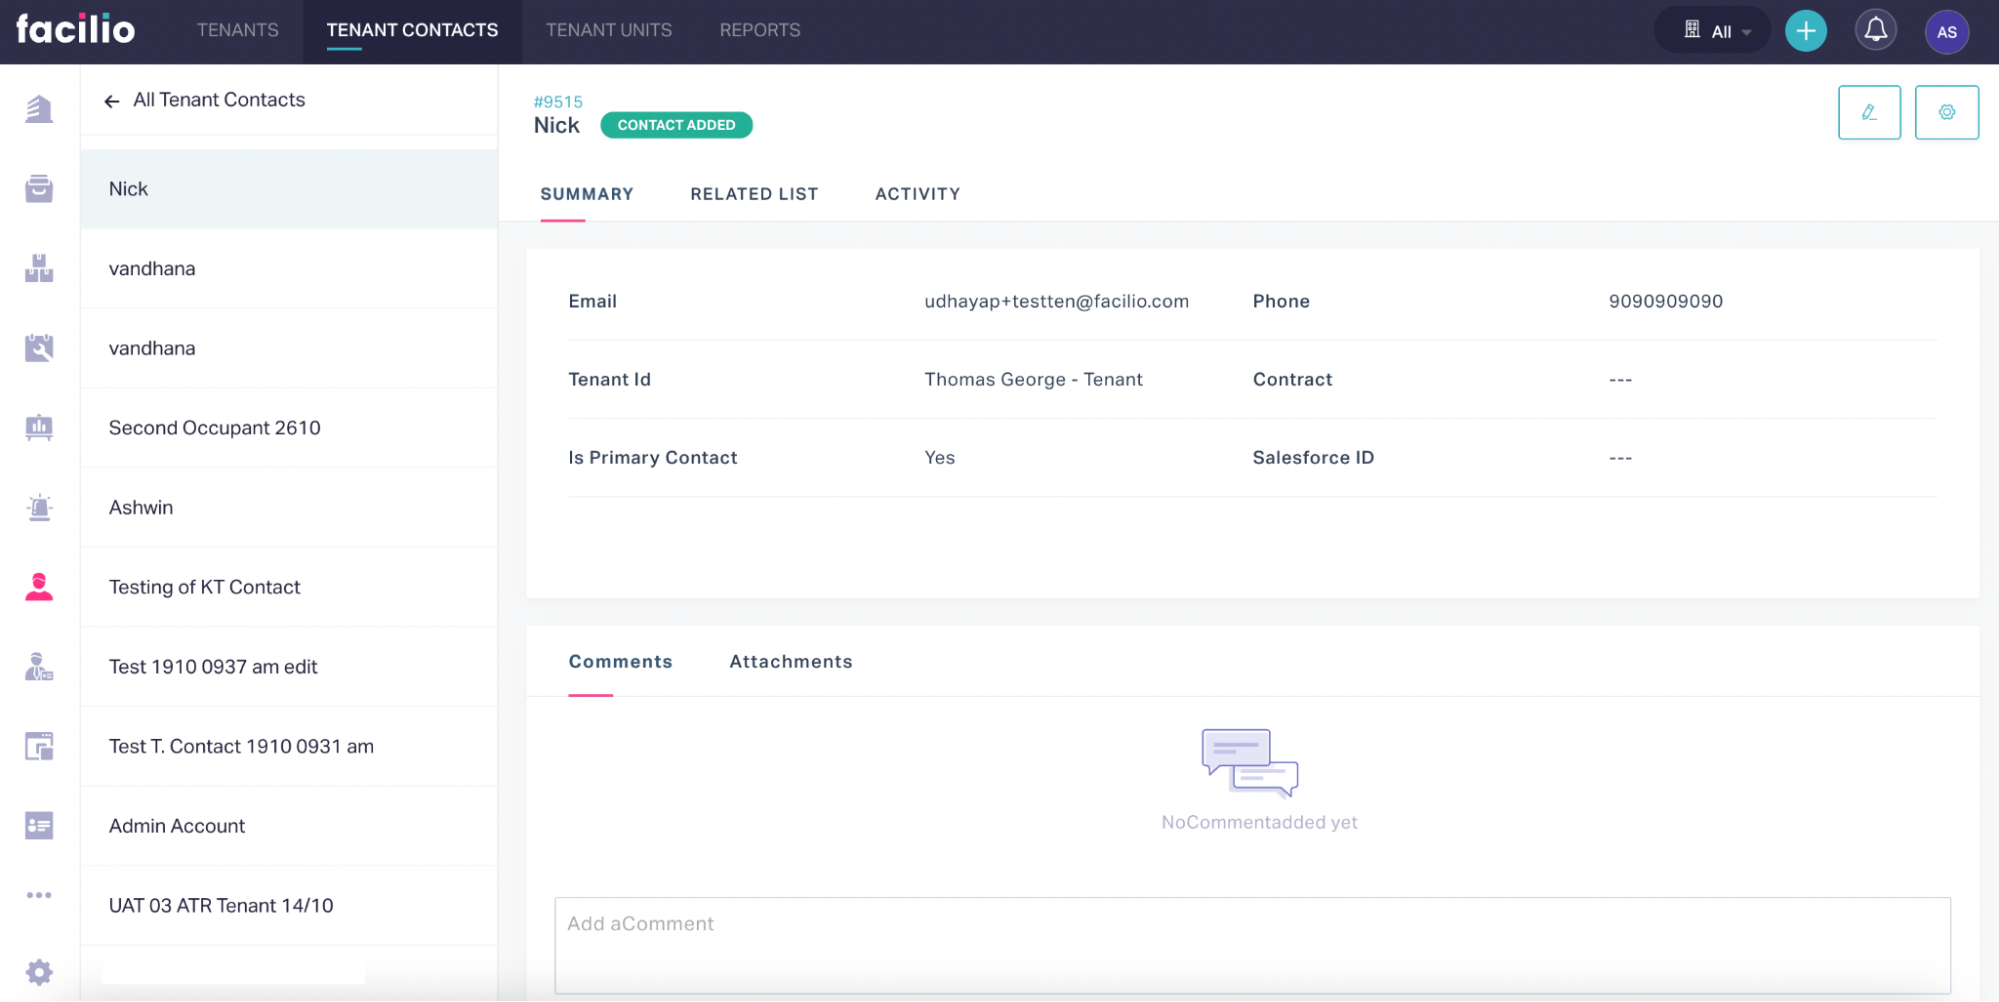
Click the
 (settings) icon at the top right of the screen. The PORTAL ACCESS window appears as shown below.
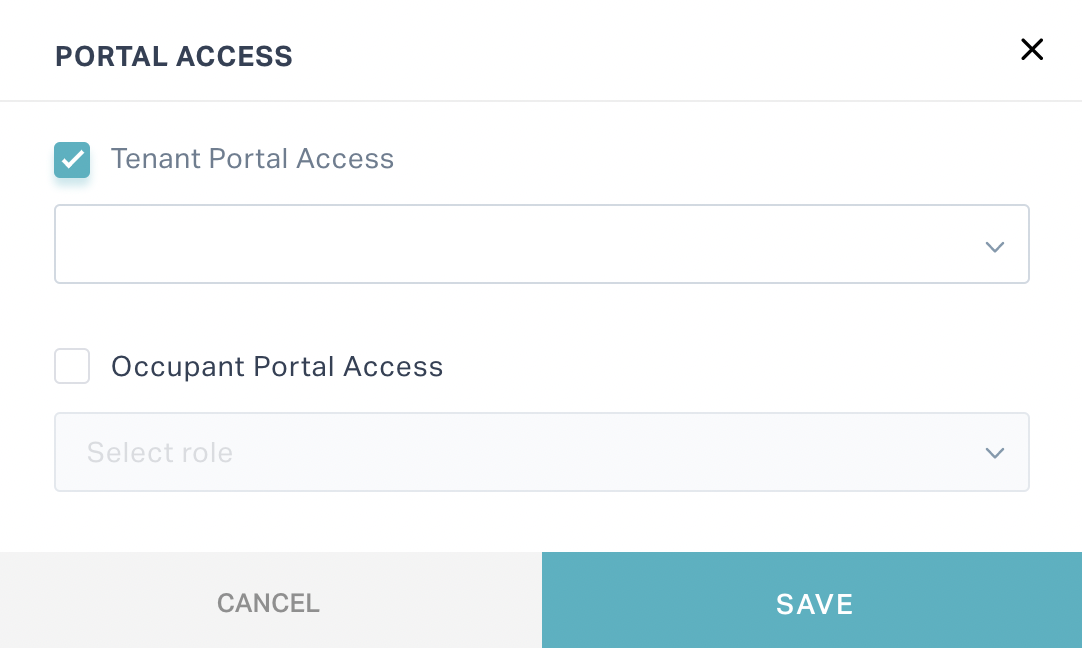
Check the Tenant Portal Access field and select an appropriate role from the dropdown.
Click SAVE. An email is triggered to the tenant contact with a link to activate the portal access.
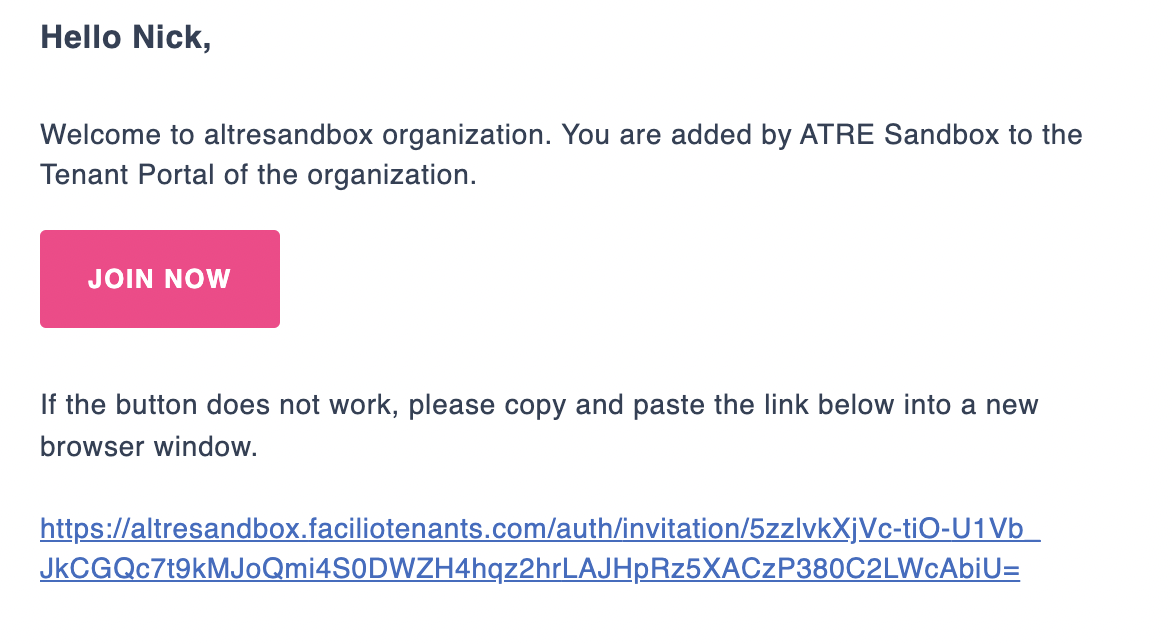
Follow the link to create a password for the account.
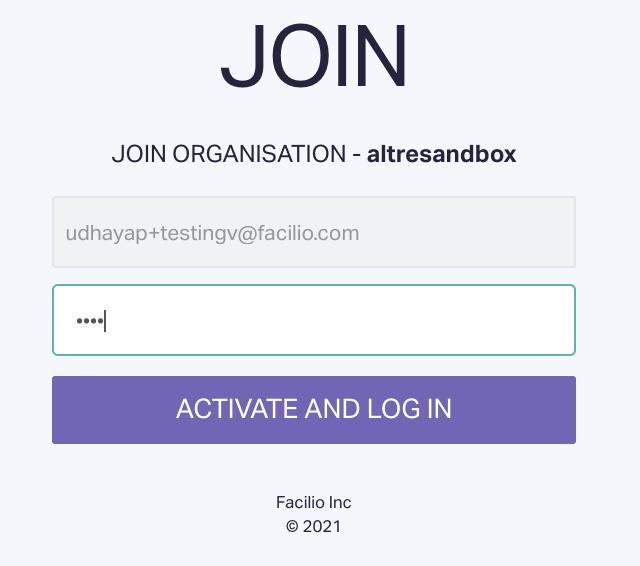
Click ACTIVATE AND LOG IN and sign in to your account. The portal access is successfully enabled for the contact.
Raising Portal Access Request
Login to the Tenant portal.
Click Occupants in the side panel. All the occupants associated with the tenant are displayed.
Select the tenant contact for whom the portal access is to be raised.
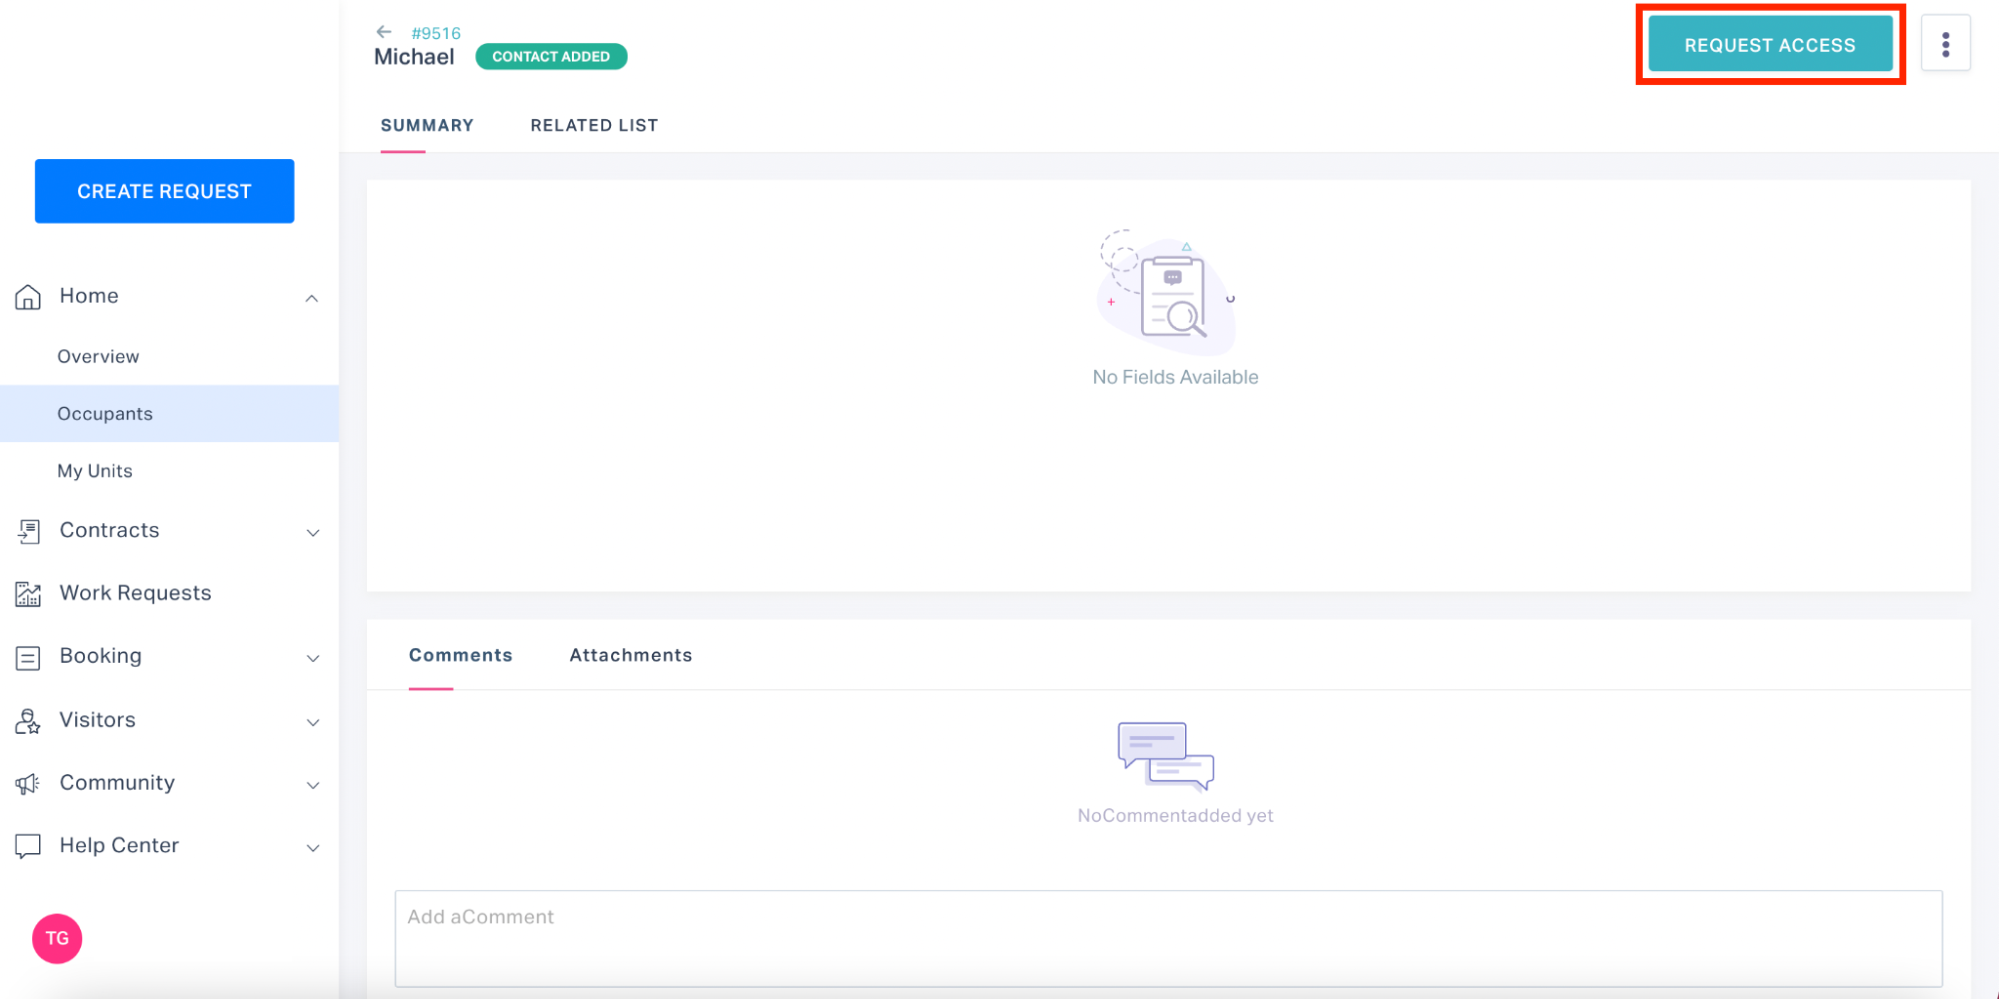
Click REQUEST ACCESS. The status of the occupant is updated to ACCESS REQUESTED.
An approval is triggered to the FM on the same.
Processing the Tenant Request
In order for the portal access to be enabled for the occupant, the FM must approve the request raised by the tenant. To process the request,
Login to the application.
Click the
(Tenants) icon in the sidebar menu. The TENANTS section is displayed by default.Navigate to the TENANT UNITS section.
Navigate to the TENANT CONTACTS section and select the appropriate view (Contacts Requesting Access) from the dashboard header.
Select the tenant request from the list of requests waiting for approval.
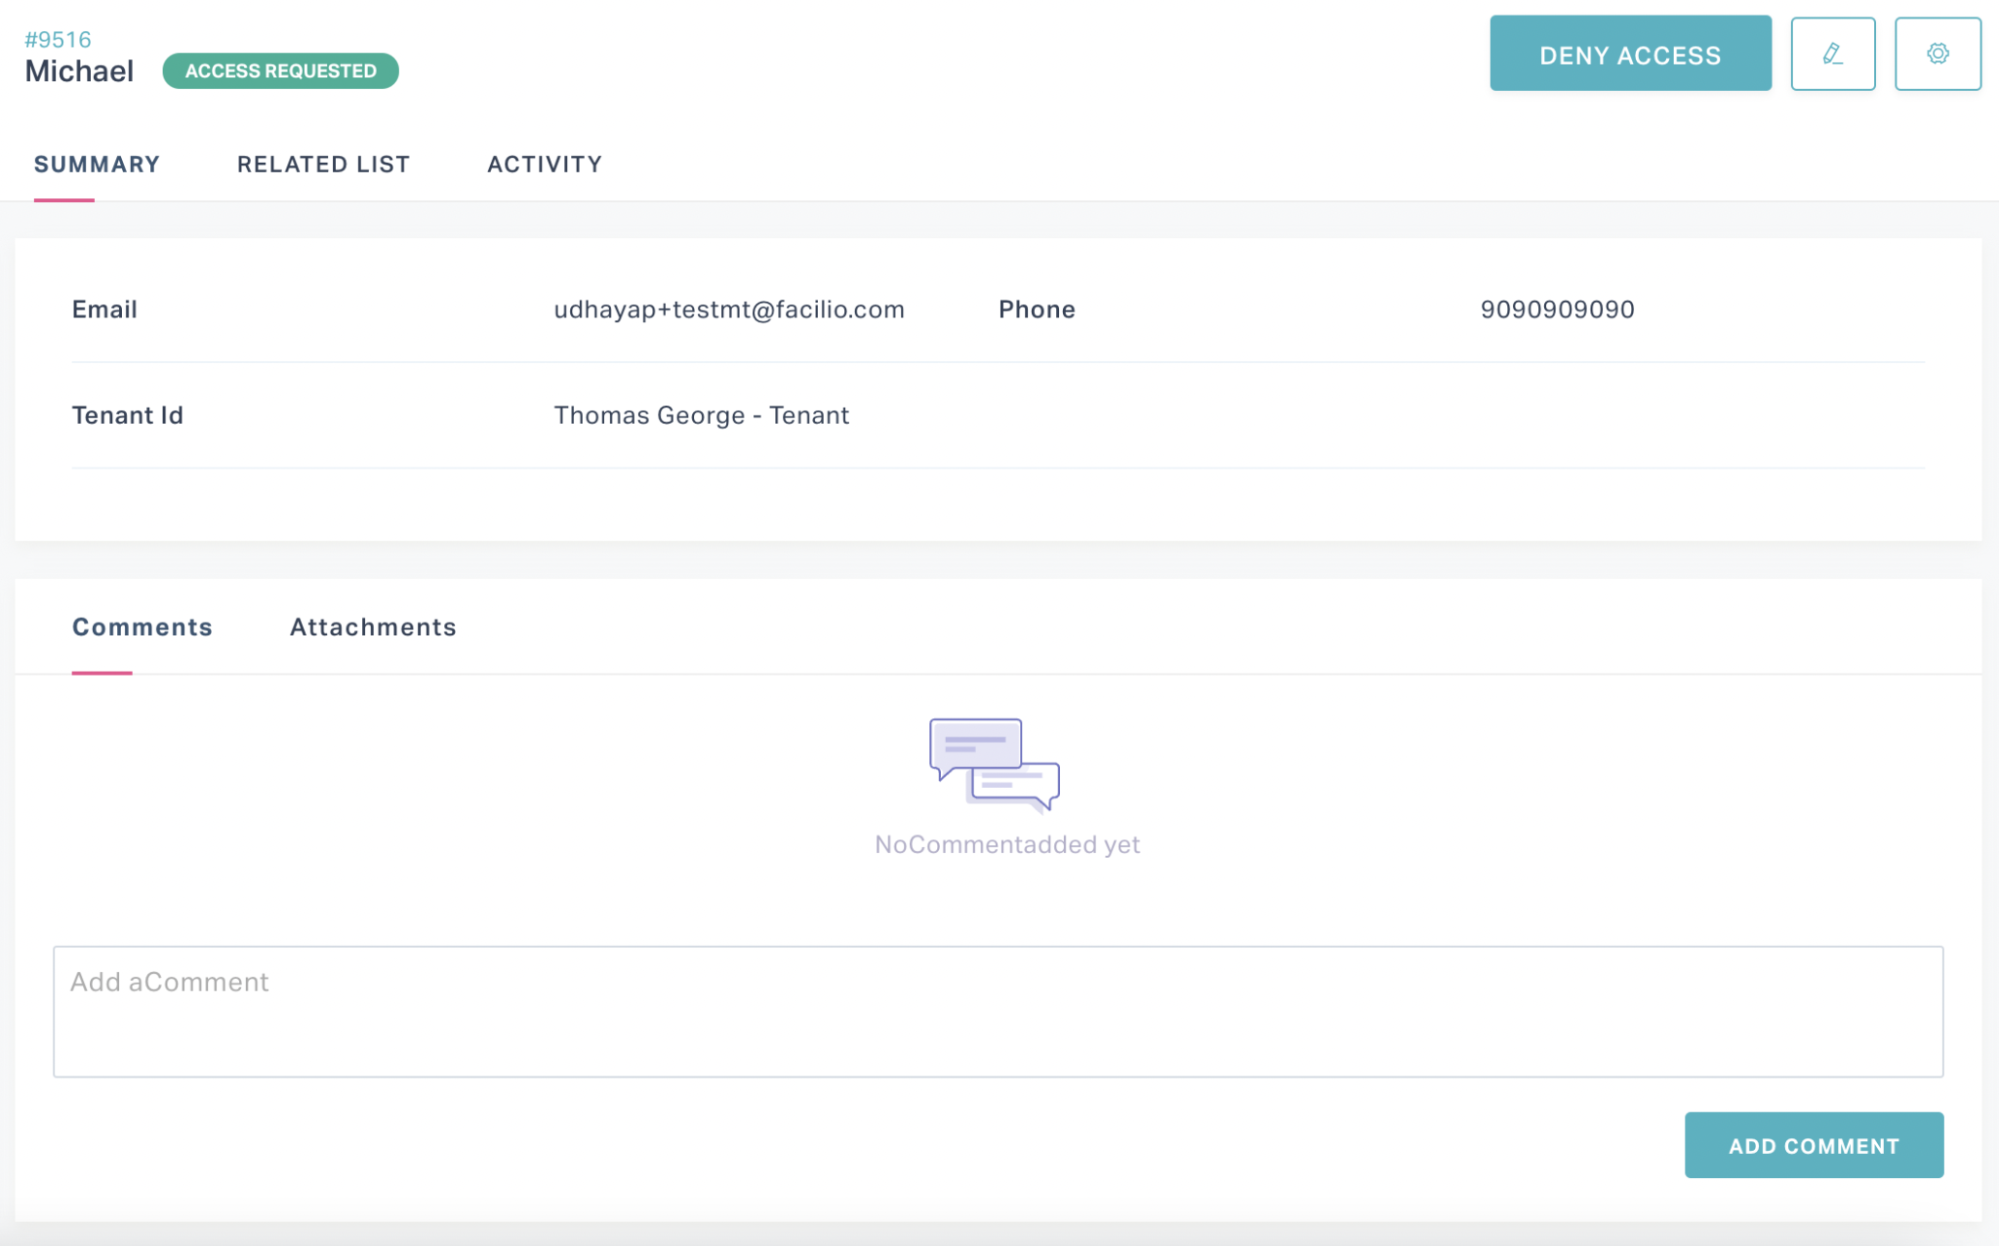
6.Perform either one of the following actions:
- Click DENY ACCESS to reject the portal access request from the tenant.
- Click the (settings) icon at the top right of the screen to enable portal access for the contact. Read the Enabling Portal Access section for more information.
The portal access is enabled with respect to the request being approved or denied by the FM.