Managing Work Orders
Unplanned maintenance is carried out to restore an asset to a condition, in which it can perform its intended function and stabilize other abnormalities in a facility. The application provides a seamless reactive management experience upon creating a smooth workflow process throughout a work request that involves the facility management team, vendor, and tenant.
Creating Work Order
In case of any unexpected outages in the facility, the users can raise a ticket to schedule maintenance. A maintenance work order can be created by the tenants or facility managers.
To create a work order,
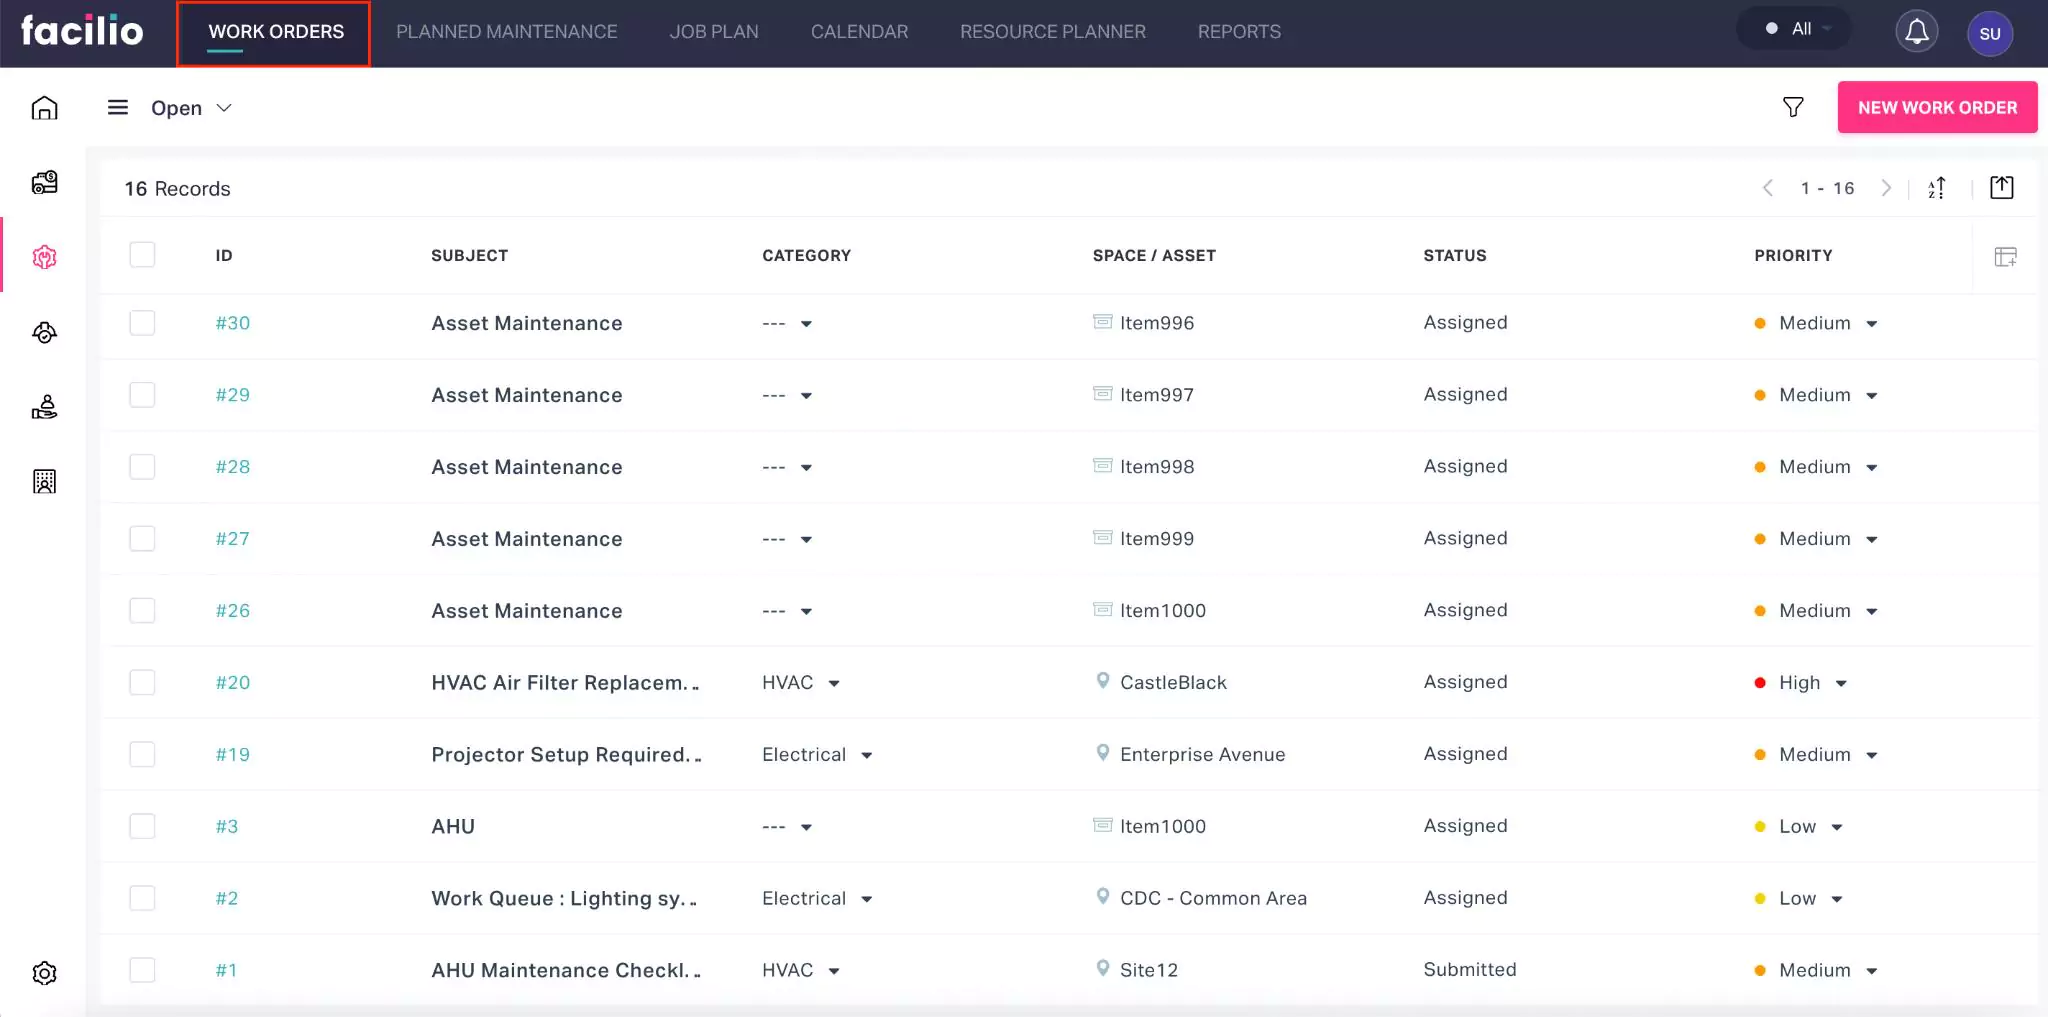
Navigate to WORK ORDERS. The list of open work orders is displayed by default as shown below.
Click the NEW WORK ORDER at the top right of the screen. The Create Work Order window appears as shown below.
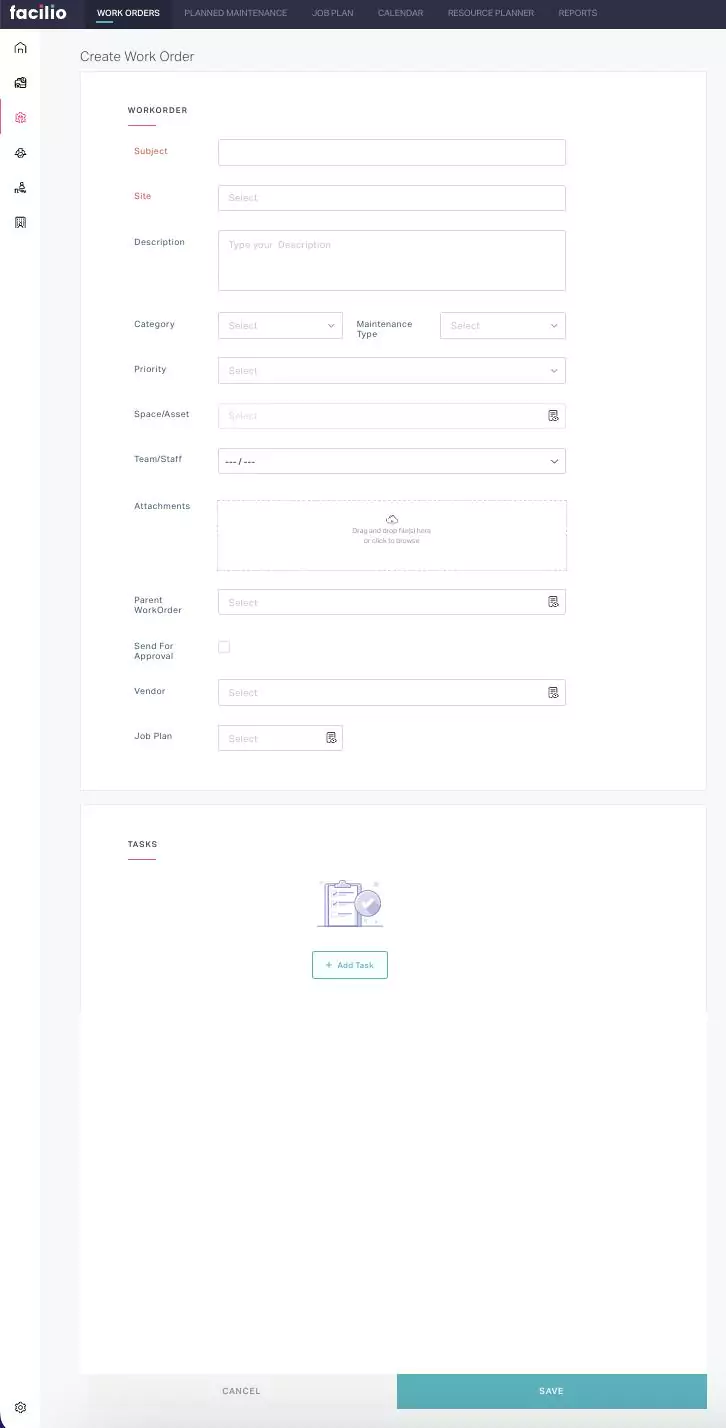
Update the following fields in this screen:
Subject - A tagline that specifies the purpose of the work order
Site - The zone where the work order task is to be executed
Description - A short note explaining the purpose of the work order
Category - The type of the work order being created
Maintenance Type - A classification to define the type of maintenance. You can choose any of the following options:
- Breakdown
- Compliance
- Corrective
- Predictive
- Preventive
- Rounds
Priority - The order in which the work order is executed. You can select from the following options:
- Low
- Medium
- High
Space/Asset - The space or asset for which the work order is created
Team/Staff - The group or individual to whom the task will be assigned
Attachments - An additional document or file providing more information on the work done
Parent Work Order - A primary work or higher-level work order that serves as a reference for the work order, if any
Send For Approval - The process that confirms the work order execution
Note: If this field is enabled, you cannot execute the work order until it is approved.Vendor - The third party to whom the maintenance activity is handed over
Job Plan - The template that defines maintenance tasks, required for the execution of maintenance activities
Tasks -The specific actions, or activities required to complete the work order
Click SAVE. The work order is added successfully to the list of open work orders.
Processing Work Order Request
The work order approval section is essential to enforce the business rules of an organization's maintenance operations, ensuring that all the work orders are valid and authorized. The created work orders are routed to approvers, which they can approve or reject. If the approver approves the work order, a technician is assigned to perform the work. If he rejects it, the approval process is terminated.
The facility manager is typically responsible for approving a work order ensuring it is valid and whether its execution negatively impacts the facility. This includes checking that the work order includes all the necessary details such as timeline, budget, resources, and other required details. When a work request is submitted by the user, the approval is triggered to the respective stakeholders with Approve and Reject options as shown below.
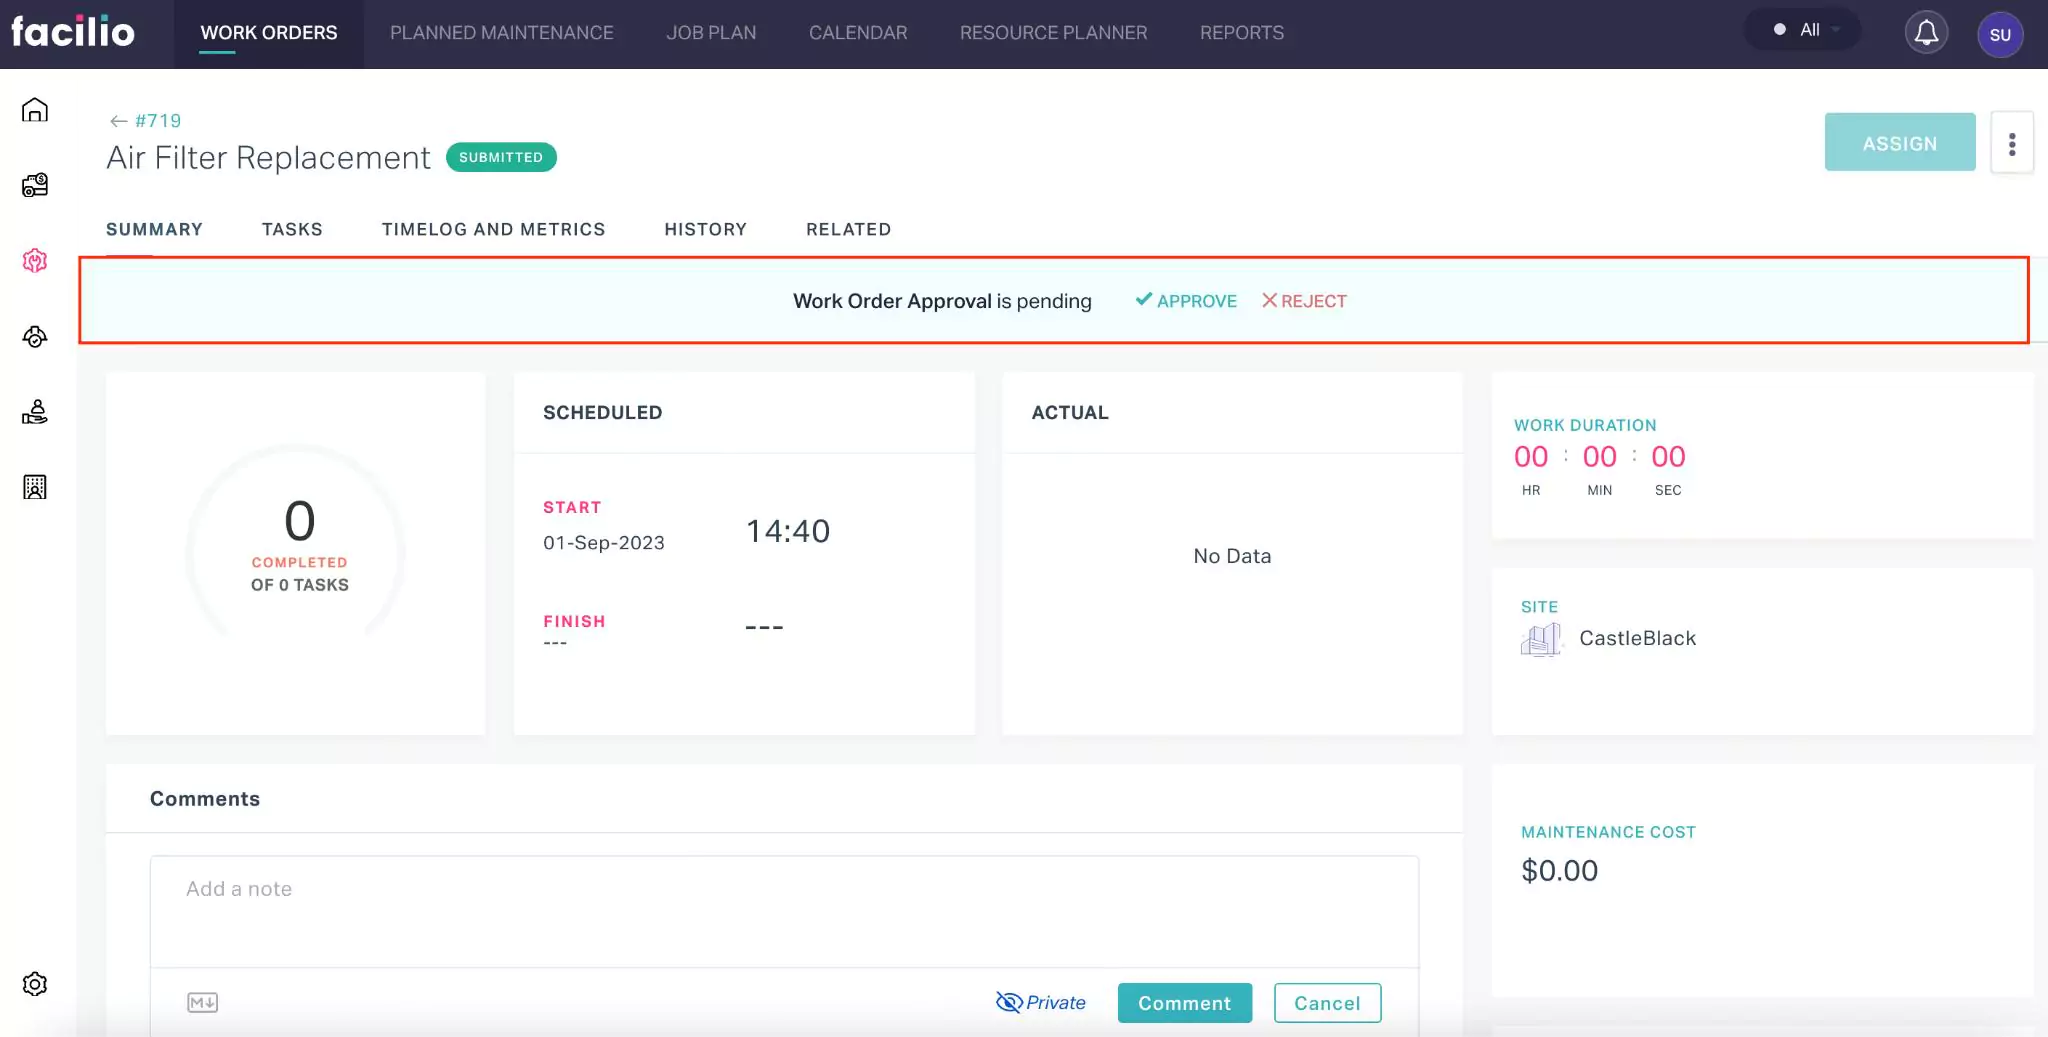
The approver can click on Approve or Reject to accept or decline the request, respectively.
Viewing Work Orders
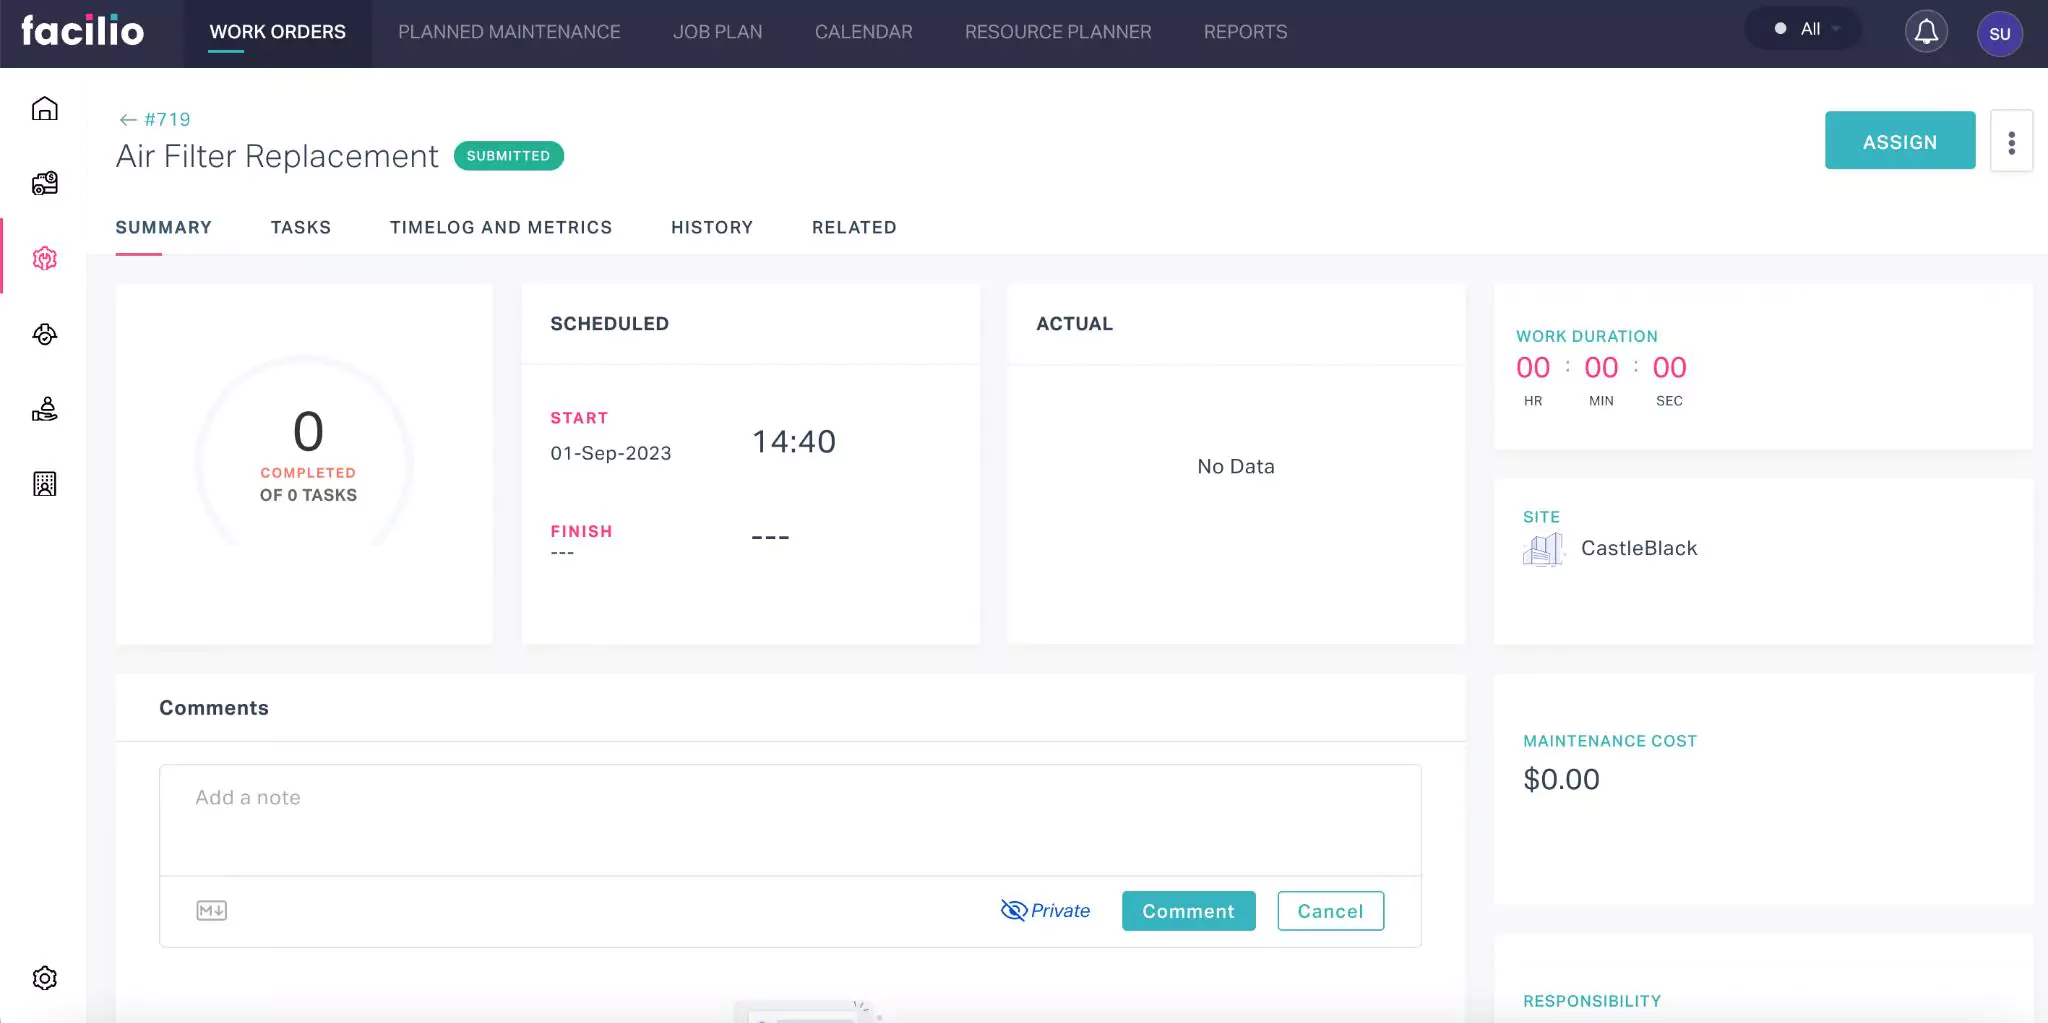
Once the work order is created, it appears in the Work Order section. You can click on it to view the details configured under each stage of configuration and add further information. The displayed details are grouped into the following sections.
Summary
The Summary section displays the primary details associated with the maintenance activity. The details include asset information provided while creating a work order, tasks, scheduled time, work duration, maintenance cost, and associated spaces/assets. It also allows you to update additional information, such as attachments, and comments, as required.
Tasks
Task is a piece of work that indicates the action(s) that must be accomplished before marking the work order 'Resolved'. The Tasks section displays all the tasks configured as a part of the work order. To add a new task, click ![]() (plus) icon , enter the task details, and click SAVE.
(plus) icon , enter the task details, and click SAVE.
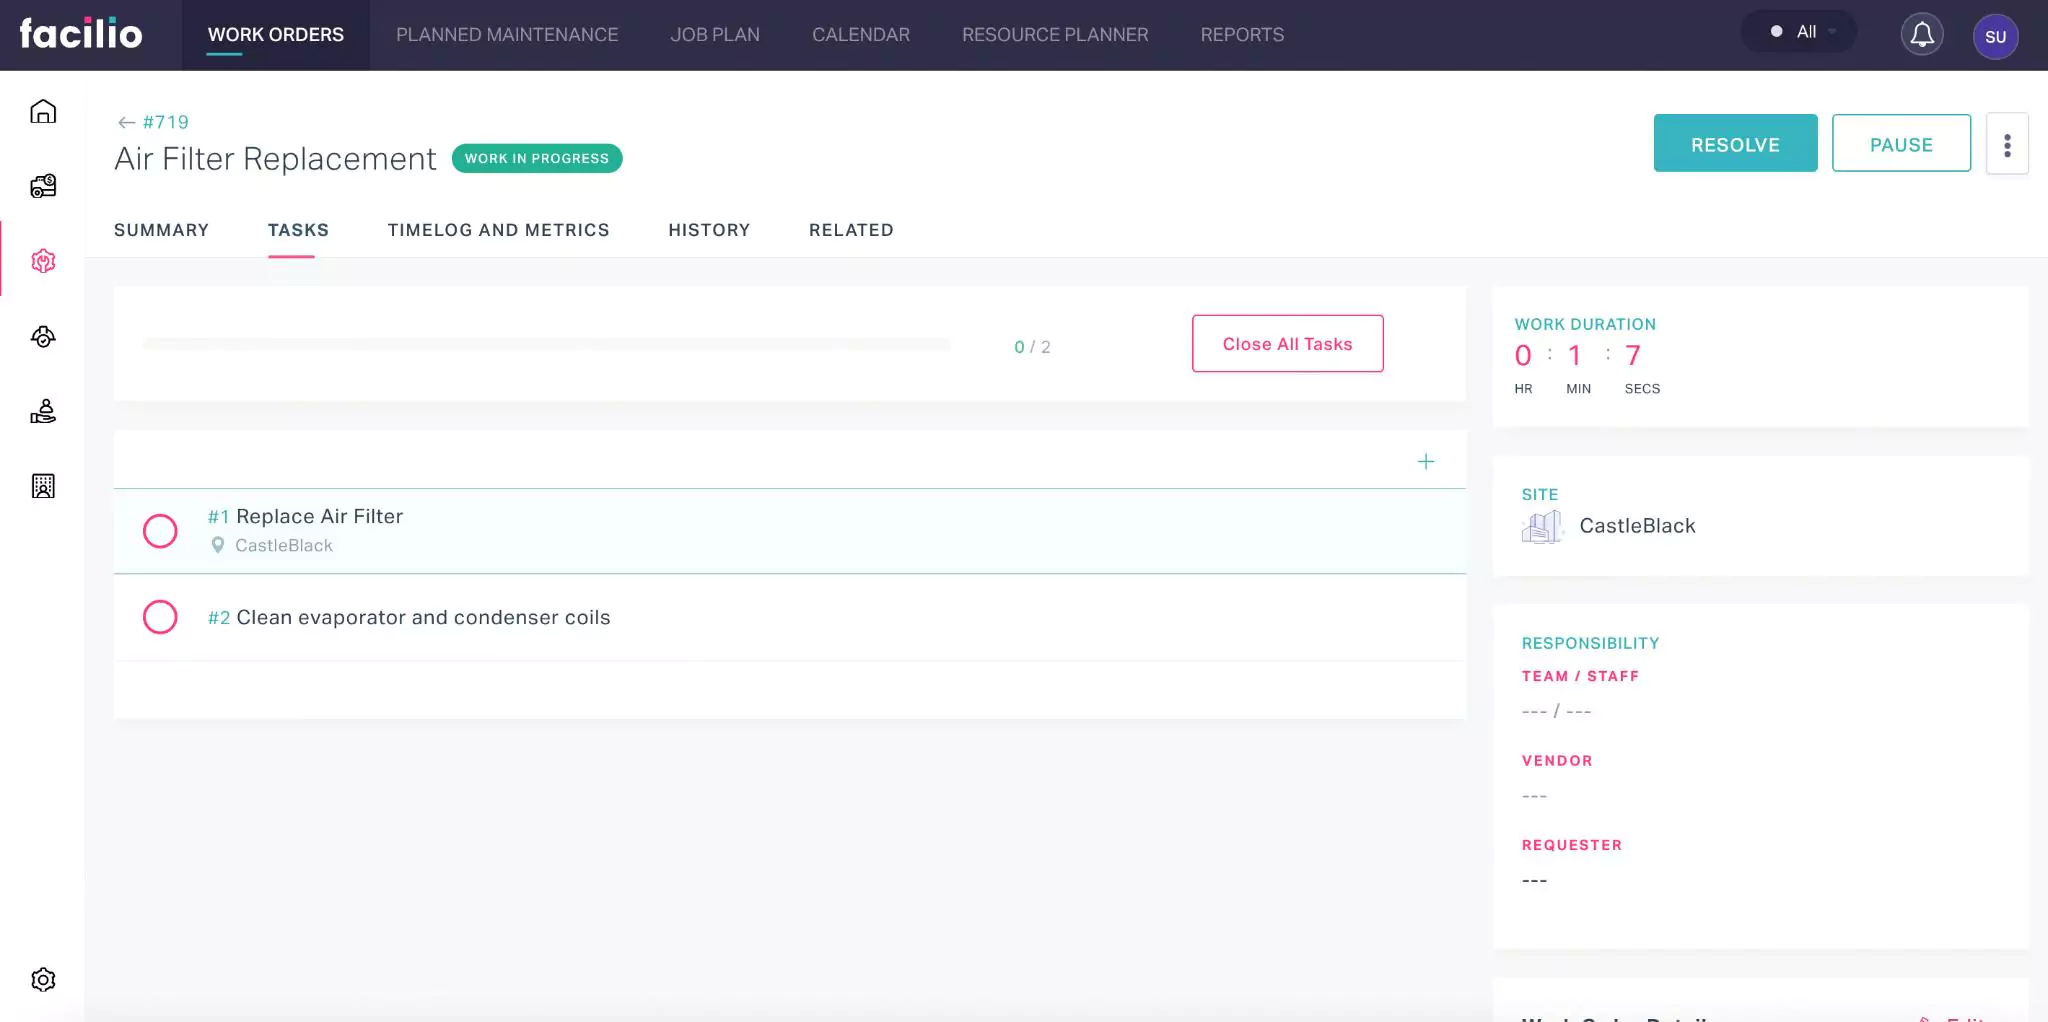
You can use the Close All Tasks button to close all tasks at once. Also, you can close an individual task or the selected tasks, thereby saving the progress. The status bar at the top of the section indicates the completion status based on the number of tasks closed.
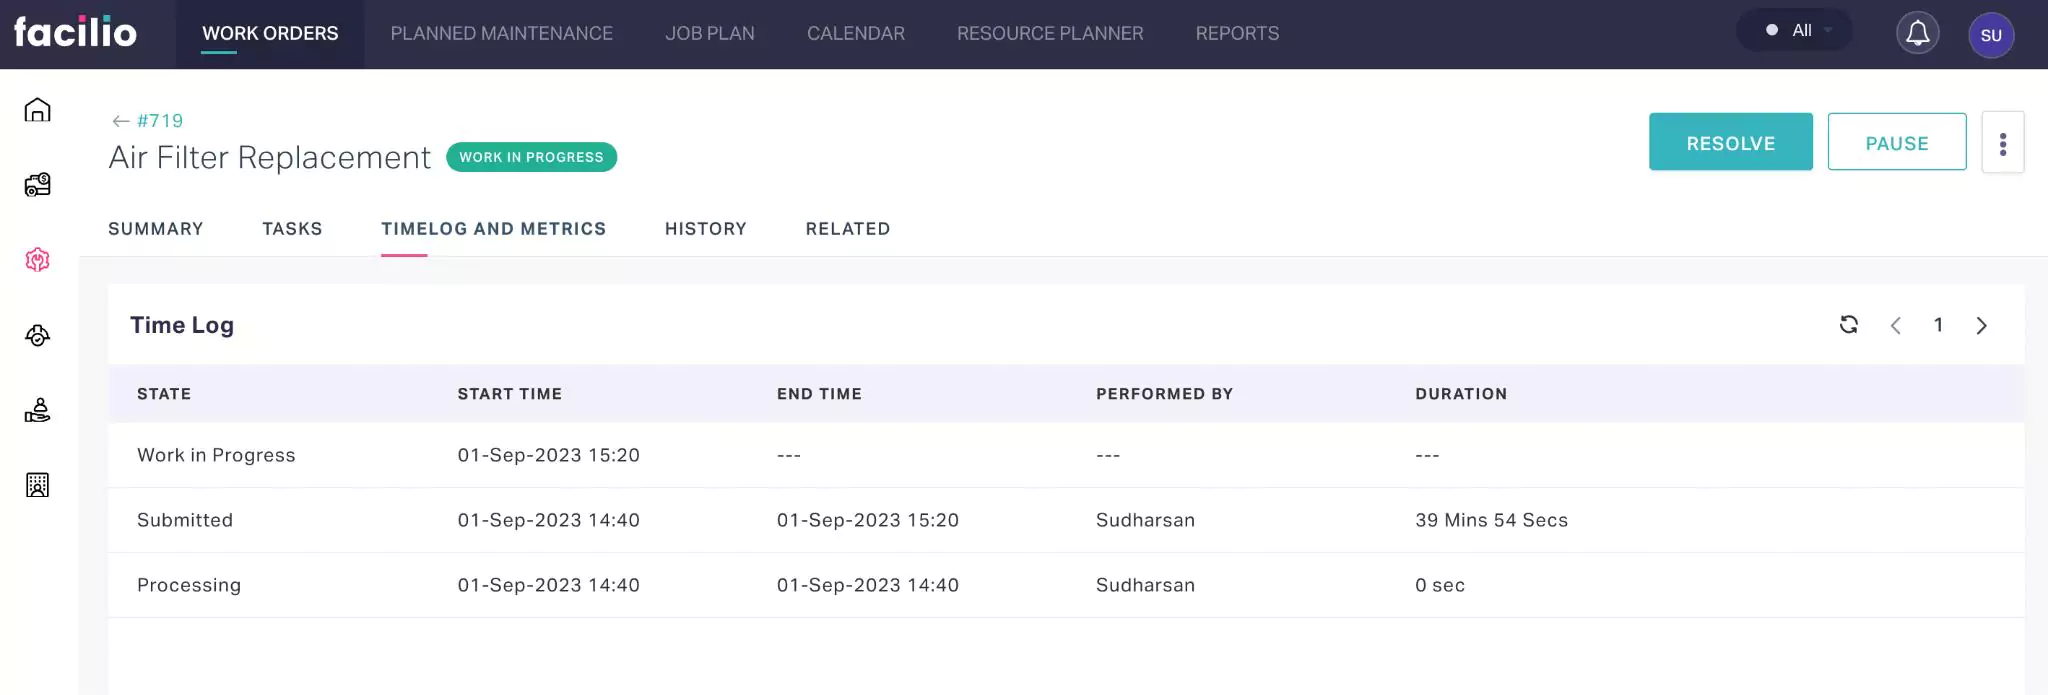
Timelog and metrics
This section tracks and measures time-related activities and performance. Timelog is a record of the time spent on various activities or tasks, whereas metrics are quantifiable measurements used to assess performance and progress.
History
The History section maintains the log of all activities that take place with respect to the maintenance activity, for future reference. The recorded information helps you understand the course of action or changes the record has undergone.
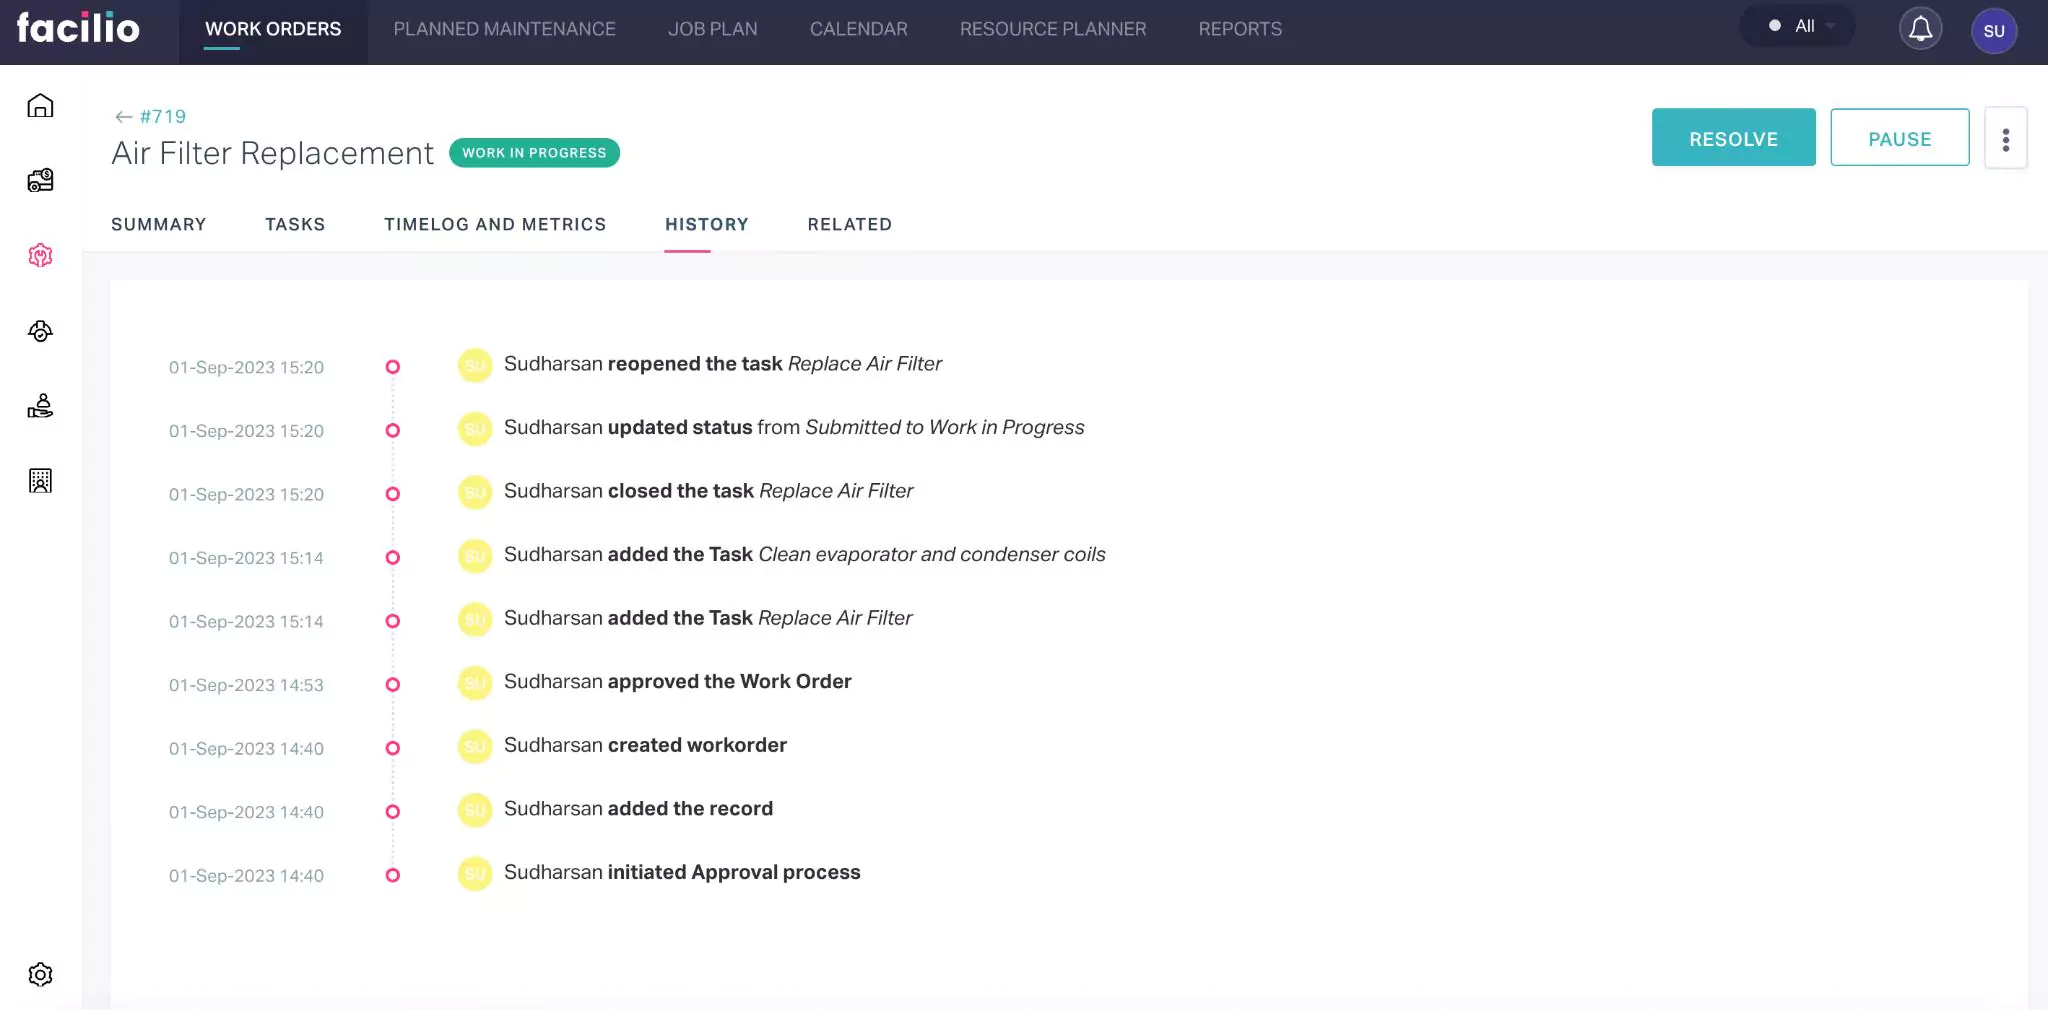
The displayed details include the action taken place, the user who performed the action and the date and time of occurrence.
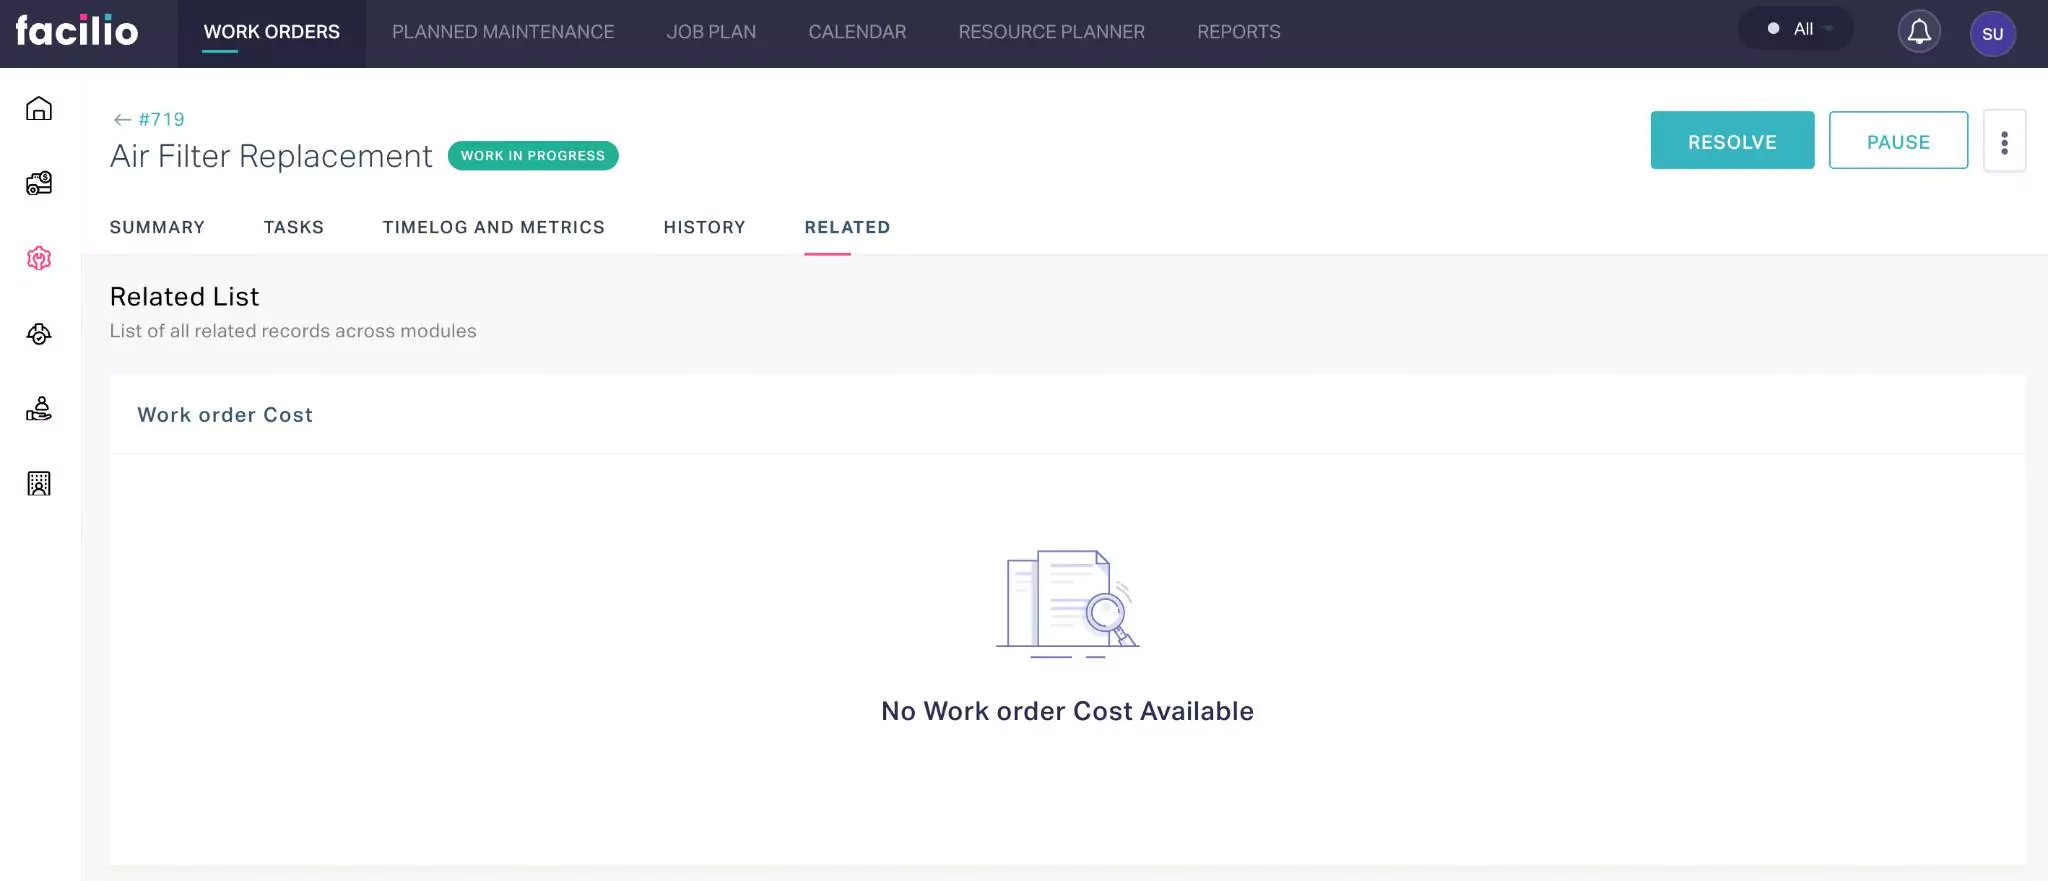
Related
The Related section displays the summary of other records related to the work order across the modules.
Executing a Work Order
Work Order execution is the process of performing a specific task or set of tasks in an organized manner. This section explains a typical workflow followed from beginning till closure, passing through required permissions and approvals throughout the execution.
To start working with a work order,
Open the work order. The corresponding Summary screen appears as shown below.
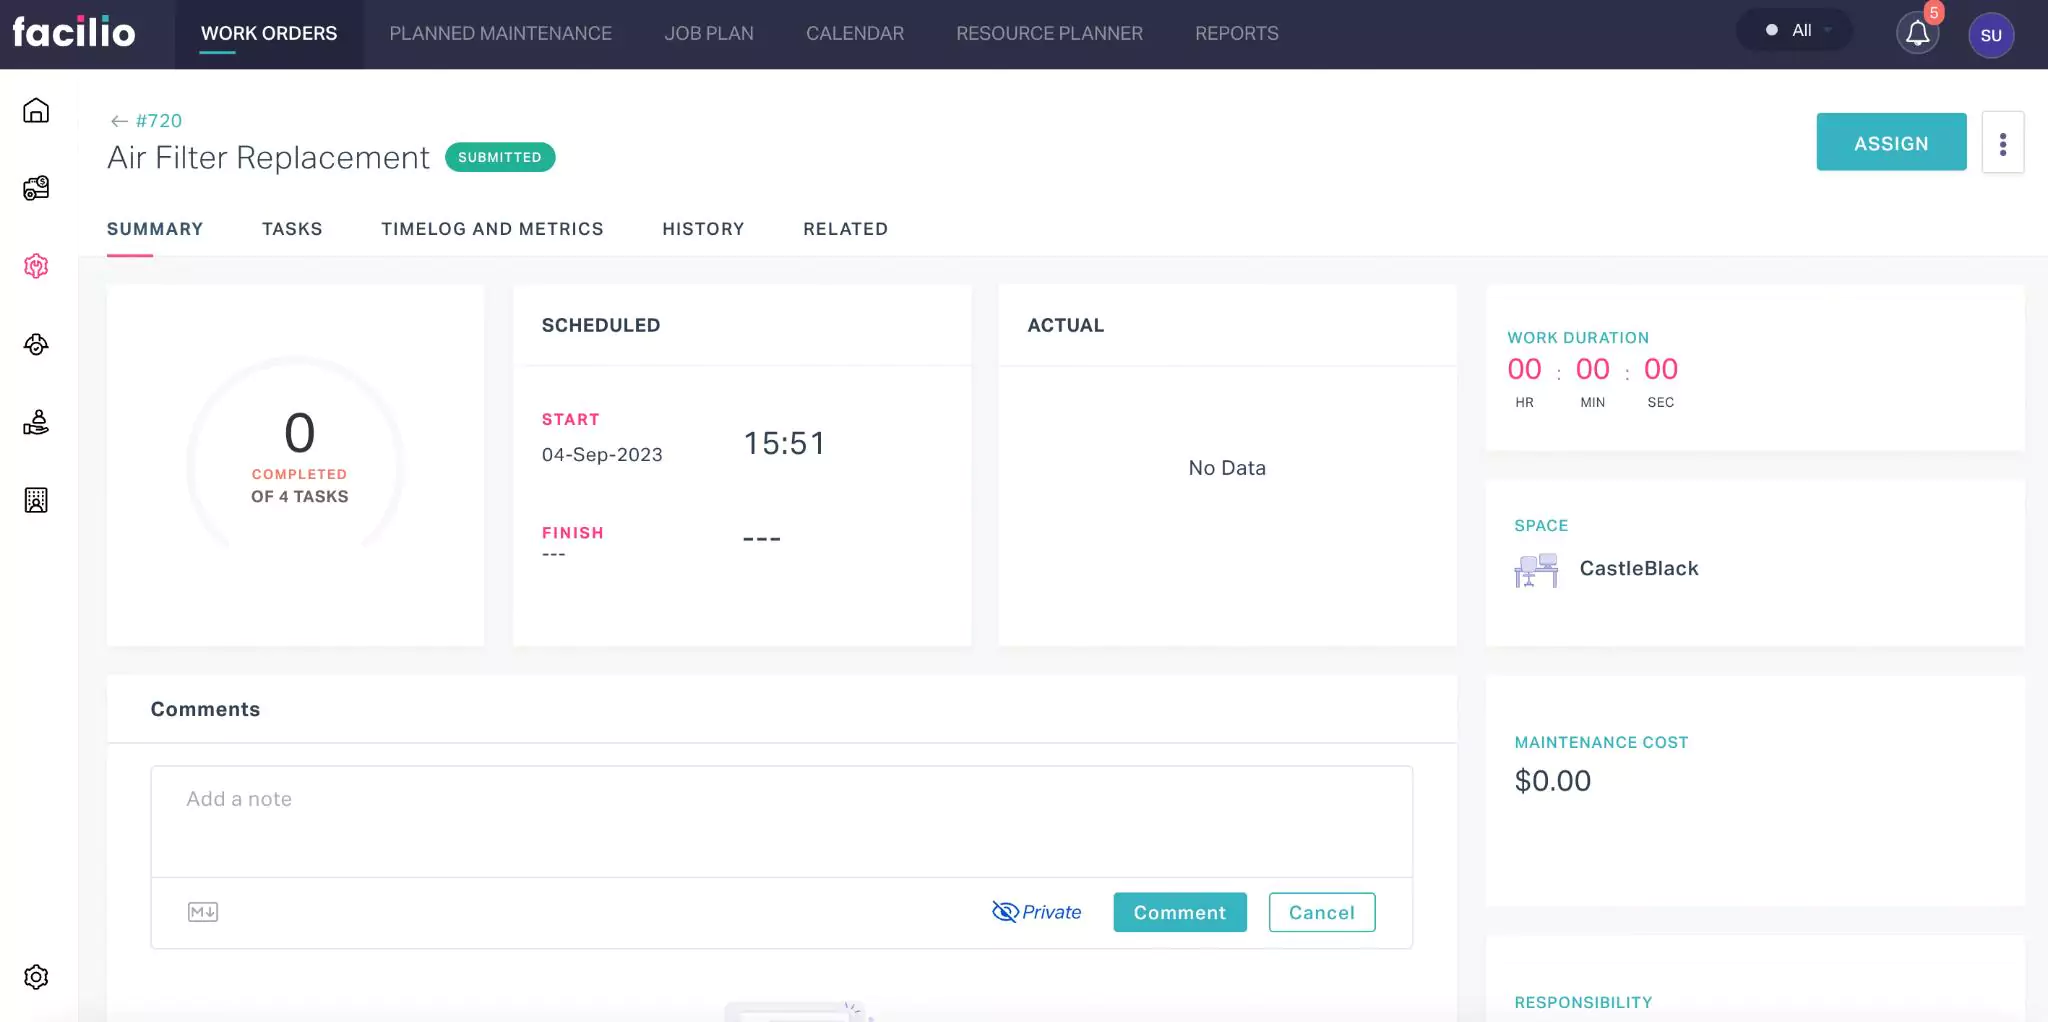
Click Assign to tag a representative to work on the issue.
Note: You can manually assign a personnel/team to take up the work. In case of any active assignment rule configured, the work order is automatically assigned to the concerned personnel/team.Once the task is assigned, the details screen appears as shown below.

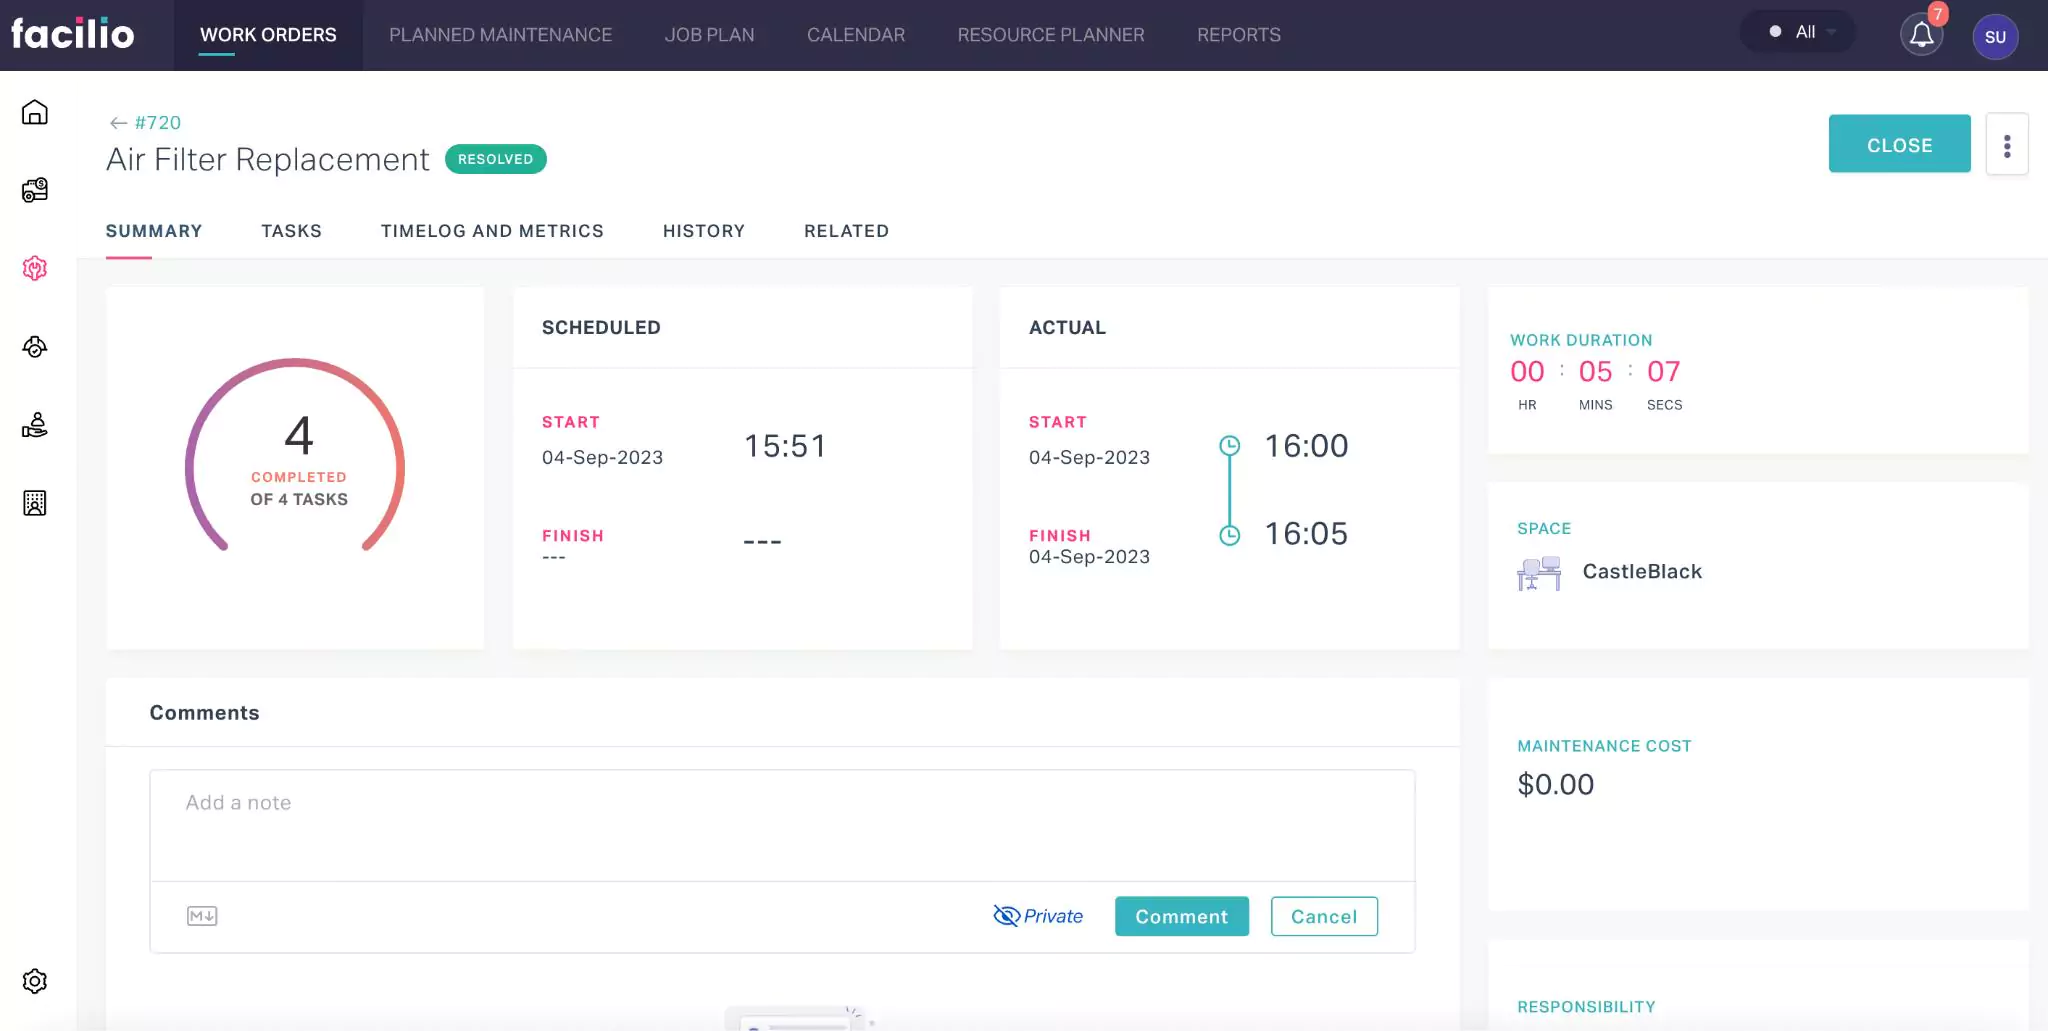
Click START WORK to begin processing the work order. The work order status changes to 'WORK IN PROGRESS' while performing the task.

After completing/closing all the tasks, click RESOLVE.
Note: You can mark a work order as 'Resolved' only if all the open tasks are closed.Finally, click CLOSE indicating no action is pending with the work order.
The work order status is updated as 'Closed'.
Note: Once a work order is closed it is moved from Open to Closed work orders list view. You can always reopen the work order by clicking RE-OPEN.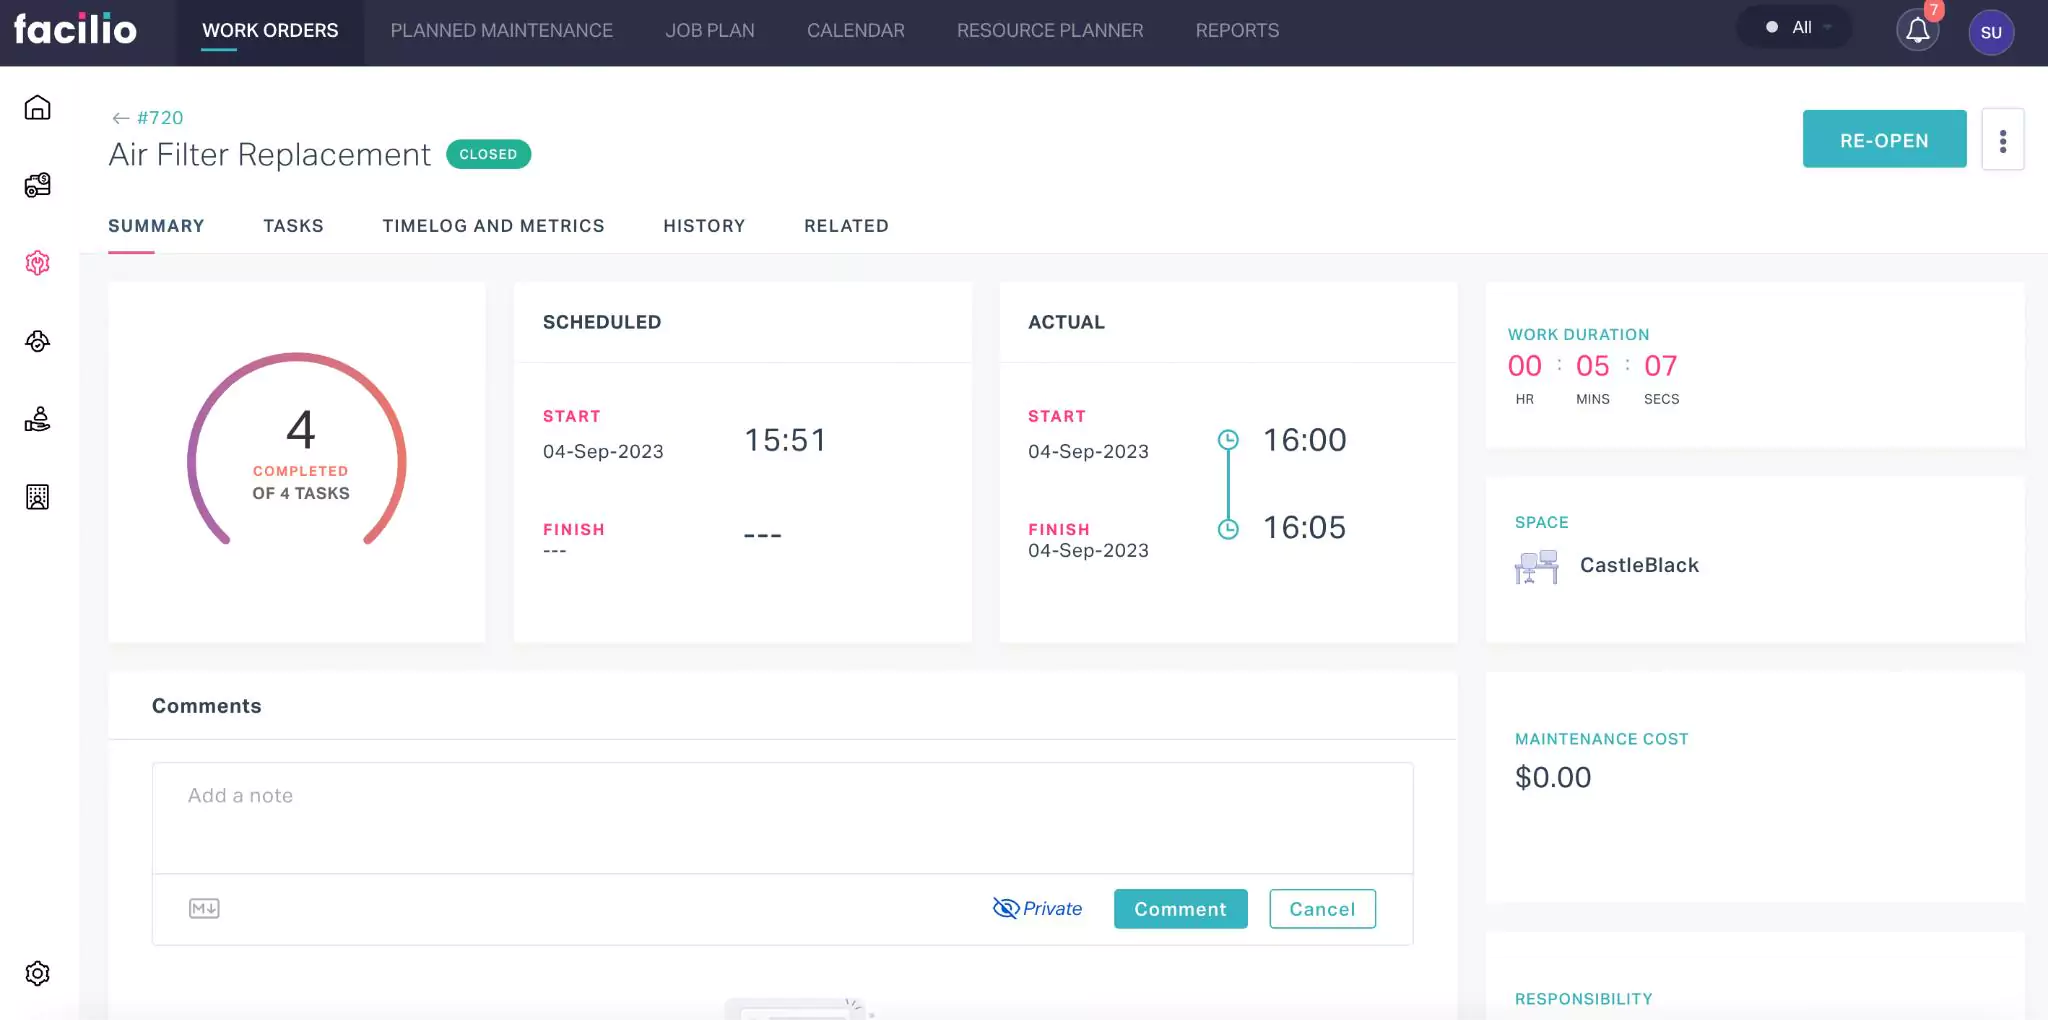
Additional Features
This module includes specific features that enable performing various actions on the work orders.
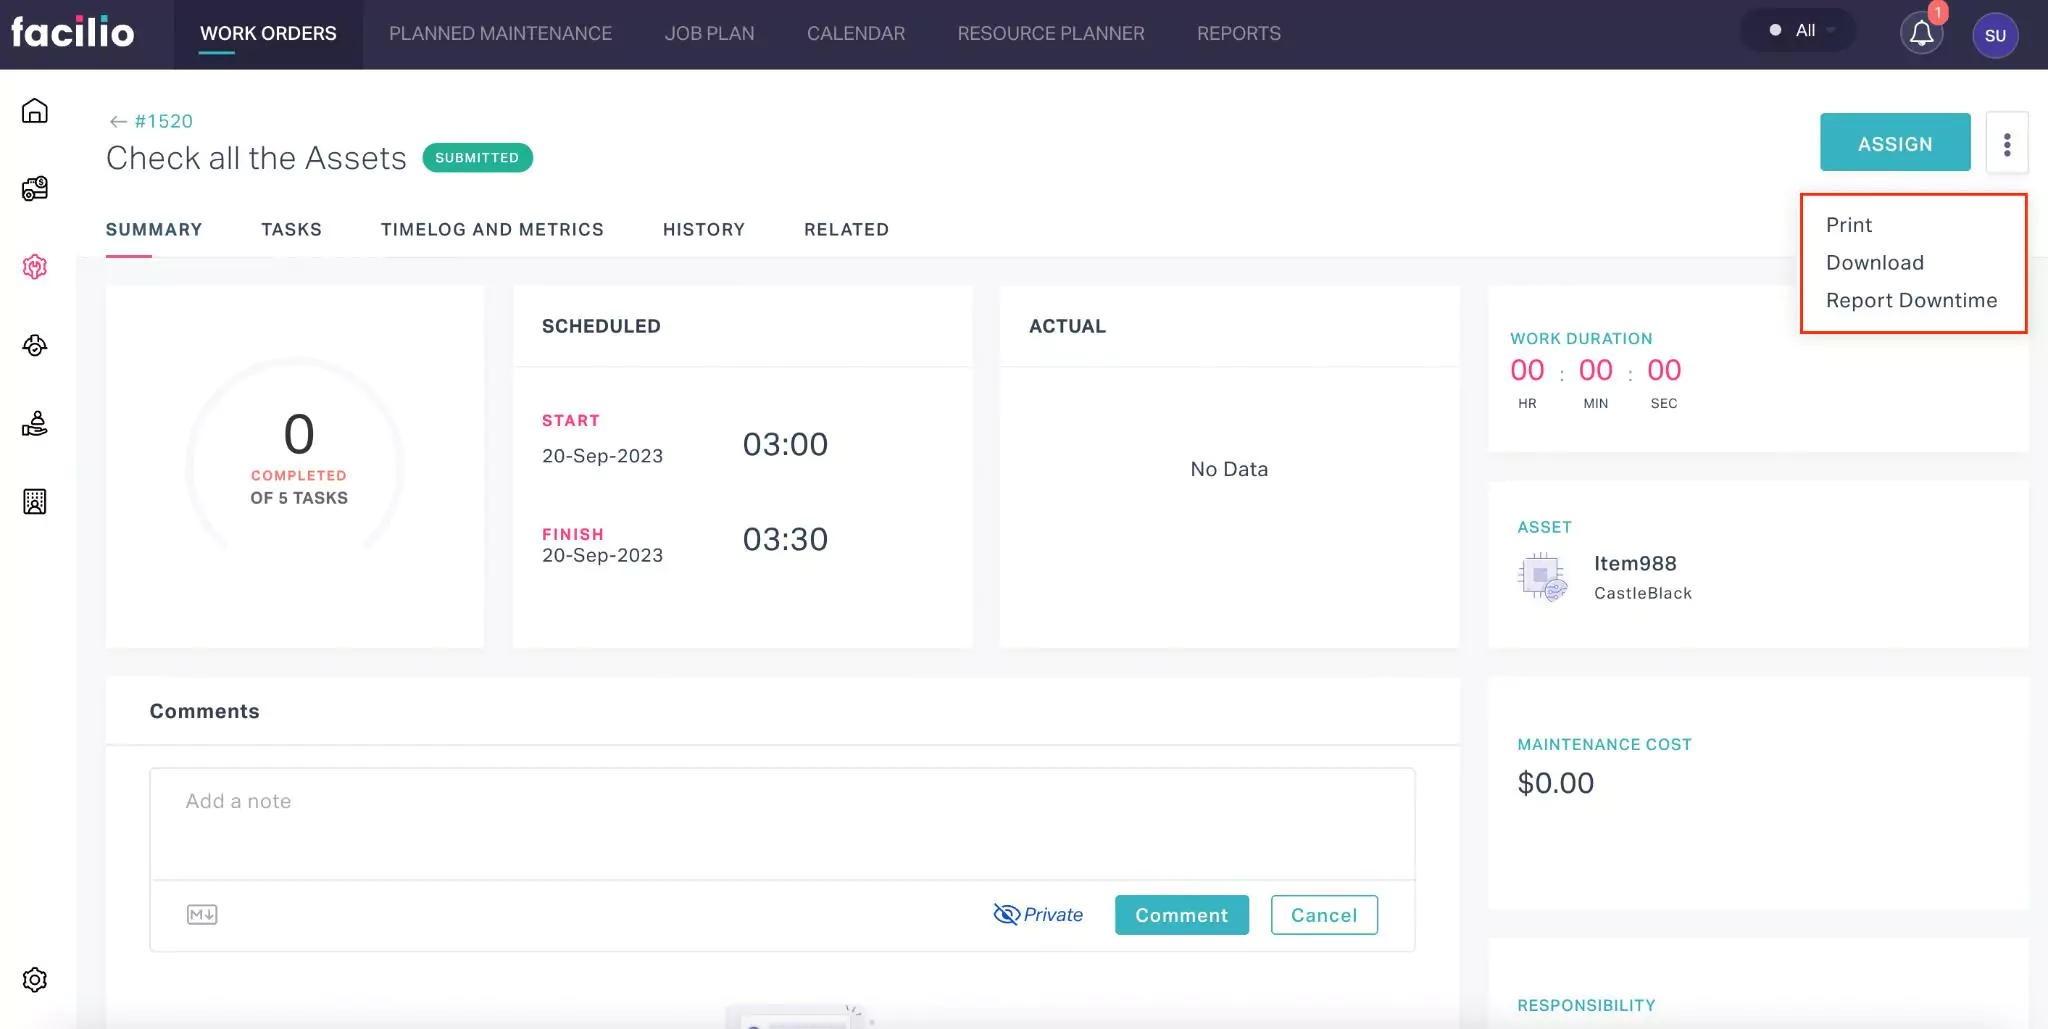
The upcoming section explains how to print, download, and report downtime for a work order.
Printing the Work Order Details
The application allows you to print the summary of the work order for future reference. To print the work order details,
Navigate to the work order details screen.
Click the
 (vertical ellipsis) icon at the top right and click Print. The WORK ORDER PRINT OPTIONS window appears, as shown below.
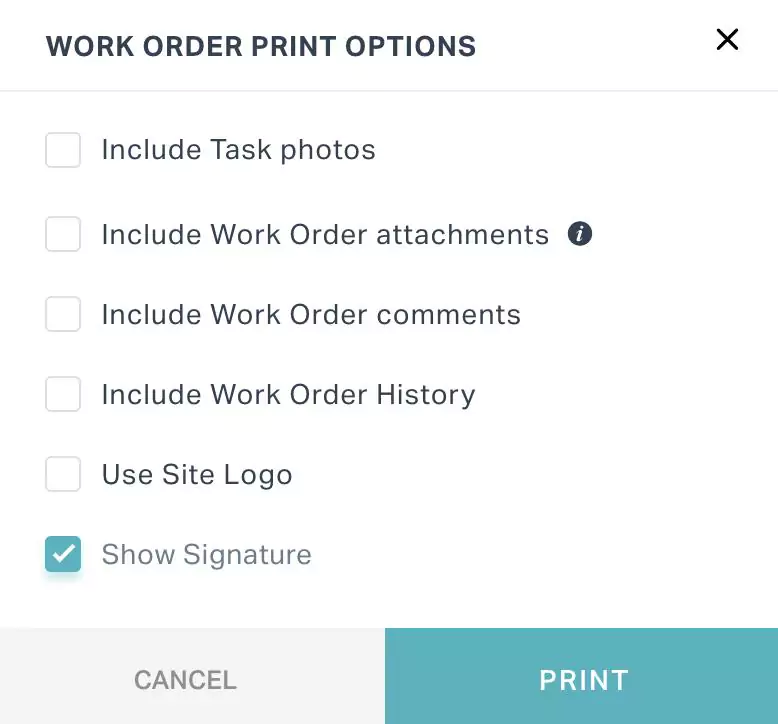
Select the required options and click PRINT. The Print window appears from where you can either print the content or save it as PDF.
Downloading the Work Order Details
Downloading a work order can ensure the required information is accessible regardless of network connectivity. To download the work order details,
Navigate to the work order details screen.
Click the
(vertical ellipsis) icon and select Download. The WORK ORDER DOWNLOAD OPTIONS window appears as shown below.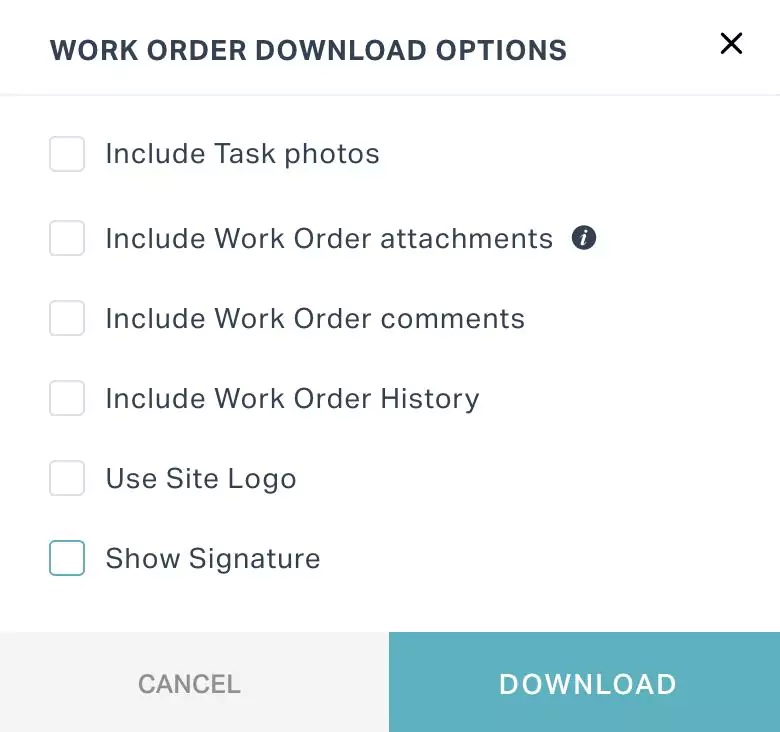
Select the required options and click DOWNLOAD. The work order details are downloaded locally on the user's device.
Reporting Downtime
Reporting downtime is required to intimate the relevant stakeholders, including technicians, facility managers, and management of a breakdown. The downtime information thus recorded also serves as a historical reference. To report a downtime,
Navigate to the work order details screen.
Click the
(vertical ellipsis) icon and select Report Downtime. The REPORT ASSET DOWNTIME window appears, as shown below.
Update the downtime duration and click SAVE. The downtime details are updated on the summary screen of the respective assets.