Configuring Planned Maintenance
The prime objective of scheduling planned maintenance work is to reduce the efforts on corrective (reactive) work. Scheduling work also provides a steady, structured, and predictable flow of work that allows the FM to manage resources (staff, inventory, and tools) more effectively. The application provides a seamless proactive maintenance experience upon creating a smooth workflow process throughout a work order that involves the facility management team, vendor, and tenant.
Creating Planned Maintenance
Planning and scheduling maintenance defines the right person, at the right time with the right materials, tools and access for work to progress from start to finish without interruption. Planned maintenance contains a job plan that is associated with work orders.
To create a planned maintenance work order,
Navigate to PLANNED MAINTENANCE. The list of planned maintenance activities created in the application are displayed by default as shown below.
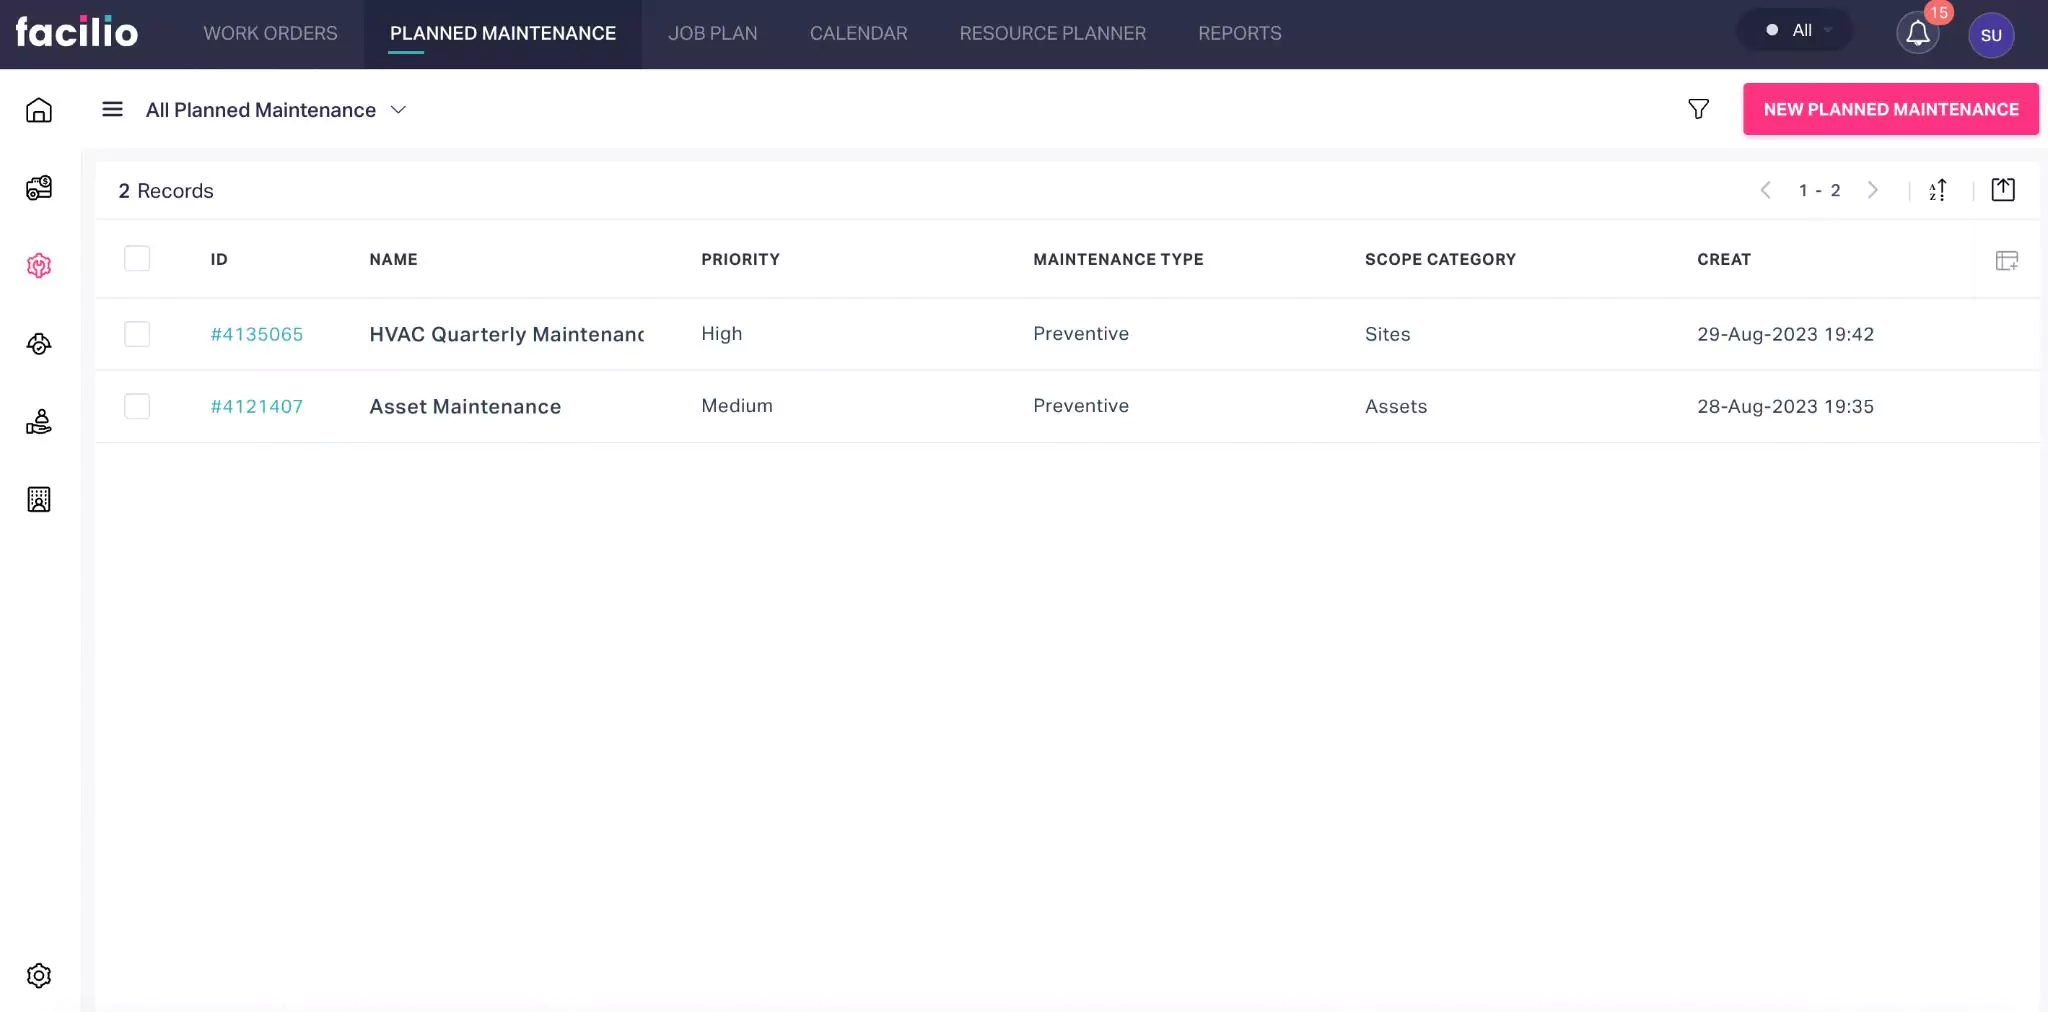
Click the NEW PLANNED MAINTENANCE. The CREATE window appears as shown below.
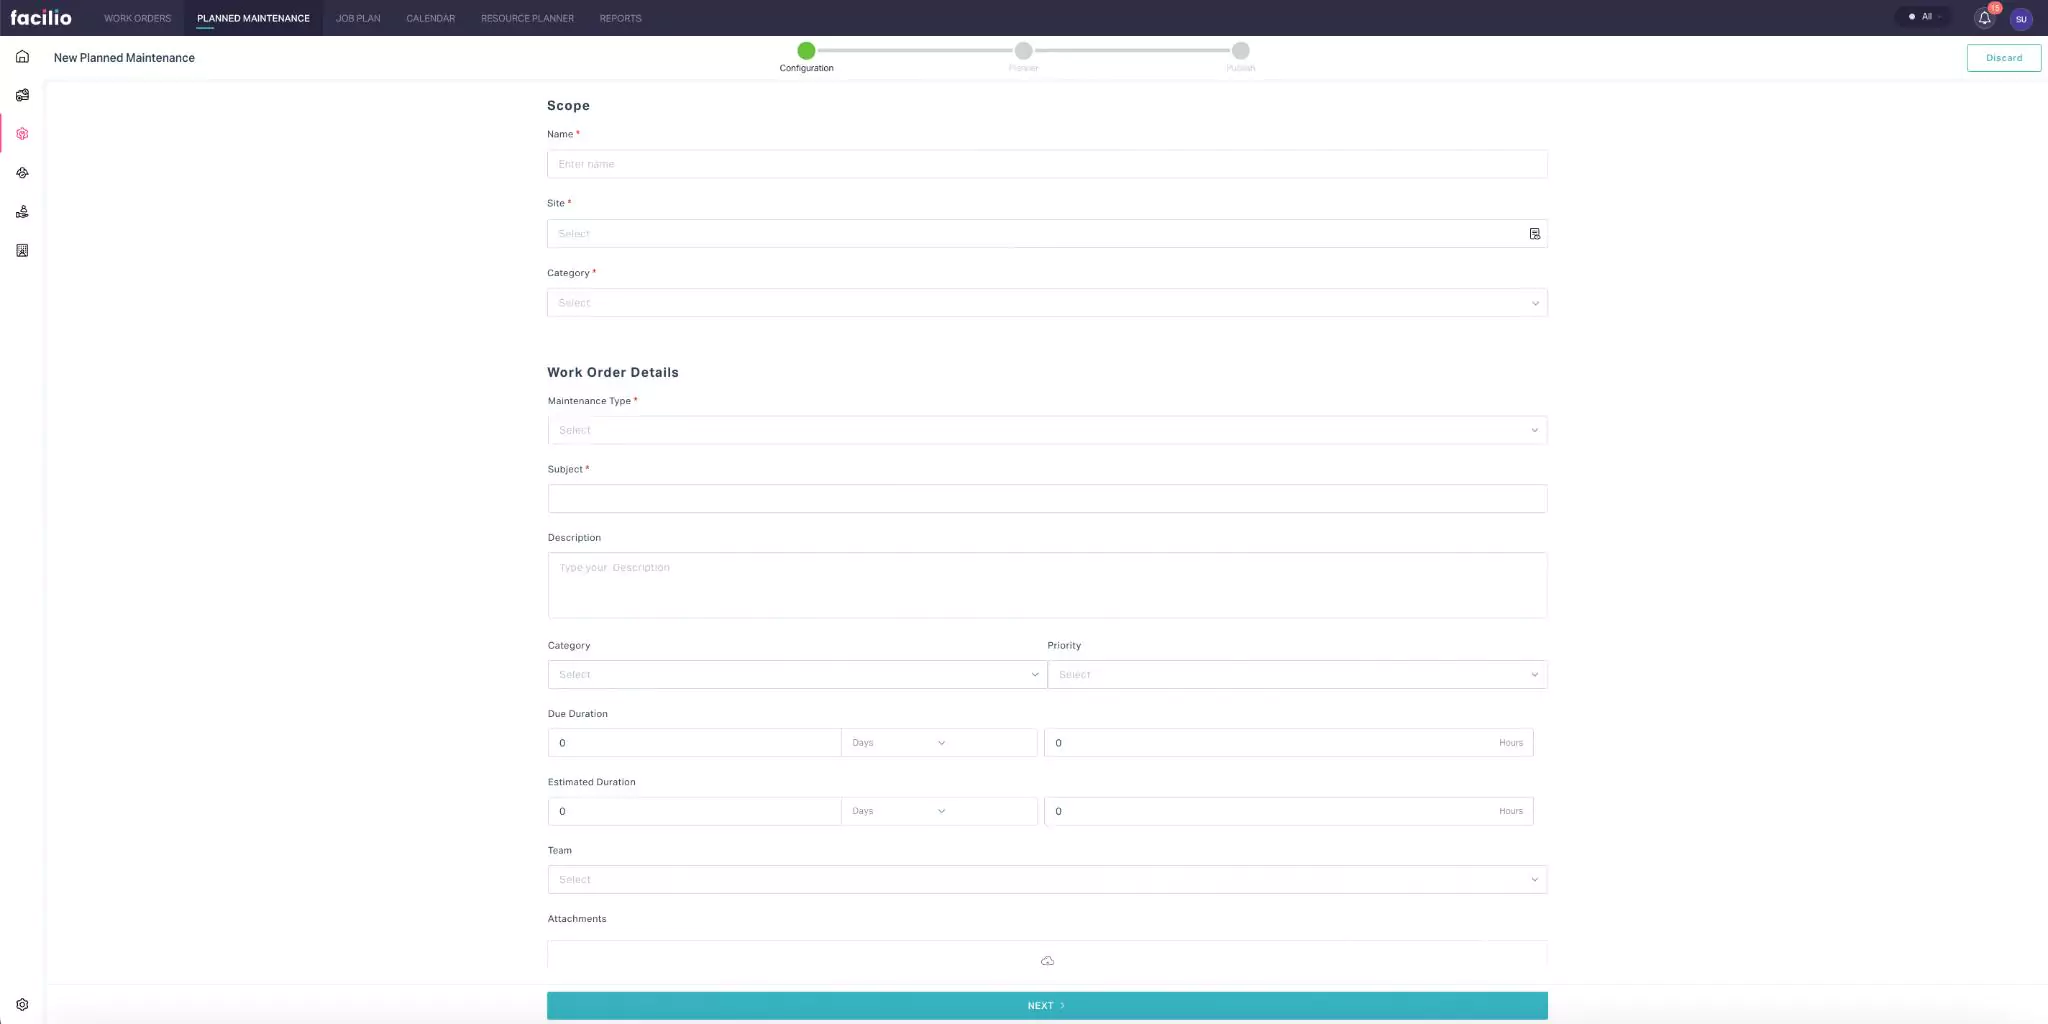
From this screen you can customize the maintenance activity, following the various stages of the planned maintenance life cycle, explained in the upcoming sections.
Stage 1: Configuration
This section allows you to record the scope and basic work order details. The following information is captured in the scope and work order details section:
Scope
- Name - A label to identify the maintenance activity
- Site - The area where the maintenance activity is to be executed
- Category -The classification of the item for which the work order is being created
Work Order Details
- Maintaintenace Type - A classification to define the type of maintenance to which the work order belongs. You can choose any of the following options:
- Breakdown
- Compliance
- Corrective
- Predictive
- Preventive
- Rounds
- Subject - A tagline that specifies the purpose of the work order
- Description - Ashort note describing the purpose of the work order
- Category - The type of the work order being created
- Priority - The urgency level or importance of a task within the maintenance system. You can select from the following options:
- Low
- Medium
- High
- Due Duration - The time frame within which a particular task needs to be completed
- Estimated Duration - The expected time required to complete a specific task or activity
- Team - The group or individual to whom the task will be assigned
- Attachments - An additional document or file that could possibly support the work order execution
You can click NEXT to configure planner settings.
Stage 2: Planner
This section allows you to configure the trigger info for the work order and tag the respective components such as assets, space, and so on. On completing the basic details configuration, click Next. The planner section appears, as shown below.
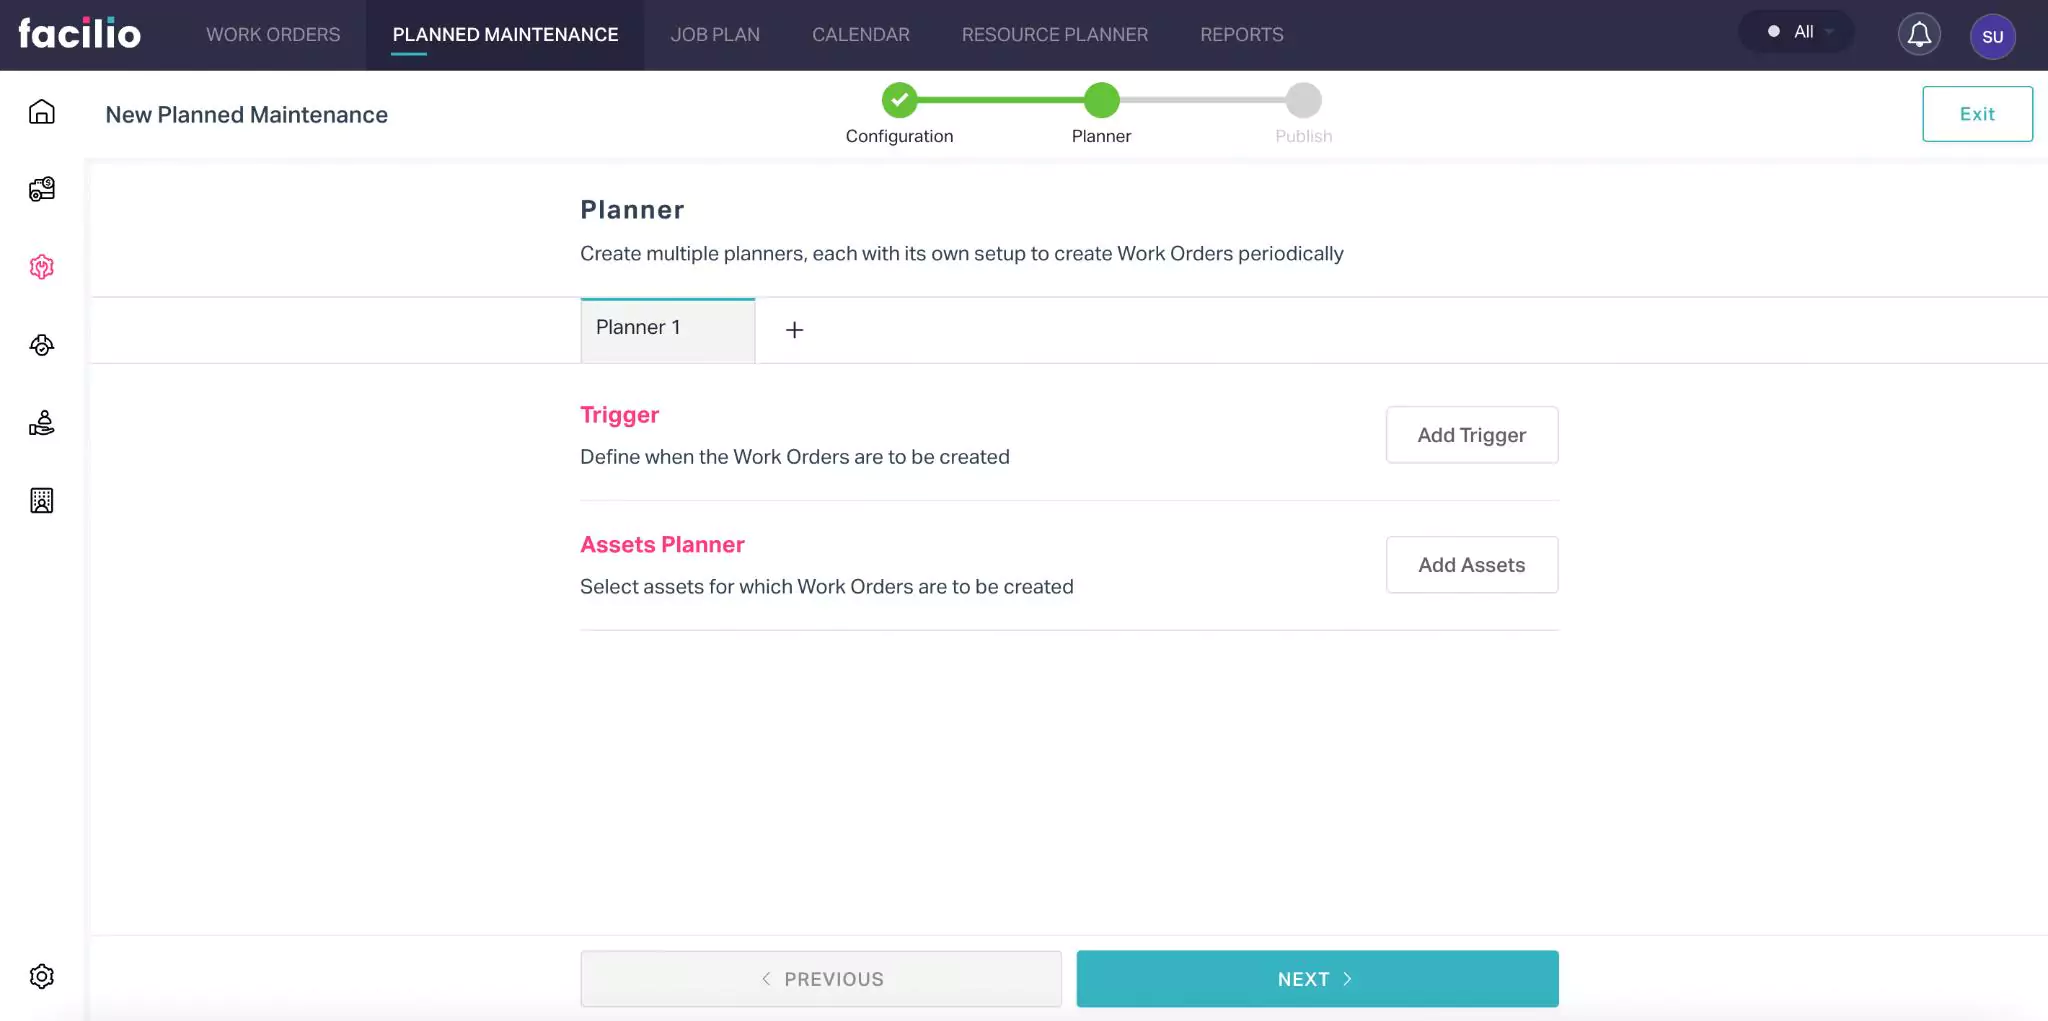
It allows you to configure the following:
Trigger -The event, condition, or criteria that initiates the generation of a work order in the Maintenance module.. To configure the trigger,
Click Add Trigger. The TRIGGER configuration screen appears.
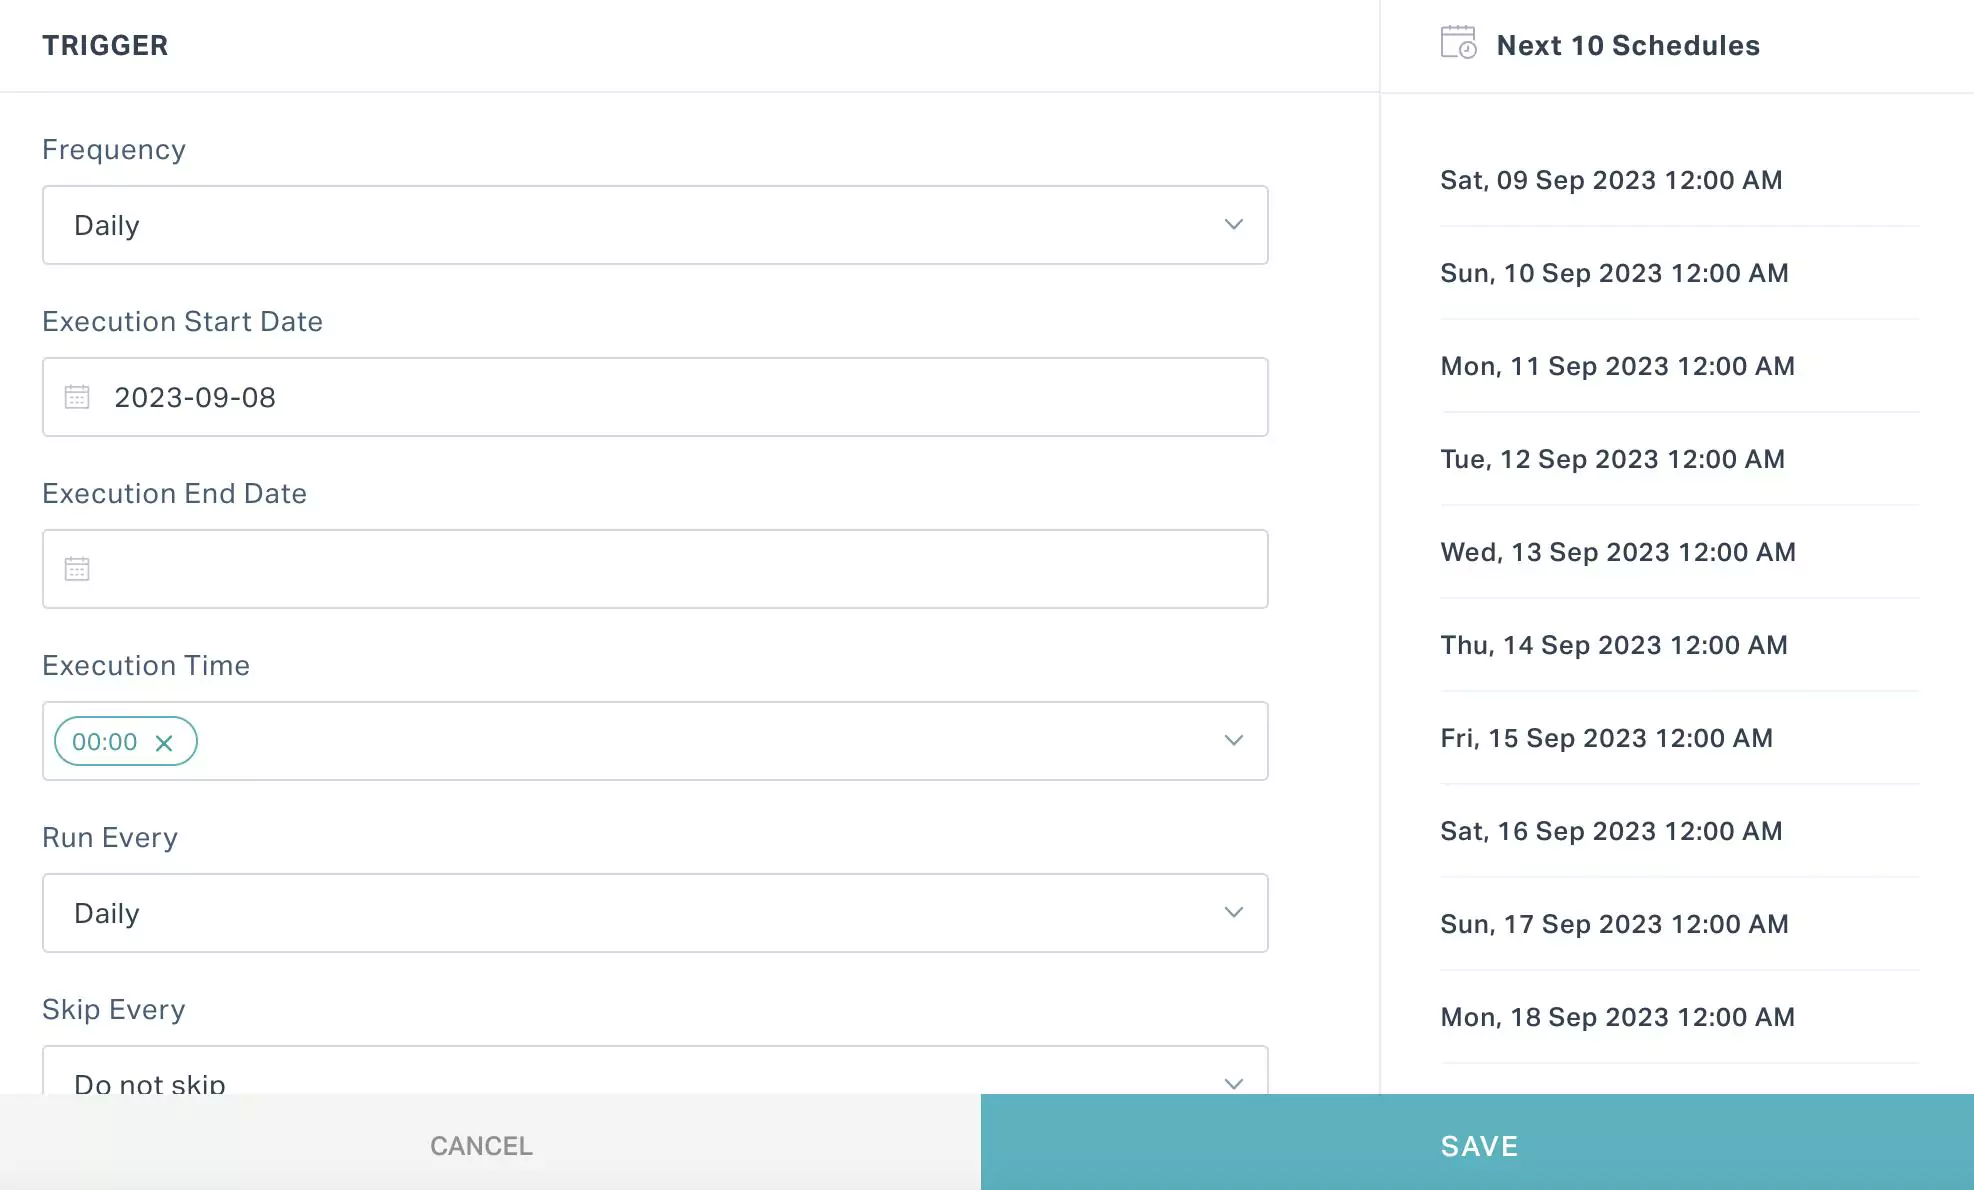
Update the following fields in this screen:
Frequency - The interval to be maintained (such as Daily, Weekly, Monthly, and so on) for triggering the work orders
Execution Start Date - The date on which the work order task must begin
Execution End Date - The date on which the work order task must end
Execution Time - The exact time at which the work order activity must execute
Run Every - The exact interval at which the work order activity should repeat, based on the selected frequency
Example: If the Frequency is set to 'Daily', this field value is Daily by default. You can change it to 2,3,4,...daily, as required.Skip Every - The specific work order cycle(s) to be skipped, if any
Note: You can set this field to 'Do not skip' if the work order can take place regularly as per the schedule.
Click SAVE. The trigger is now added to the planned maintenance template.
Assets Planner - You can select assets for which Work Orders are to be created. To add assets,
Click Add Assets, the screen to select assets appears as shown below.
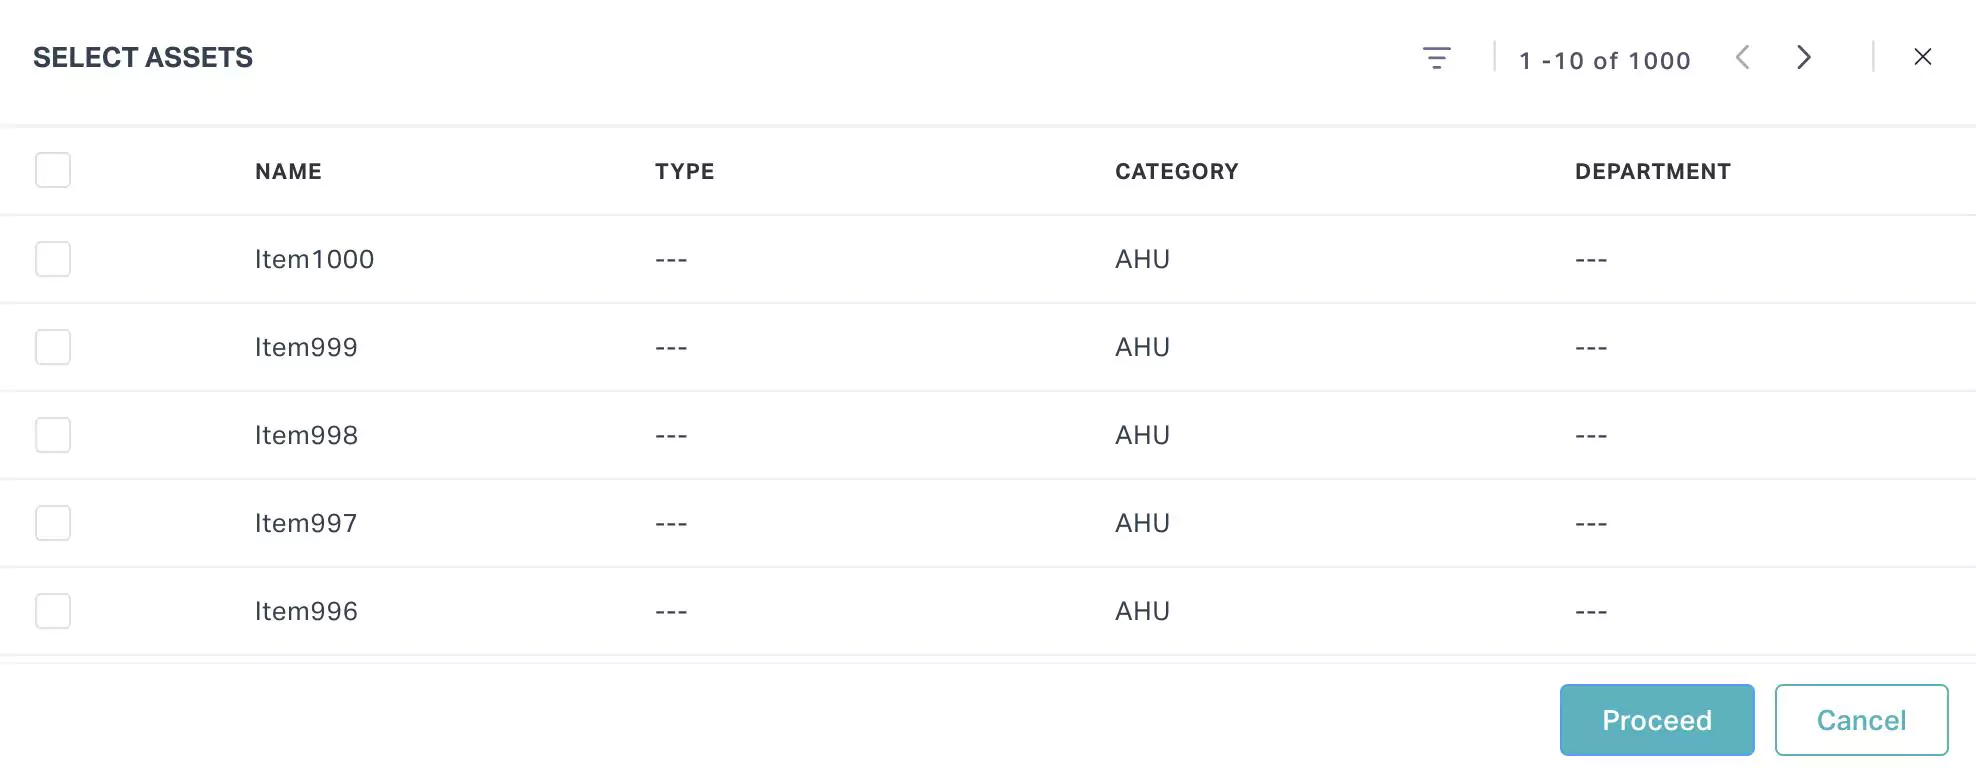
Enable the check box to select the assets and click Proceed. The field to associate a technician and job plan appears in the following screen.
Add the corresponding technician and select the job plan from the list of configured job plans. Click Save to update the settings.
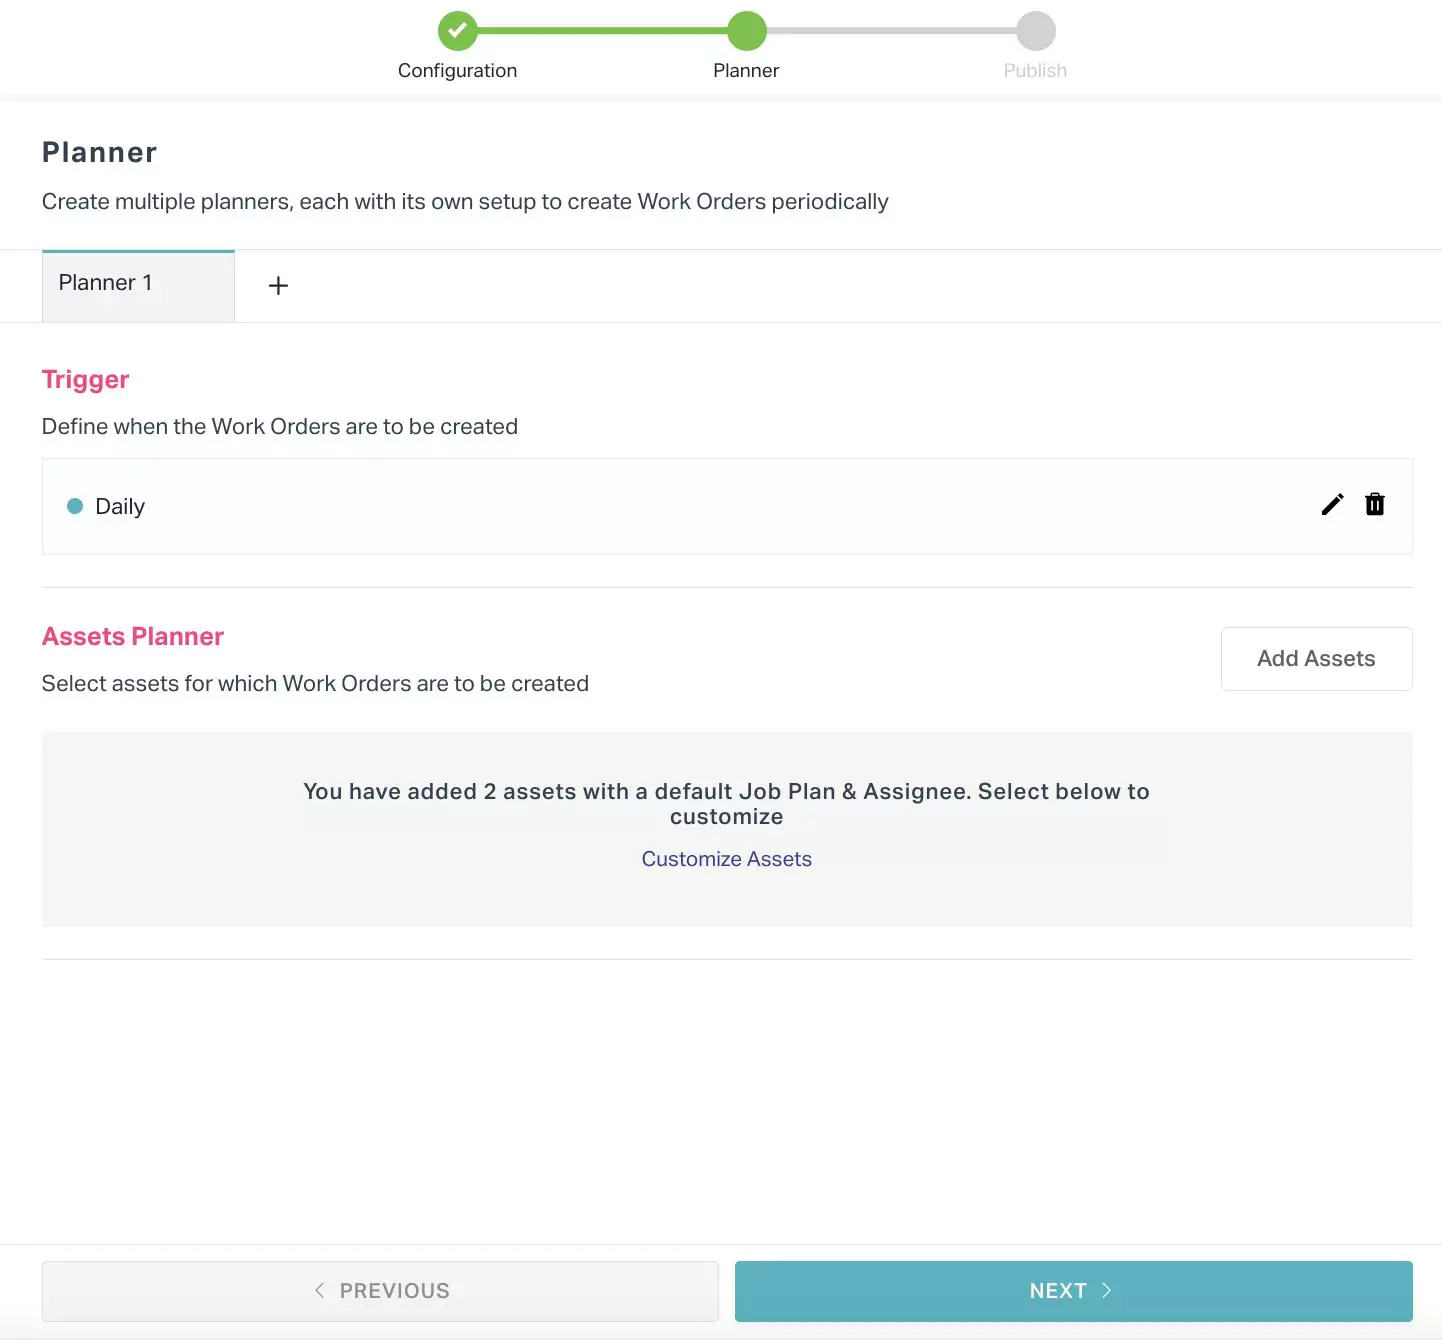 Note: You can update the assets details, job plan, and assignee information anytime when required by clicking the Customize Assets link. The planner settings vary with respect to the scope category set while configuring the basic details.
Click NEXT to publish the planned maintenance.
You can add more than one planner by clicking on the (plus) icon on the planner screen.
Stage 3: Publish
This section allows you to publish the planned maintenance template. On completing the planner setup, click Next. The screen to publish the planned maintenance template appears.
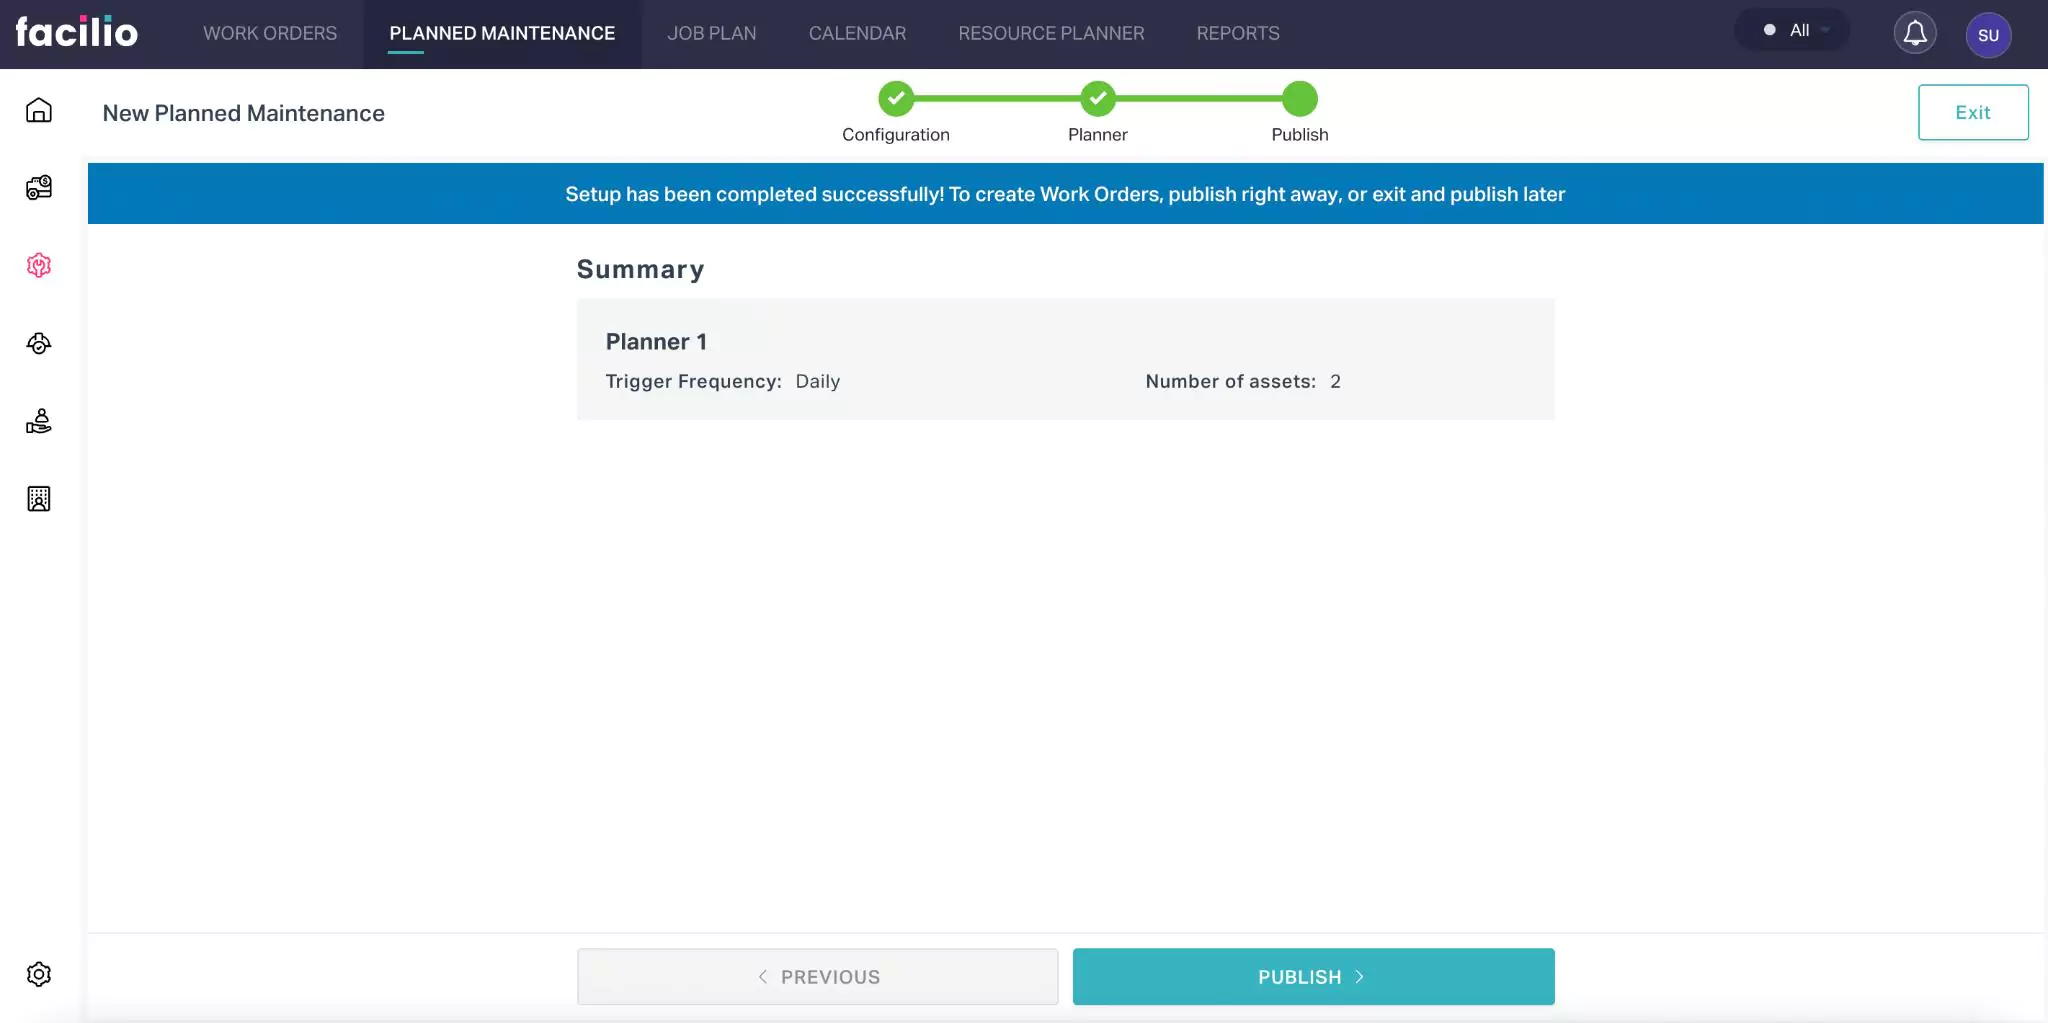
On clicking PUBLISH, the planned maintenance template is published successfully and the following summary screen appears.
The details configured as a part of the planned maintenance setup are reflected in the respective work orders triggered in the Maintenance module.
Viewing Planned Maintenance
Once the planned maintenance is configured, it appears under the PLANNED MAINTENANCE section. You can click on it to view the details configured under each stage of configuration.
These details are displayed under the respective sections as explained below.
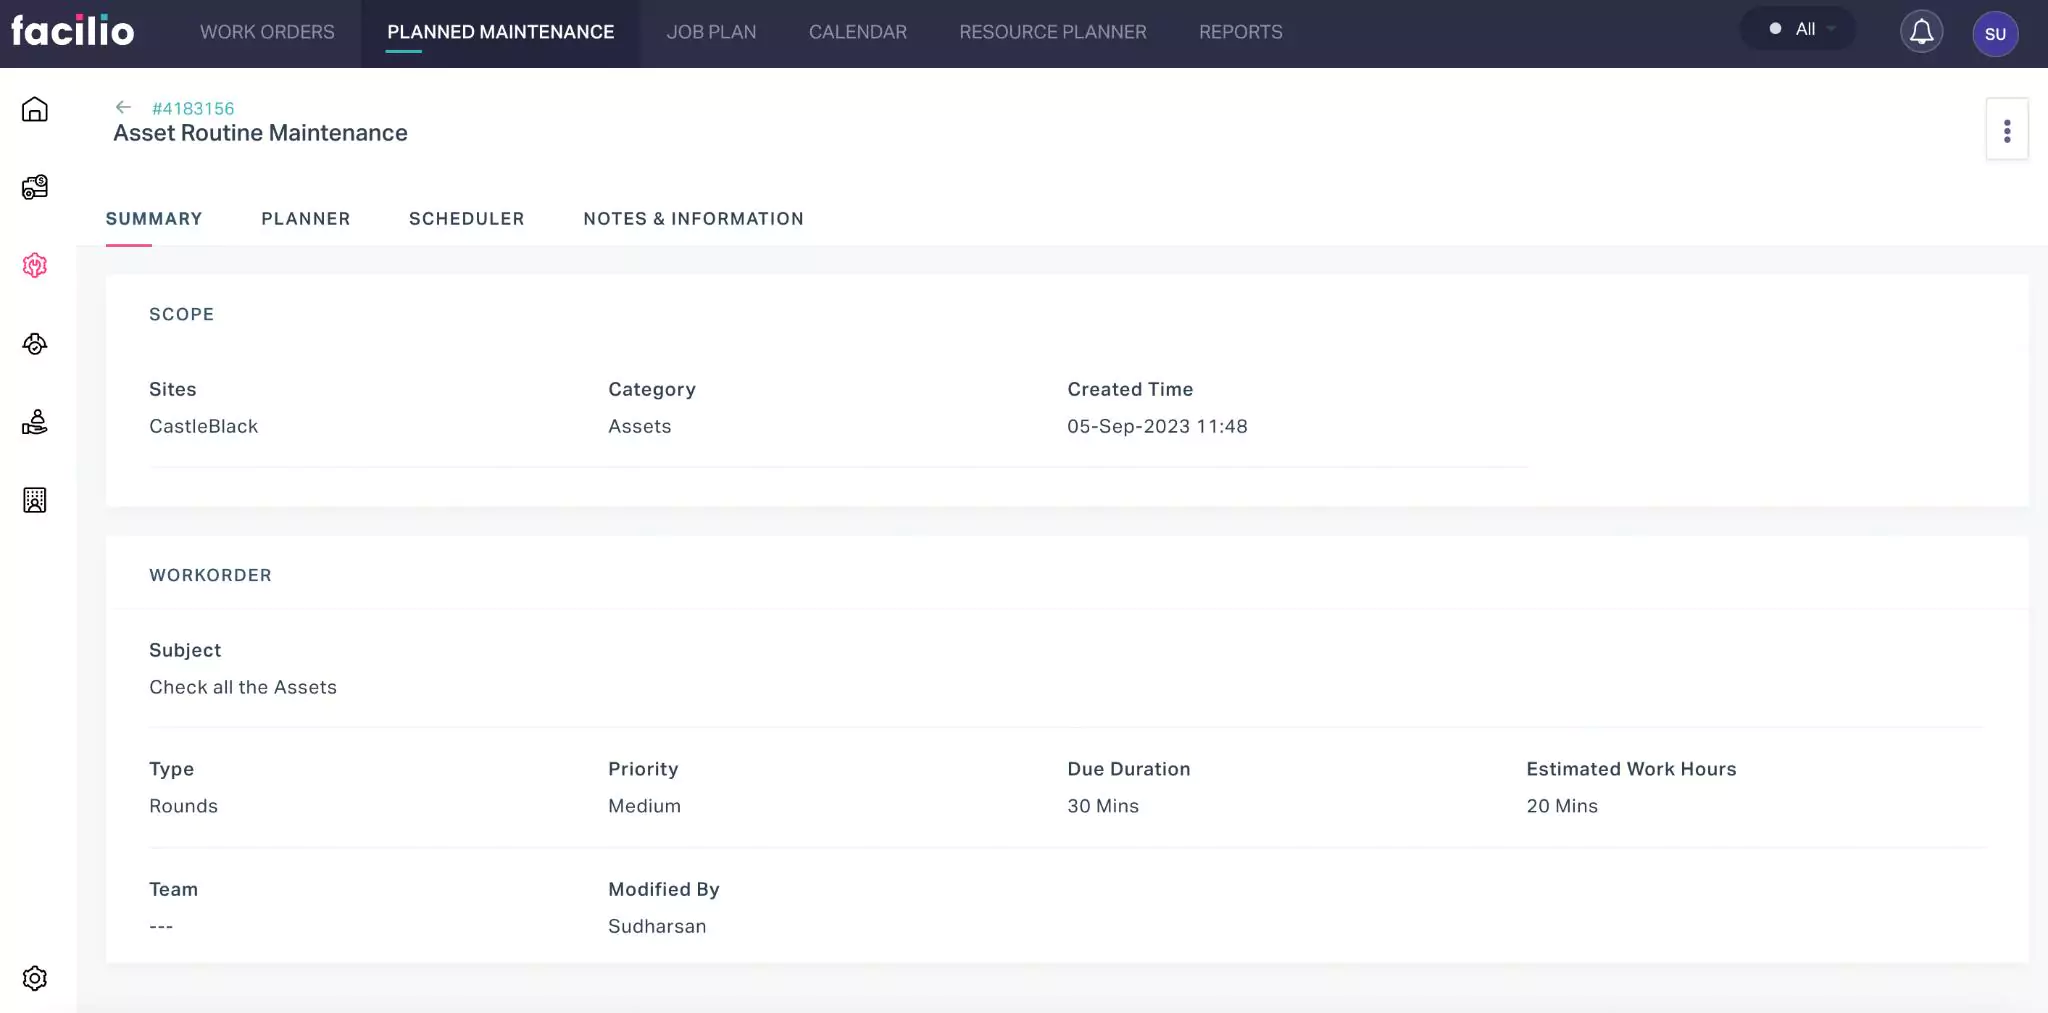
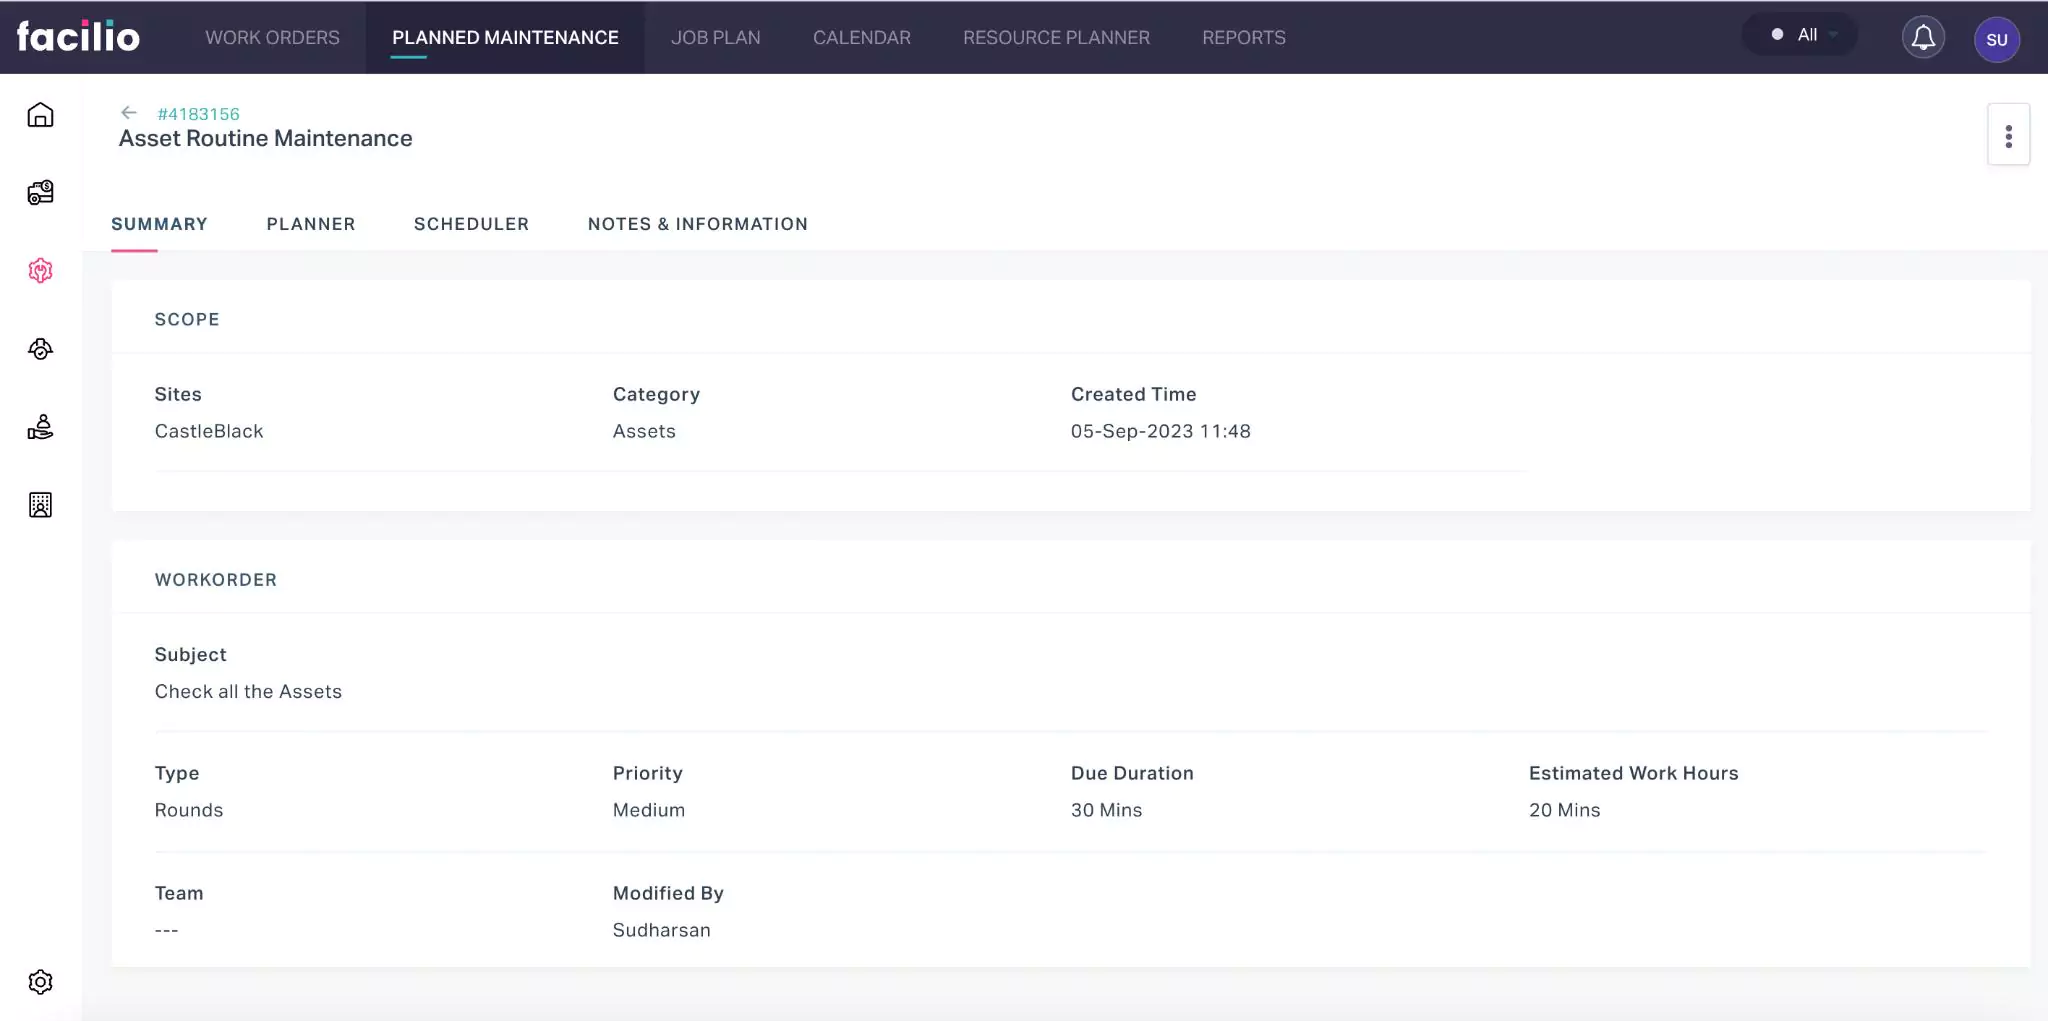
Summary
The SUMMARY section displays the scope and work order details associated with the maintenance activity. Details like site, category, created time, work order subject, priority, due duration, estimated work hours, modified by, and team are displayed in this section.
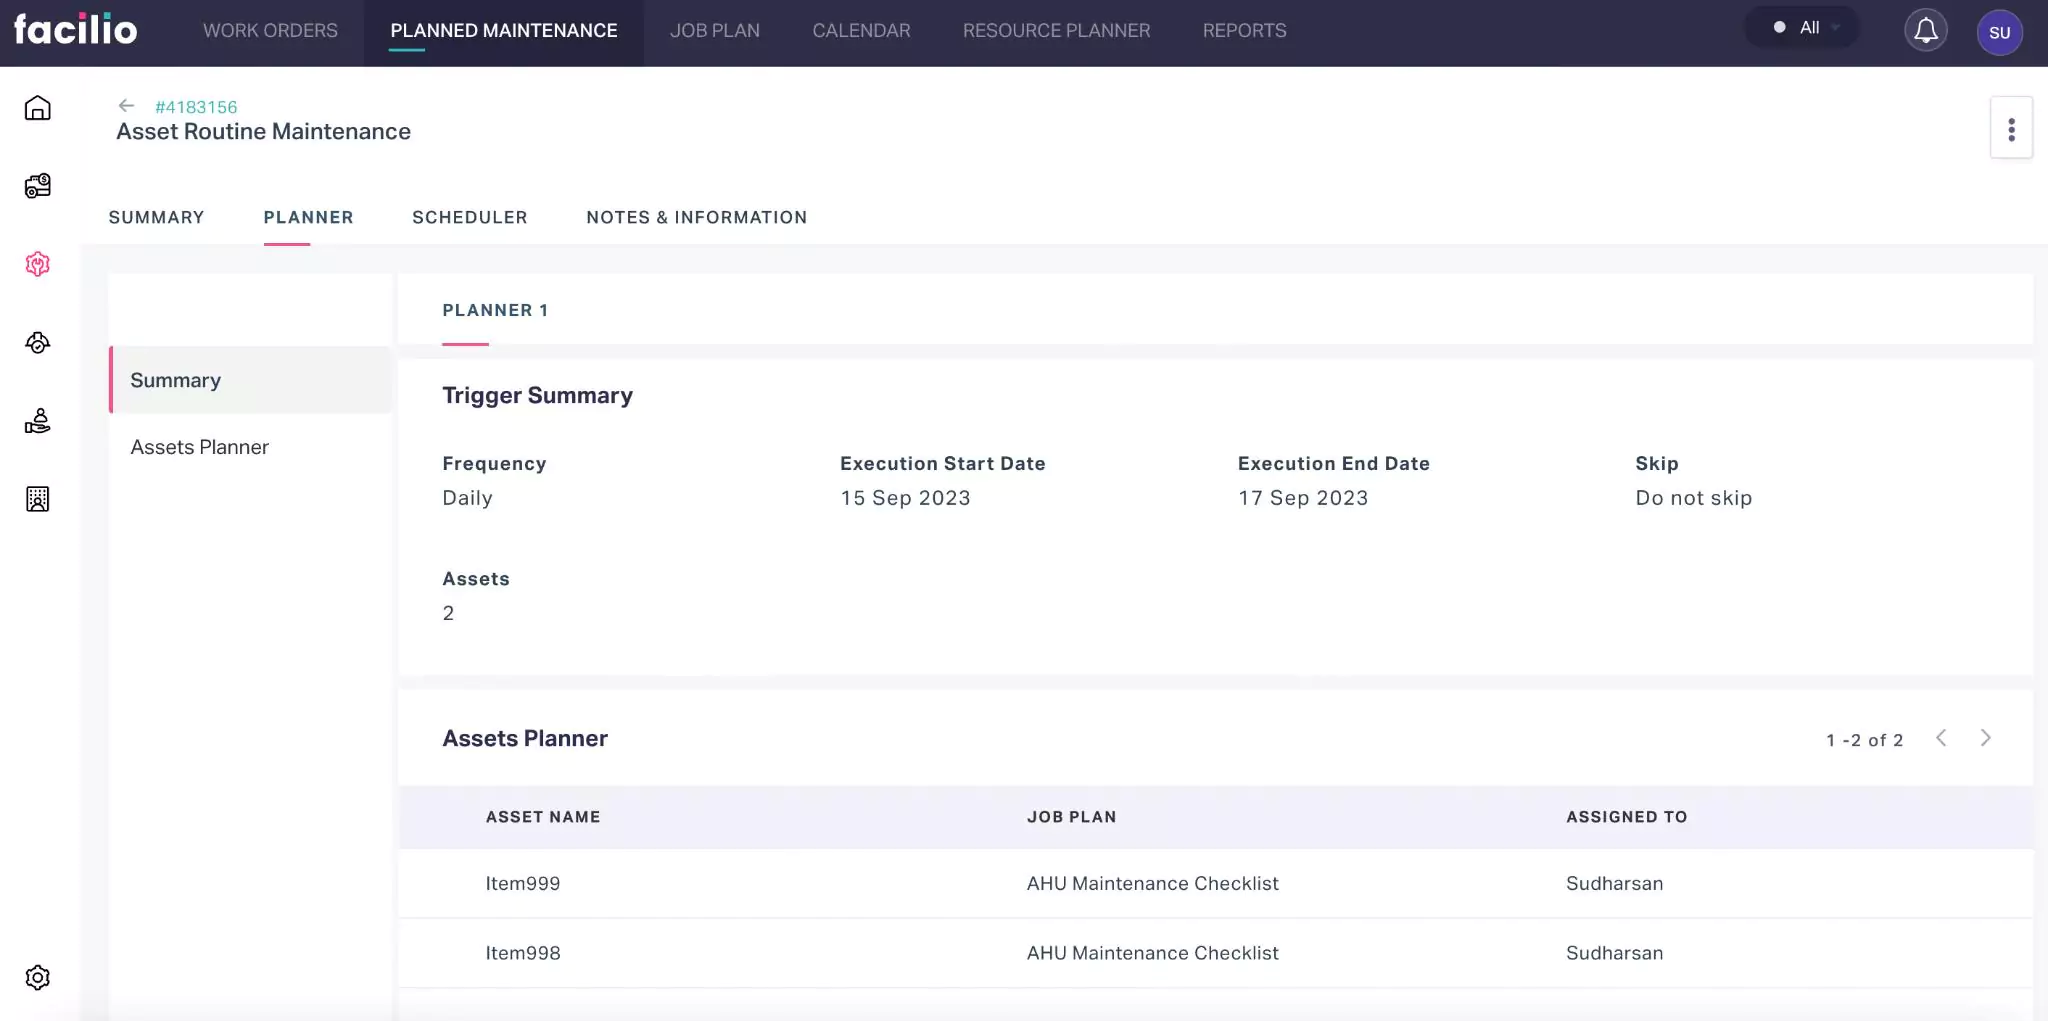
Planner
This section displays trigger and planner details associated with the maintenance activity. Details like frequency of execution, execution start and end date, asset name, job plan, and assigned technician are shown in this section.
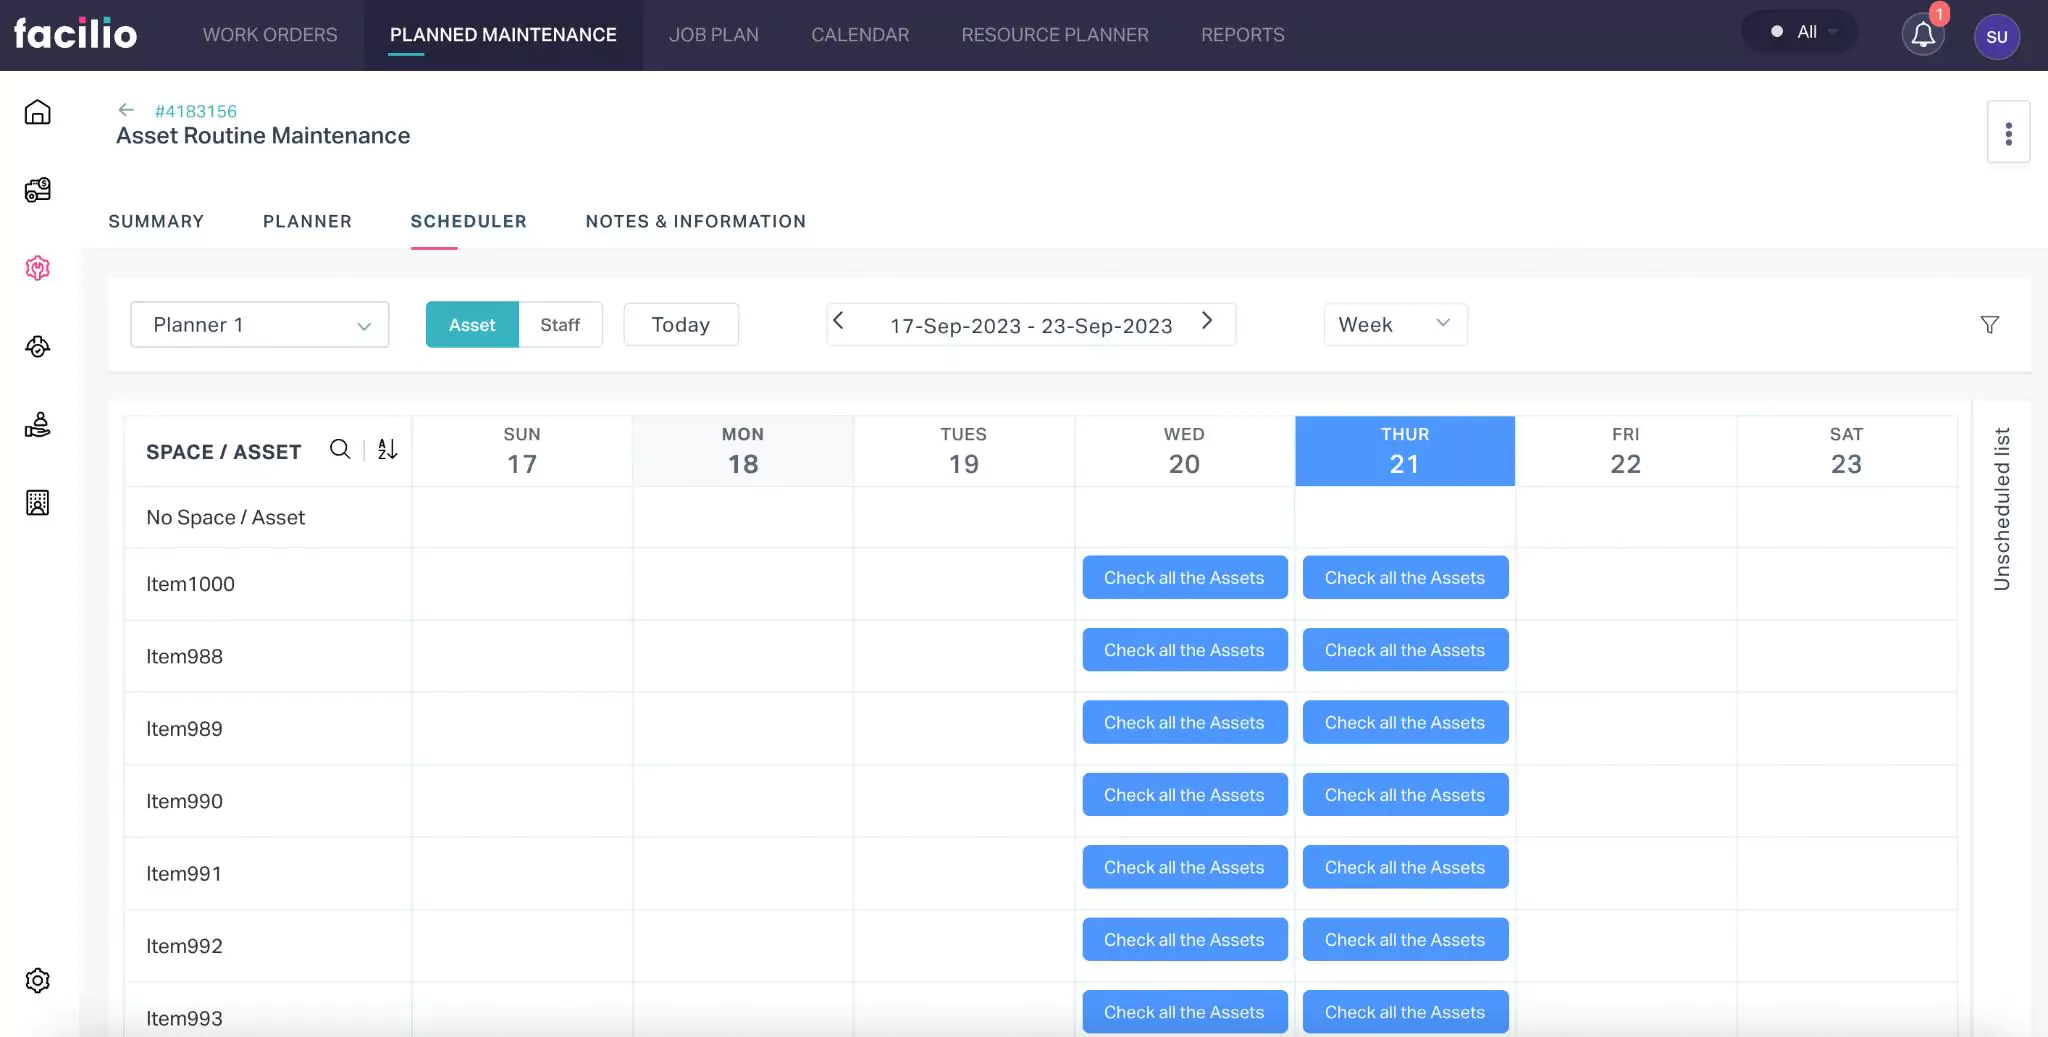
Scheduler
The SCHEDULER section provides information on when a maintenance activity should be performed and by whom. You can switch between Asset and Staff to access the list of assets/space and details of technicians to whom the task is assigned.
Read the Resource Planner section for more information on scheduling work orders.
Notes and Information
The NOTES & INFORMATION section provides additional details about the planned maintenance. It allows you to add notes and attach documents regarding the maintenance activity to be performed.
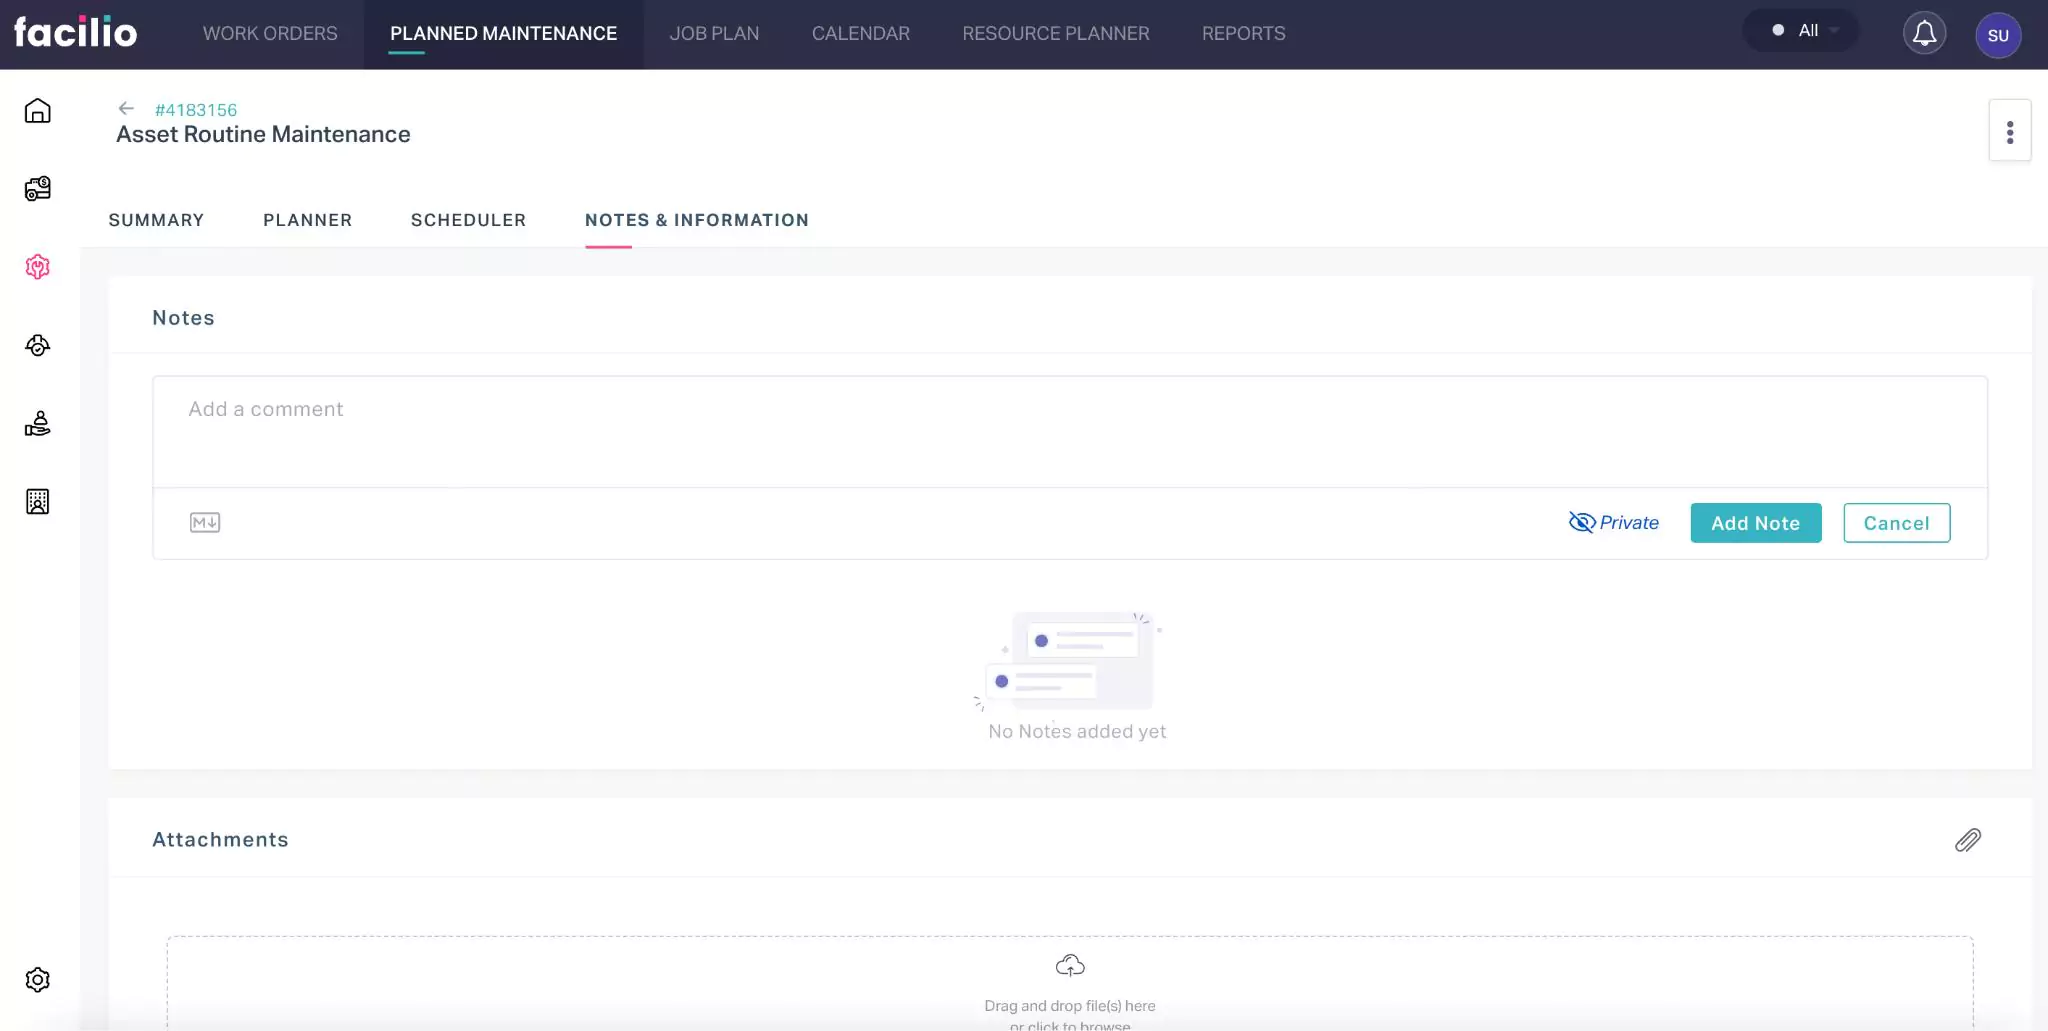
Anybody who has access to the application can add their comment in the Notes section and it is visible only to the concerned parties, as the Private mode is enabled by default. You make the comment accessible to the selected portal users upon enabling Public mode, as shown below.
Also, the application allows you to apply styles to your text, like bold, italics, and more using markdown. You can explore the possible conventions by clicking the icon at the bottom left of the comment box.
In addition, you can also attach documents related to the request, if any.
There are certain functionalities associated with this section facilitating various activities over the configured planned maintenance.
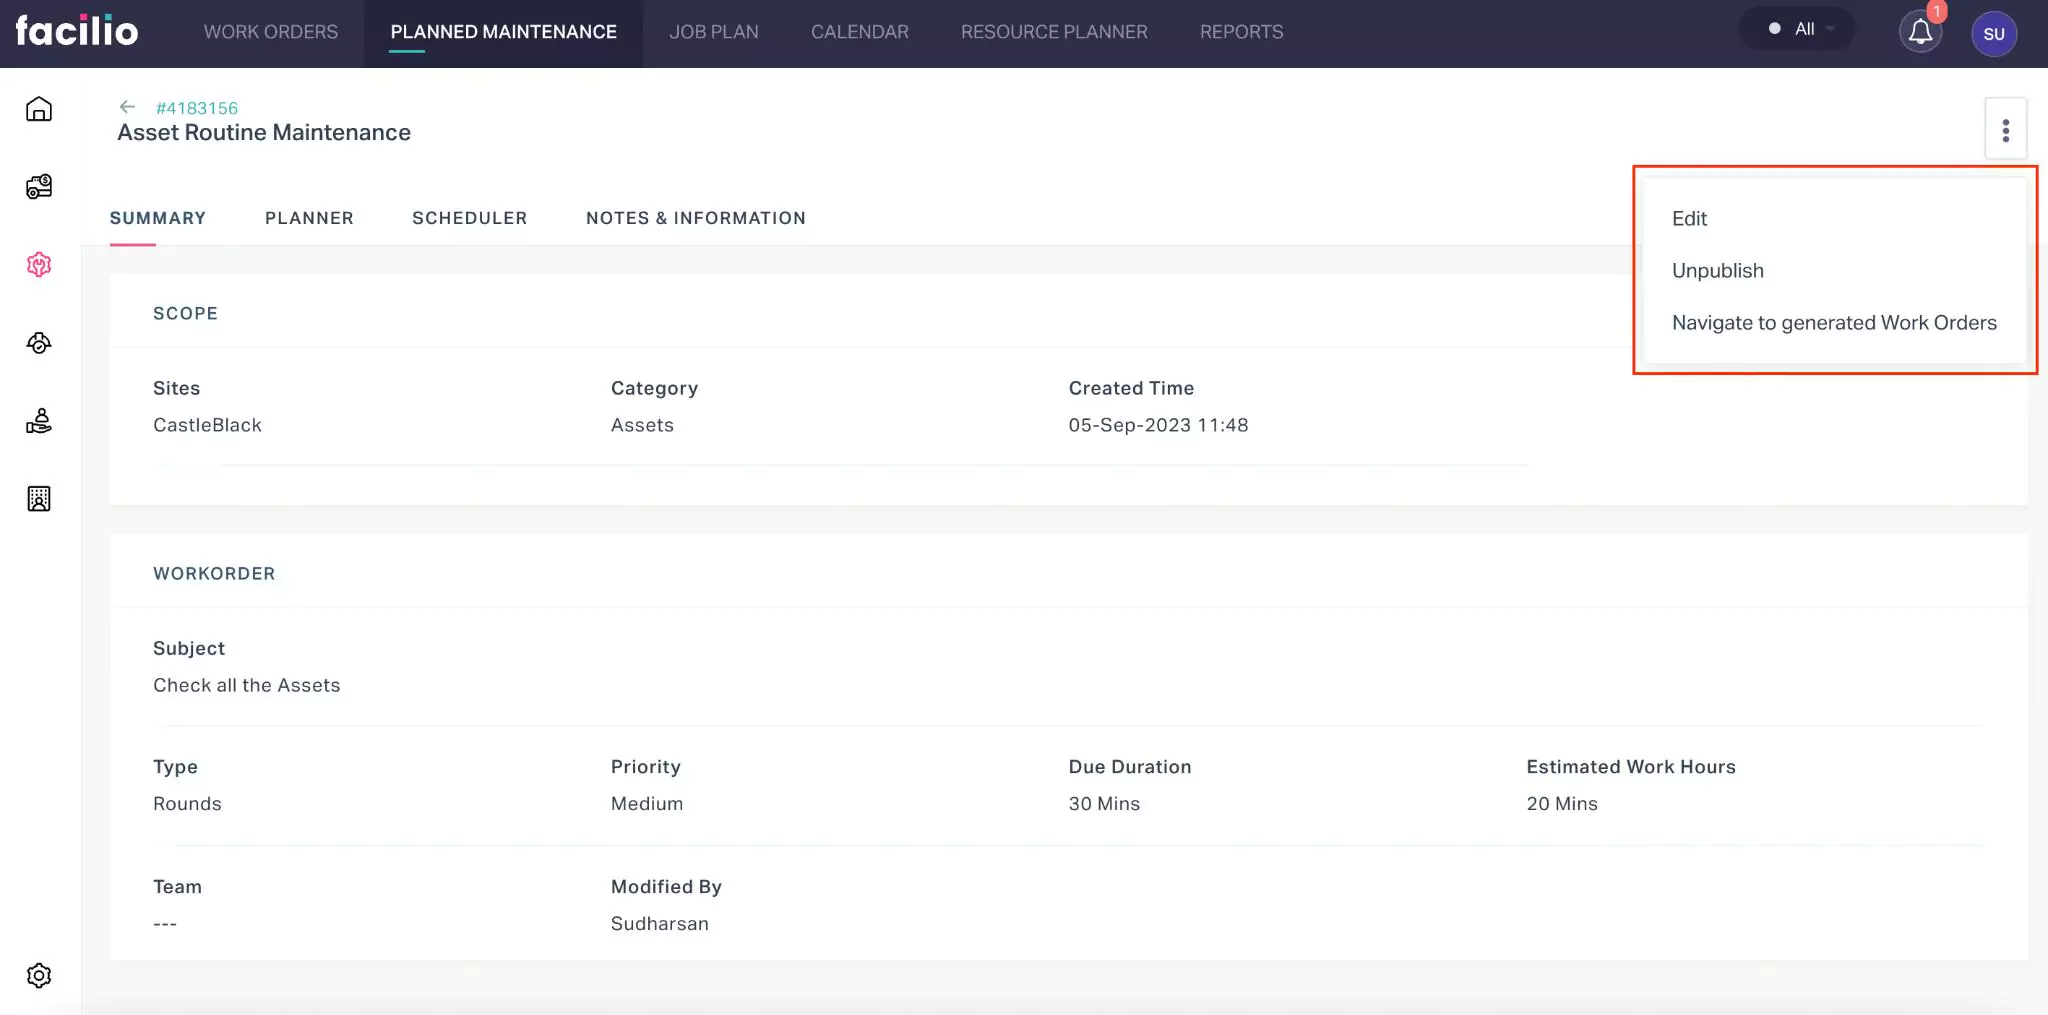
They are,
| Component | Action/Description |
|---|---|
| Edit | To make changes to the existing planned maintenance configuration |
| Unpublish | To temporarily hide the configured planned maintenance for various reasons, like making updates |
| Navigate to generated Work Orders | To access the work orders triggered from the configured planned maintenance |