Configuring Stateflow Transition Properties
You can configure various other properties of the transition like, the users who can perform the transition, the condition under which the transition is to be executed, the validations to be performed before execution and so on. The upcoming sections explain these configurations in detail.
Pre-execution Properties (Before)
This section explains the settings and configurations that are considered before executing the selected transition.
The BEFORE section allows you to configure Who can perform this transition and the circumstances under which the transition is applicable. You can choose any of the following options:
Users - You can specify the users, roles or groups who can perform this transition, in the window that appears when you click Configure.


You can choose this transition to be applicable for Tenant, Vendor and Occupant portals upon selecting the respective text boxes as shown below:

You can select the Allow Permalinks check box to allow access to this transition for the users who are not registered with Facilio.
You can also choose to,
Specify conditions for this transitio
Update fields while performing this transition
Create record while performing this transition
Automated by Time - You can specify the time with respect to which the transition will be enabled. Click Configure Time against this field and specify the required details in the window that appears.

You can choose any of the following options:
On Time - You can specify the duration after which the transition must be enabled.
On Date - You can configure the duration for enabling the transition with respect to a date field. It is to be noted that the date fields listed in the dropdown are the fields associated with the selected module.
Example: A sample scenario is shown below.
In the above screenshot, the transition is enabled after an hour from the record creation time.
Automated by Condition - You can define the criteria (or condition) for enabling the transition. Read the Criteria Configuration section for more information.
As a part of above explained settings, you may have to perform the following configuration(s), as applicable:
Geo Restriction Configuration
You can configure a geographic filter defining the work location to ensure if the professional is available at the designated place to initiate the work.

When you click Configure against the Make geo restriction mandatory field, the following dialog appears where you can set the Location and specify the acceptable/serviceable radius by adding the Range (in meters).

As a result of this configuration, the professional can initiate the work only when he is available in the specified site and is restricted to operate from other location. It helps ensuring if the work is being genuinely carried out from the right location.
Criteria Configuration
You can define the criteria (or condition) for enabling the transition.
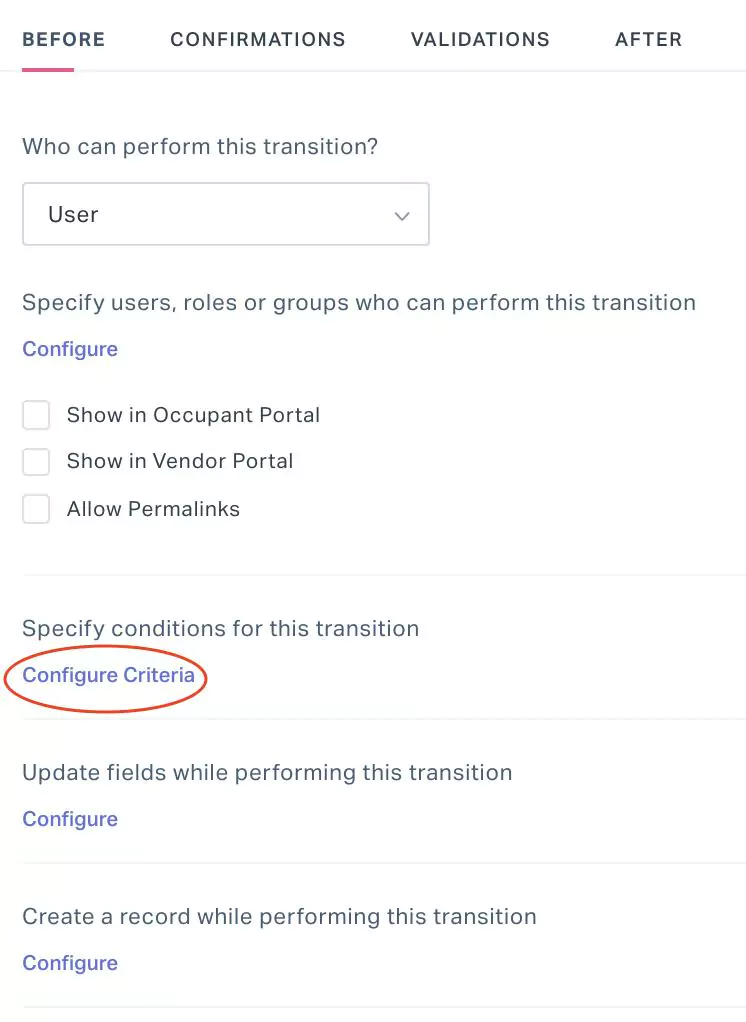
When you click Configure Criteria against the Specify conditions for this transition field, the following screen appears, where you can define the trigger field, corresponding operator and input value (as applicable) in the following fields:

Field - Select a field on which the condition is to be applied.
Note: The values in the drop down list are the fields corresponding to the selected module.Operator - Select the operation or comparison methodology to be applied. You can choose any of the following possible operators:
- Is empty
- Is not empty
- Is
- Isn't
- Role is Date related operators (like, Yesterday, starting tomorrow, last month, this week and so on)
- Numeric operators (like, !=, >=, >, between and so on)
- String operators (like, contains, starts with, ends with and so on)
Note: The operators displayed vary with respect to the field chosen.Value - Enter the field input for which the condition applies.
Note: The applicability of this field depends on the operator set. For example, if the operator is set to ‘Is empty’ this field is not applicable.

Here, the configured transition is executed only for the records whose Subject is not ‘Test’.
The criteria created is specific to the selected transition. You can use the ![]() and
and ![]() buttons to add or delete a record in this window. In case of multiple criteria, you can choose to match all or selected criteria using the Match All and Match Any options.
buttons to add or delete a record in this window. In case of multiple criteria, you can choose to match all or selected criteria using the Match All and Match Any options.
QR/Barcode Scanning Configuration
You can configure QR/barcode scanning to ensure whether the task or workflow is executed on the right asset.
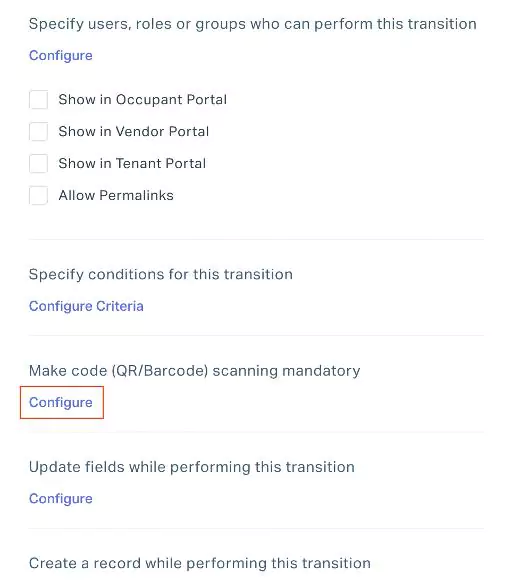
When you click Configure against the Make code (QR/Barcode) scanning mandatory field, the following window appears where you can select a field to map a specific value with the QR/Barcode. For instance, if this field is set to Asset Name, when the user scans the QR code on the asset the name of the asset is displayed.

As a result of this configuration, while executing the transition you are prompted to scan a QR/Barcode for validating the asset. Once the validation is successful, you can proceed to the next step in the workflow. Else, the following error message appears on the screen:

Thus, enabling QR/barcode scanning ensures you are on the right asset.
Field Update Configuration
You can configure the transition to update the required field value(s) in the selected record.
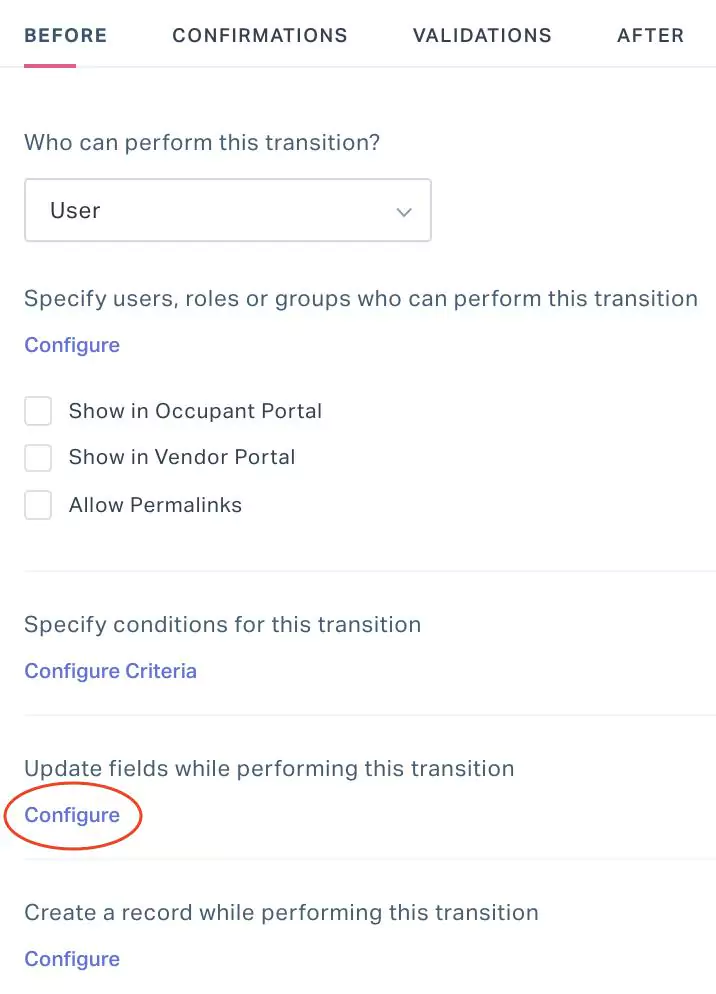
When you click Configure against Update fields while performing this transition field, you will be prompted to select the fields to build a form after which you will be directed to the form builder screen, where you can customize the form further and apply the required rules (read the Managing Templates section in the Managing Modules document for more information).
As a result of this configuration, when the transition is executed, the customized form that you created (with selected fields) will be displayed. After you save the form, the field values that you updated in the form will be updated in the record.
Record Creation Configuration
You can configure the transition to create a new record in the selected module using an existing template.

When you click Configure against Create a record while performing this transition field, the following screen appears, where you can define the module in which the new record is to be created and the form that must be used to create the record.

As a result of this configuration, when the transition is executed, the selected form will be displayed. After you save the form, a new record will be created in the selected (new) module.
Confirmations
You can configure the confirmations required before the execution of the transition.

When you click Add Confirmation in the CONFIRMATIONS section the following screen appears, where you can choose the Condition to be met and compose the respective confirmation Message to be displayed.

You can also configure more conditions to be listed in the drop down. To create a new condition,
Click the ADD NEW option associated with the Condition field. The ADD CONDITION screen appears as shown below.

Provide a Name for the condition and click Configure. You can choose any of the following actions:
- Simple - Allows you to configure your own criteria. Read the Criteria Configuration section for more information.
- Script - Allows you to configure the script to be executed. Read the Script Guide for details on working with scripts.
Click SAVE. The new condition is now added to the drop-down as shown below.

You can create new conditions and modify or delete the existing conditions from the Condition Manager. Read the Condition Manager feature for more information.
Validations
You can configure the validations required before the execution of the transition.

When you click Add Validations in the VALIDATIONS section the following screen appears, where you can choose the Condition to be met and compose the respective Error Message to be displayed if the condition is not met.

You can also configure more validations to be listed in the drop down. To create a new validation,
Click the ADD NEW option associated with the Condition field. The ADD CONDITION screen appears as shown below.
Provide a Name for the condition and click Configure. You can choose any of the following actions:
- Simple - Allows you to configure your own criteria. Read the Criteria Configuration section for more information.
- Script - Allows you to configure the script to be executed. Read the Script Guide for details on working with scripts.
Click SAVE. The new condition is now added to the drop-down as shown below.
You can create new conditions and modify or delete the existing conditions from the Condition Manager. Read the Condition Manager section for more information.
Post-execution Properties (After)
This section explains the configuration of resulting actions after the execution of the transition.

Click Configure in the AFTER section and select any of the following options:
Send Email - An email is triggered to the configured list of users
Field Update - The value of the selected field is updated to the configured or defined value, on execution of the transition
Example: A sample scenario is shown below.
Here, on click of the button, the Priority of the selected record(s) will be updated to Low.
Send Mobile Notification - A push notification is triggered to the configured users on their phone
Execute Script - The configured script is executed on execution of the transition. Read the Script Guide for details on working with scripts.
Change Status - The status of the selected record is updated to the configured or defined value, on execution of the transition.
Example: A sample configuration is shown below.
Here, on execution of the transition, the status of the record is updated to On Hold.
 icon and reset option to modify the configured settings and remove the configuration, respectively.
 You can use the ![]() icon in the Edit Transition State window to remove the selected transition.
icon in the Edit Transition State window to remove the selected transition.