Creating Vendor Mapping
The purpose of creating vendor mapping is to automatically assign tickets to a vendor contact, when a request is created on a defined condition (for example, building, category and so on). To create a vendor mapping,
Login to the application.
Click the
 (Connected Apps) icon in the sidebar menu. All the business units are displayed by default.
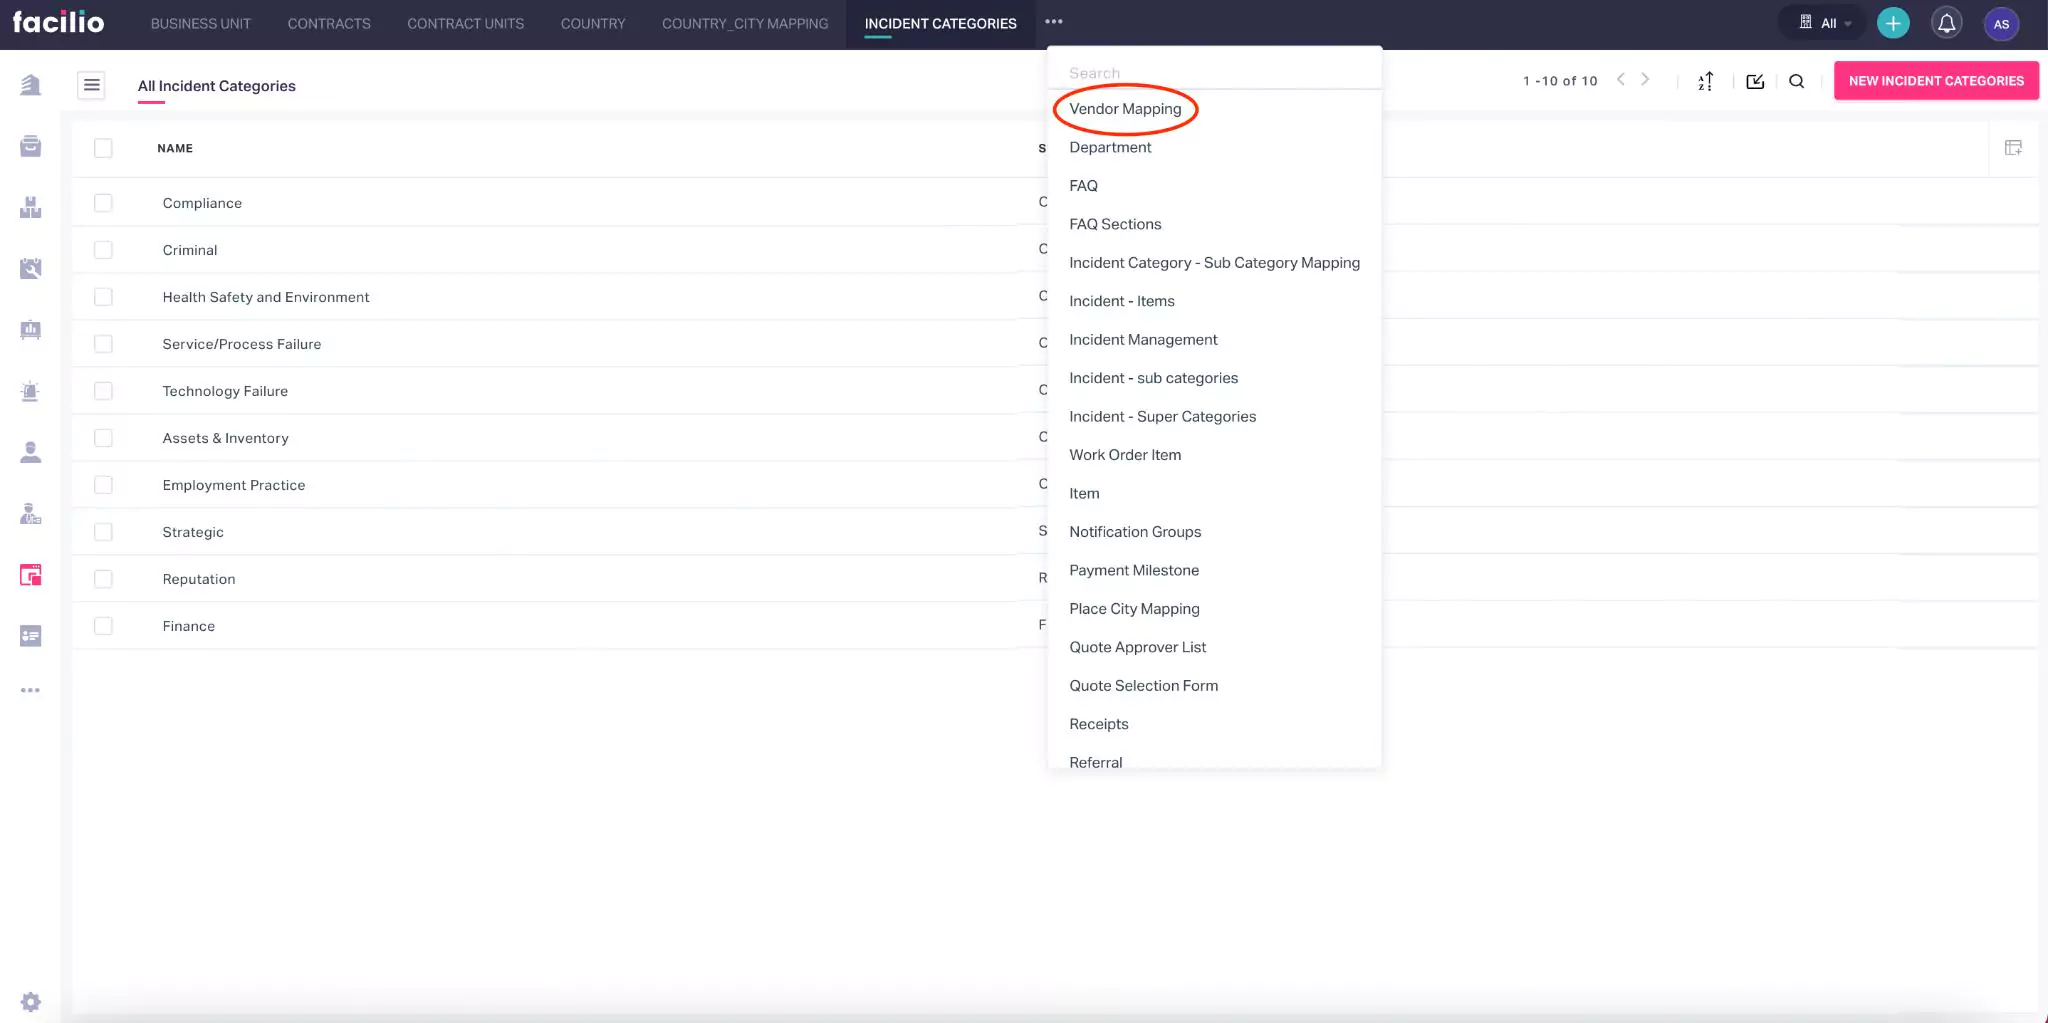
Navigate to the required view (Vendor Mapping) from the dashboard header as shown above.
Click NEW VENDOR MAPPING. The Create Vendor Mapping screen is displayed as shown below.
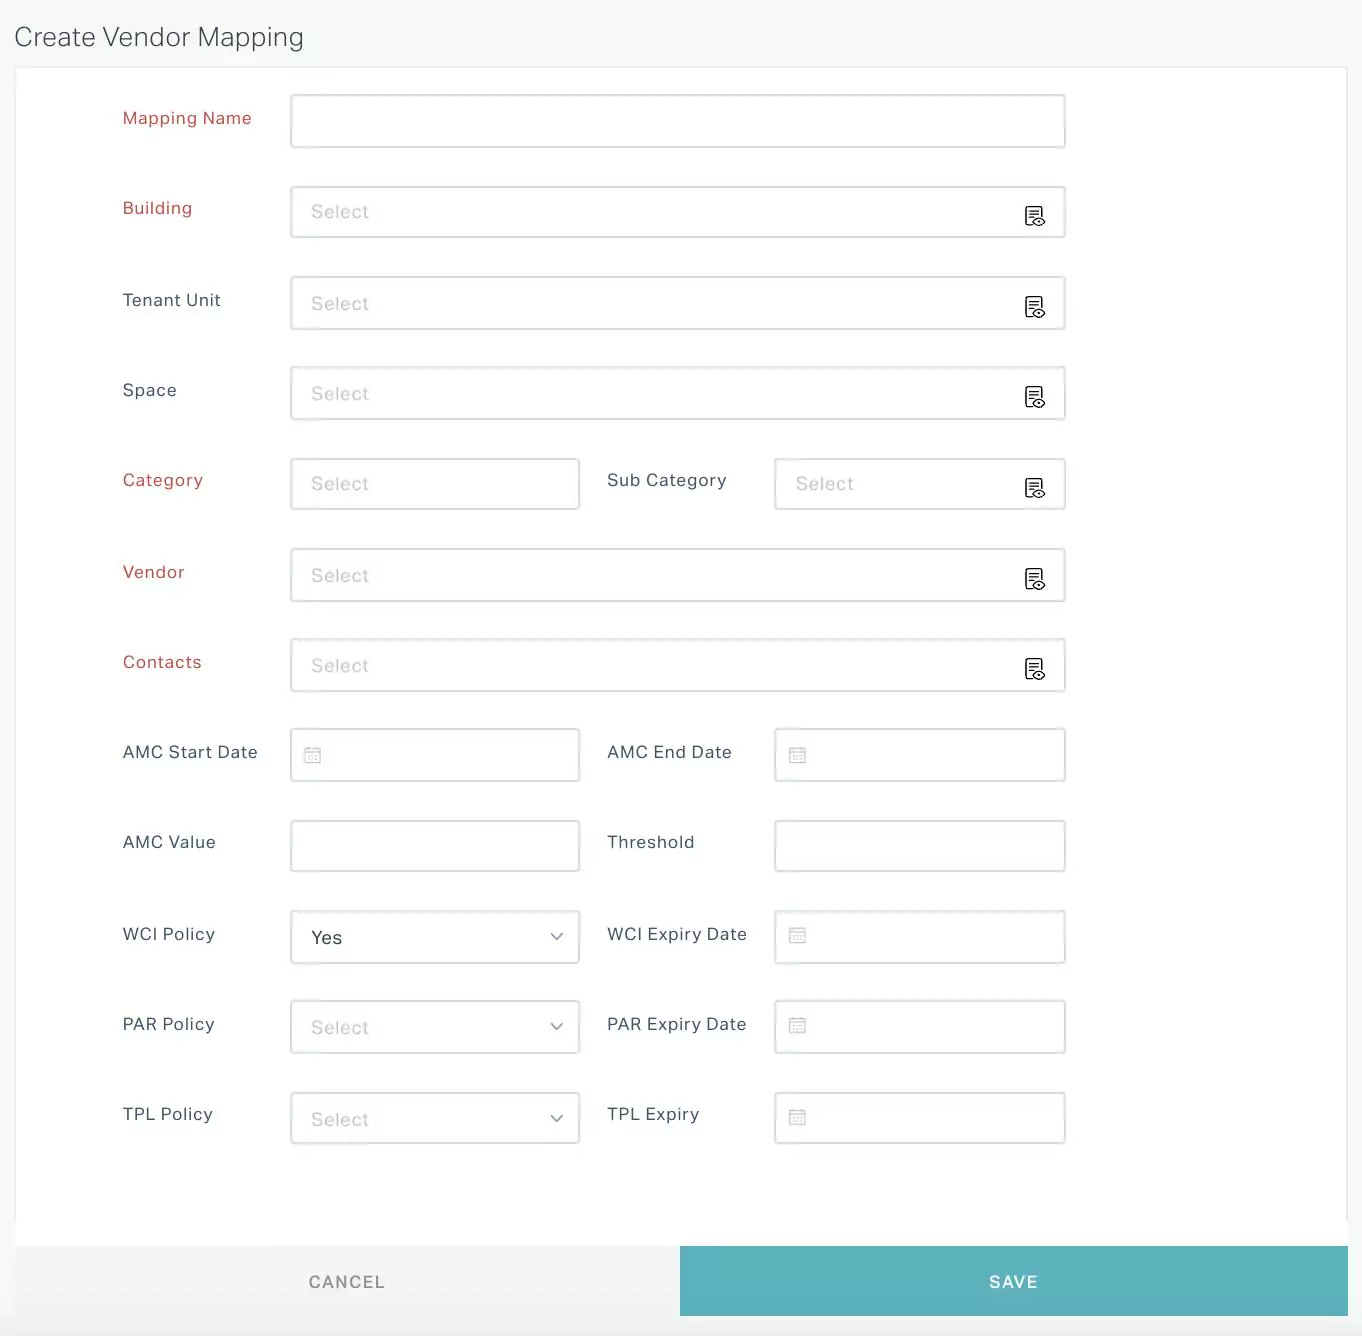
Update the required fields in this screen. Based on the values in the Building, Tenant Unit, Space, Category and Sub Category fields, a new request is assigned to the specified Vendor Contact.
Note: Priorities are configured to handle multiple mapping conditions created on the same combination of selected attributes.Click SAVE. The vendor mapping is now saved to the dashboard.