Working with Quotations
When a client or tenant raises a service request, it can be converted into a structured work order for efficient execution and resolution. A quotation is then generated using basic information from the work order and sent to the vendor. The vendor updates and sends the quotation to the client or tenant. The following sections will guide you through how to raise a quote from a work order, convert the quote to a user quote, send the quote to the user and mark it as sent, manage its terms and conditions, and revise the quote as needed.
Quote Creation from Work Order
The quote is created to provide a cost estimation of the requested service that is required for addressing the request. From the work order details screen, you can create a quote to give detailed information of costs for the goods and services. This quote is accessible to the vendor in the Quote section of the Vendor portal.
To create a quote from work order,
Navigate to the Work Order section under the Maintenance module and select the required work order. The corresponding details screen appears as shown below.

Navigate to the Financial section and click Generate Quote. The Choose Quote Type dialog appears with the Quote Type field set to Vendor by default.
Note: The list of users displayed in this field varies based on the information in the work order. For example, if the quote is created for a client, the drop-down options will be ‘Client’ and ‘Vendor’.Select the user for whom the quote is being created in the Quote Type field and then click Create. The Standard form to create a quote is displayed as shown below.
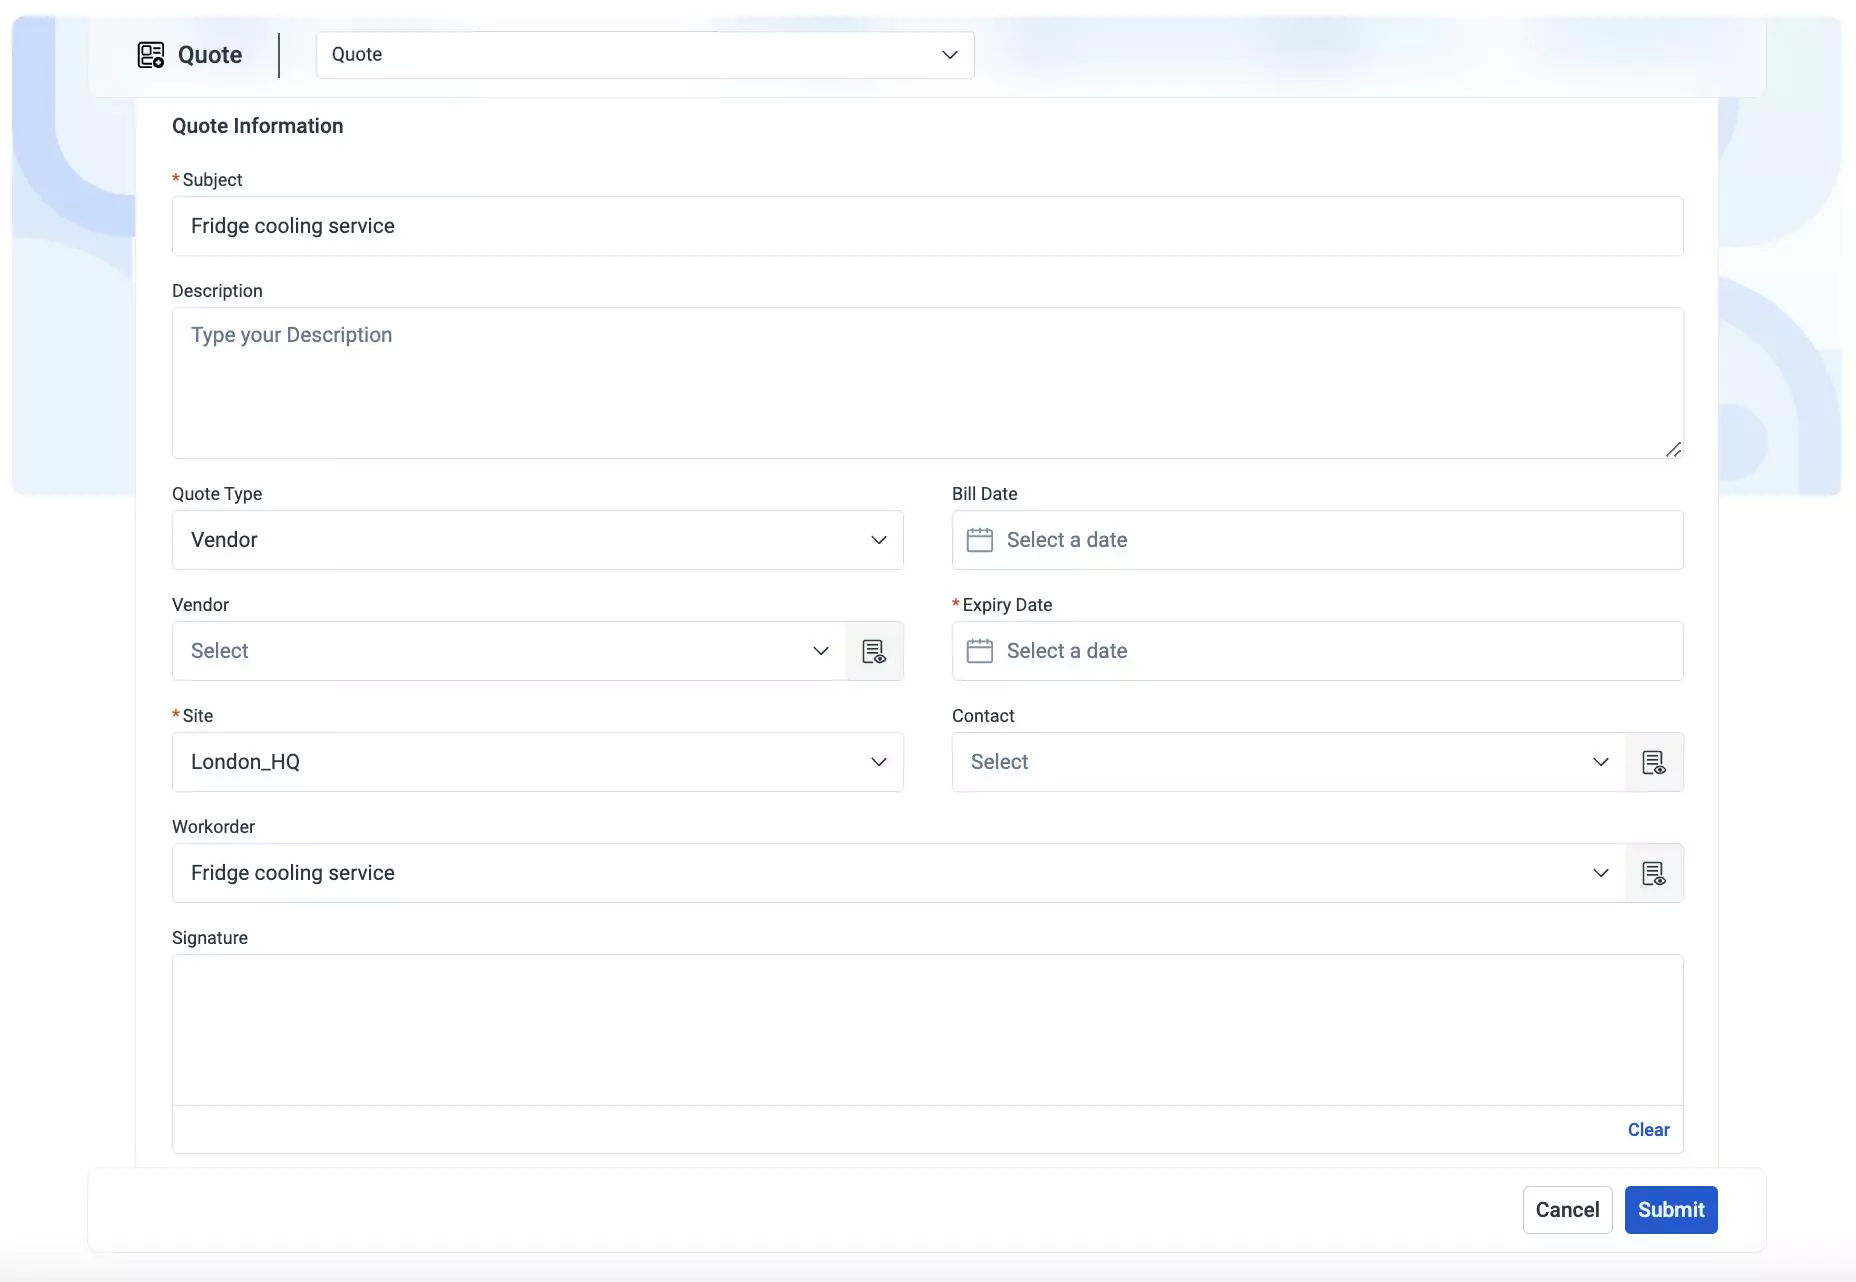
Update the required fields in this screen. Read the Creating Quotation section for more information.
Note: The Subject, Site, and Workorder information are automatically synchronized from the work order. You can leave the line items blank for the vendor to update.Click Submit. The quote is created and its details screen automatically opens up as shown below.
This quote is reflected in the Quote section in the Vendor portal. You can send the quote to the client/tenant once the update quote is received from the vendor.
Converting to User Quote
The vendor quote is converted to a user quote when the manager prefers to add a markup value or make changes to the existing quote. After conversion, you can send it to the client or tenant.
To convert to user quote,
Navigate to the Quote section under the Financials module.
Select the required quote from the list of quotes. The corresponding details screen appears.
Click the
 (Vertical ellipsis) icon at the top right and click Convert to User Quote as shown below.
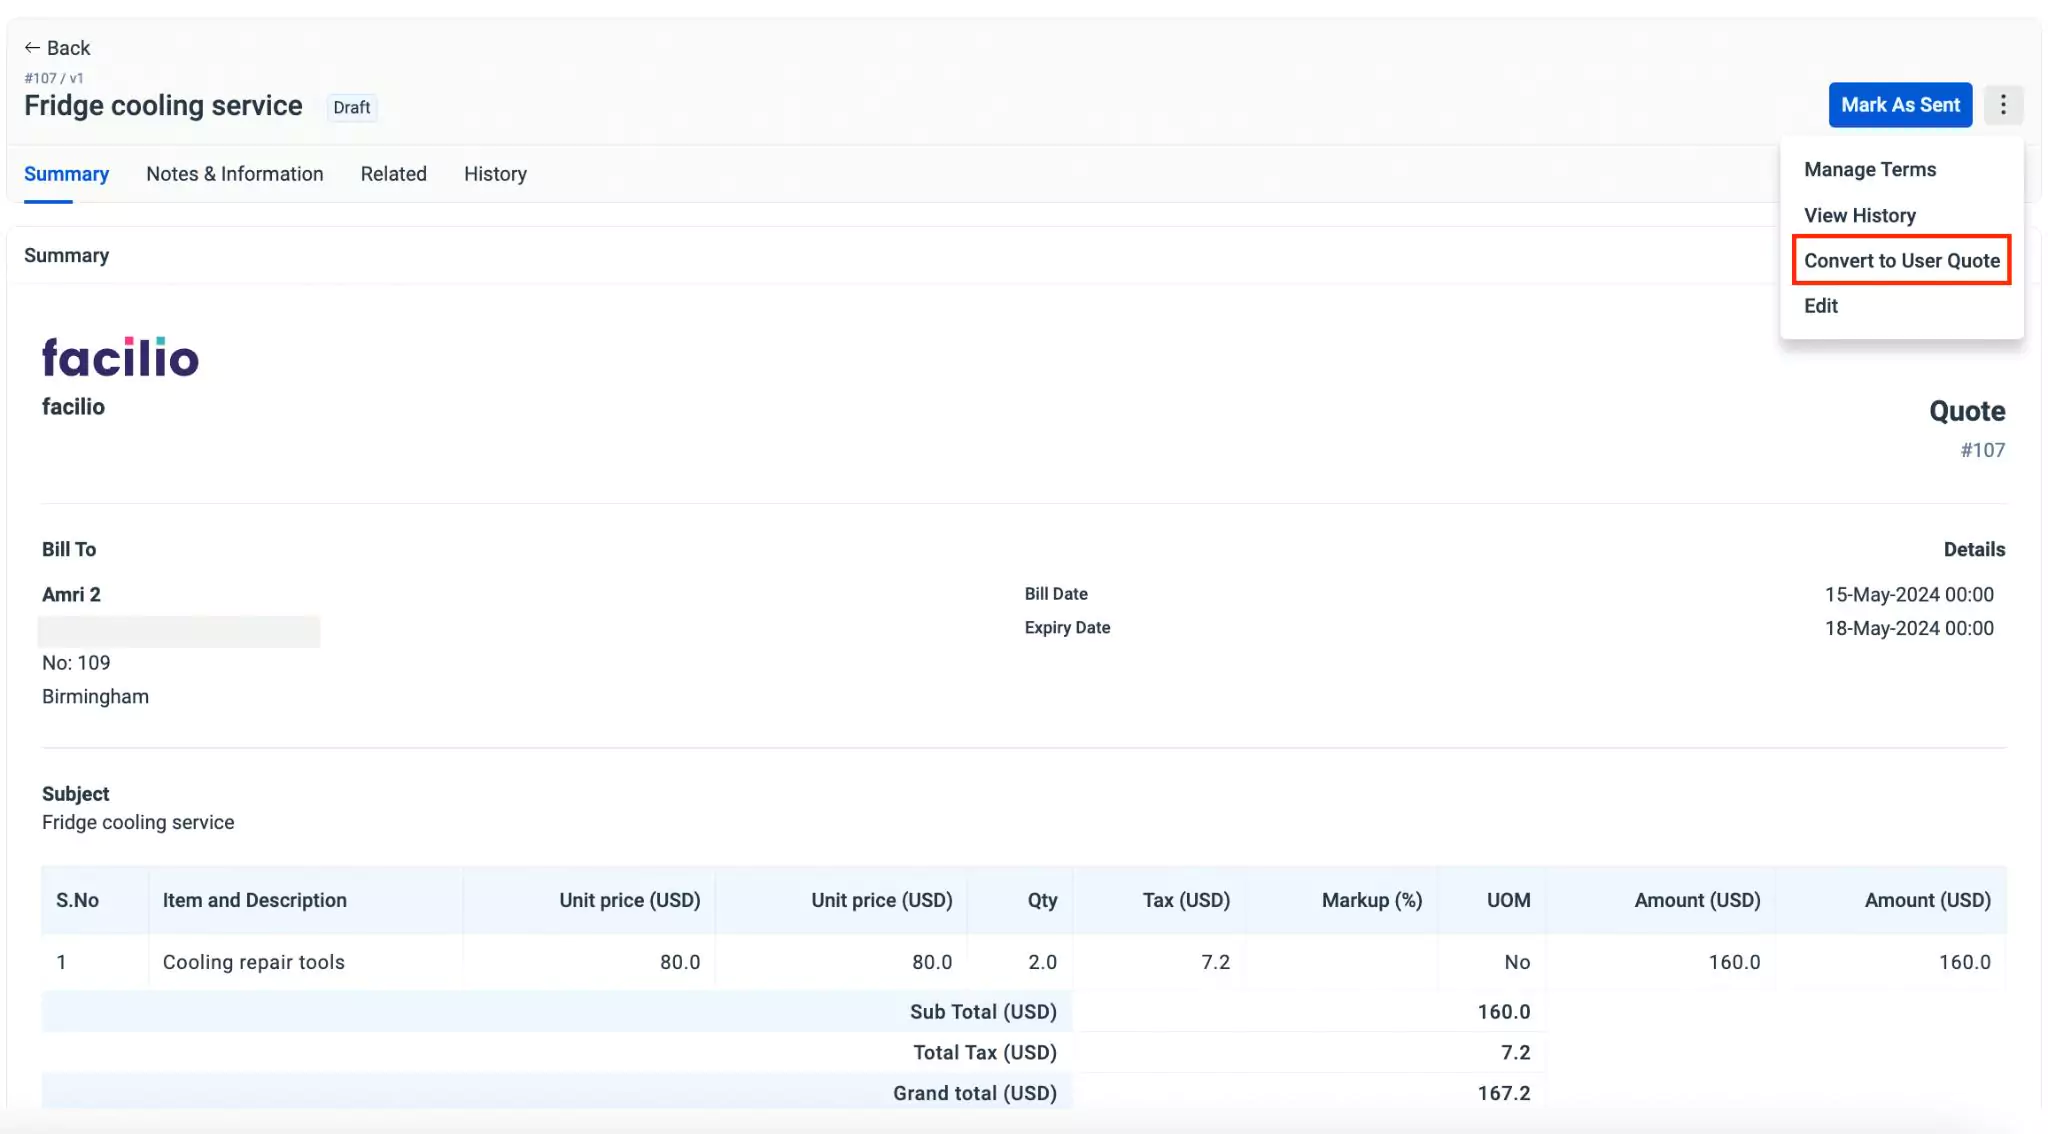
Select the Quote Type in the Choose Quote Type window and click Create. The Standard form to create a quote appears as shown below.
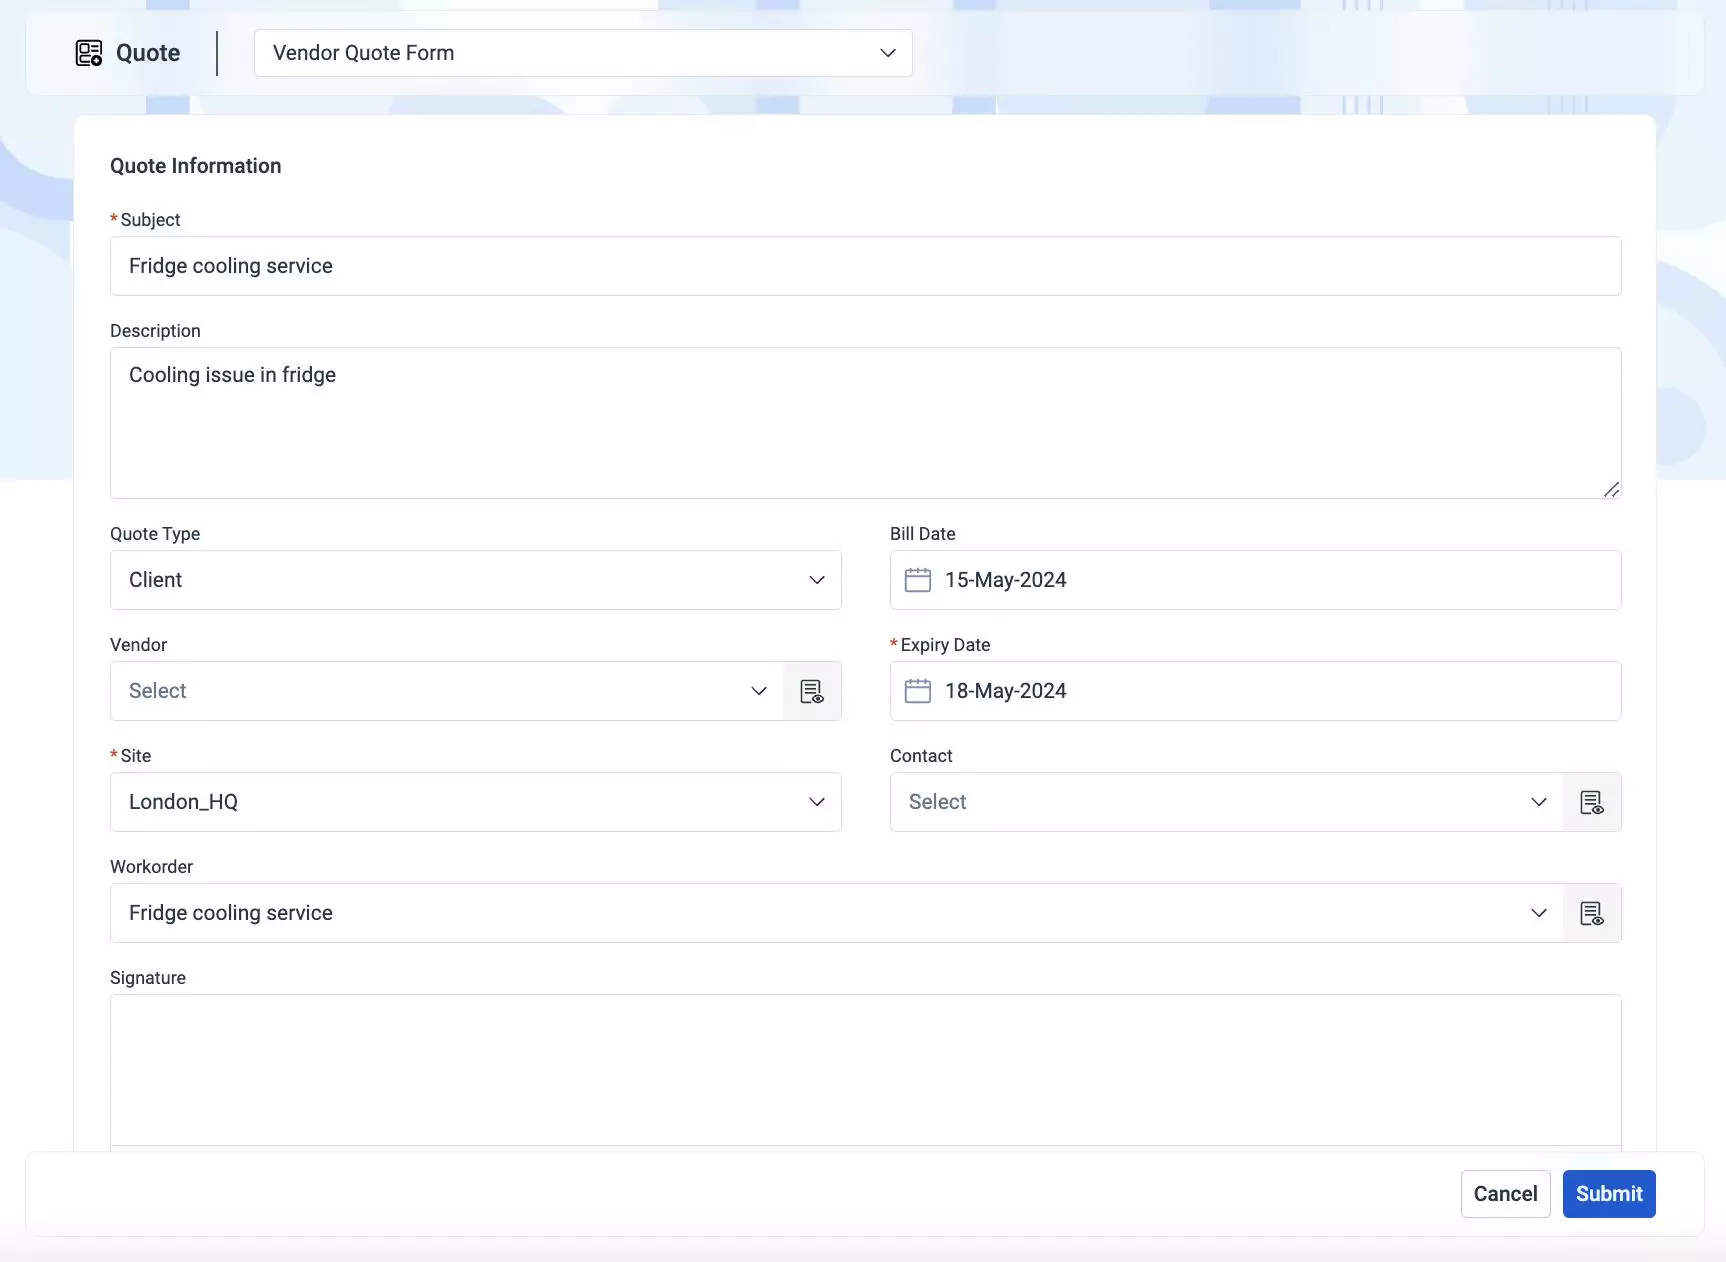
All the work order related details are synchronized from the work order. You can update the markup value in the Markup field and also make changes to other field values (if required).
Update the other required fields and click Submit. The submitted quote is added as a new version of the quote in the Quotes section.
The updated quote can be sent to the user.
Sending Quote to the User
Once the quote is created, you can send the quotation to the respective client or tenant.
To send the quotation to a client or tenant,
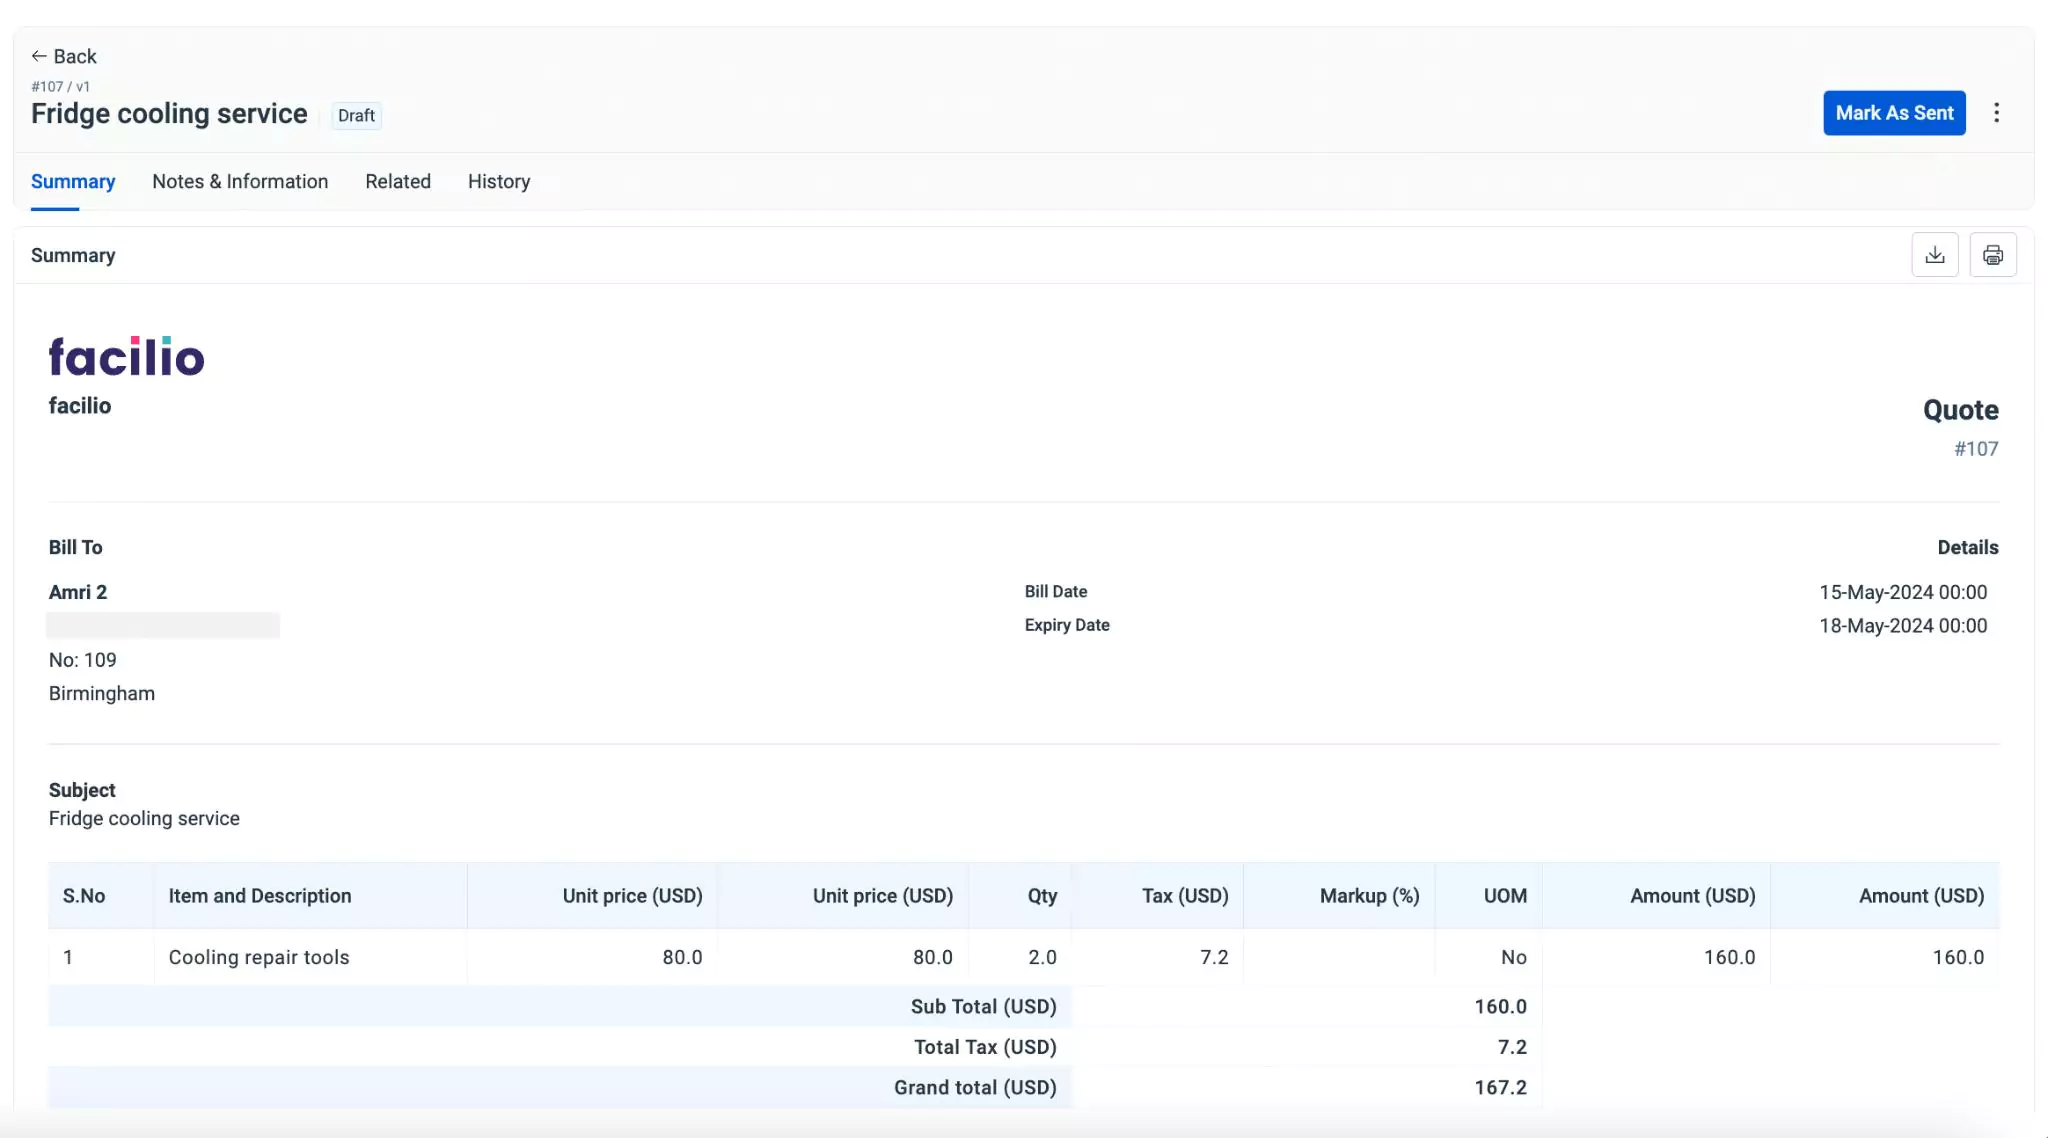
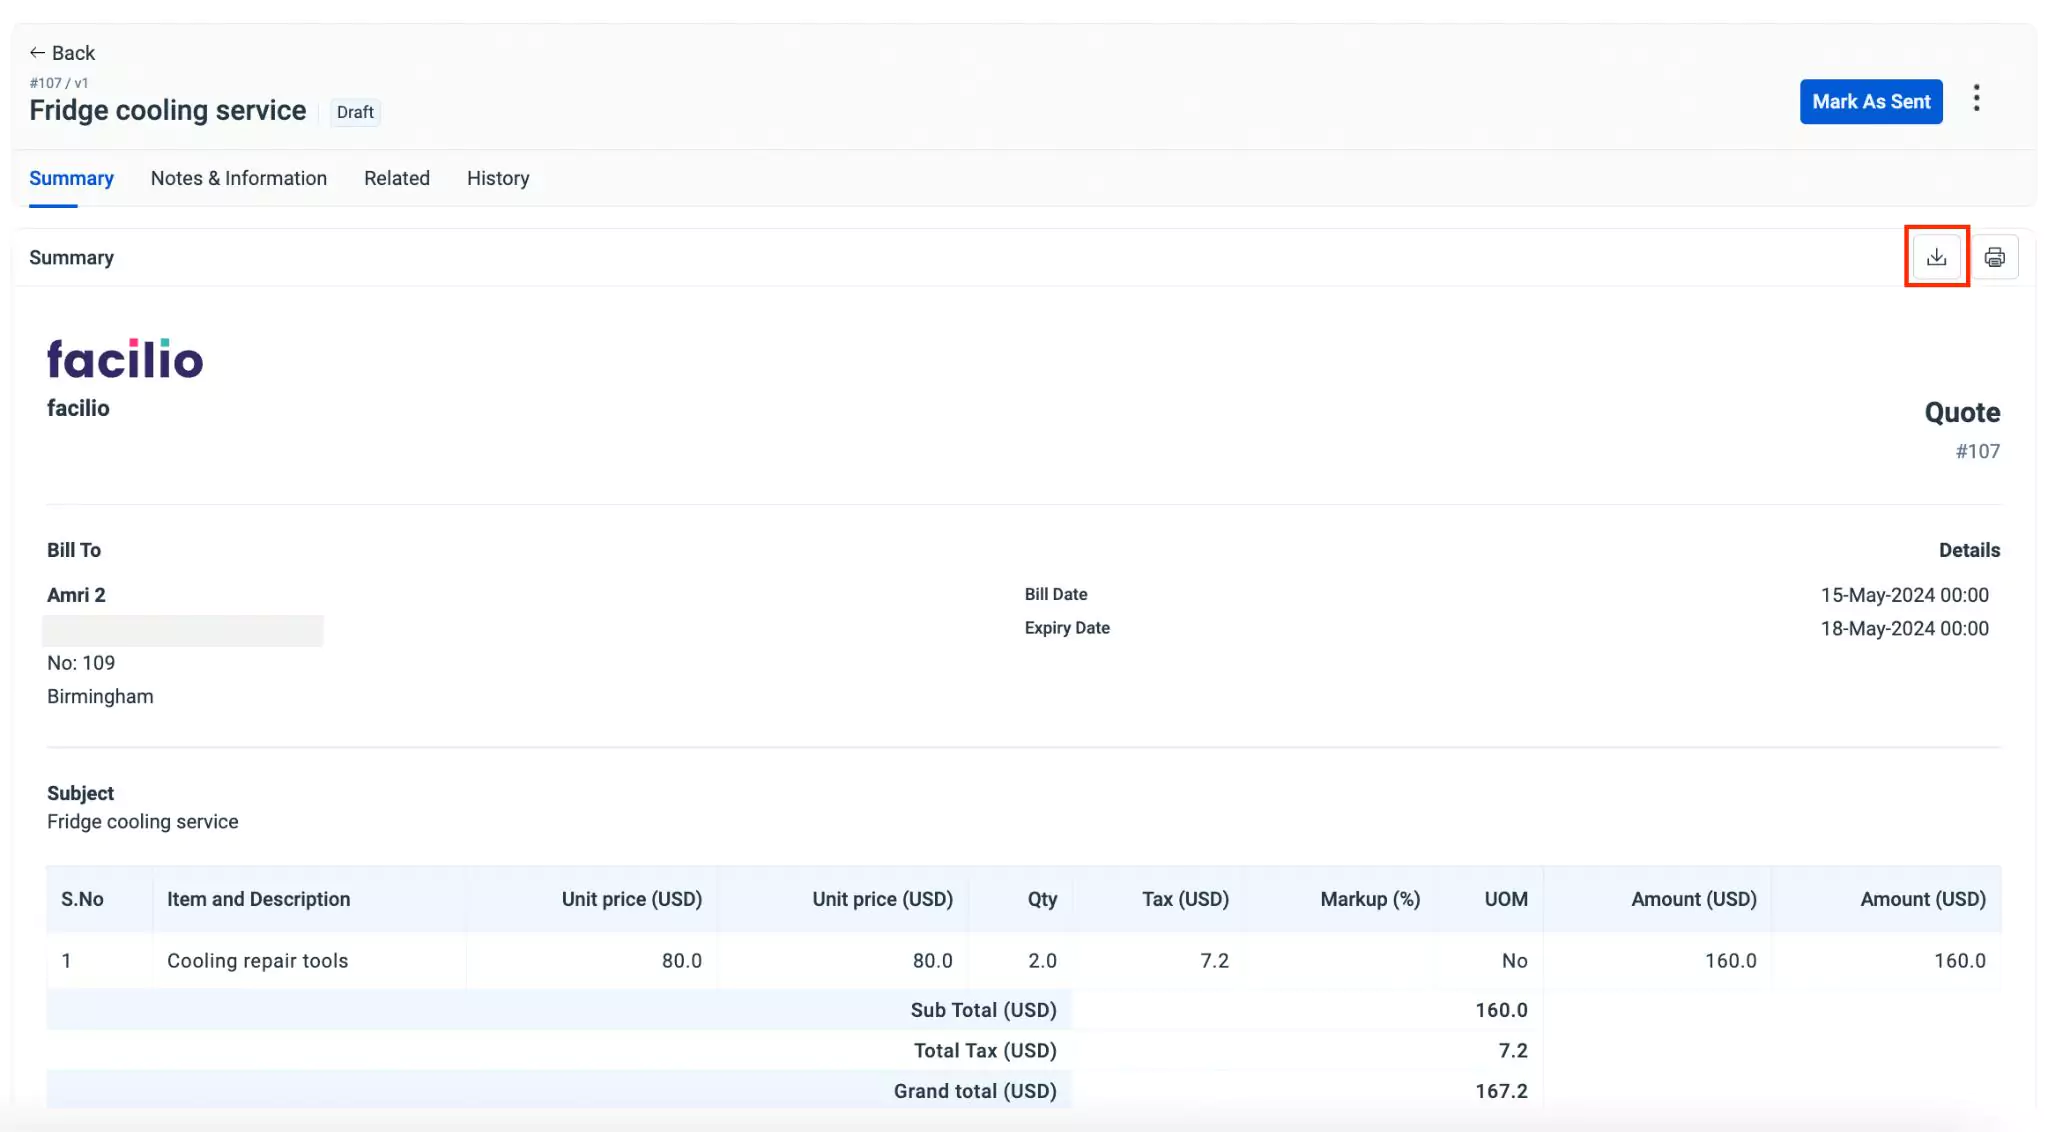
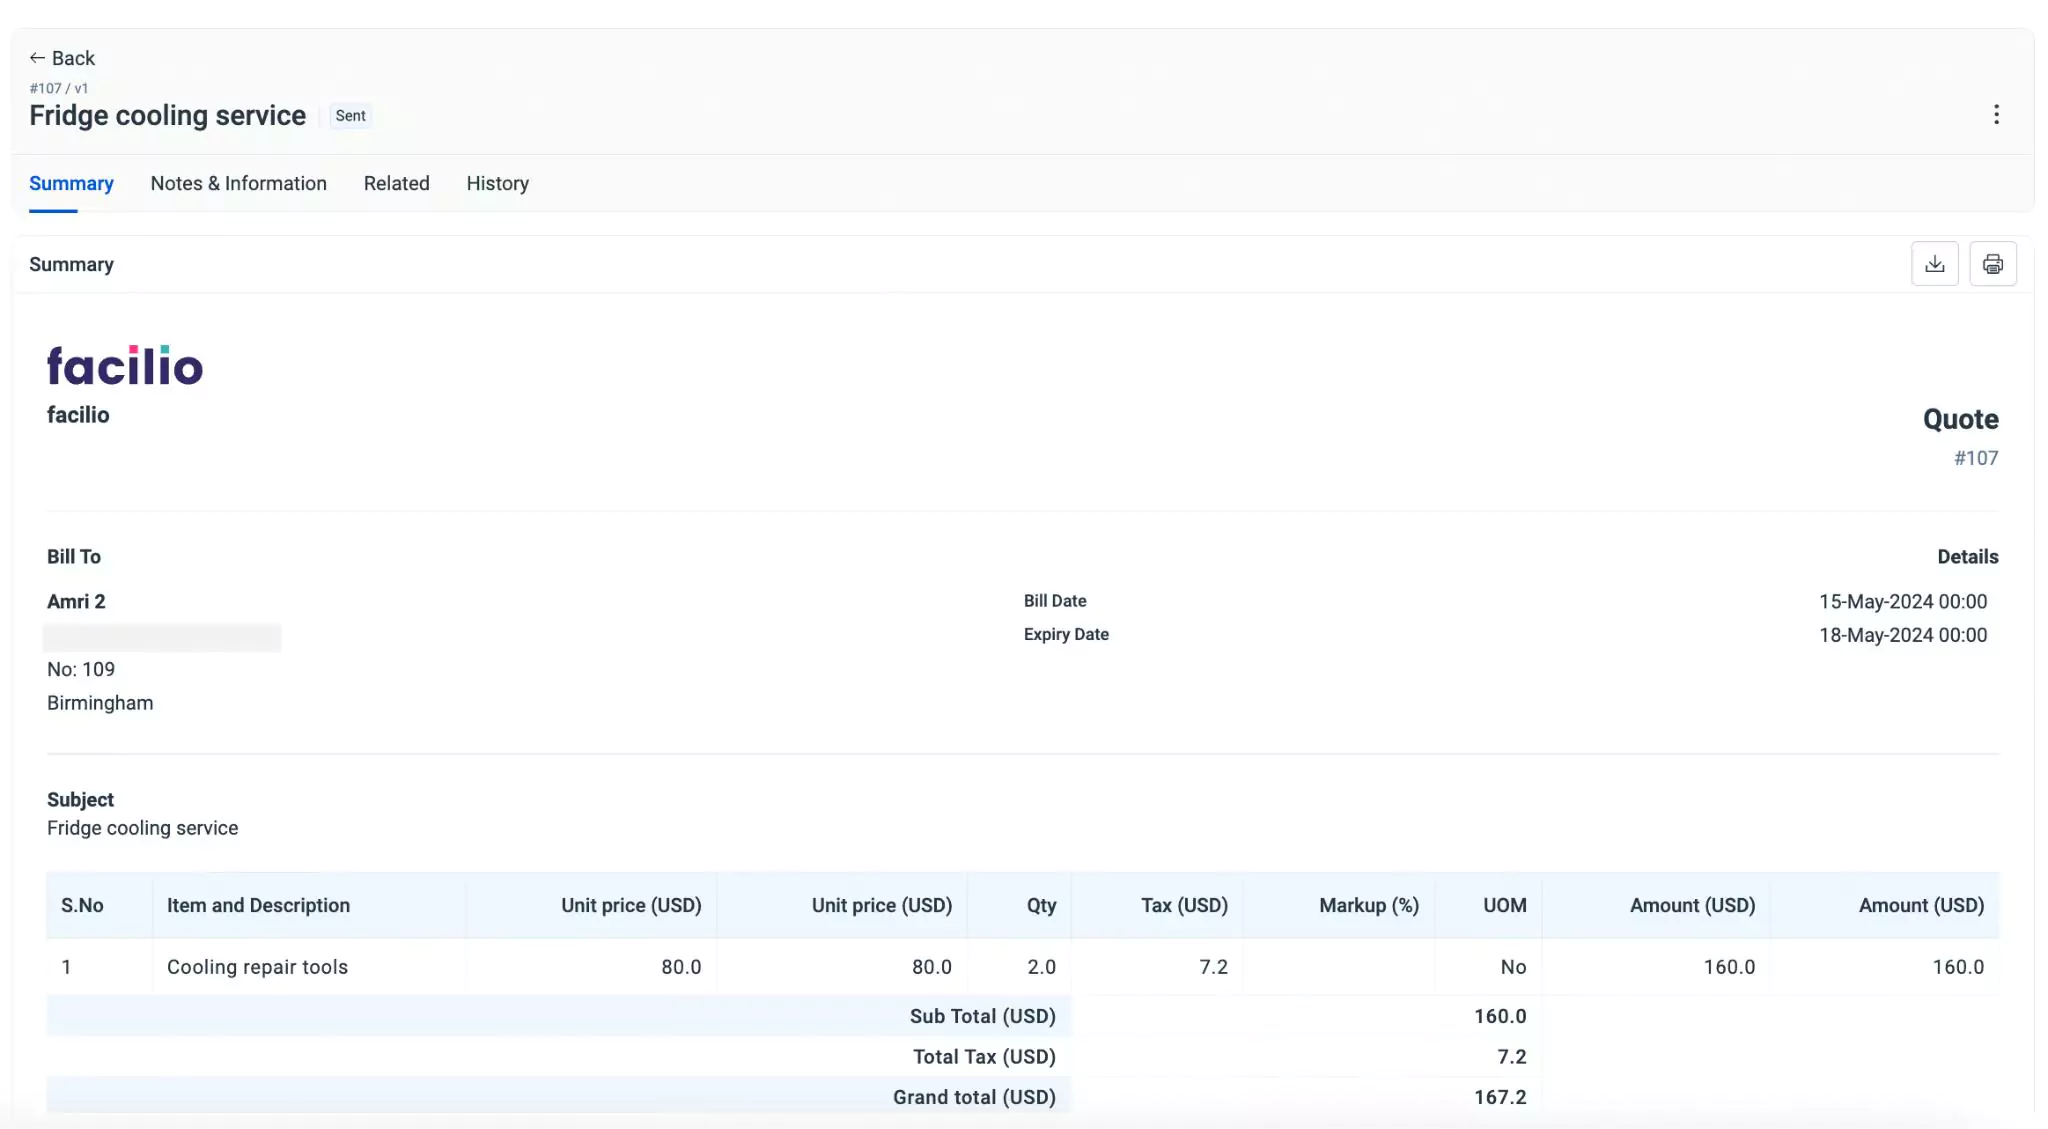
Select a quote from the Quote section. The details screen appears as shown below.
Click the
 (Download) icon to download the quote.
Send the downloaded quote to the client/tenant through mail. Once the quote is sent, the status of the quote can be marked as sent in the details screen.
Marking Quote as Sent
When a new quote is created, it is initially in the Draft state by default. Once the quote is finalized and sent to the client or tenant, you can update its status to Sent to reflect its current stage in the process.
To mark the quote as sent,
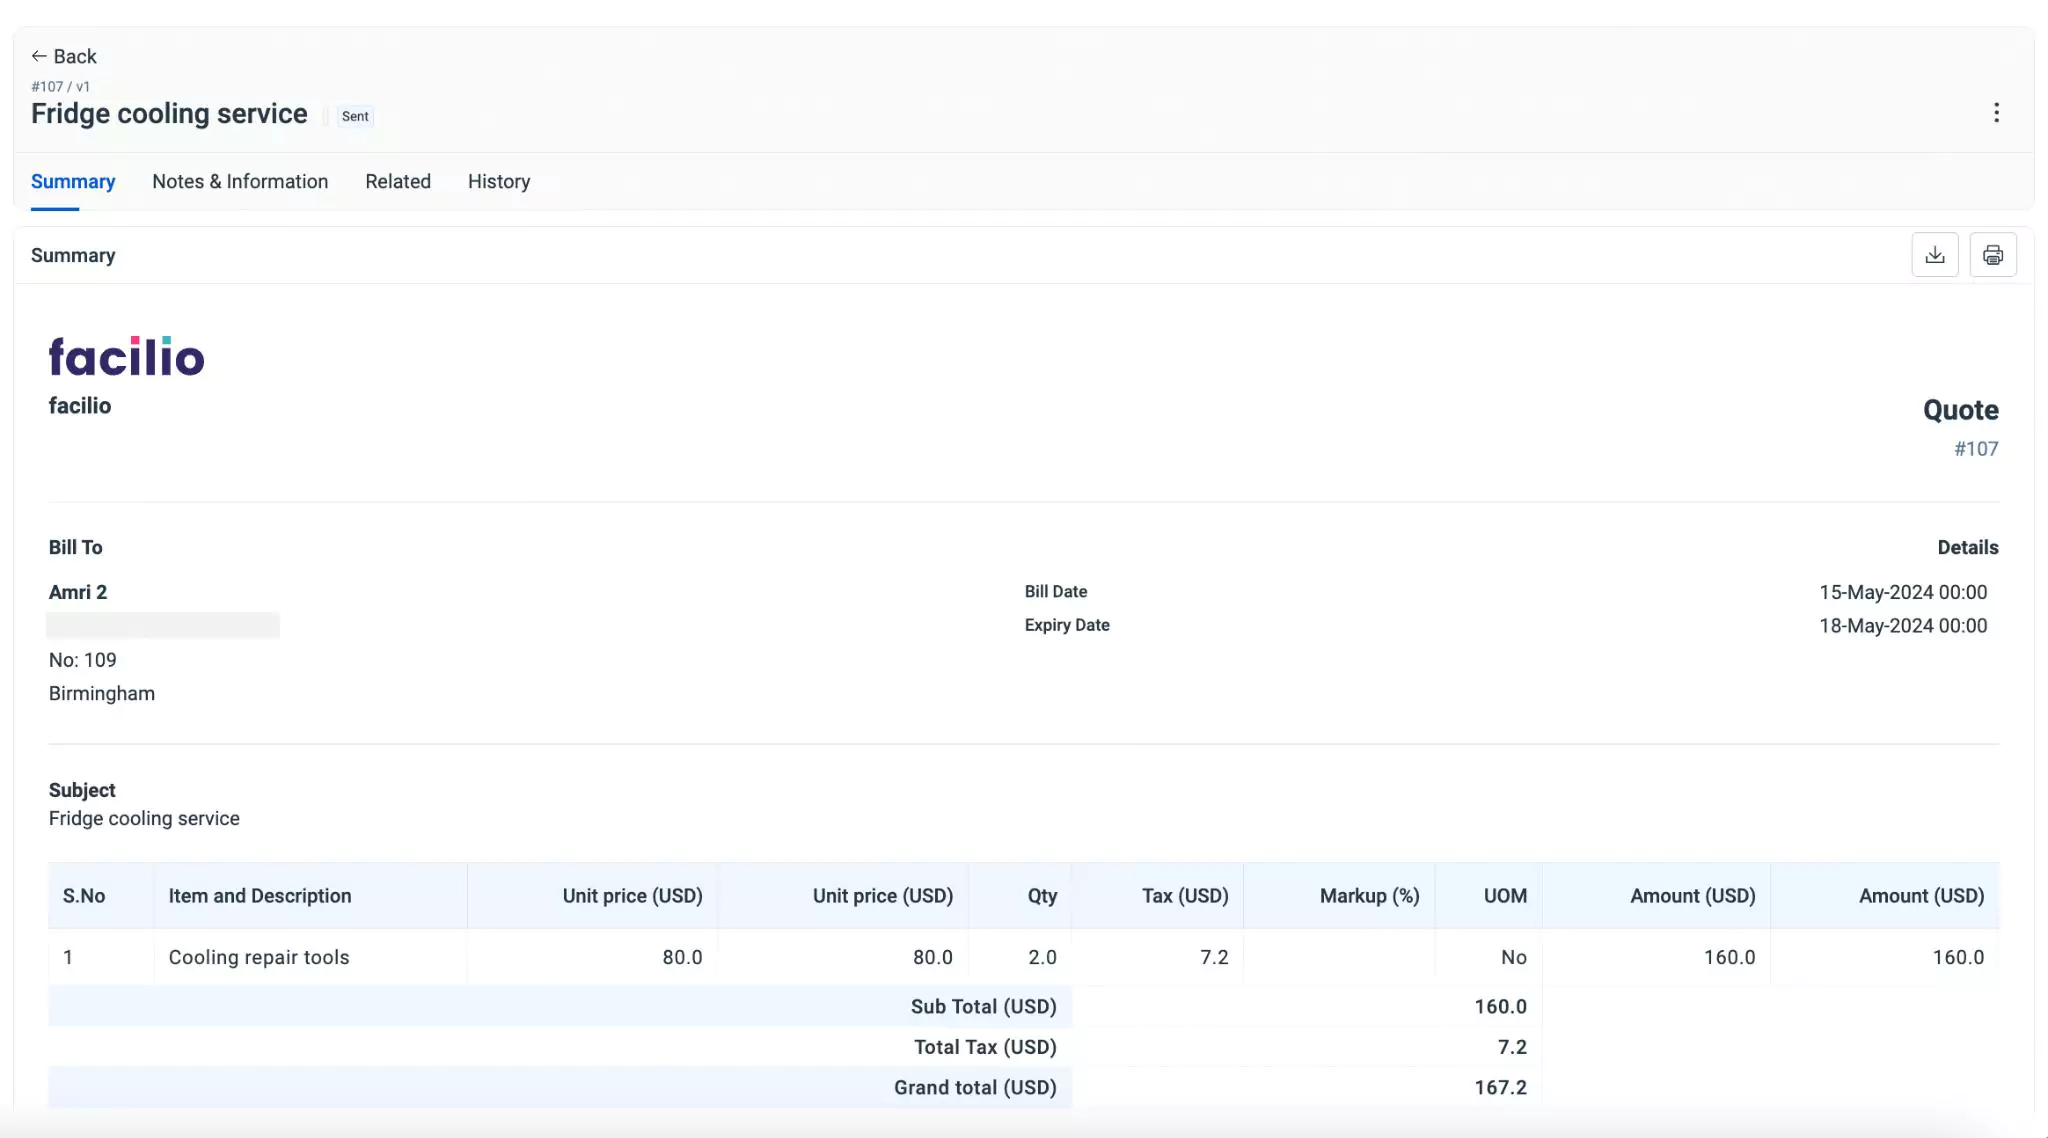
Select the required quote from the Quote screen. The details screen of the selected quote appears as shown below.
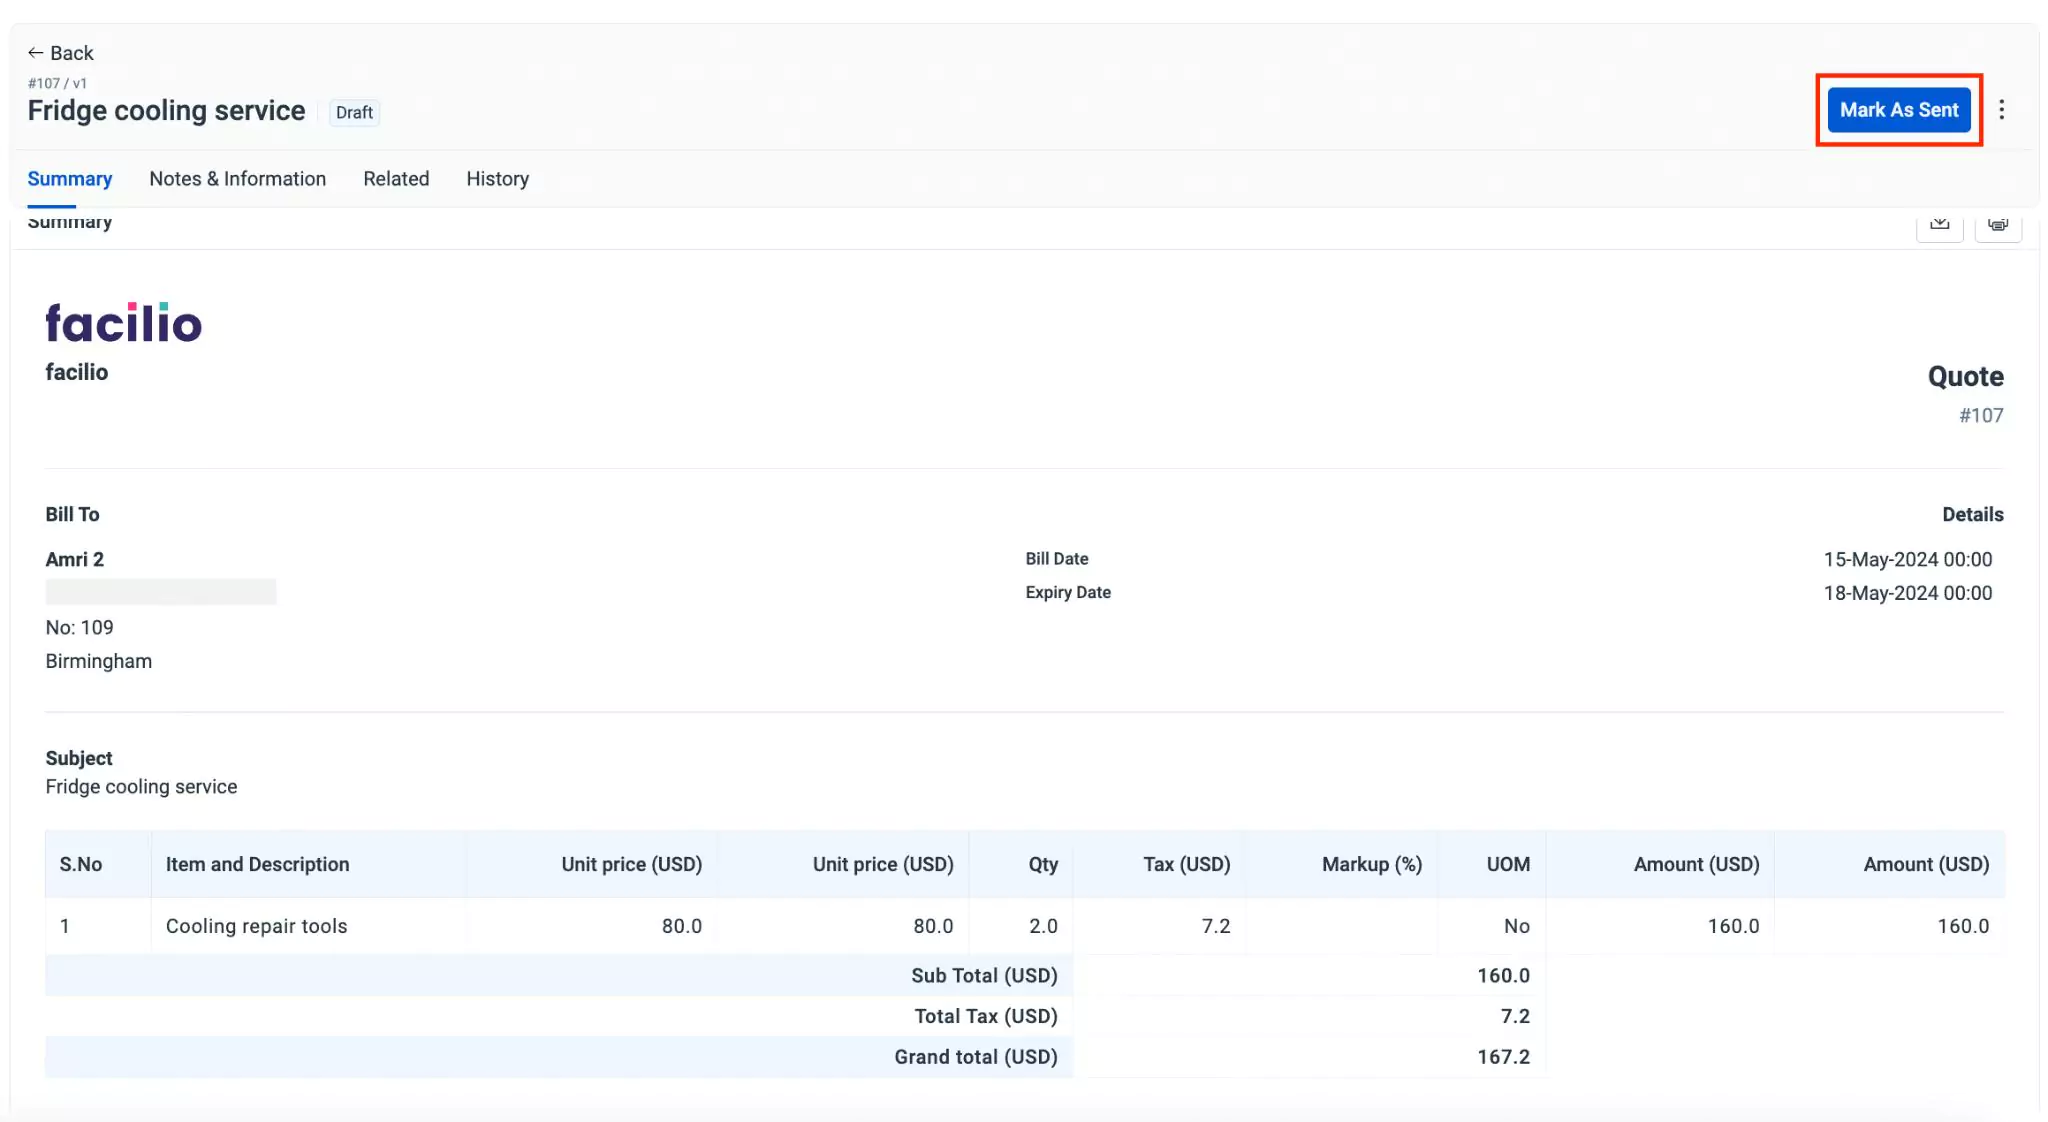
Click Mark As Sent at the top right of the screen. The Mark As Sent prompt appears as shown below.
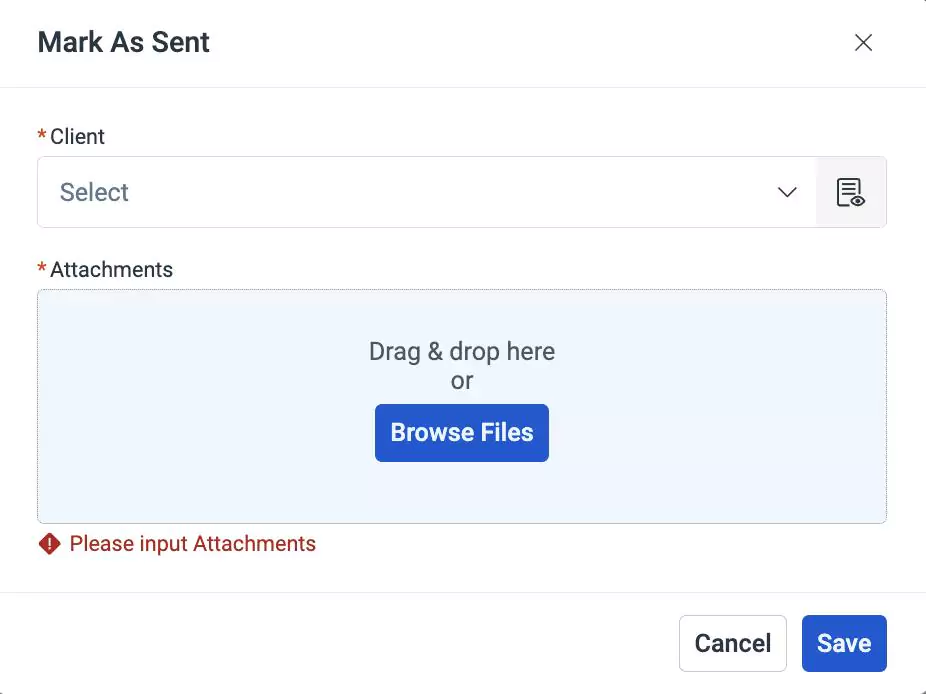
Update the following field and add an attachment:
Client - The client to whom the quotation is to be sent. Select the client name from the drop down list.
Note: The field displayed varies based on the user set in the Quote Type field.Attachments - Any file(s) that provides additional information. You can attach a file(s) by clicking on Browse files or simply dragging and dropping the files.
Note:The file size must be less than 5MB.
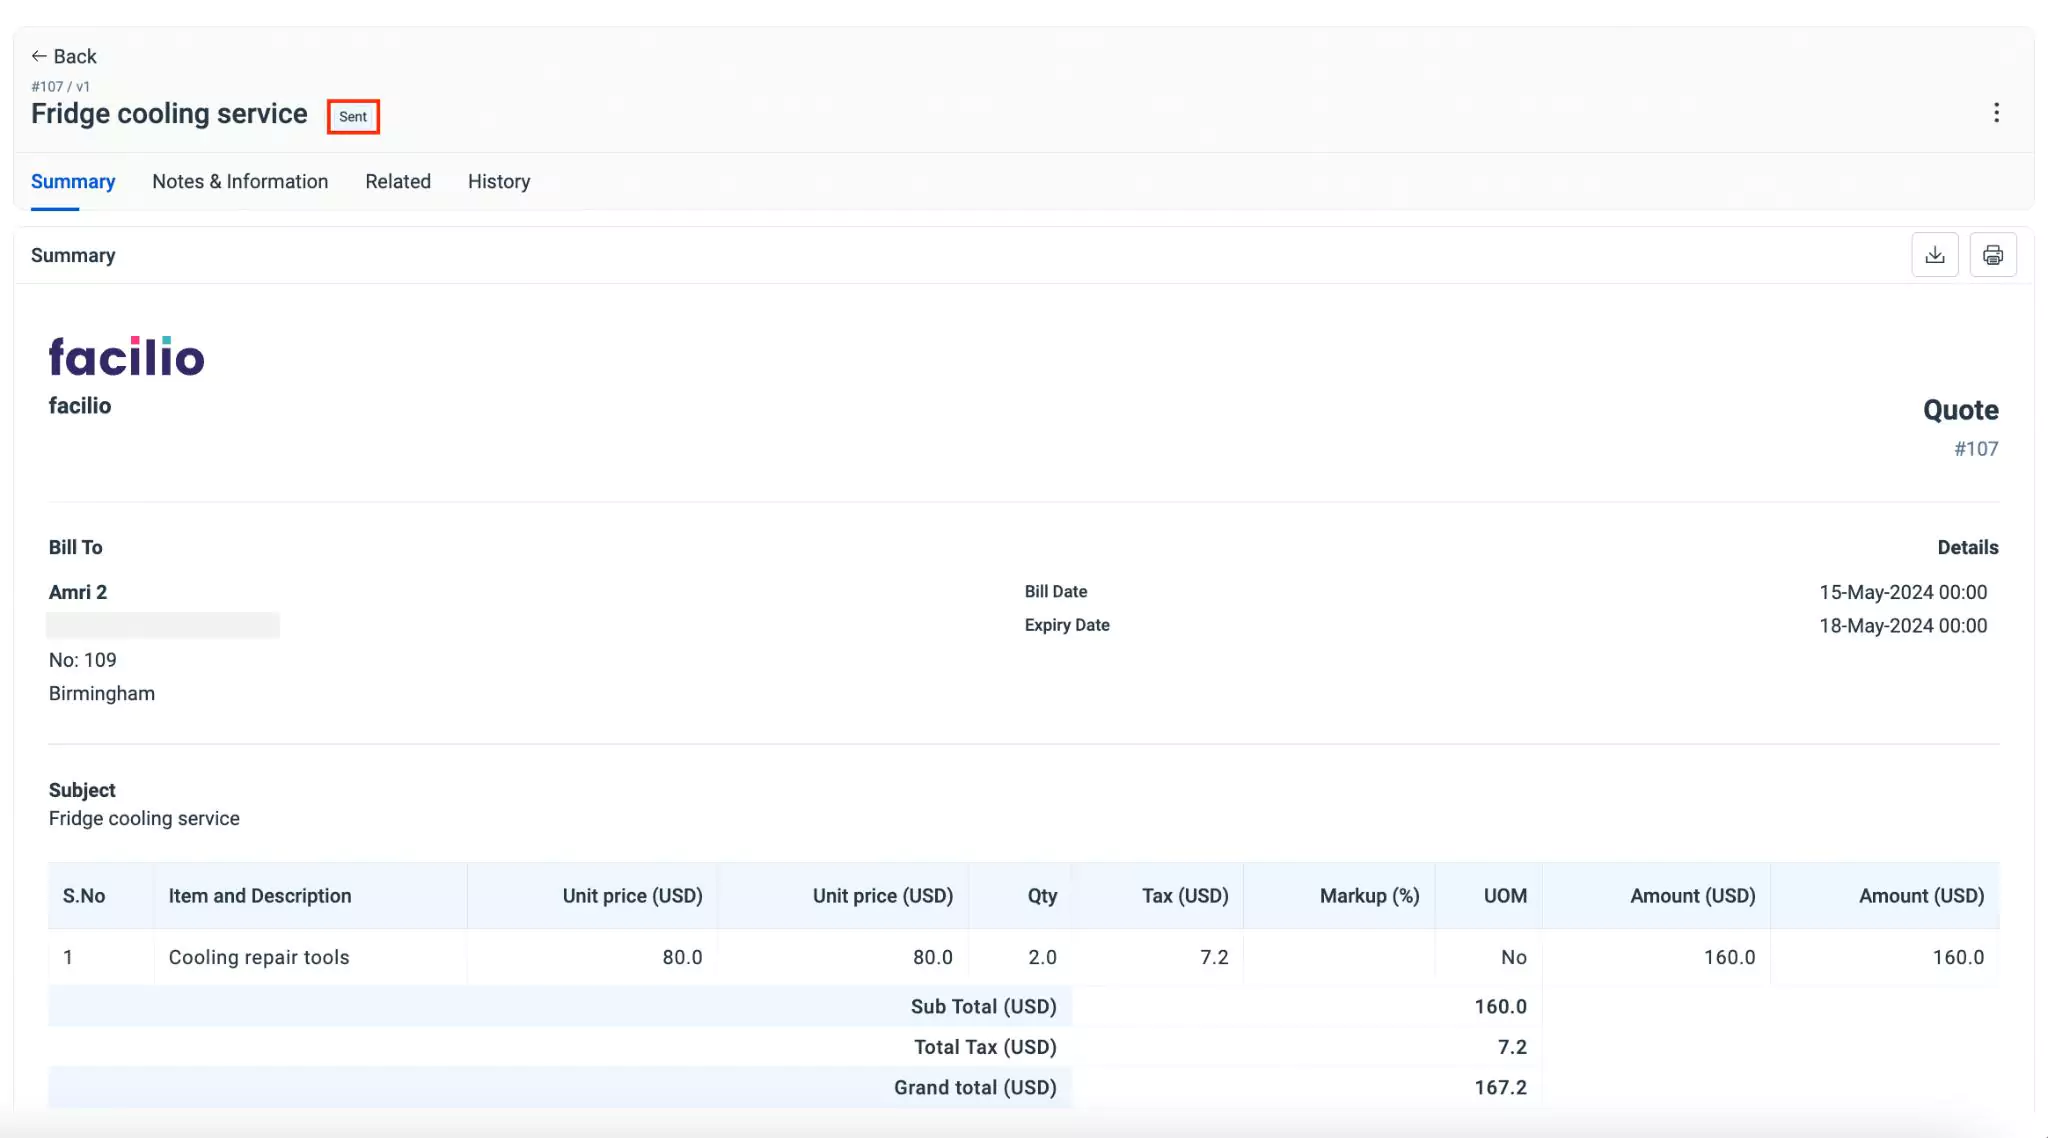
Click Save. The quote status is now updated as Sent as shown below.
 Note: You can modify the quote details by clicking on the (Vertical ellipsis) icon at the top right and selecting Edit only when the quote is in the Draft state. Once the status changes to Sent, the Edit option is unavailable, wherein you can make changes using the Revise option.
Managing Terms
The terms and conditions for quotes include payment terms, delivery timelines, and any specific obligations or warranties. Associating terms and conditions with a quote ensures clarity, sets expectations, and legally protects both the buyers and sellers involved.
To associate terms and conditions,
Select the quote from the list of quotes. The corresponding details screen appears as shown below.
Click the
(Vertical ellipsis) icon at the top right and select Manage Terms. The Manage Terms window appears with the list of terms as shown below.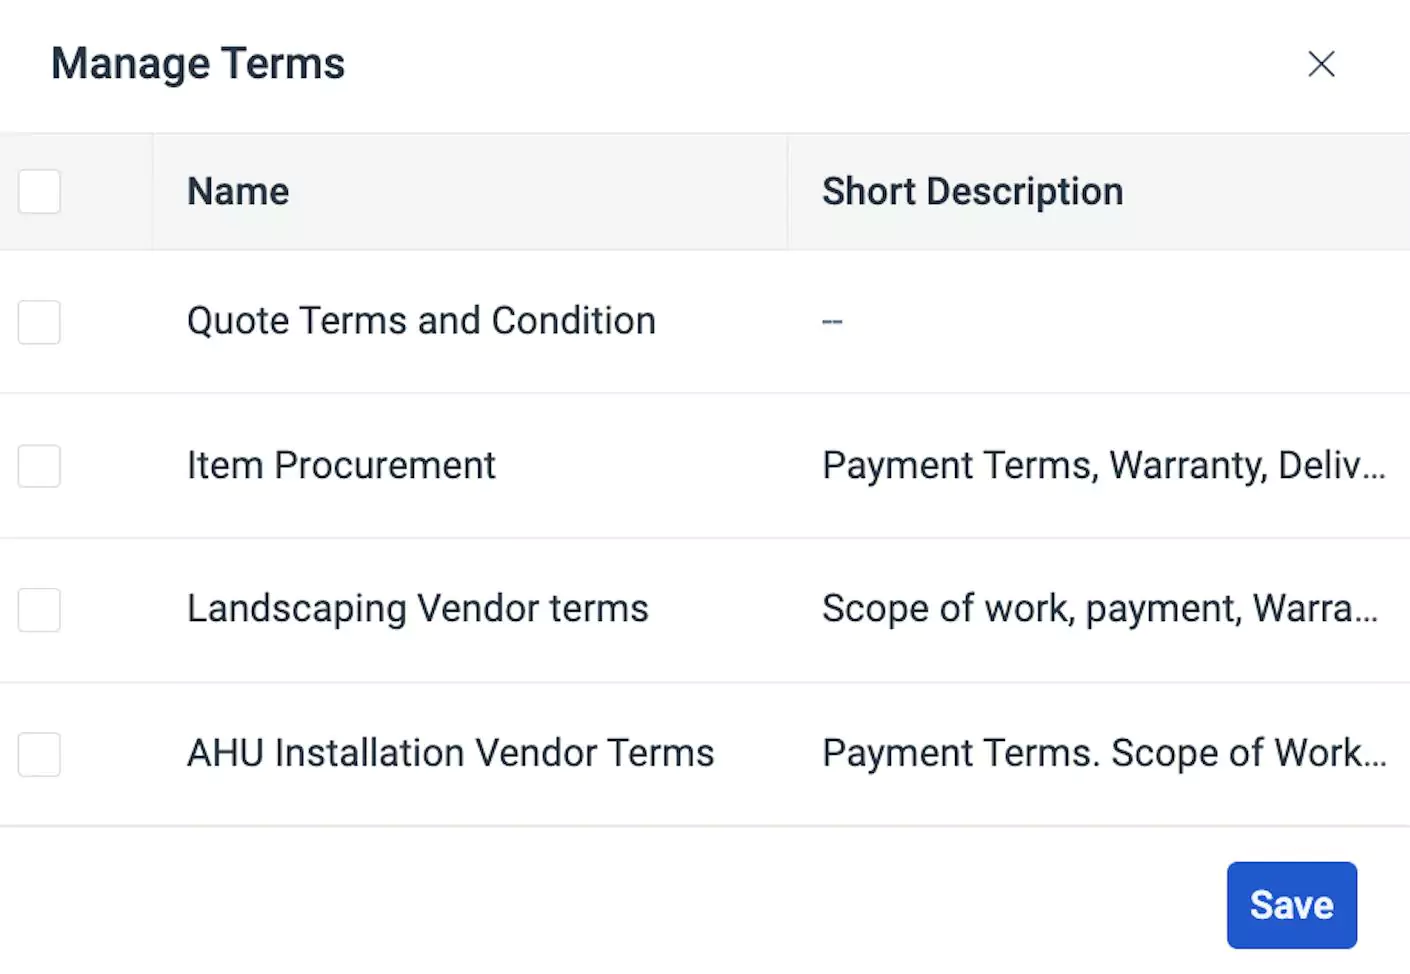
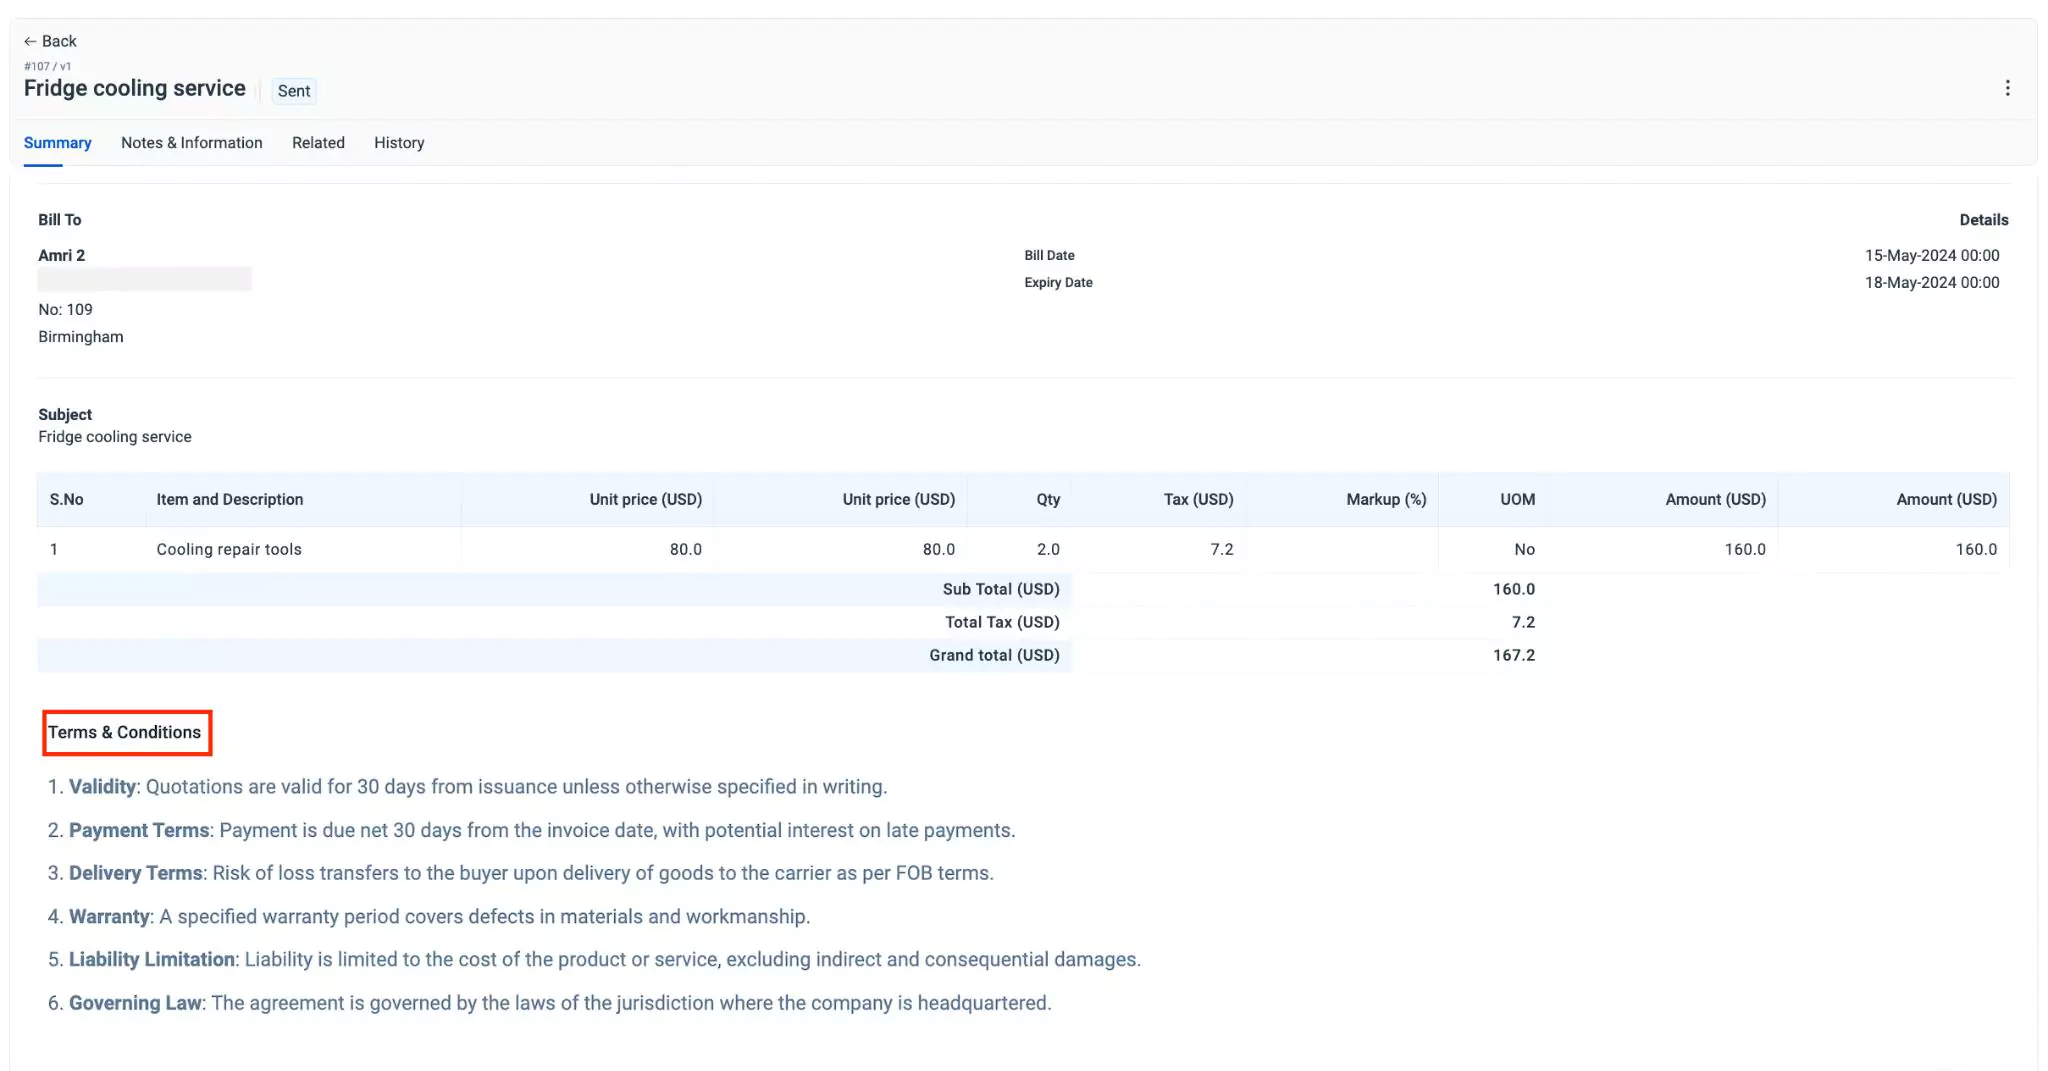
Select the term(s) appropriate for the quotation and click Save. The terms and conditions are associated with the quotation and displayed in the details screen.
After a quotation is created, you can associate terms and conditions as preferred.
Viewing Version History
Viewing quote history refers to reviewing the past quotations that have been generated, sent, or modified. This historical record provides a comprehensive overview of all previous interactions related to the quote’s cost estimates.
To view version history,
Select the quote from the list of quotes. The corresponding details screen appears as shown below.
Click the
(Vertical ellipsis) icon at the top right and select View History. The Quote Version History window appears with the list of quote versions.Click View to view the details screen of the quote version.
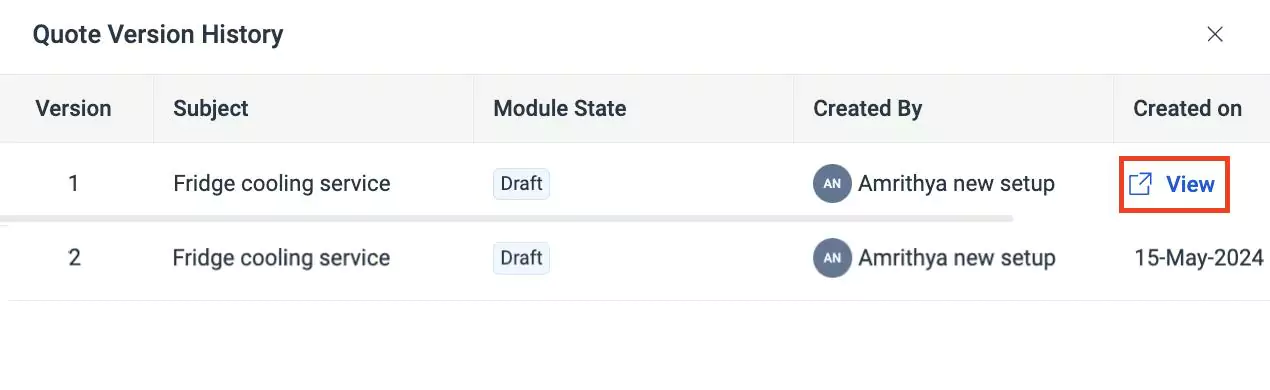 Note: The View option appears only when you hover over the quote version.
You can click
 (Cancel) on the top right of the Quote Version History window to close it.
Revising a Quote
A quote is revised when there are modifications to the originally requested items or services, or their pricing. Revising the quote ensures that these changes are accurately reflected, providing both parties with a clear and updated price estimate. This process ensures mutual understanding and agreement on the revised terms.
To revise a quote,
Select the quote from the list of quotes. The corresponding details screen appears as shown below.

Click the
(Vertical ellipsis) icon at the top right and select Revise. The Quote form with the existing details appears as shown below.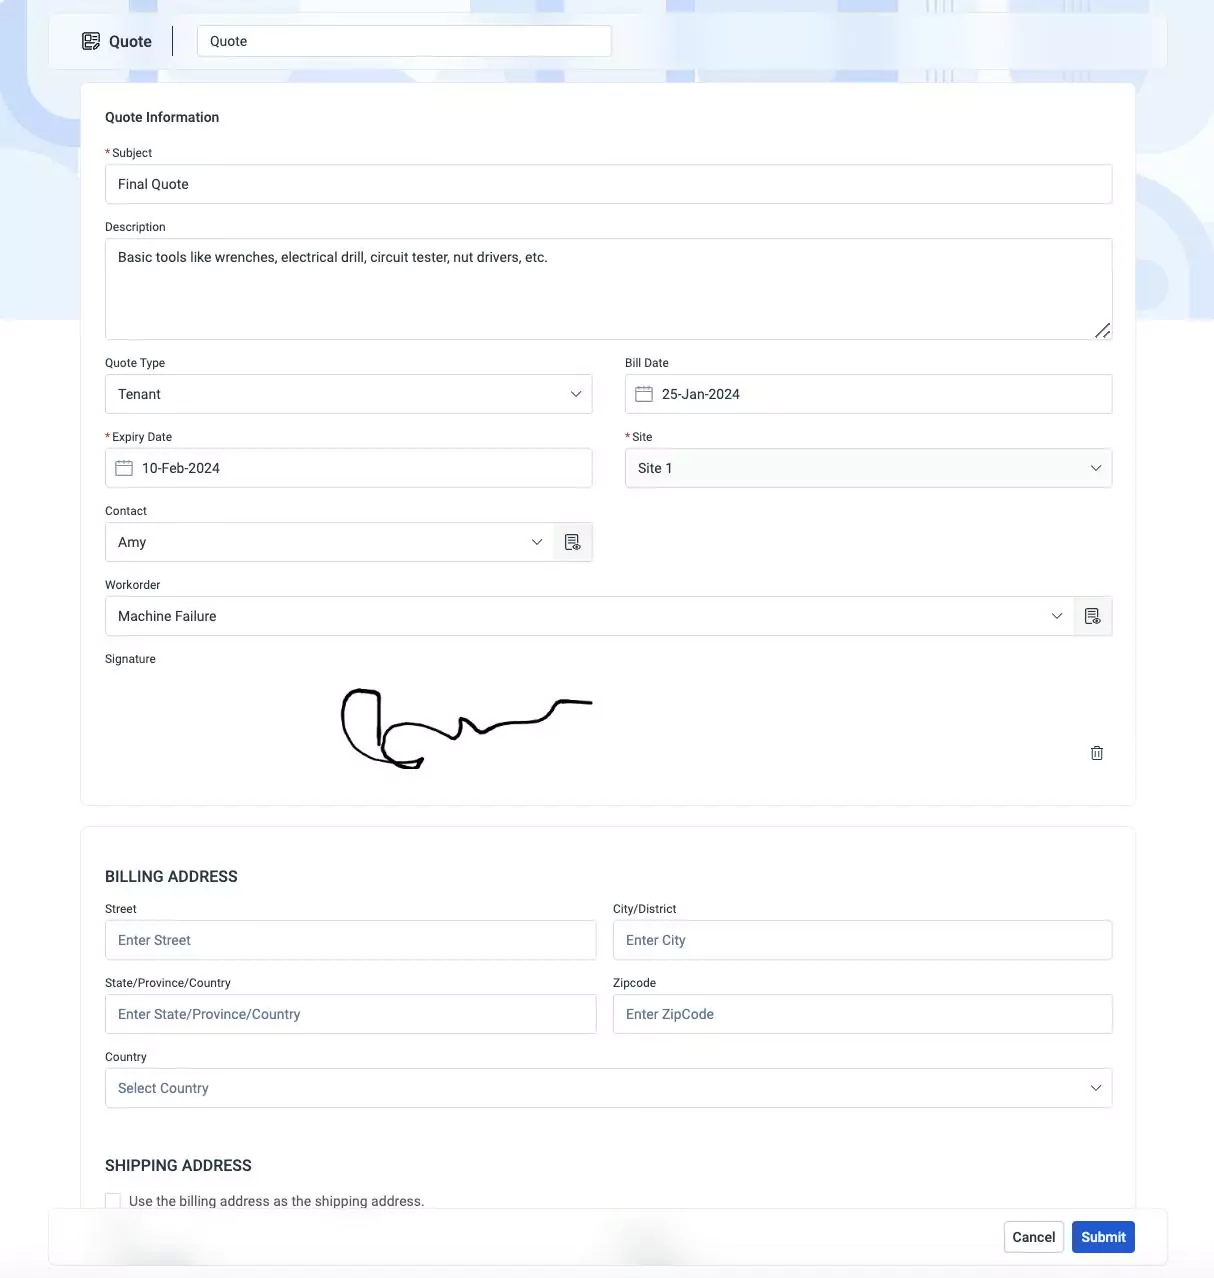
Update the required details in this form and click Submit. The quotation is revised and its status is updated as Draft.
Note: The Revise option appears only for the quotes that are marked as sent. The Revise option appears only for the quotes that are marked as sent.