User-defined Roles
A user-defined role is a custom role created by the users with admin permissions enabled.
The user-defined roles simplify the administration and rights management by allowing the administrator to group required permissions into a single role and then assign the role to the users who need those authorities to perform their task.
Creating a Role
The Roles module of the application enables the creation of individual roles for each category of employees in an organization. To create a new role,
Click NEW ROLE at the top right. The NEW ROLE window appears as shown below.

Update the Name and Description fields in this screen and click CONFIRM. The created role is now added to the dashboard, which in turn can be utilized while creating a user of selected user account type.
Read the Configuring Permissions section for details on configuring required permissions to the user with respect to their responsibilities.
Configuring Permissions
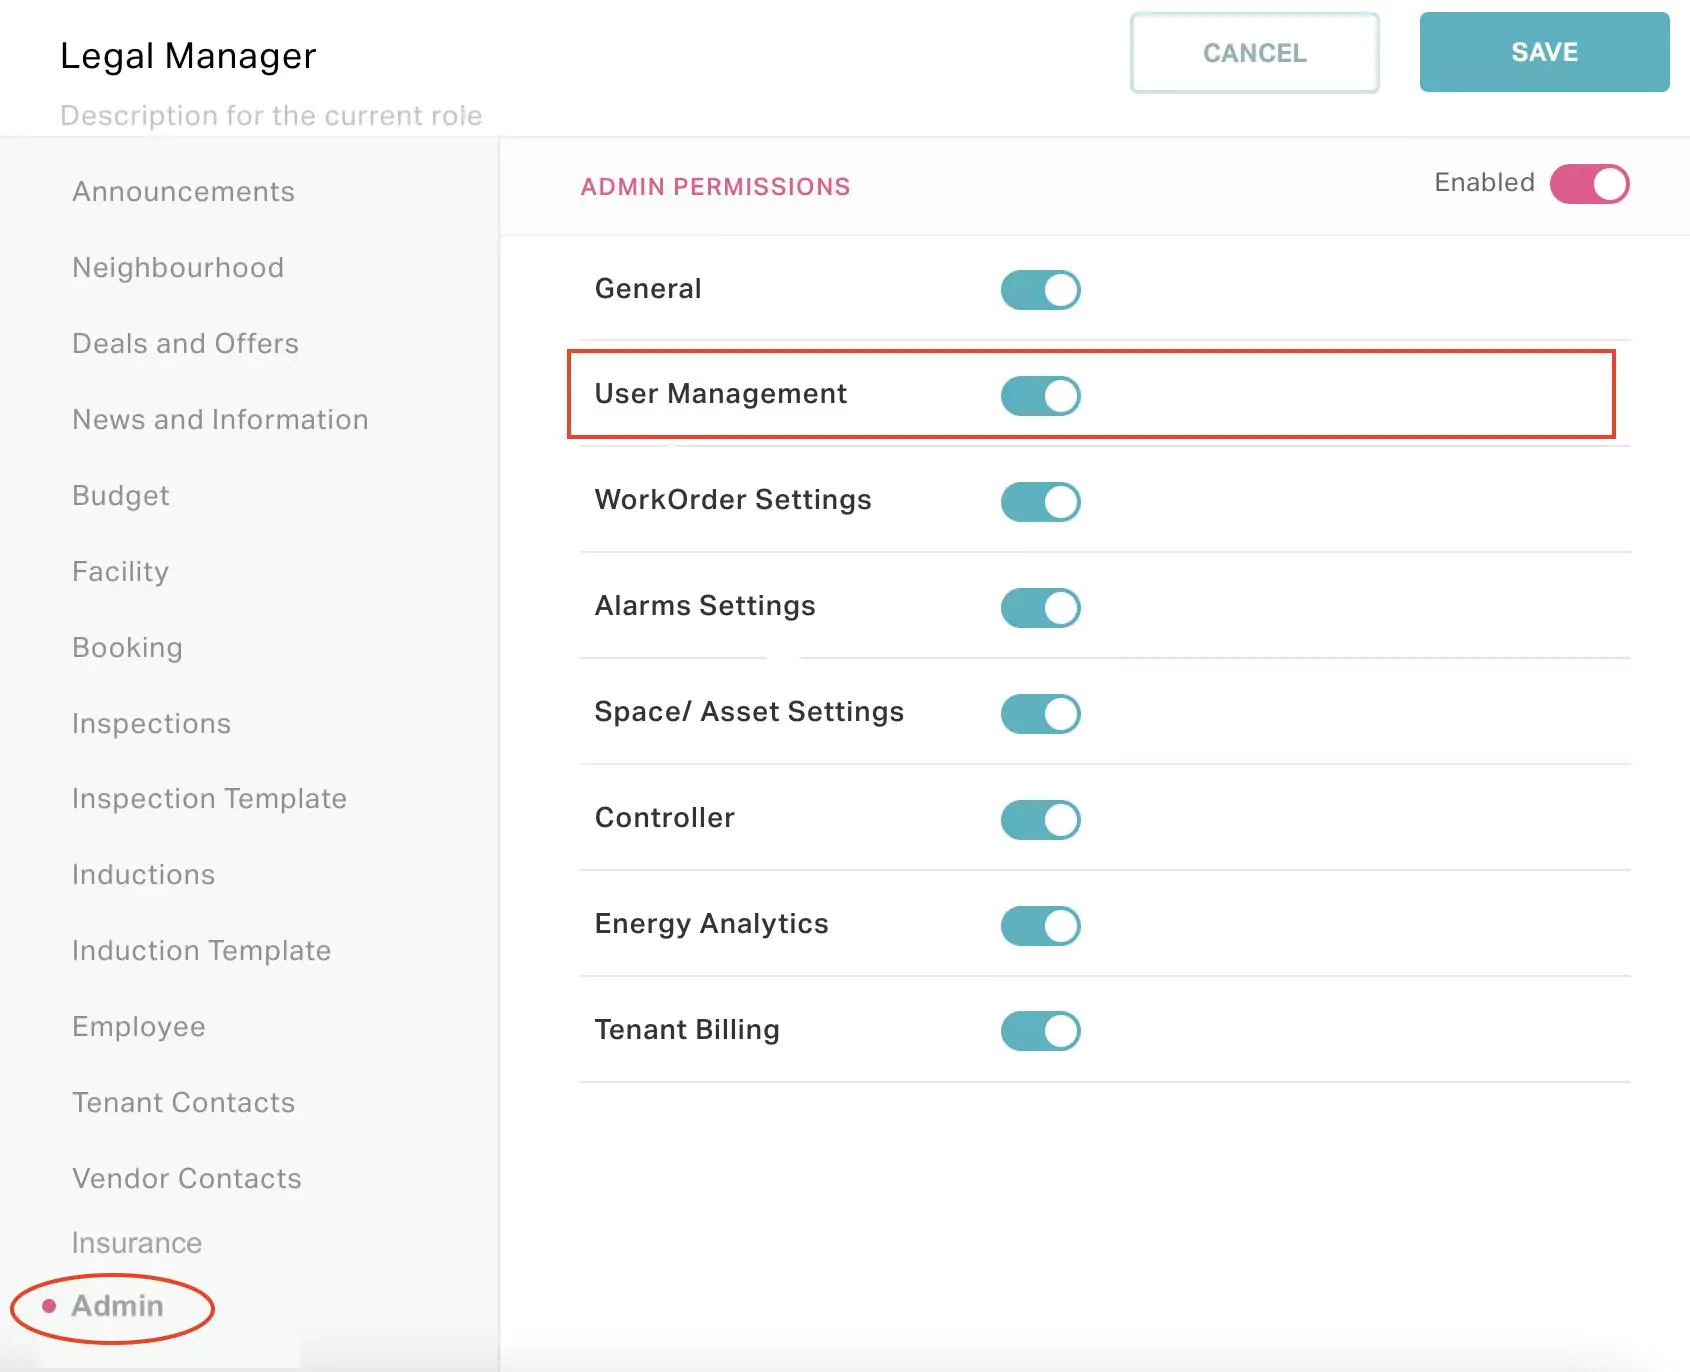
All modules and corresponding actions are disabled for a role by default. You must enable the required permissions after a new role is created so that it can be assigned to the users. To configure the permissions for a role,
Select the required role from the dashboard. The Edit Role window appears as shown below.

Enable the required modules and corresponding actions with respect to the responsibilities of the user.
Note: Both the system and custom modules associated with the user account type are displayed in this window. Read the Managing Modules section for more information.Configure further permission levels for actions, if applicable. You can choose any one of the following options:
All - To enable access to all items in the module
Team - To enable access for items specific to the team
Self - To enable access only for items definite for the user
Note: This option is selected by default.
For example, consider the permissions configured for an executive in the Work Orders module.
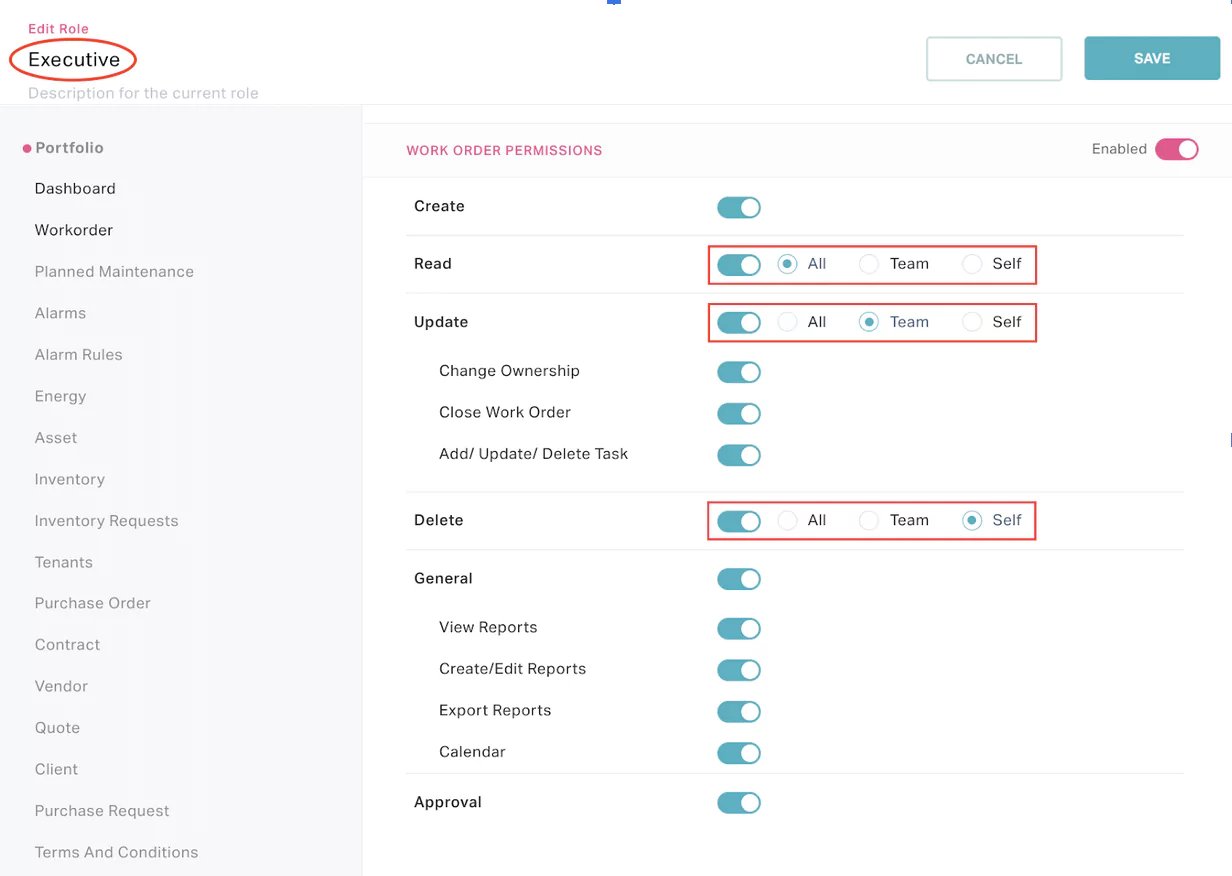
With the above configuration, an executive is allowed to view all the work orders, update the work orders specific to his team and delete only the work orders assigned to him.
Click SAVE. The role is now updated with the new set of permissions configured.
Note: The configured permissions will be applied to the user upon assignment of the corresponding role.
Modifying Permissions
In case of any modification in the permissions enabled for employee categories, the respective roles must be updated. To make changes to an existing role,
Click the
 icon respective to the role whose properties are to be modified.
The Edit Role window appears as shown below.
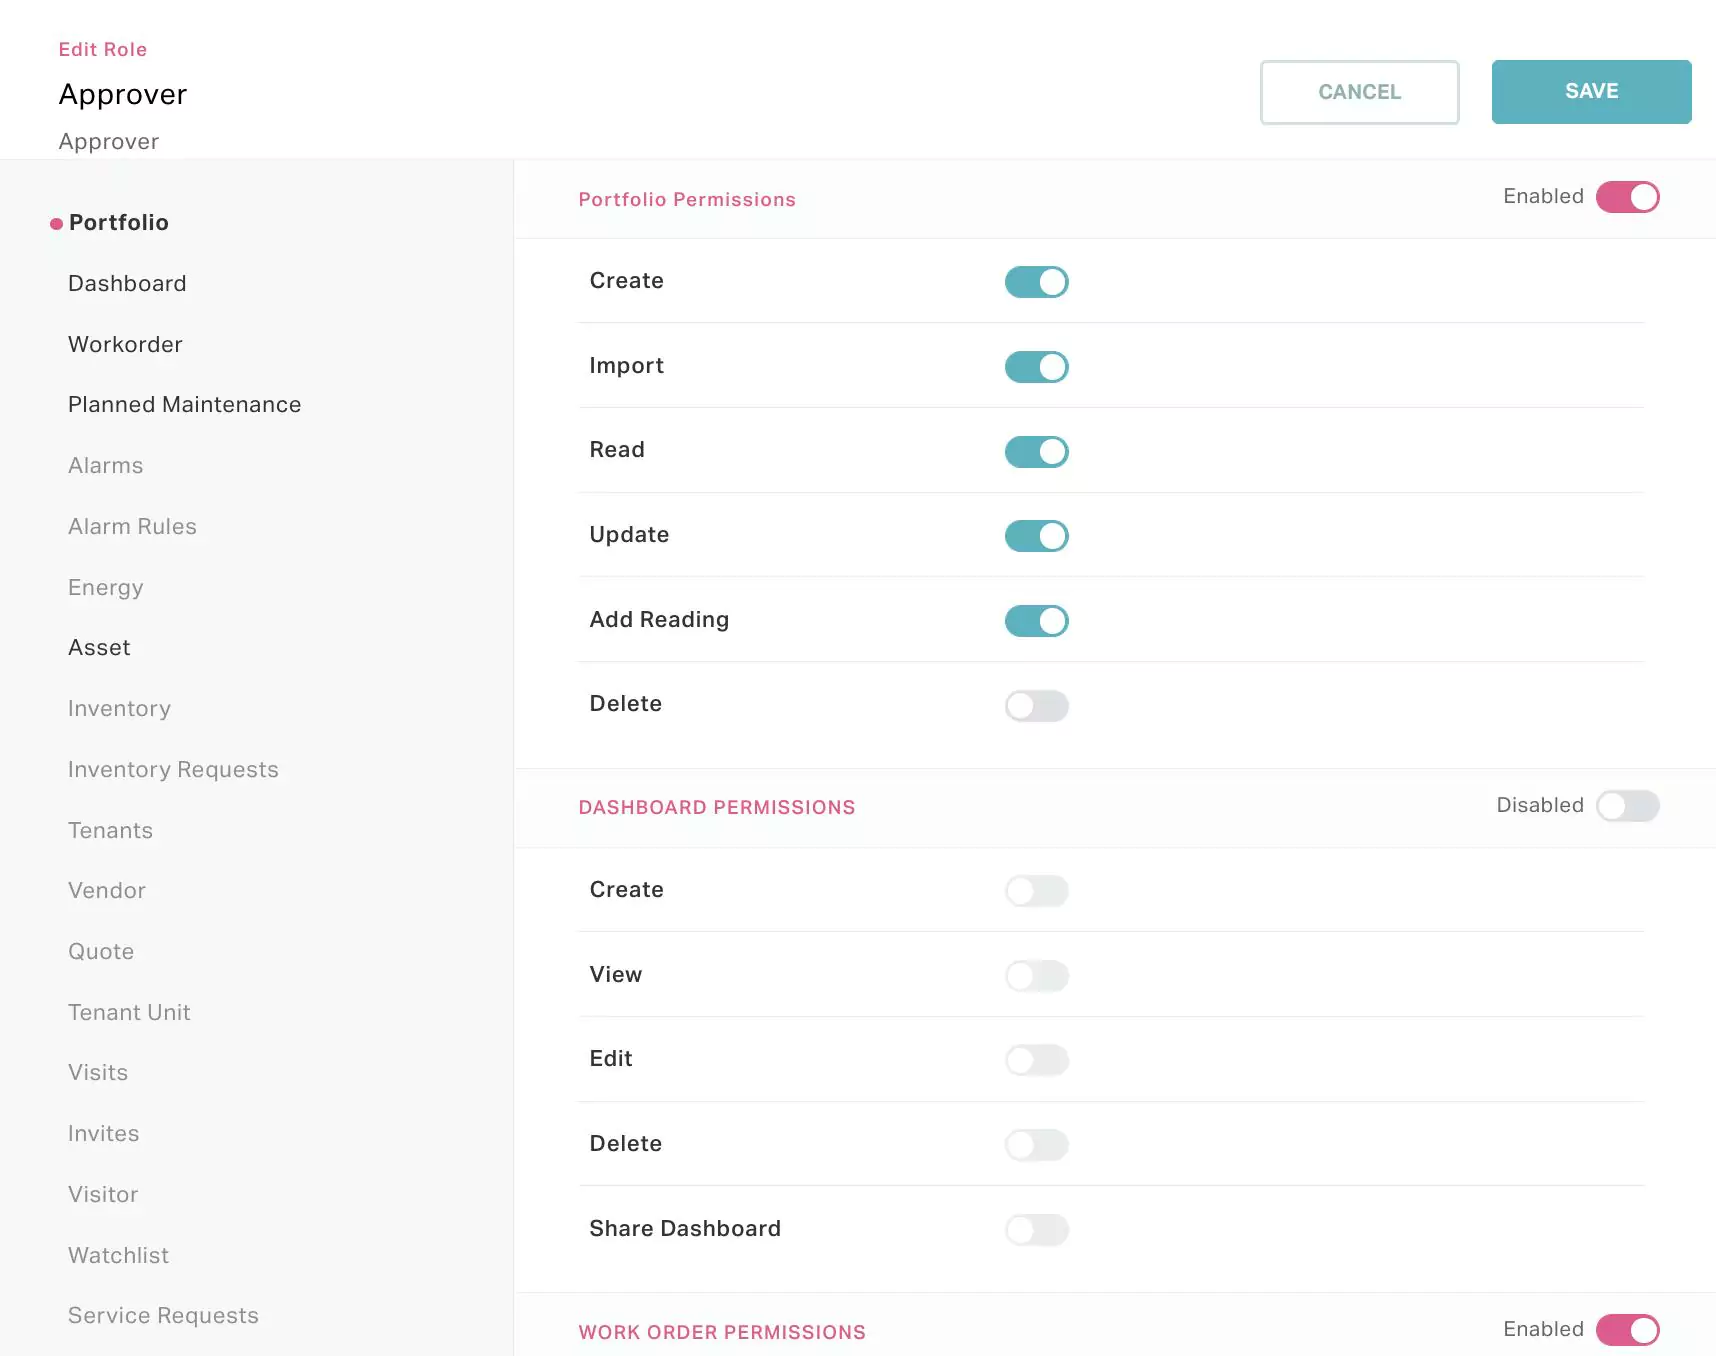
Enable or disable the modules and corresponding actions as required.
Click SAVE. The modified permissions are now updated in the role.
In case of modification to the permission levels of a user due to association or dissociation of a role, it takes effect after the user subsequently logs into the system.
Deleting a Role
In order to maintain the active list of roles, you can always delete the ones that are not in use. To delete an unwanted role,
Click the
 icon respective to the role that has to be deleted.
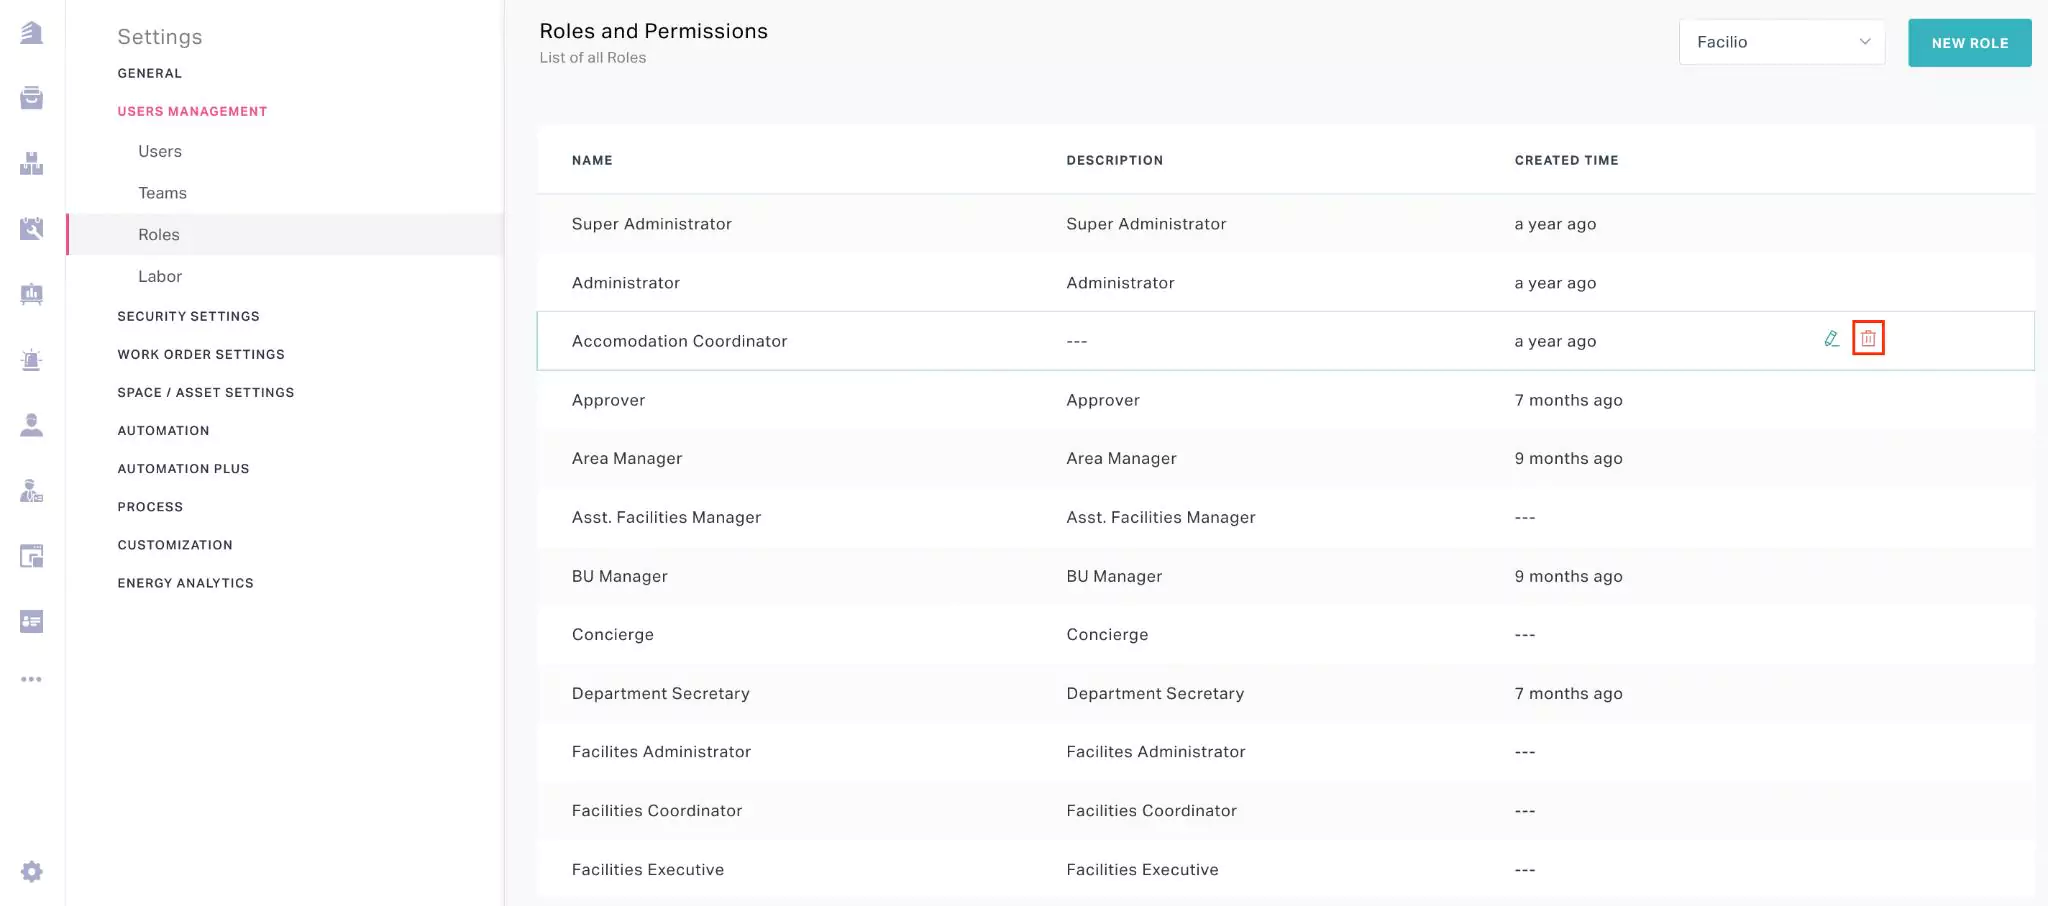
A confirmation window appears asking you to confirm the action.
Click DELETE. The role is now permanently deleted from the Roles and Permissions screen.