Configuring Access Control Settings
The portals are websites that simply provide a way for users to stay connected and updated about the organizational activities such as transactions and workflows, and generally contain all information relevant to the users. The administrators are allowed to configure access control settings for individual portals created as a part of the application. Before a portal is handed-over to its users, it is important to focus on configuring certain attributes and/or services so as to achieve data security and integrity. The upcoming sections explain how to configure the authentication and authorization settings for the portal.
Users Management
tasks on behalf of their organization (for example, members in a vendor company) such as processing work requests or approving quotes. The Users section of this module facilitates the management of users list and their access control rights. This section allows you to add or remove users, modify user details, associate appropriate roles and so on.
Creating a User
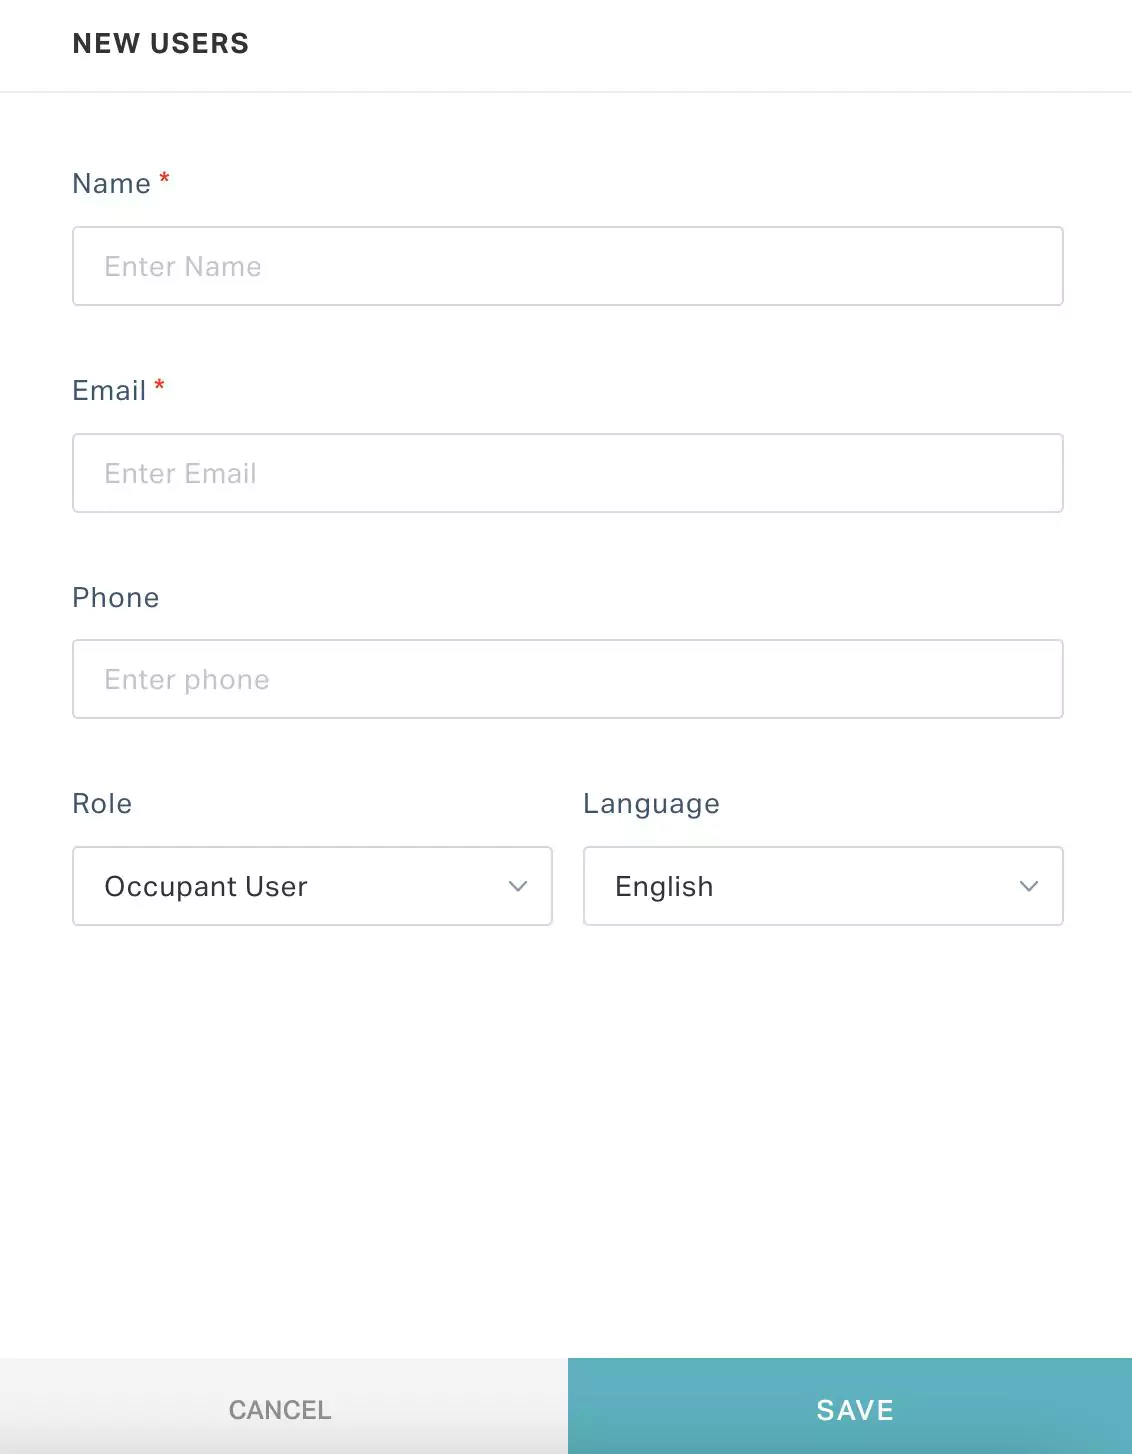
In the Users section, you can maintain the list of users associated with the portal. As a part of the user creation process, you can record the user details (for example, phone number and email) and associate an appropriate role (for example, occupant and vendor) to the user. To add a new user to the portal,
Navigate to the Users section and click ADD USER.
Select any of the following options that appear:
New User - This option allows you to create a new user upon associating the required role and other details.
Existing User - This option allows you to add an existing user upon associating the required role.
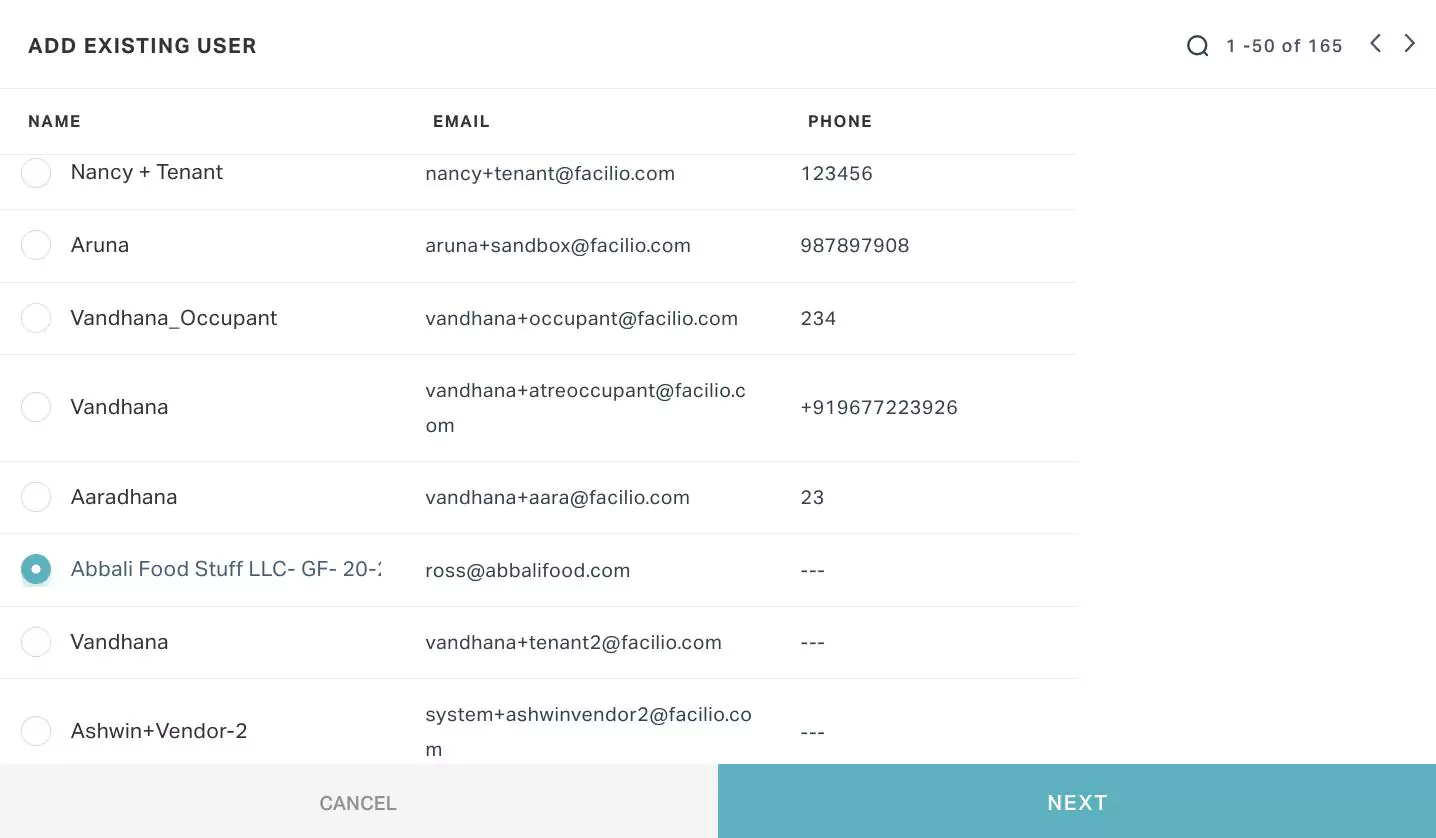

Click ADD. The user is now added to the list of users in this section as shown below.
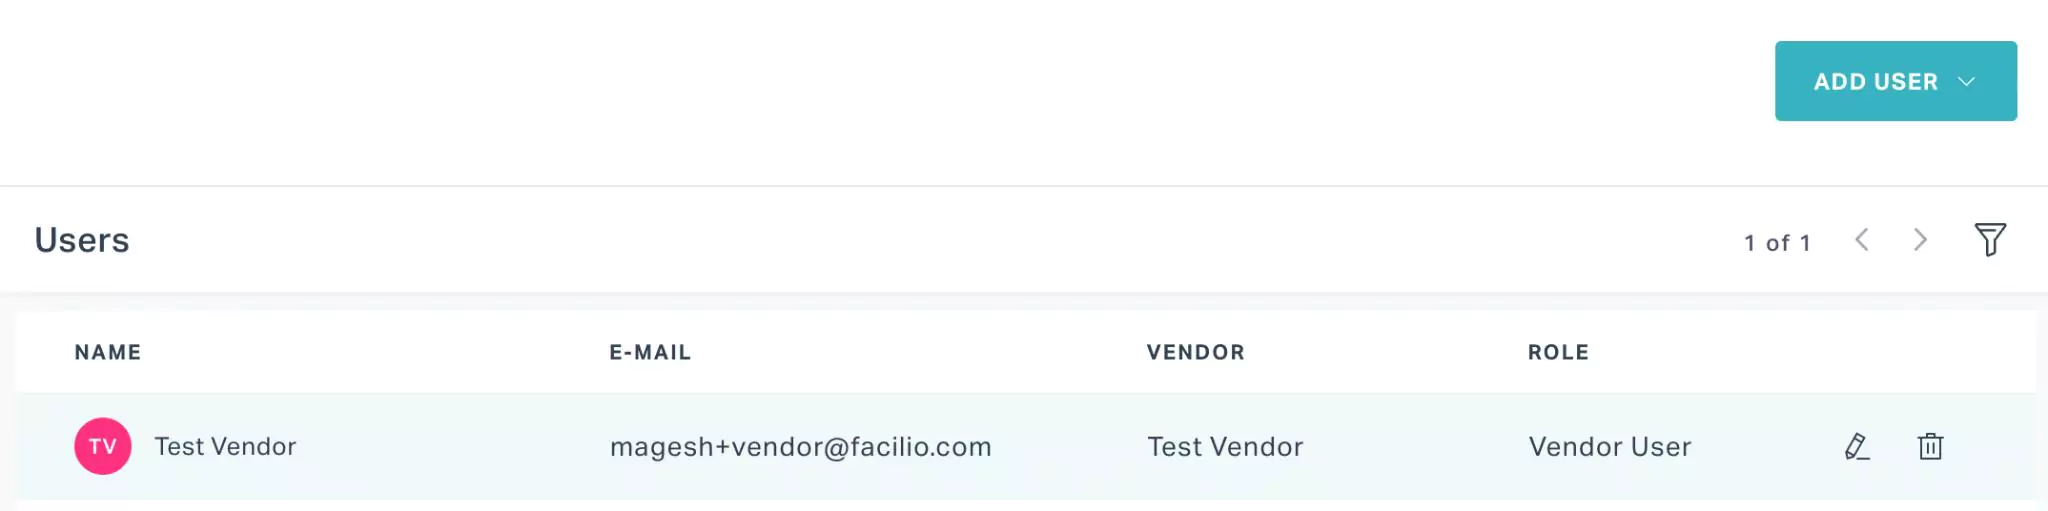
Other Functionalities
There are certain icons or functionalities associated with this section that facilitate various other activities.

| Icon | Action/Description |
|---|---|
| Used to search for a user using the name or email of the user | |
| Used to modify the details of the associated with the user | |
| Used to delete the user details permanently from the application |
Roles Management
A role represents the category of user within a company (For example, administrator and employee) and is defined based on the responsibilities and privileges associated with the particular user category. Role management is the process of controlling what actions are visible to a user, group of users or users in an organization by associating that information with a role.
The primary goal of the Roles section in the portal summary screen is to allow access only for the specified interface elements (for example, buttons, tabs and fields) to a user category upon defining roles. In other words, you can disable permission to an action or a tab in the portal for which that user does not have access control rights, through a role.
The upcoming sections explain how to create roles in association with a portal and enable required permissions to the users.
Creating a Role
The Roles section allows you to create individual roles for each category of users (for example, administrator and supervisor) among the set of users listed in the portal summary screen. Read the Creating a Role section in Roles Management for more information.
Configuring Permissions
All tab groups, tabs and corresponding actions are disabled for a role by default. You must enable the required permissions after a new role is created so that it can be assigned to the users. To configure the permissions for a role,
Select the required role from the dashboard. The edit role window for desktop view appears by default as shown below.
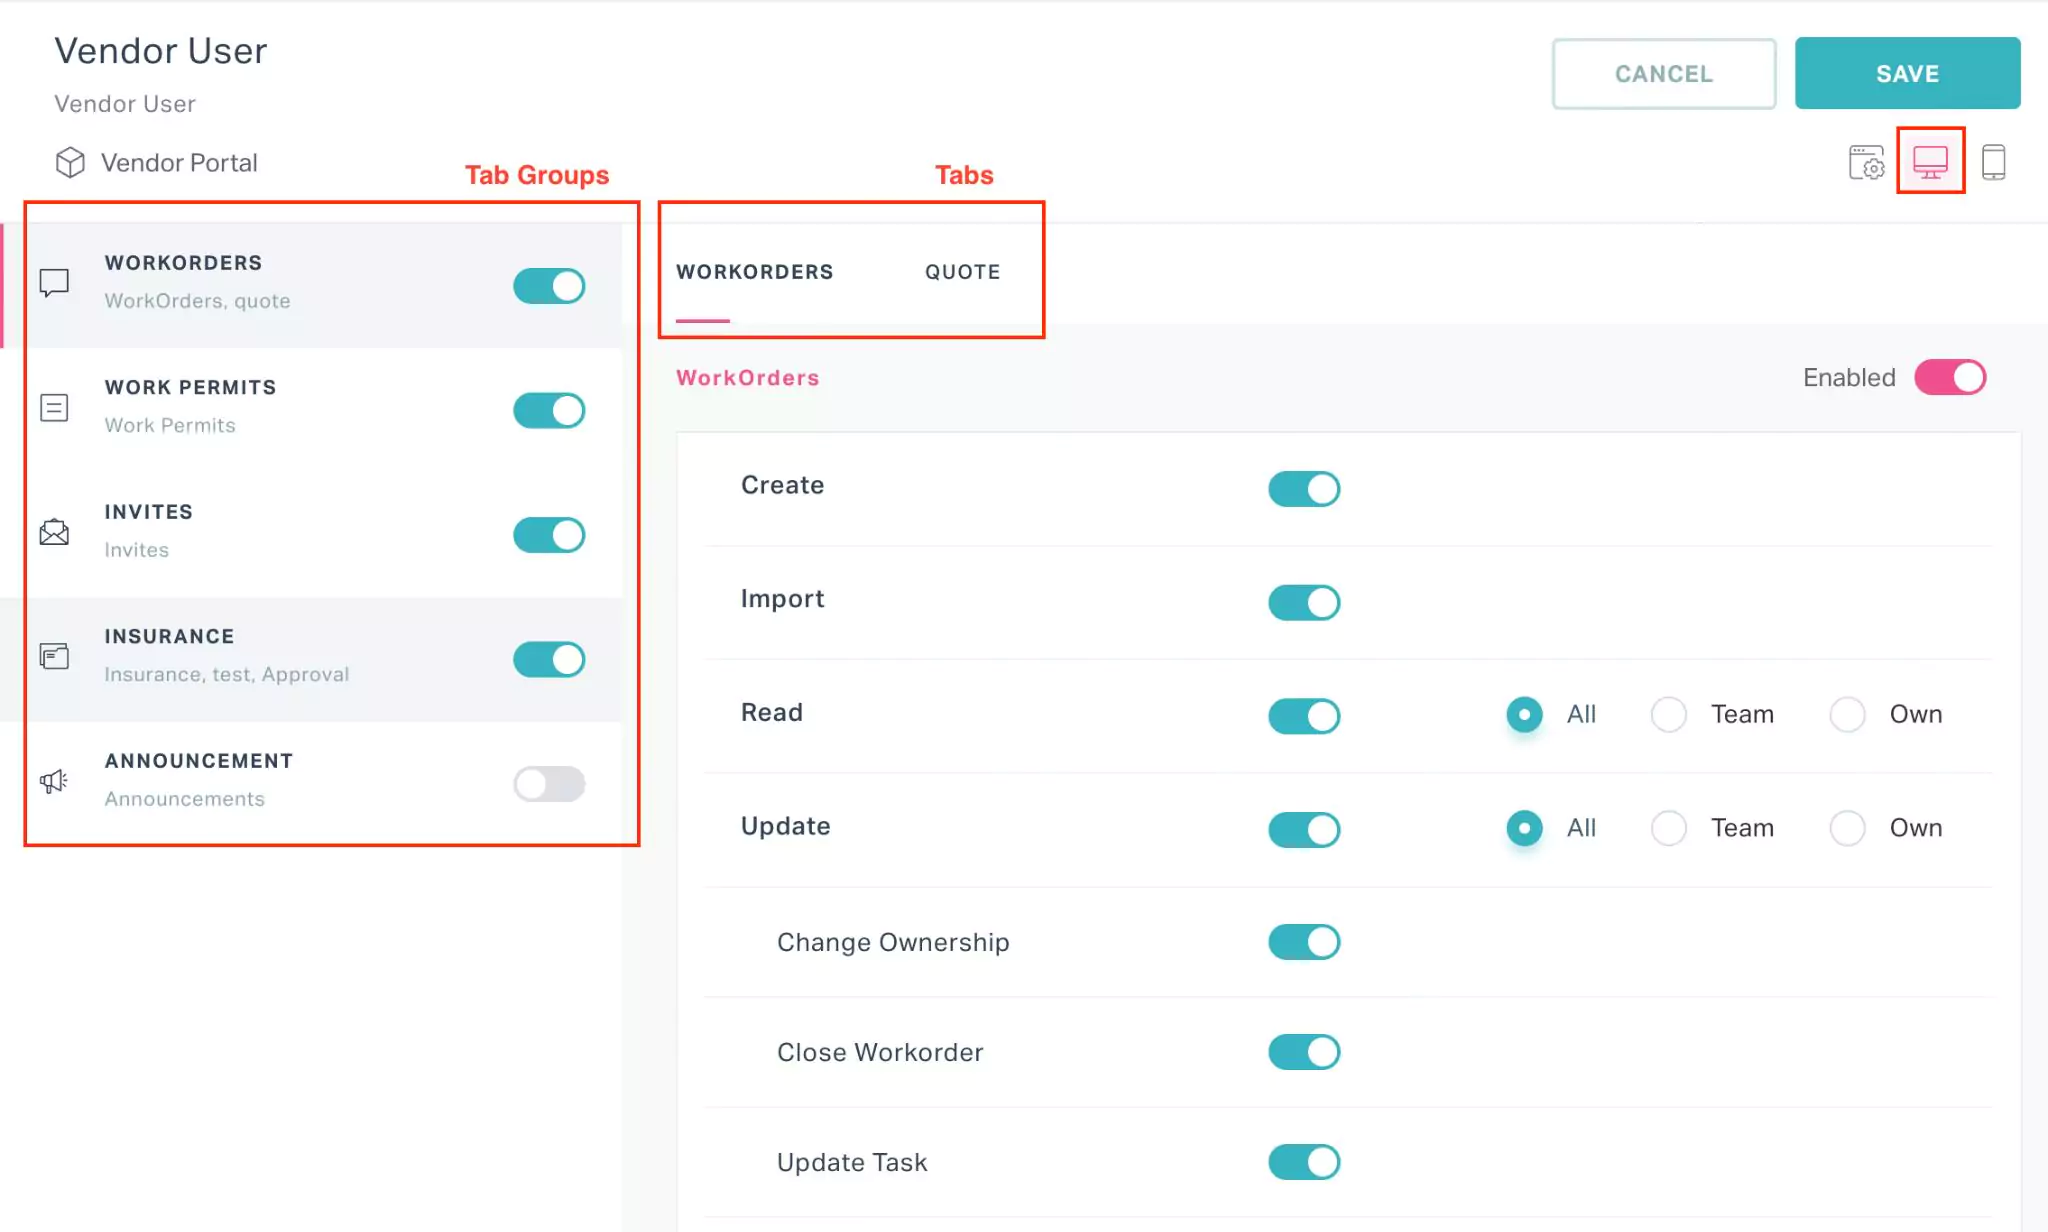 Note: The list items in the left panel are the tab groups and the tabs corresponding to the selected tab group appear as individual sections as shown above (read the Configuring Web Layout section for details on how to configure the portal view).
Enable the required tab groups, tabs and corresponding actions with respect to the responsibilities of the user. To define the scope for an action, you can also select any of the following options (if applicable):
- All - To allow access for all items
- Team - To allow access for items that are specific to the user’s team
- Own - To allow access for items that are specific only to the user
For example, if you select Team against the Read action in the Workorder module, the user will have access to view all work orders created in association with the user’s team.
Note: You can configure different sets of permissions for web and mobile views.You can use the (desktop) and
  (mobile) icons to navigate to the appropriate sections.
 Click SAVE. The role is now updated with the new set of permissions configured.
Note: The configured permissions will be applied to the user upon assignment of the corresponding role.
You can navigate to the tab settings section using ![]() icon to view or enable any tab and its respective actions configured as a part of the portal.
icon to view or enable any tab and its respective actions configured as a part of the portal.
Other Functionalities
The application allows you to modify or permanently delete the roles associated with a portal.
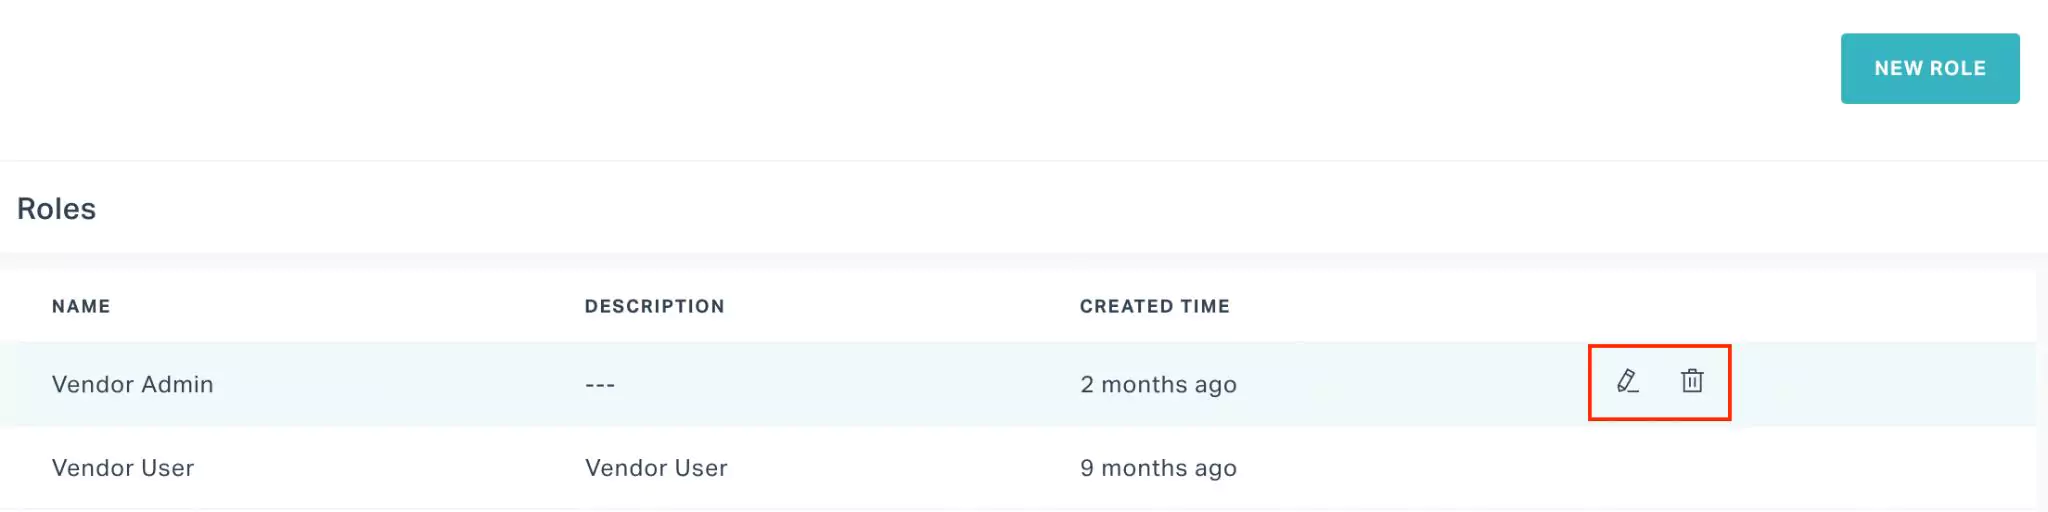
You can use the ![]() and
and ![]() icons corresponding to a role to edit and delete it, respectively.
icons corresponding to a role to edit and delete it, respectively.
SSO Configuration
The SSO feature simplifies the access management allowing the users to access authorized application resources with a single set of credentials. The purpose of the SSO section in this module is enabling the user to login to Facilio portals using the SSO credentials. Read the Single Sign-On (SSO) section to understand the configuration and working of this feature in Facilio.