Working with Visitor Management Kiosk
The facility entrance is often the first touchpoint of an organization, and taking the visitors through the check-in procedure is the opportunity to make the right impression on them. Visitor management kiosks give organizations the way to modernize their environments while putting new guests at ease by offering a smooth check-in or out.
Facilio empowers you to untangle your visitor management routines with a refreshing and innovative set-up. Its visitor kiosk provides safe ways to register visitors while enhancing the security of your premises. You can set up and activate the visitor kiosk on a compatible iPad or tablet to authorize visitor entry and exit.
The administrator configures the kiosk set-up, and once the set-up is complete, the application will be ready to capture the visitor check-in and out details.
System Requirements
The following table depicts the system requirements for the Facilio - Visitor Kiosk application to work.
| Type | Requirement | Specification |
|---|---|---|
| Android | OS | Android version 7 and above |
| Device | Tablet | |
| iOS | OS | iOS version 15 and above |
| Device | iPAD |
You can download and install the Facilio - Visitor Kiosk application on your tablet or iPad from thePlay Store or App Store.
Illustrating Check-In through Visitor Kiosk
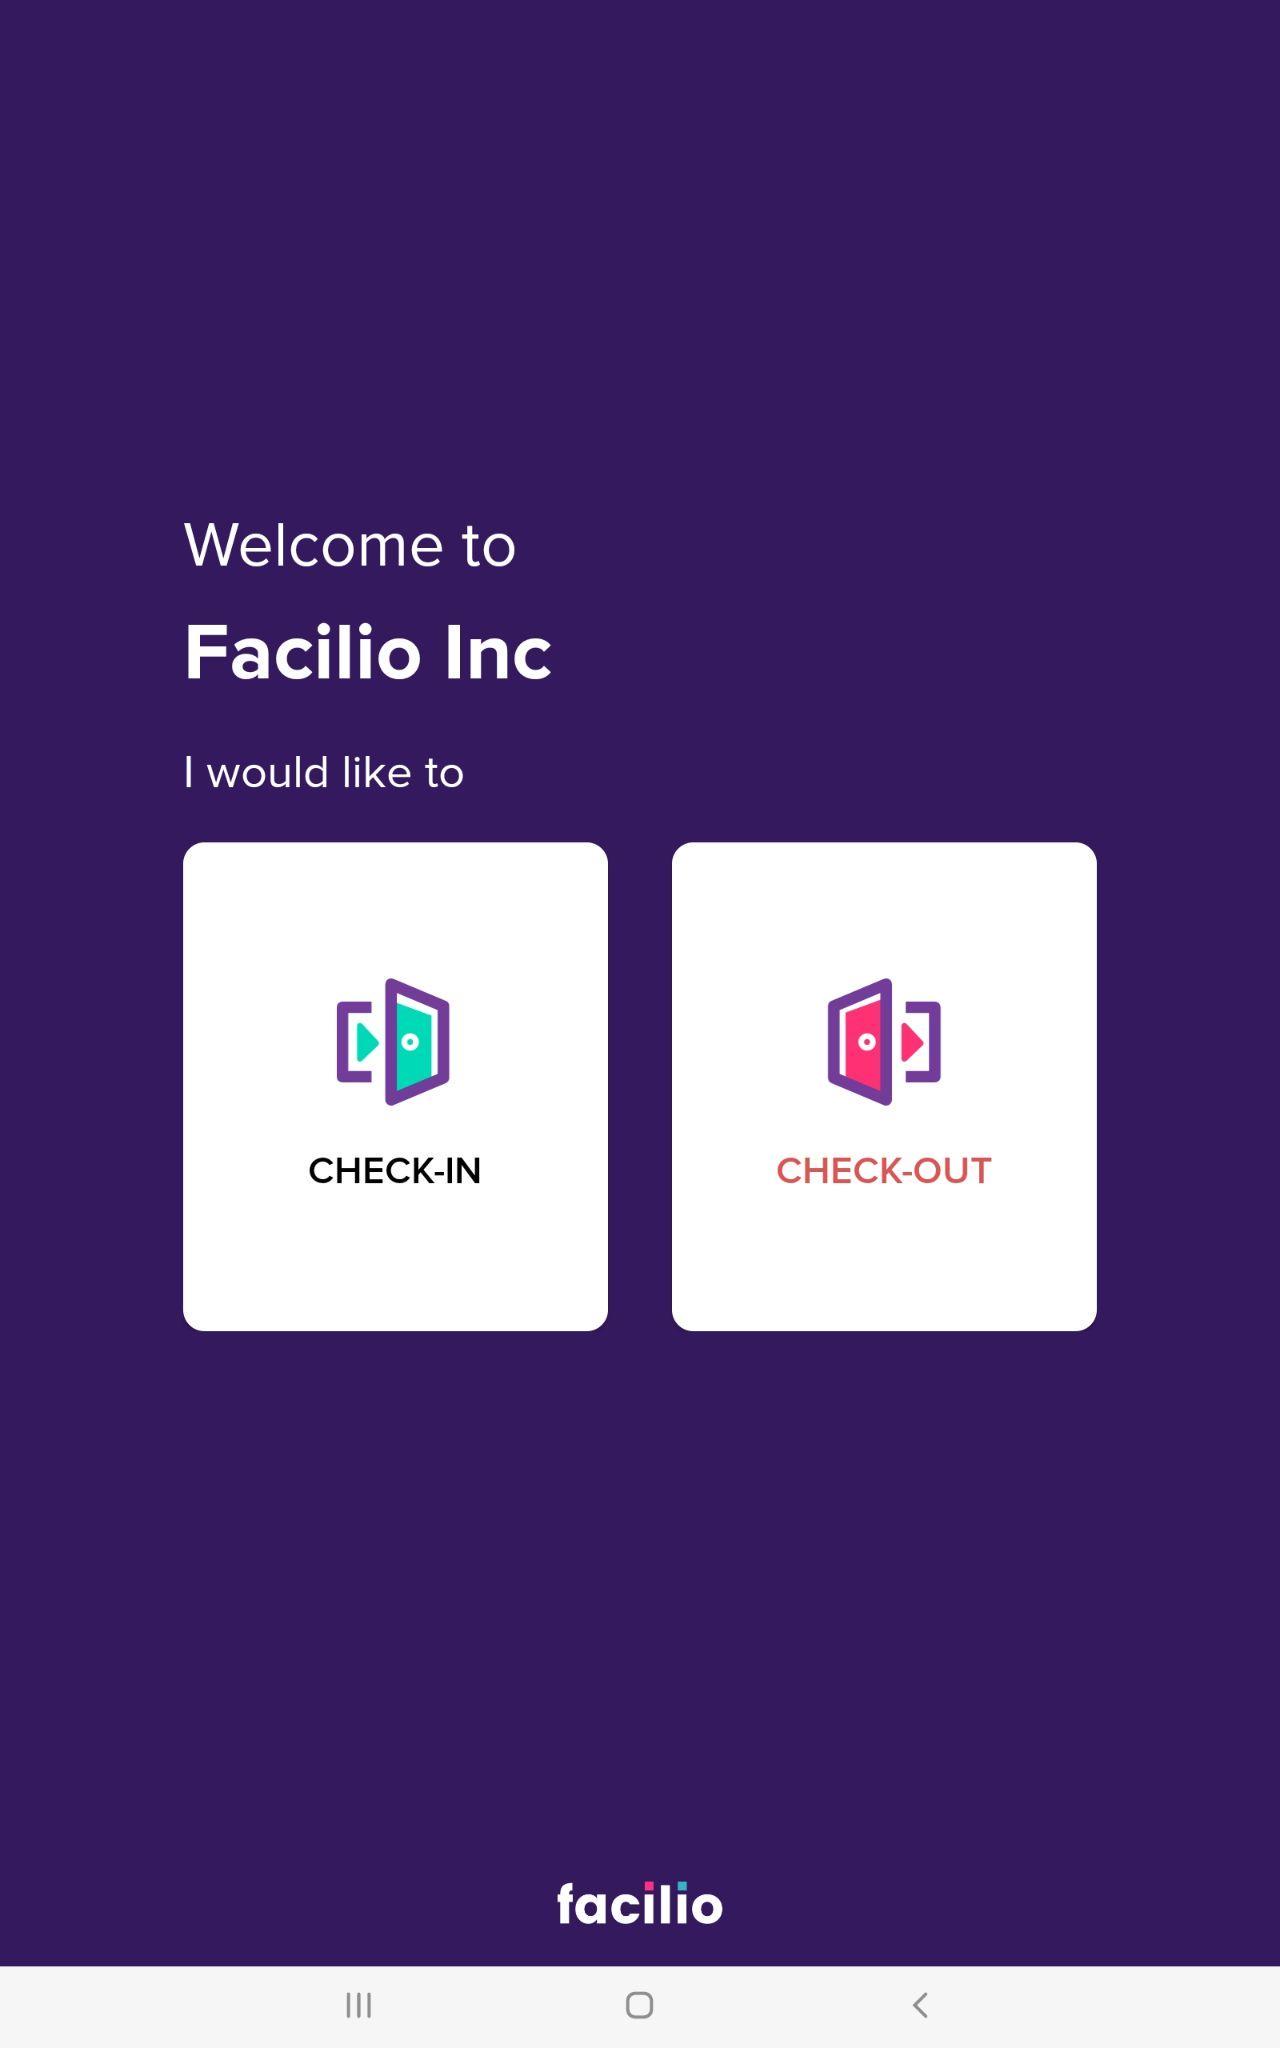
When a visitor has arrived at the facility, the security team must take the visitor through the check-in process to authorize his entry into the premises. To initiate the check-in process, open the Facilio - Visitor Kiosk application on the iPad or tablet and click CHECK-IN.
The upcoming sections explain the step-by-step procedure that the security personnel should undergo to authorize the visitor's entry.
Step 1: Selecting an Option to Register
Various factors act as passes to permit entry into a secured facility. Facilio provides the following options for the visitors to register themselves when they check in to the facility.
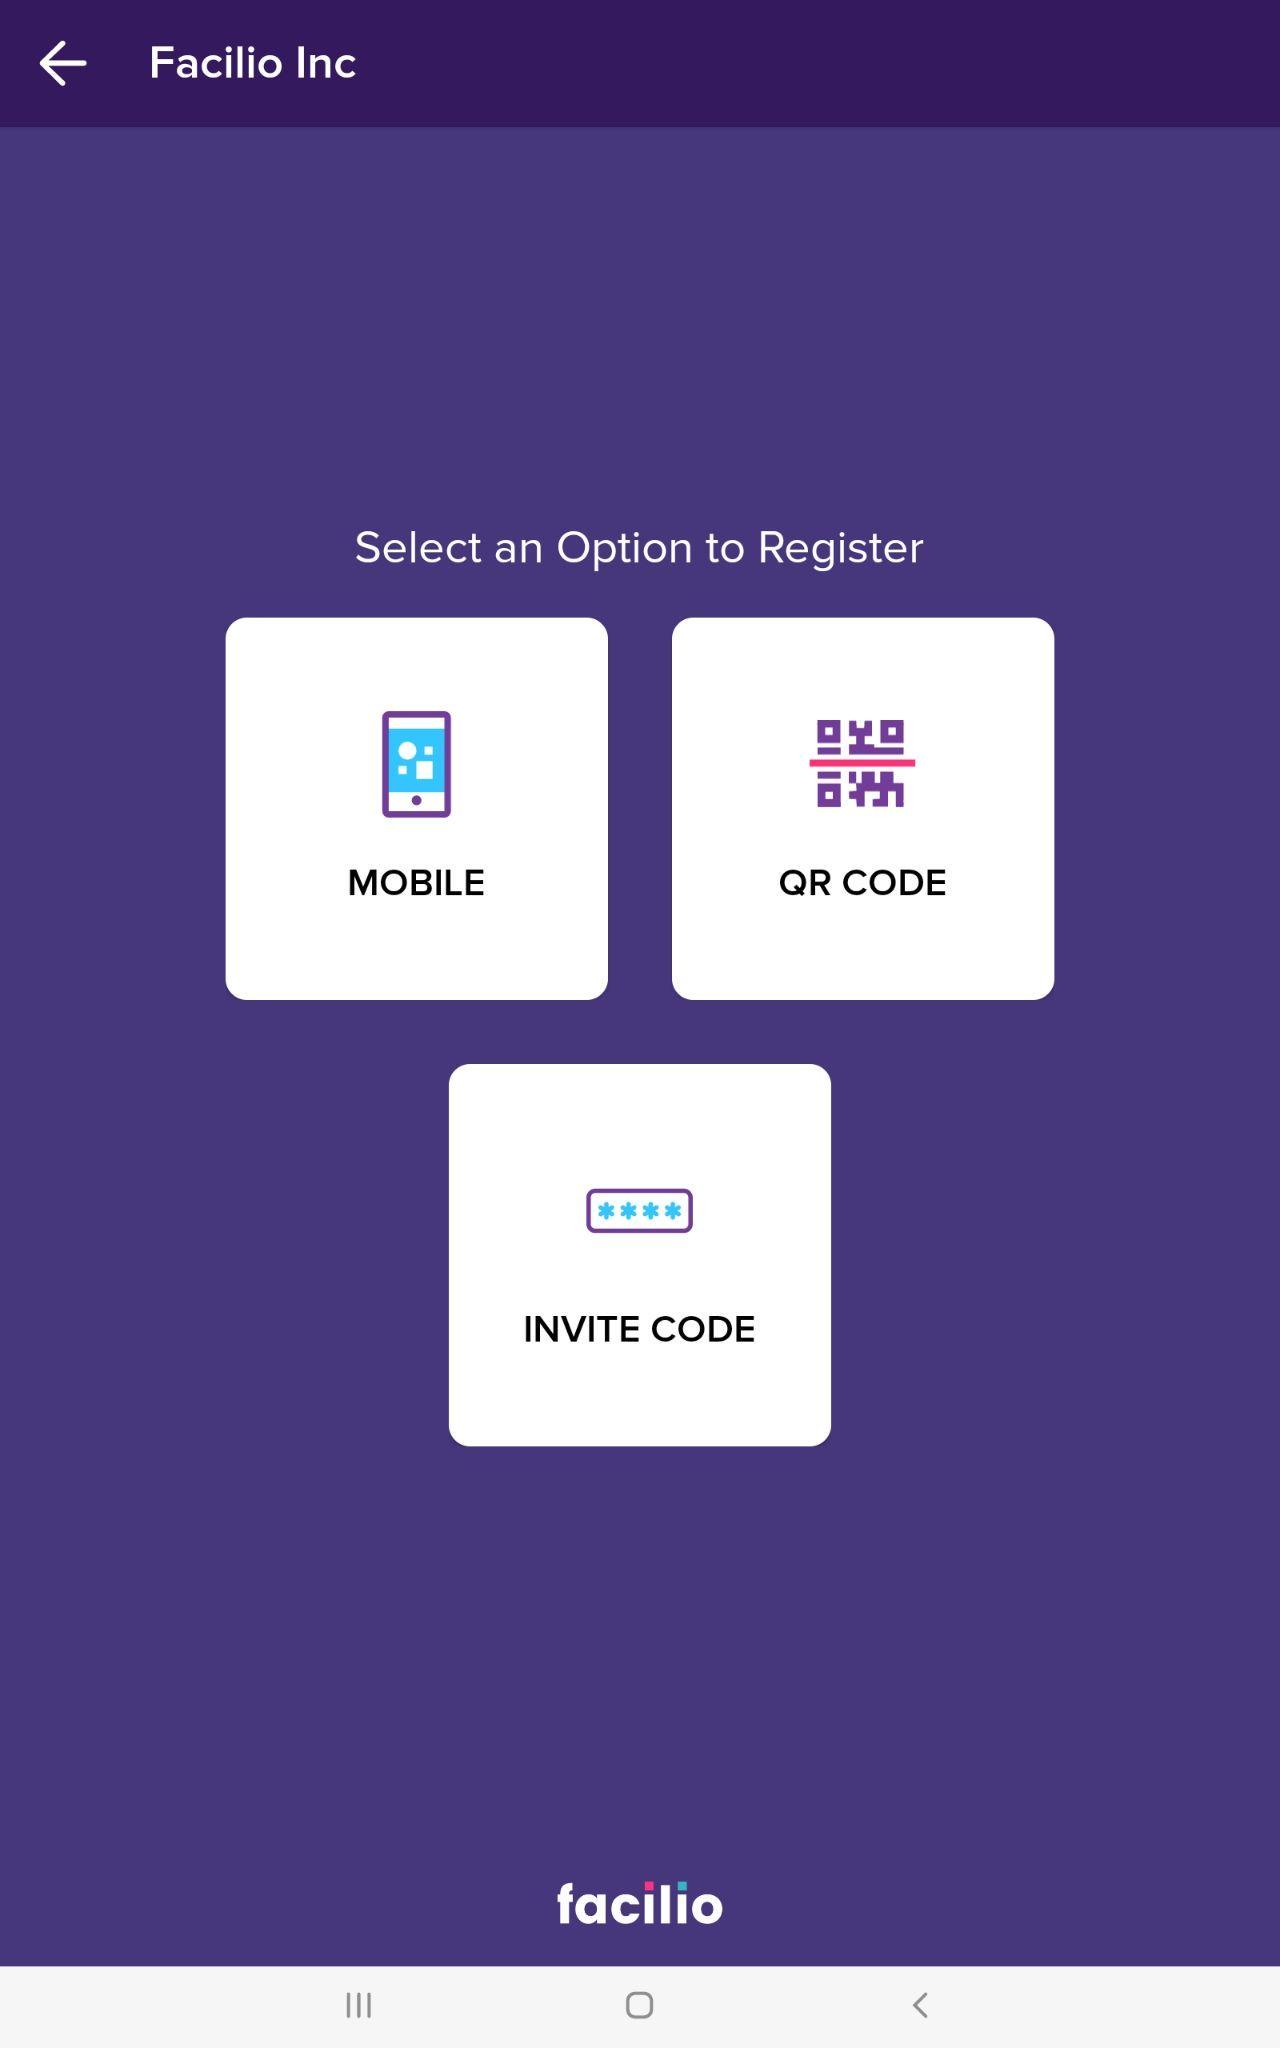
When a visitor directly checks in to the facility without an invite, you can select MOBILE to allow the visitor to use the mobile phone number for entry. On the other hand, you can choose QR CODE or I NVITE CODE when the visitor has an invite with him.
The various possible check-in scenarios are illustrated below:
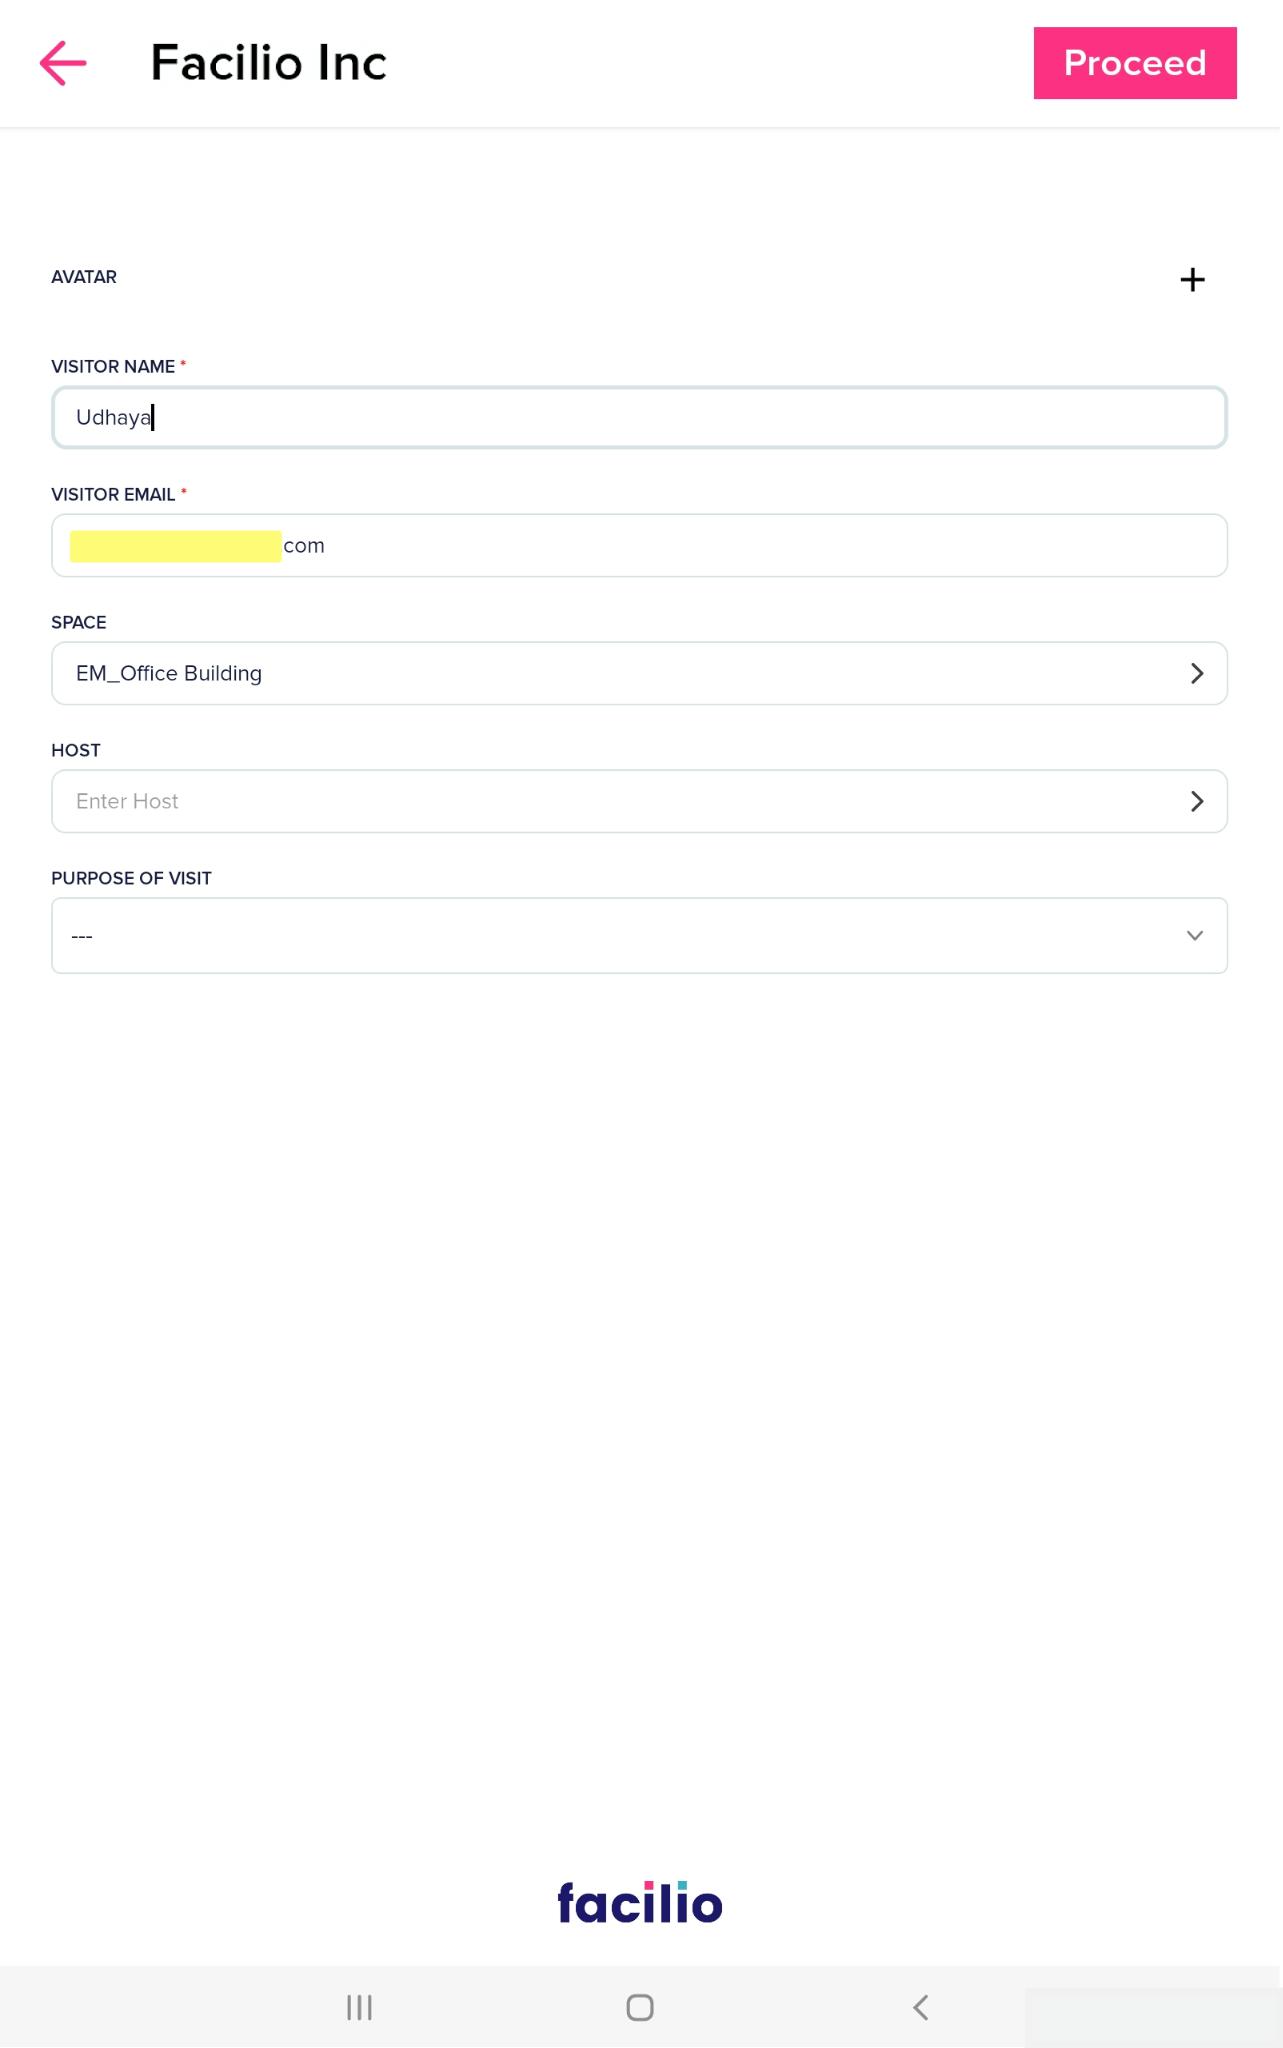
If a visitor checks in to the facility using the mobile number whose details already exist in Facilio, all the details except the Host and Purpose of Visit are automatically populated (as shown below).
If a visitor wants to check in to the facility using an invite, once you scan the QR code or try to authorize the entry using the invite code, the visit details are displayed as shown below.
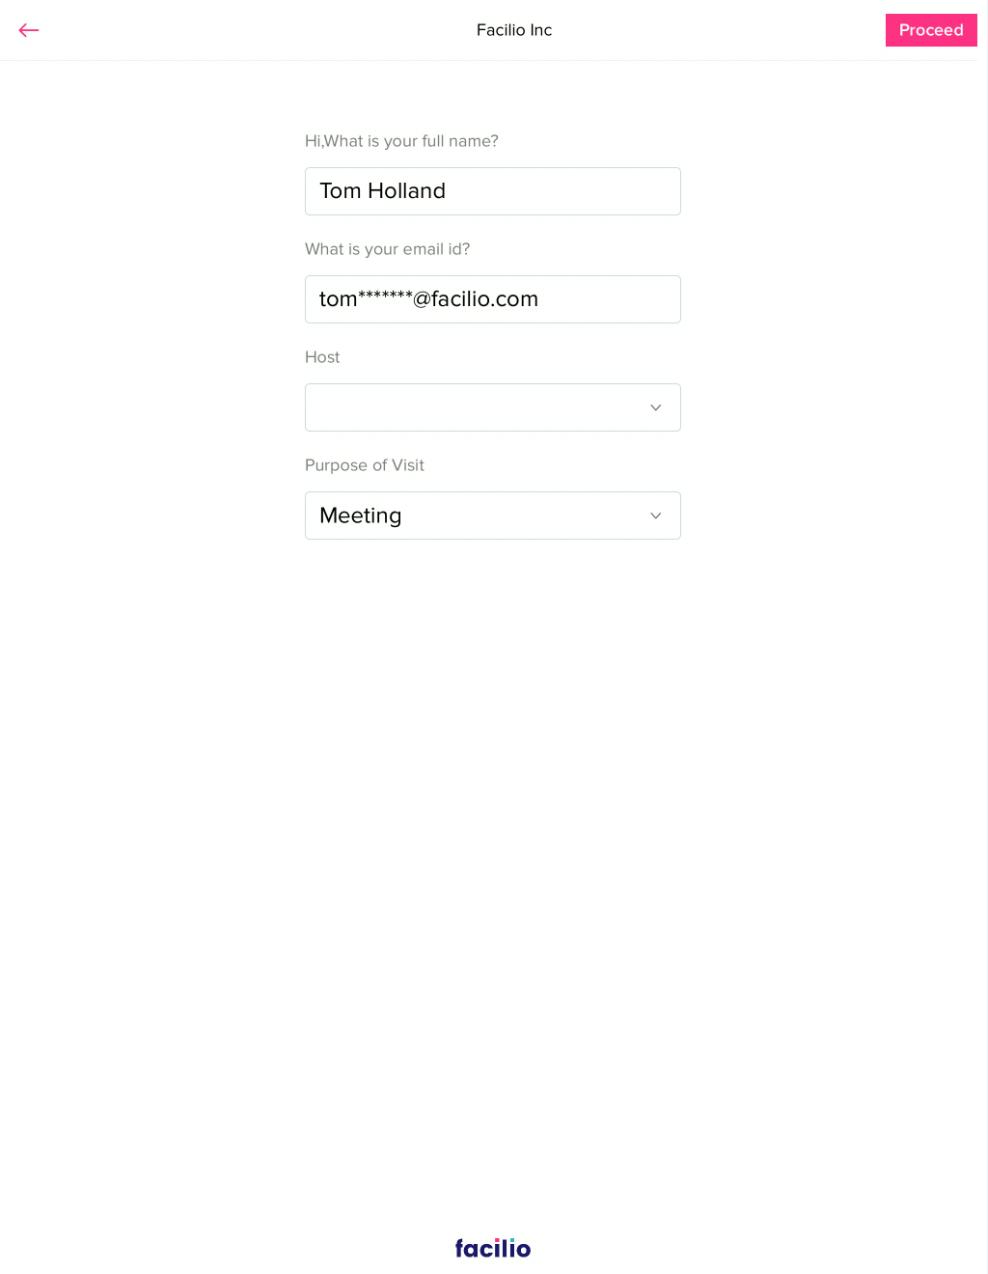
Review the details displayed and click Proceed to confirm the same. You can proceed with Step 3: Capturing Visitor's Photo for further instructions.
Note : If the visitor is visiting the facility for the first time and doesn't have an invite, you should capture the visitor's details during the check-in process. You can proceed with Step 2: Selecting the Visitor Type for further instructions.
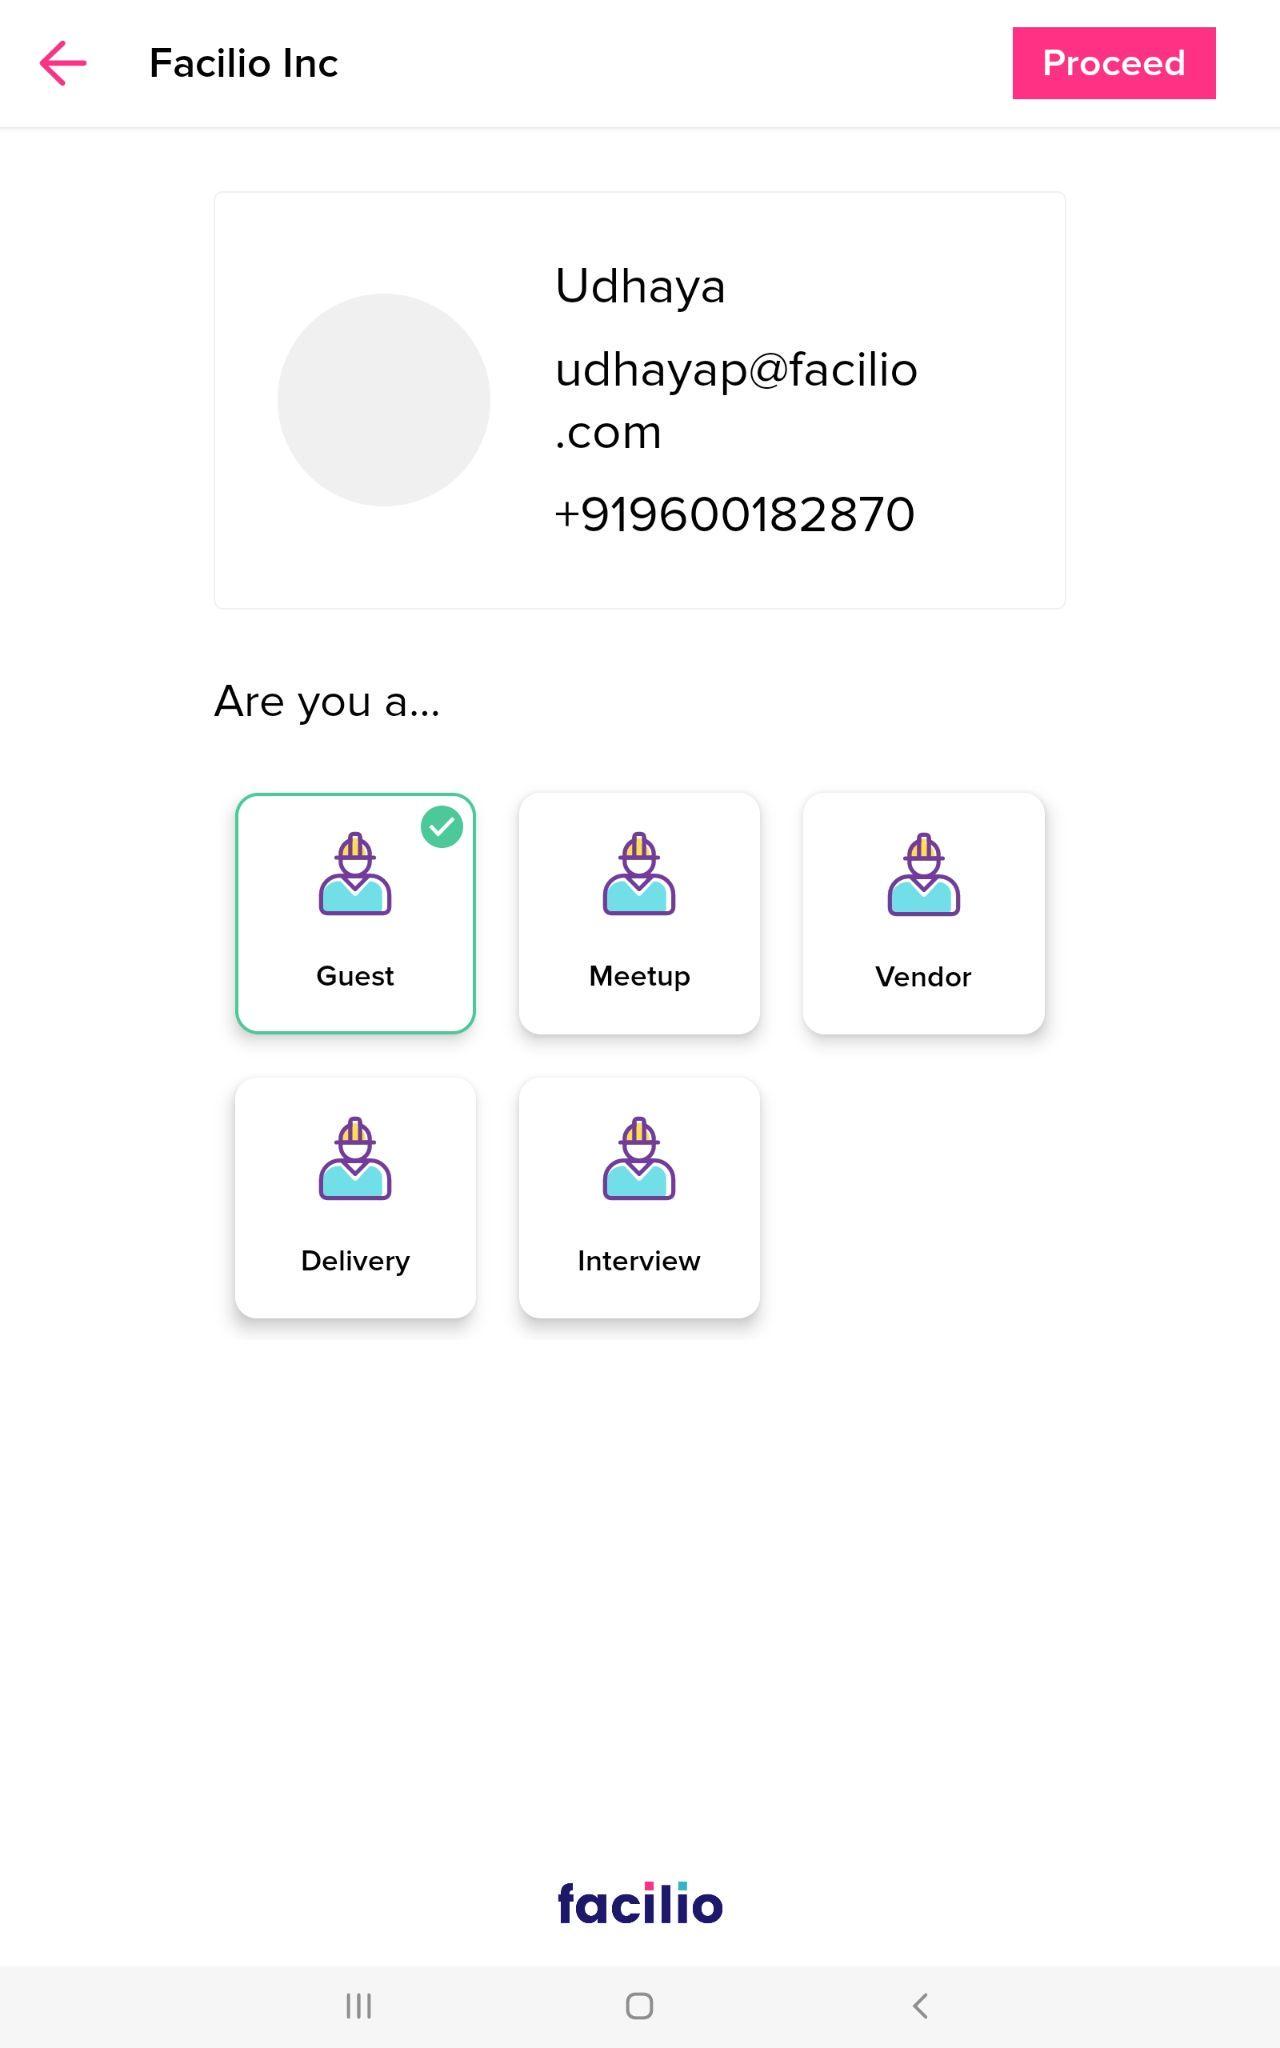
Step 2: Updating the Visitor Type and Other Details
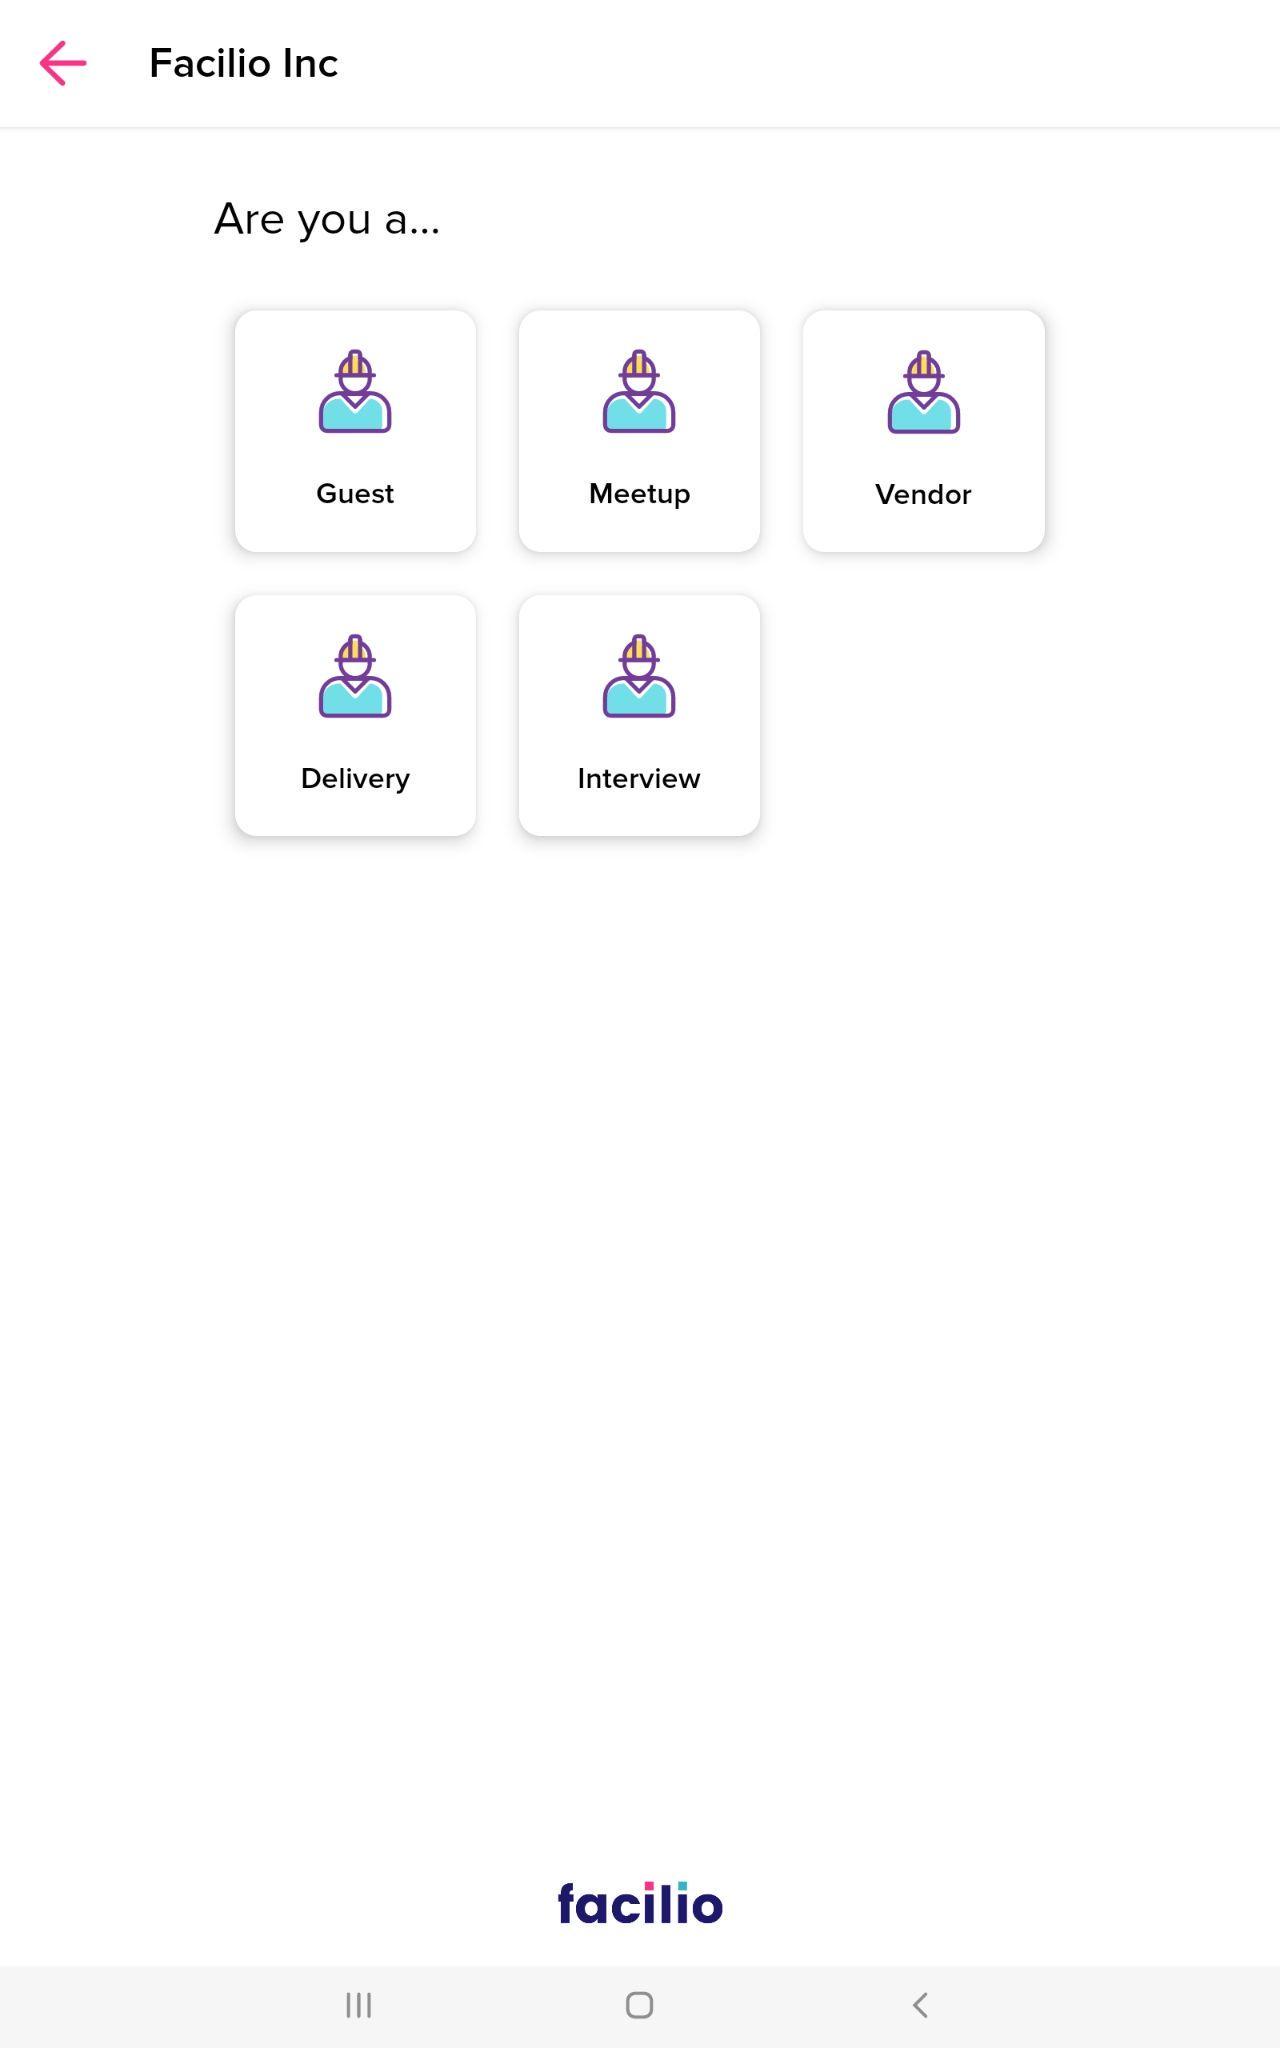
The application permanently stores the history of all the visits and the details of the visitors for future reference. If the visitor is checking in to the facility for the first time, you will be prompted to choose the visitor type as shown below.
Perform the following steps to register the visitor details:
Select the type of visitor. The visitor details screen appears as shown below.
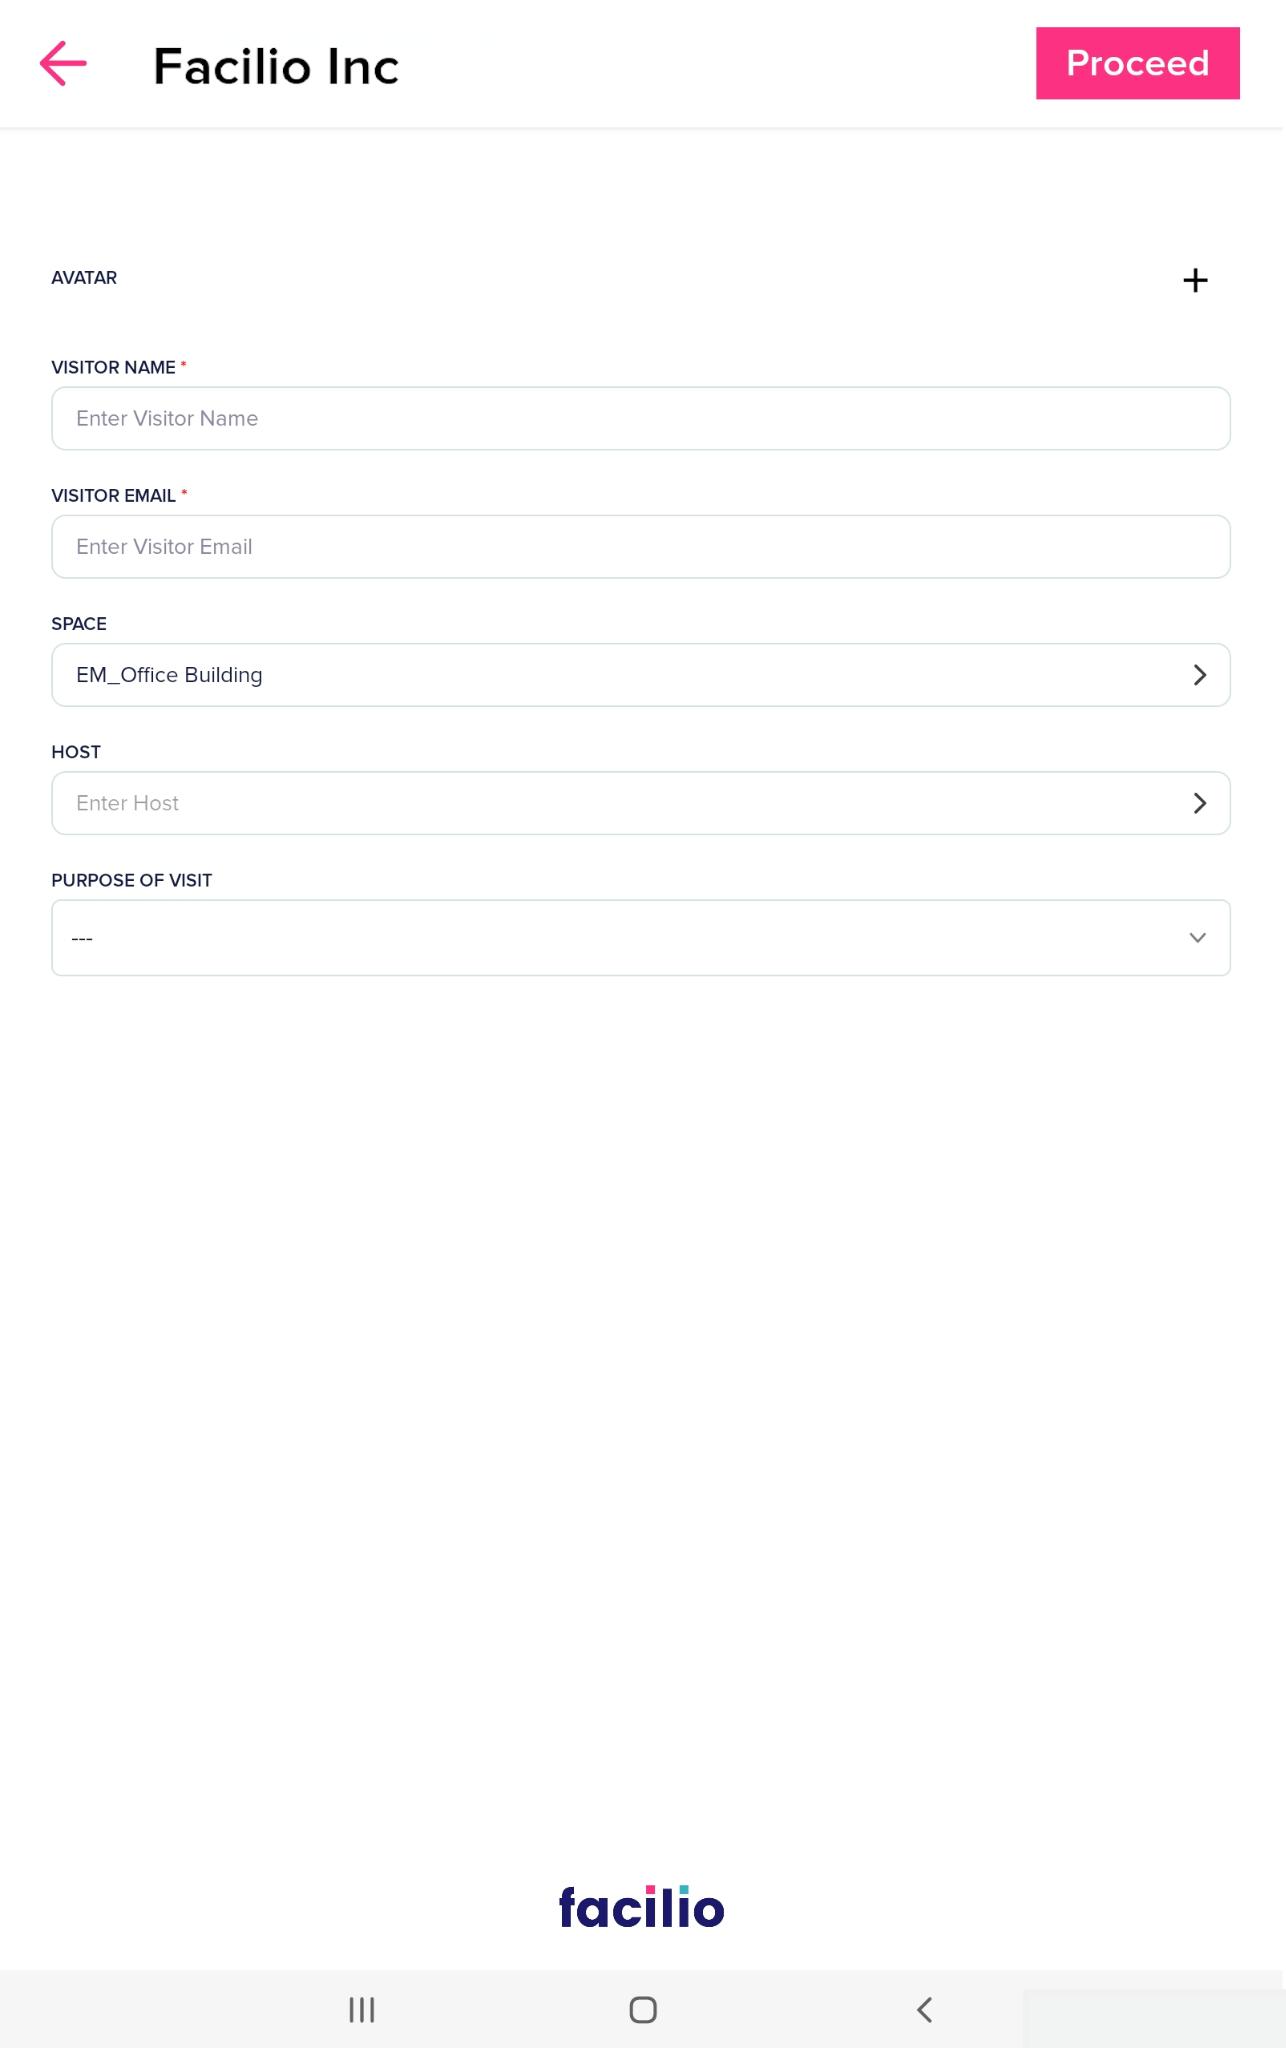
Update the following fields on this screen.
- AVATAR - You can either capture a picture of the visitor or upload an image file from the device upon clicking the
 icon.
icon. - VISITOR NAME - The name of the visitor
- VISITOR EMAIL - The email address of the visitor
- SPACE - The space which the visitor likes to visit
- HOST - The resident whom the visitor wants to meet
- PURPOSE OF VISIT - The reason why the visitor wants to enter the facility
- AVATAR - You can either capture a picture of the visitor or upload an image file from the device upon clicking the
Click Proceed to move to the next step.
Step 3: Capturing Visitor's Photo
After the visitor details are recorded, you will be prompted to capture the photo of the visitor.
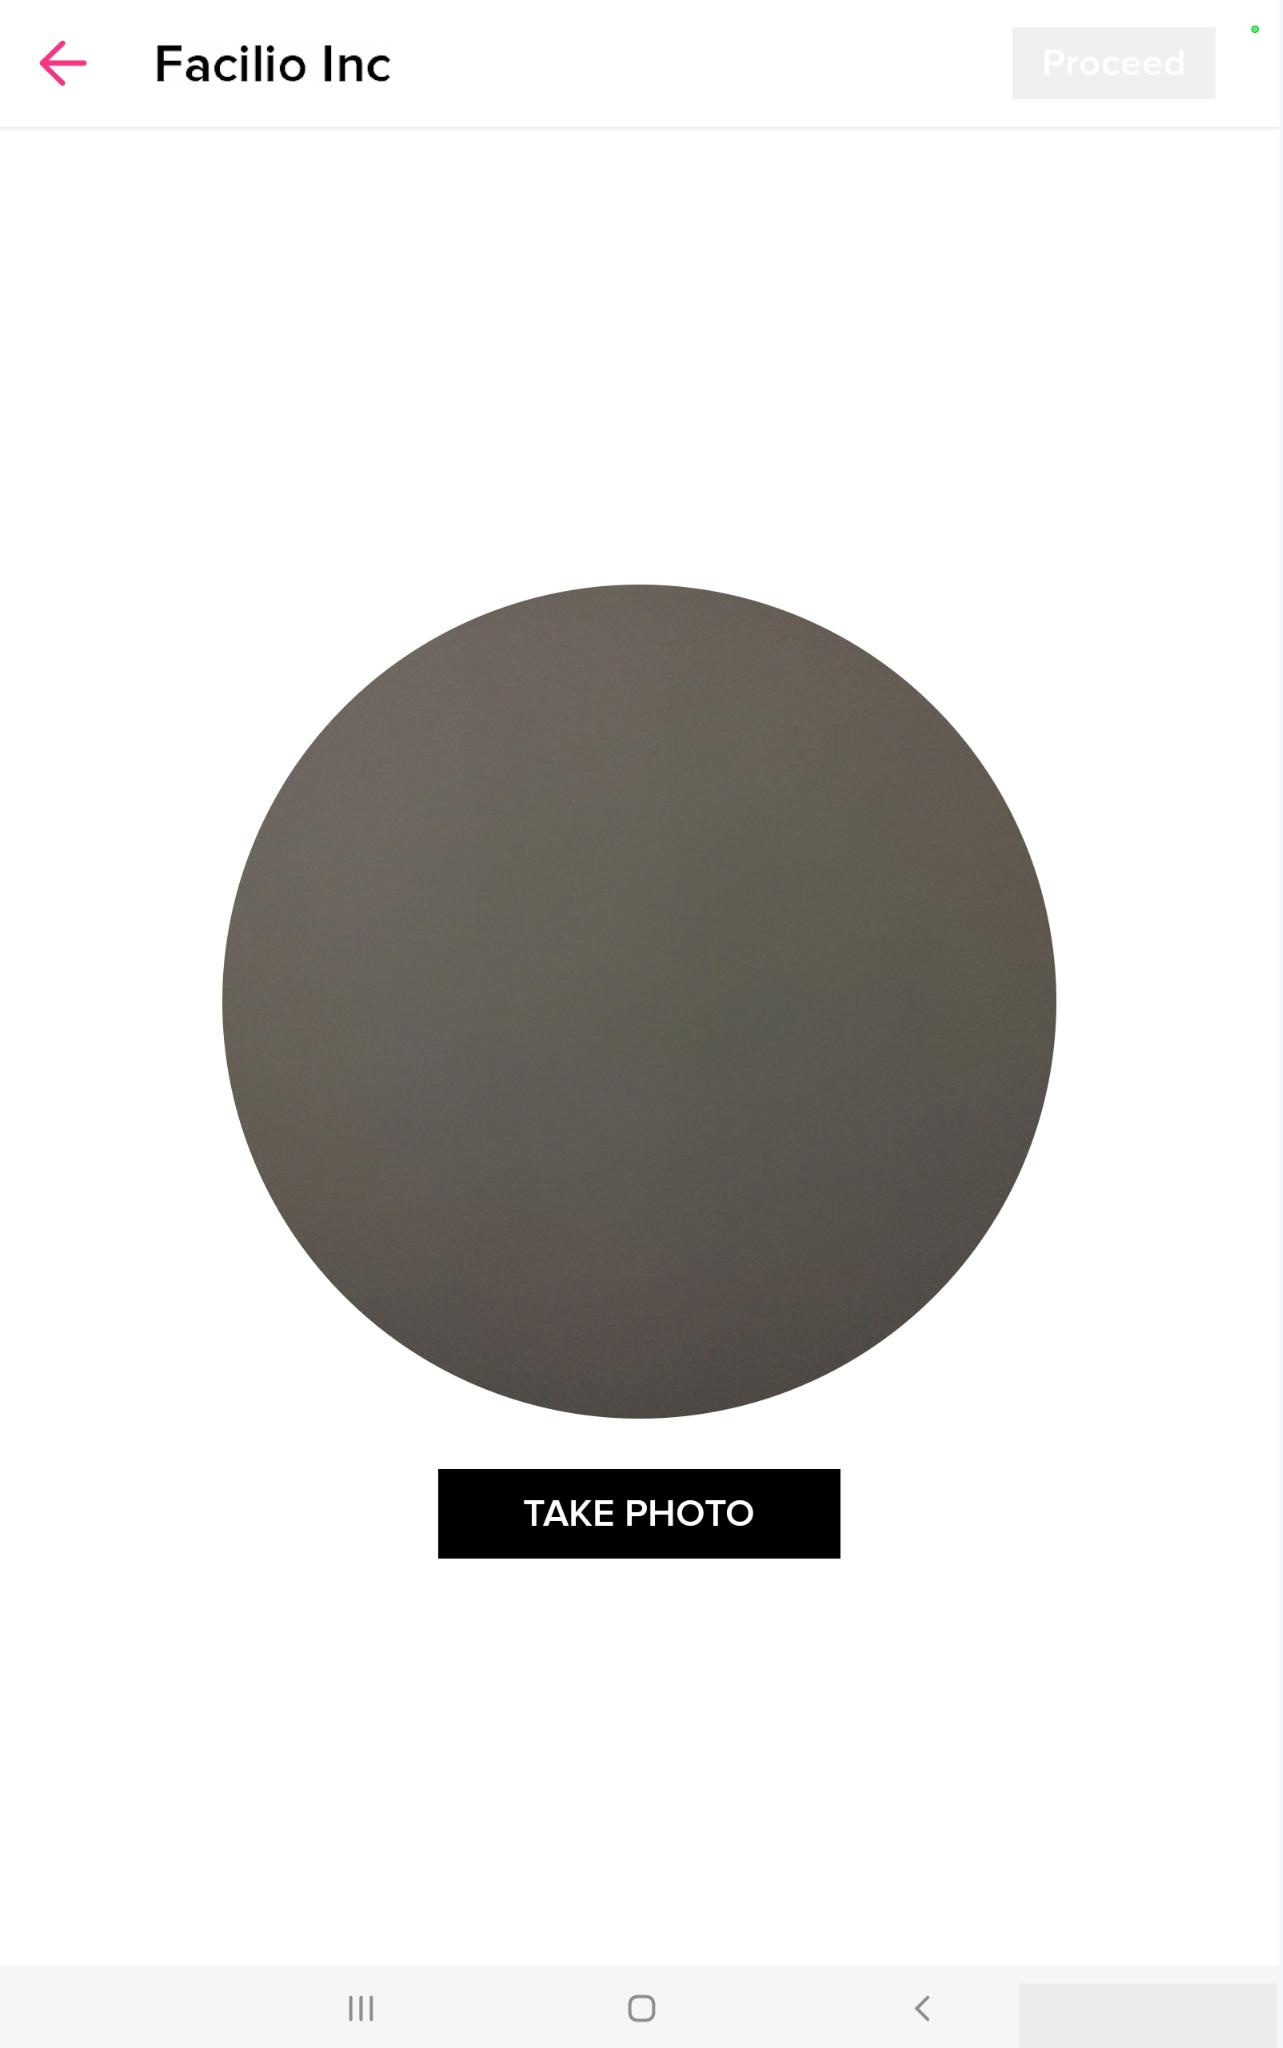
Capturing visitor photos sets a tone that your company takes itself and the safety of everyone in the building seriously. The photo captured on this screen will be printed on the visitor badge, increasing security. To capture a picture of the visitor,
Focus on the visitor's face and click TAKE PHOTO.
Note : You can always retake the picture using the RETAKE option, if required.
If the captured image looks fine, click Proceed to move to the next step.
Step 4: Signing Non-Disclosure Agreement (NDA)
The final step of the check-in process is to have the visitor sign the NDA digitally. Signing the document, the visitor assures to refrain from actions that might lead to exposing any confidential information related to the organization.

Having the visitors sign the NDA helps in simplifying decision making and also reminds the visitors to be cautious and prudent. To capture the digital signature,
Allow the visitor to go through the whole agreement and sign it as shown in the screenshot above.
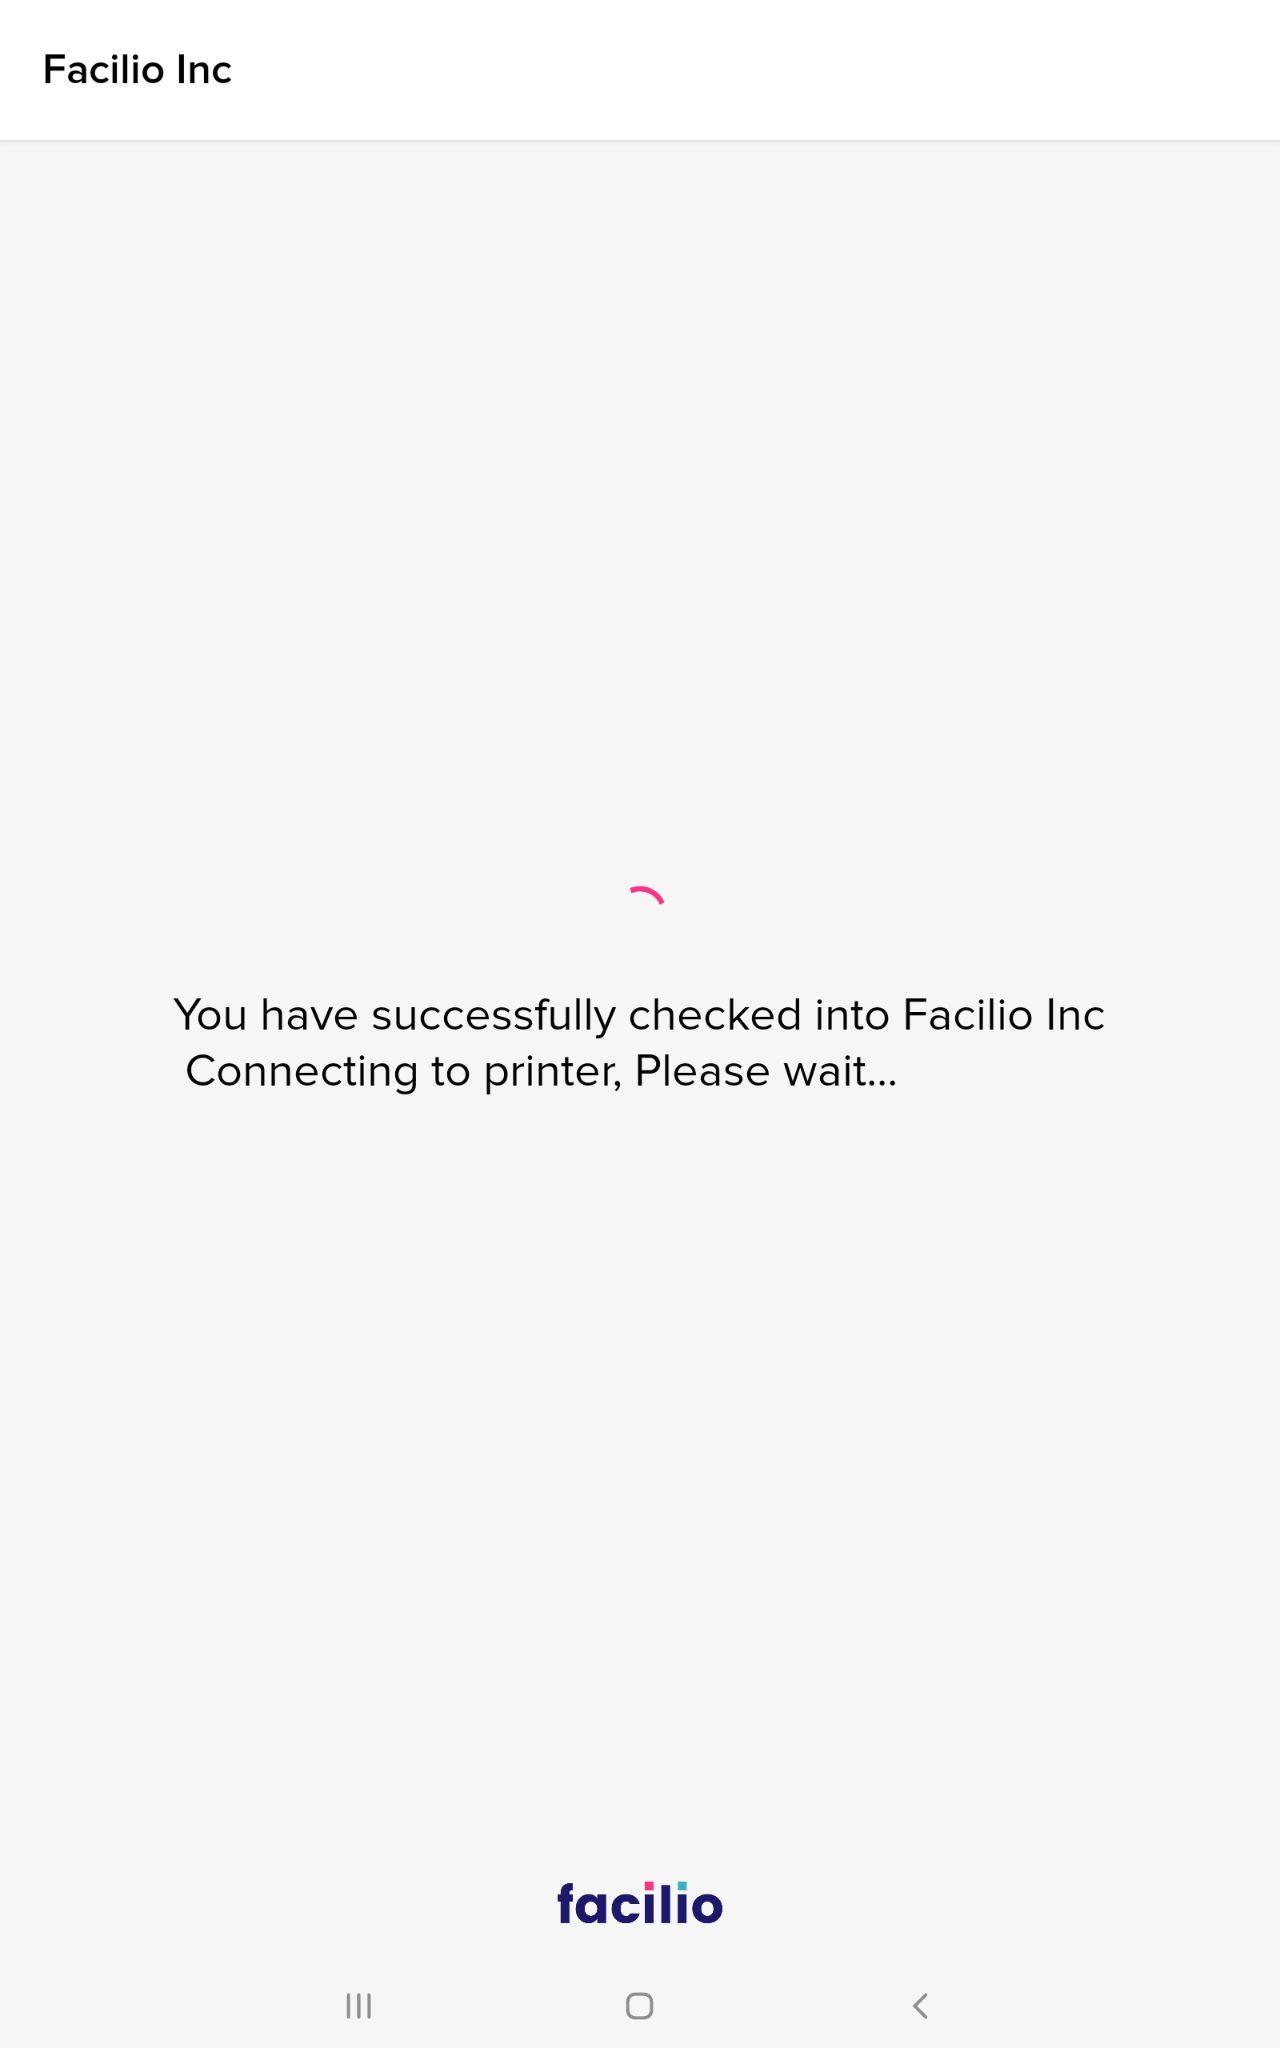
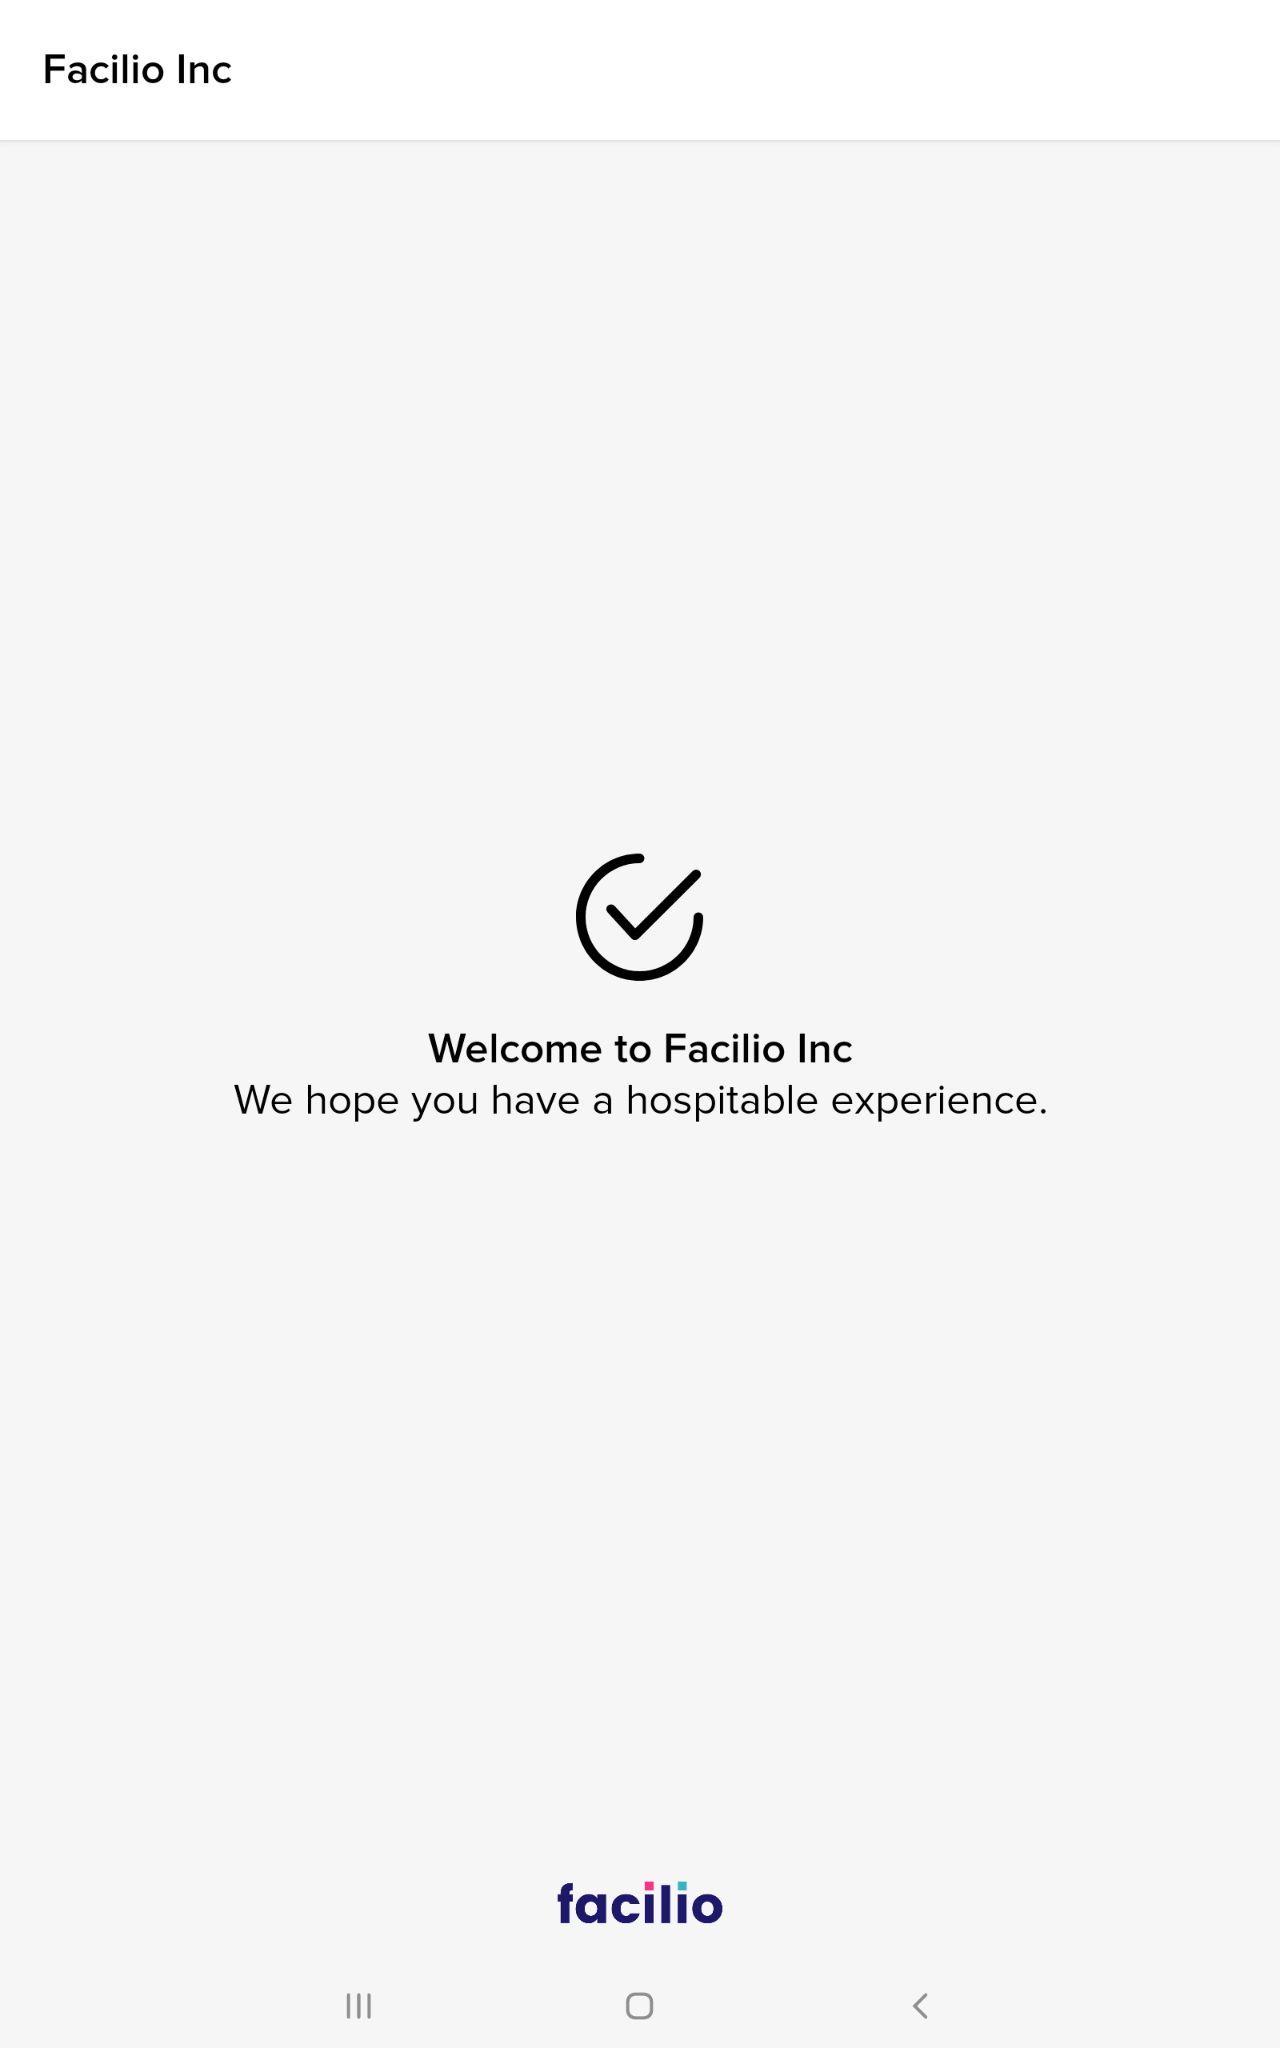
Click Proceed. The visitor badge is printed and the following message is displayed, confirming that the visitor is now successfully checked in to the facility.
Note : if the same visitor checks in to the facility again, his details are auto-populated upon entering the phone number. Hence, the mobile number acts as a unique identifier for every visitor.
Printing Visitor Badge
For identification purposes, all non-employees entering the premises must be given visitor badges. Similar to the employee ID card, issuing visitor badges are vital to make everyone feel comfortable and safe. Not only do they help distinguish one from another, but also they identify people who may have gained unauthorized access.
If the administrator has configured printer access for the application, the visitor badge can be printed after the visitor signs the NDA.
Illustrating Check-Out through Visitor Kiosk
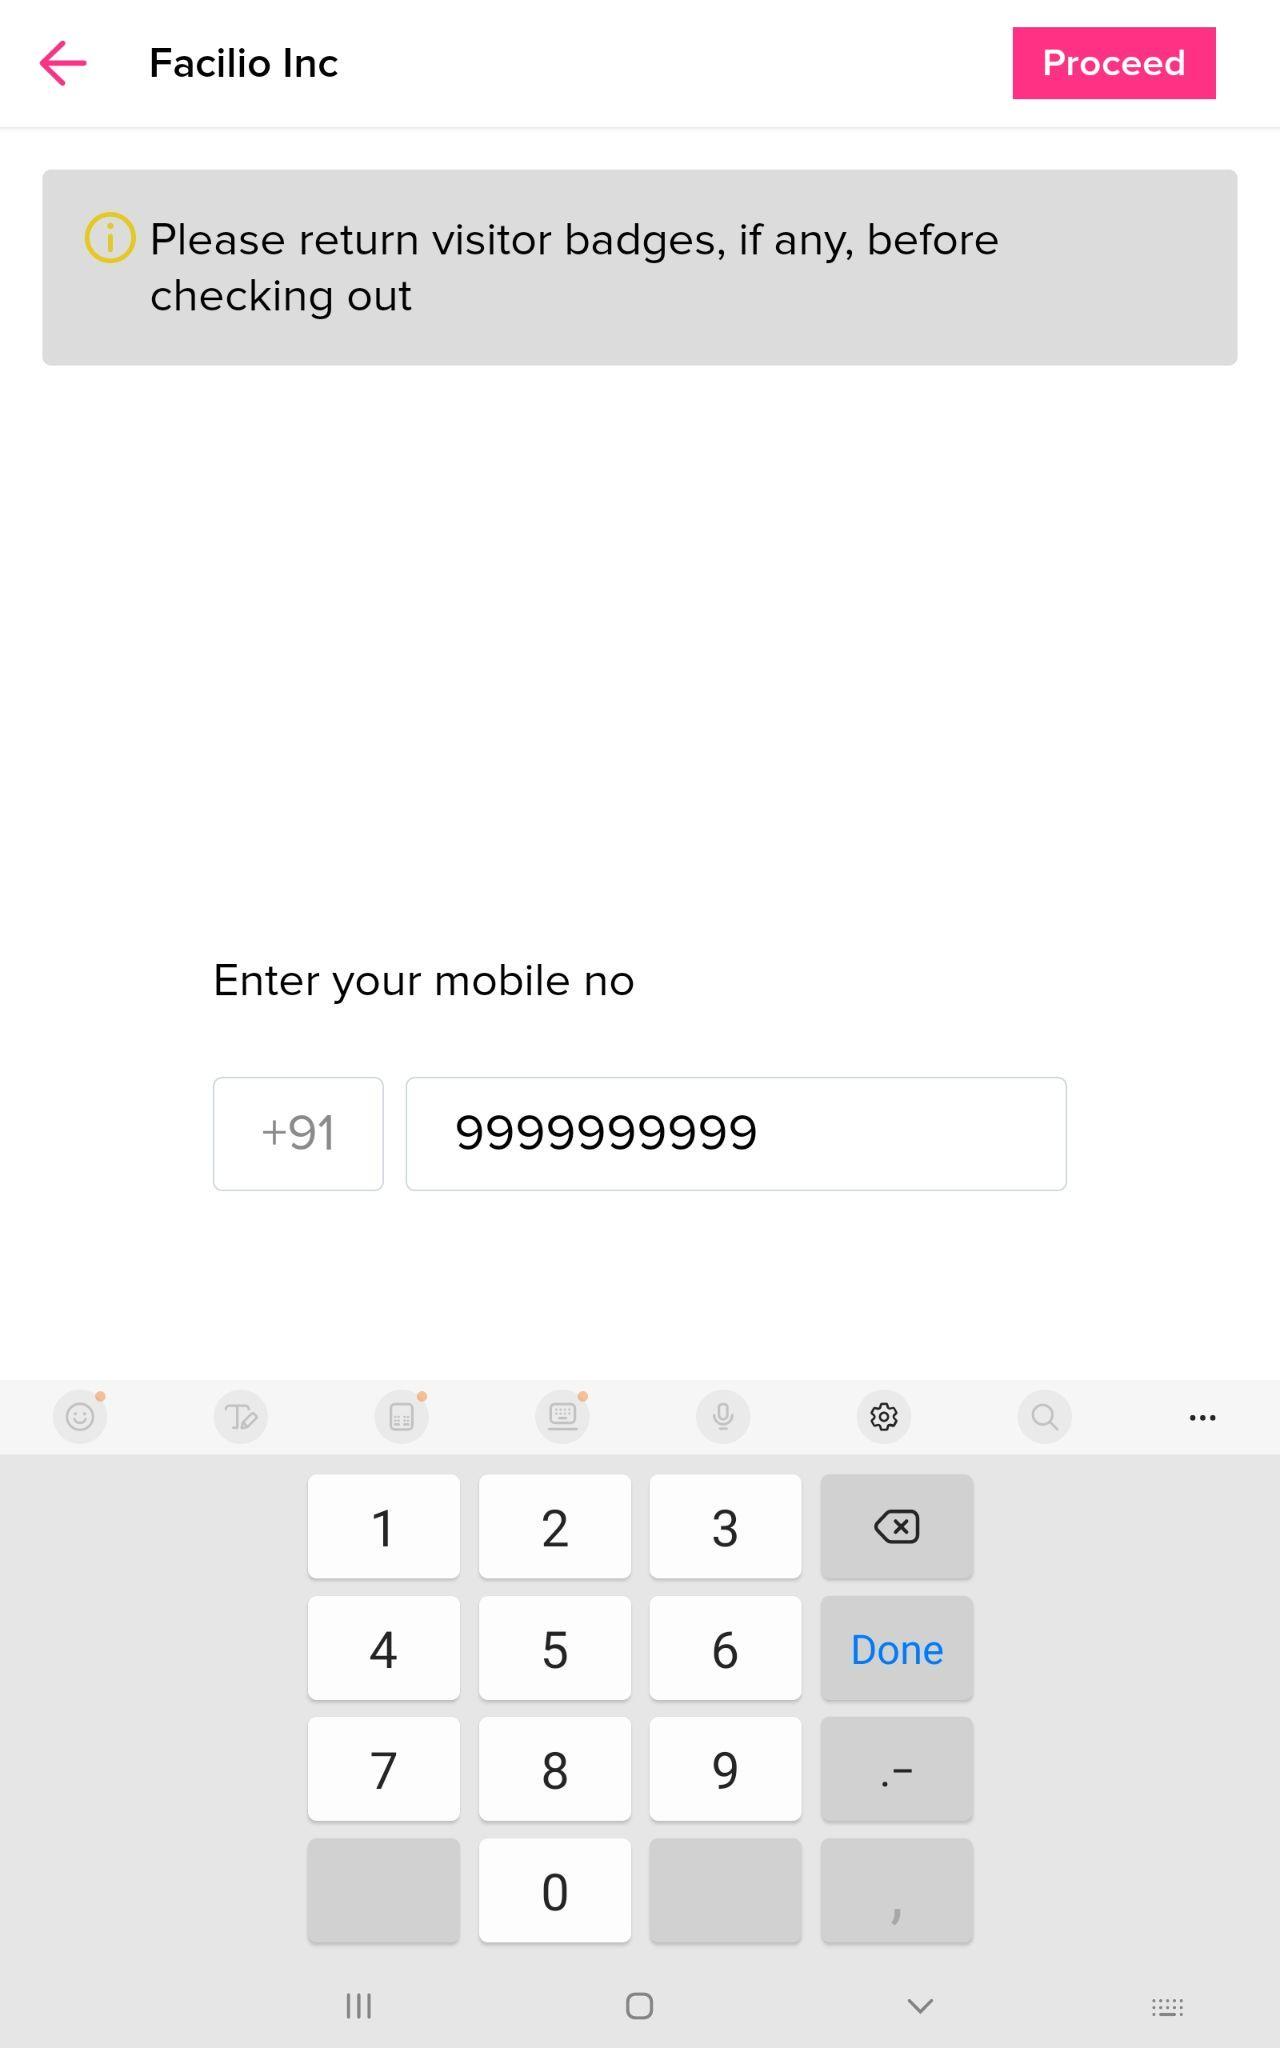
When a visitor wants to leave the facility, the security team must digitally check out the visitor from the facility. To check the visitor out,
Open the Visitor Kiosk application on the iPad or tablet and click CHECK-OUT.

The following screen appears prompting you to select an option to check out.
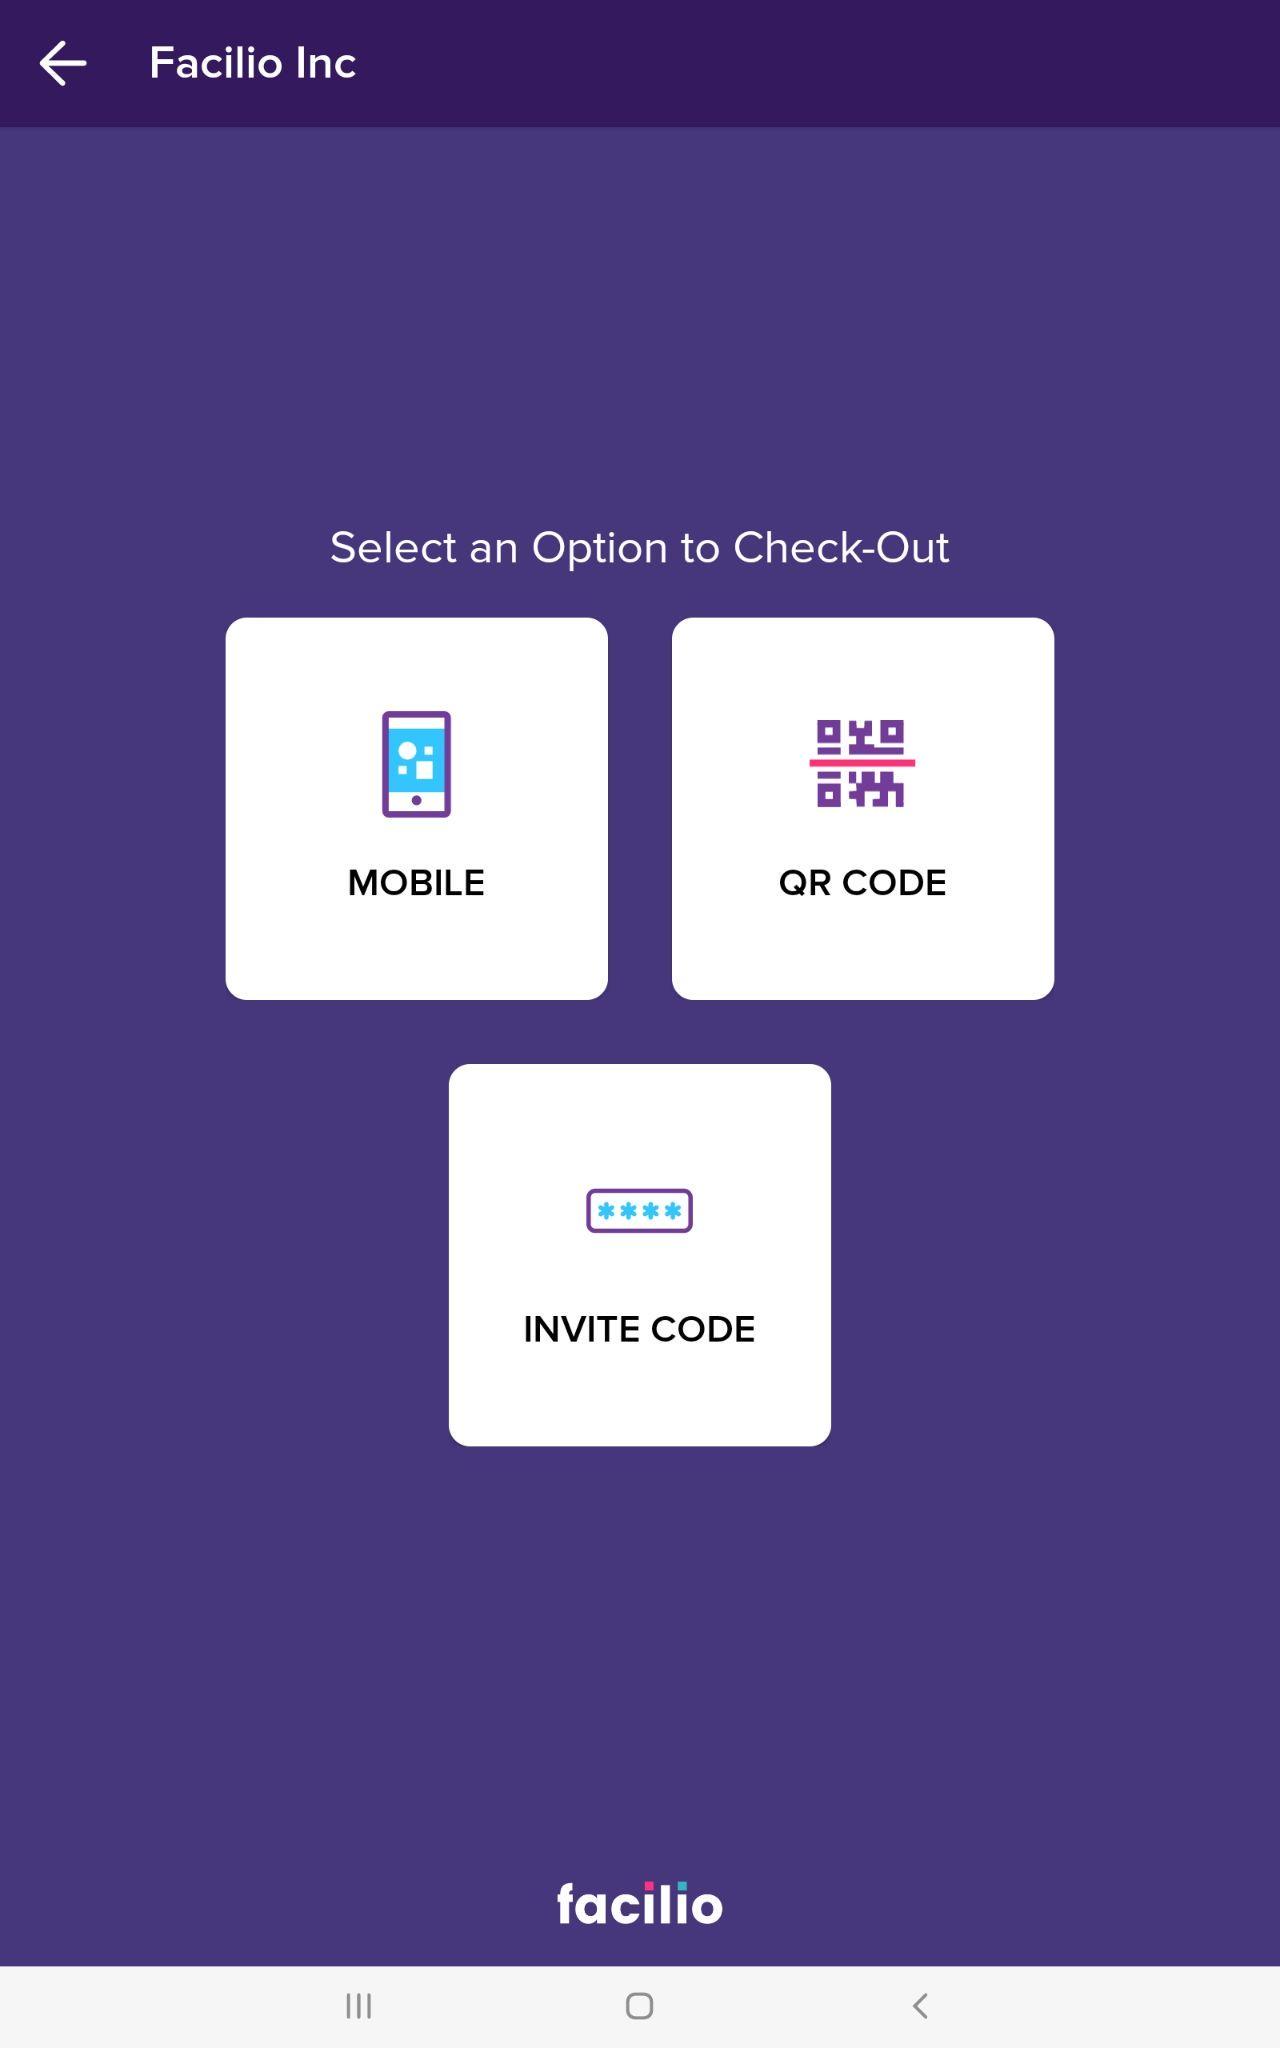
Select any of the following options:
- MOBILE - To check out the visitor using his contact number.
- QR CODE - To check out upon scanning the QR code in the invite.
- INVITE CODE - To check out using the invite code in the invite.
Note : If the visitor has an invite, you can use the QR CODE or INVITE CODE option to check out, as required. If not, you can select MOBILE to check out using the visitor's contact number.
Input the required details and click Proceed.
Example : If you select MOBILE, you should input the visitor's 10-digit mobile number and click Proceed as shown below.
The following message appears, confirming that the visitor has successfully checked out of the facility.
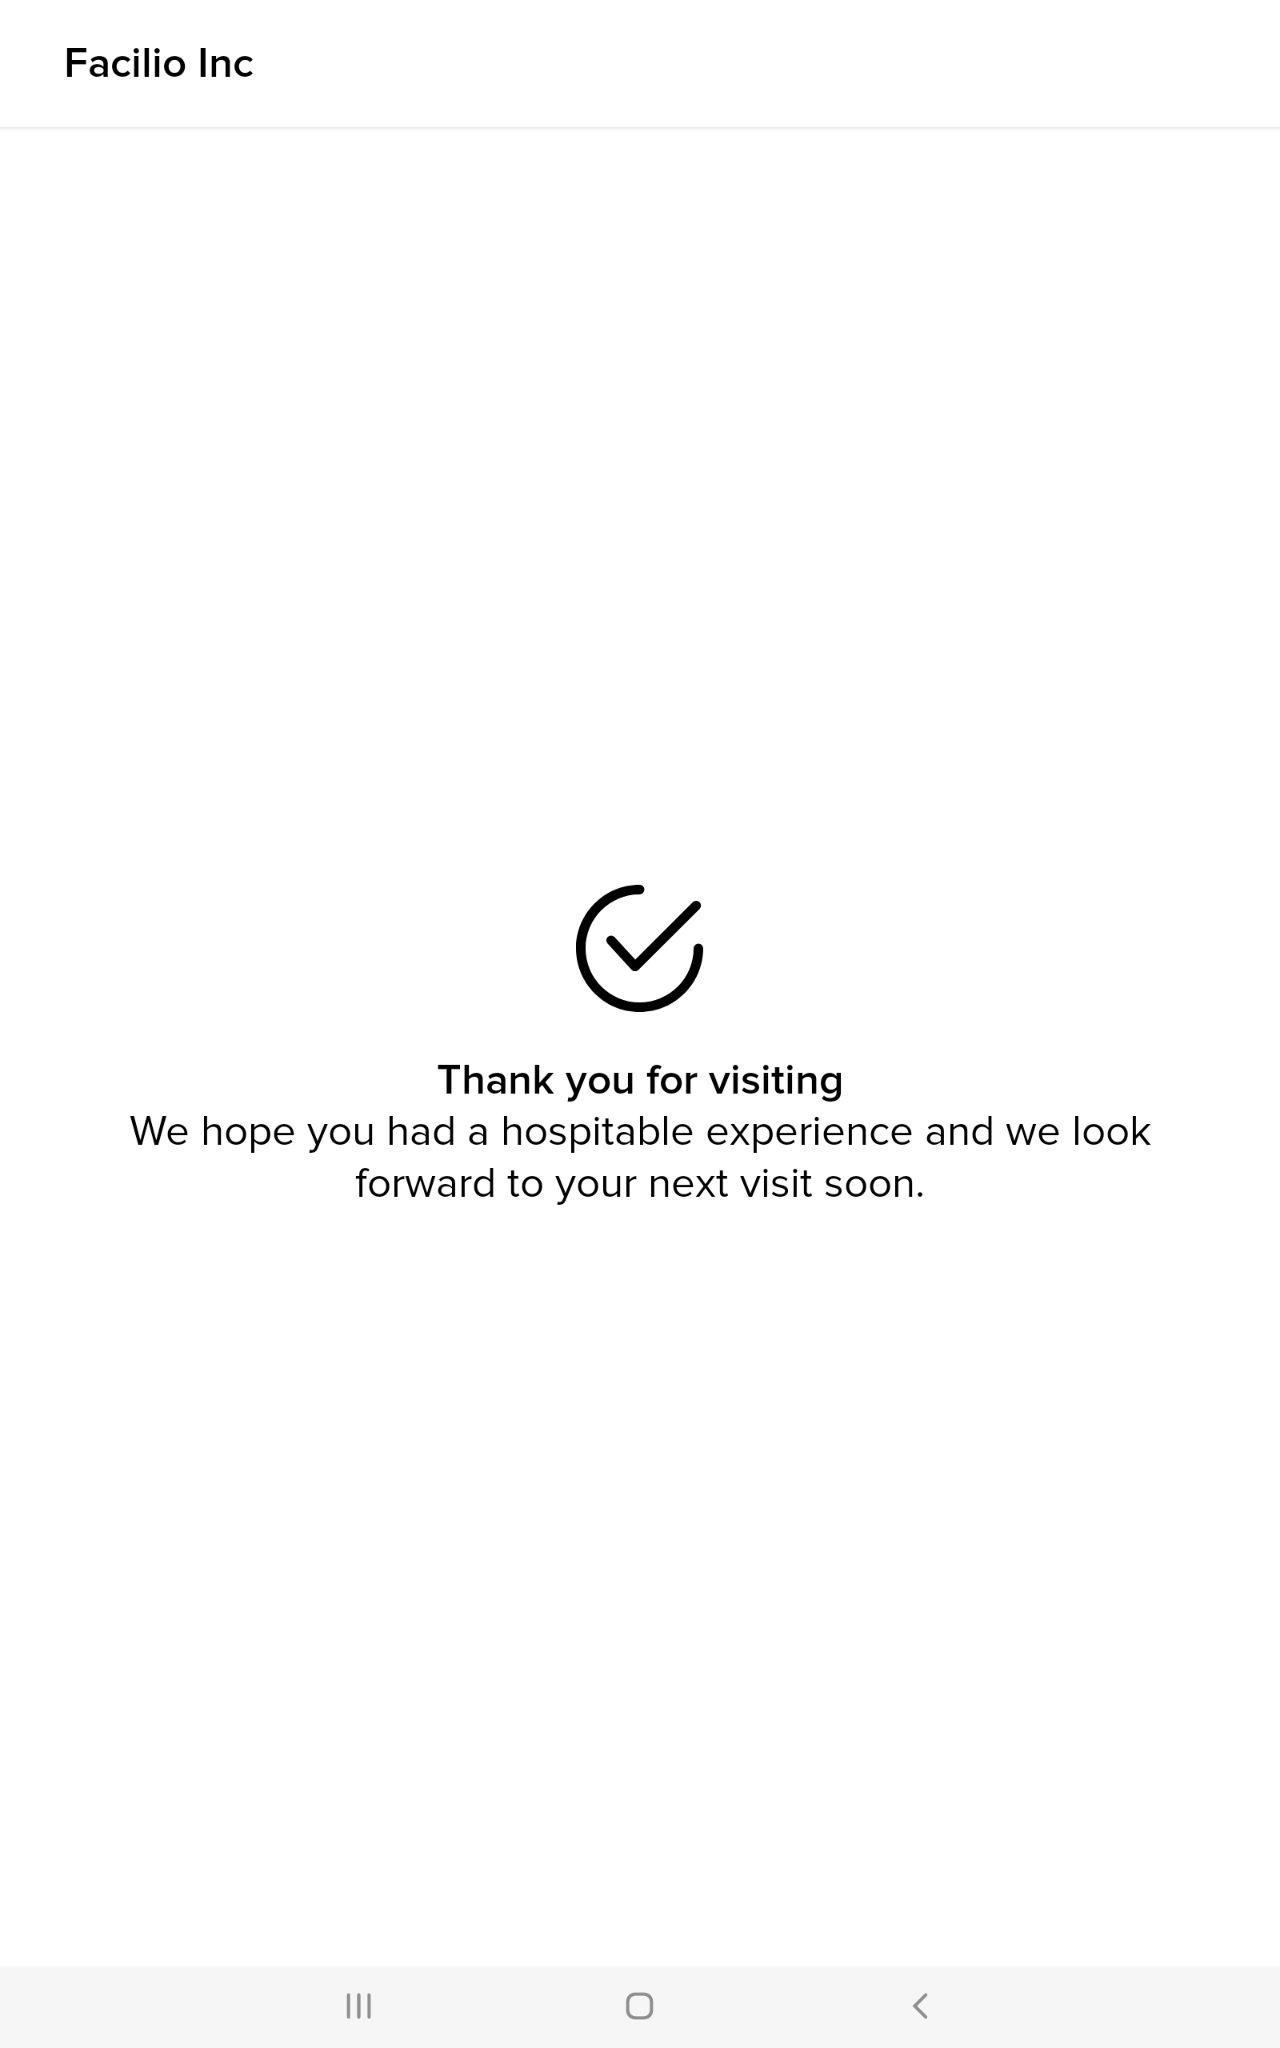
You must ensure to collect the visitor badge (if any) from the visitor before checking him out of the facility to prevent using it beyond the time the visitor is approved to be on-site.