Illustrating Visitor Management Aspects
The visitor management module is all about reducing the security and compliance risk associated with the outsiders visit, while providing a seamless experience for all the visitors, residents and the in-house security team from invitation to departure. To navigate to this module, click the  (Visitors) icon in the sidebar menu. All the visits are displayed by default, as shown in the screenshot below.
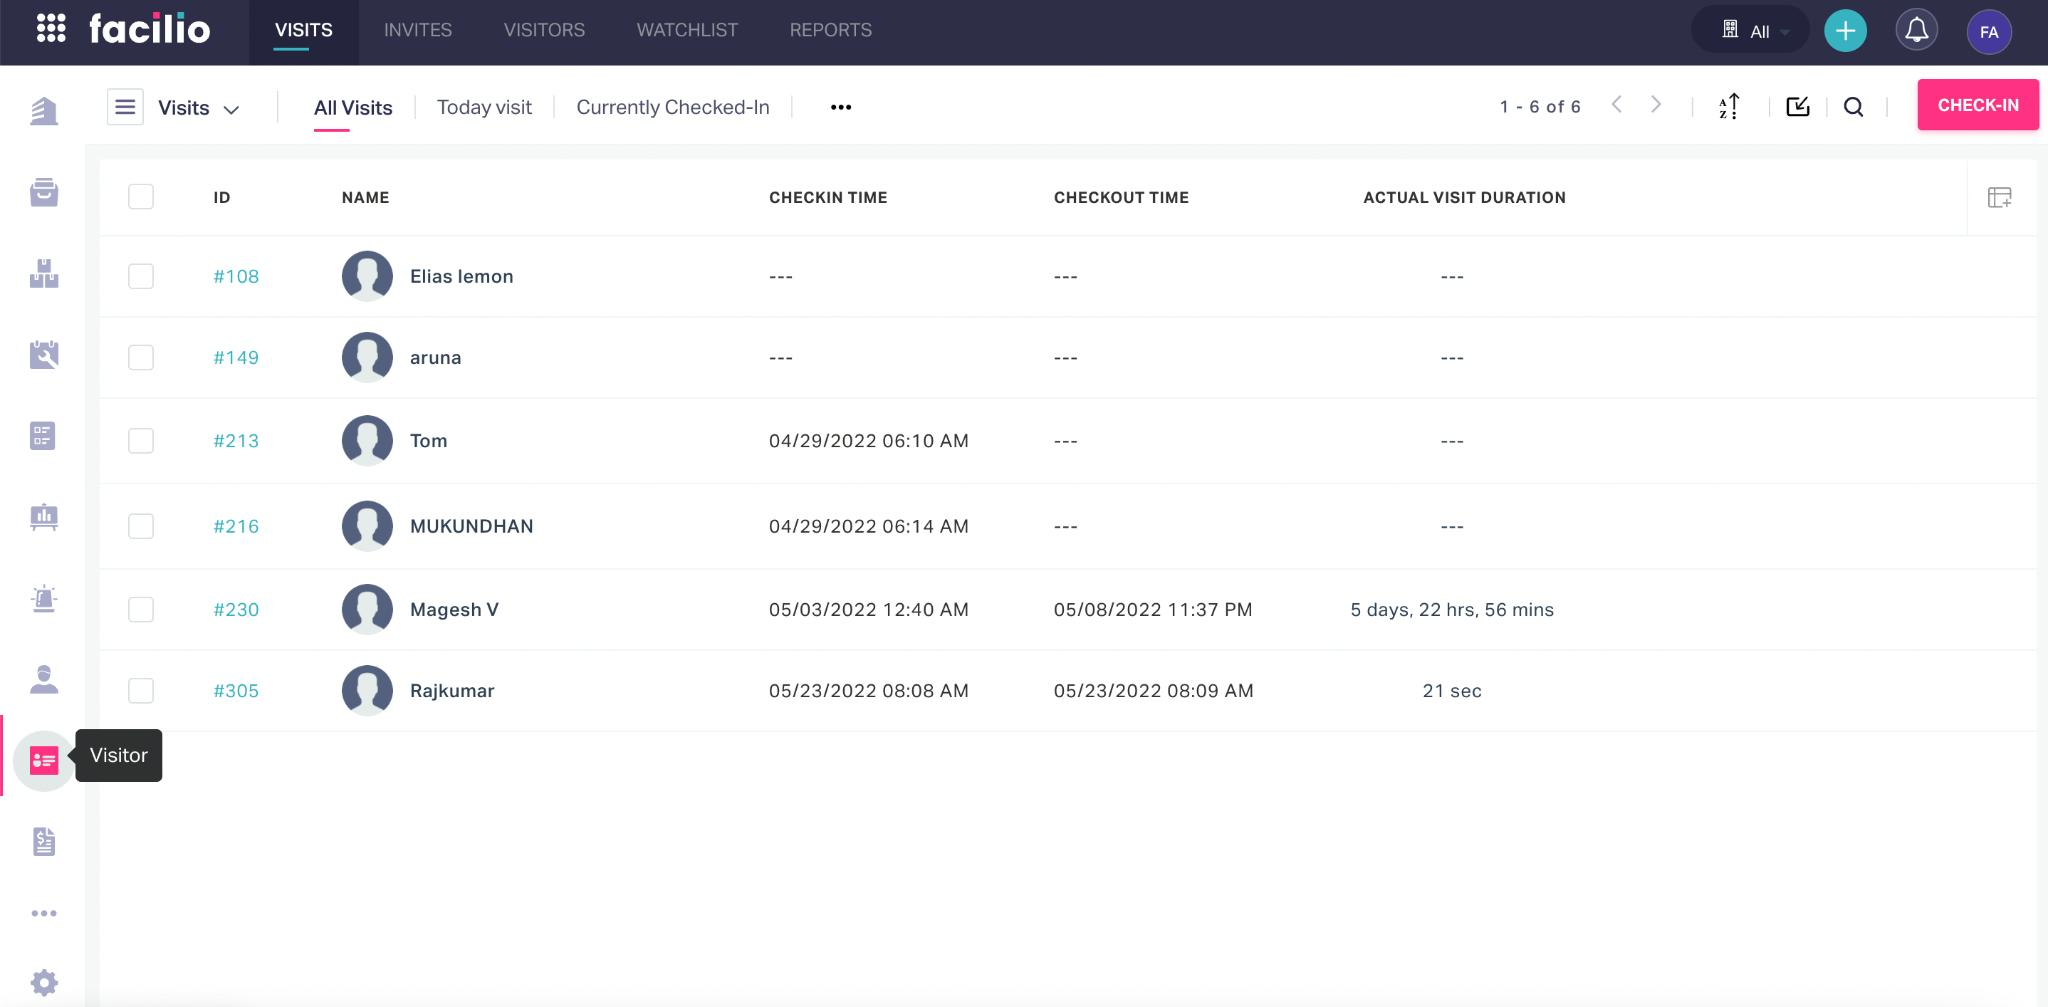
The upcoming sections explain how to manage the various aspects of visitor management.
Managing Visits
Every outsider entry into the facility is captured in the VISITS section of the application. The act of recording the visits helps to keep track of all the visitors who enter and leave the premises. The upcoming topics explain the check-in and check-out processes and other possible actions in this section.
Illustrating Check-In Process
When a visitor has arrived at the facility, the security team must take the visitor through the check-in process to authorize his entry into the premises. The various ways to authorize the check in are illustrated in the upcoming sections:
Direct Check-In
To record an outsider's visit directly,
Click CHECK-IN at the top right of the VISITS section. You will be prompted to choose the visitor type (For example, guest or vendor).
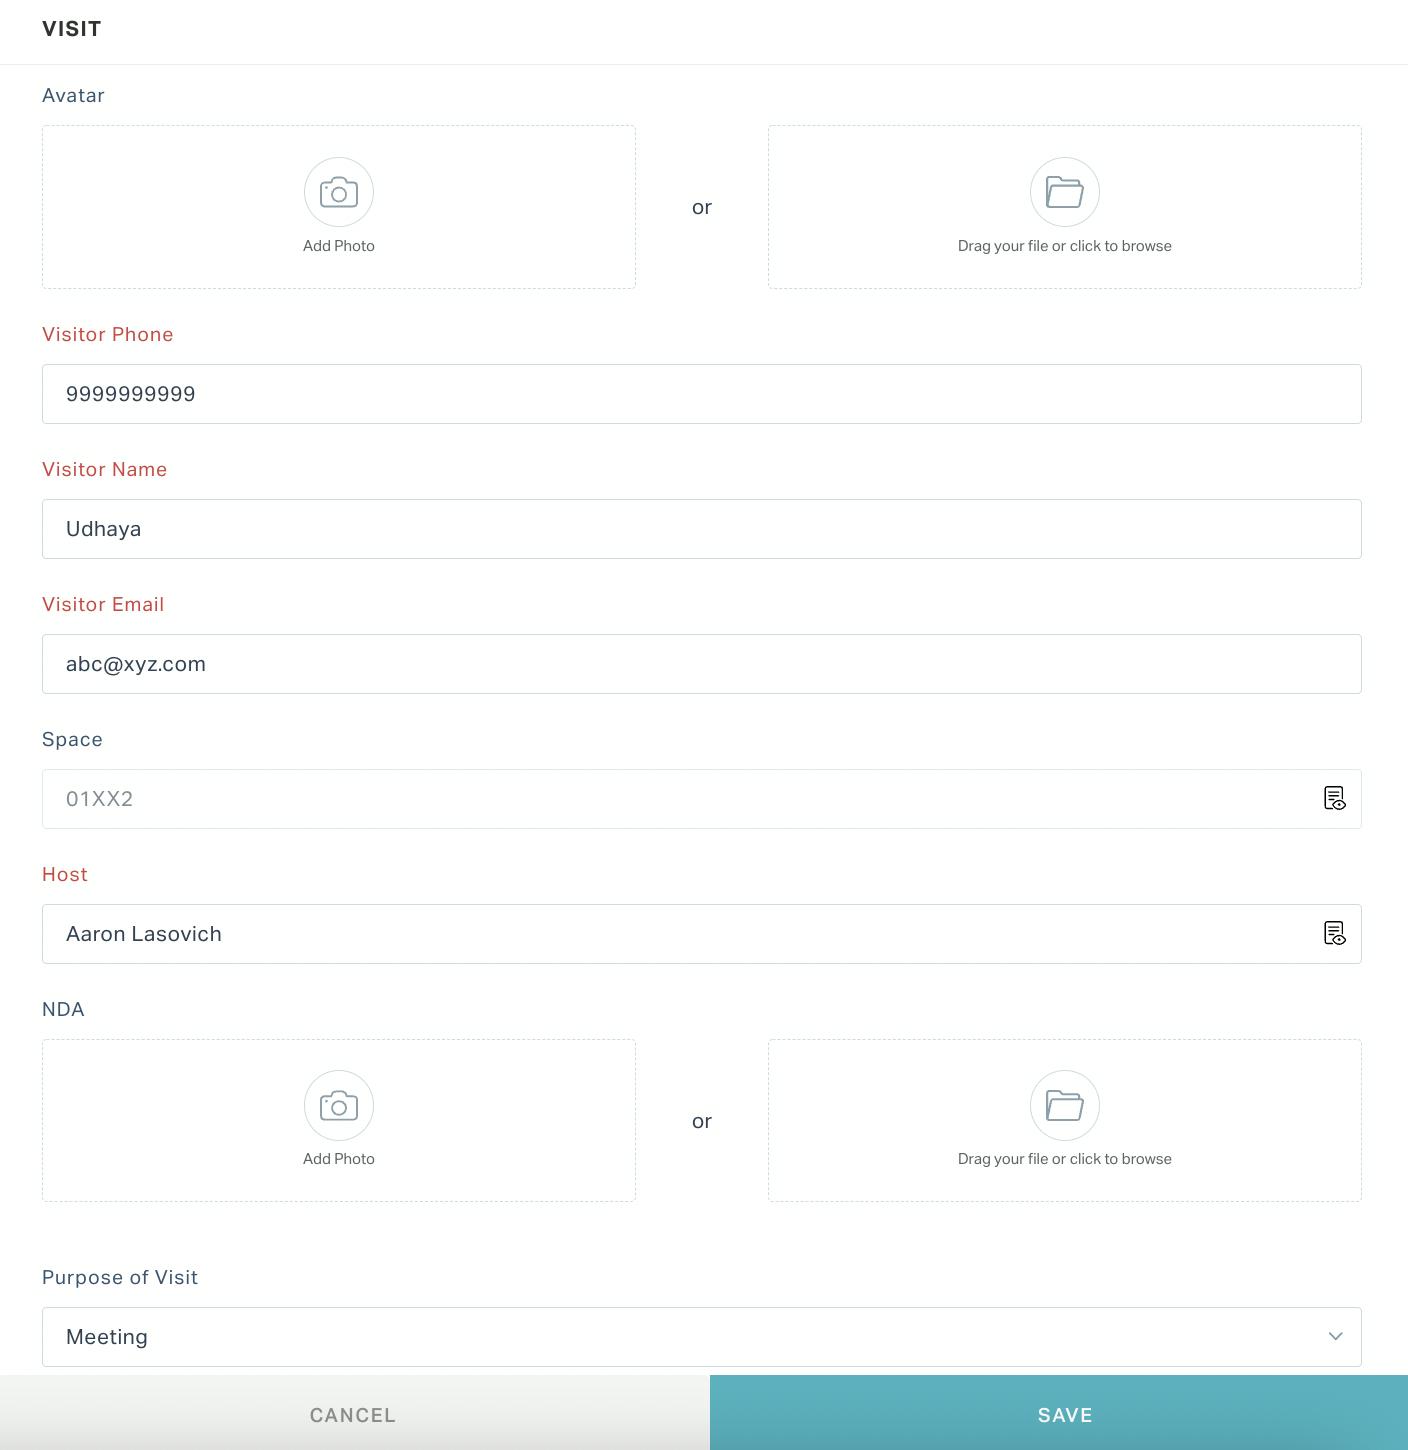
Select the type of visitor. The VISITS screen appears as shown below, where you can enter the details of the visitor and the visit.
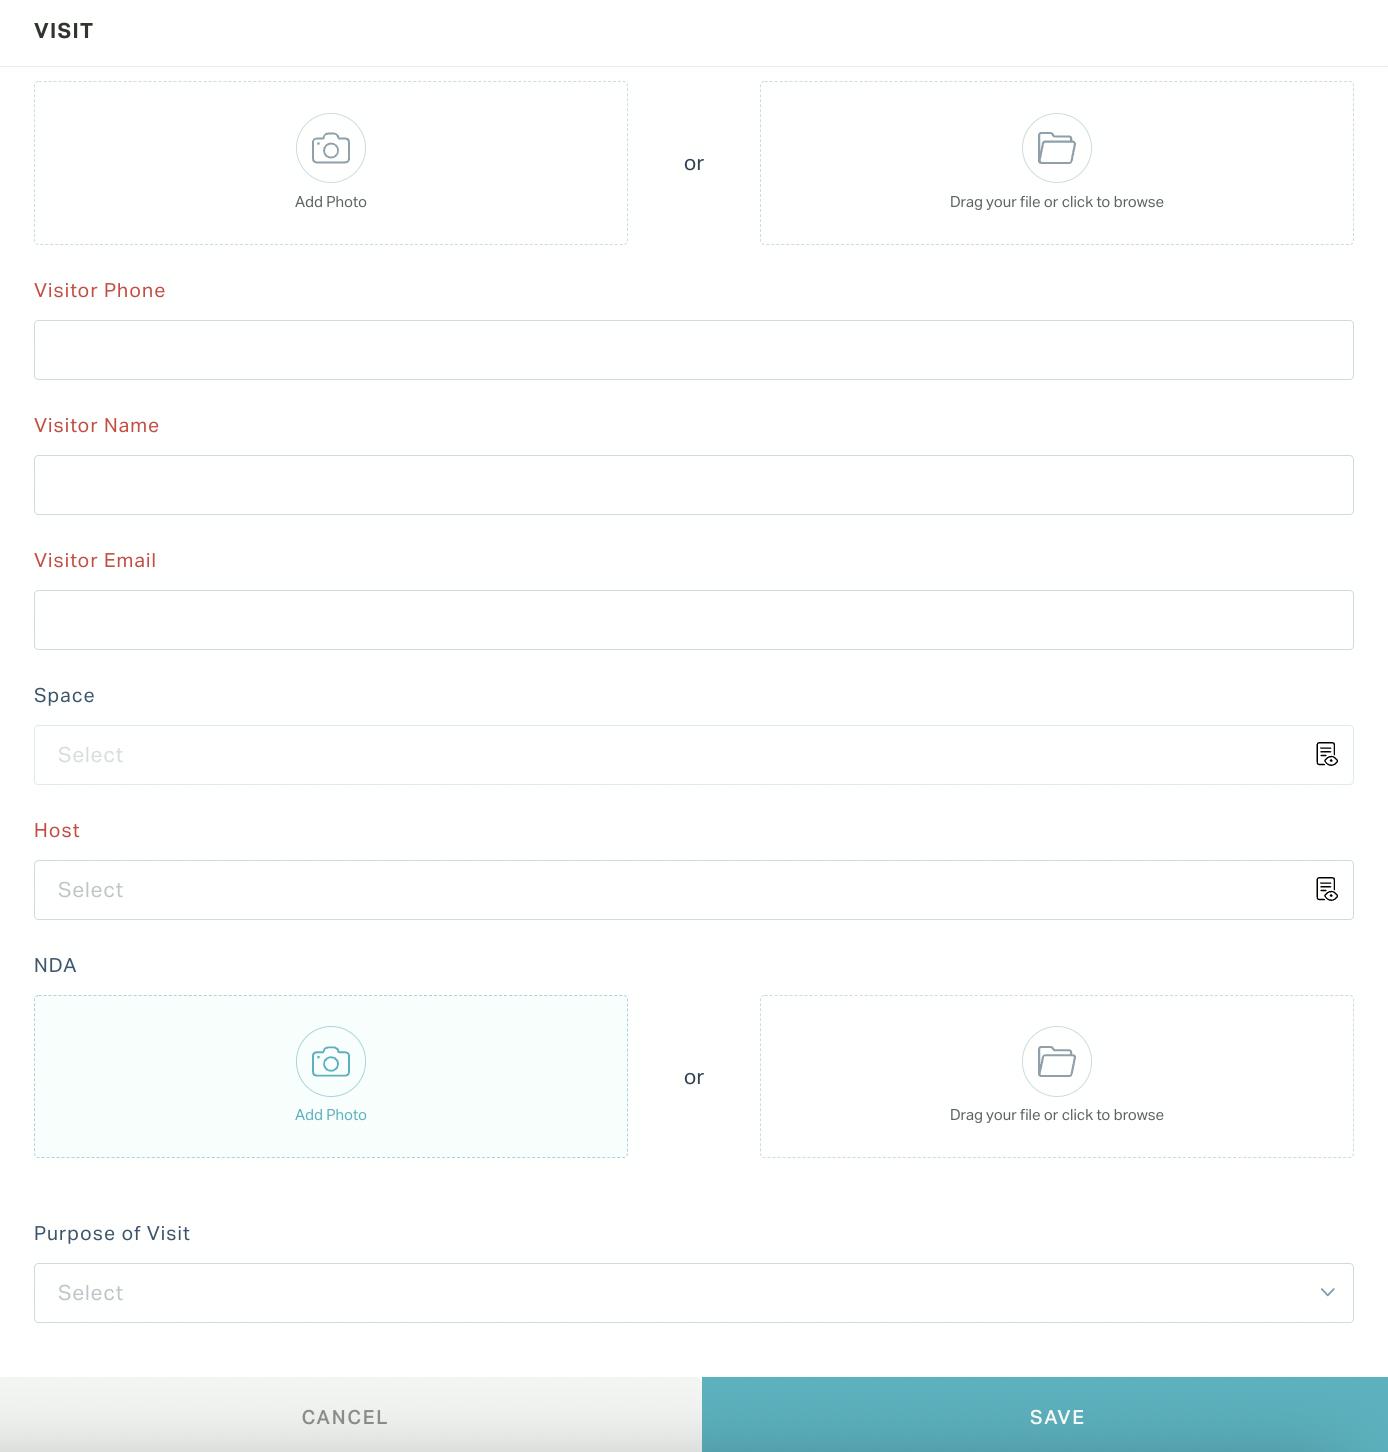
Update the following fields in this screen:
Photo - You can either capture a live picture of the visitor or upload an image file from the device.
Visitor Phone - The mobile number of the visitor.
Note : In general, the mobile number acts as the unique identifier for the visitor. That is, if the visitor checks-in to the facility in the future, his/her details will be auto-populated upon entering the phone number.
Visitor Name - The name of the visitor
Visitor Email - The email address of the visitor
Space - The space which the visitor likes to visit
Host - The resident whom the visitor wants to meet
NDA - The signed copy of the Non-Disclosure Agreement
Purpose of Visit - The reason why the visitor wants to enter the facility
Click SAVE. The visitor is now successfully checked-in to the facility.
Check-In Using Visitor Code
Alternatively, If the visit is already scheduled and the visitor has an active invite code, the security personnel should perform the following steps to authorize the entry:
Click CHECK-IN at the top right of the VISITS section. The CHOOSE VISITOR TYPE dialog appears as shown below.
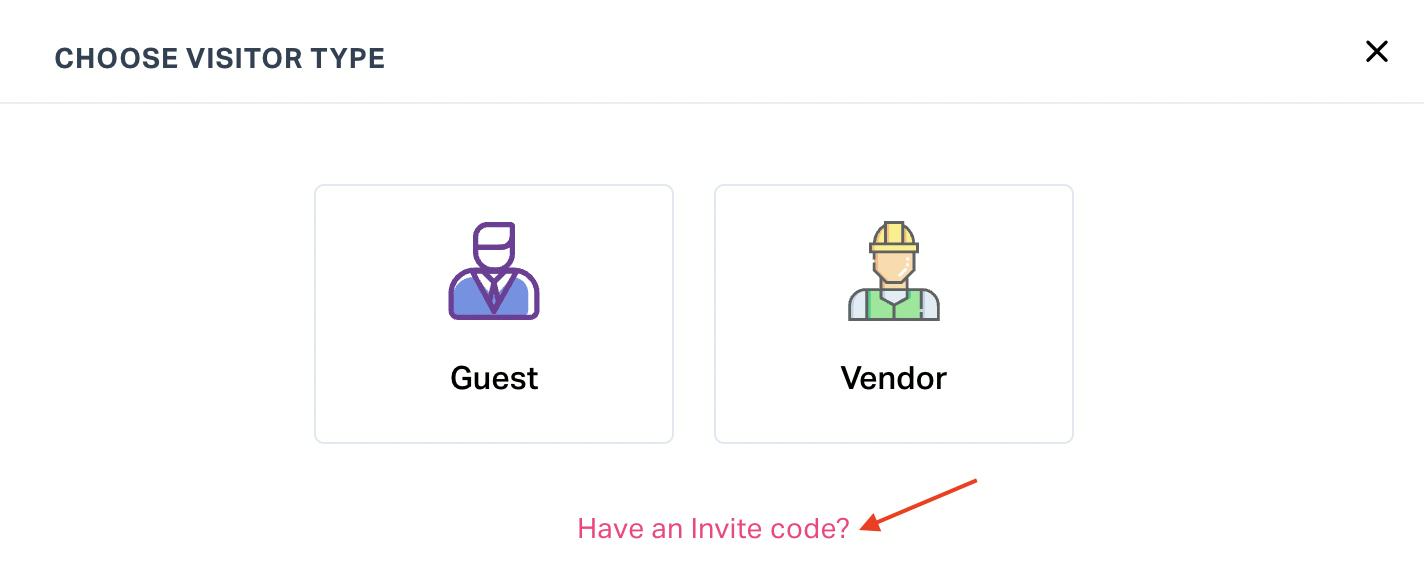
Click the Have an Invite Code link. The ENTER INVITE CODE window appears as shown below.
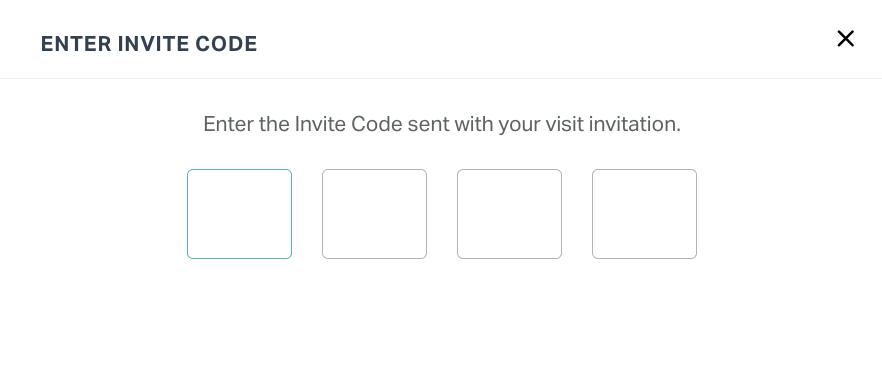
Enter the invite code. It then redirects to the VISIT screen, where the details of the visitor and the visit are auto-filled.
- Click SAVE. The visitor is now successfully checked-in to the facility.
Check-In Using QR Code
If the visitor has a QR code, the entry can be authorized upon scanning it using the Visitor Kiosk configured in an iPad or Android tablet. Read the Illustrating Check-In through Visitor Kiosk section for more information.
Check-In Through Invite
Also, the security personnel can simply retrieve the invite from the relevant view (For example, All Invites or Today's Invites) in the INVITES section and click CHECK IN against it, to authorize the visit.

Read the Managing Invites section for details on working with invites.
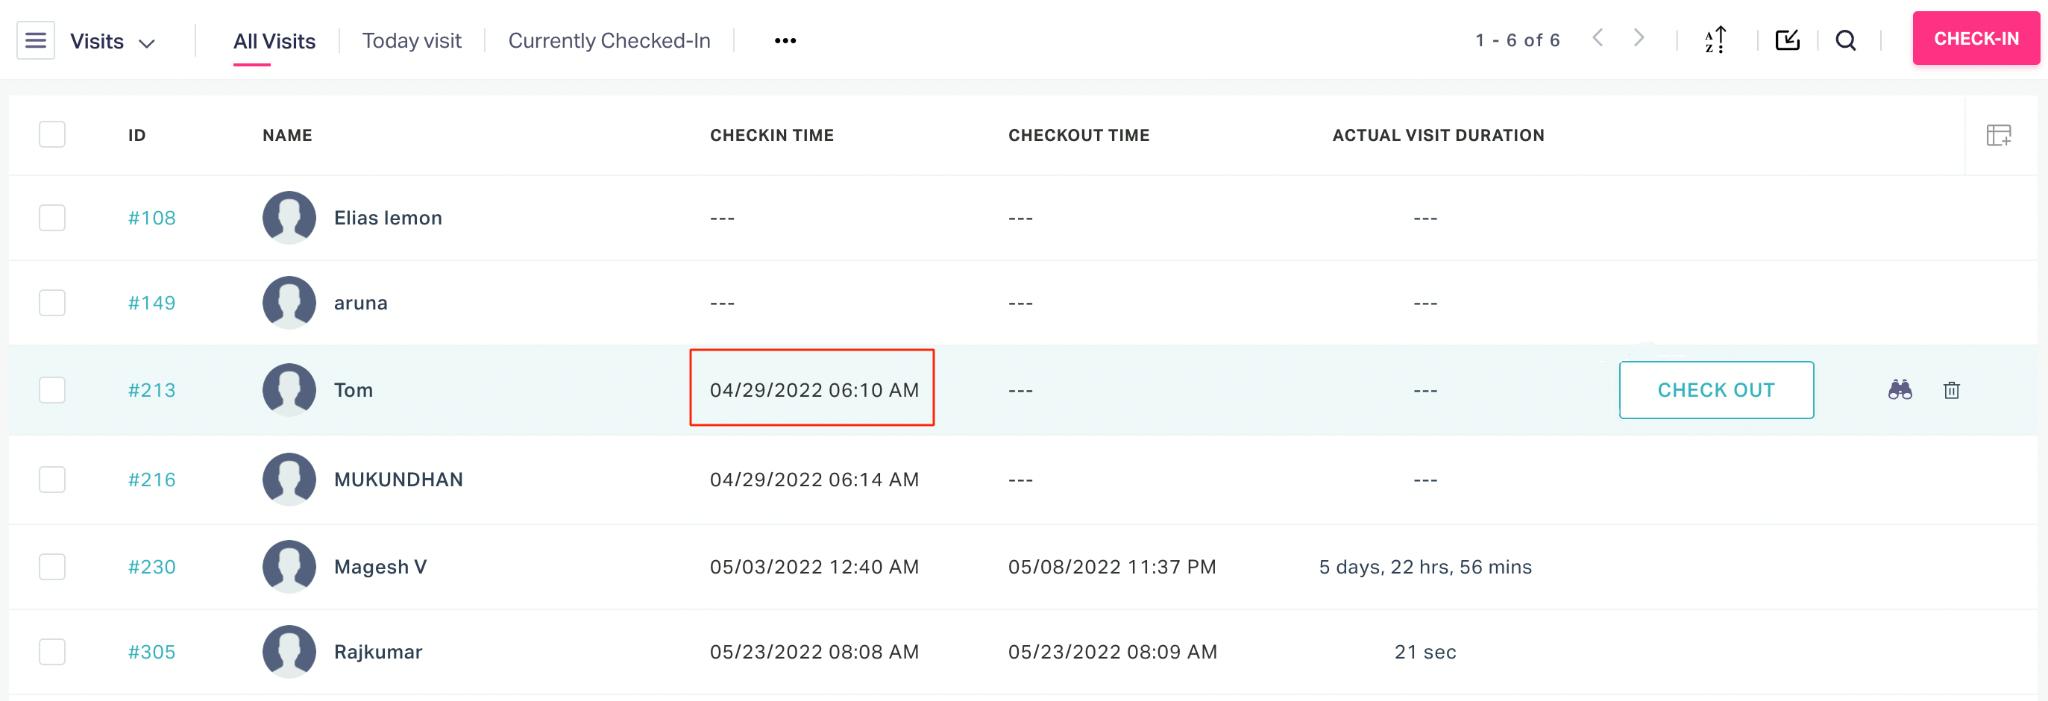
Once the visitor has successfully checked in to the facility, the check-in time is updated in the visit as shown below.
Note : During the check-in process, It is mandatory to update the valid phone number, name and email address of the visitor, as a new record will be created in the VISITORS section with the details provided in this screen. Read the Managing Visitors section for more information.
Illustrating Check-Out Process
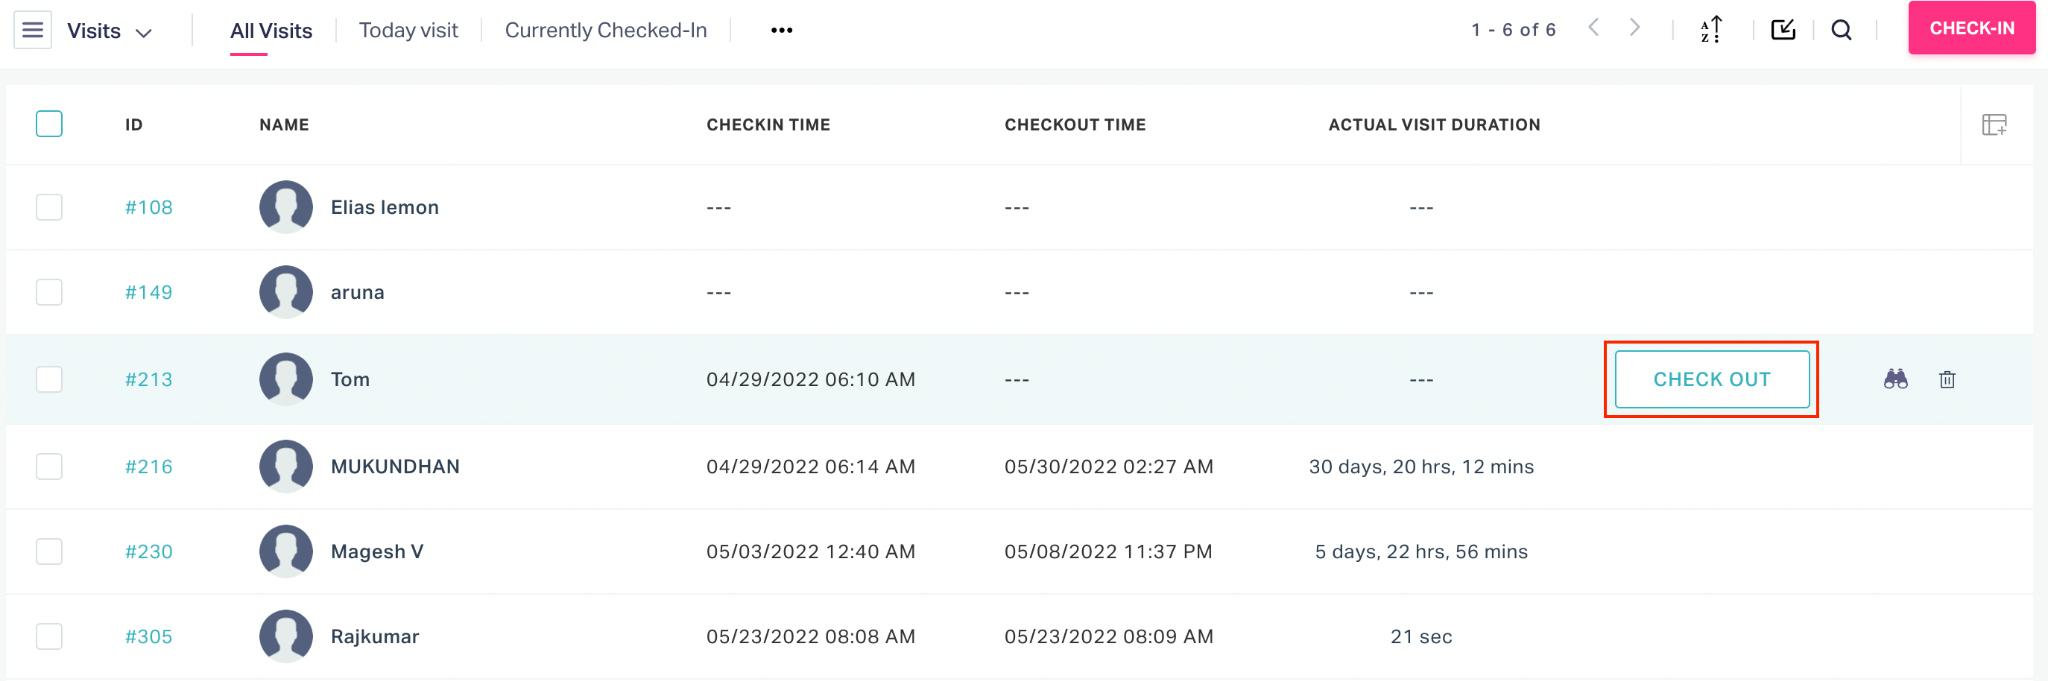
When the visitor leaves the facility, the security personnel can simply click CHECK OUT against the visit as shown below.
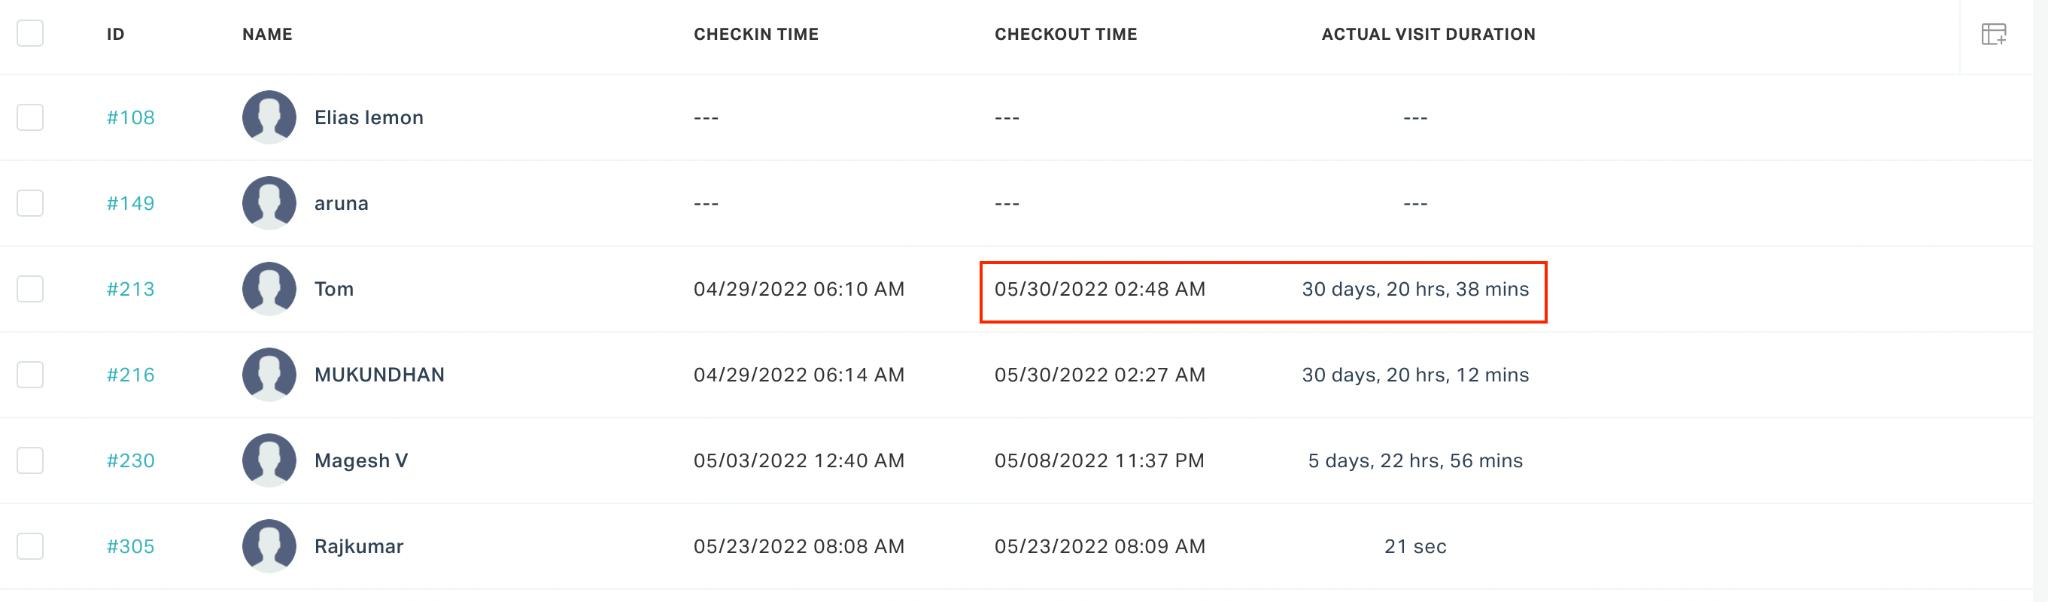
Alternatively, the CHECKOUT button in the visit details window can also be used to check out of the facility. Once the visitor has checked out, the check out time and the visit duration is updated in the record as shown below.
Note : In case the administrator has configured automatic check-out, the visitor will be considered checked out at the specified time and the check-out details will be automatically updated in the visit.
Illustrating Other Actions
There are certain functionalities associated with this section that facilitate various other activities across the module.

When a record is selected in this section, the following options appear in the dashboard header:
MARK AS VIP - To add the selected visitor to the watchlist as a VIP
MARK AS BLOCKED - To add the selected visitor to the watchlist as a blocked visitor
PRINT BADGE - To generate a badge with the details of the visitor. A sample visitor badge is shown in the screenshot below.
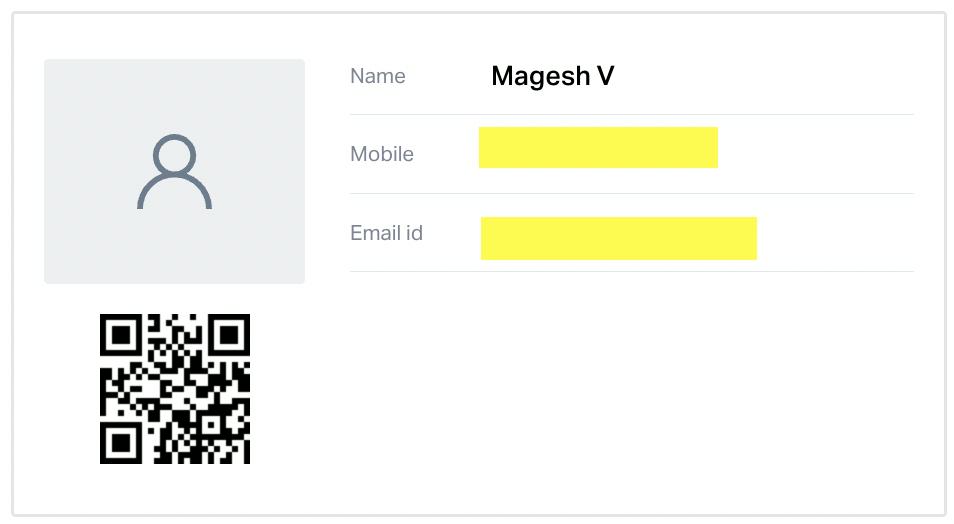
This badge can be printed and handed over to the visitor, which may be used as a temporary ID within the premises.
Note : This badge must be collected back from the visitor, when he/she leaves the facility.
The ![]() and
and ![]() icons corresponding to a visit are used to view the details of the visit and delete it, respectively.
icons corresponding to a visit are used to view the details of the visit and delete it, respectively.
Managing Invites
When a resident is expecting a guest or any outsider to visit the facility, he can send an invite to the visitor using the application to ease the check-in process. The invite has a QR code or invite code that is verified by the security team at the facility entrance to authorize the entry. To create an invite,
Navigate to the INVITES section and click NEW INVITE.
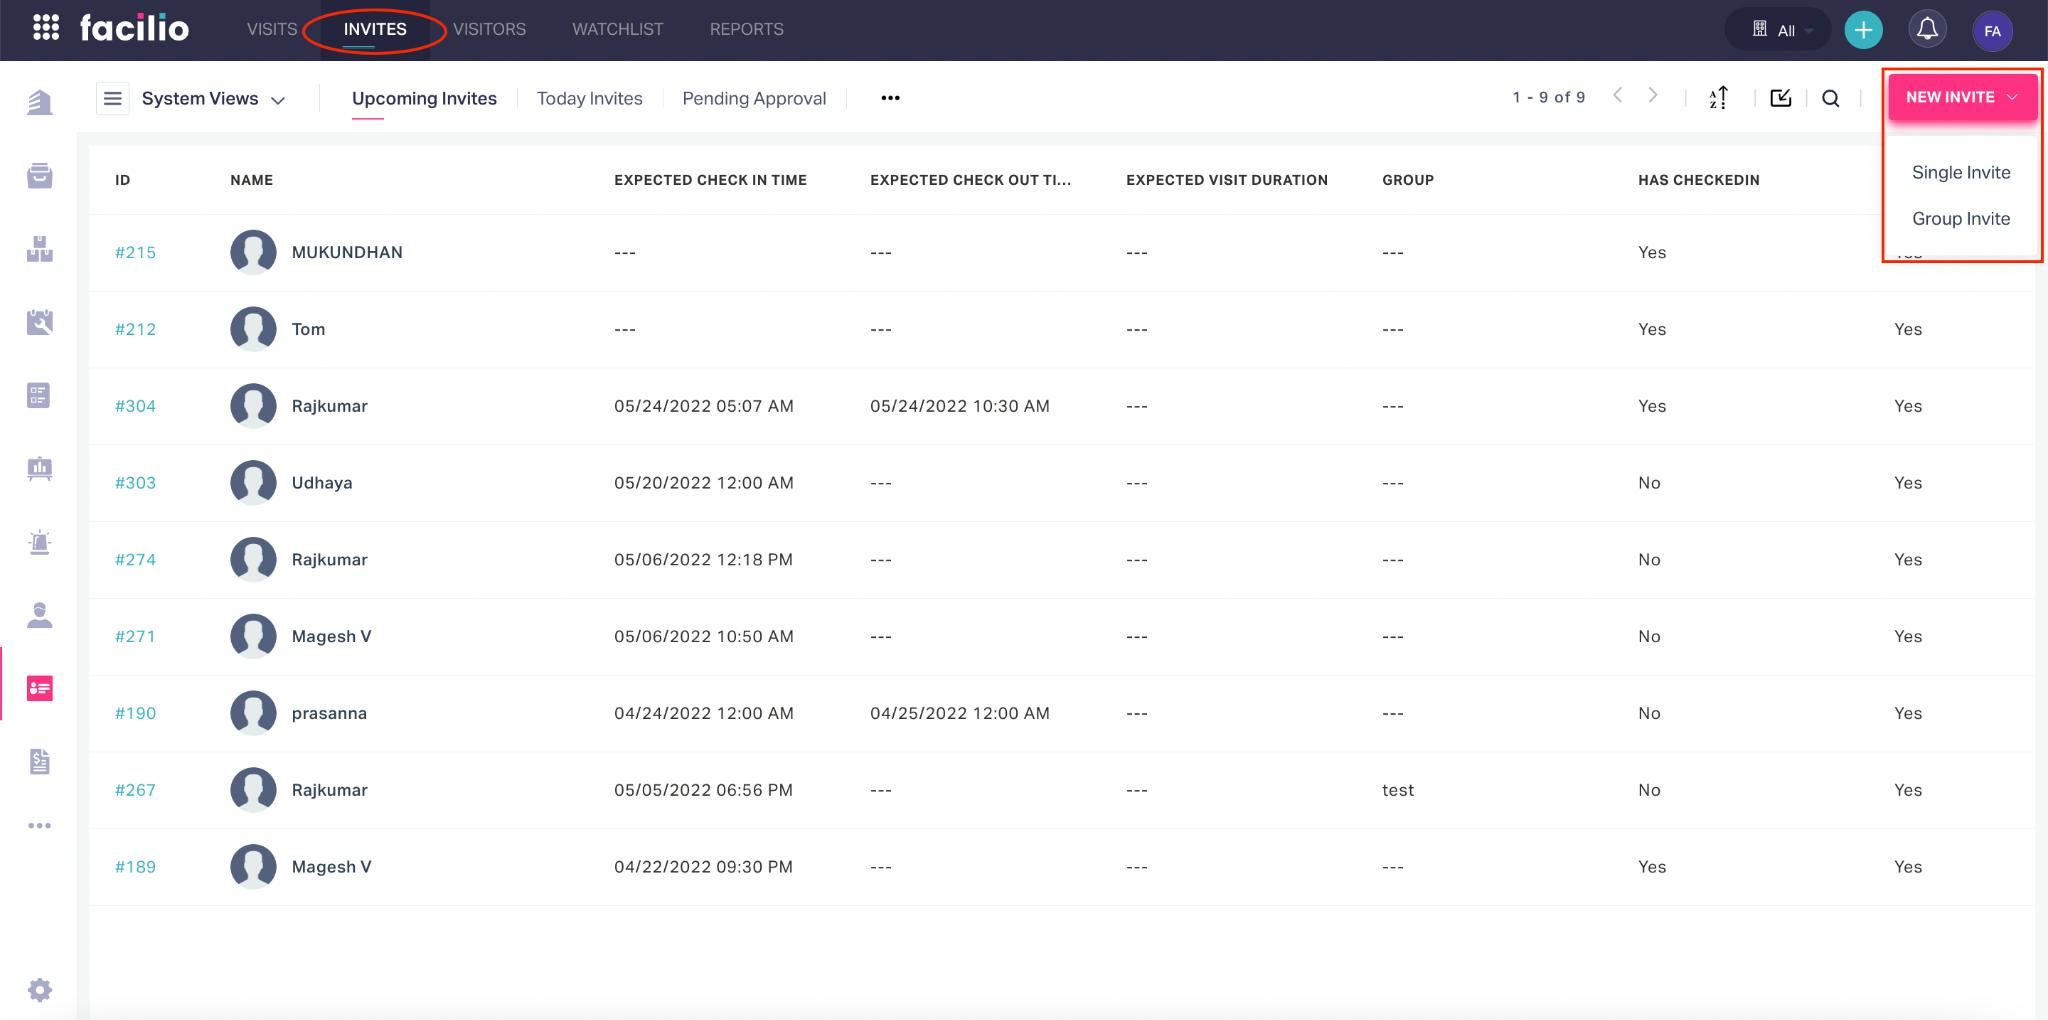
Select any one of the following options:
Single Invite
To send the invite to a single person. For example, inviting somebody for a personal meet up.
Group Invite
To send an invite to a group of members (for example, inviting a set of people for a conference or business meeting).
Note : Group invite is a flexible feature that allows you to invite multiple visitors belonging to the same visitor type through a single invite and send it across once, rather than creating numerous invites for one meeting. You can include a maximum of 25 members in a group invite.
Although a single invite is forwarded to multiple visitors, every visitor included in the invite must check in to the facility individually.
The CHOOSE VISITOR TYPE screen appears as shown below.
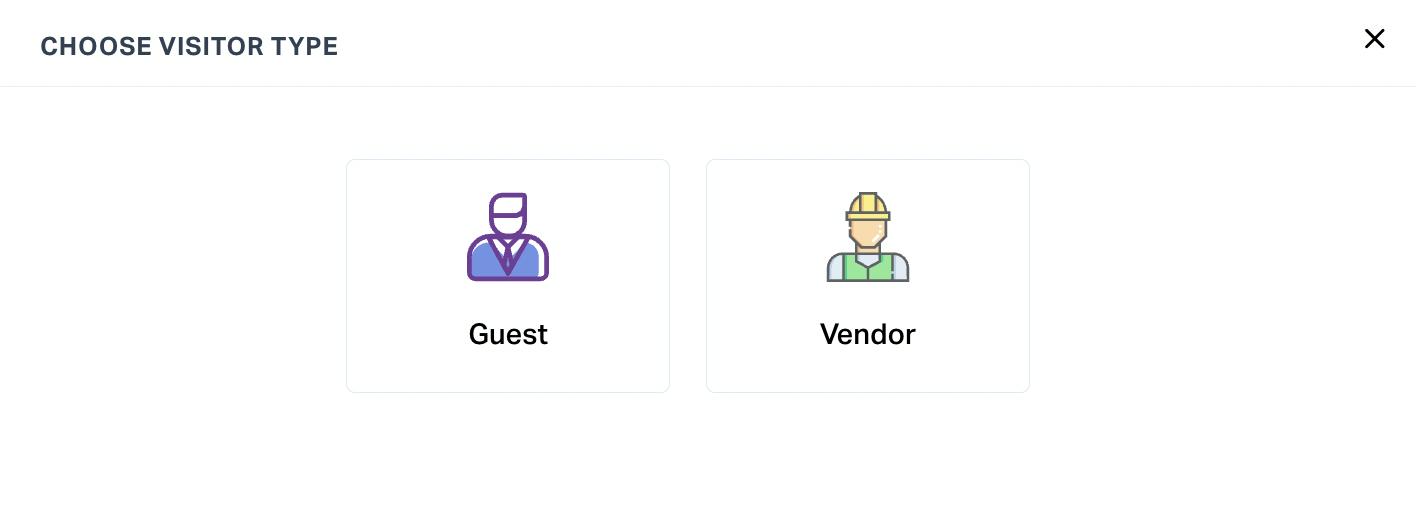
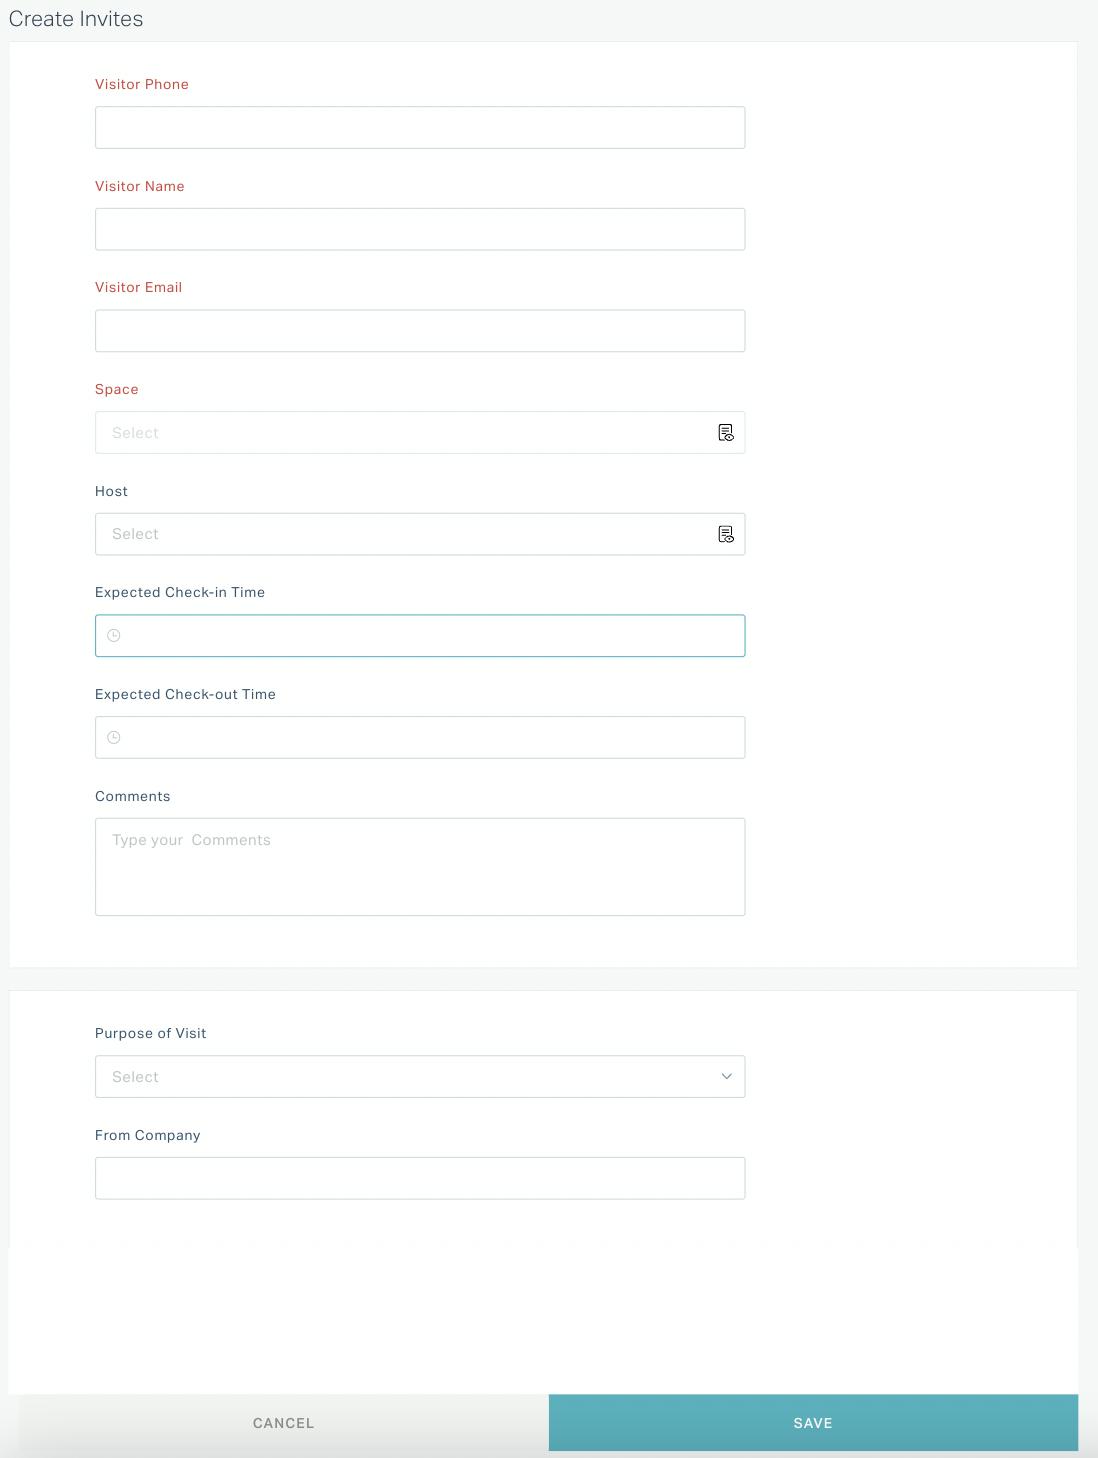
Select the type of visitor. The Create Invites screen appears as shown below. The screen that appears, varies with respect to the invite type (that is, single or group invite) selected.
Single Invite Configuration
Group Invite Configuration
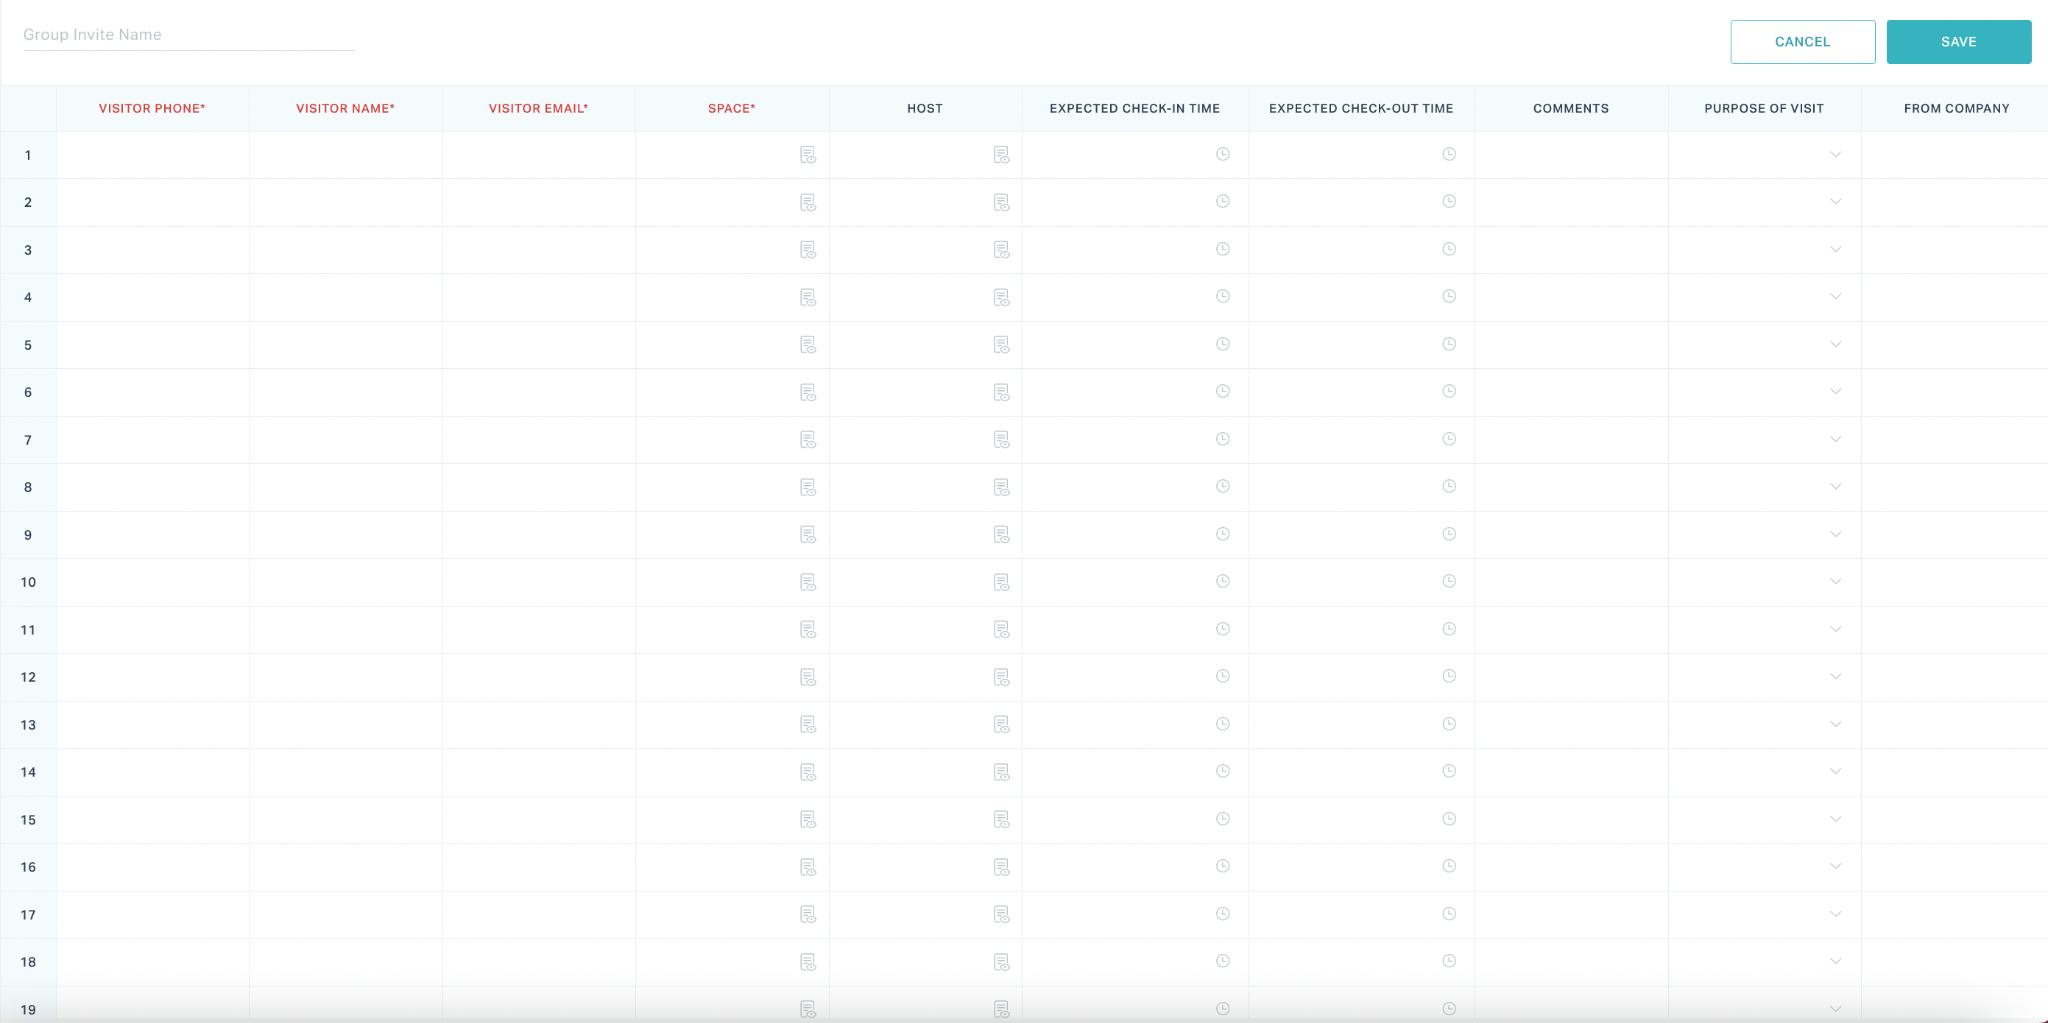
Update the following fields in this screen:
Visitor Phone - The mobile number of the visitor.
Note : In general, the mobile number acts as the unique identifier for the visitor. That is, if the visitor checks-in to the facility in the future, his/her details will be auto-populated upon entering the phone number.
Visitor Name - The name of the visitor
Visitor Email - The email address of the visitor
Space - The space which the visitor will visit
Host - The resident whom the visitor will to meet
Expected Check-in Time - The estimated arrival time of the visitor
Expected Check-out Time - The estimated departure time of the visitor
Note : The visitor cannot check-in to the facility, if the estimated check-out time is lapsed.
Comments - Message to the security team, if any
Purpose of Visit - The reason why the visitor wants to enter the facility
From Company - The name of the organization to which the visitor belong (if any)
In case of group invite, specify the invite name at the top of the form.
Click SAVE. The invite is now sent to the visitors.
Note : The invite is triggered to the visitor in the configured form, that is, it could be an email or SMS.
The visitor details specified as a part of the invite are also recorded in the VISITORS section and they are permanently stored in the All Visitors view. Read the Managing Visitors section for more information.
The ![]() and
and ![]() icons corresponding to an invite can be used to view the details of the invite and delete it, respectively.
icons corresponding to an invite can be used to view the details of the invite and delete it, respectively.
Managing Visitors
A visitor is an individual who is visiting a facility for a reason. The VISITORS section in the application records the details of every visitor visiting the facility for future reference. Also, this section allows you to directly add new visitors whose details can be retrieved while they check in to the facility. To add a new visitor,
Navigate to the VISITORS section and click NEW VISITOR. The VISITOR screen appears as shown below.
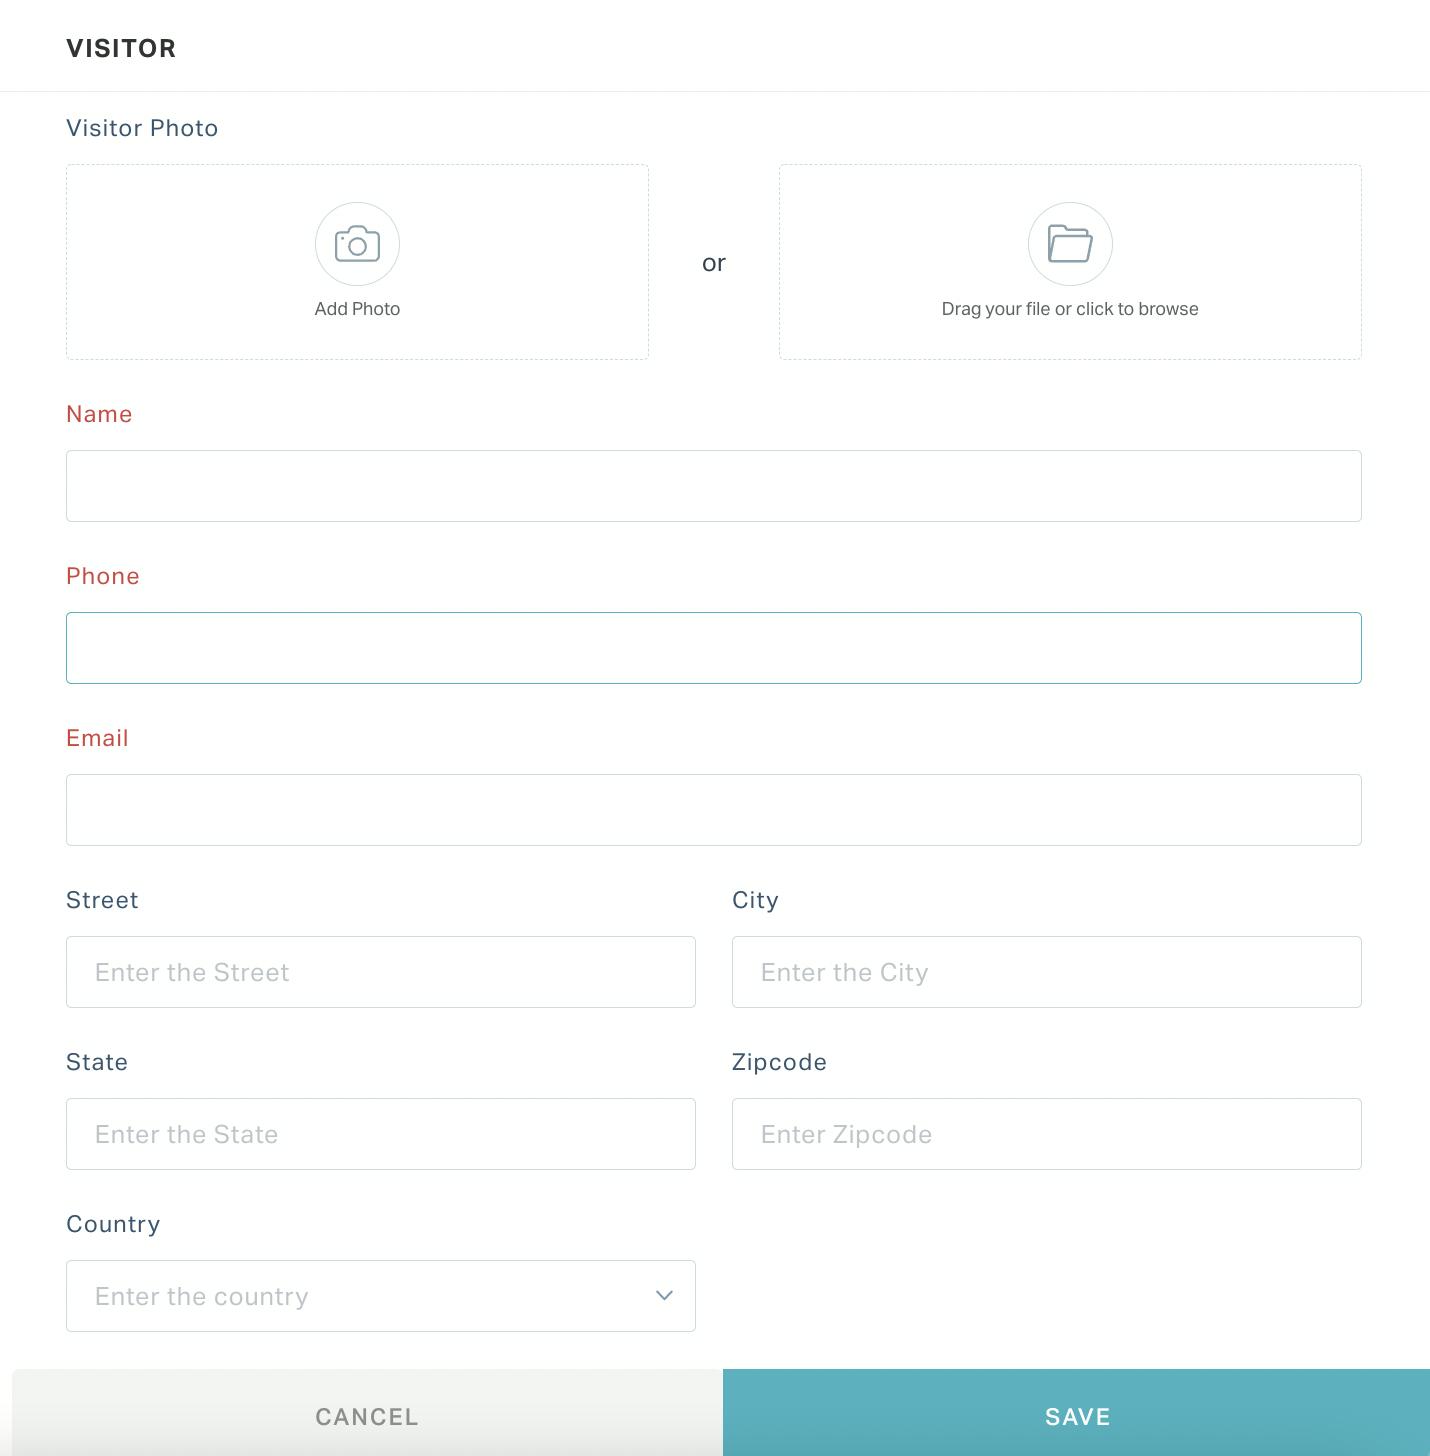
Update the following fields in this screen.
Visitor Photo - You can either capture a live picture of the visitor or upload an image file from the device.
Visitor Phone - The mobile number of the visitor.
Note : In general, the mobile number acts as the unique identifier for the visitor. That is, if the visitor checks-in to the facility in the future, his/her details will be auto-populated upon entering the phone number.
Visitor Name - The name of the visitor
Visitor Email - The email address of the visitor
You can optionally update the visitor's address in the Street, City, State, Zipcode and Country fields.
Click SAVE. The visitor details are now successfully updated.
The visitor details registered as a part of the check-in process, invite and watchlist creations are also recorded in this section. Read the Managing Visits, Managing Invites and Managing Watchlist sections for more information.
You can use the ![]() and
and ![]() icon corresponding to a visitor, to edit and delete the visitor details, respectively.
icon corresponding to a visitor, to edit and delete the visitor details, respectively.
Managing Watchlist
The application allows you to create a watchlist of privileged visitors (VIPs) and visitors for whom entry must be restricted (blocked visitors). You can secure your building and enforce compliant visitor check-in processes using watchlists.
The general principle of the watchlist is to alert the users (typically the security team) when a visitor matches a record in a watchlist. To create a watchlist,
Navigate to the WATCHLIST section and click NEW WATCHLIST. The WATCH LIST window appears as shown below.
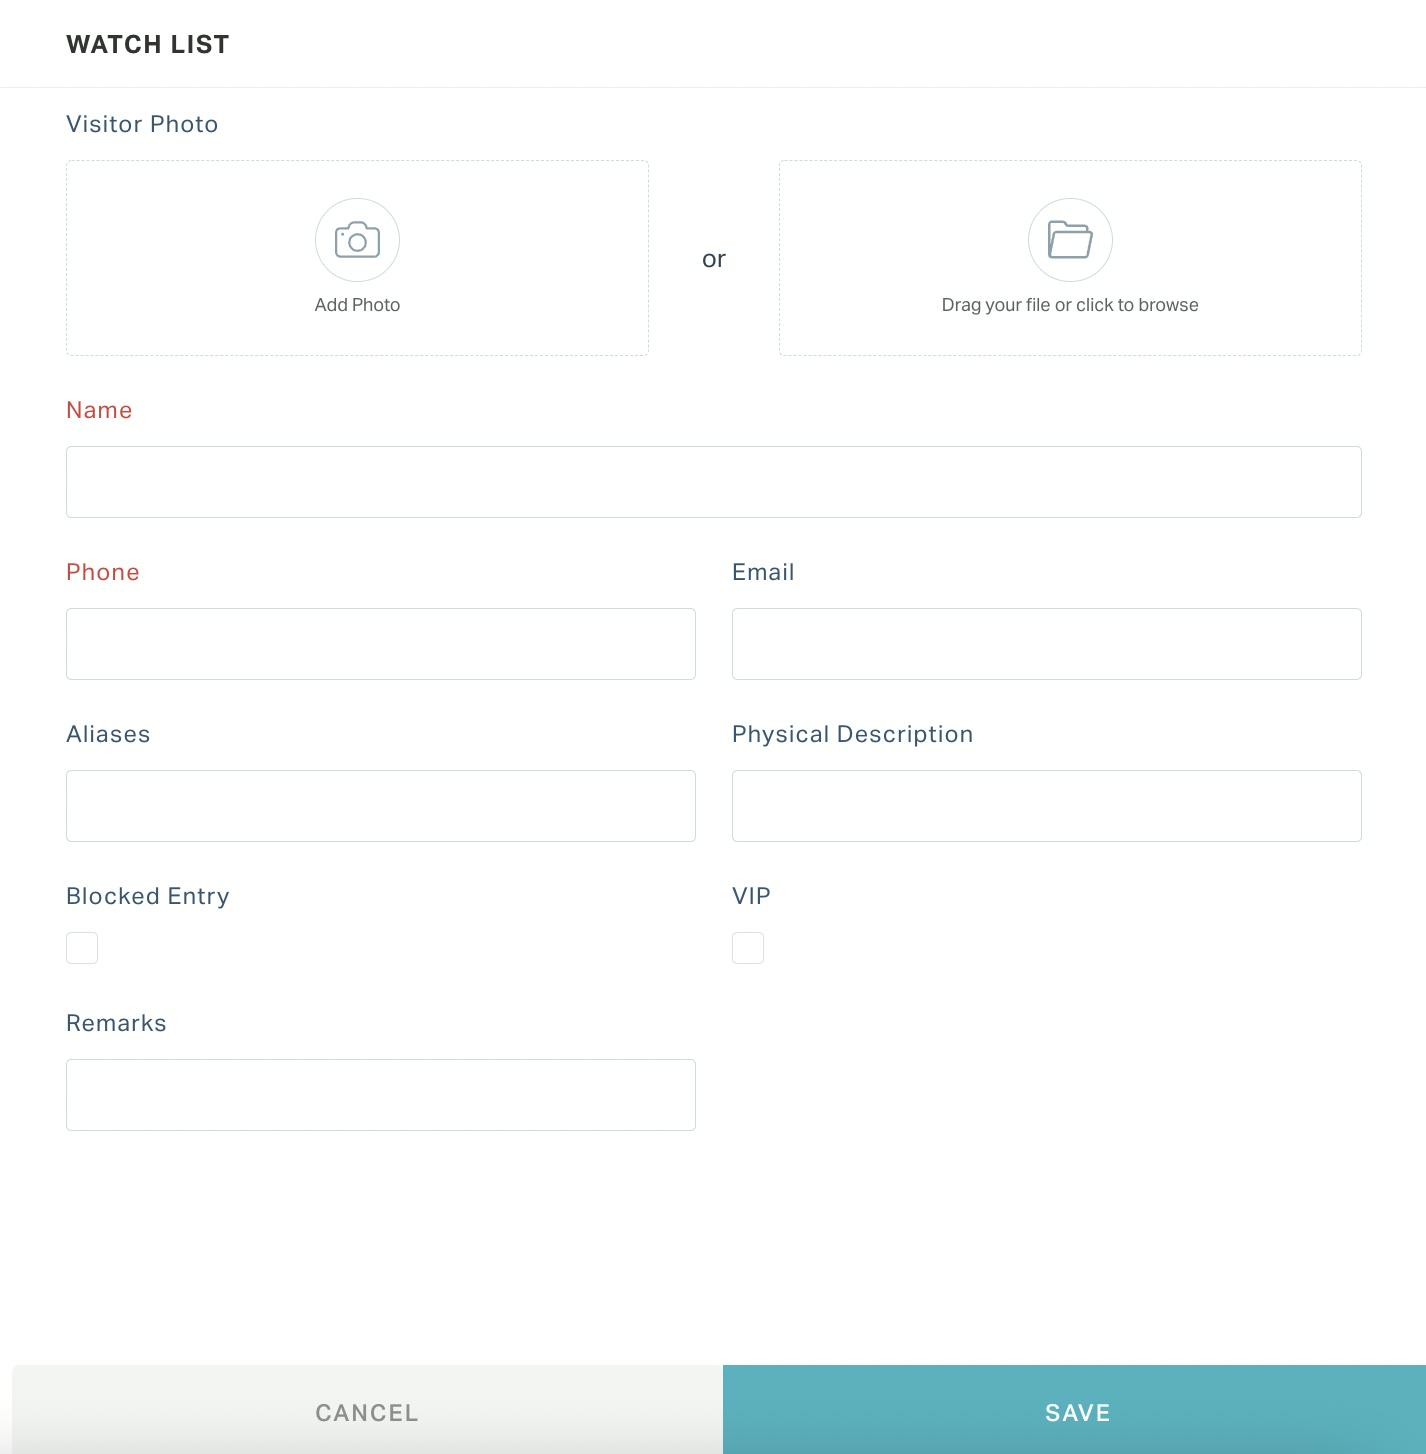
Update the following fields in this screen.
Visitor Photo - You can either capture a live picture of the visitor or upload an image file from the device.
Visitor Phone - The mobile number of the visitor.
Note : In general, the mobile number acts as the unique identifier for the visitor. That is, if the visitor checks-in to the facility in the future, his/her details will be auto-populated upon entering the phone number.
Visitor Name - The name of the visitor
Visitor Email - The email address of the visitor
Aliases - Any alternate names that the visitor can possibly use
Physical Description - Details that describe the physical appearance of the visitor
Blocked Entry - Is the visitor a suspicious person
Note : An approval is triggered when a blocked visitor checks in to the facility.

VIP - Is the visitor a privileged person
Remarks - Things to note on the arrival of the visitor
Click SAVE. The visitor contact is now added to the watchlist.
Note : When a visitor in the watchlist checks in to the facility, an email or SMS notification is triggered to the specified users, if configured by the administrator.
The visitor details specified as a part of the watchlist creation are also recorded in the VISITORS section and they are permanently saved in the All Visitors view. Read the Managing Visitors section for more information.
You can use the ![]() and
and ![]() icon corresponding to a watchlist contact, to edit and delete the contact details, respectively.
icon corresponding to a watchlist contact, to edit and delete the contact details, respectively.