Configuring Administrator Settings
The administrator settings page is a self-service portal that provides the administrator with a comprehensive view of all the setup-related information. The application groups similar settings corresponding to the module into individual sections. These settings allow the administrator to configure the required elements and enable or disable the available features.
The information recorded in the application, as a result of these configurations, helps the users to extract the required reports or present them in the dashboard for quick reference and a high-level view.
` The visitor management module allows the administrator to configure the set of policies and hardware additions used to monitor the usage of a building or site. The application offers a greater level of customization, which includes setting the aspects of almost all the features, adding relevant fields, and much more.
In this module, the administrator can configure the possible types of visitors who might visit the facility, the kiosk devices for various facility entrances to authorize the visitor's entry and exit, printers to print visitor badges, watchlists, approvals, notifications, and other settings.
Illustrating Visitor Management Settings
This module allows configuring various visitor management aspects to monitor the outsider visits and their activities.
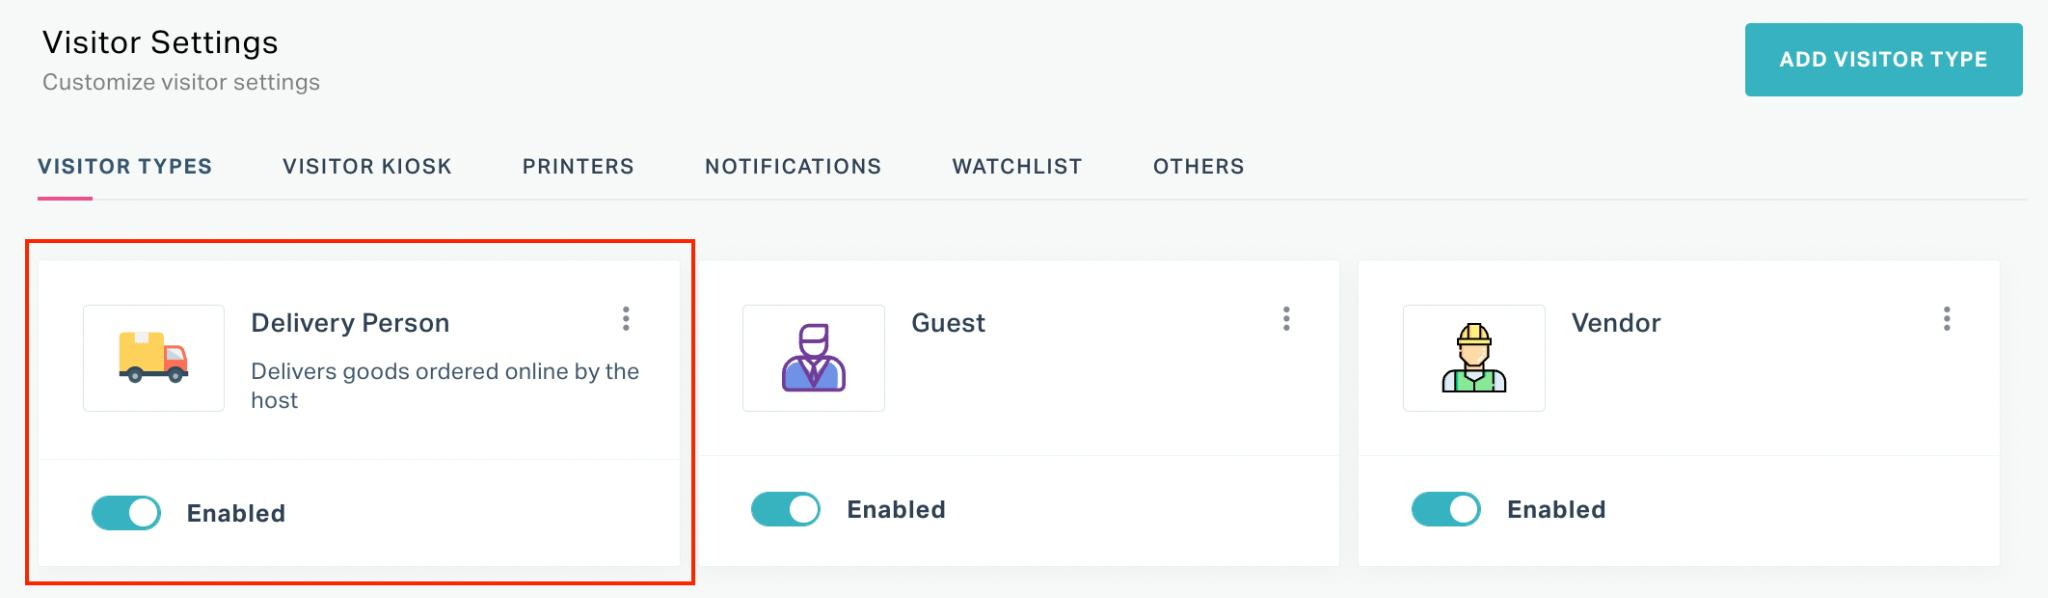
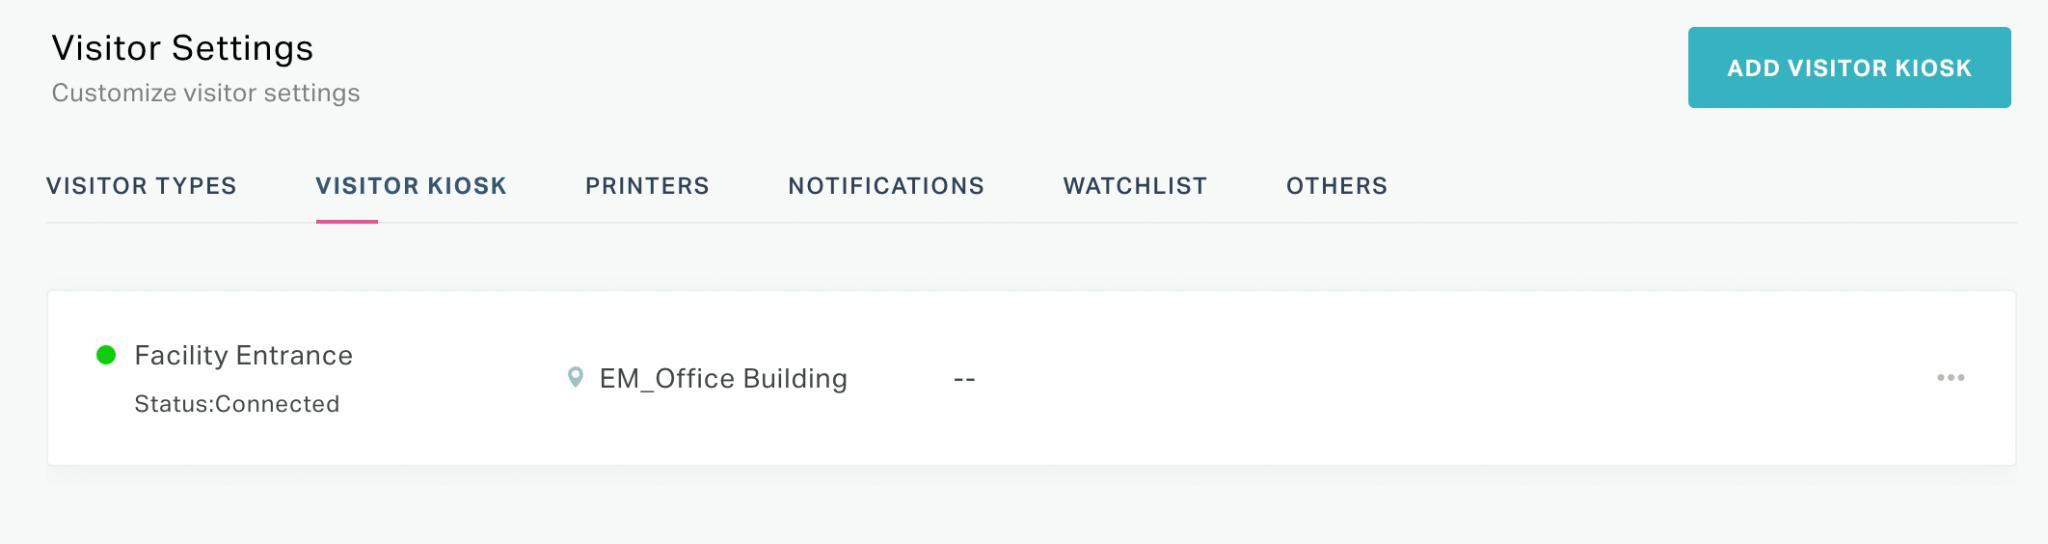
In order to navigate to this module click the  (Settings) icon and select Visitor Settings under the GENERAL section. The Visitor Settings screen appears as shown below, where the list of all visitor types configured are displayed by default.
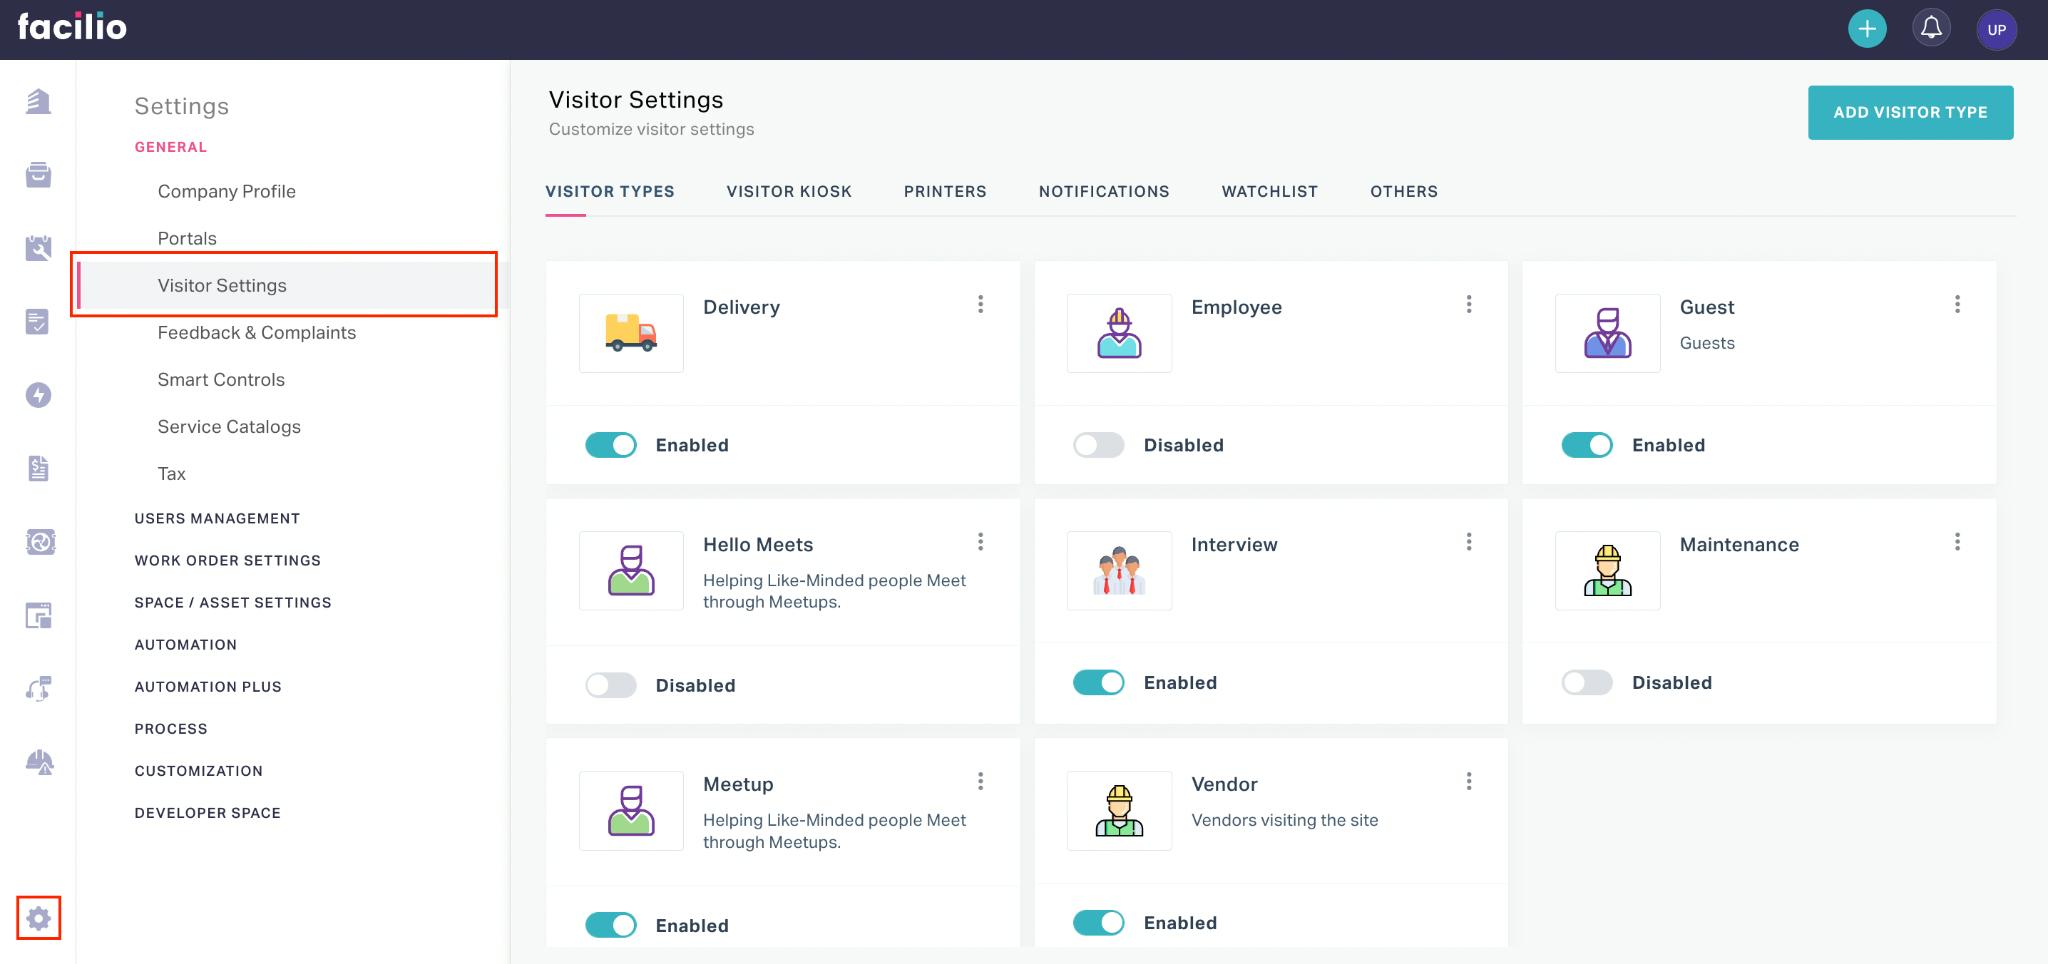
The upcoming sections explain how to configure the various features and functionalities of Visitor Management.
Managing Visitor Types
The segmentation of the visitors based on their profile or their purpose of visit helps streamline the outsider visits across facilities. When a visitor checks in to a facility, the application first prompts the security personnel to choose the type of visitor.
In the VISITOR TYPES section, you must add all possible visitor types who might visit the facility and configure the respective settings.
Adding Visitor Type
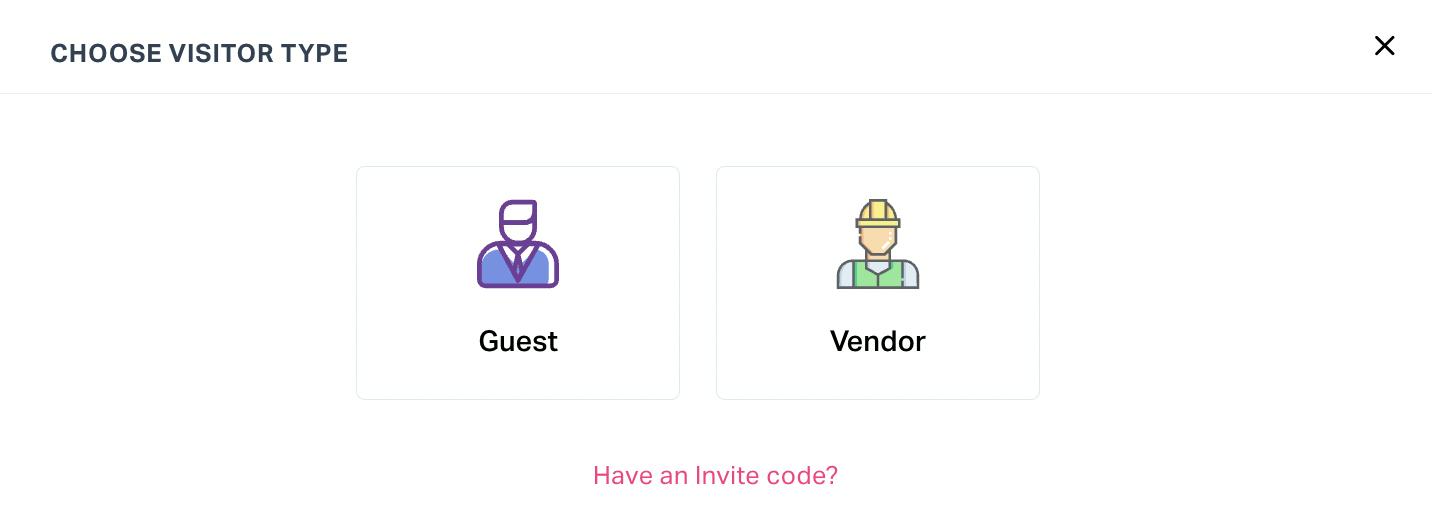
When you add a visitor type in this section, it reflects in the application (as shown below), which the security personnel can use to categorize the visitor while checking in to the facility.
To add a visitor type,
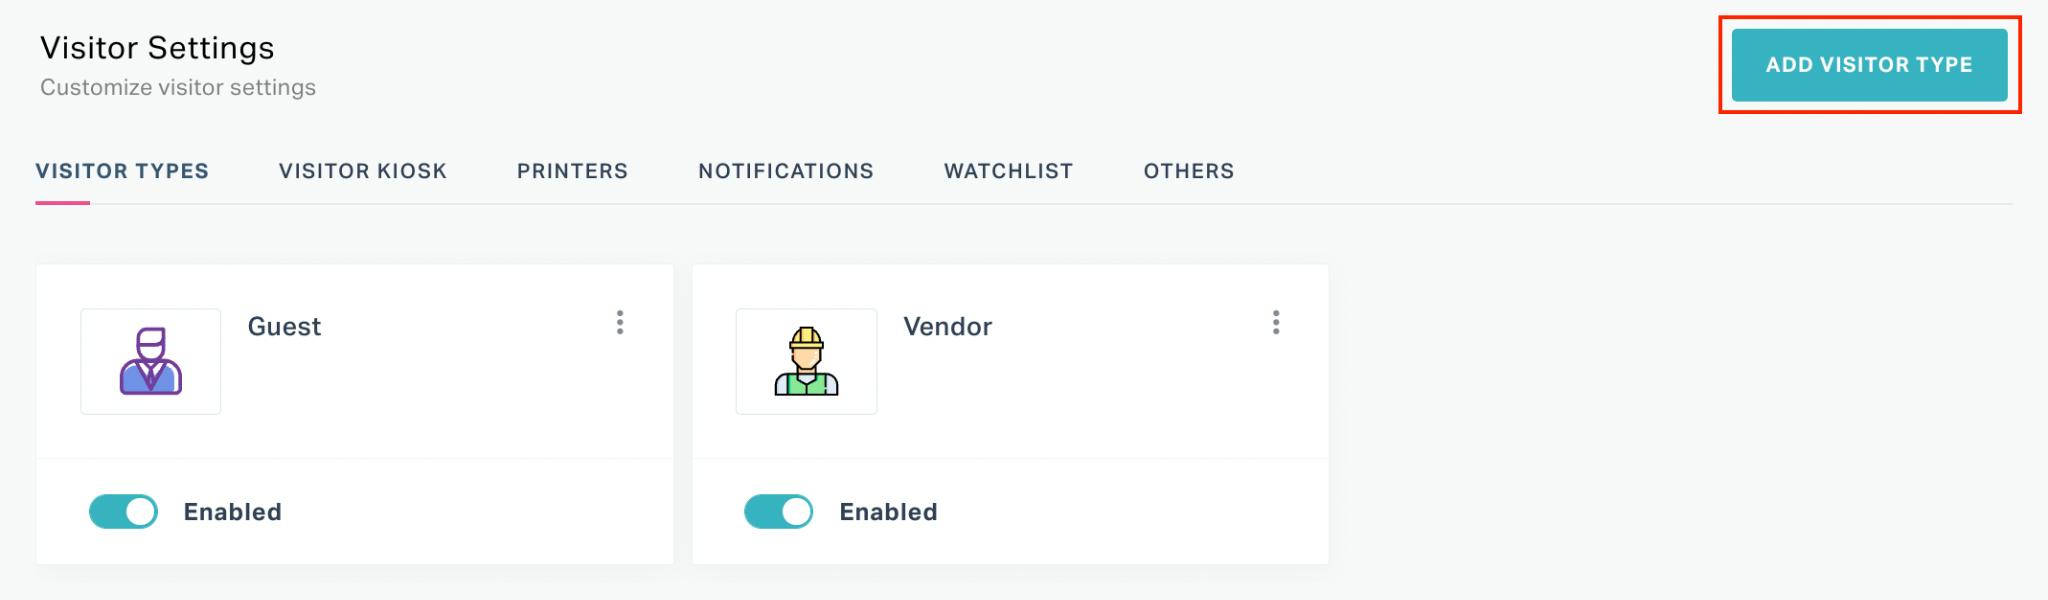
Navigate to the VISITOR TYPES section and click ADD VISITOR TYPE.
The NEW VISITOR TYPE window appears as shown below.
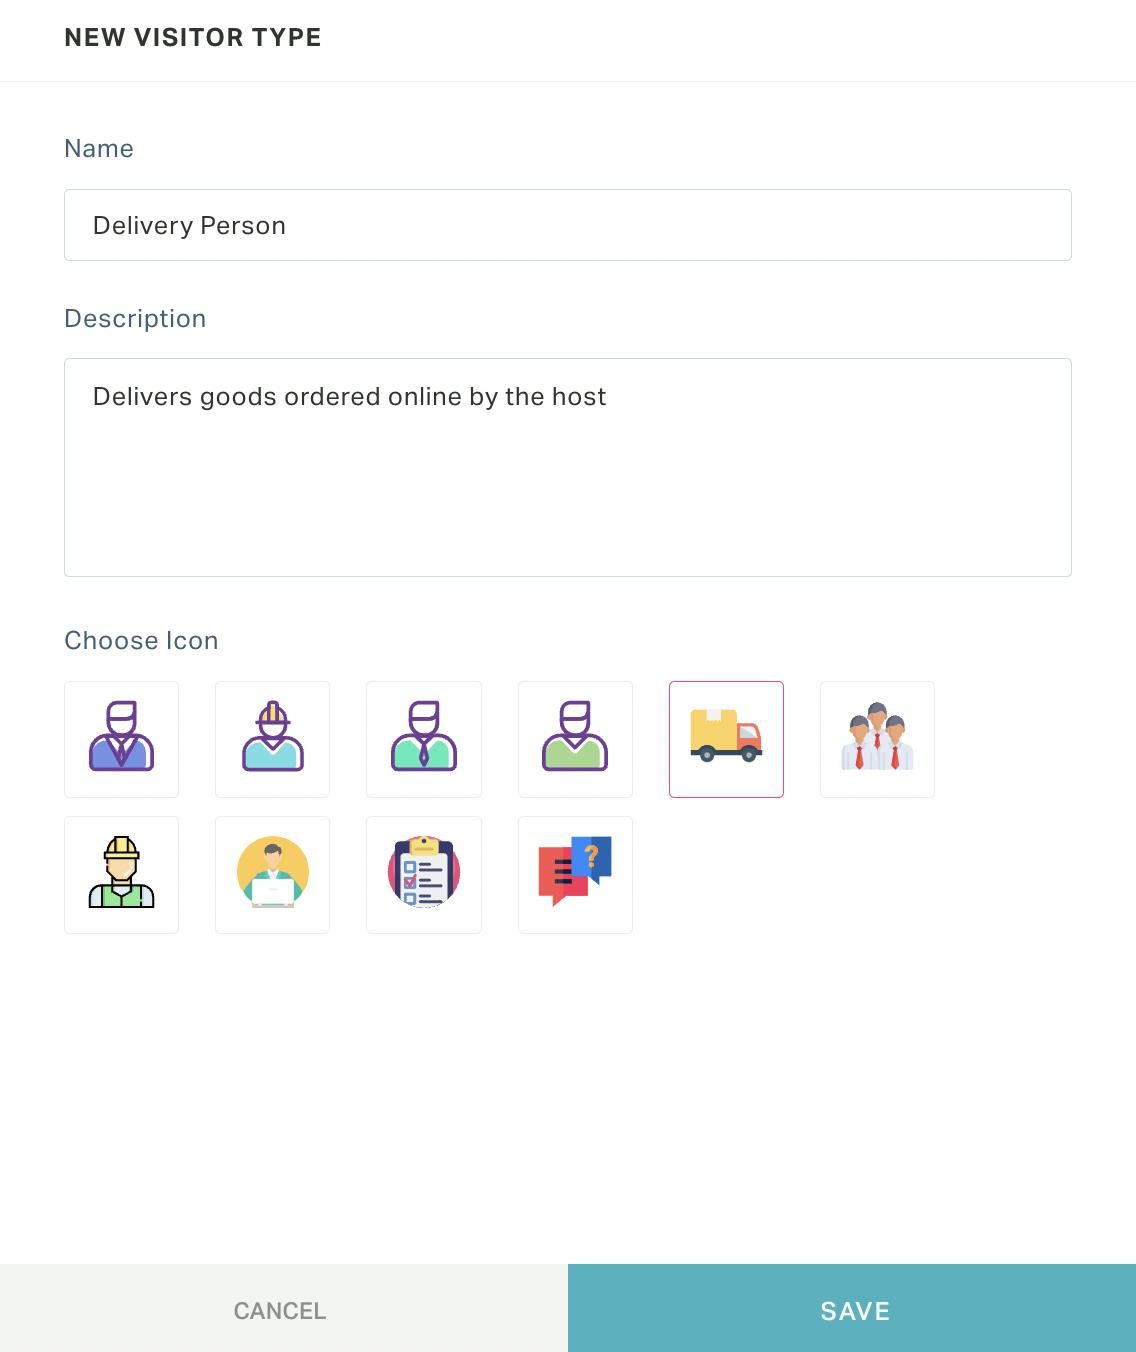
Update the following fields in this screen:
- Name - The type of visitor (for example, Delivery person)
- Description - A short description explaining the purpose of the visit
- Choose Icon - The icon that better defines the visitor profile
Click SAVE. The new visitor type is now added to this section as shown below.
Read the Configuring Visitor Type Settings section for further instructions.
Configuring Visitor Type Settings
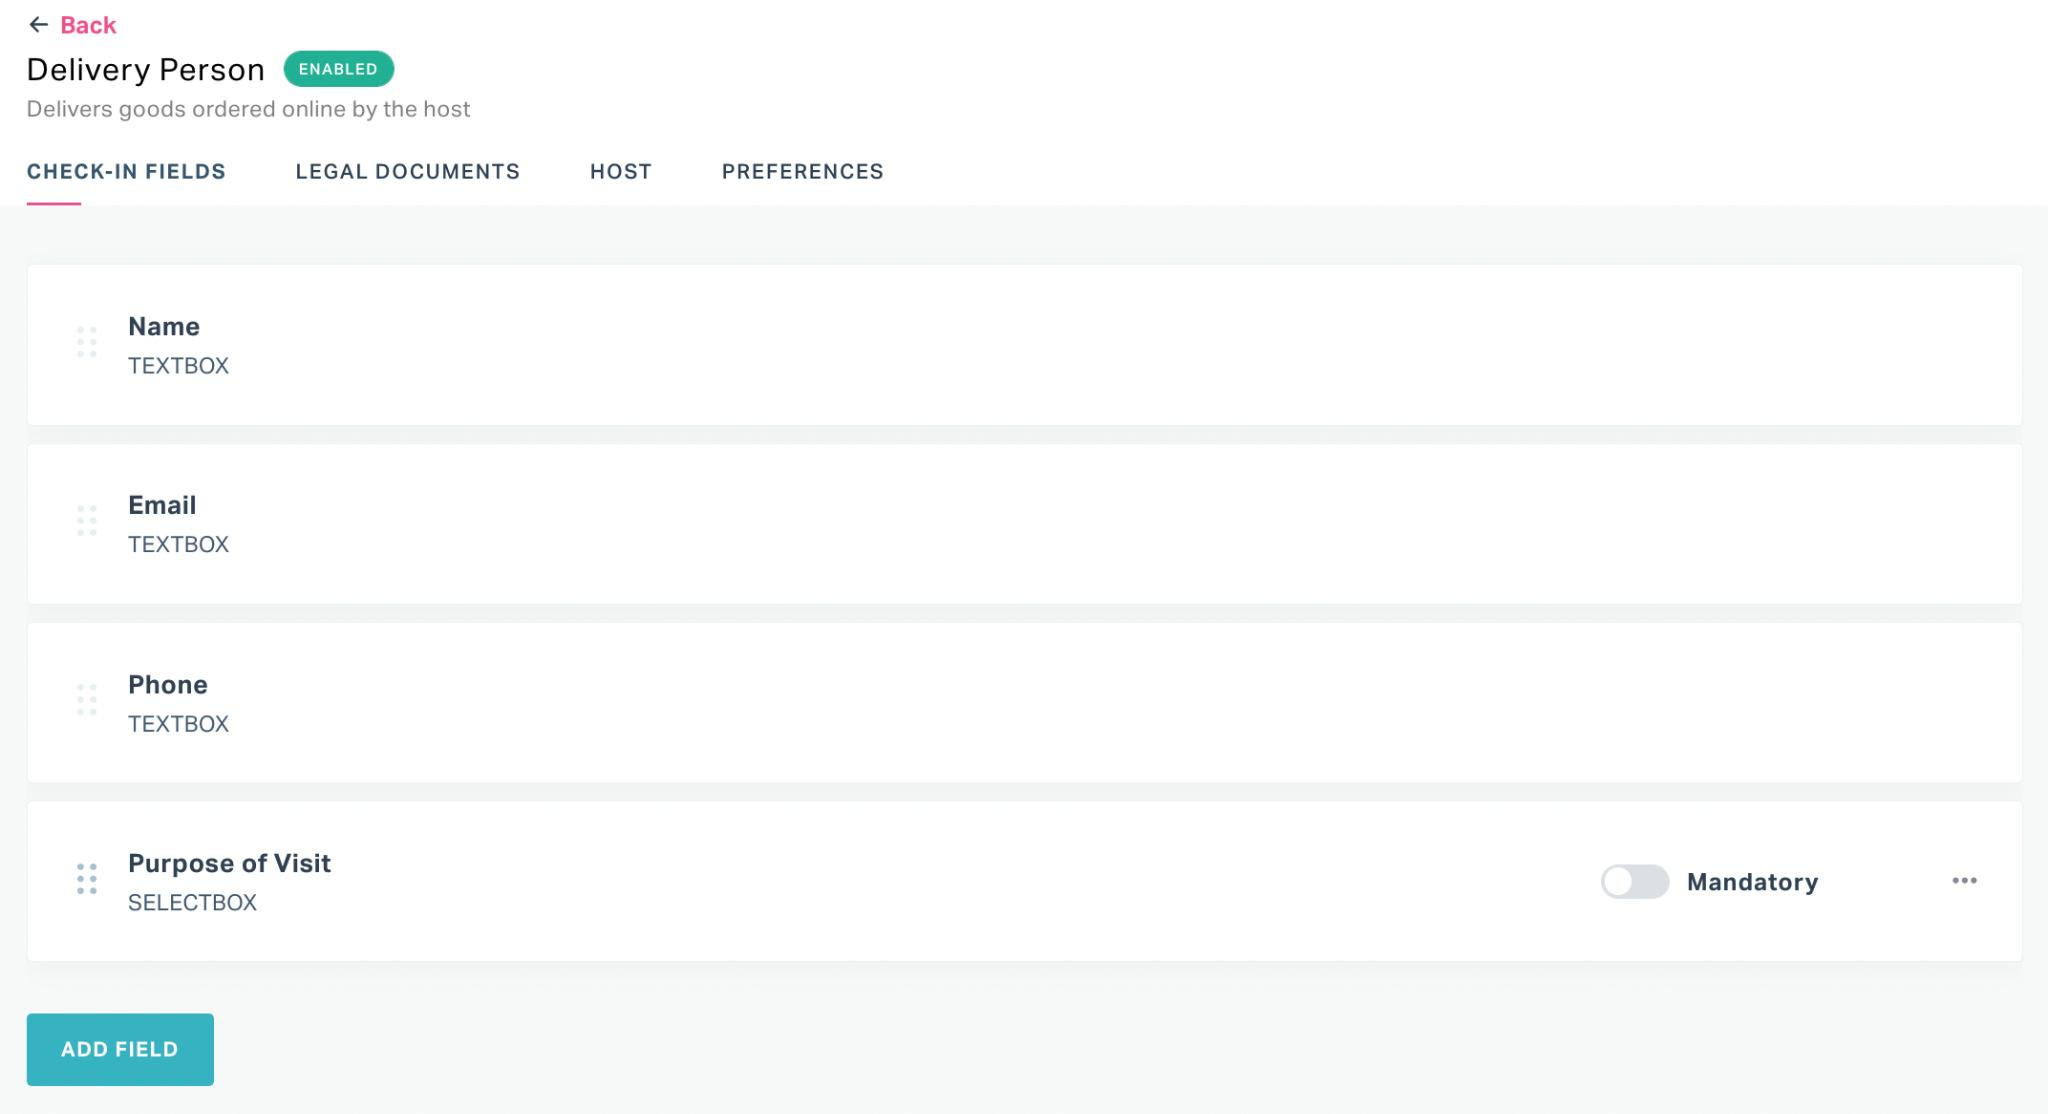
After you add a visitor type, you should configure the details to be captured (that is, the form to be displayed) with respect to the visitor type selection. Click on the visitor type to navigate to the corresponding settings screen as shown below.
The upcoming sections explain how to add the required fields and configure other settings concerning a visitor type.
Check-In Fields
In this section you can add the basic fields that should appear, upon selecting the visitor type. The Name, Email, Phone and Purpose of Visit fields appear by default. To add a new field,
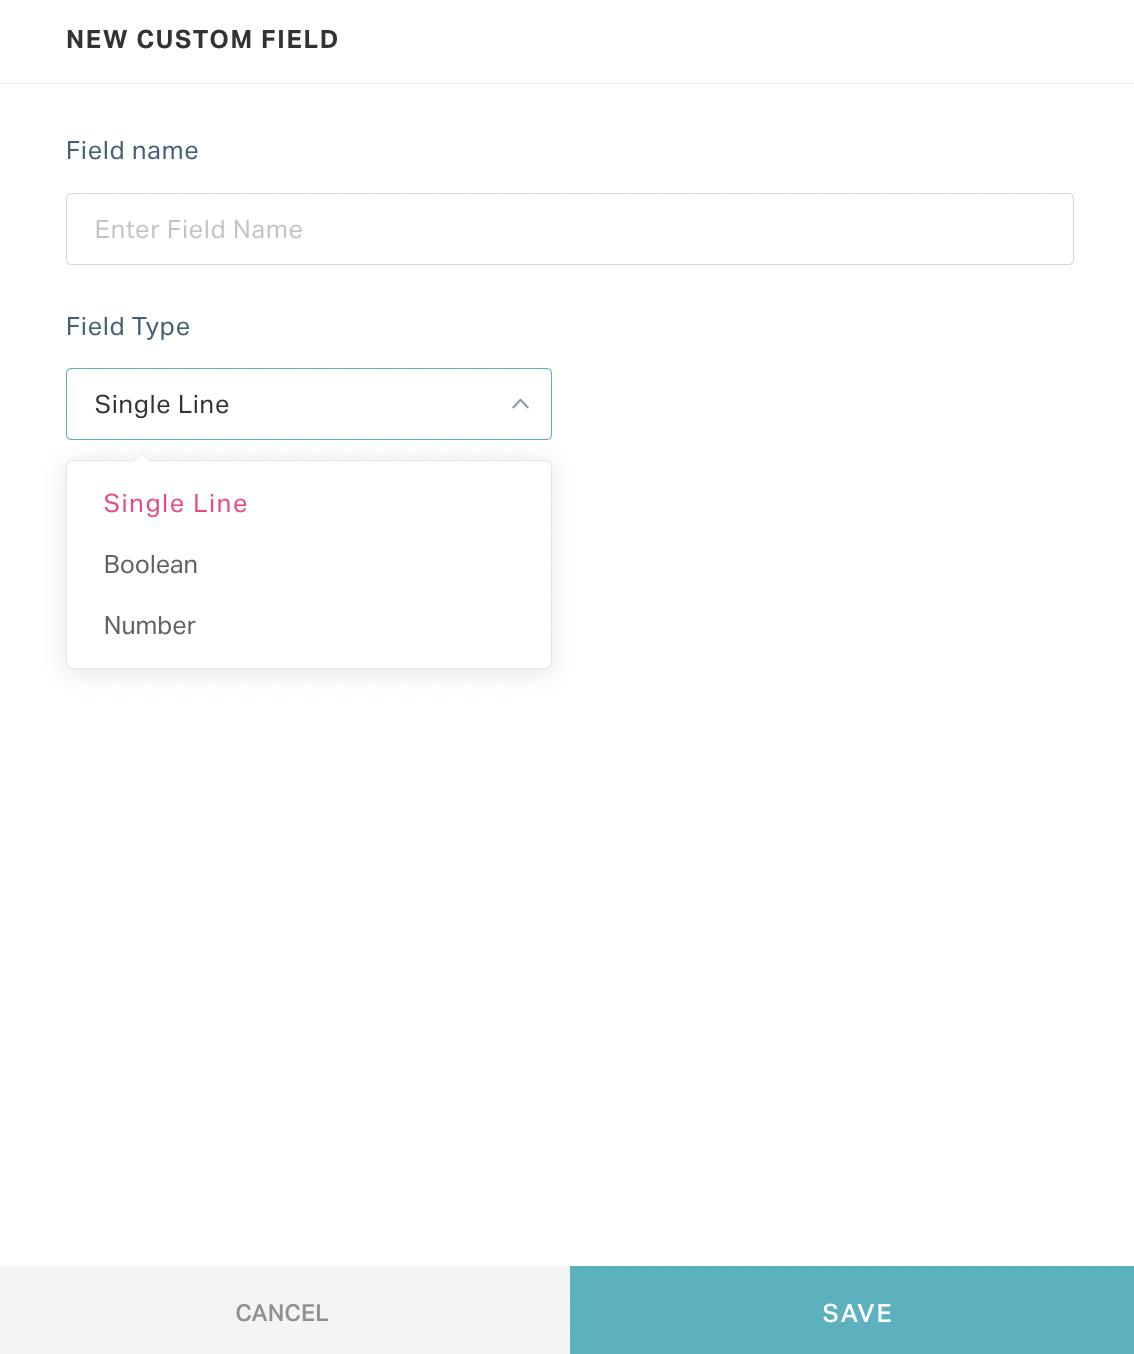
Click ADD FIELD. The NEW CUSTOM FIELD window appears as shown below.
Update the following fields in this screen:
Field Name - Display name of the field in the application
Field Type - The type of input to be captured. You can choose any of the following options:
Single Line - Inserts a single line text field.

Note: It captures a maximum of 250 characters. This field type is used to capture text input.
Boolean - Inserts a boolean field, that is, a yes or no field.

Number - Inserts a numeric input field.

Note: You can enable the toggle button
 corresponding the field to mark it as mandatory in the form.
Click SAVE. The field is now successfully added to the form.
Similarly, you can add more fields to the form as needed. You can click and drag the  icon corresponding to a field to reorder it.
Note: You cannot reorder the Name,Email and Phone fields.
Legal Documents
This section allows you to set up the NDA that the visitor should digitally sign while checking in to the premises.
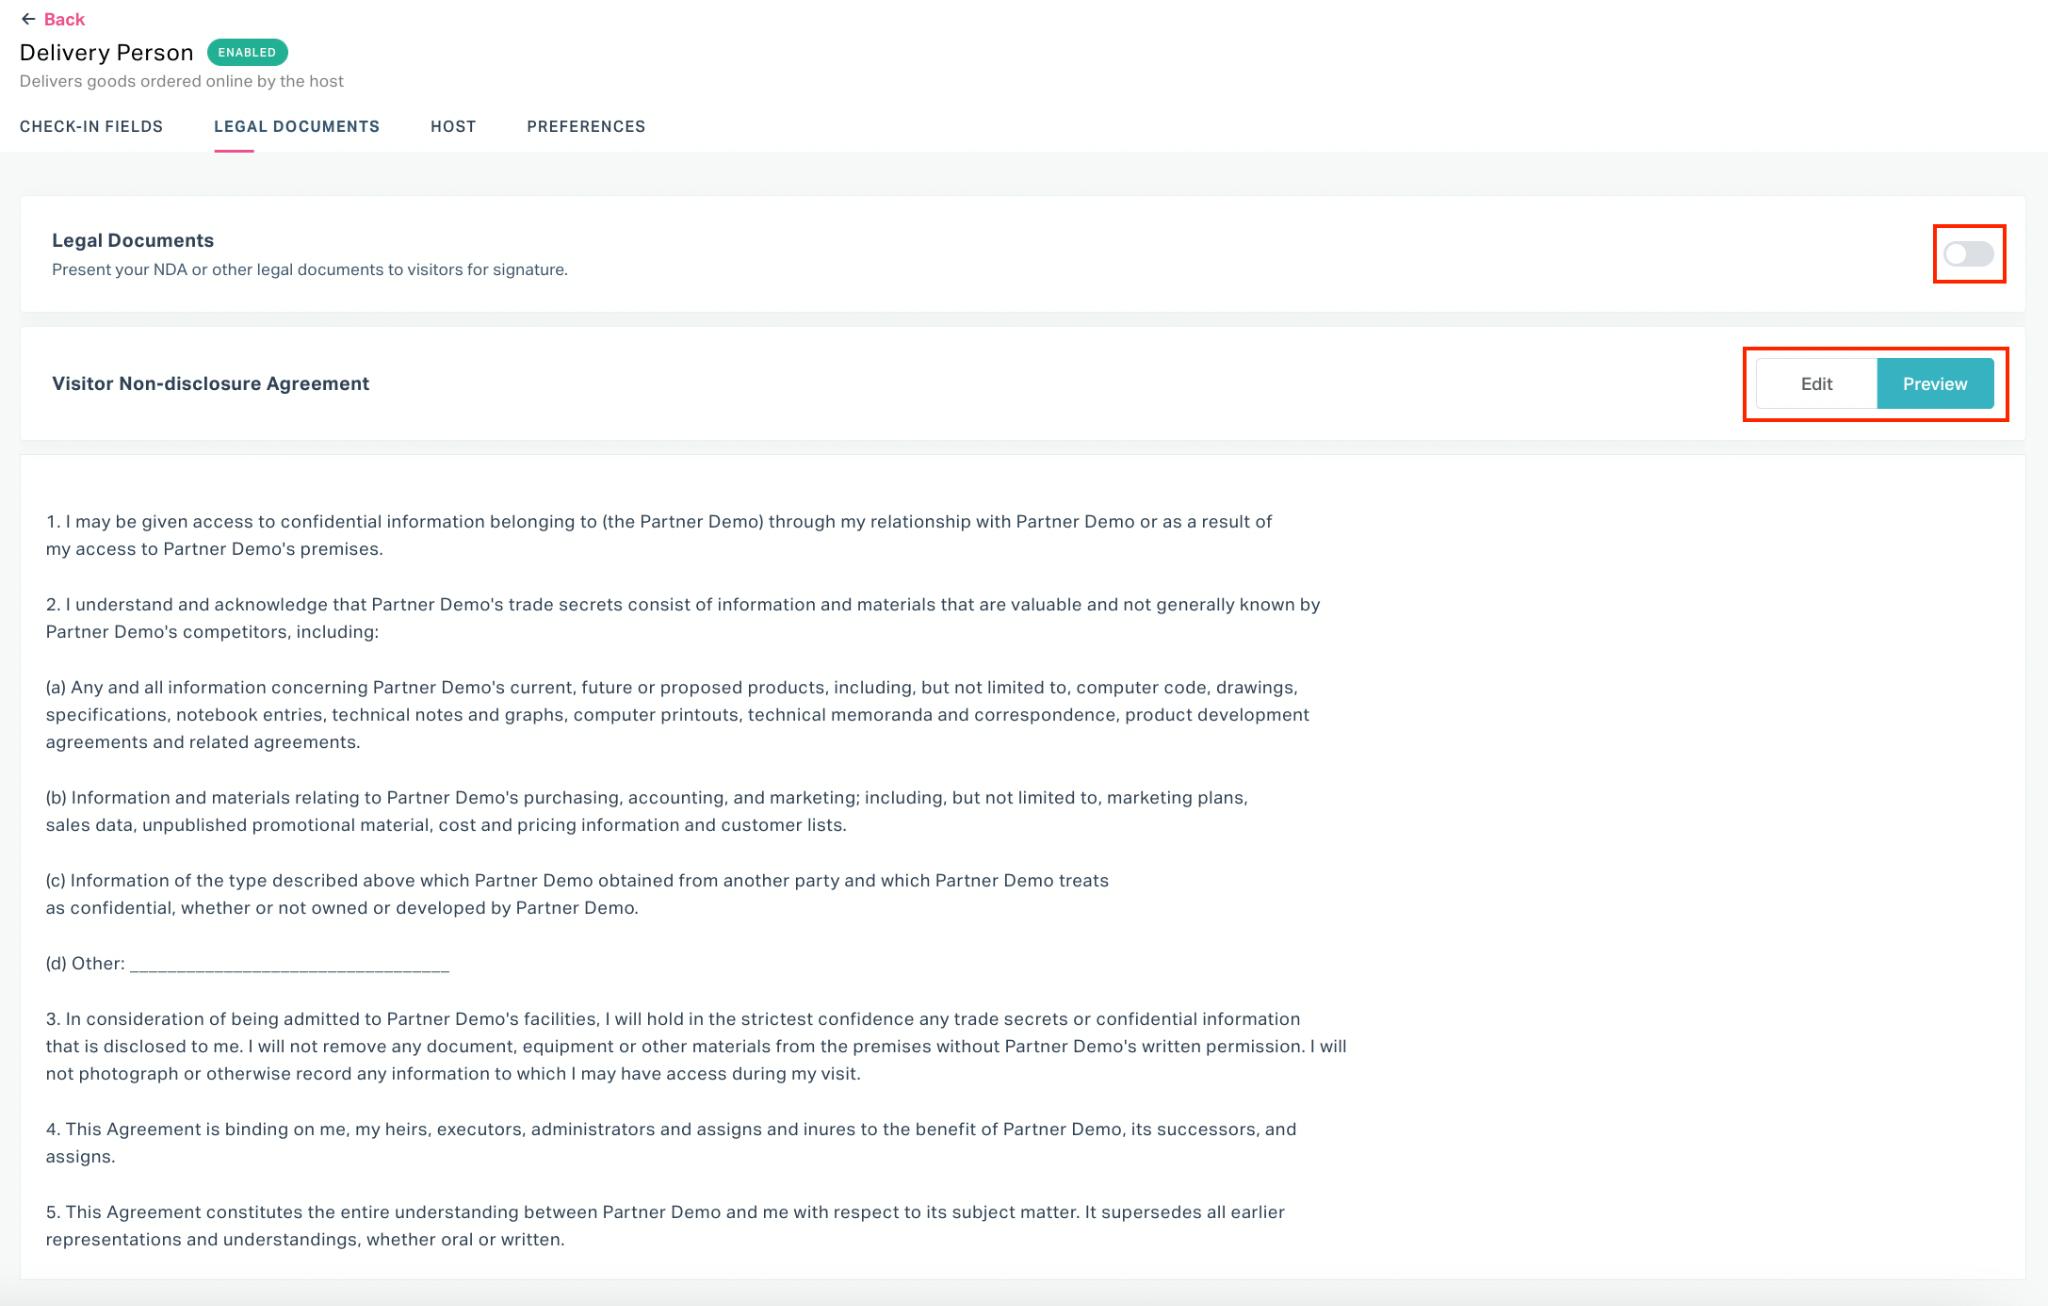
The application has a default NDA content set, as shown in the screenshot above. You can click Edit to make changes to it and switch to Preview to save the changes made.
You can use the toggle button ![]() in this screen to enable or disable the NDA field in the form.
in this screen to enable or disable the NDA field in the form.
Host
In this section, you can set whether to capture the host whom the visitor wants to meet. It further allows you to configure the other related settings, increasing the security of the premises.
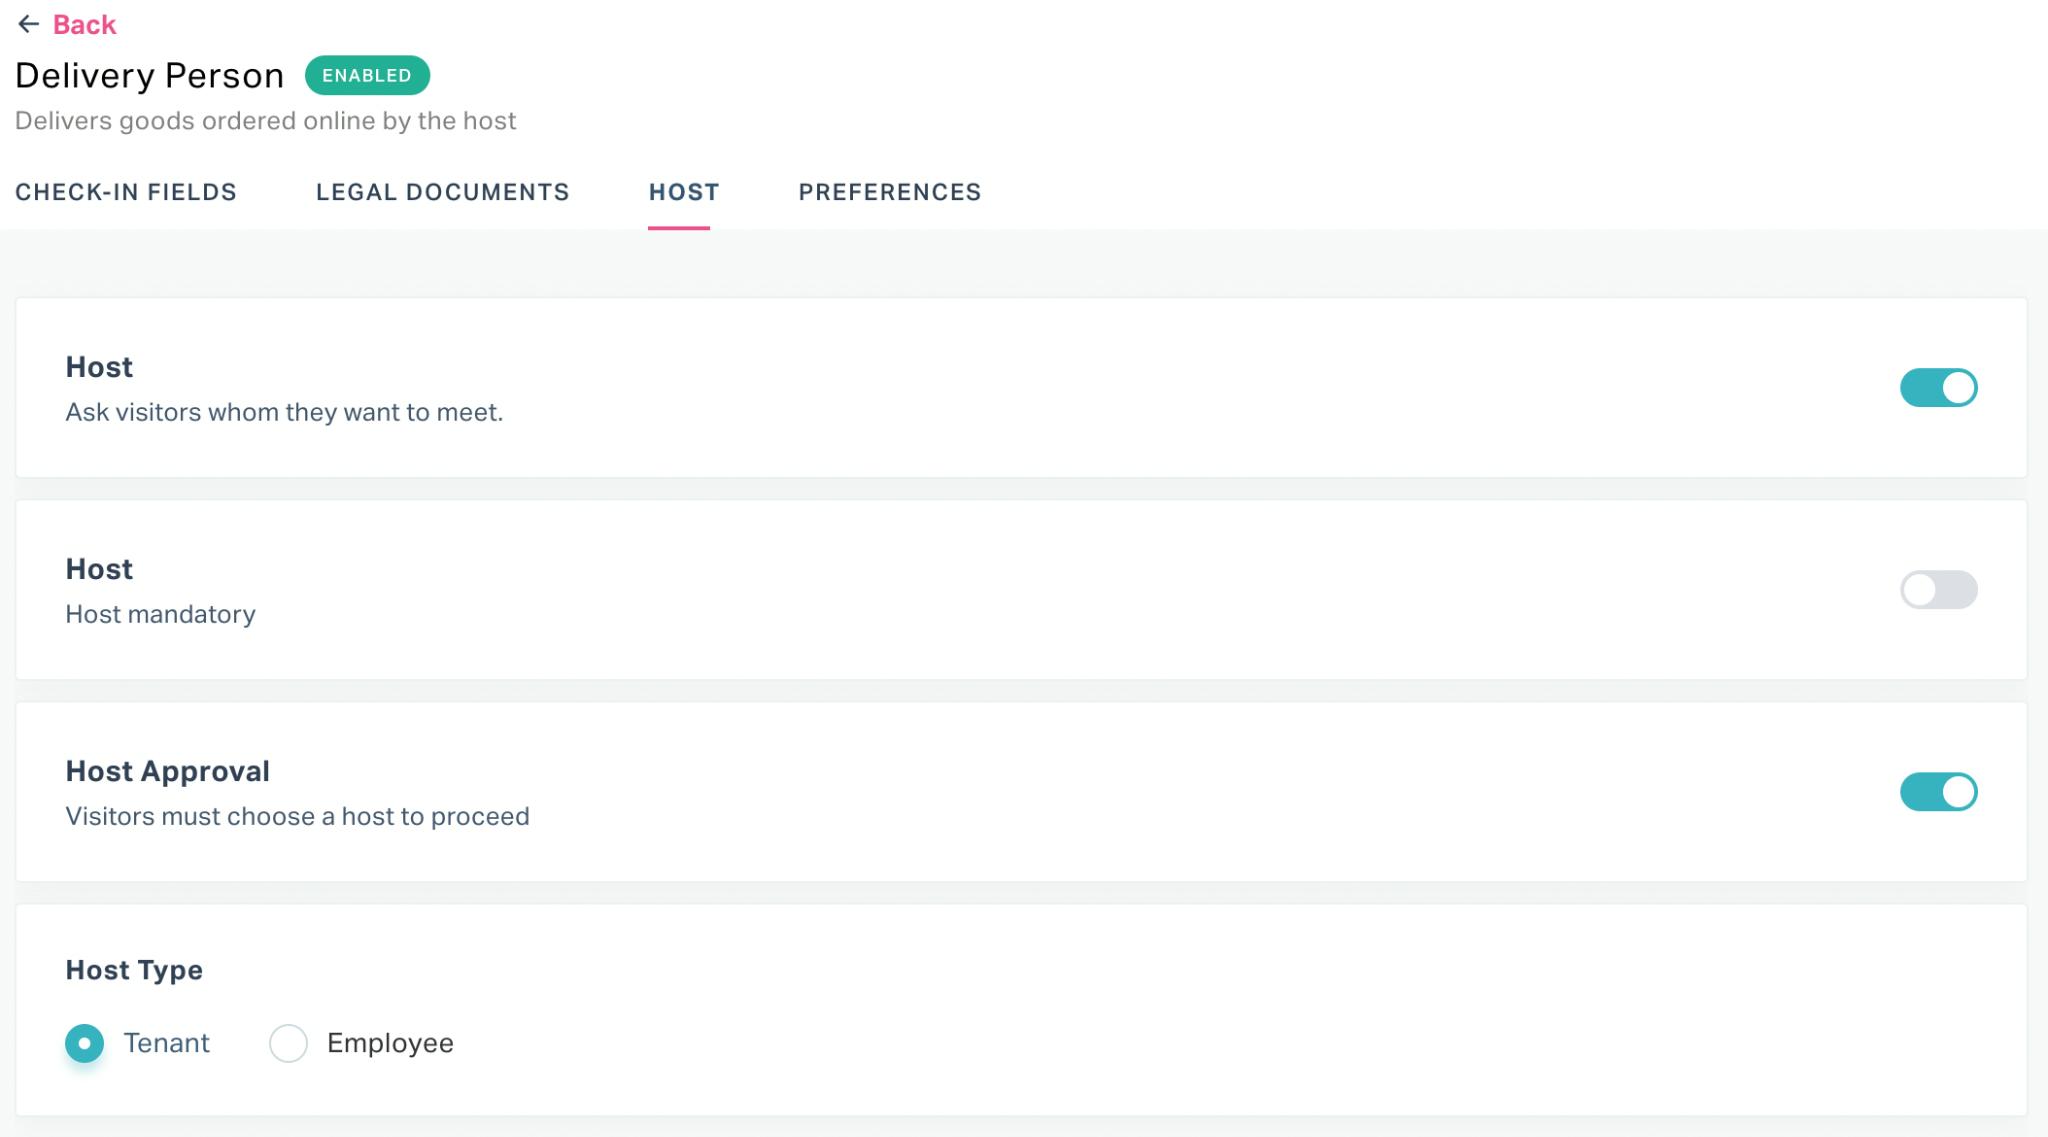
You can enable the following settings in this screen:
Host - To add the Host field in the form
Note: If this option is disabled, the rest of the options in this screen are not applicable.
Host Mandatory - To refrain the visitor from checking in without choosing a host
Host Approval - To trigger an approval to the host requesting to authorize the visitor's entry
The Host Type field filters the list of hosts to be displayed to the user for selection.
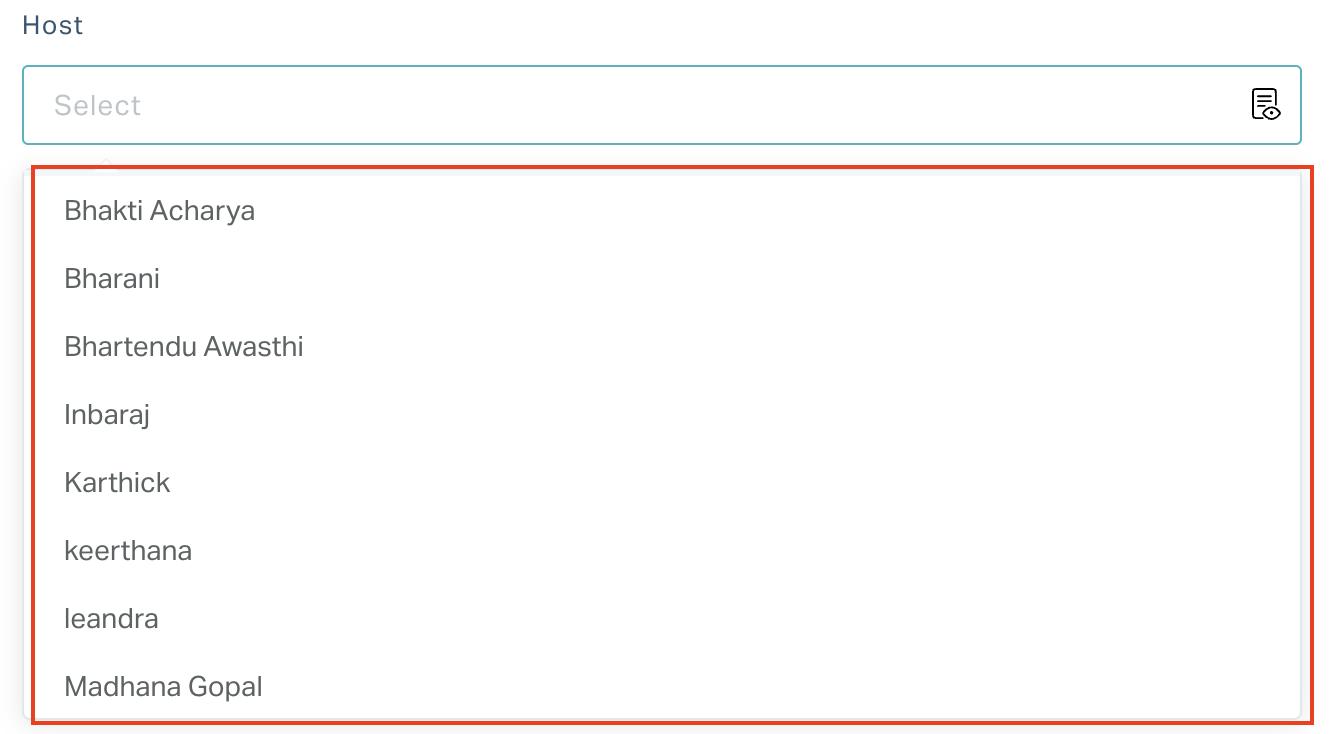
In other words, setting this field looks up the users in the respective portal of the organization to the Host field in the form, as shown in the screenshot above. For example, If this field is set to Tenant, the users listed in the Tenant portal will be mapped to the Host field for selection.
Note: The options displayed (Tenant, Employee) may vary with respect to the organization.
Preferences
In this section, you can configure additional preferences that might tighten the security of the premises even further.
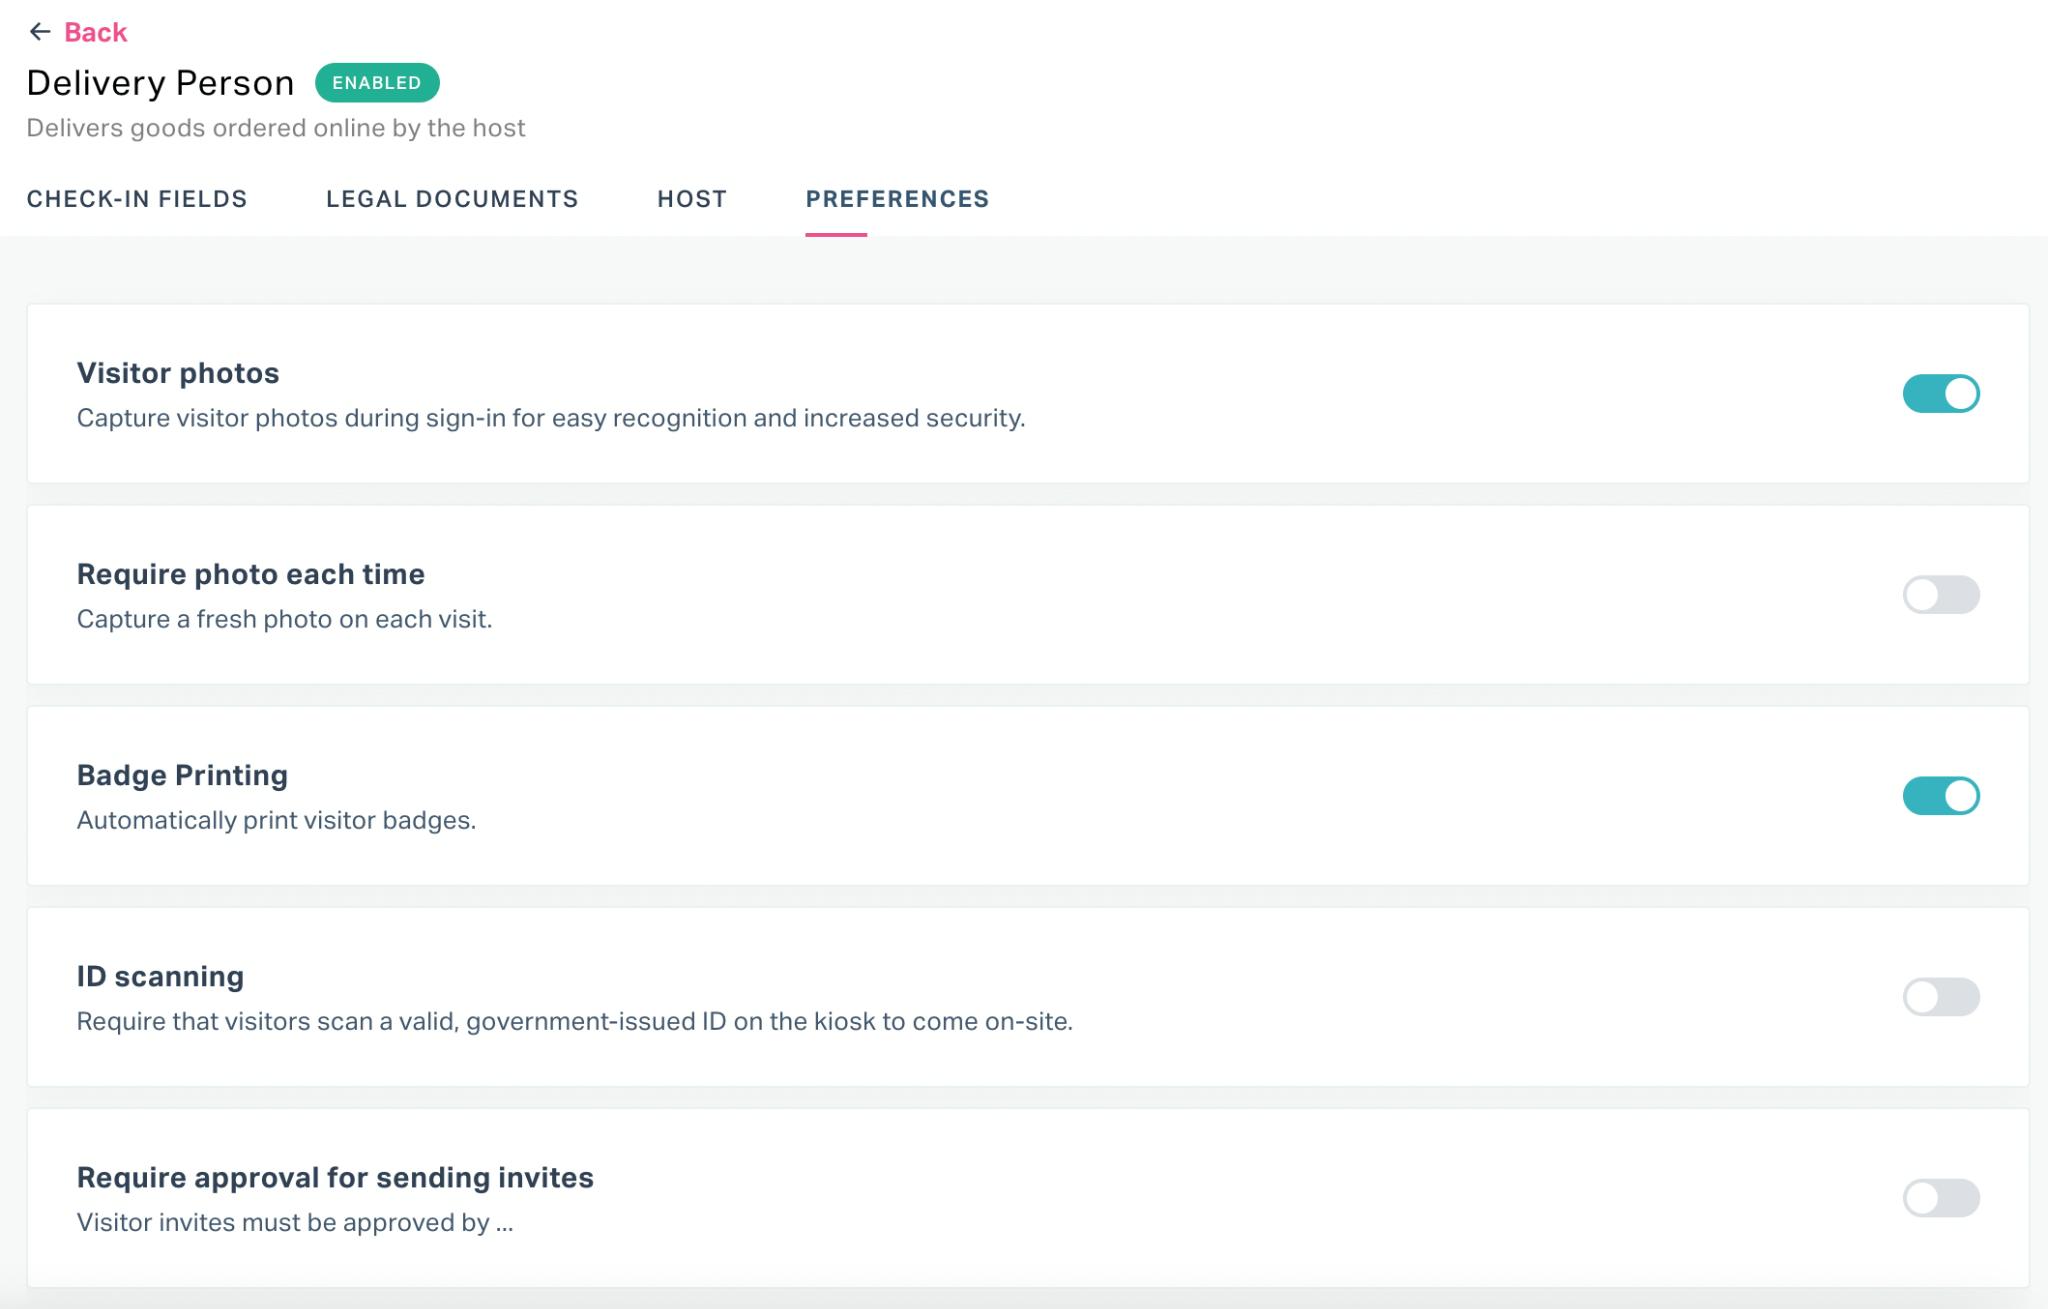
This section allows you to enable the following features or settings:
Visitor Photos - To capture visitor photo on check-in
Require photo each time - To capture the visitor photo every time the visitor checks-in to the facility
Badge Printing - To automatically print the visitor badge on successful check-in through visitor kiosk
Note: This step is skipped, if no printer was chosen while adding the visitor kiosk.
ID scanning - To prompt the visitor to scan a valid government-issued ID on the kiosk while checking in
Require approval for sending invites - To trigger an approval to the facility administrator when a host initiates an invite
Note: You can configure different sets of fields, features and settings for various visitor types.
Other Functionalities
There are certain functionalities and icons associated with this section that facilitate various other activities.
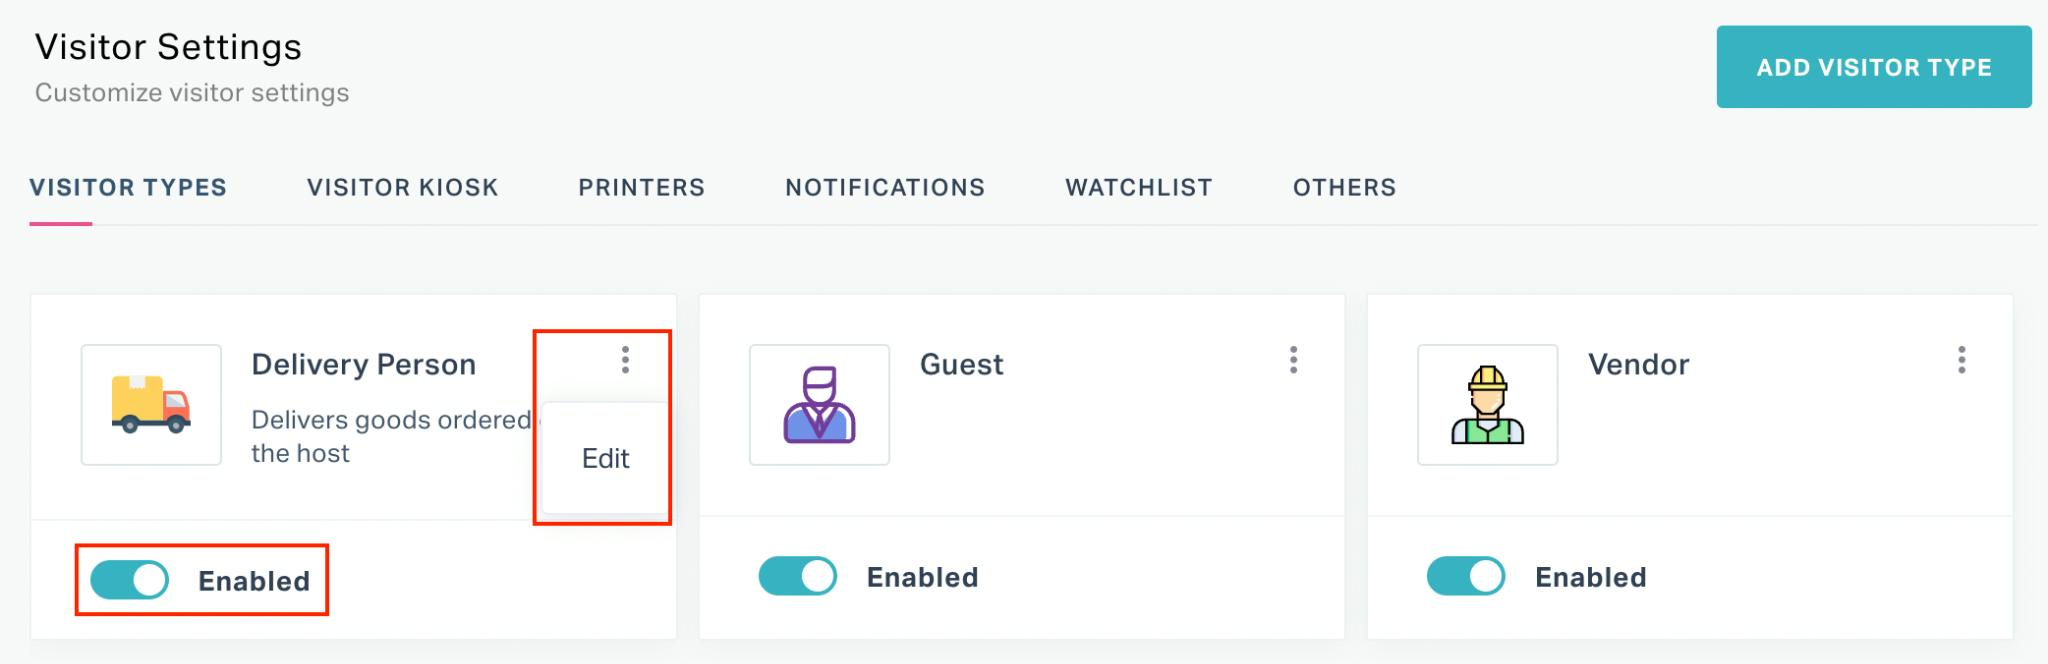
They are,
| Icon | Action/Description |
|---|---|
| Used to enable or disable the visitor type in the application | |
| Used to modify the basic details (Name, Description and Icon) of the visitor type. Note: Click the |
Managing Visitor Kiosk
A visitor kiosk provides easy ways to check in the visitors while enhancing the security of your premises. You can set up the visitor kiosk on a compatible iPad or tablet to authorize visitor entry and exit.
In the VISITOR KIOSK section, you must add and configure the visitor kiosk(s) deployed at all entry and exit pathways of the premises.
Adding Visitor Kiosk
In order to activate the visitor kiosk you should first add the kiosk details in this section. To add a new visitor kiosk,
Navigate to the VISITOR KIOSK section and click ADD VISITOR KIOSK.
The VISITOR KIOSK window appears as shown below.
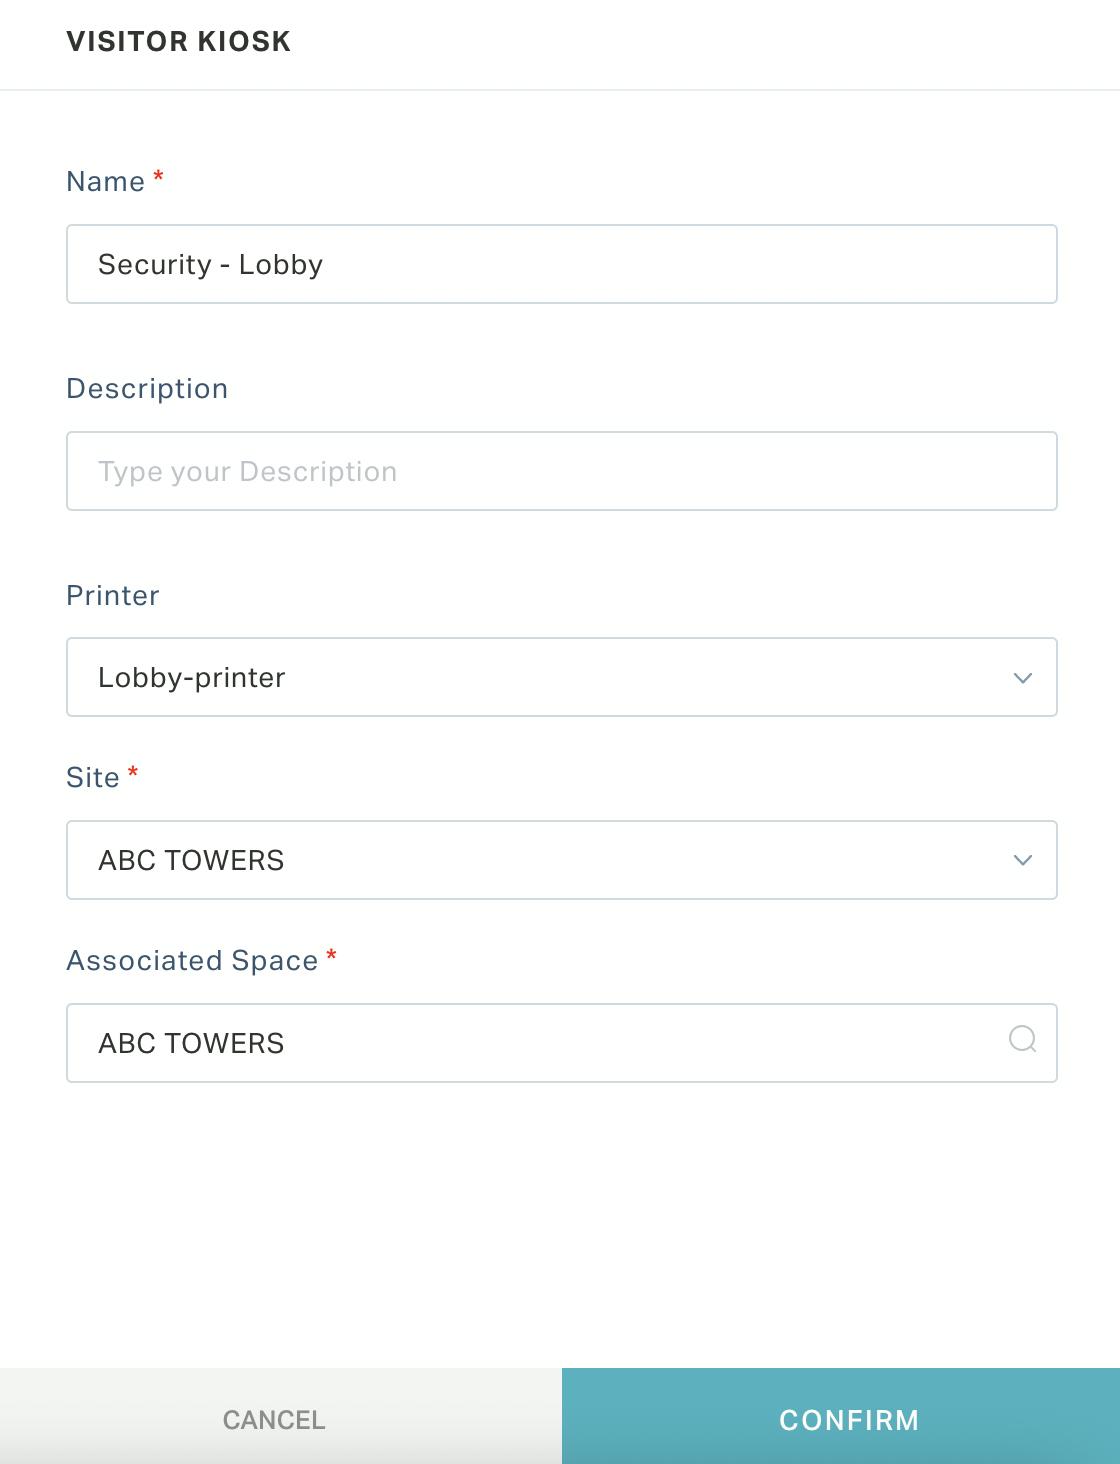
Update the following fields in this screen:
Name - The name of the kiosk device
Description - A short description of the device (if required)
Printer - The printer to be accessed to print the visitor badge
Note: Read the Managing Printers section for more information.
Site - The site to which the kiosk device belongs
Associated Space - The exact space where the device is deployed
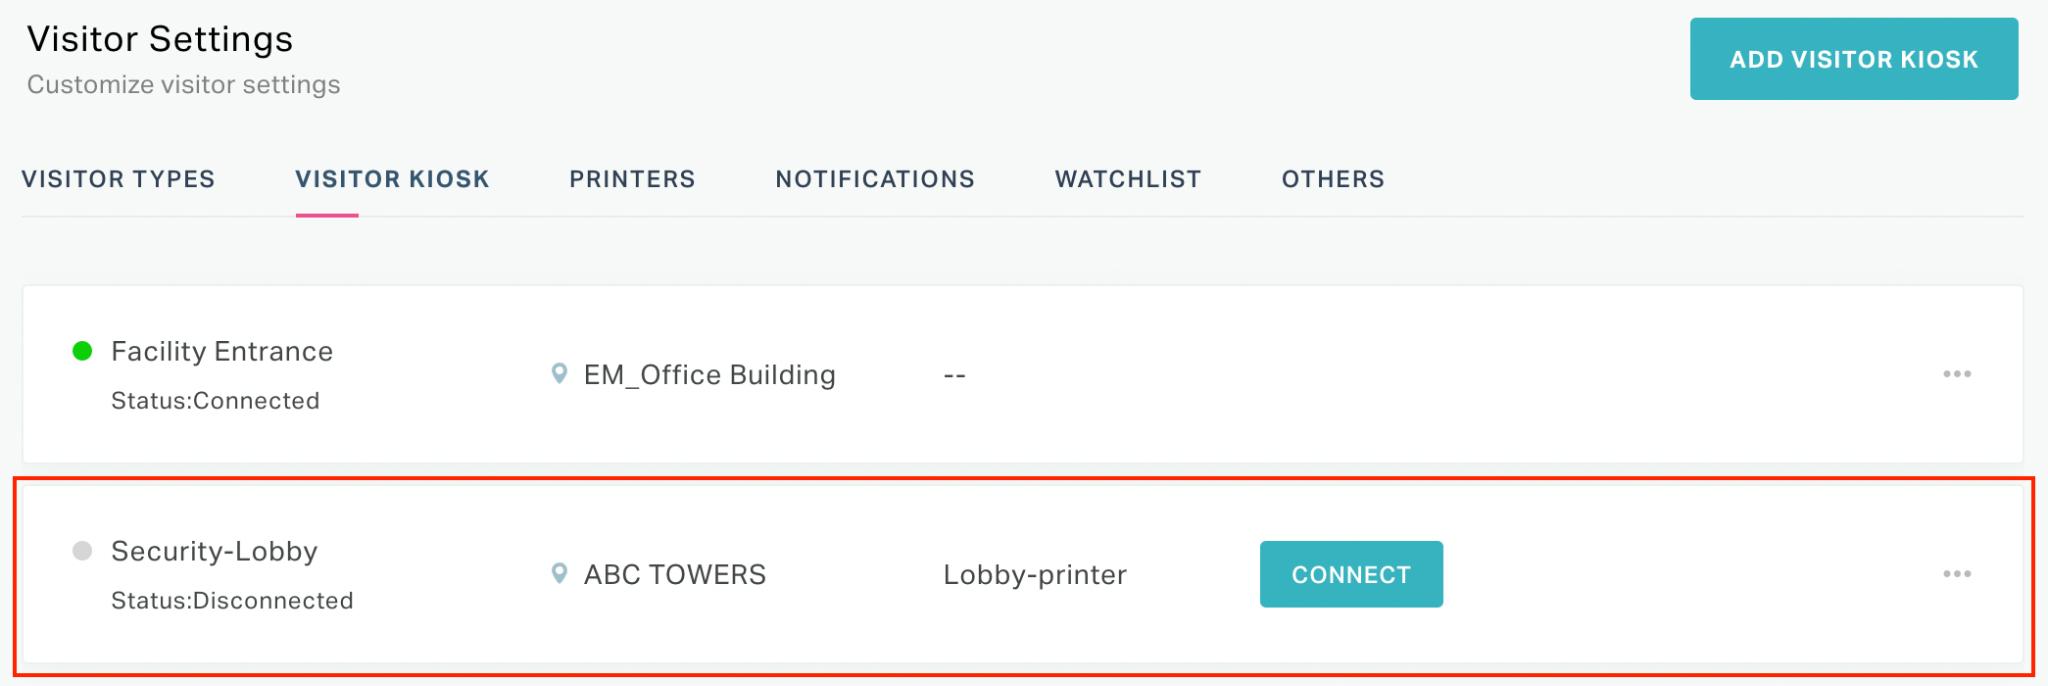
Click CONFIRM. The kiosk device is now added to this section as shown below.
Connecting to the Kiosk Device
While activating the visitor kiosk, you should pair the device with the application as a one-time process. To connect the device to the application,
Click CONNECT against the kiosk details in the VISITOR KIOSK section as shown below.

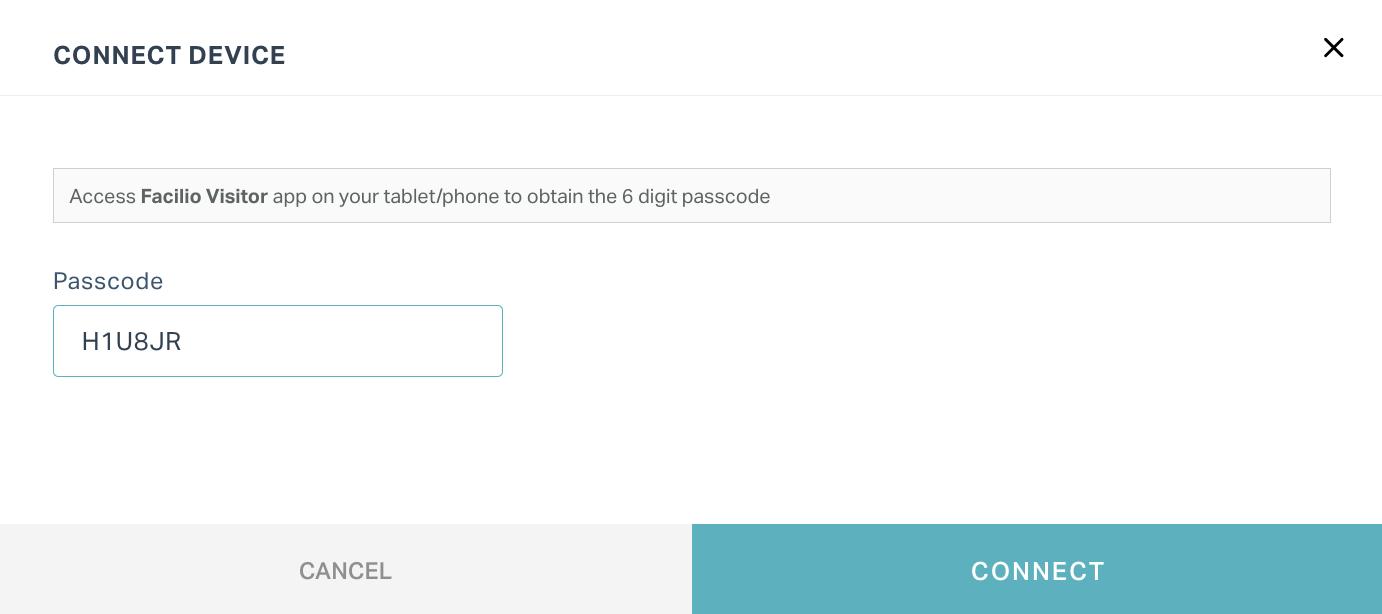
The CONNECT DEVICE window appears prompting you to enter a passcode.
Open the Facilio - Visitor Kiosk application on your device (tablet/ipad), simultaneously. The passcode to connect the device appears as shown below.
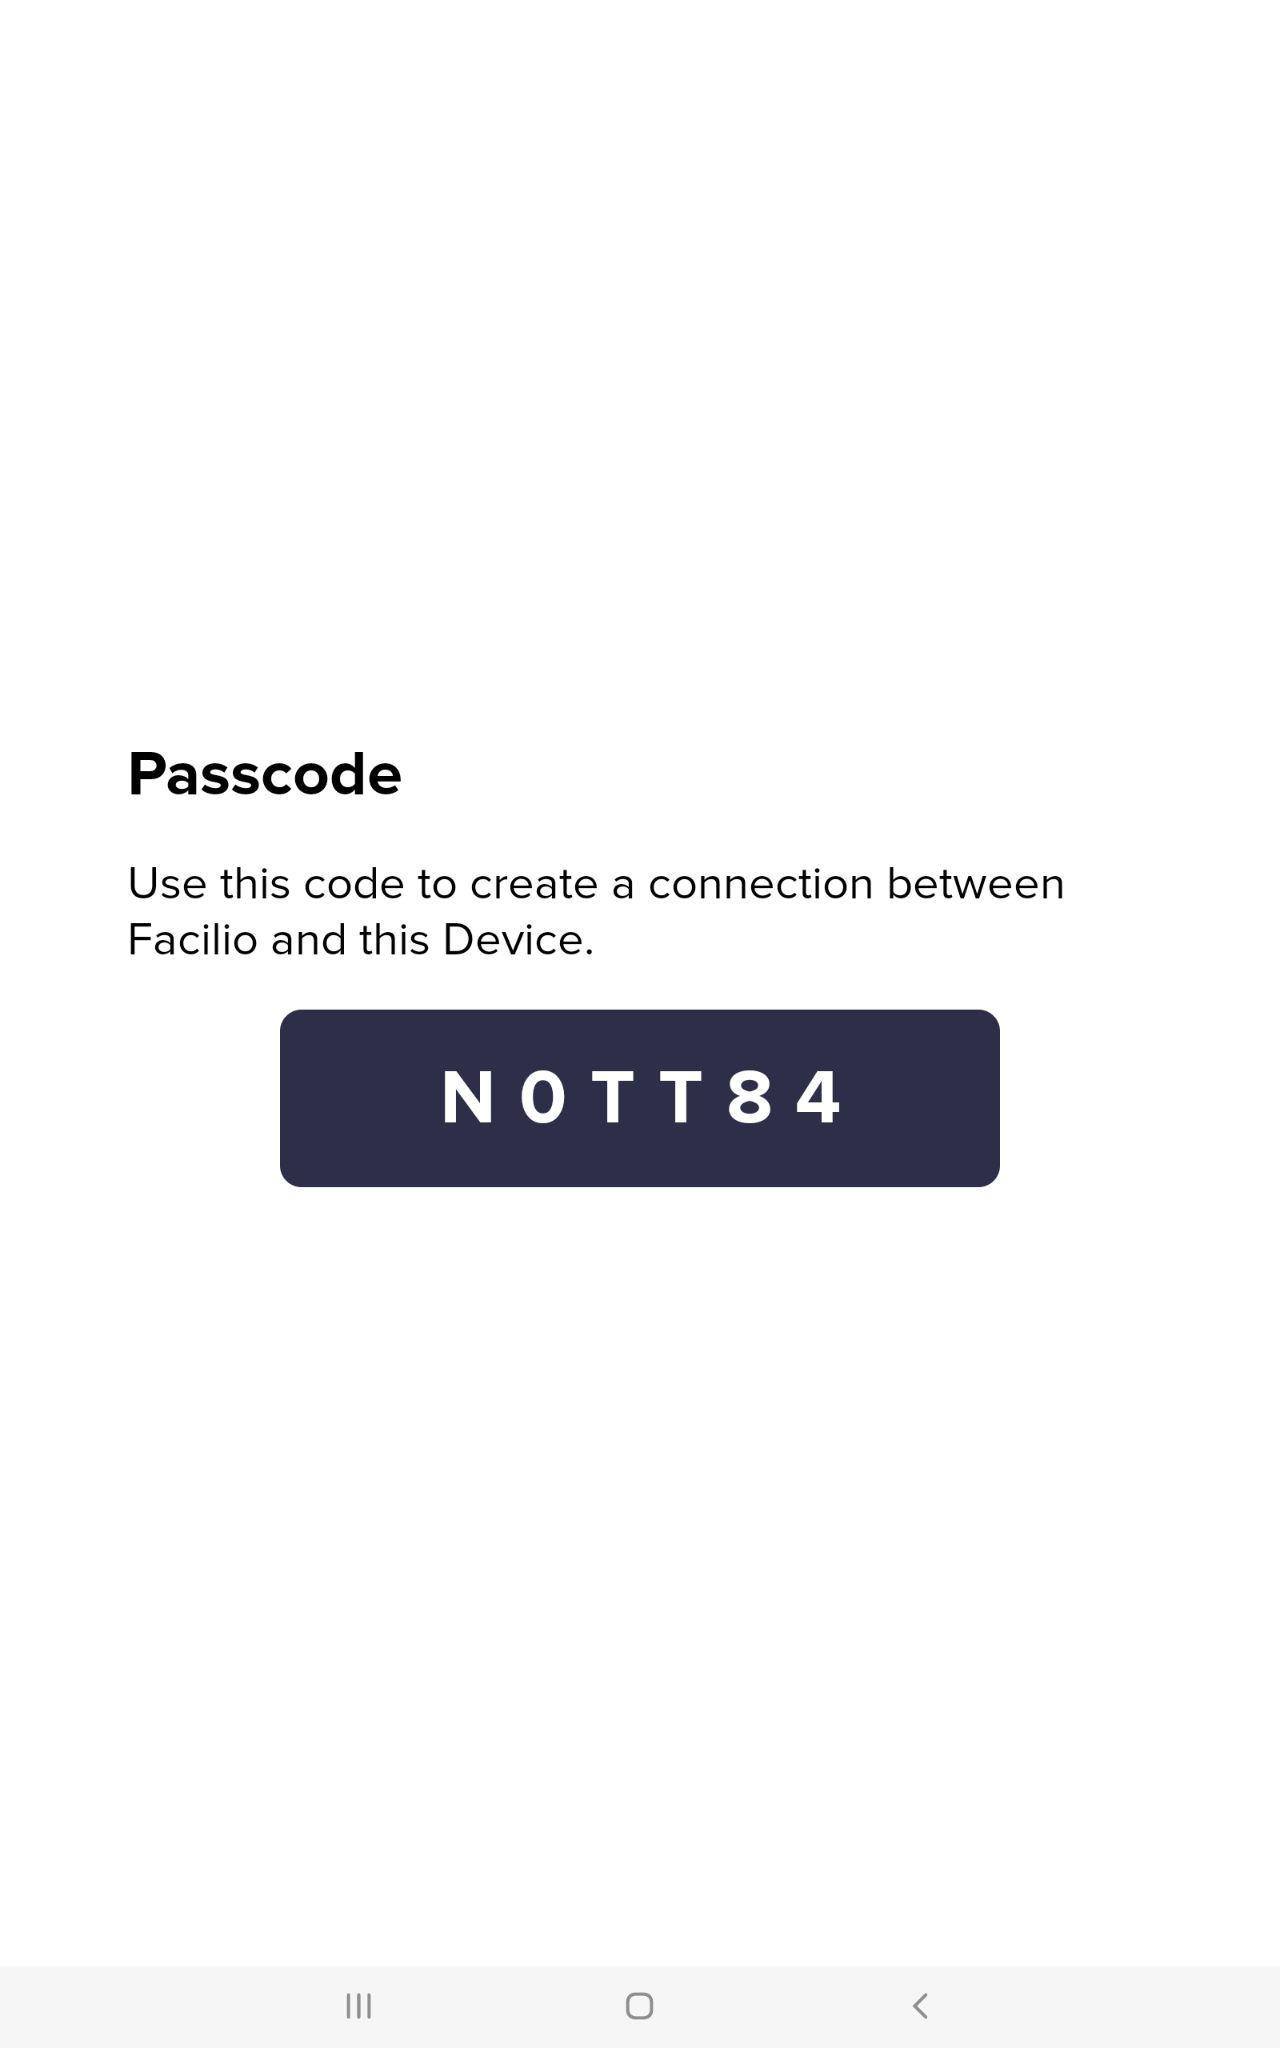
Enter this passcode in the CONNECT DEVICE window and click CONNECT.
The device starts downloading the configuration as shown below on a successful connection.

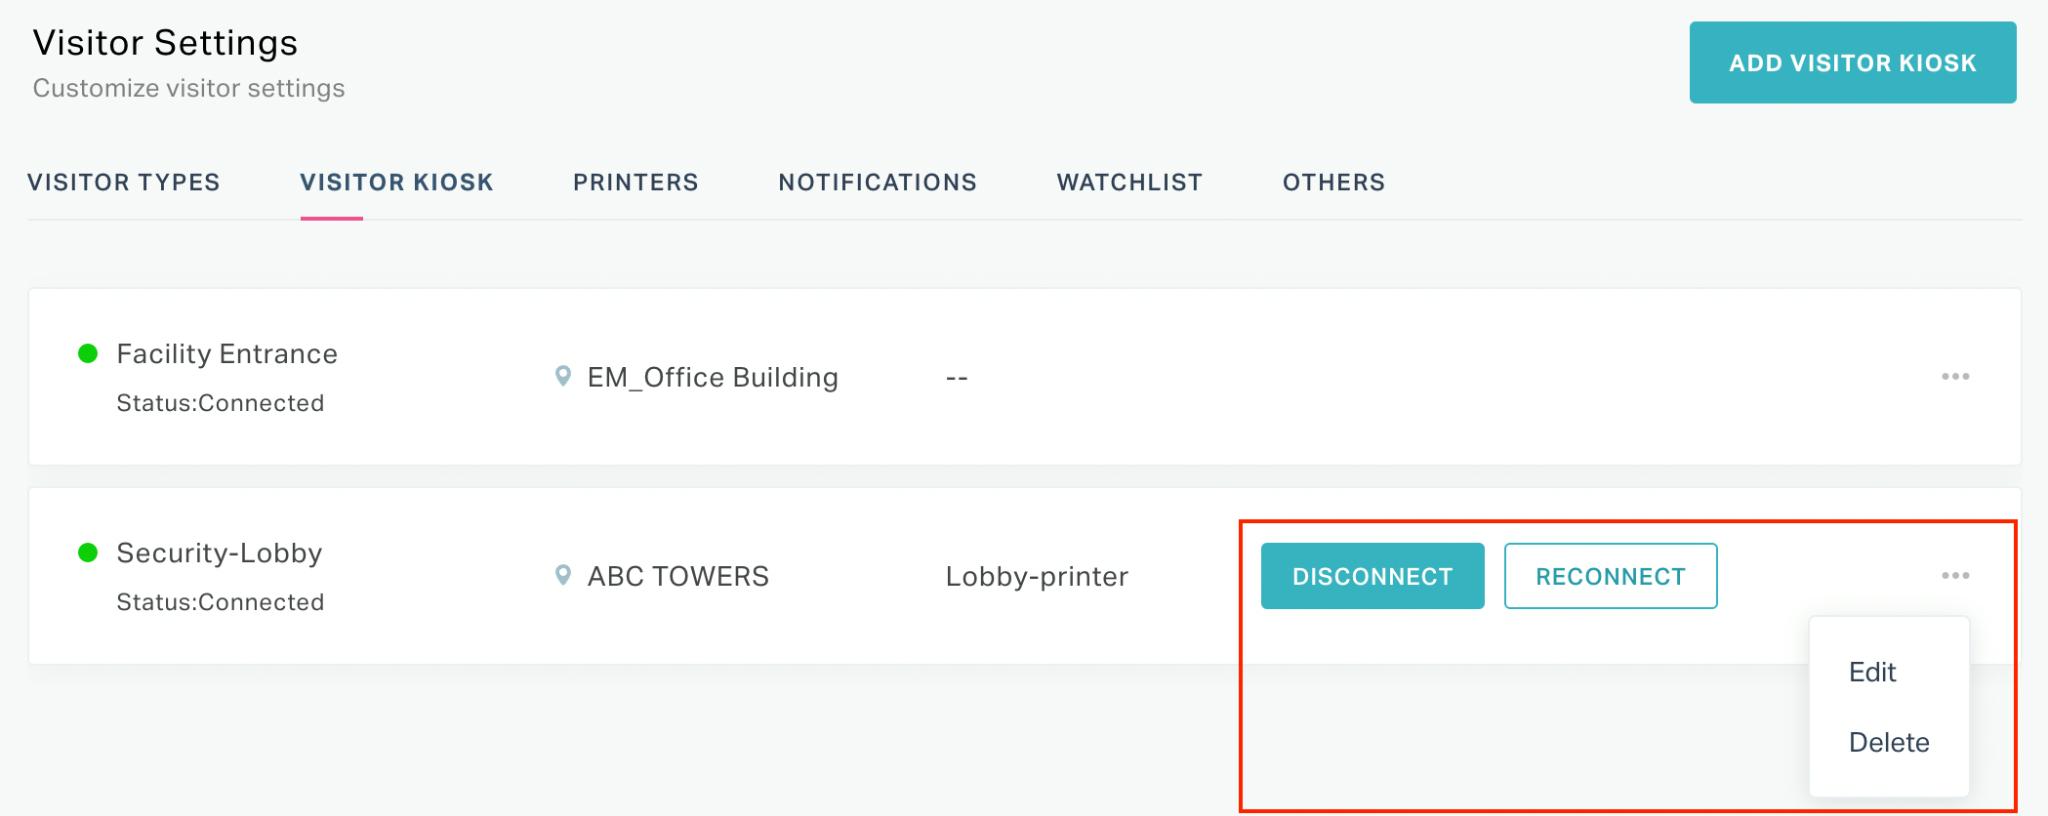
Also, the device status in the application turns to 'Connected' with a green indicator, as shown below.

You can now use the kiosk device to capture the visitor check-in and out details.
Other Functionalities
There are certain options and icons associated with this section that facilitate various other activities.
They are,
| Icon | Action/Description |
|---|---|
| DISCONNECT | Used to temporarily deactivate the kiosk device |
| RECONNECT | Used to reactivate a disabled kiosk device. Note: When you click RECONNECT, you should go through the entire procedure to reconnect the kiosk to the application. Read the Connecting to the Kiosk Device section for more information. |
| Edit | Used to modify the details of the kiosk device Note: Click the |
| Delete | Used to remove the kiosk device permanently from the application Note: Click the |
Managing Printers
The role of printers in visitor management is to print the visitor badge, which is handed over to visitors for identification purposes. When a printer is connected to the visitor kiosk, it automatically prints the badge on a successful visitor check-in.
In the PRINTERS section, you must add all the printers which might be used to print the visitor badges across the facility.
Adding a Printer
Facilio supports Brother printers for printing labels on visitor check-ins. In order to associate a printer with the kiosk device, you should first add the printer to the application. To add a printer,
Navigate to the PRINTERS section and click ADD PRINTER.
The ADD PRINTER window appears as shown below.
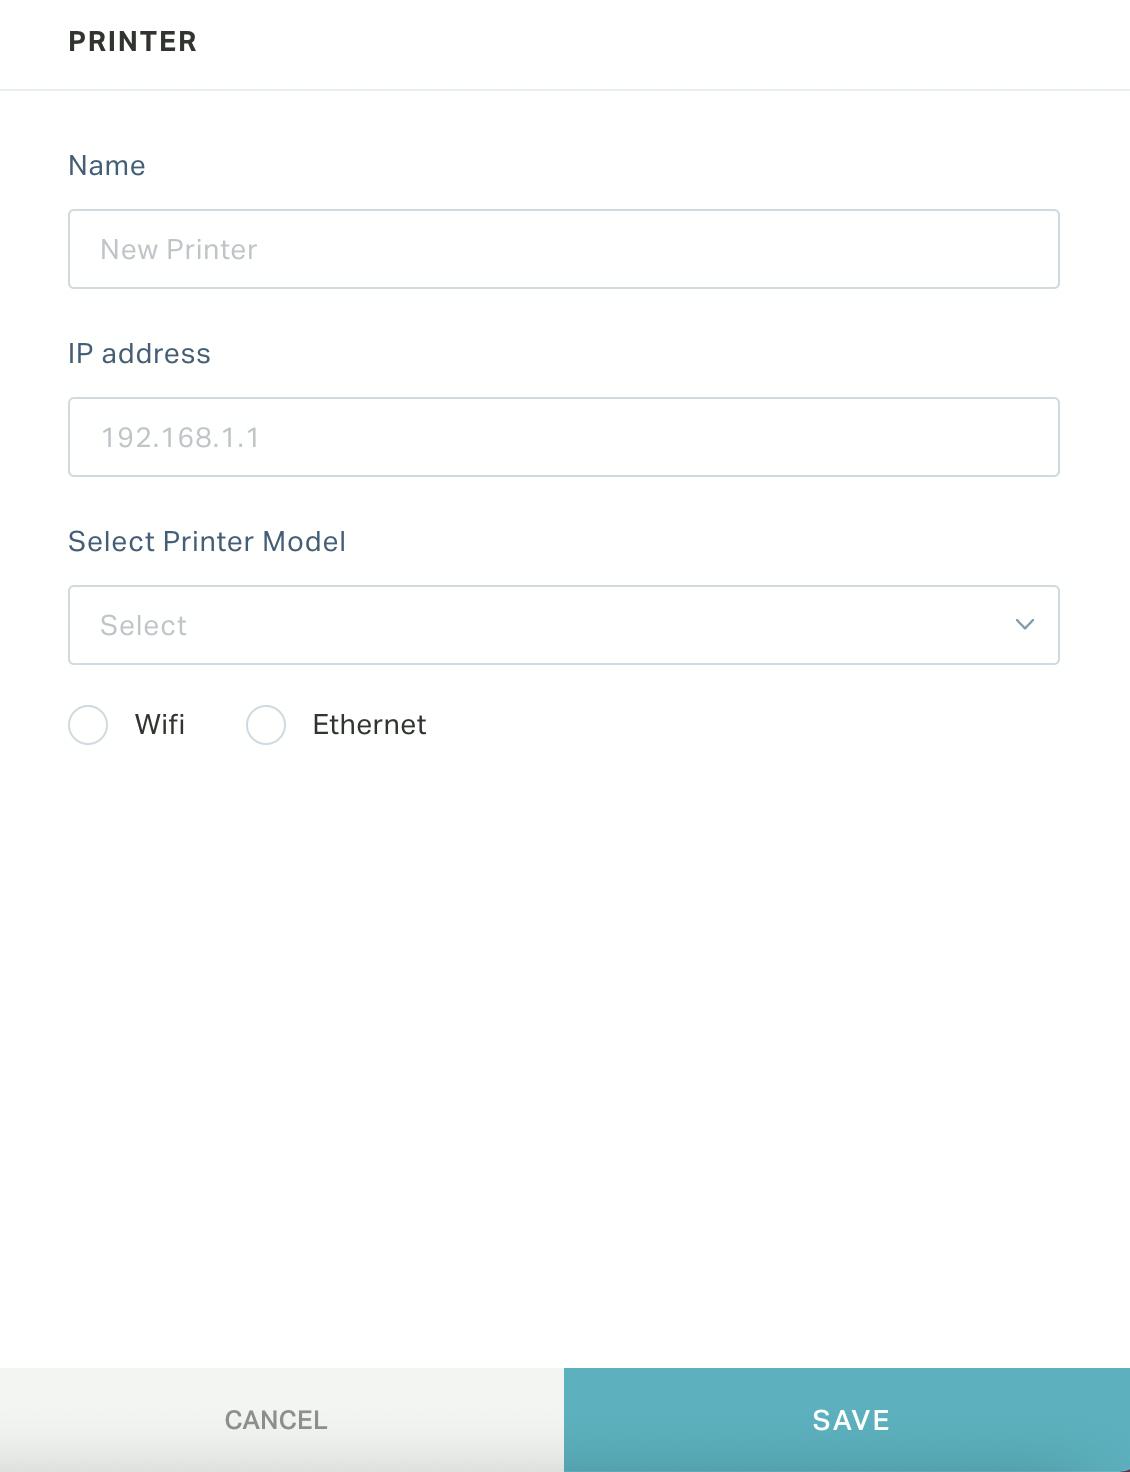
Update the following fields in this screen:
Name - Name of the printer
Tip: You can name the printer after the associated space.
IP Address - The IP address of the printer
Select Printer Model - The model of the printer being added
Note: You can choose any of the supported printers listed in the drop-down
Wifi - Select this option if the printer works wirelessly
Ethernet - Select this option if the printer works on a wired connection
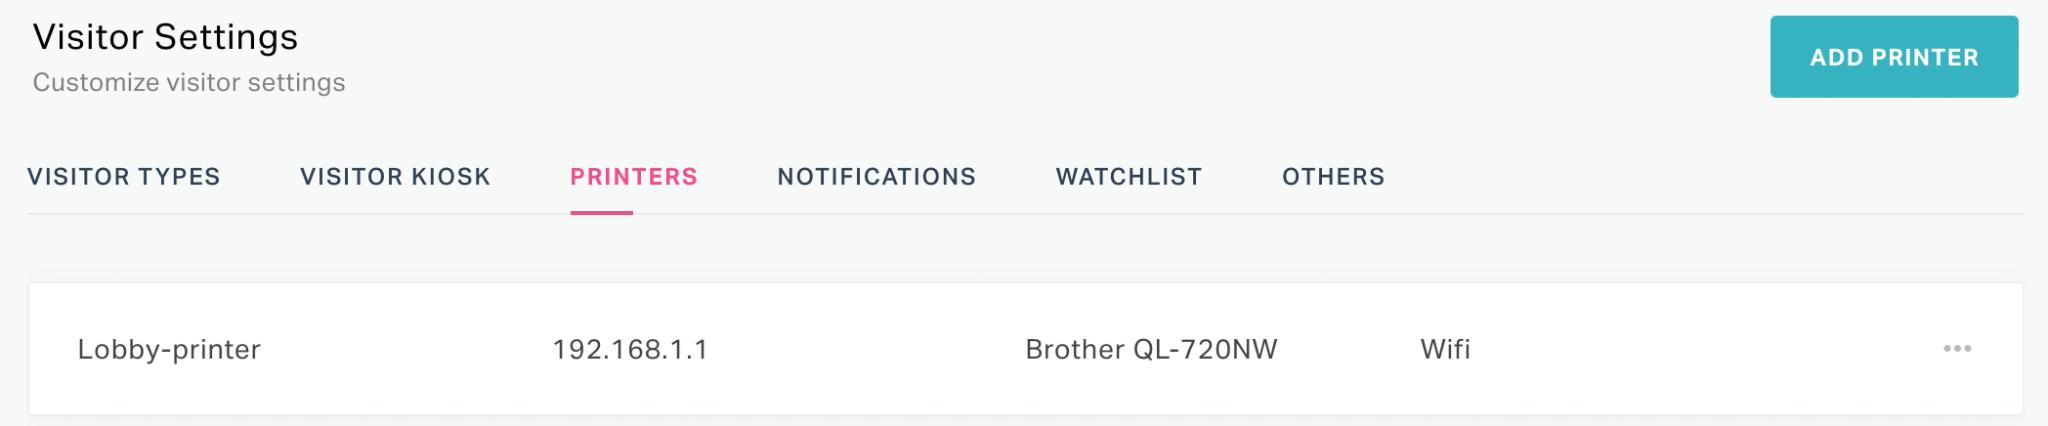
Click SAVE. The printer is now added to the application.
Other Functionalities
There are certain functionalities associated with this section that facilitate other activities.
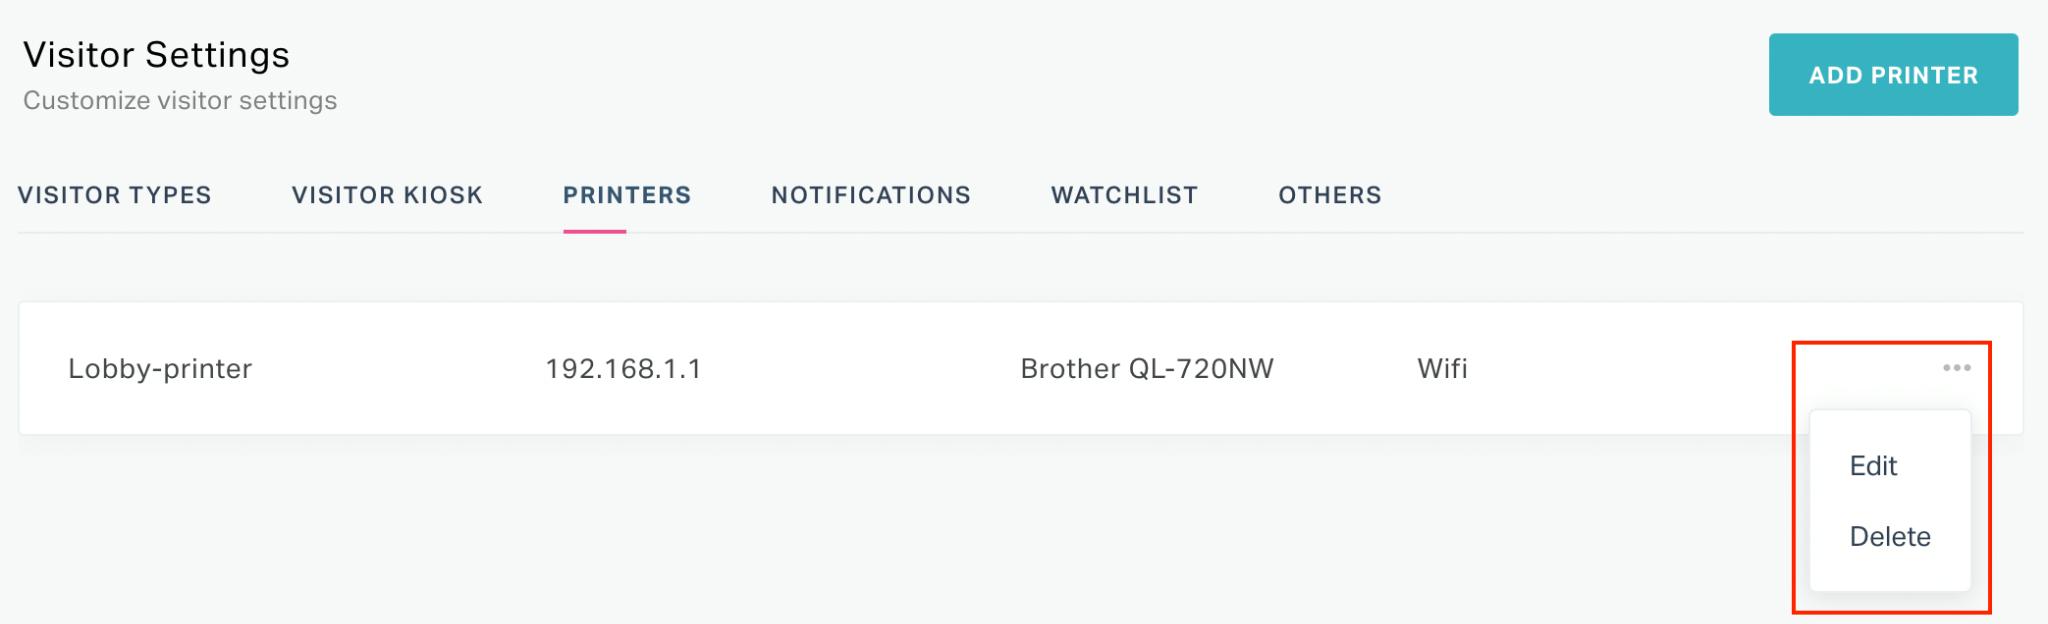
They are,
| Icon | Action/Description |
|---|---|
| Edit | Used to modify the printer details Note: Click the |
| Delete | Used to remove the printer permanently from the application Note: Click the |
Configuring Notifications
The application triggers a notification to alert the users on the arrival or departure of the visitors. It is a notice, request, or approval triggered as an email or SMS to both the hosts and visitors as configured.
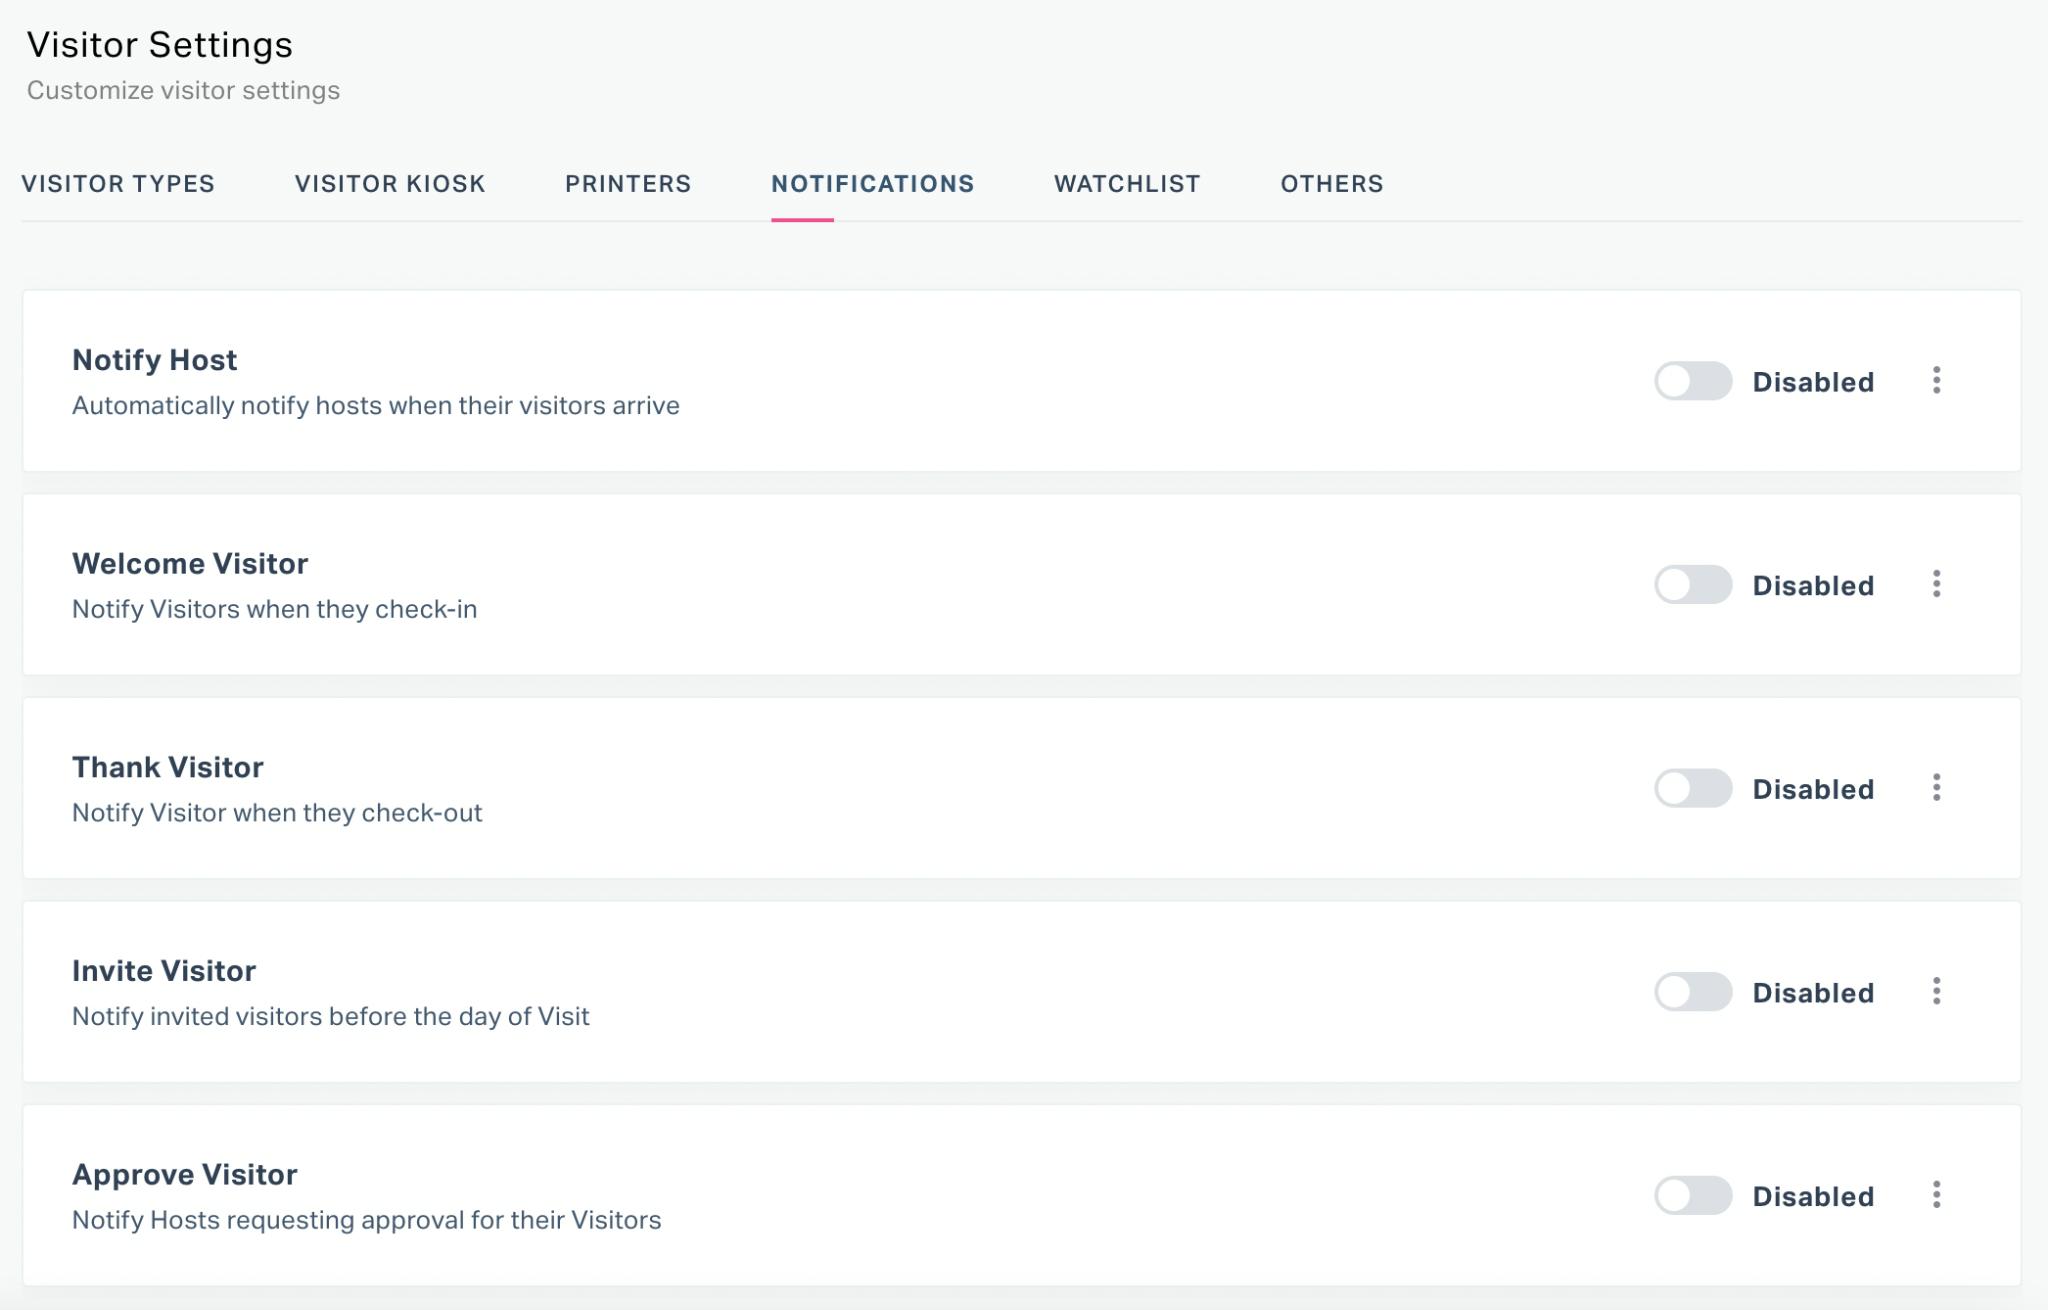
This section allows you to enable the following notifications:
- Notify Host - To notify the host on the arrival of the visitor
- Welcome Visitor - To notify the visitor on successful check-in
- Thank Visitor - To notify the visitor on his check-out
- Invite Visitor - To remind the visitor on a invite from the host
- Approve Visitor - To trigger an approval to the host, requesting him to authorize the visitor's entry
You can use the toggle button ( ![]() ) corresponding the field to enable the feature.
) corresponding the field to enable the feature.
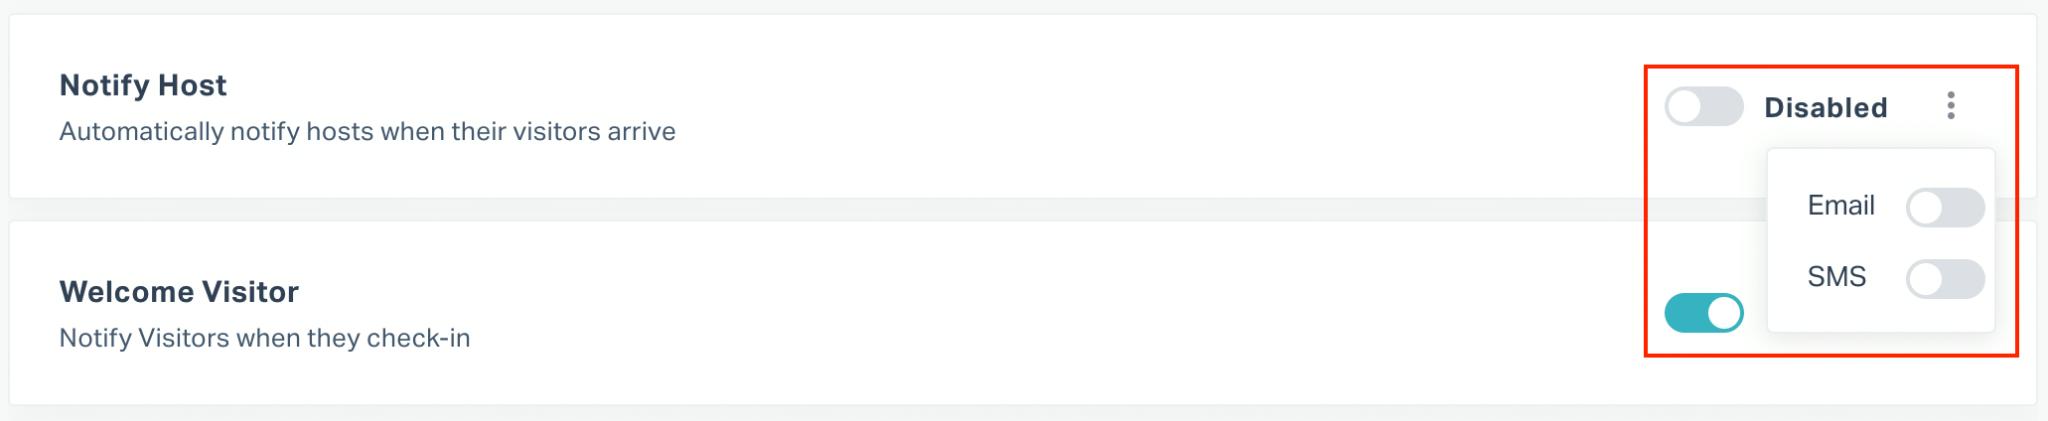
Click the ![]() icon for configuring whether to notify the user through email or SMS.
icon for configuring whether to notify the user through email or SMS.
Configuring Watchlist Notifications
A watchlist is created to identify the privileged visitors (VIPs) and visitors for whom entry is restricted (blocked visitors). Configuring watchlist notifications, alerts the selected users when a visitor matches a record in a watchlist.
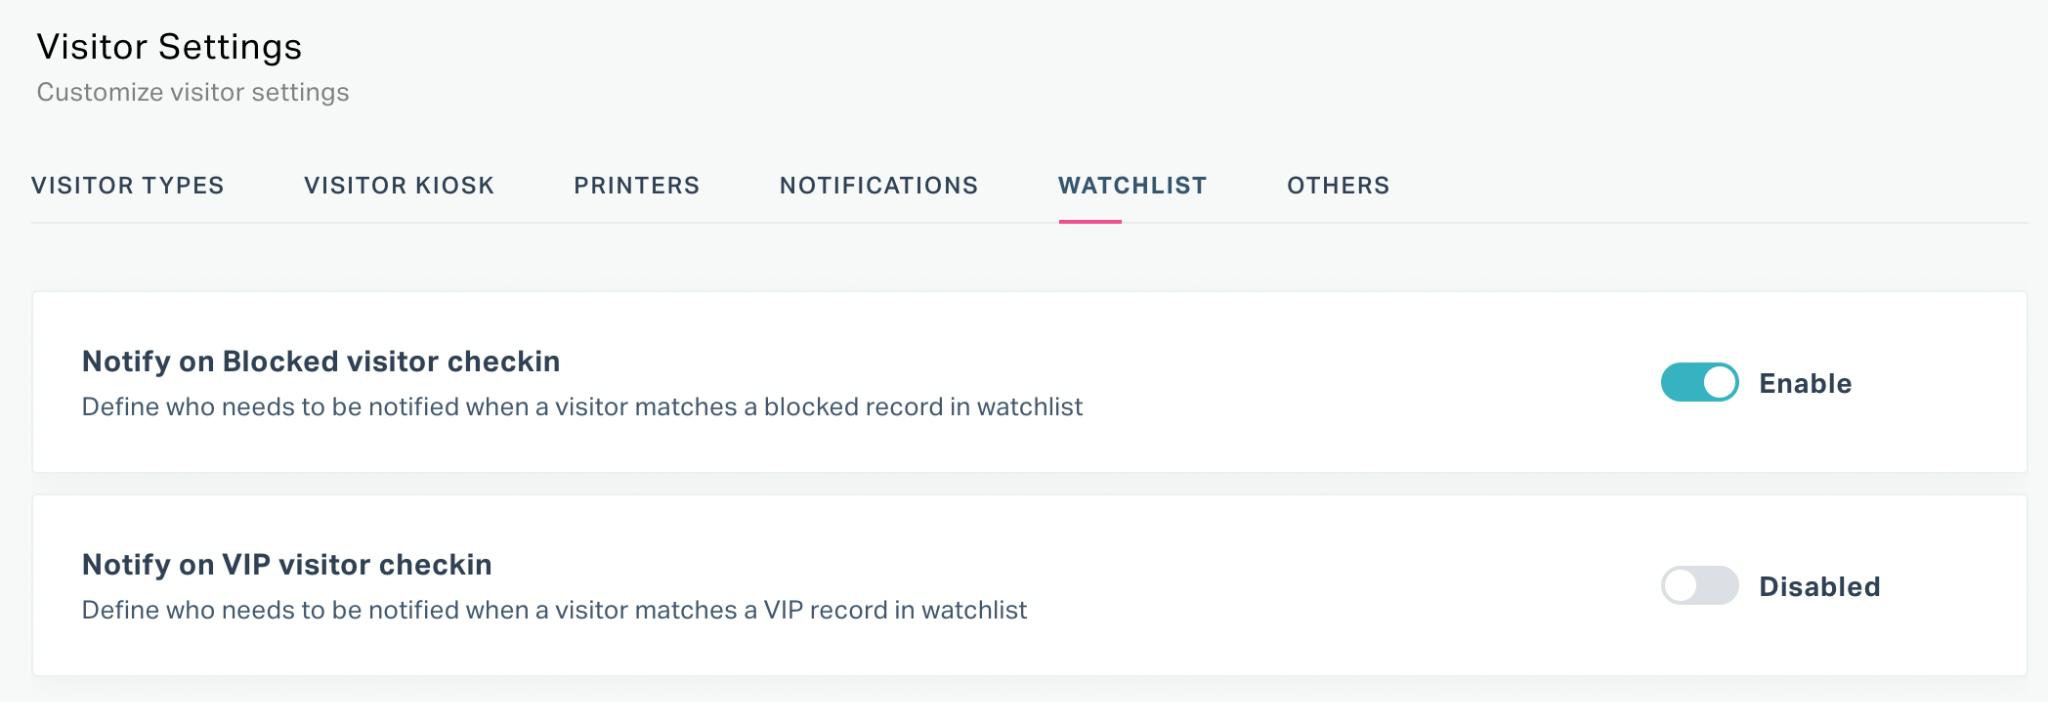
You can enable the following watchlist settings:
- Notify on blocked visitor check-in
- Notify on VIP visitor check-in
You can use the toggle button ( ![]() corresponding to the field to enable the notification. When you activate a feature, the Notification Preference window appears, as shown below.
corresponding to the field to enable the notification. When you activate a feature, the Notification Preference window appears, as shown below.
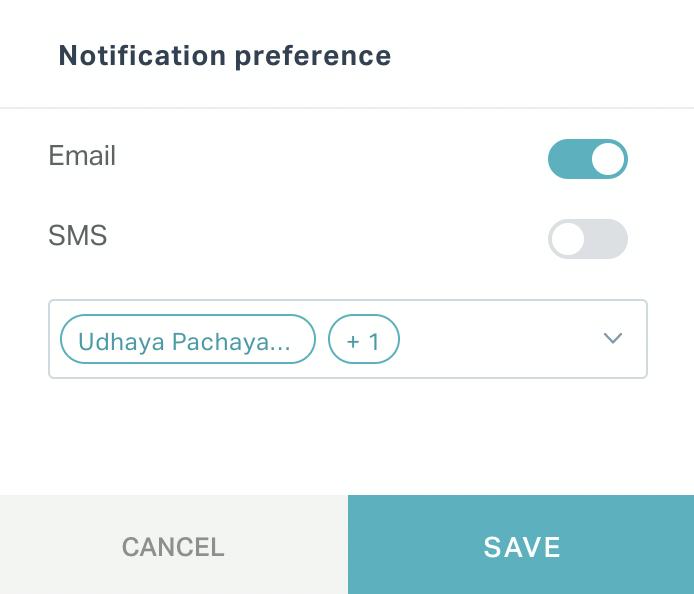
In this window, you can enable the required form(s) of notifications and configure the users who should be notified on watchlist visitor check-ins.
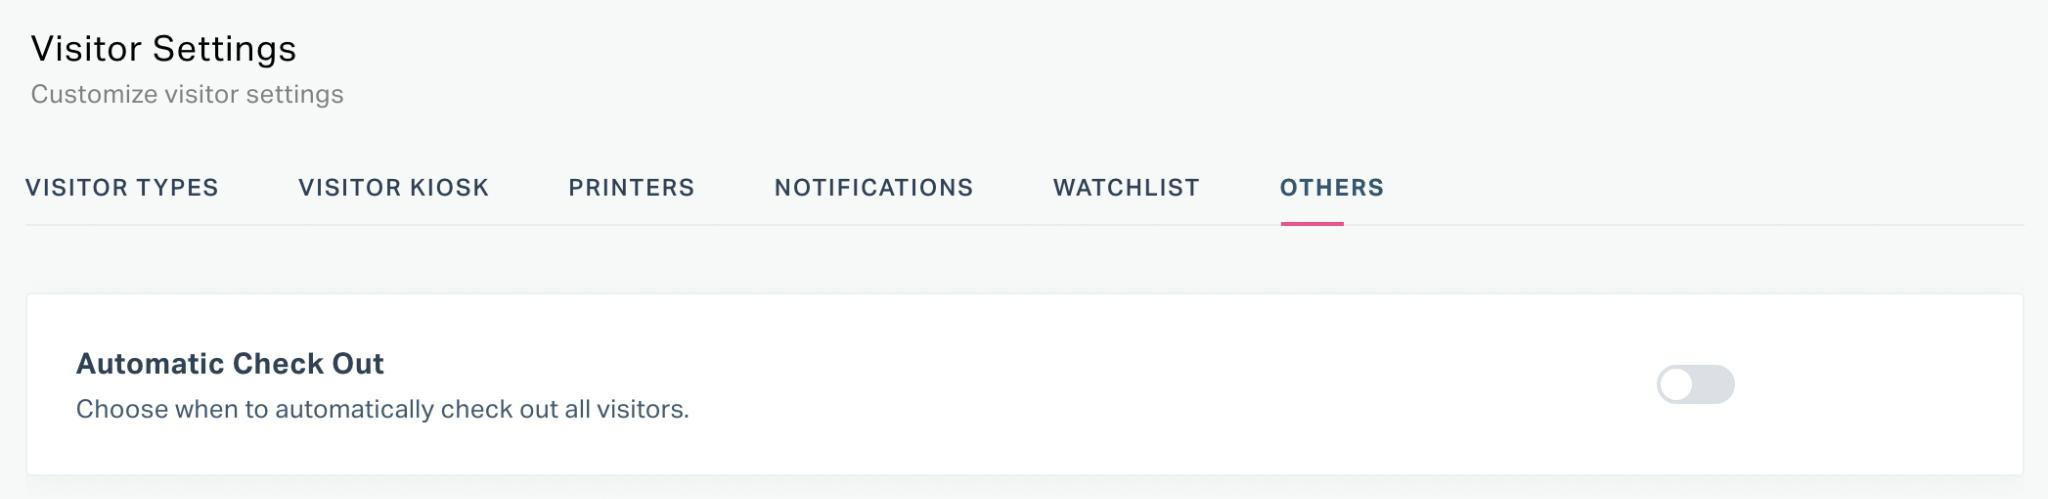
Configuring Automatic Check-Out
In addition to the above settings, you can enable automatic check-out if you need all the visitors to be checked out of your facility after a particular time. Navigate to the OTHERS section shown below to enable this feature.
If you enable this feature, you will be prompted to choose the time at which the visitors must be checked out.

If this feature is enabled, the visitor will be considered checked out at the specified time and the check-out details will be automatically updated in the visit.
It is crucial for an administrator to efficiently configure the required settings to utilize the application more effectively. The administrator settings thus configured can always be modified as and when needed.