Illustrating Flagged Alarm Process
The Flagged Alarm Process involves defining rules and criteria that determine when an alarm is flagged for attention, and identifying specific alarms that require significant assessment and resolution. The criteria for flagging alarms may include various parameters like evaluation settings, configuring email notification, creation of work orders, and the closure of flagged alarms.
The upcoming sections illustrate how to configure rule details, controller criteria, site criteria actions for assessment and resolution, and closure of a flagged alarm process.
Defining Rules Details
The elementary requirement of creating a flagged alarm process is to define the type of alarm evaluation. This section allows you to register the basic details, like its name, description, client, alarm type, and so on.
To configure rule details,
Navigate to the Rule Details section from the New Flagged Alarm Process screen. The Rule Details screen appears as shown below.
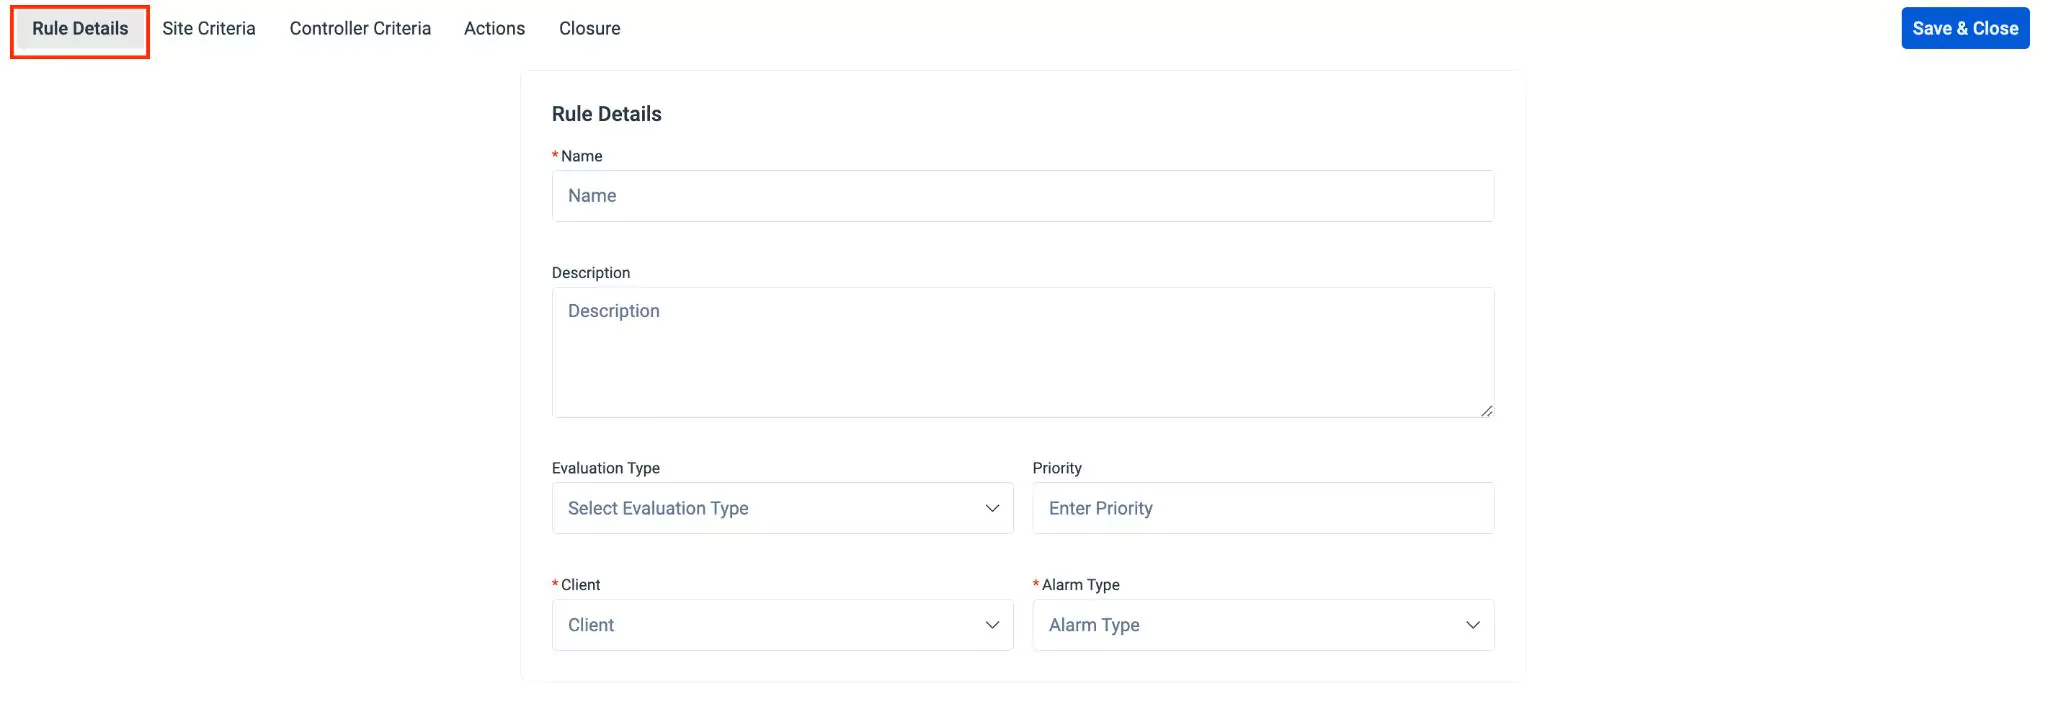
Update the following fields in this section:
Name - A label to identify the rule
Description - Ashort note explaining the purpose of the rule
Evaluation Type - The time frame for observing the alarm occurrences and events
Priority - The level of urgency assigned to each alarm within a system
Note: The lower numbers indicate higher priority.Client - The entity for which the rule details are being created
Alarm Type - The classification of alarms with unique set of attributes
Click Save & Close. The new flagged alarm process is now added to the list.
Defining Site Criteria
Defining site criteria is an essential aspect of the condition creation process. The condition represents a single criterion or a combination of criteria to flag alarms based on the conditions tailored for a specific site.
To define site criteria,
Navigate to the Site Criteria section from the New Flagged Alarm Process screen. The Site Criteria screen appears as shown below.

Update the following fields in this screen to define a site criteria.
Select Attribute - Select an attribute on which the condition is to be applied.
Operator - Select the operation or comparison methodology to be applied. You can choose any of the following possible operators:
- Is empty
- Is not empty
- Is
- Isn't
- With role
- Date related operators (like, Yesterday, starting tomorrow, last month, this week and so on)
- Numeric operators (like, !=, >=, >, between and so on)
- String operators (like, contains, doesn't contains, starts with, ends with, my teams, and so on)
Note: The operators displayed vary with respect to the attribute chosen.Value - Enter a value for which the condition applies.
Note: The applicability of this field depends on the operator set. For example, if the operator is set to 'Is empty' this field is not applicable.
A sample criterion configuration is shown in the screenshot below.

You can use the +Add Condition button to add a record and
 icon to delete a record in this window.
Click Save & Close. The site criteria are added to the Flagged Alarm Process successfully.
Defining Controller Criteria
Defining controller criteria is a crucial aspect of the condition creation process. The condition represents a set or combination of criteria to flag alarms based on specific conditions tailored for a particular controller.
To define controller criteria,
Navigate to the Controller Criteria section from the New Flagged Alarm Process screen. The following screen appears as shown below.

Update the following fields in this screen to define a controller criteria.
Select Attribute - Select an attribute on which the condition is to be applied.
Operator - Select the operation or comparison methodology to be applied. You can choose any of the following possible operators:
- Is empty
- Is not empty
- Is
- Isn't
- With role
- Date related operators (like, Yesterday, starting tomorrow, last month, this week and so on)
- Numeric operators (like, !=, >=, >, between and so on)
- String operators (like, contains, doesn't contains, starts with, ends with, my teams, and so on)
Note: The operators displayed vary with respect to the attribute chosen.Value - Enter a value for which the condition applies.
Note: The applicability of this field depends on the operator set. For example, if the operator is set to 'Is empty' this field is not applicable.
A sample criterion configuration is shown in the screenshot below.

You can use the +Add Condition button to add a record and
icon to delete a record in this window.Click Save & Close.The controller criteria are added to the Flagged Alarm Process successfully.
Configuring Actions
Defining Actions involves configuring predefined responses and workflows for various scenarios that may arise when a flagged alarm is triggered. This section allows you to configure emails for notification, create work orders, add assessment definitions in which you can configure one or more levels of assessment, add parameters for assessment, add attachments, and enable deferred email notifications.
To define actions,
Navigate to the Actions section from the New Flagged Alarm Process screen. A screen to configure actions appears as shown below.
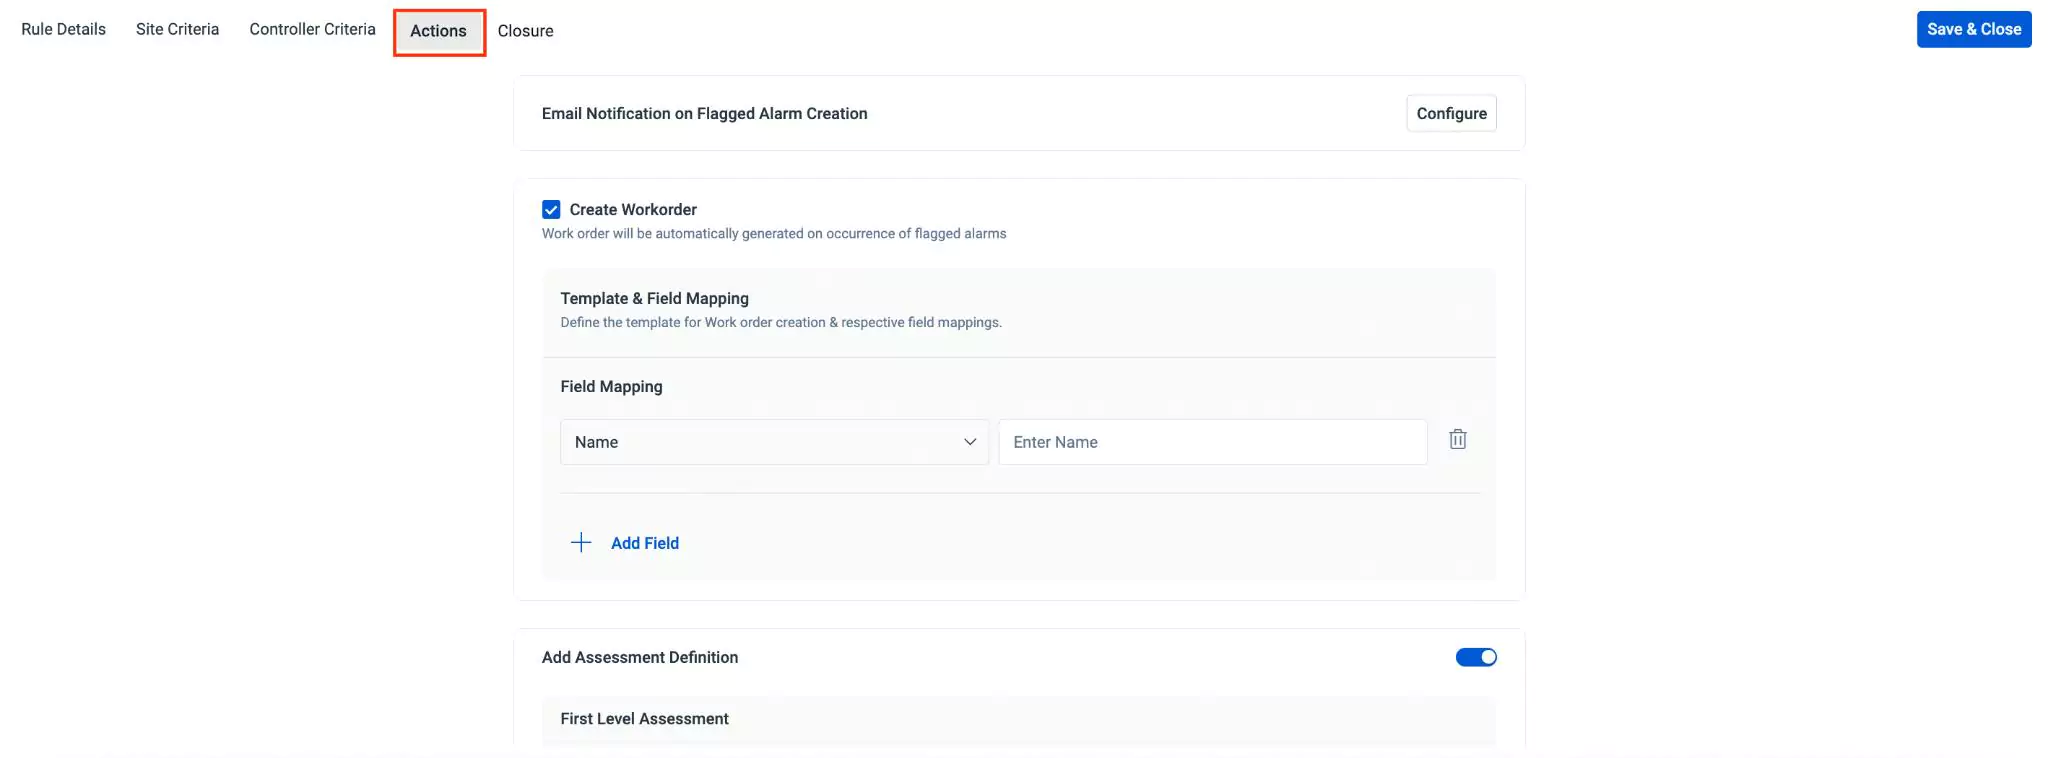
Configure the required actions as illustrated in the upcoming sections.
Configuring Email Notification on Flagged Alarm
The notification emails are typically the no-reply emails, which are used to send automated emails to notify users on specified actions. Configure email notifications to ensure the flagged alarm is updated to the preferred recipients. This section explains how to configure an email notification for flagged alarms.
To create an email notification,
Click the Configure button. The Flagged Alarm Creation Email window appears as shown below.
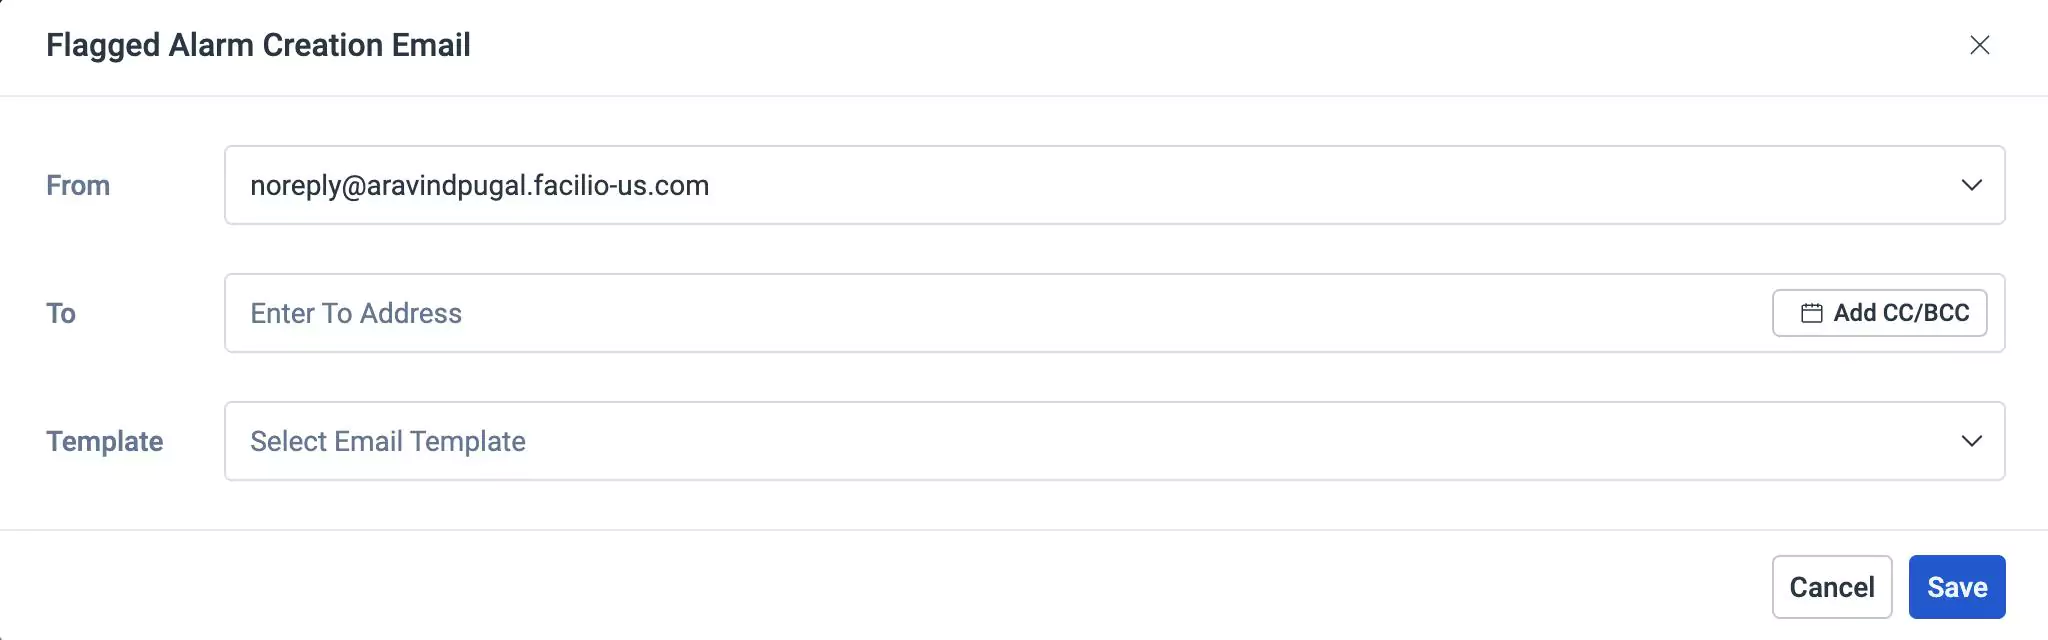
Specify the recipient (To, CC, and BCC) details.
Select an email template to be used for sending the notification email.
Click Save. An email notification on flagged alarms is created as shown below.

You can click Edit Configuration to modify the configured email and use the
 icon to delete the configured email notification.
Creating Work Order
Creating a work order for flagged alarms involves configuring the system to generate a work order automatically in response to specific conditions or criteria set for flagged alarms. This streamlines the workflow, enabling a prompt and organized approach to addressing and resolving identified issues.
To create a work order,
Enable the Create Workorder checkbox. The Field Mapping configuration screen appears as shown below.
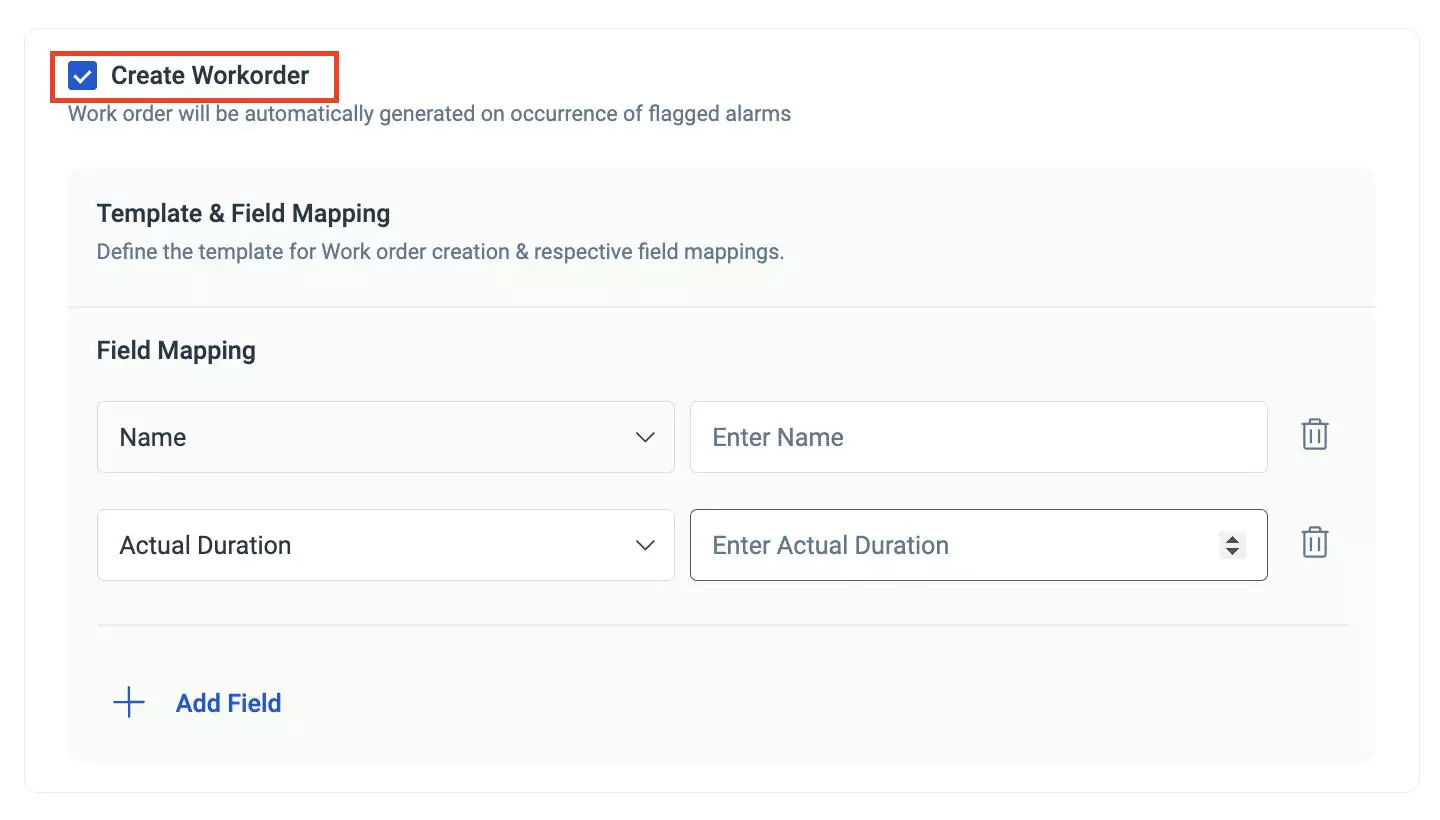 Note: The following fields appear for configuration only when Create Workorder is enabled.
Update the following fields in this screen:
Field - Select a field to map the value.
Note: The first field is auto-filled with the field "Name" and cannot be modified. You can input the relevant value in the corresponding Value field.Value - Enter an appropriate value with respect to the selected field.
Note: The values displayed in the drop down list are the values corresponding to the selected field.
Click the
 icon or Add Field to add a field and the icon to delete a field in the configuration screen.
Adding Assessment Definition
Adding an assessment definition is the establishment of a definition and specific parameters that are used to evaluate the flagged alarm. It typically involves the evaluation and response to specific alerts or alarms that have been flagged for attention. The definition and parameters define the urgency of the flagged alarms to be considered for evaluation and resolution.
First Level Assessment
The first level alarm assessment process involves determining the first level evaluation team, configuring the email notification, and adding relevant recommendations for appropriate actions.
To add an assessment definition,
Enable Add Assessment Definition. The First Level Assessment configuration screen appears as shown below.
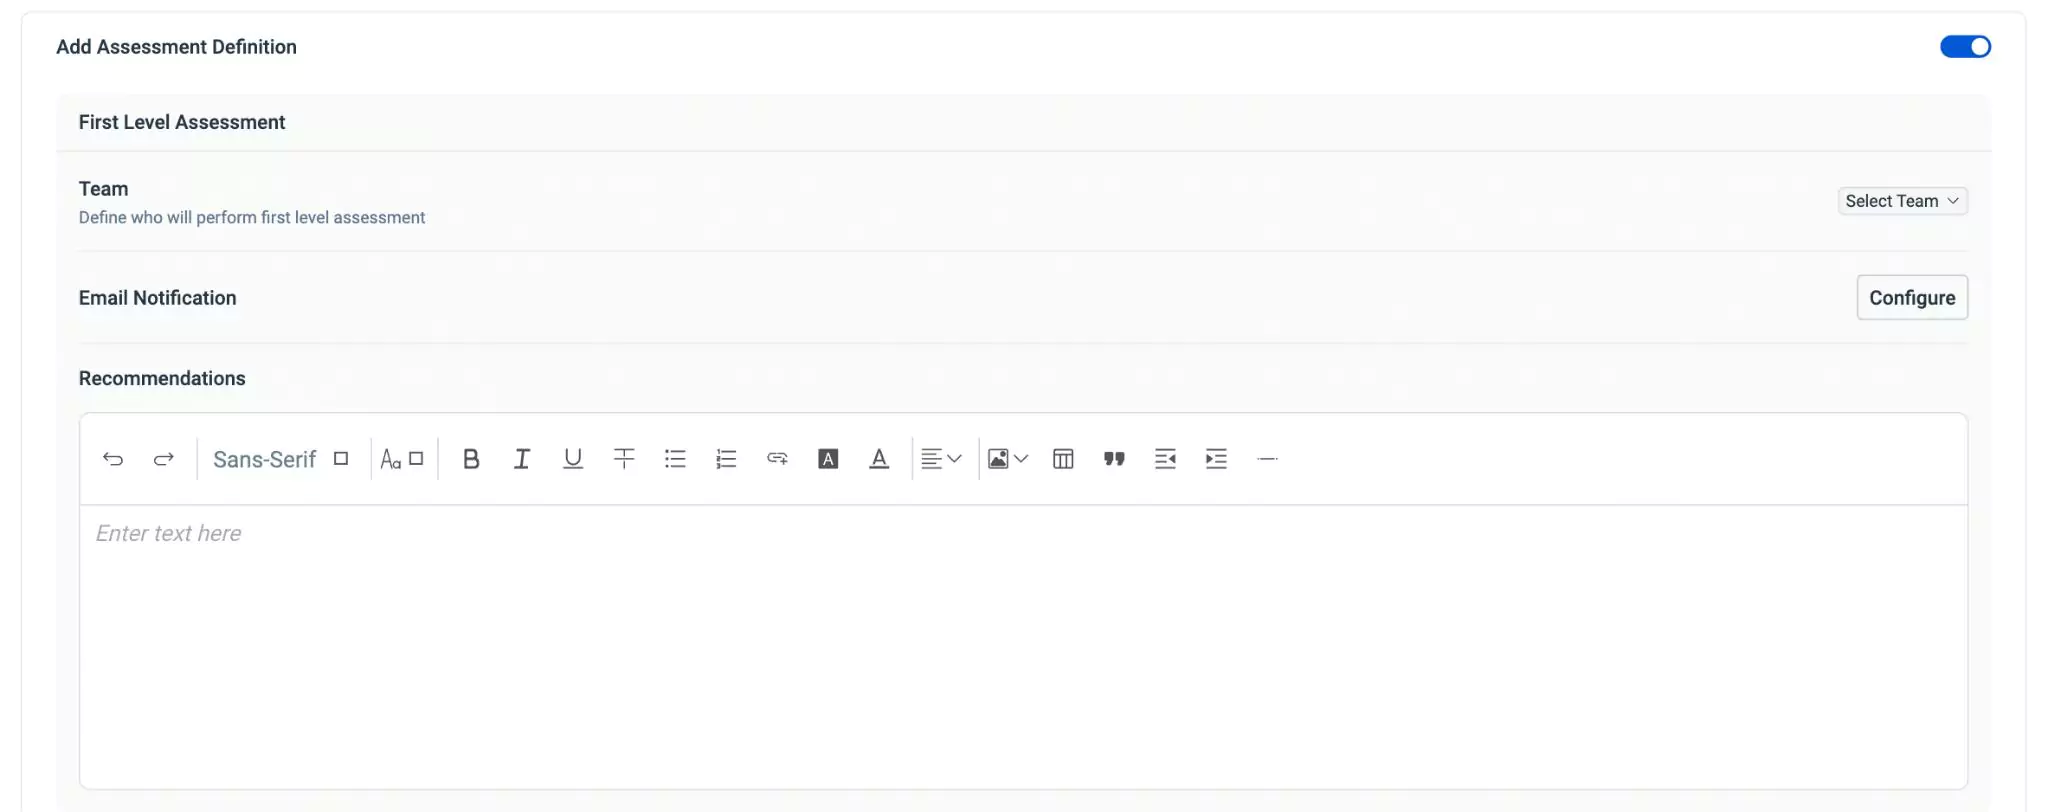 Note: The following fields appear for configuration only when the Add Assessment Definition toggle is enabled.
Update the following details in this screen:
Team - The group or individual who can perform the first level assessment on flagged alarms. Click Select Team and choose a preferred team from the dropdown list.
Email Notification - The message to notify the team members of specified actions related to flagged alarms. To send an email notification to the evaluation team, click Configure. The Email To Assessment Team prompt appears as shown below.
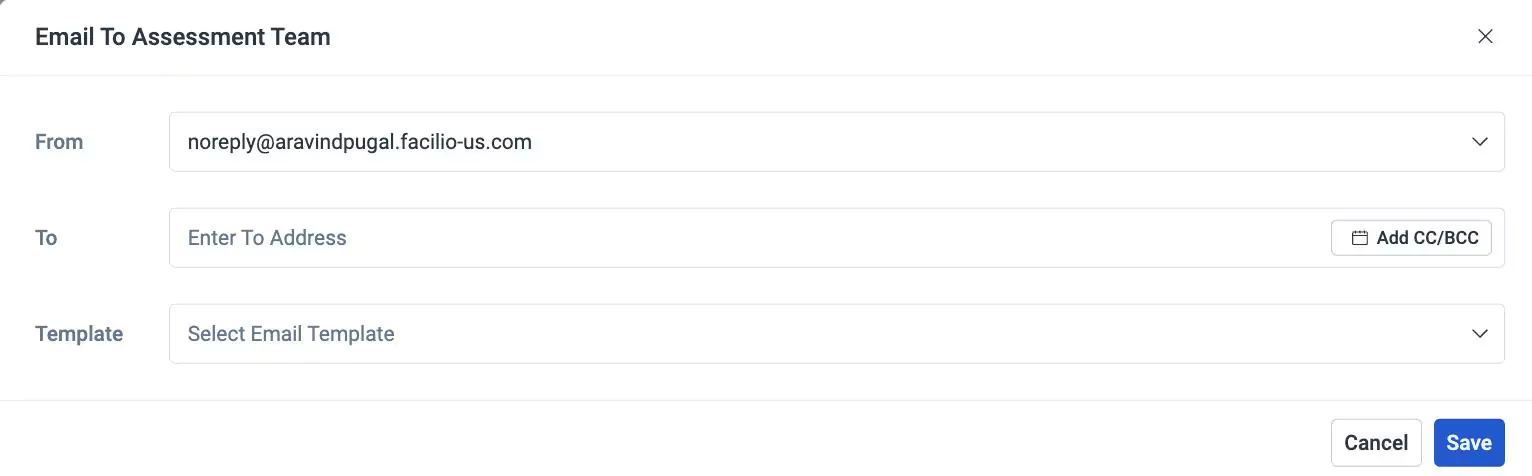
Update the fields in the above screen and click Save. Read the Configuring Email Notification on Flagged Alarm section for more information.
Recommendations - Special instruction or guidance to the evaluation team(s)
First Level Assessment Parameters
First Level assessment parameters refer to the criteria and conditions used to evaluate and analyze alarms that have been flagged for special attention. The assessment parameters are the set of rules or attributes used to determine the importance and severity of flagged alarms. When certain events or conditions meet predefined criteria, they are flagged as significant, requiring closer examination and immediate action. Each assessment level parameter has two workflows depending on the work order being enabled or disabled in the previous section.
When Create Work Order is Enabled
When the option to create a work order is enabled during assessment, the parameters associated with the flagged alarms to be considered include the configuration of timing to generate work order, timing to proceed with work order when no action is taken after custody, the reasons for inhibiting the alarm, the reasons for closing the issue, the cause of the issue, the conditions that could resolve this problem, and the remaining timing for assessment in the Summary screen.
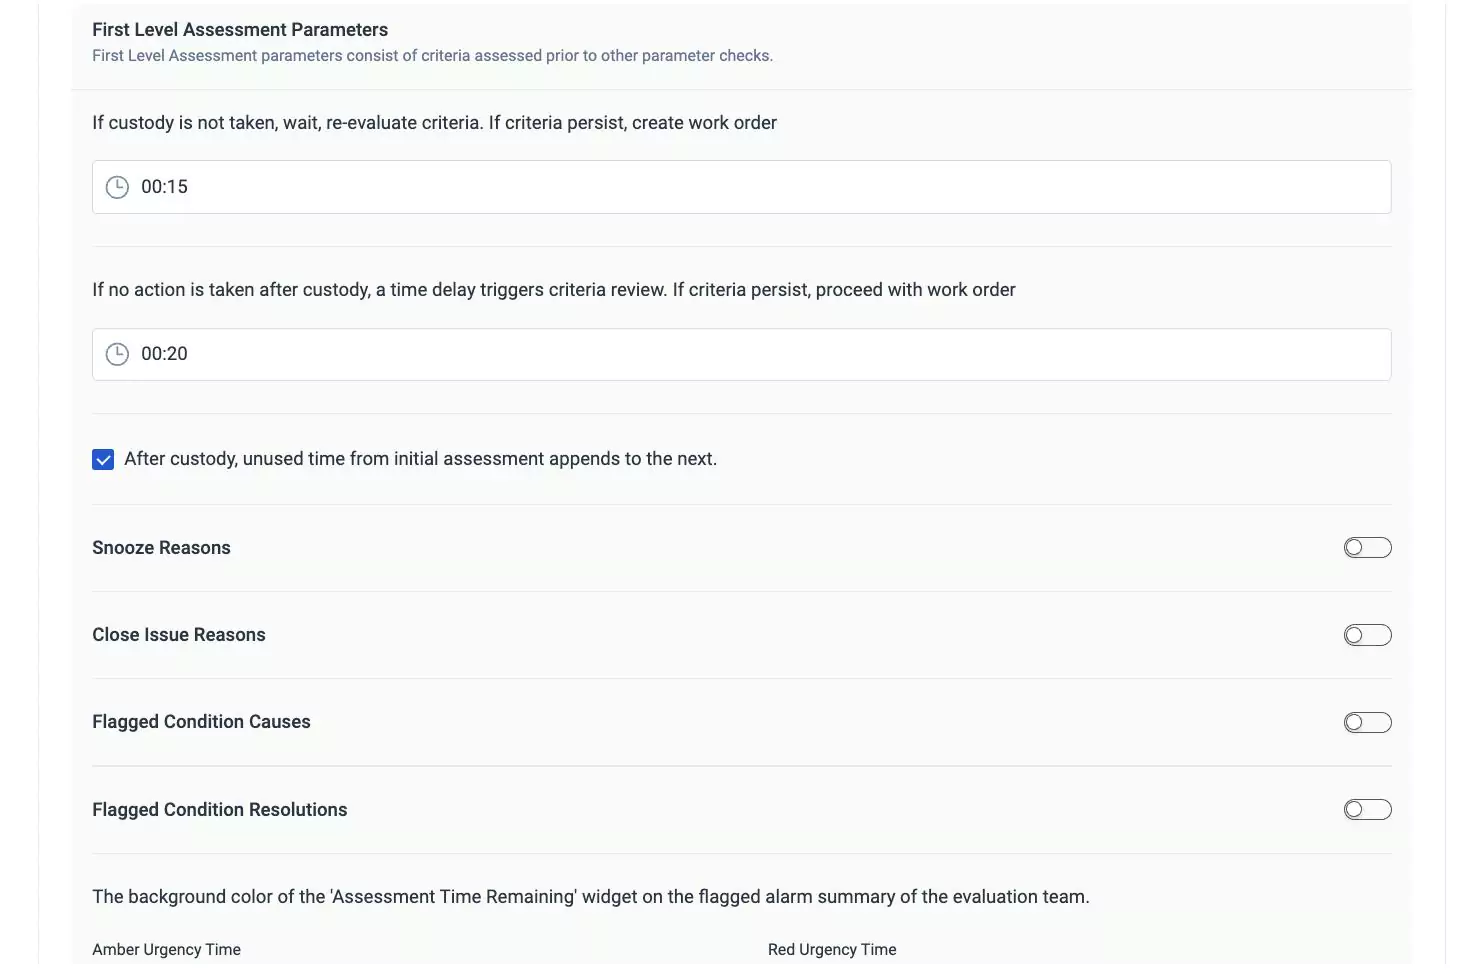
Update the following fields in this screen.
If custody is not taken, wait, re-evaluate criteria. If criteria persist, create work order - Select the time frame after which a work order should be generated if custody is not taken.
If no action is taken after custody, a time delay triggers criteria review. If criteria persist, proceed with work order - The delay time frame to be triggered after which a work order should be created if no action is taken after custody.
After custody, unused time from initial assessment appends to the next - Upon taking custody of the flagged alarm, any unused time from the initial assessment is carried forward to the subsequent flagged alarm assessment process.
Snooze Reasons - To specify the reasons for inhibiting flagged alarms. To add a reason,
Enable the Snooze Reasons toggle. The
icon and the Add Snooze Reason option appears.Click
or the Add Snooze Reason option. An Add Snooze Reason prompt appears.
- Snooze Reason - The reason to snooze for an assessment
- Max Snooze Time - The maximum time limit to snooze for an assessment
Click Add. The inhibit reason and the time frame is added in the screen.
You can use Add Snooze Reason or
 ,
,  ,and
,and  icons to add, edit, and delete the inhibit reasons respectively.
Close Issue Reasons - To specify the reason for closing a particular issue of the flagged alarm. To add a reason for closing an issue,
Enable the Close Issue Reasons toggle. A field appears to enter the reason as shown below.

Enter the reason for closing the issue related to the alarm. For example, HVAC issue.
Flagged Condition Causes - To specify the cause that resulted in the alarm being flagged. To add a cause,
Enable the Flagged Condition Causes toggle. A field appears to enter the cause as shown below.

Enter the potential condition that caused the alarm to be flagged. For example, Cooling system malfunctioned.
Flagged Condition Resolutions - To specify the resolution to rectify the issue associated with the flagged alarm. To add a resolution,
Enable the Flagged Condition Resolutions toggle. A field appears to enter the conditions for resolving the alarm as shown below.

Enter predefined action to address and resolve flagged conditions. For example, Verified the functioning of cooling systems
Click the
icon to add more records in each parameter of the assessment.The background color of the 'Assessment Time Remaining' widget on the flagged alarm summary of the evaluation team - The widget displaying the time left for an assessment on the Summary screen of the evaluation team.
Amber Urgency Time - The color duration for the alarms flagged as intermediate urgent
Red Urgency Time - The color duration for the alarms flagged as critically urgent
Note: The Red Urgency Time field always displays the timeframe set within the range defined in the Amber Urgency Time field.
Note: If a flagged alarm is assigned to an evaluation team and a corresponding work order is generated, the assessment of the alarm is managed by both the evaluation team and the workflow associated with the work order. Whichever party closes the alarm first will have the updated status reflected for both parties.When Create Work Order is Disabled
When the option to create a work order is disabled during assessment, the parameters associated with the flagged alarms that appear in this section are shown below.
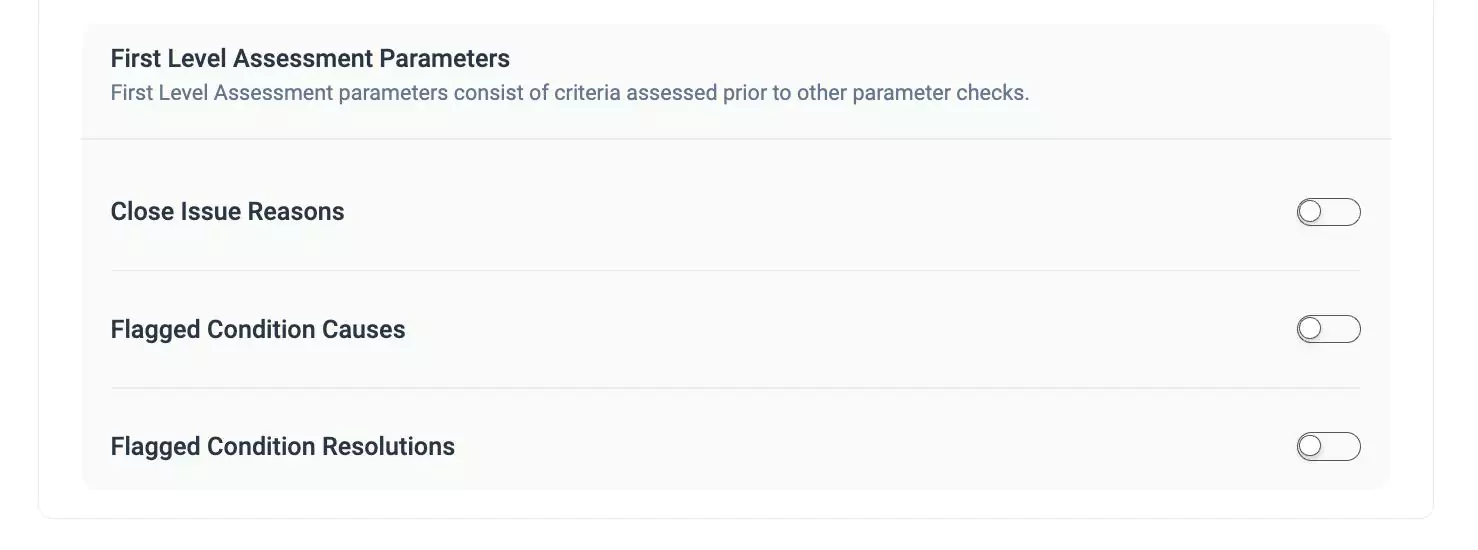
Read the Close Issue Reasons, Flagged Condition Causes, Flagged Condition Resolutions field descriptions in the When Create Work Order is Enabled section to understand the definition and working of each parameter.
Note: The first-level assessment parameters consist of criteria that need evaluation before initiating the assessment process.You can use the
icon or Add Next Level Assessment available at the bottom of First Level Assessment Parameters to add a new level of assessment definition.Attaching Files
Attaching files can provide additional information to help assess and resolve the flagged alarms more comprehensively. It serves as an effective means of communication between team members, allowing them to share relevant information and collaborate on the assessment. To add an attachment, click Browse Files and attach the required file(s) or drag & drop the required file(s) from the system.
 Note: The file size must be less than 5MB.
You can attach more than one file and use the
icon to delete the uploaded file.Enabling Deferred Email Notification
The Deferred Email Notification option allows you to delay or defer the delivery of email notifications for flagged alarms. It is helpful in scenarios where immediate email notifications may not be desired, such as during specific maintenance tasks, or when certain conditions require further assessment before notifying relevant parties.
To configure deferred email notification,
Click the Enable Deferred Email Notification toggle. The following fields appear as shown below.
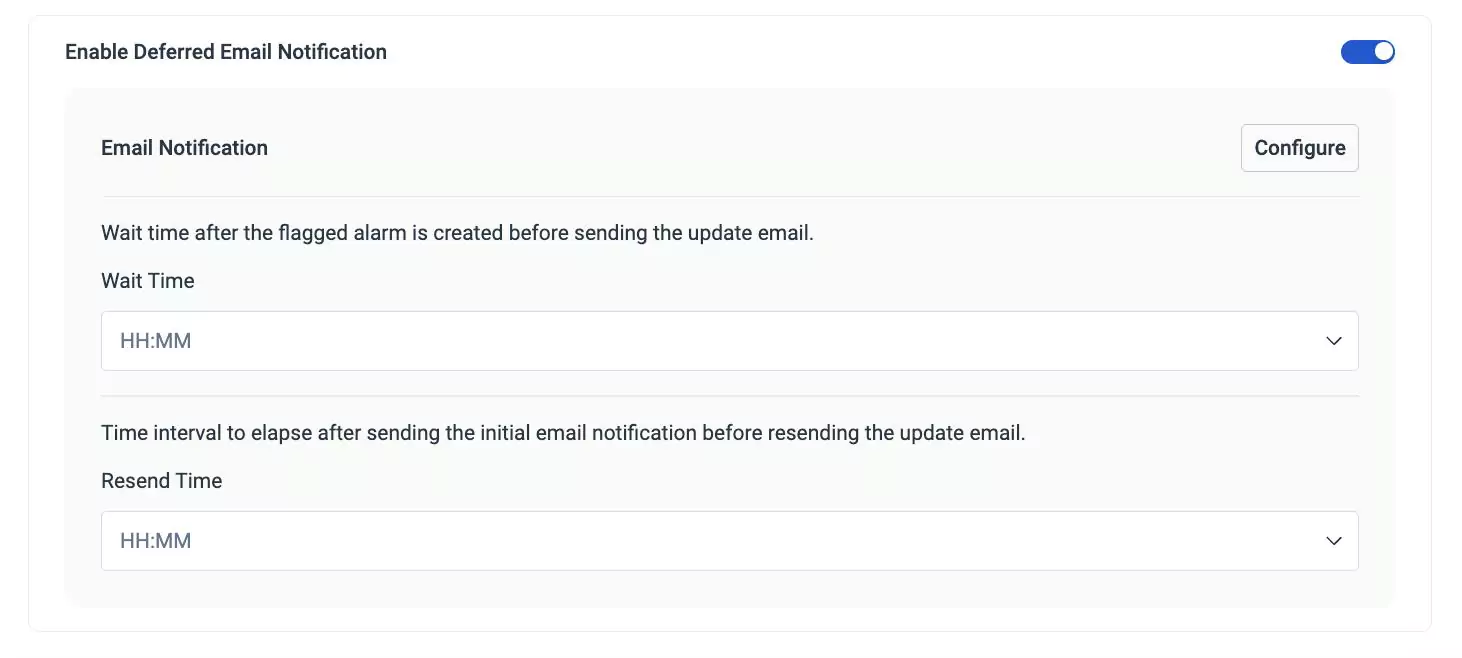 Note: The following fields appear only when Enable Deferred Email Notification is enabled.
Update the following fields in this screen.
Email Notification - To inform users about specified actions or updates related to flagged alarms. To configure the deferred email notification,
Click Configure. The Deferred Email prompt appears as shown below.
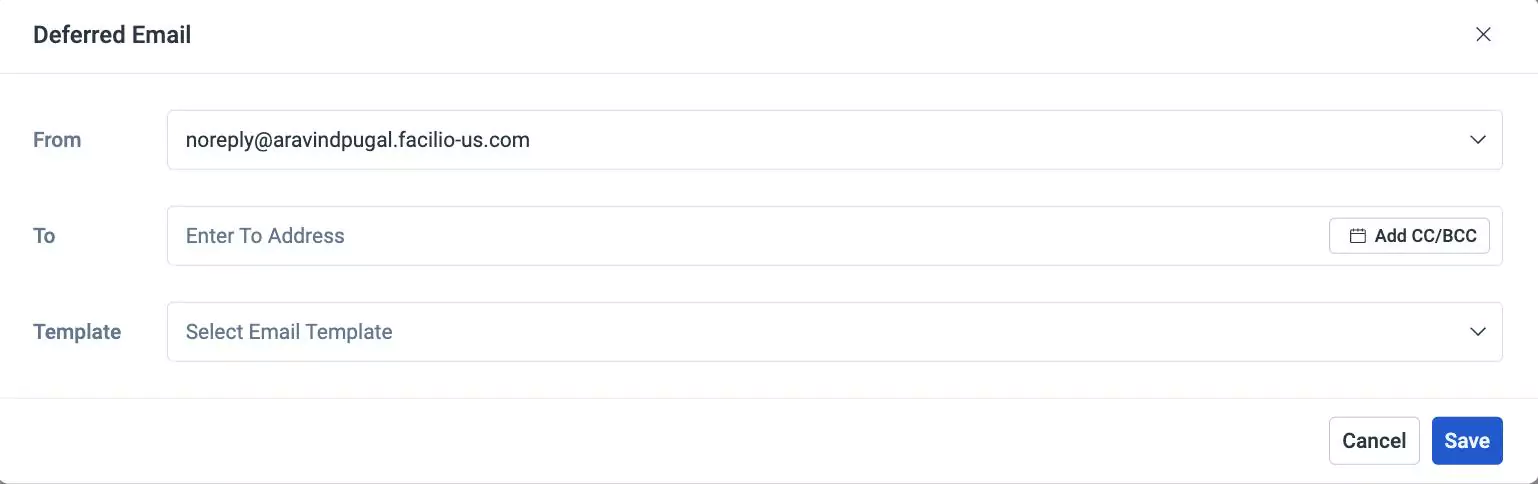
Specify the recipient (To, CC, and BCC) details.
Select an email template to be used for deferring the email notification.
Click Save. The deferred email notification is created as shown below

You can click Edit Configuration to modify the configured email and use the
icon to delete the configured email notification.
Wait Time - To specify the duration to wait after the creation of the flagged alarm before sending an update through email
Resend Time - To specify the time interval that should pass after sending the initial email notification before re-sending an updated email
Click Save & Close. The actions for configuring email notification, creating work order, assessment and evaluation, enabling deferred email notification and file attachment are added to the Flagged Alarm Process successfully.
Configuring Closure Settings
Closure of flagged alarms is to conclude the actions initiated during the assessment and evaluation of flagged alarms. It allows tracking the progress and status of assessment actions associated with the alarms. This functionality simplifies the resolution process by synchronizing the closure of flagged alarms with the associated filtered alarms, work orders, and flagged alarm closure exceptions.
To add a closure,
Navigate to the Closure section from the New Flagged Alarm Process screen. A screen to configure closure fields appears as shown below.
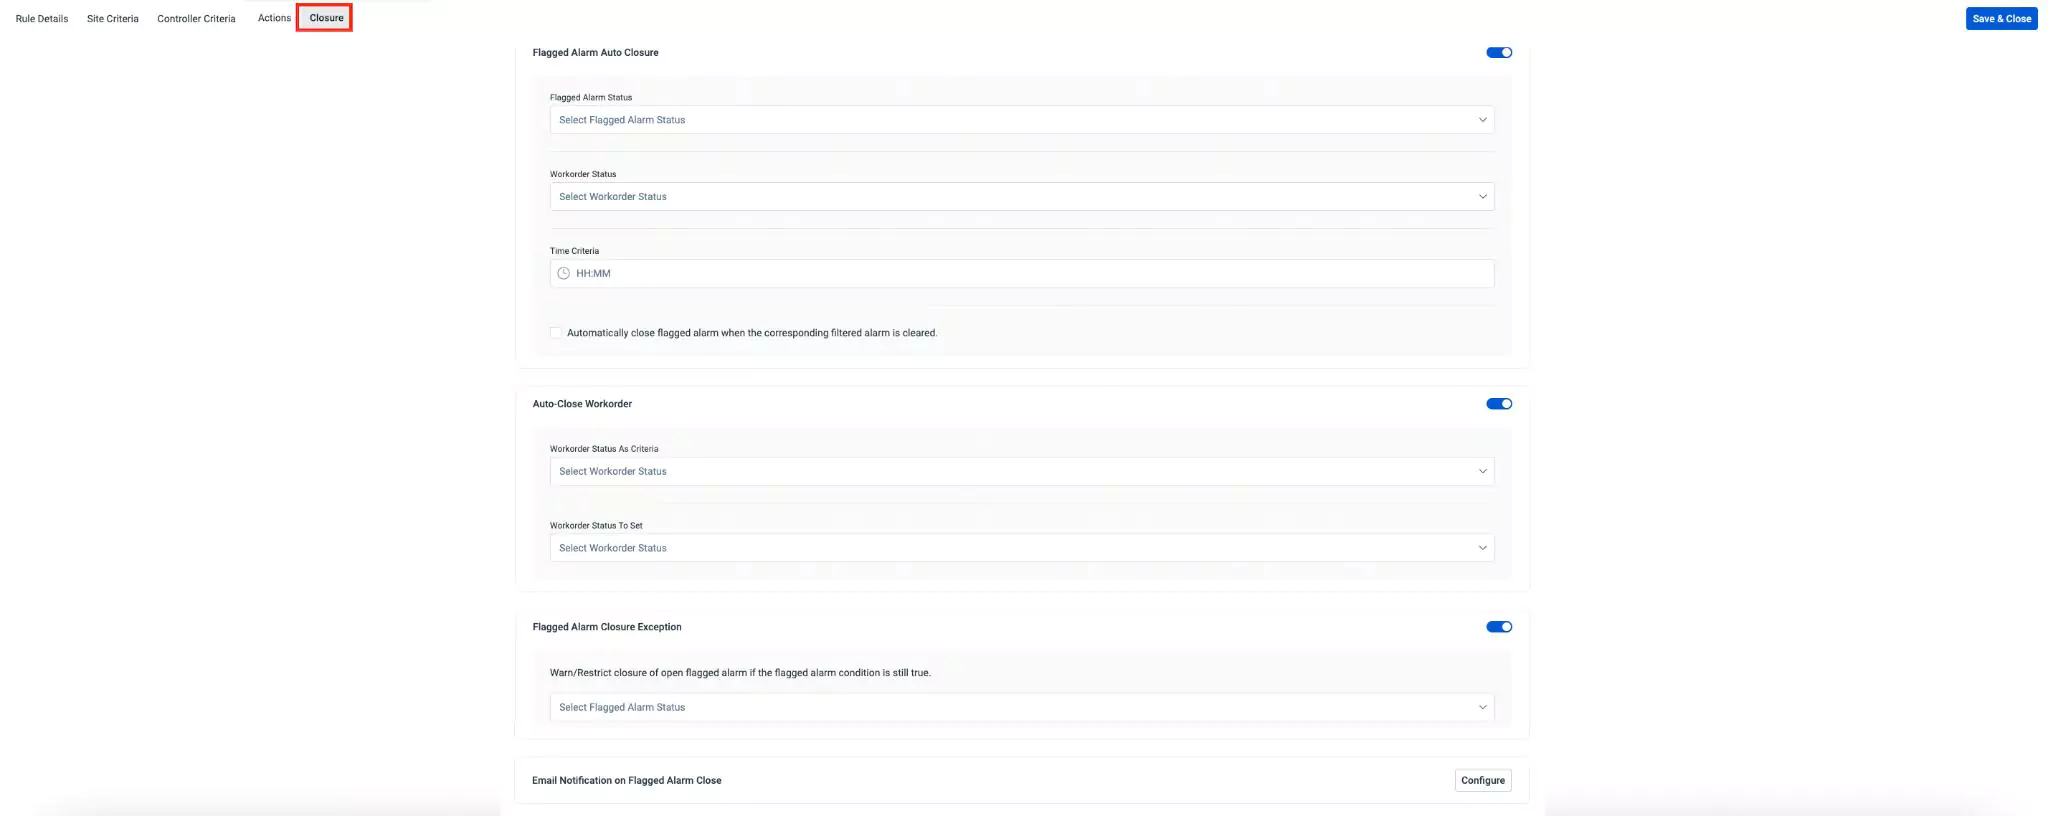
Configure the required closure actions as illustrated in the upcoming sections.
Flagged Alarm Auto Closure
The Flagged Alarm Auto Closure automatically closes a flagged alarm under certain conditions or criteria. The status of the flagged alarm is directly associated with the work order status. When a flagged alarm meets specific criteria, such as associated work order being closed, the system automatically closes the flagged alarm to streamline the process and reduce manual intervention. This feature can enhance efficiency by automating the closure of flagged alarms.
It also automatically closes a flagged alarm once the corresponding filtered alarm is closed based on the configuration made in this section.
To configure auto closure of flagged alarms,
Enable the Flagged Alarm Auto Closure toggle. The Flagged Alarm Auto Closure screen appears as shown below.
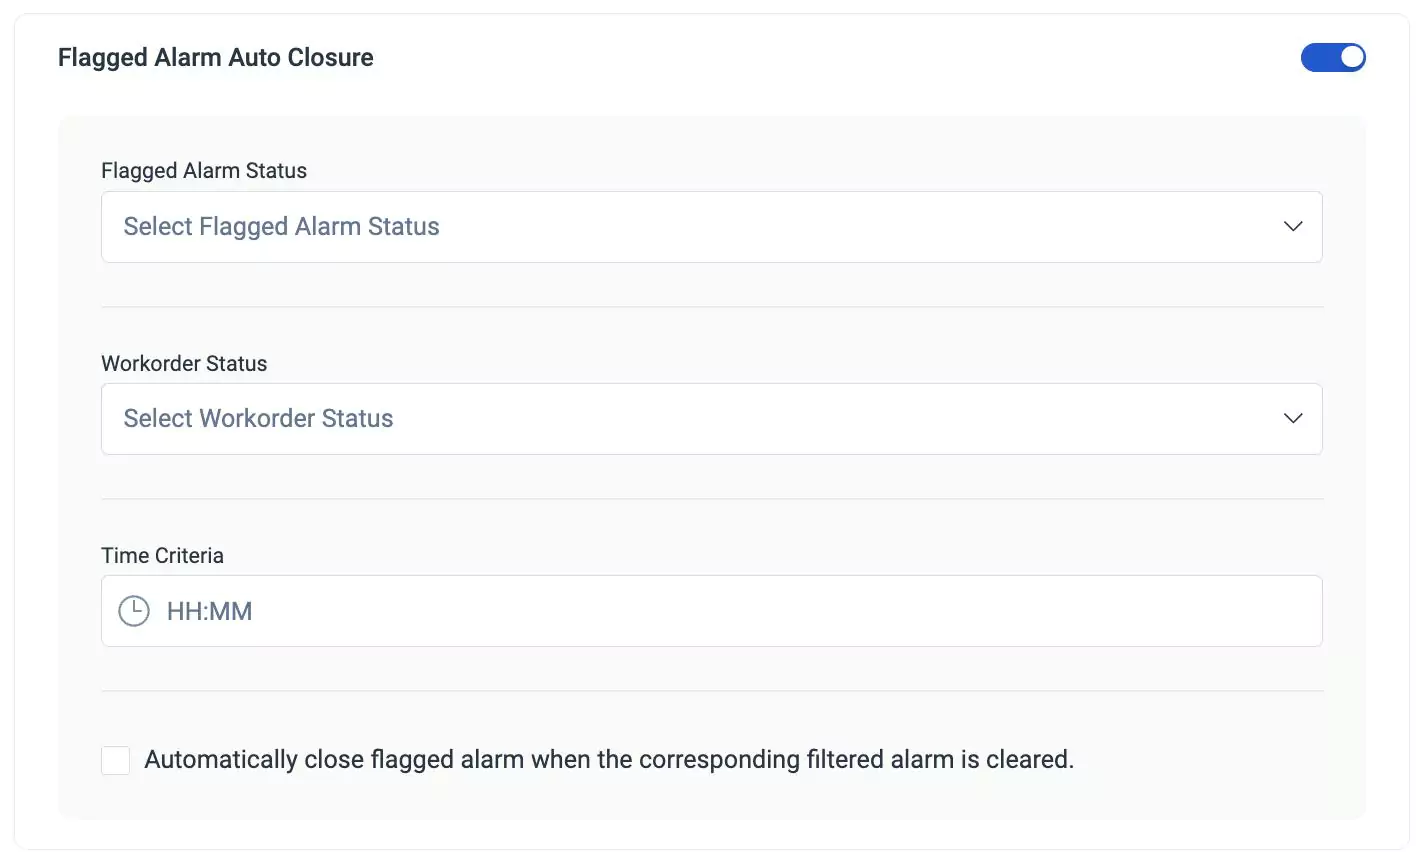 Note: The following fields appear for configuration only when the Flagged Alarm Auto closure toggle is enabled.
Update the following fields in this screen.
Flagged Alarm Status - The state or condition of a flagged alarm in the assessment, evaluation, or resolution process. Select the status of the flagged alarm from the dropdown list.
Workorder Status - The state of a work order that reflects the progress or completion of tasks associated with it. Select the work order status for the flagged alarm from the dropdown list.
Note: The Flagged Alarm Status and Work Order Status are multi-select fields. You can select more than one option.Time Criteria - The time frame after which the alarm would be automatically closed.
When any of the above criteria matches the set condition, the flagged alarm will be automatically closed.
Note: You can enable the Automatically close flagged alarm when the corresponding filtered alarm is cleared checkbox to automatically mark a flagged alarm as closed when the associated filtered alarm is cleared.
Auto-Close Workorder
The Auto-Close Work Order automatically closes a work order associated with a particular task or issue. This workflow enhances efficiency by automatically marking a work order as closed once the specified condition or criteria is met.
To configure auto-close work order,
Enable the Auto-Close Workorder toggle. The Auto-Close Workorder screen appears as shown below.
 Note: The following fields appear for configuration only when the Auto-Close Workorder toggle is enabled.
Update the following fields in this screen.
- Workorder Status As Criteria - The criteria based on which the work order status is set. Select the criteria from the dropdown list.
- Workorder Status To Set - It determines a particular status as "Closed", which is to be considered as the work order status based on the set criteria. By default, the status is set to Closed.
Flagged Alarm Closure Exception
The Flagged Alarm Closure Exception option allows for specific circumstances where the closure of a flagged alarm can be treated differently from standard closure procedures. When this option is enabled, you can either warn and close the alarm or restrict the closure of open alarms if the conditions triggering the alarm are still valid.
To configure flagged alarm closure exception,
Enable the Flagged Alarm Closure Exception toggle. The Flagged Alarm Closure Exception screen appears as shown below.
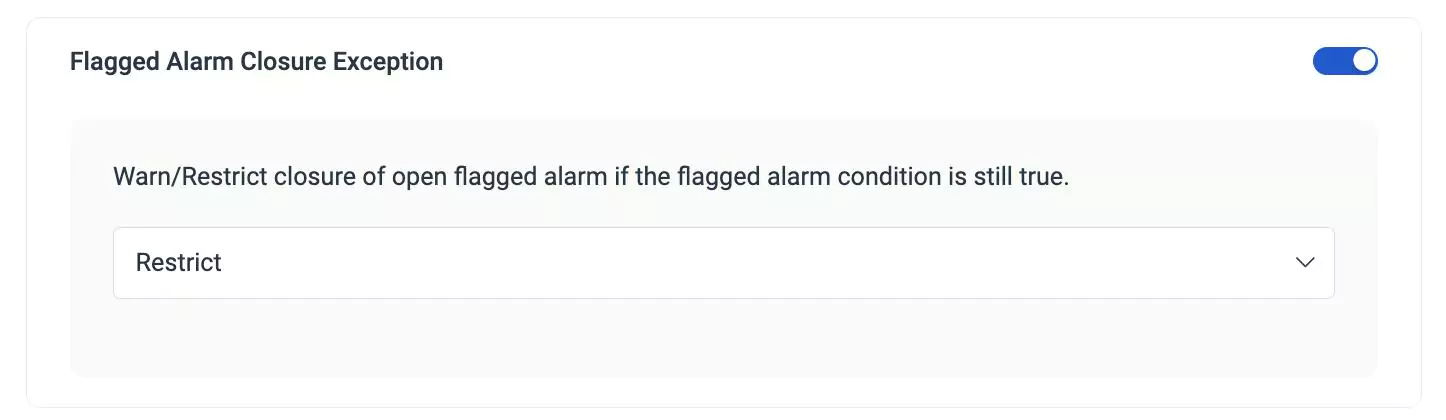 Note: The following field appears for configuration only when the Flagged Alarm Closure Exception toggle is enabled.
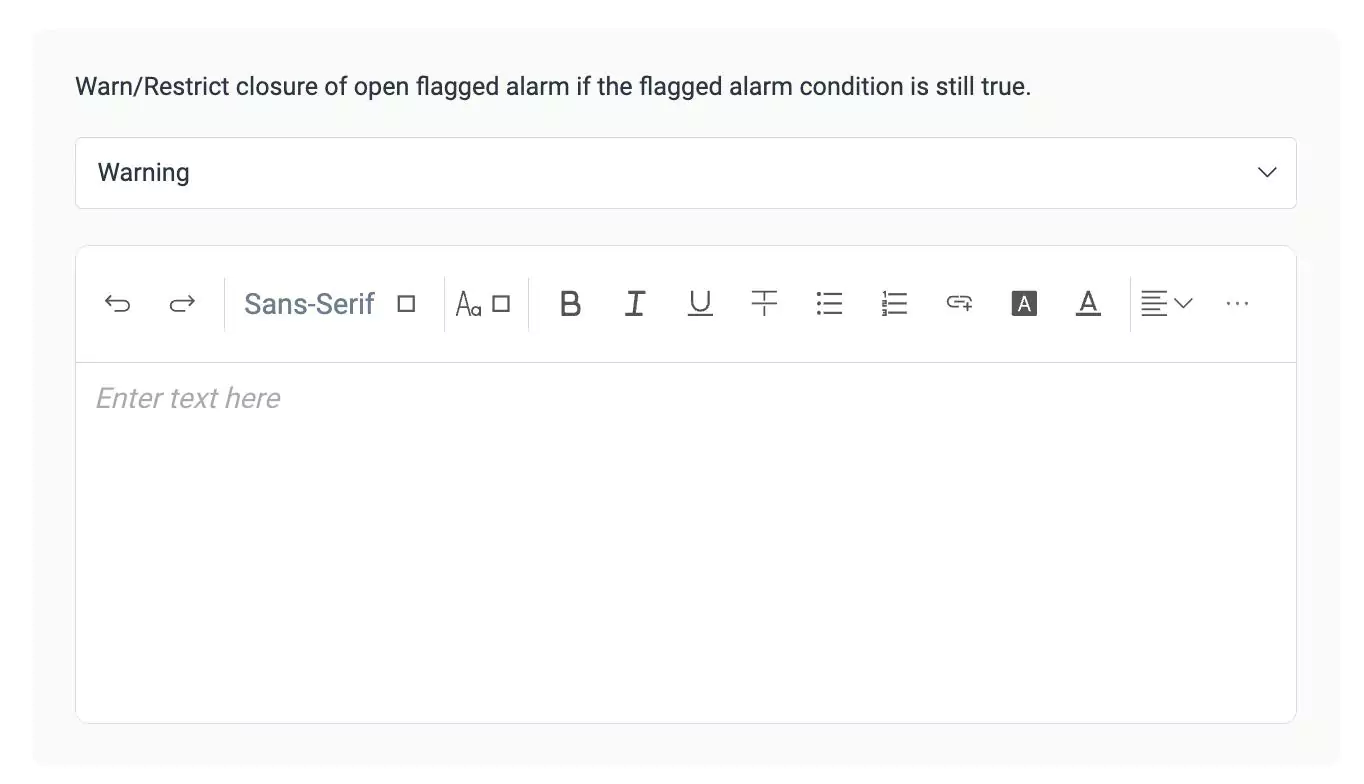
Select either of the following options for closure exception.
Warning - To prompt the assessment team to review the alarm before finalizing the closure. When this option is selected, a field appears to add an alert message to the evaluation team before closing an alarm.
Restrict - To impose restriction on the closure of flagged alarms. When this option is selected, the open alarms are prevented from being closed.
Email Notification on Flagged Alarm Close
Email Notification on Flagged Alarm Close allows you to send an email notification when the flagged alarm is closed. It triggers email notifications as an event-driven response to the closure of flagged alarms, ensuring timely and automated communication. To configure the email notification when the flagged alarm is closed,
Click Configure. The Flagged Alarm Close Email prompt appears as shown below.
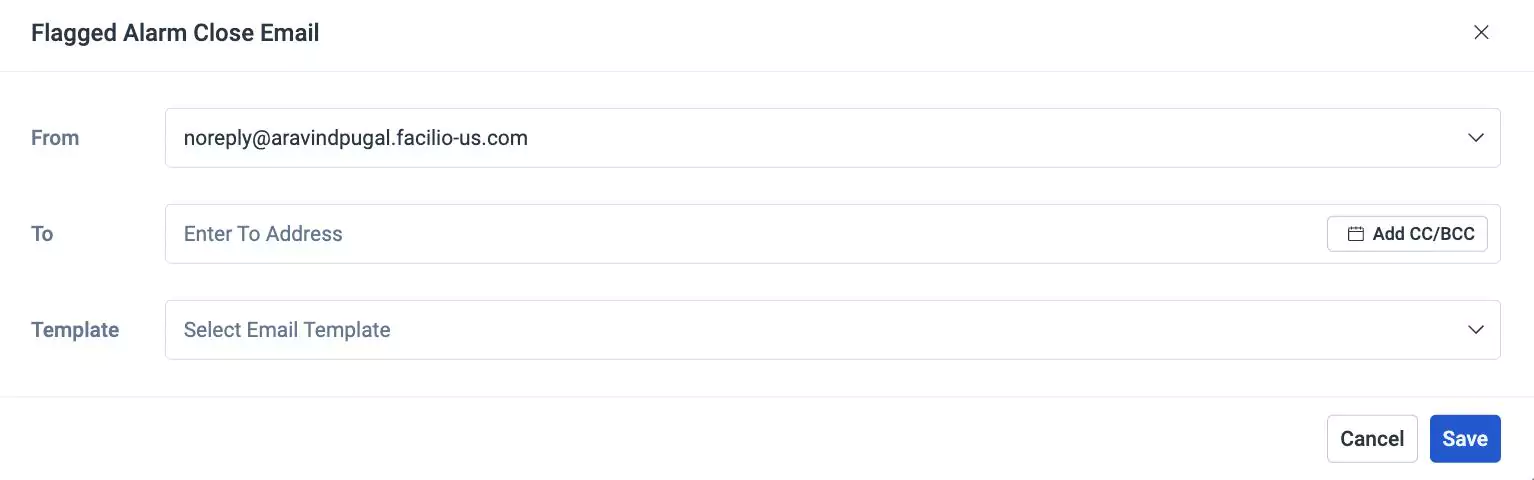
You can specify the recipient (To, CC, and BCC) details.
Select an email template to be used for triggering the email notification for closure.
Click Save. The email notification is created as shown below.

You can click Edit Configuration to modify the configured email and use the
icon to delete the configured email notification.
Click Save & Close. The closure fields for closing the evaluation are added to the Flagged Alarm Process successfully.