Creating Space Hierarchy
The space hierarchy creation is the process of registering the structural details of the buildings by geographical area into the application, respective to the order of the elements.
For example, buildings are grouped within the sites based on their location, and floors and spaces are associated with the buildings.
The upcoming sections explain the flow involved in creating the hierarchy.
Adding a Site
In general, the site refers to the locality of the properties belonging to an organization. Adding a site in the application is used to group one or more buildings of an organization, which are located in the same zone. By default, the Site section is displayed with the available list of sites in the Portfolio Management screen.
To add a site,
Click New Site in the Portfolio Management screen. The Site window appears as shown below.
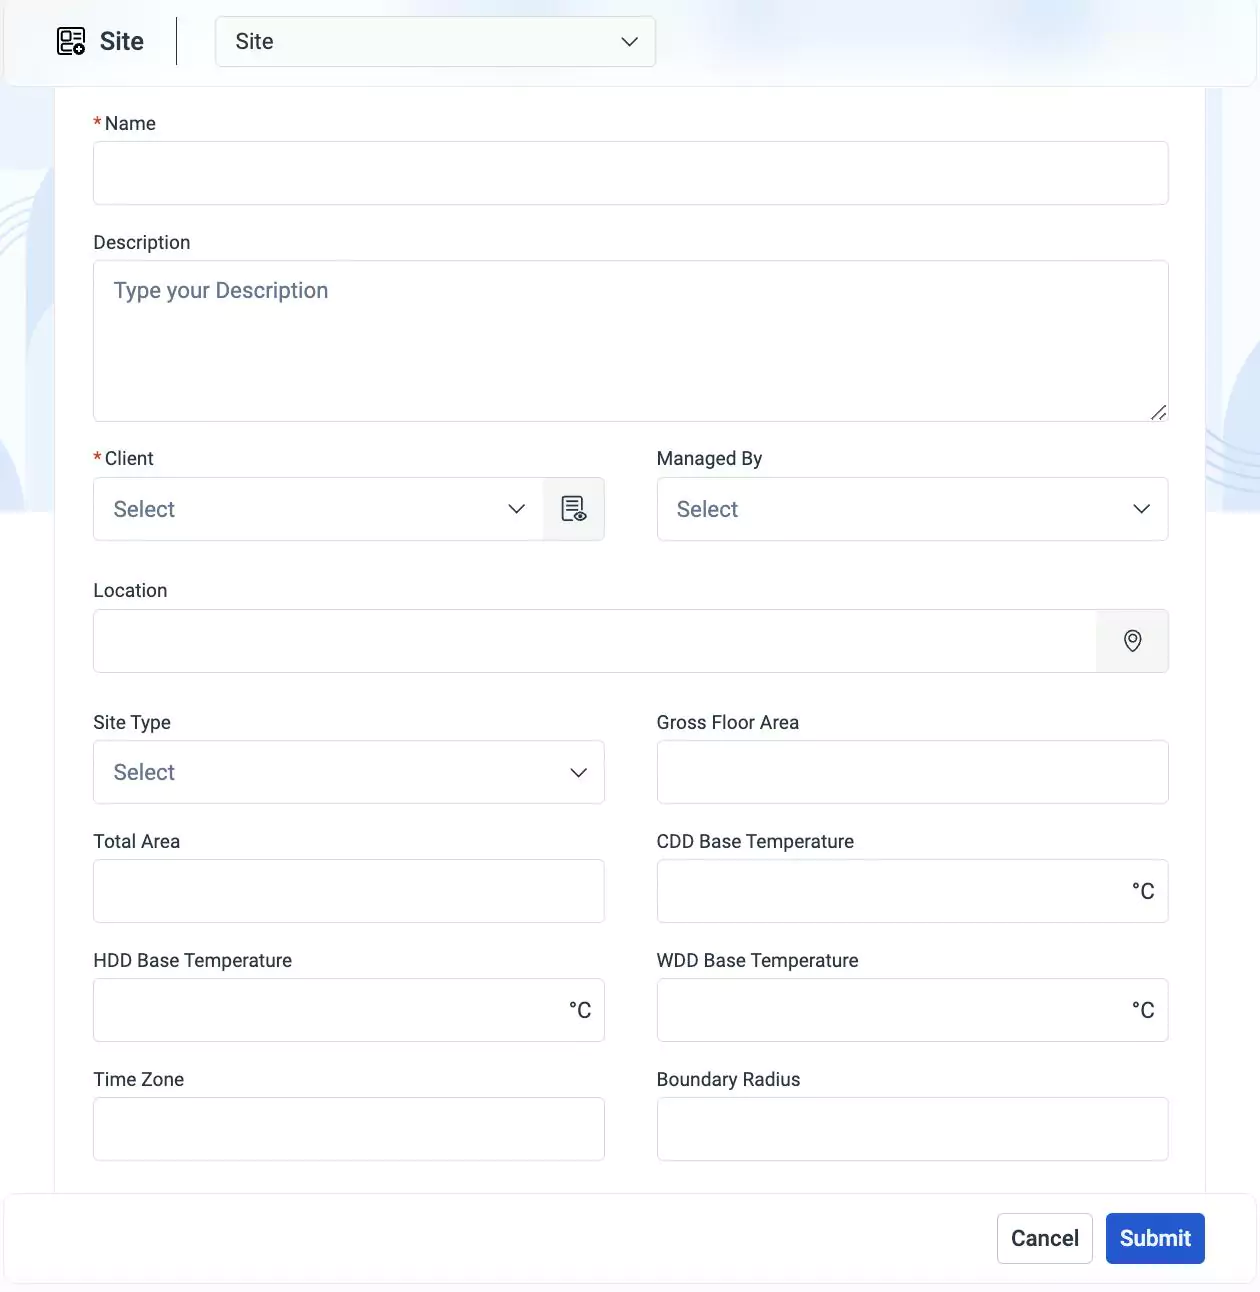
Update the following fields in this screen:
Name - The name of the site
Description - A short note that specifies the locale information of the site
Client -The entity for which the site is being added
Managed By - The name of the facility manager who is responsible for the site
Location - The latitude and longitude details of the site
Note: You can use the icon in this field to pin the exact location using the location picker powered by Google.
Site Type - The category of the site being added
Example: Hospital, retail, commercial, residential, mall and so onGross Floor Area - The total area of all the floors of a building
Total Area - The overall land area within the property boundary
CDD Base Temperature - The degrees that a day's average temperature is above the base temperature.
HDD Base Temperature - The degrees that a day's average temperature is below the base temperature.
WDD Base Temperature - The relative value calculated based on air temperature, air humidity and atmospheric pressure.
Time Zone - The time zone at which the site operates
Boundary Radius - The distance between the center of the site and any point on its boundary.
Note:The CDD and HDD base temperature values are used to calculate additional energy required for space cooling and heating, respectively. The base temperature is subjective to the utilities and planning entities.Click Submit. The new site is now successfully added to the Sites section.
Adding a Building
A building is the most significant component in space management. Every building must be associated with a site in the application, which makes it easy to understand the list of buildings the organization owns in a selected zone and execute any site-specific actions on the respective facilities. To add a building,
Navigate to the Building section inthe Portfolio Management screen and select New Building. The Building window appears as shown below.
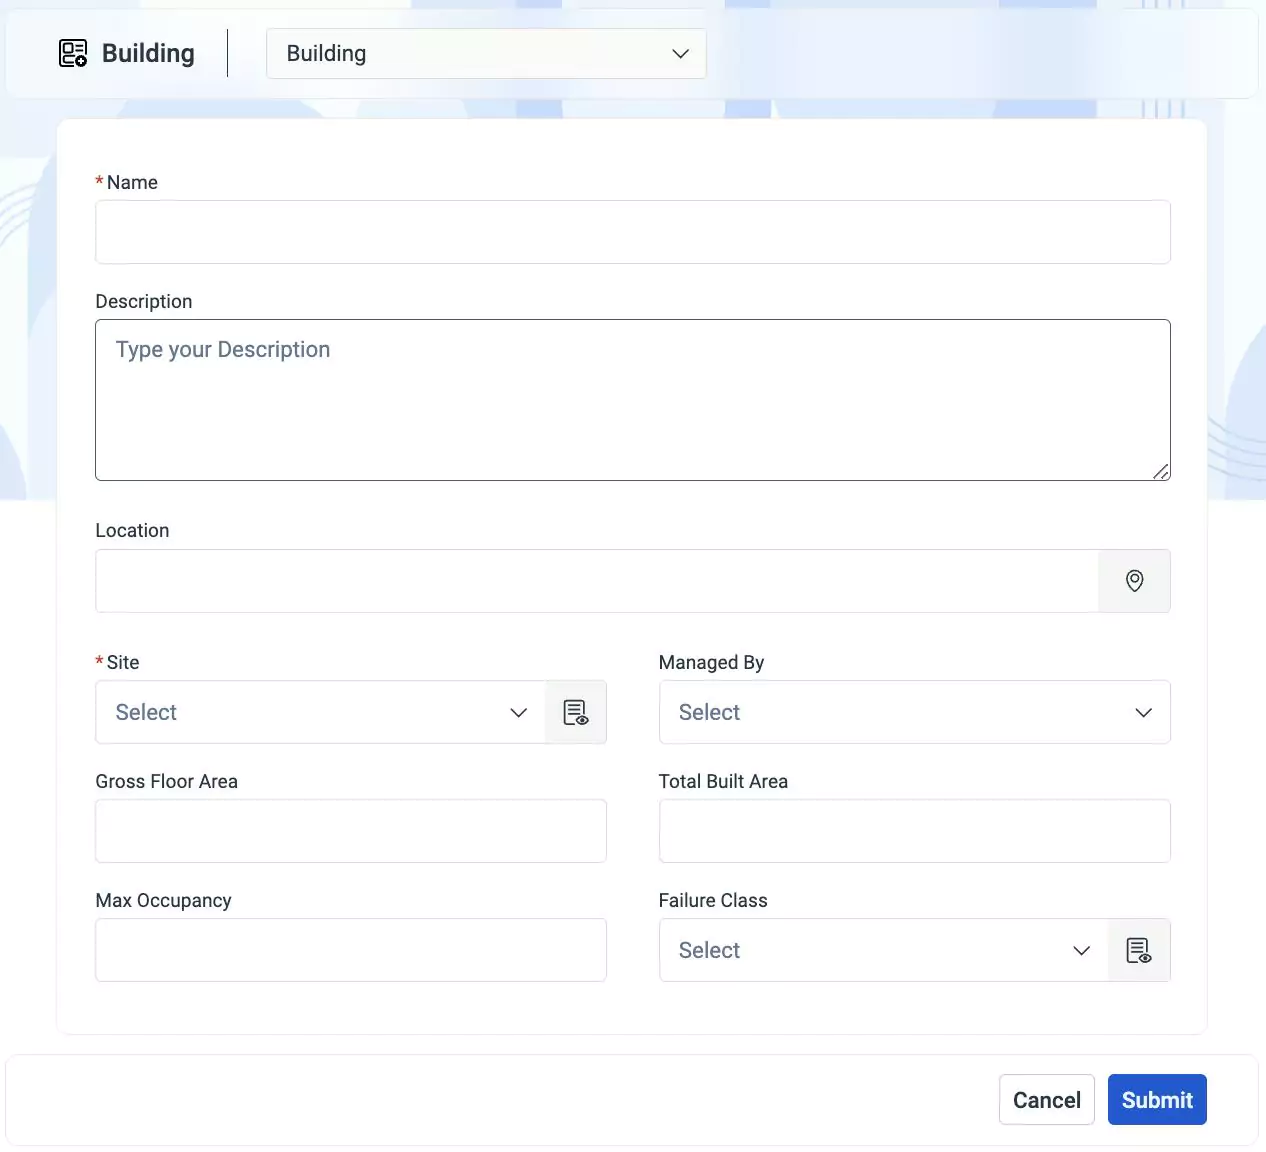
Update the following fields in this screen:
Name - The name of the building
Description - A short note that specifies the functions of the building.
Tip:You can consider specifying landmarks using which the facility can be easily identified.Location - The latitude and longitude details of the building
Note:You can use the icon in this field to pin the exact location using the location picker powered by Google.Site - The zone where the building is located
Managed By - The name of the facility manager who is responsible for the building
Gross Floor Area - The total area of all the floors of a building
Total Built Area - The overall land area within the property boundary, that is, the gross area of the property
Max Occupancy - The maximum number of people who can occupy the facility at a time
Failure Class - The possible issue that can cause disruption in the working facilities. For example, equipment malfunction.
Click Submit. The building is now successfully registered under the selected site.
Associating a Floor
The floors indicate the levels in a building. The purpose of registering the floors of a building is to segregate the various spaces located in each level across the building. You can successively register every floor in a building to the application. To add a new floor,
Navigate to the Building section in the Portfolio Management screen.
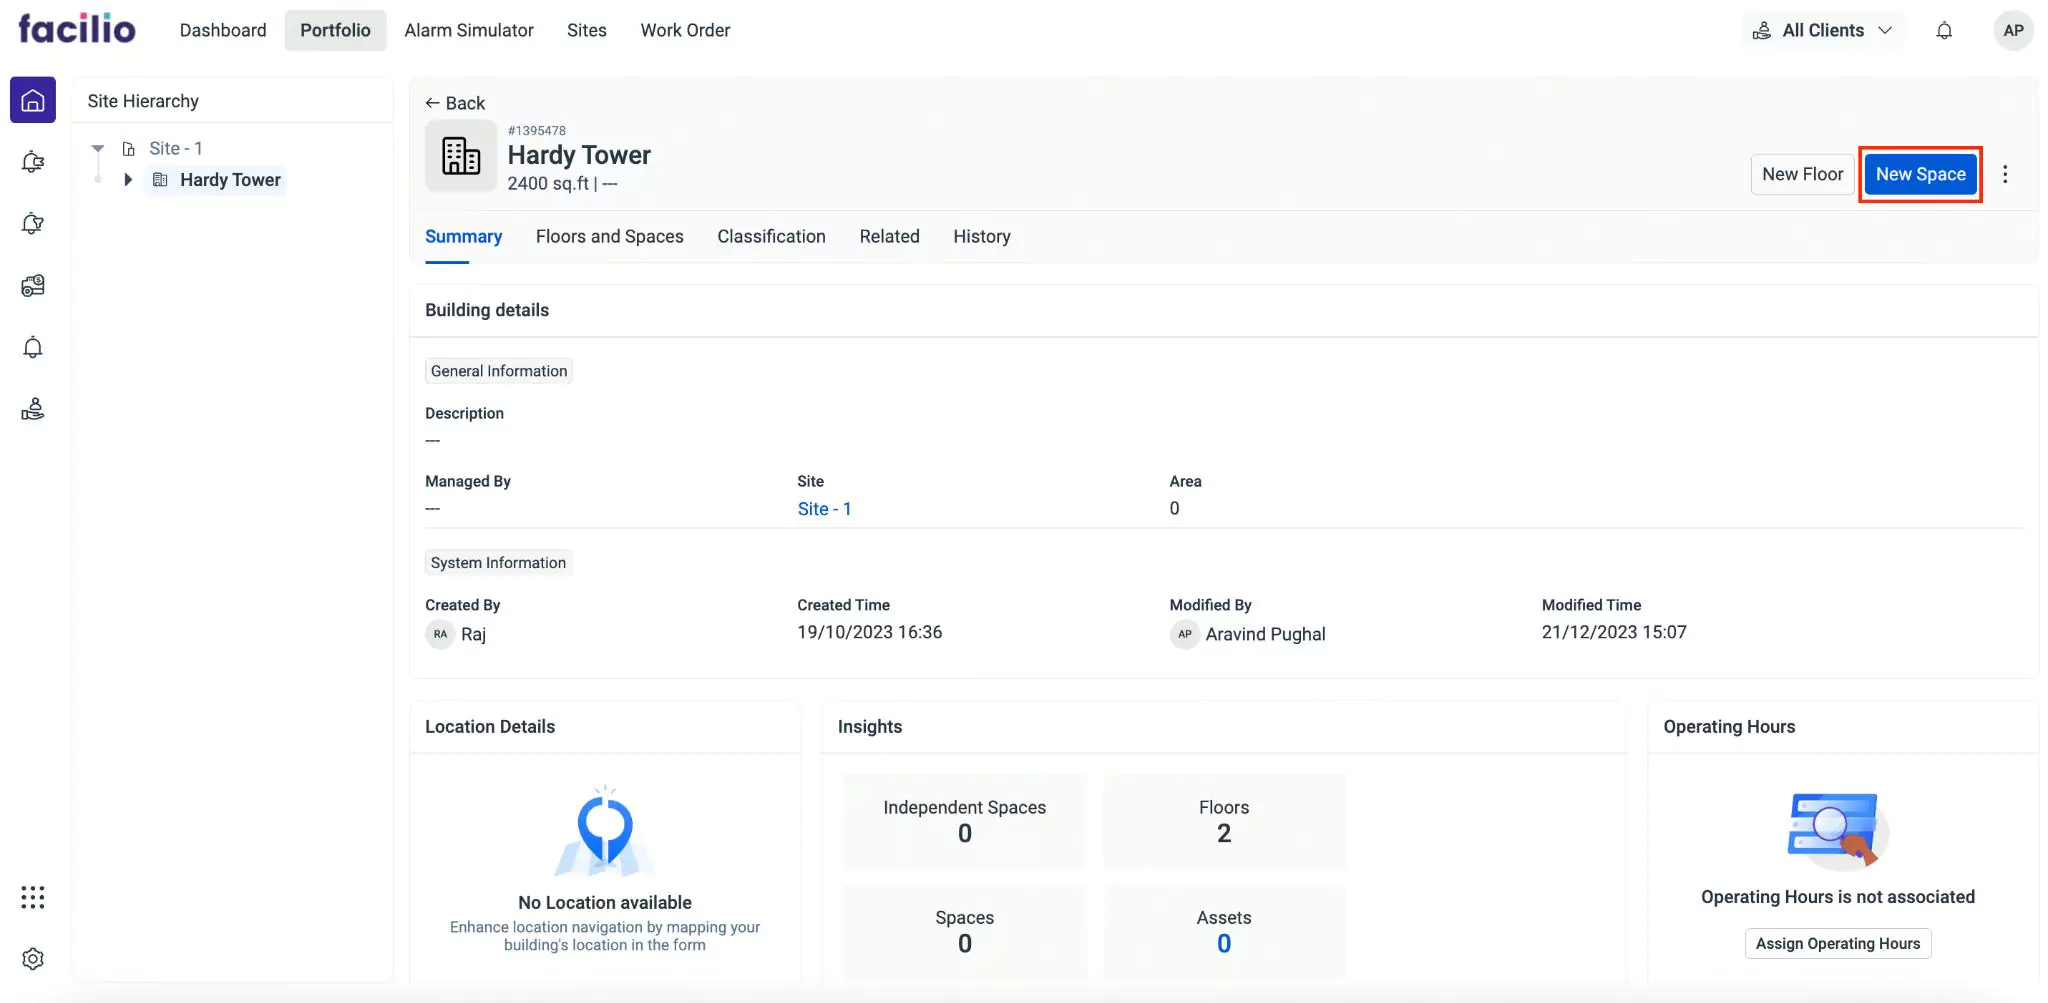
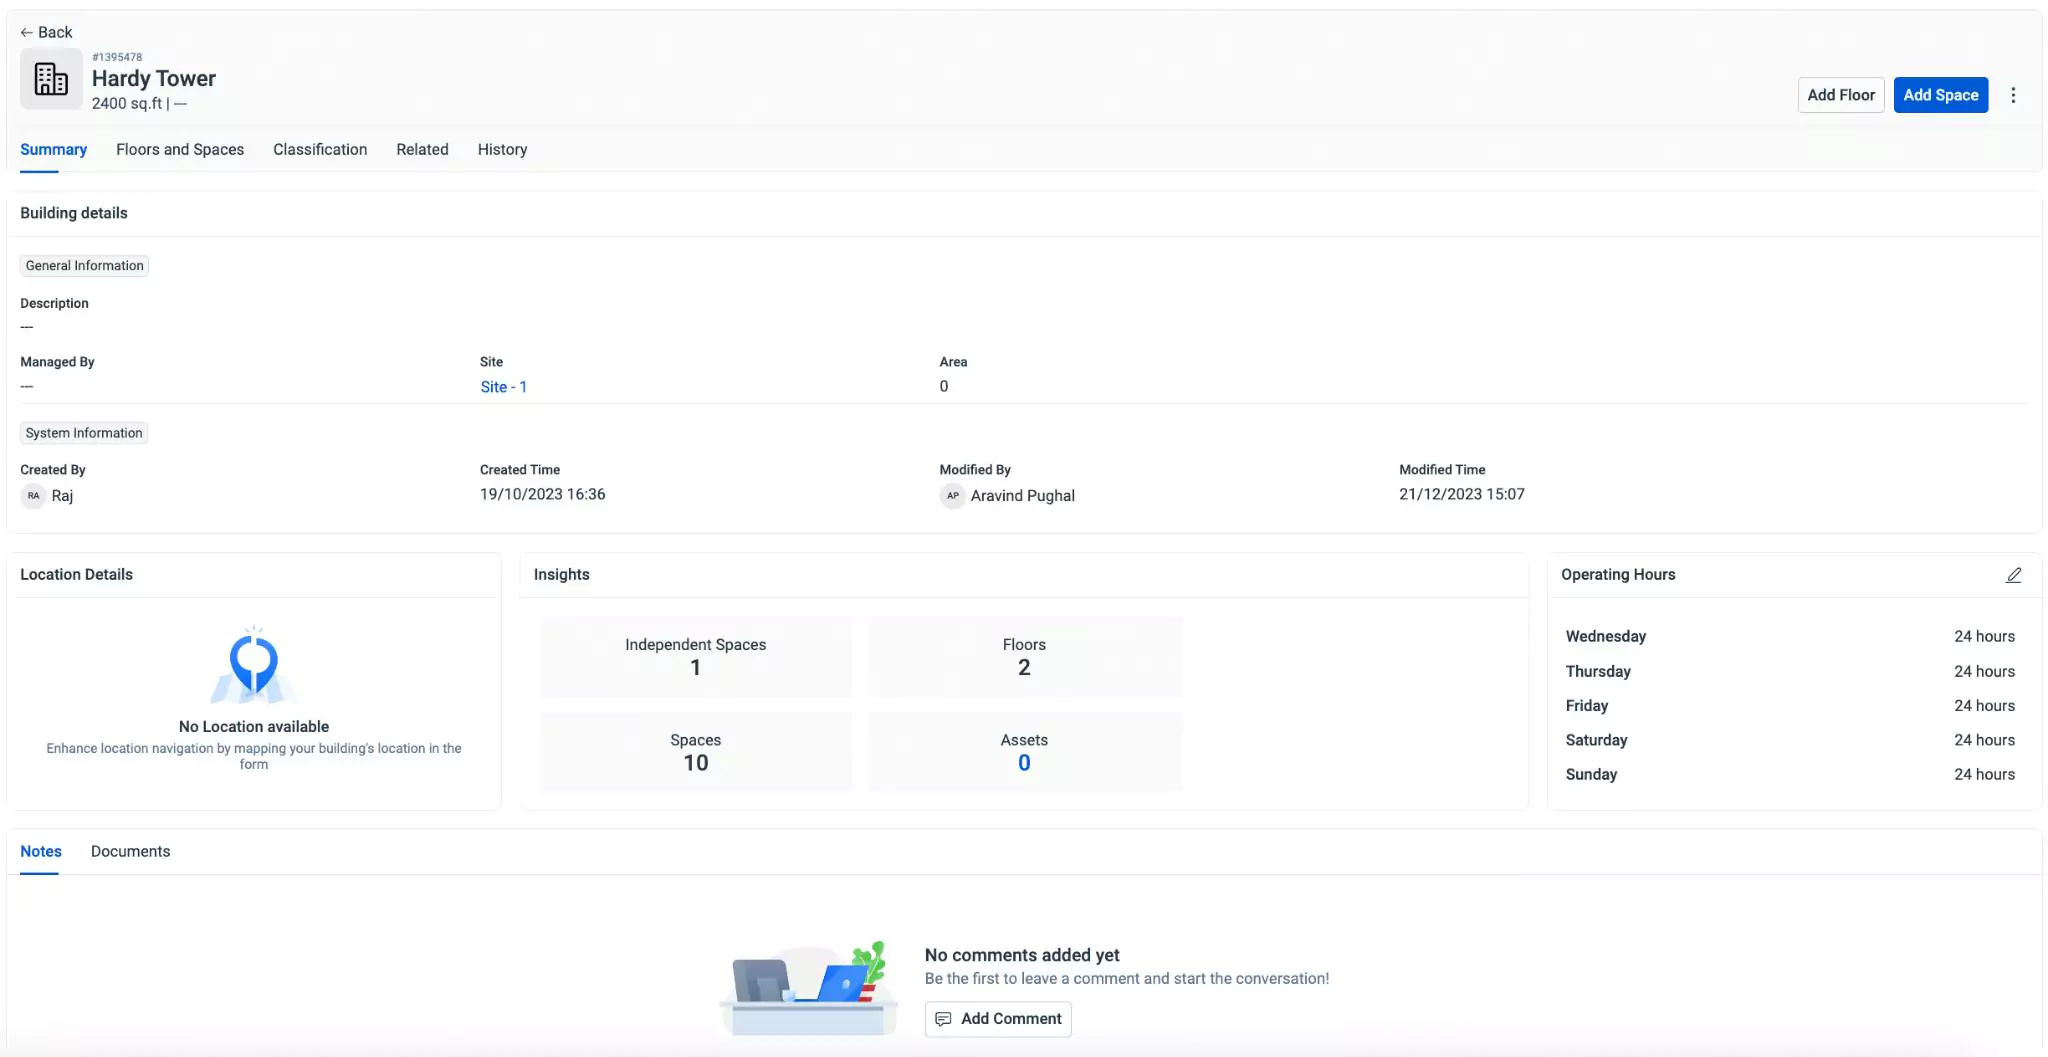
Select the required building. The corresponding Summary screen appears as shown below.
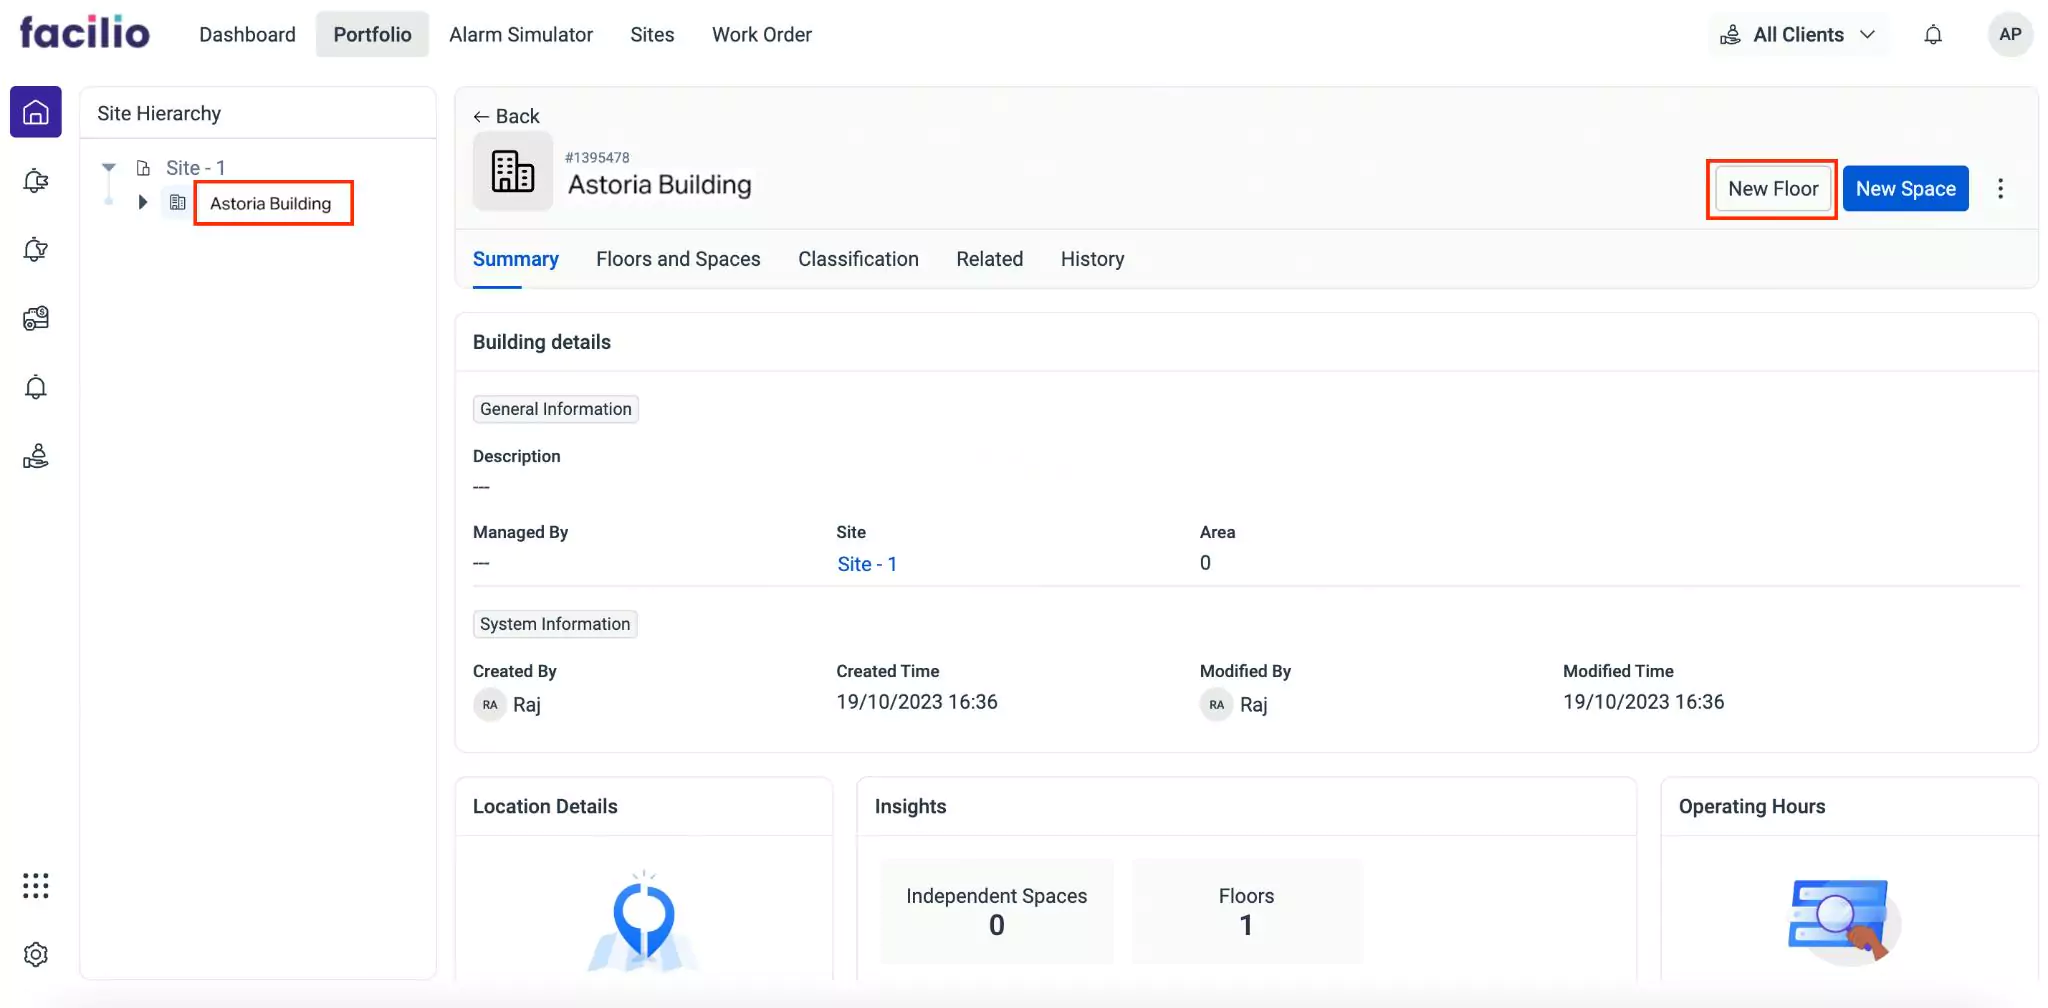
Click New Floor at the top right. The screen to capture the floor details appears as shown below.
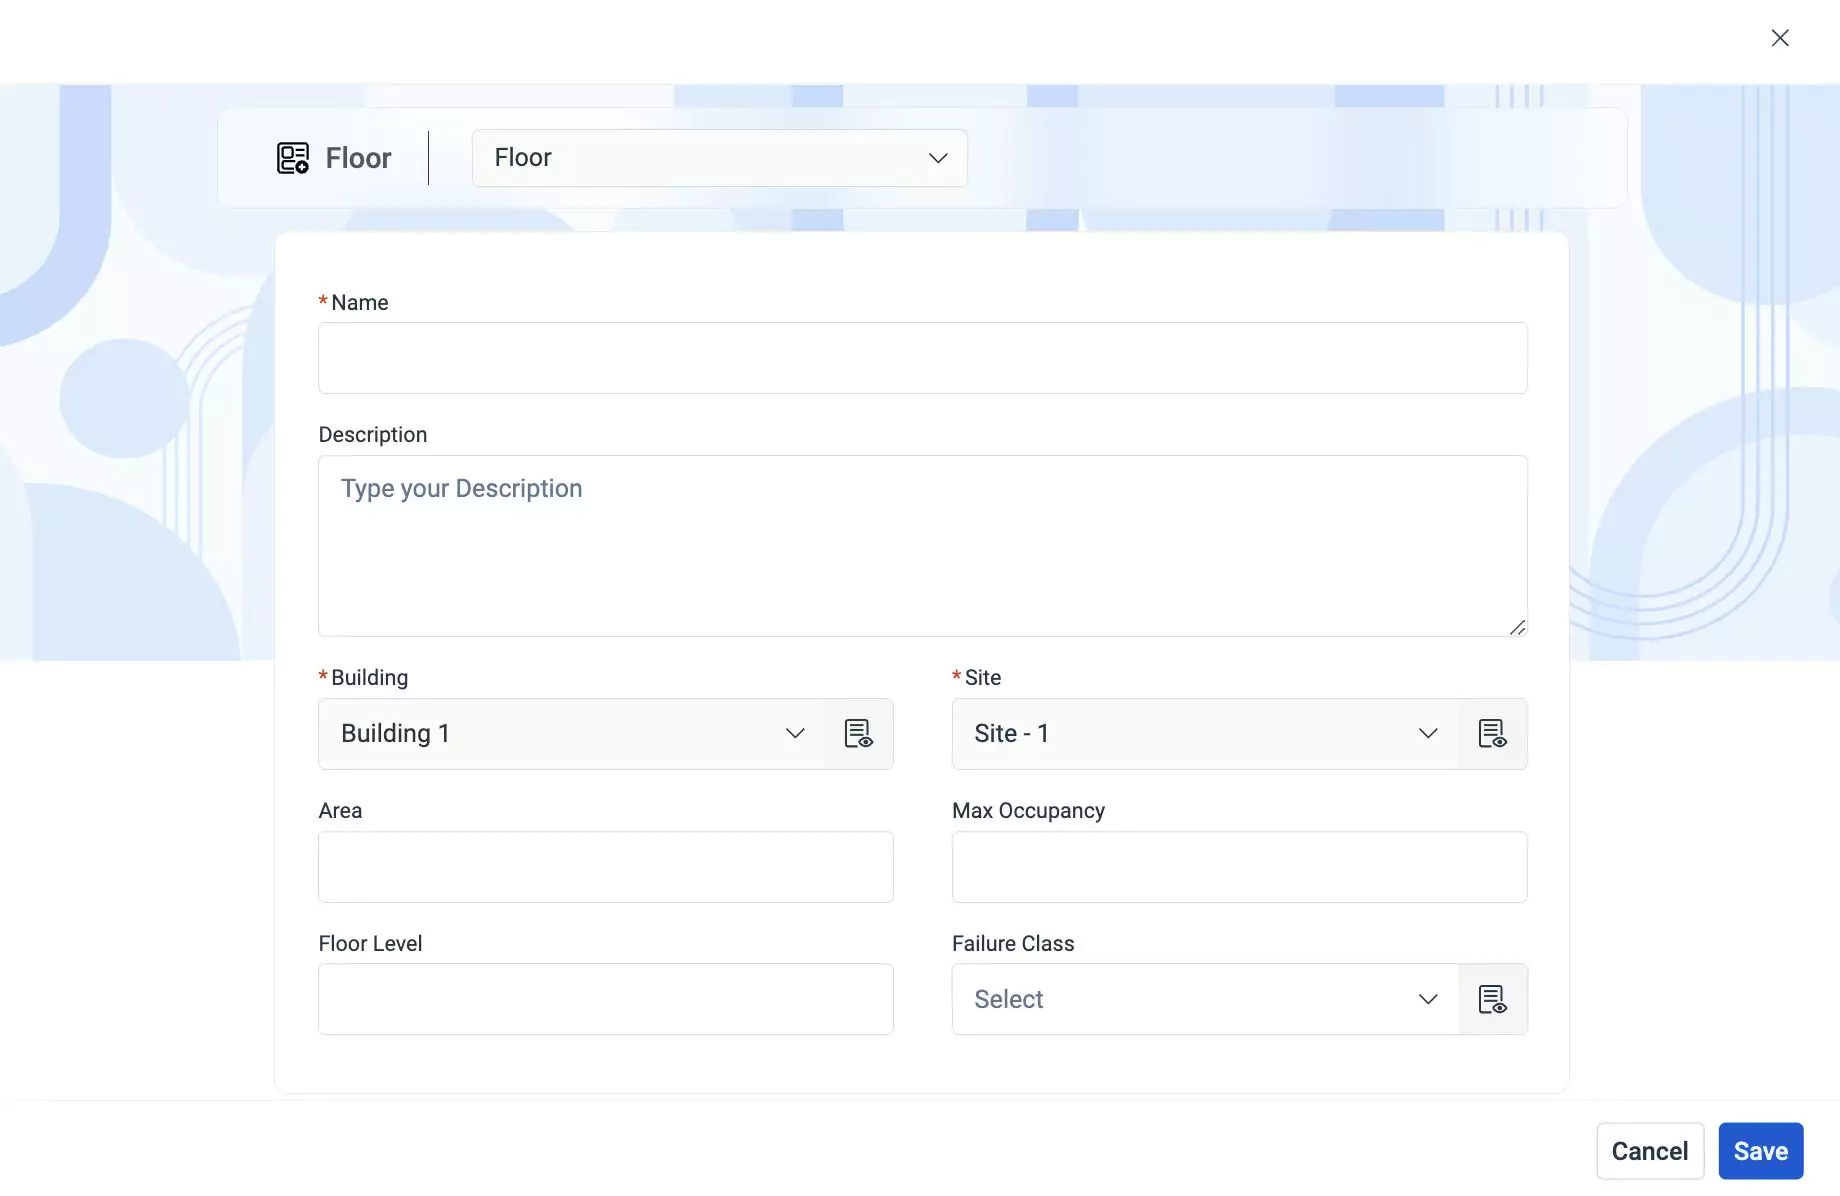
Update the following fields in this screen:
Name - A label to identify the floor
Tip:You can name a floor after the floor number.Description - A short note on the floor, if required
Building - The building with which the floor is associated
Site - The zone where the corresponding building is located
Area - The location where the corresponding building is situated
Max Occupancy - The maximum number of people who can occupy the floor at a time
Floor Level - The level number of the floor in the building
Failure Class - The possible issue that can cause disruption in the working facilities. For example, equipment malfunction.
Note:The Building and Site fields are auto-filled with respect to the building chosen and cannot be modified.Click Save. The floor is now successfully registered against the building.
Associating a Space
A space in general is an area reserved for a specific purpose. Spaces can be registered as a part of a floor, building, or site itself, depending on its purpose and location. For instance, a storeroom is typically associated with a floor, whereas parking or garden space is associated directly with the building or site. To add a space,
Select the required element to which the new space must be associated.
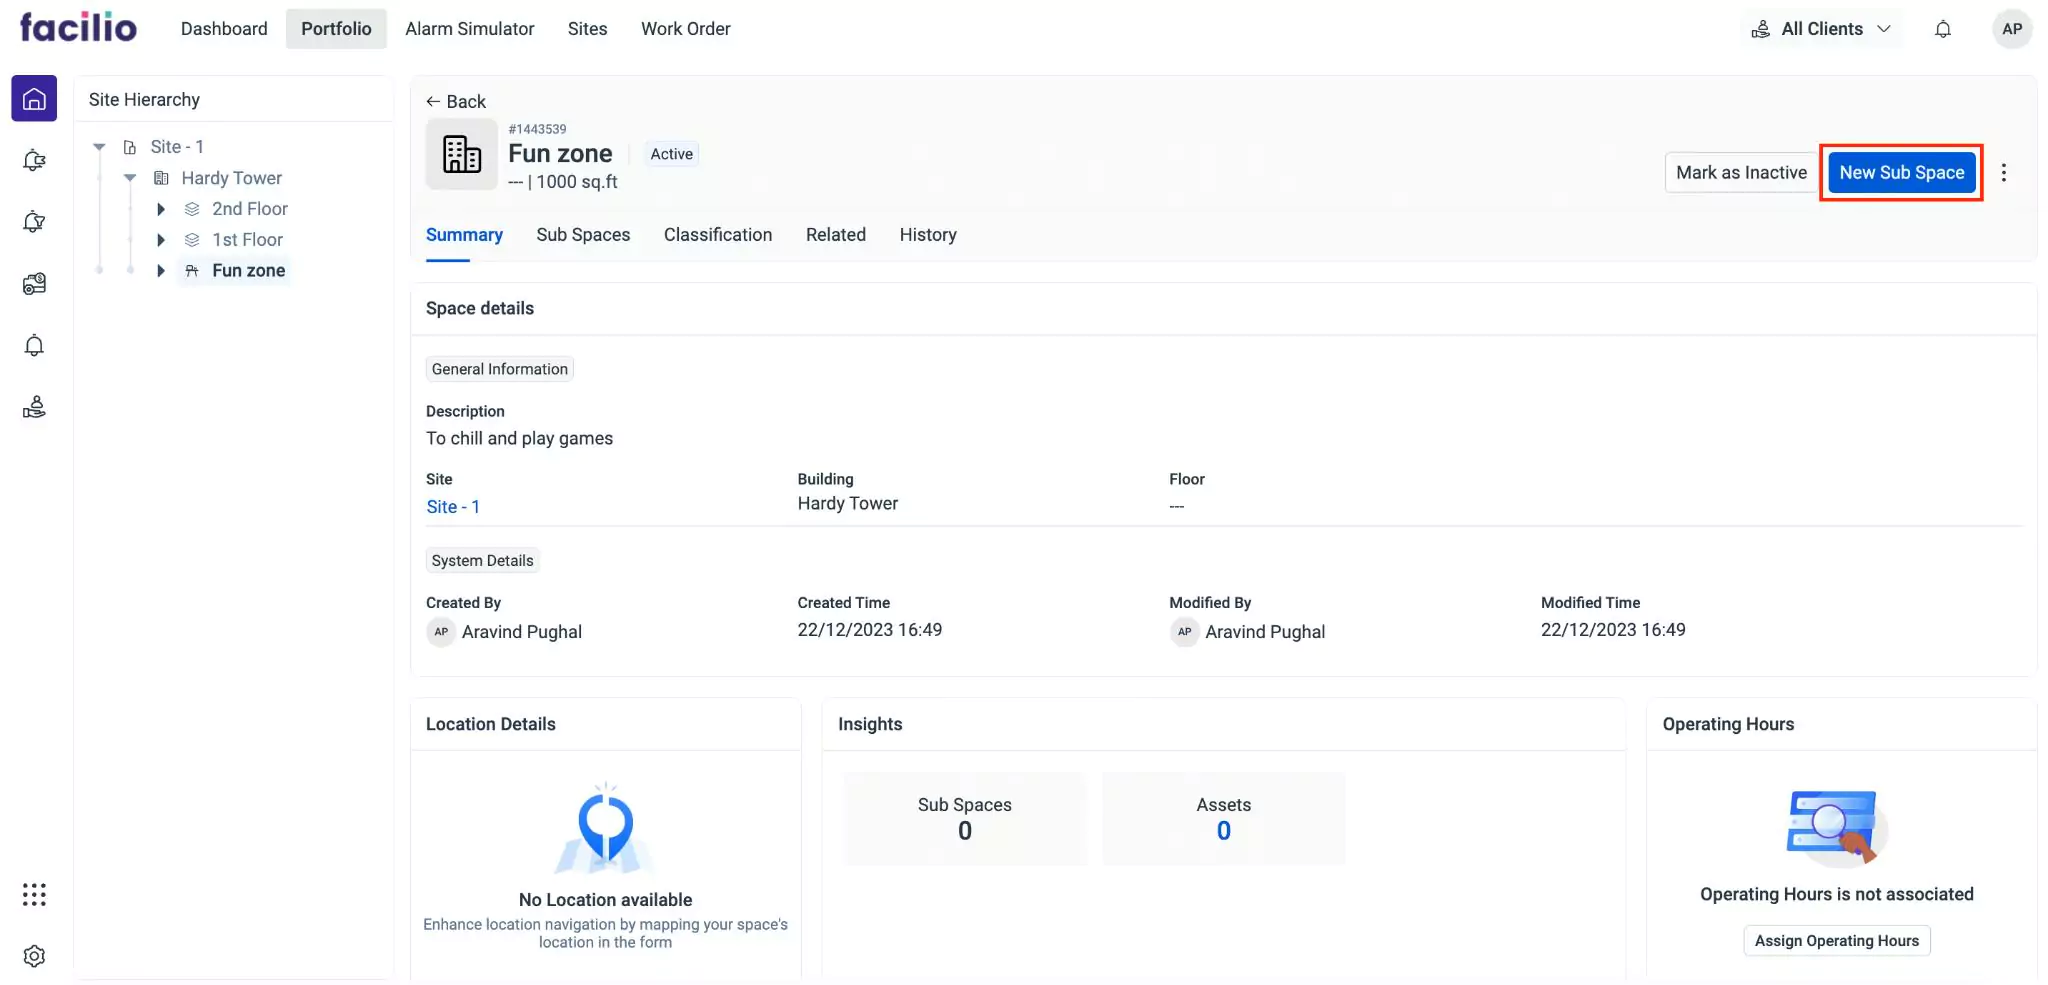
Example: If the new space is to be registered as a part of a floor, select the site, building and then the appropriate floor.The corresponding SUMMARY screen appears as shown below.
Click NEW SPACE. The screen to capture the space details appears as shown below.

Update the following fields in this screen:
Name - A label for the space to identify it
Description - A short note that defines the purpose of the space
Category - The classification of the space based on its purpose
Area - The location where the space is setup
Floor Associated - The floor at which the space is located
Note: This field is auto-filled and cannot be modified.Maximum Occupancy Count - The maximum number of people who can occupy the space at a time
Location - The latitude and longitude details of the space
Note: You can use the icon in this field to pin the exact location using the location picker powered by Google.Failure Class - The possible issue that can cause disruption in the working facilities. For example, equipment malfunction.
Amenities - The additional services, resources, and comfort requirements associated with the space
Click Save. The new space is now registered under the selected element (that is, site, building, or floor).
Associating a Subspace
A subspace is nothing but an extension of a space. For instance, the utility area is a subspace for the kitchen. The purpose of registering a subspace is to differentiate the additional part of a space that is utilized for other activities. To add a subspace,
Select the building from the Portfolio screen. The corresponding Summary screen appears as shown below.
Navigate to Floors and Spaces.
Select an appropriate space from the Spaces section. The corresponding Summary screen appears as shown below.
Click New Sub Space. The screen to capture the subspace details appears as shown below.
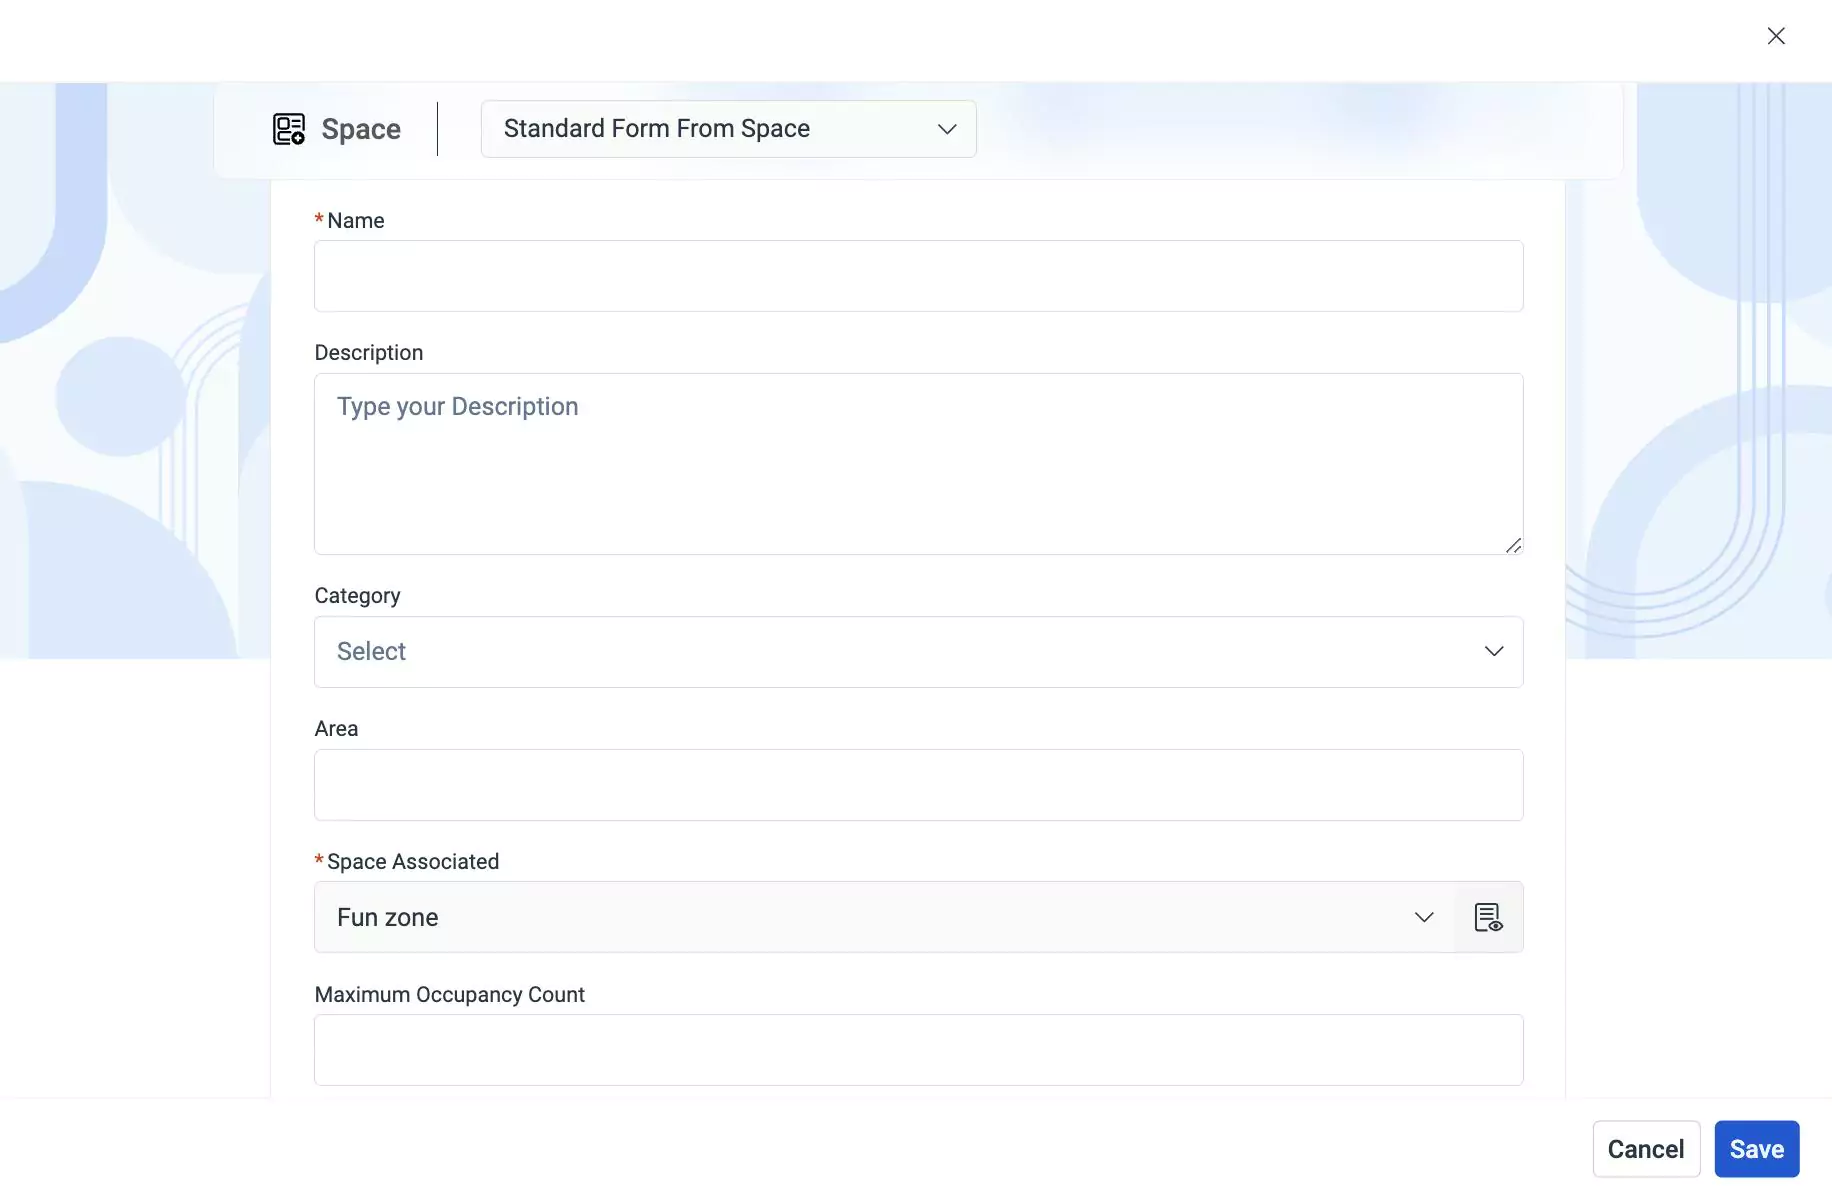
Update the required fields in this screen. Read the Associating a Space section for more information.
Note: The Space Associated field is auto-filled and cannot be modified.Click Save. The subspace is now successfully added to the selected space.