Configuring Employees
The Employee section serves as a centralized hub for managing all aspects related to field agents and other personnel involved in delivering on-site services. It contains a comprehensive database of all field agents and includes details such as name, contact information, job title, skills, and more.
The following sections explain how to add an employee and enable portal access for the employee.
Adding an Employee
The Employee section allows organizations to systematically manage their workforce. The administrators can add an employee and establish an inclusive database of employees.
To add an employee,
Navigate to the Employees section. The All Employees screen appears with the list of available employees as shown below.
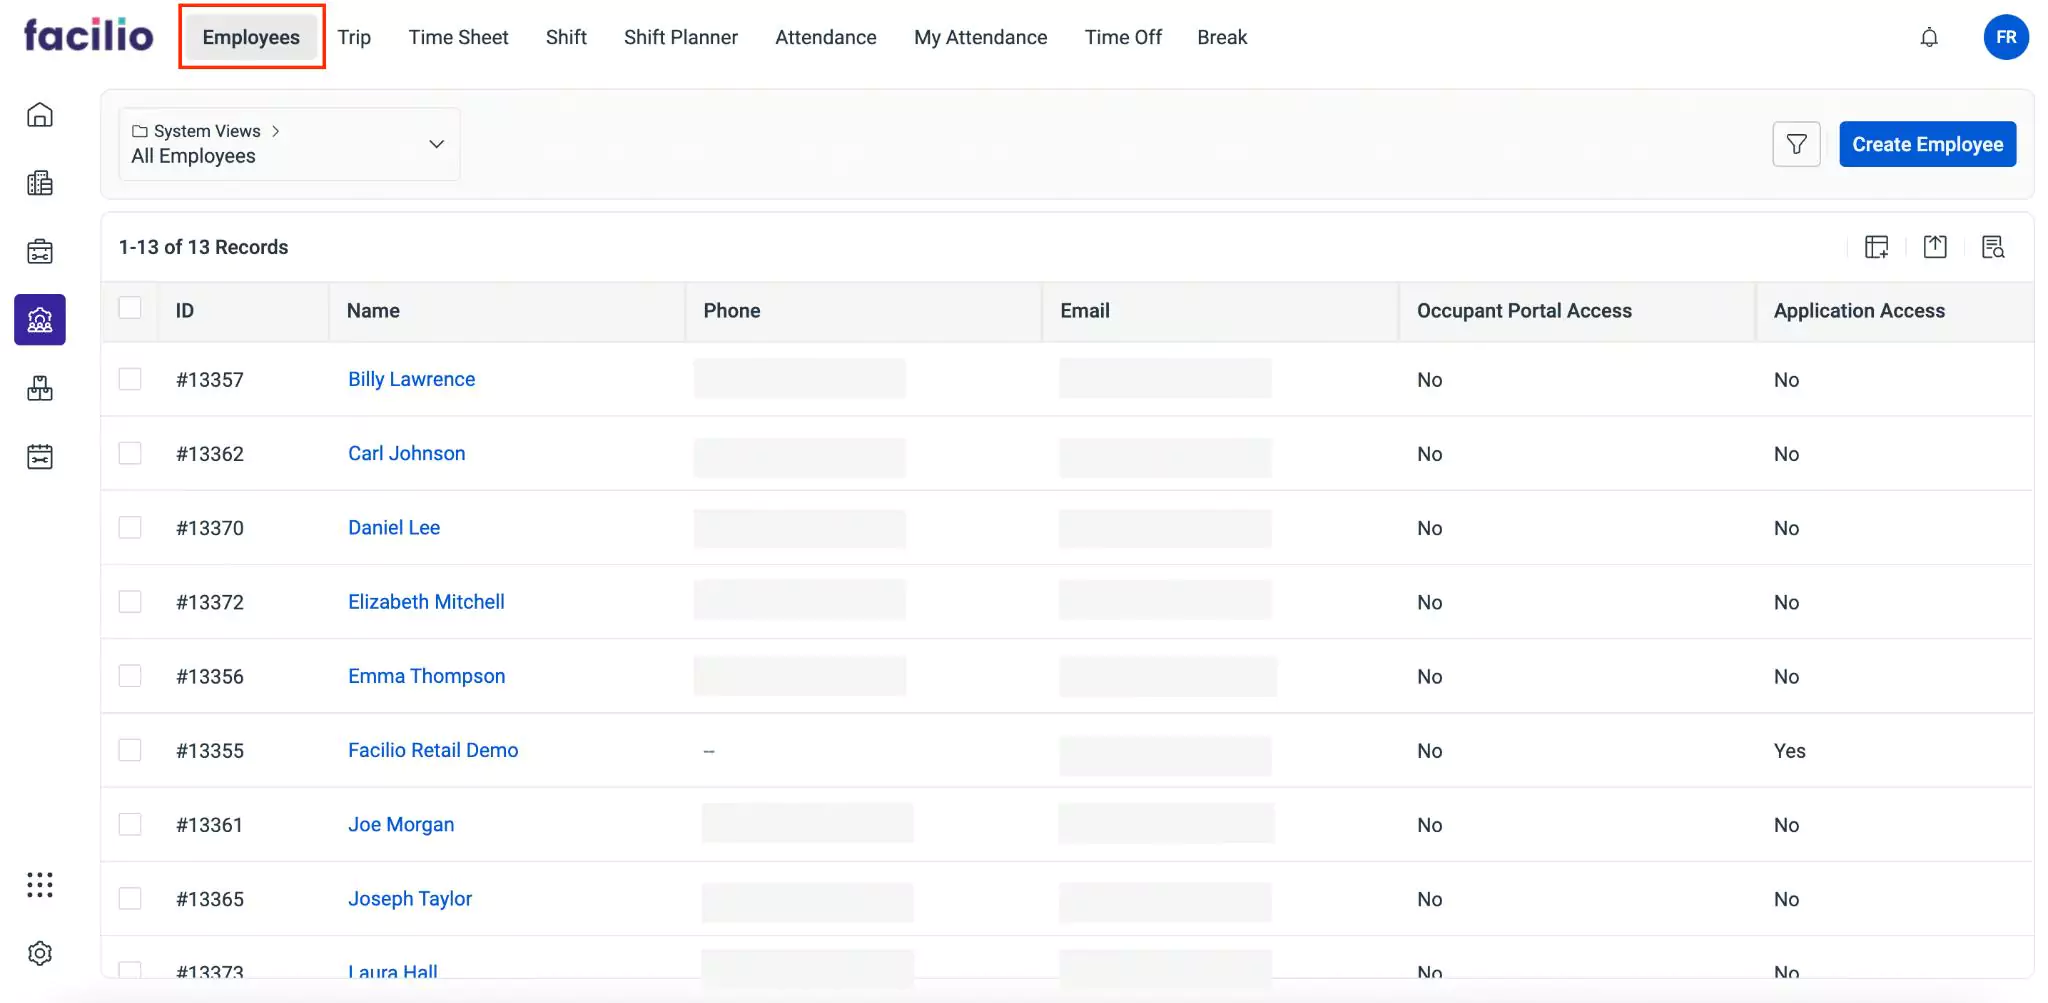
Click Create Employee. The Employee screen appears as shown below.
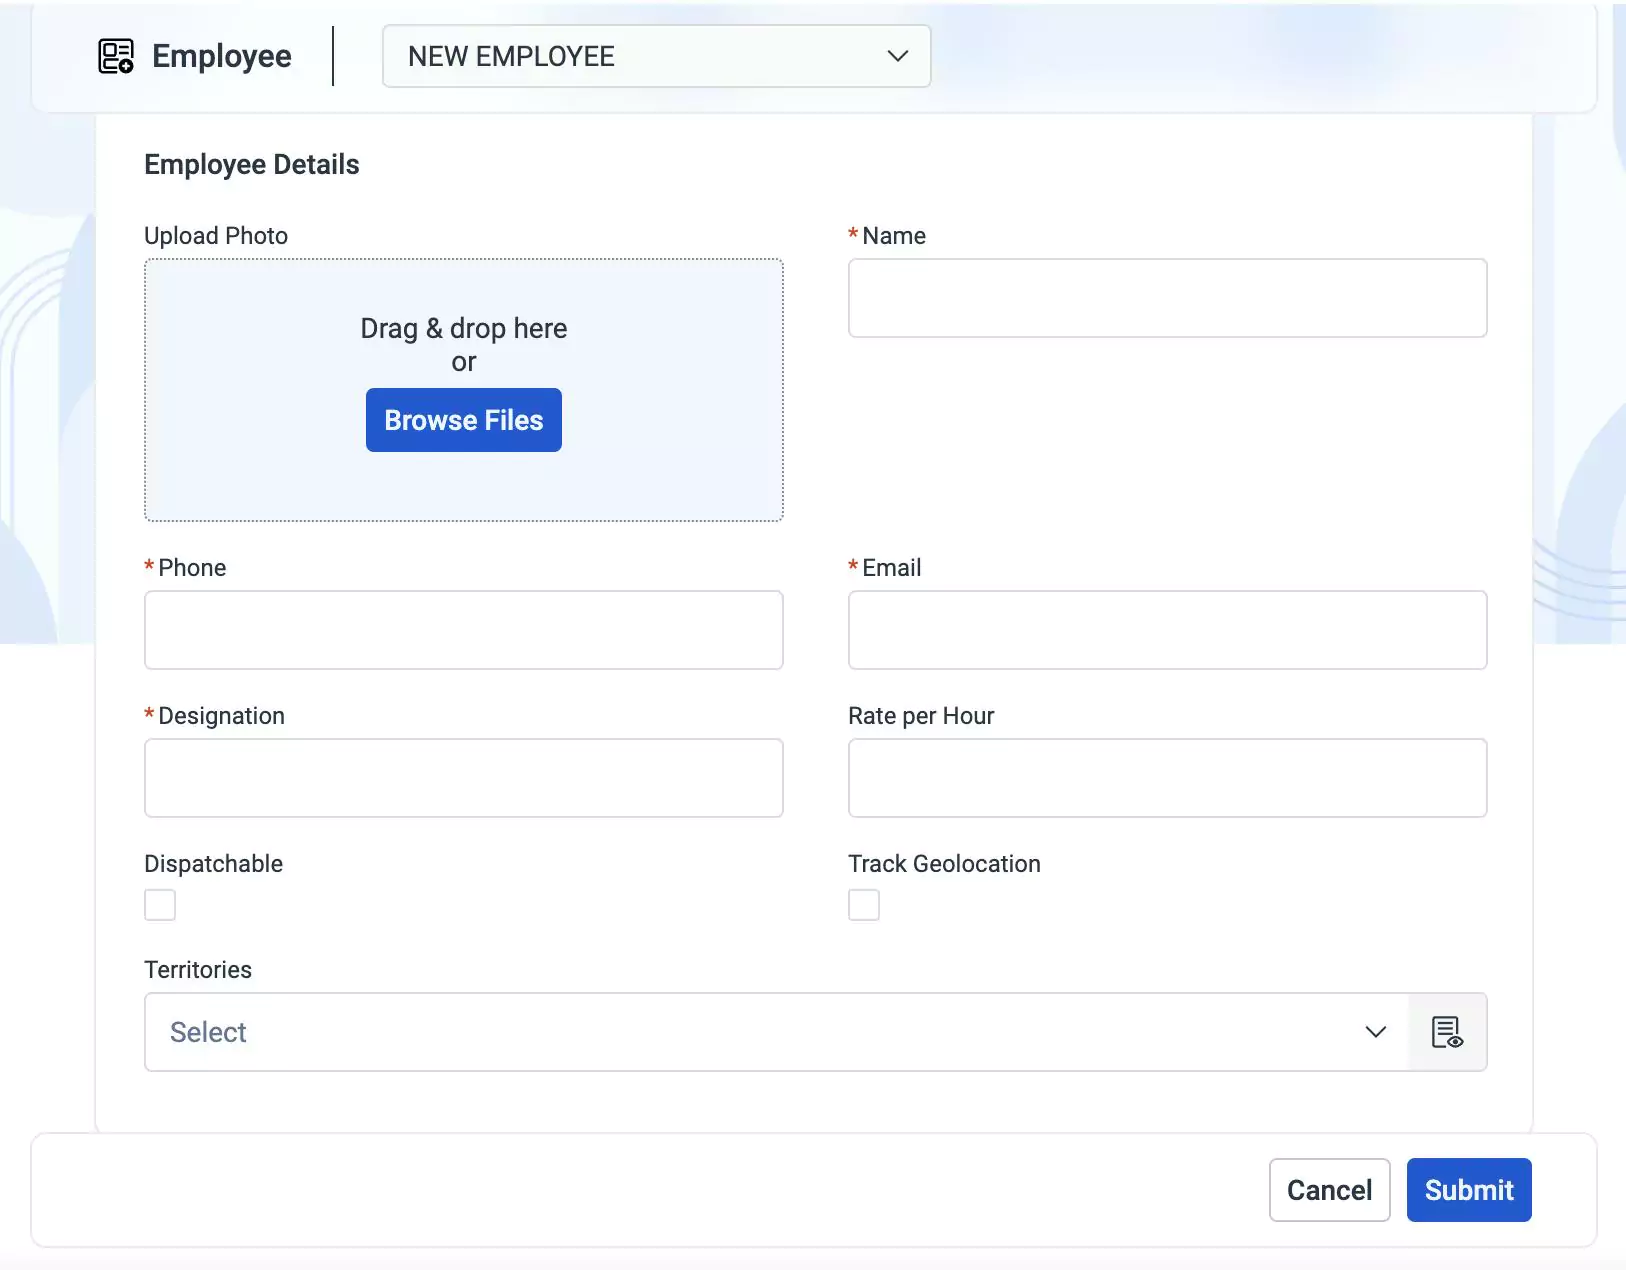
Update the following fields in this screen:
Upload Photo - The photo of an employee for identification purposes. You can either drag and drop or simply browse and upload a photo
Name - The name of the employee
Phone - The contact number of the employee
Email - The email address of the employee
Designation - The job title or role of the employee within the organization
Rate per Hour - The hourly pay charged for the field service
Dispatchable - The checkbox to determine whether the employee to be considered for field services
Note: The Dispatchable checkbox must be enabled for an employee to be displayed as a field agent. Only these employees can be dispatched to attend a service appointment.Track Geolocation - To track the geolocation of employee during their work hours
Note: When this checkbox is checked, the field agent receives a notification about their location tracking once they commence their trip.Territories - The geographical areas or territories assigned to the employee for service coverage
Click Submit. The employee is added to the All Employees list.
Enabling Portal Access
A facility administrator or the manager is authorized to enable employee portal access for an employee. To enable portal access,
Navigate to the Employees section and select an employee for which portal access has to be enabled. The summary screen appears as shown below.
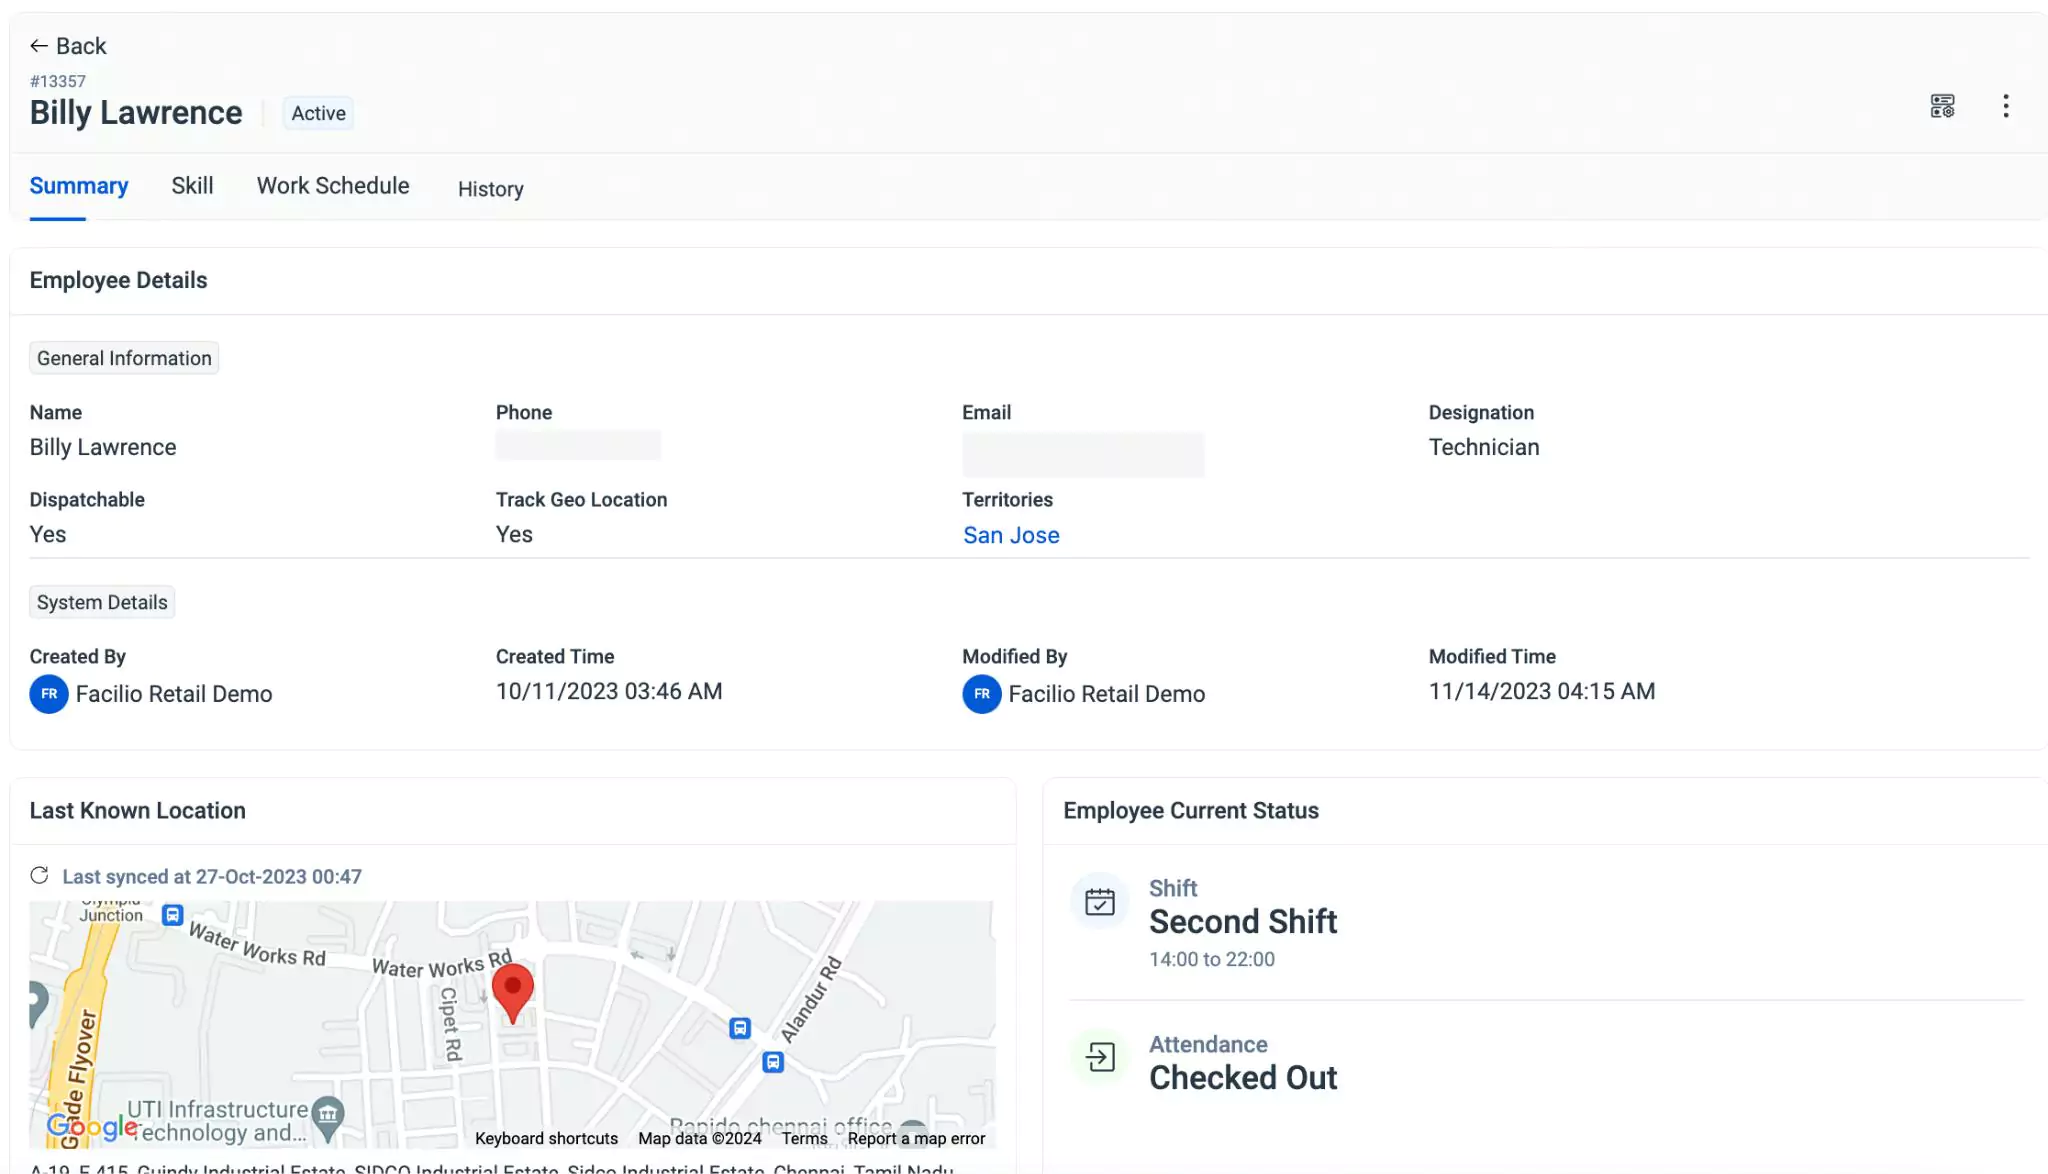
Click the (Settings) icon at the top right of the screen. The Access Management window appears as shown below.
Enable the Employee Portal toggle. The Portal Access screen appears as shown below.
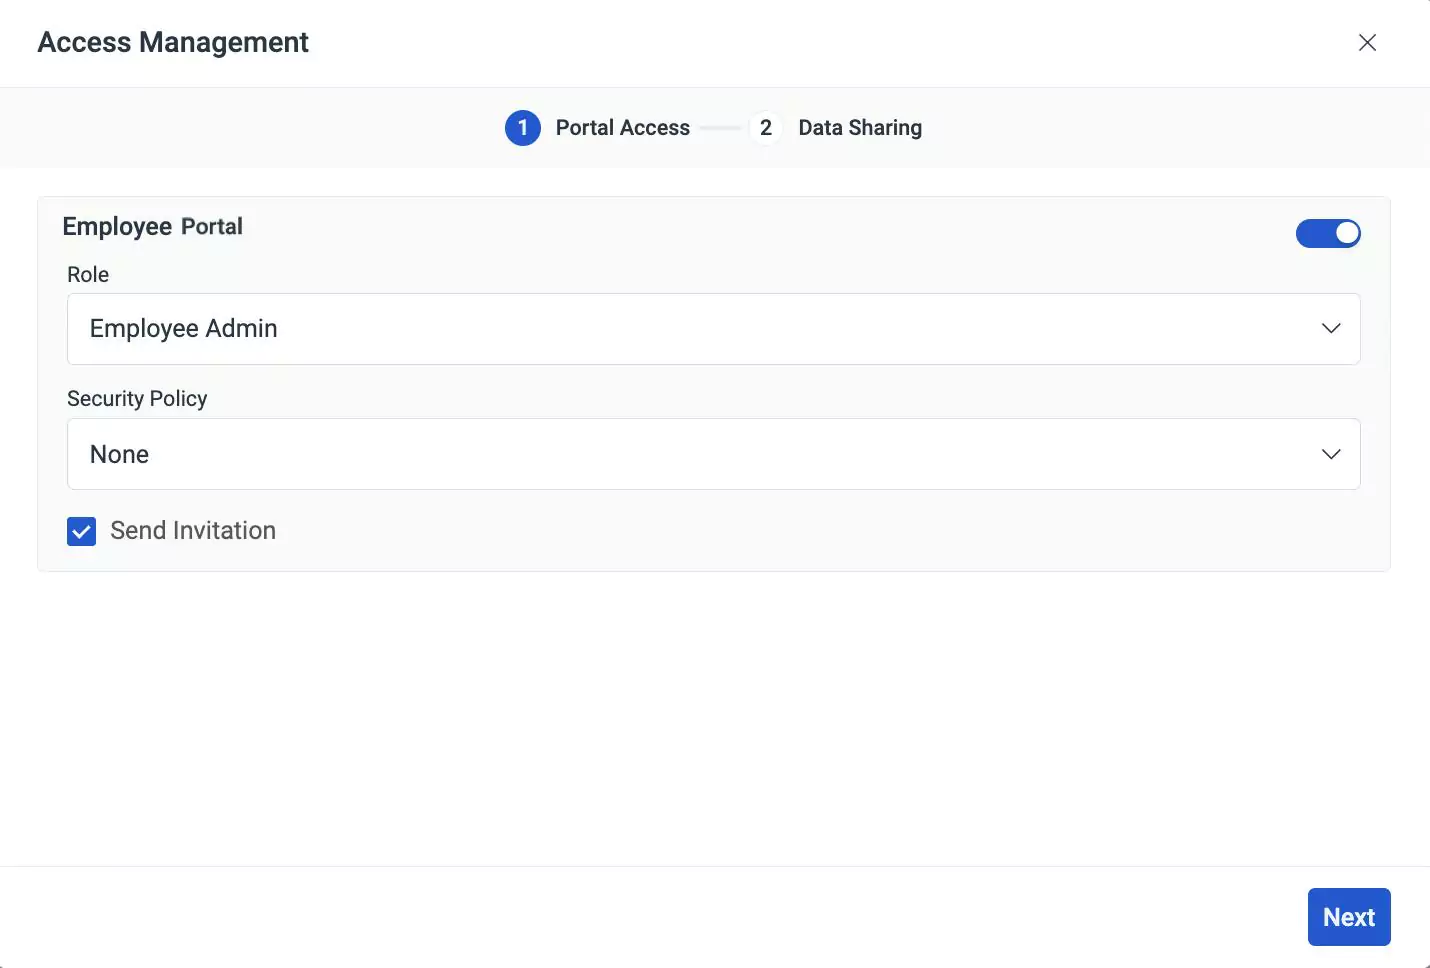
Select an appropriate role and security policy from the dropdown.
Click Next. The Data Sharing screen appears.
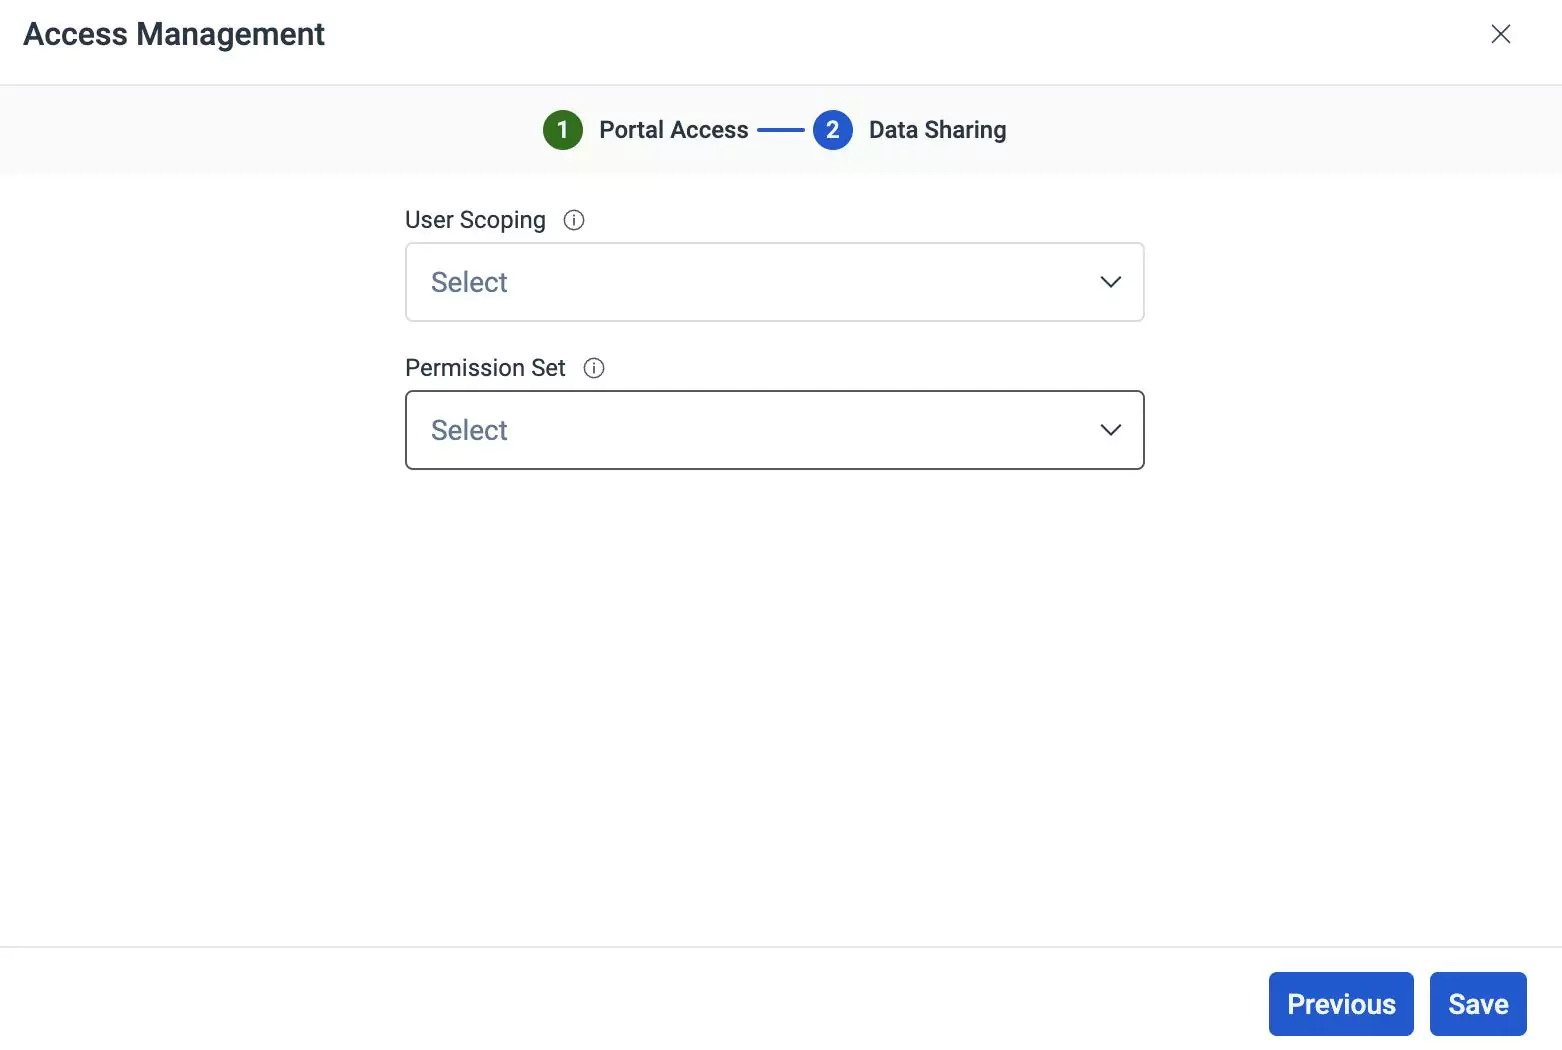
Select the appropriate user scope and permission set.
Click Save. An email is triggered to the employee with a link to activate the portal access.
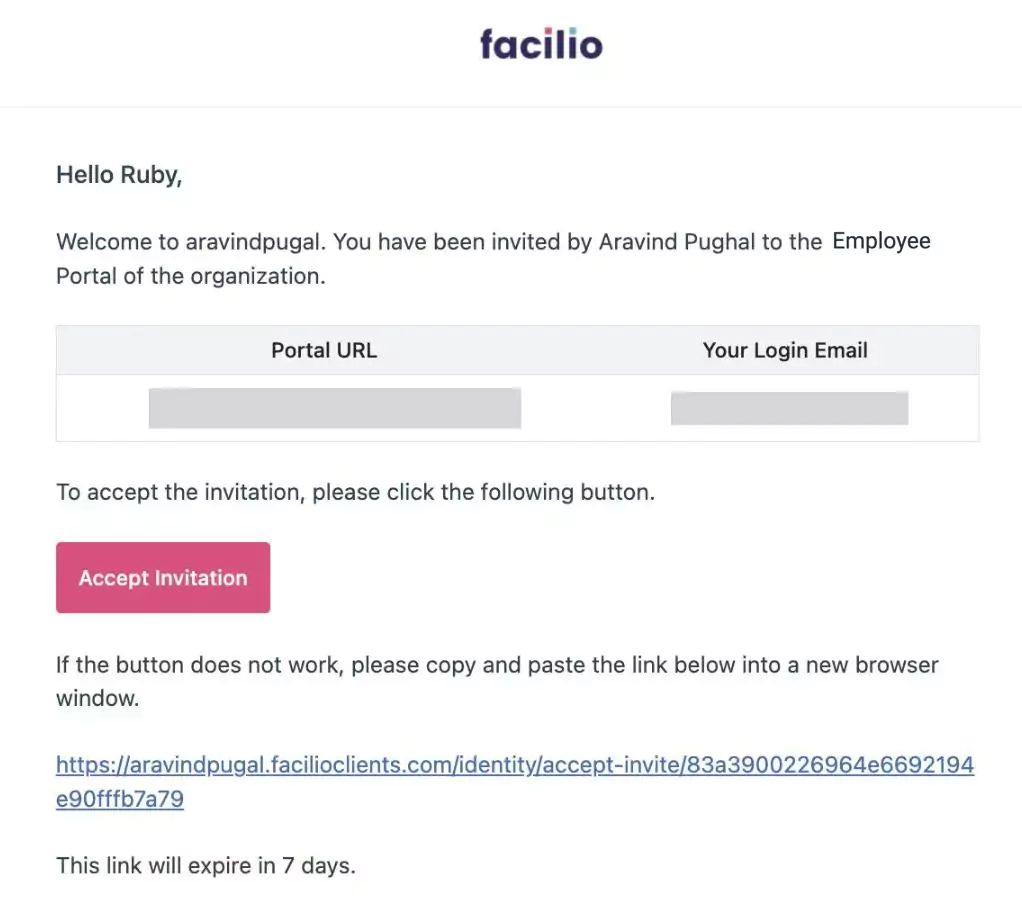
Follow the link to create a password for the account.
Type the new password and click Join. The portal access is successfully enabled for the employee.