Managing Work Orders
Unplanned maintenance is carried out to restore an asset to a condition in which it can perform its intended function and stabilize other abnormalities in a facility. The application provides a seamless reactive management experience upon creating a smooth workflow process throughout a work request that involves the facility management team, vendor, client, and tenant.
Creating a Work Order
Creating a work order for unplanned maintenance involves outlining the specifics of an unforeseen or urgent maintenance task. This includes detailing the required repairs and materials, and assigning the task to the appropriate personnel.
To create a work order,
Navigate to WORK ORDERS. The list of open work orders is displayed by default as shown below.
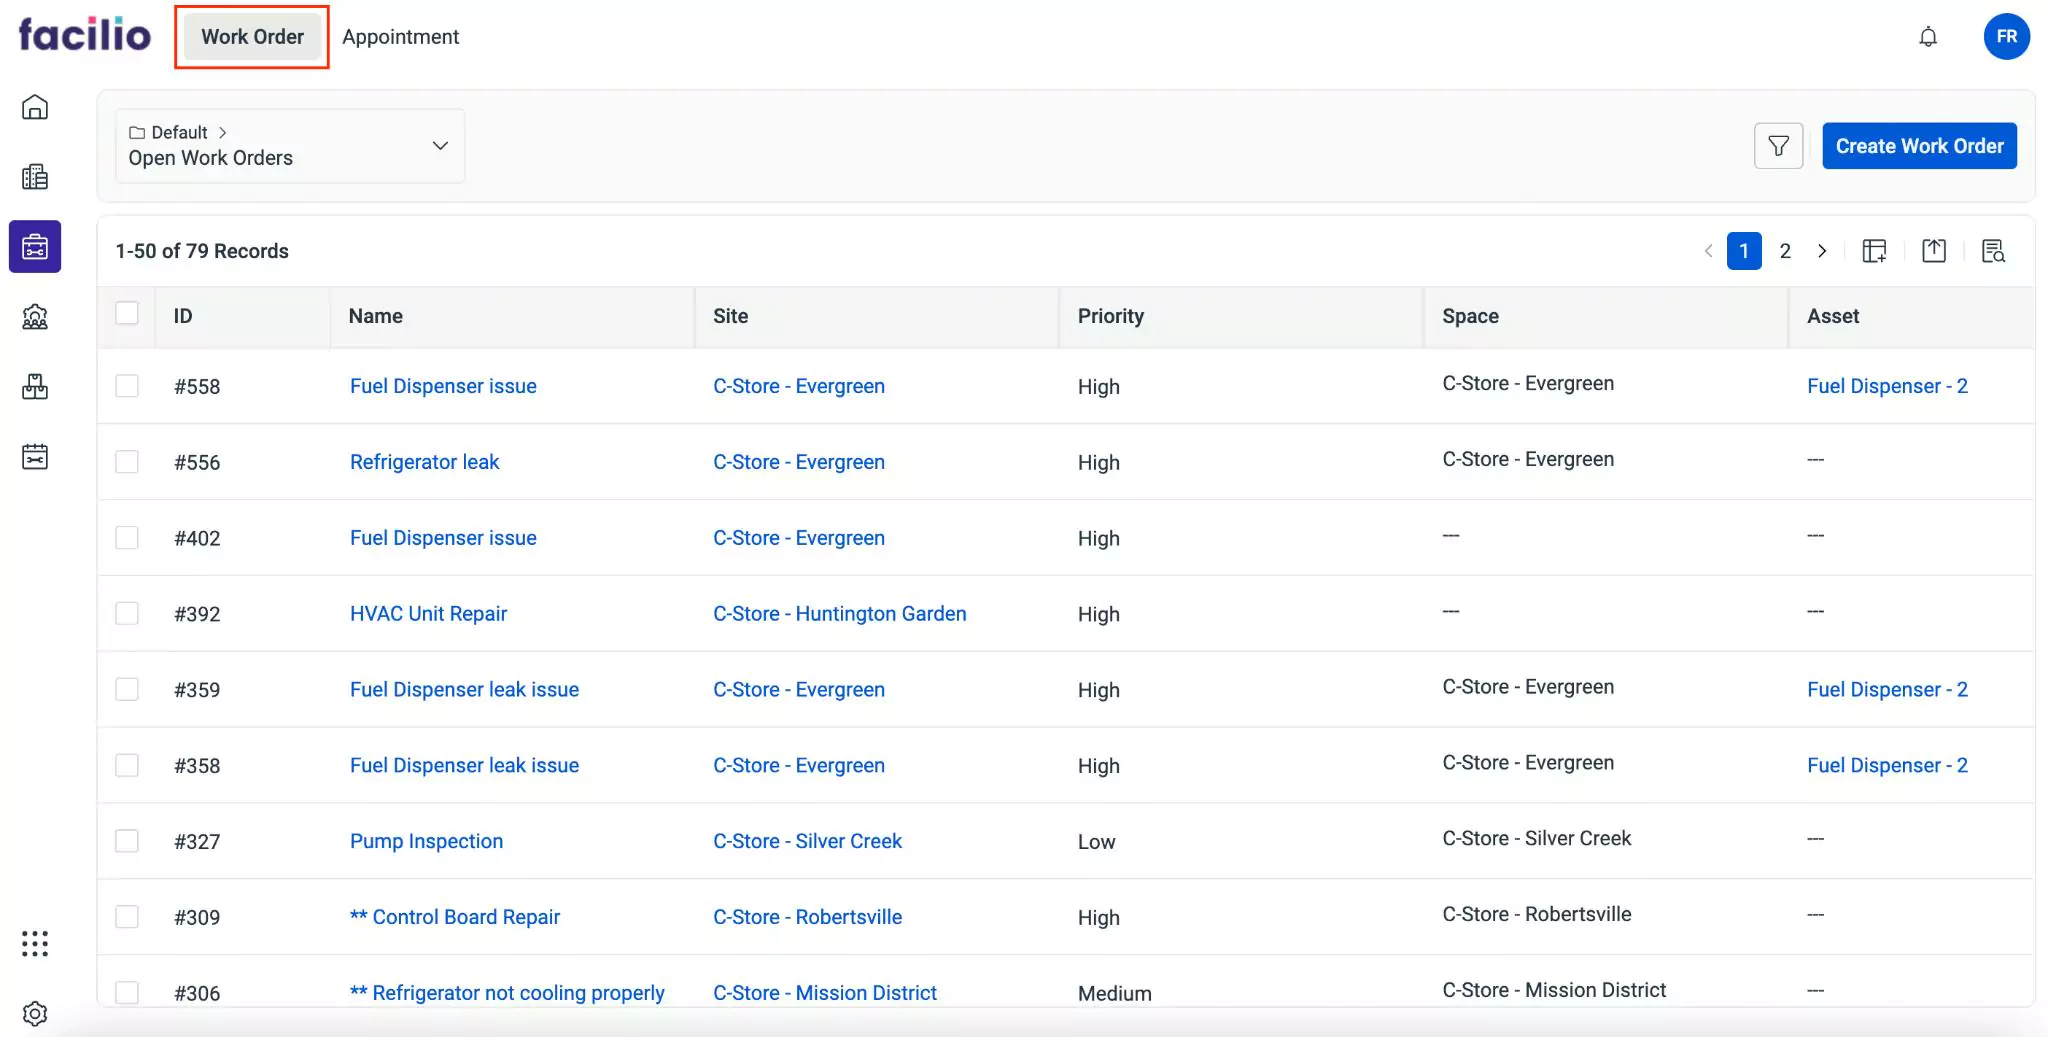
Click the Create Work Order at the top right of the screen. The Create Work Order window appears as shown below.
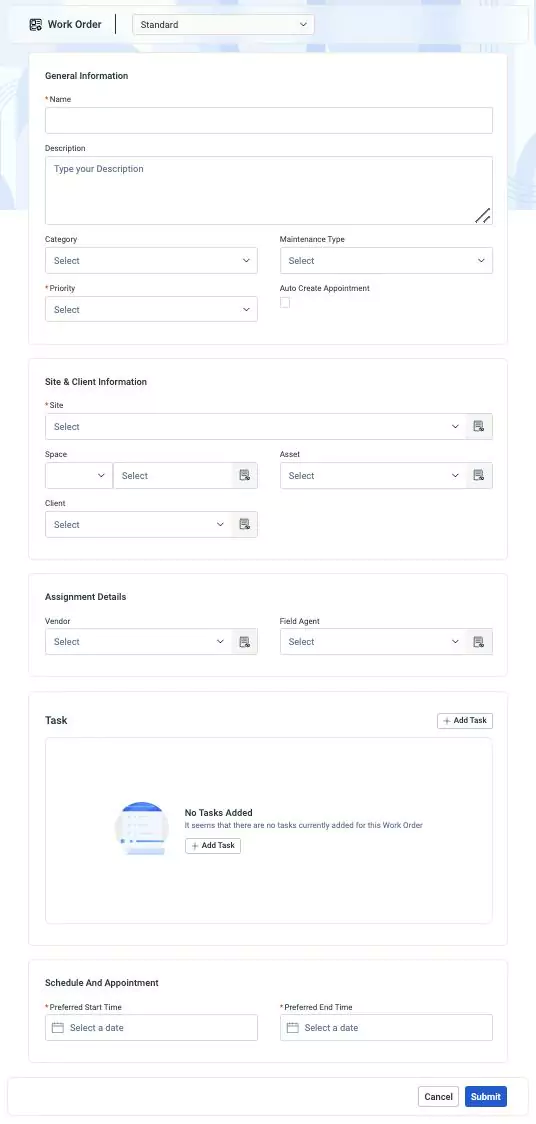
Update the following fields in this screen:
- Name - A tagline that specifies the purpose of the work order
- Description - A short note explaining the purpose of the work order
- Category - The type of the work order being created
- Maintenance Type - A classification to define the type of maintenance. You can choose any of the following options:
- Breakdown
- Compliance
- Corrective
- Preventive
- Rounds
- Priority - The order in which the work order is executed. You can select from the following options:
- Low
- Medium
- High
- Auto Create Appointment - A checkbox to automatically create an appointment for the work order
- Site - The zone where the work order task is to be executed
- Space - The space for which the work order is created. You can choose a space category such as site, building, floor, and space, and then select the preferred space.
- Asset - The asset for which the work order is created
- Client - The entity for which the work order is being created
- Vendor - The third party to whom the maintenance activity is handed over
- Field Agent - The individual to whom the task will be assigned
- Tasks - The specific actions, or activities required to complete the work order. You can click Add Task to add new task details. Read the Adding a Task section for details on adding and customizing tasks.
- Preferred Start Time - The date and time at which the work order task must begin
- Preferred End Time - The date and time at which the work order task must end
Click Submit. The work order is added successfully to the list of open work orders.
Adding a Task
The Task section provides a job plan required for accomplishing the work order. This section allows you to add items, tools and services associated with the work order. Items are physical objects or materials required to complete the tasks outlined in the work order. For instance, if the work order involves repairing a machine, the items needed might include replacement parts or components. Tools are the equipment or instruments necessary for task execution, enabling workers to perform their duties effectively and efficiently. This may encompass specialized tools specific to the task at hand. Services refer to any external assistance or expertise necessary for work order completion. This could involve hiring contractors, outsourcing tasks, or obtaining specialized services such as technical support.
Additionally, you can also add task code, work type, and skills required for completing the work order. A task code serves as a unique identifier assigned to each specific task within a work order, facilitating the tracking and order of execution. The work type categorizes the nature of the task to be performed and provides information on required tools, items and related services. Skills refer to the specific qualifications needed to complete the task outlined in the work order, including technical skills, or specialized knowledge required for effective task performance.
To add a Task,
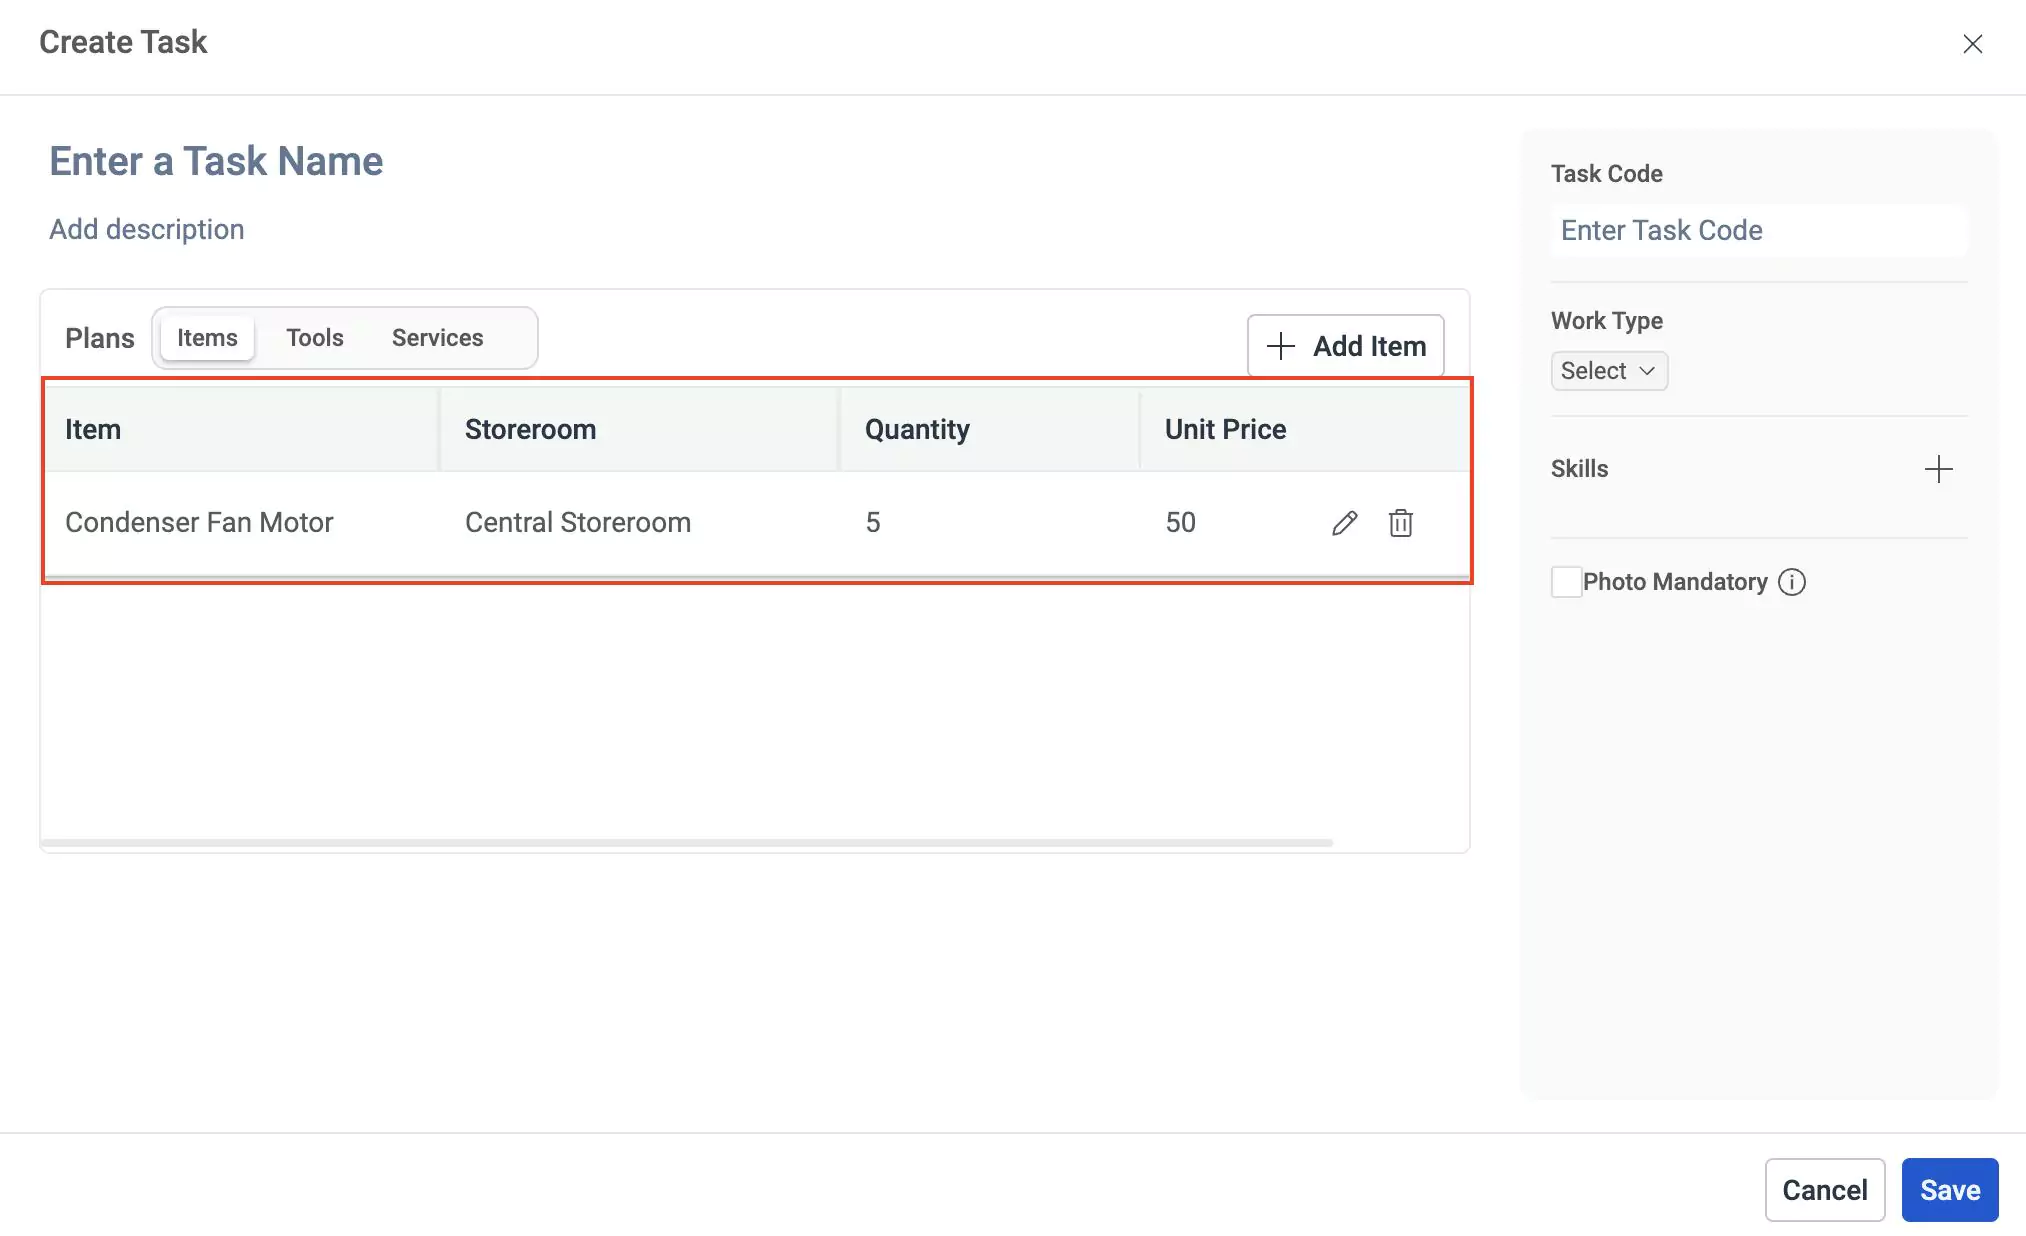
Click Add Task. The Create Task Window appears as shown below.
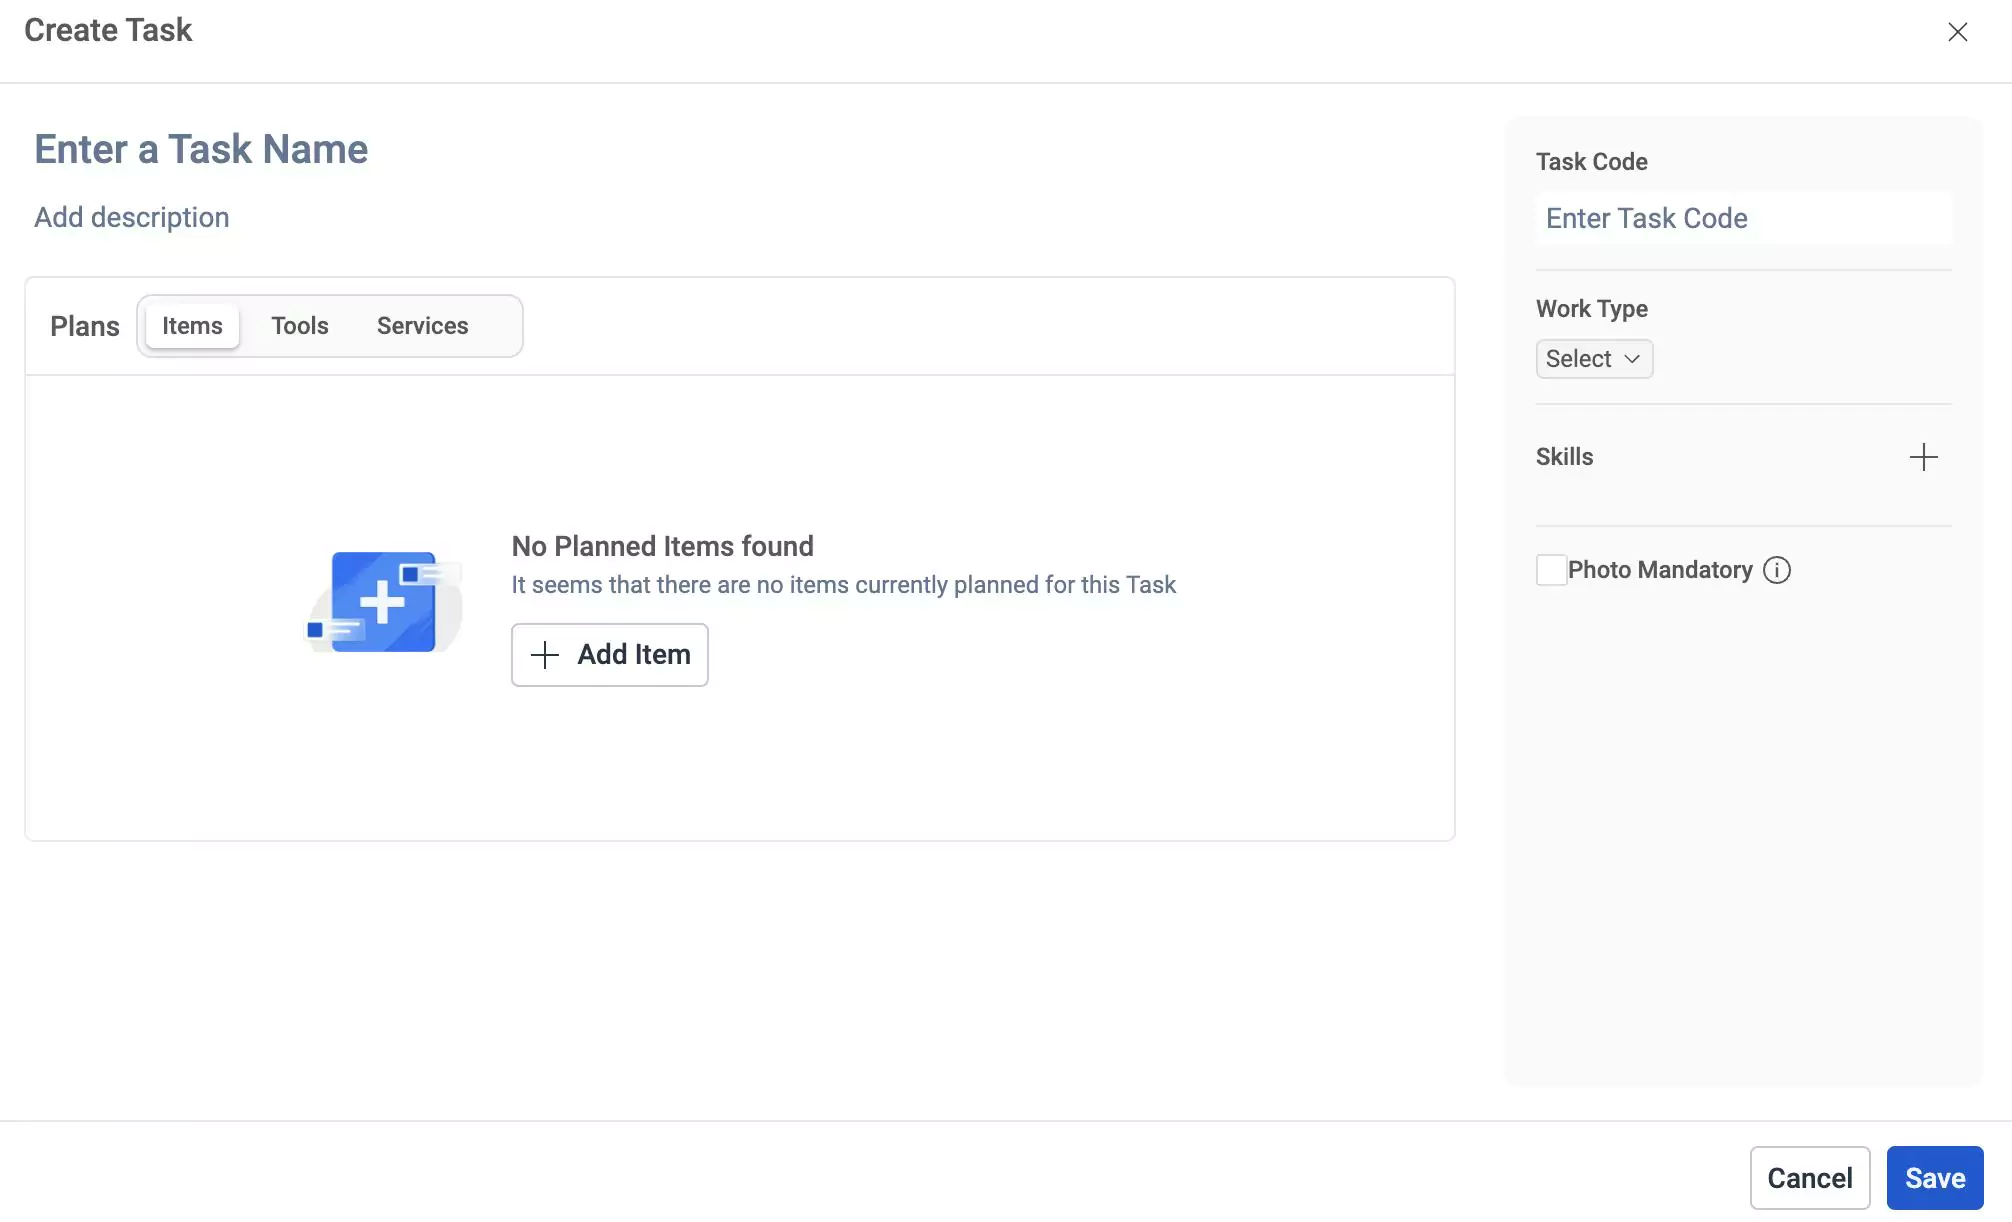
Enter the task name and description in the respective tabs.
Click
 button to add items. The Choose Item window appears.
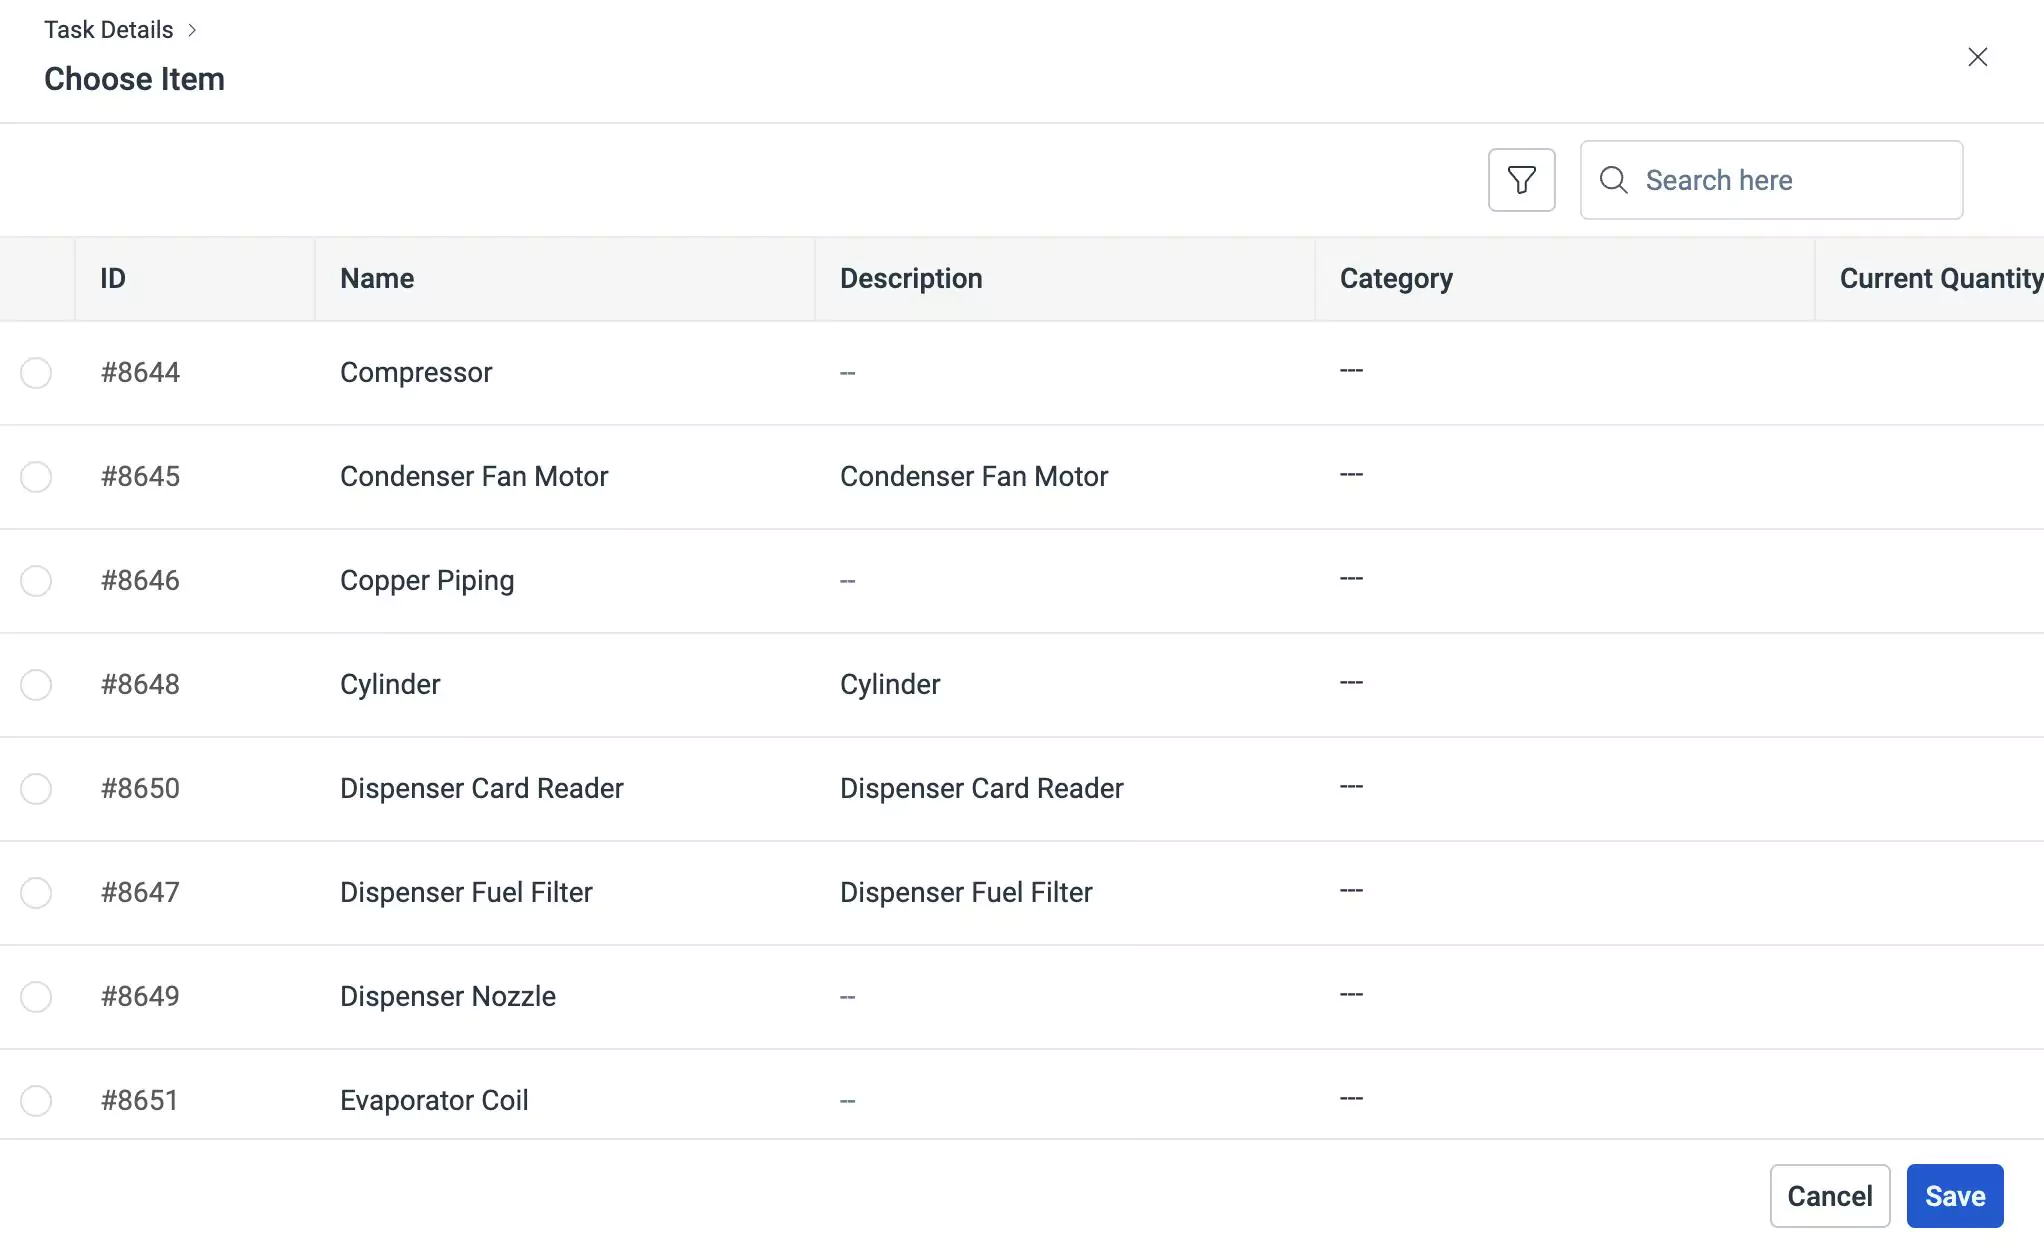
Select an Item and click Save. The screen to add items appears.
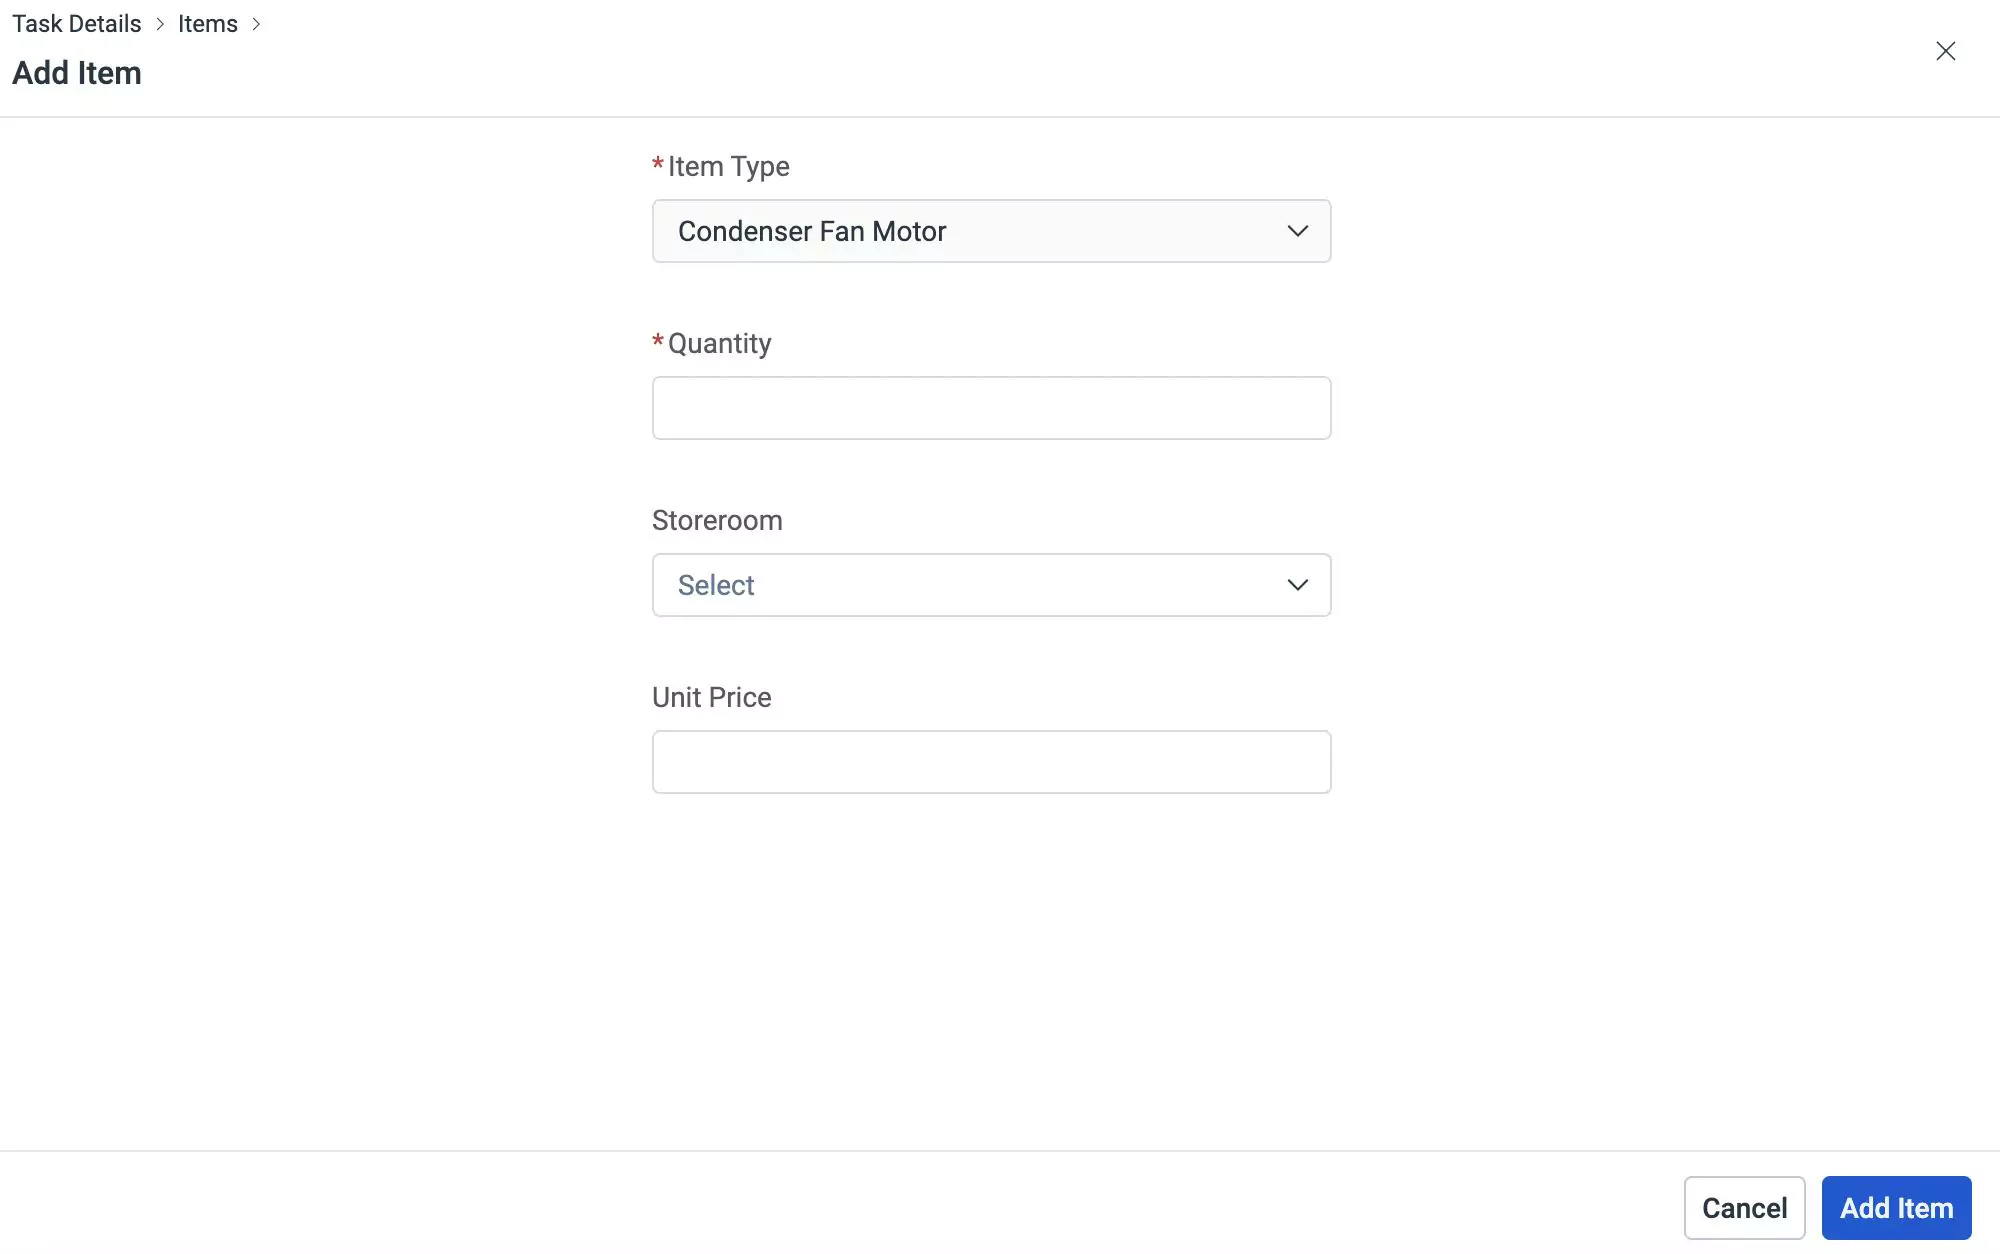
Enter the required details and click Add Item. It is mandatory to fill in the Quantity field before adding an Item. The item is added successfully as shown below.
You can click
 and
and  icons to edit and delete the record respectively.
Similarly, you can add tools and services by clicking on the Tools and Services sections.
Enter the task code in the Task Code section.
Click
 button in the Work Type section to select a work type from the available list.
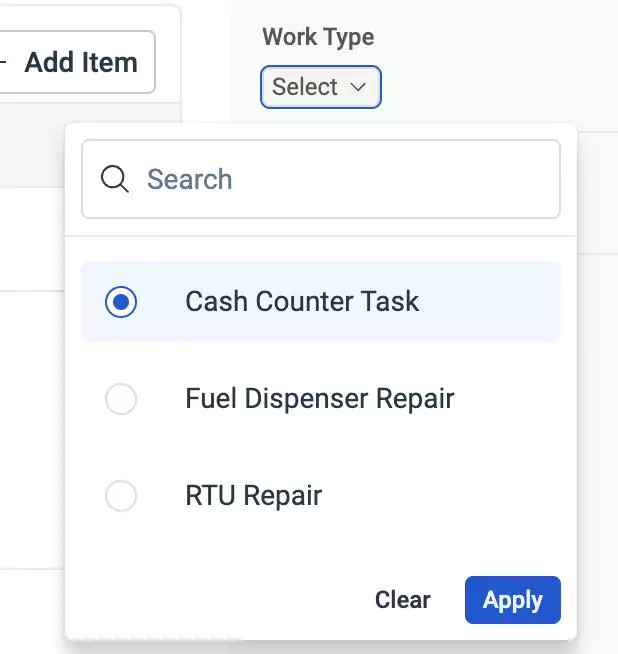
Click Apply or Clear to apply or clear the work type, respectively.
Note: When you apply a work type and if there is an existing record in planned inventory, services, and skills the following warning screen will appear.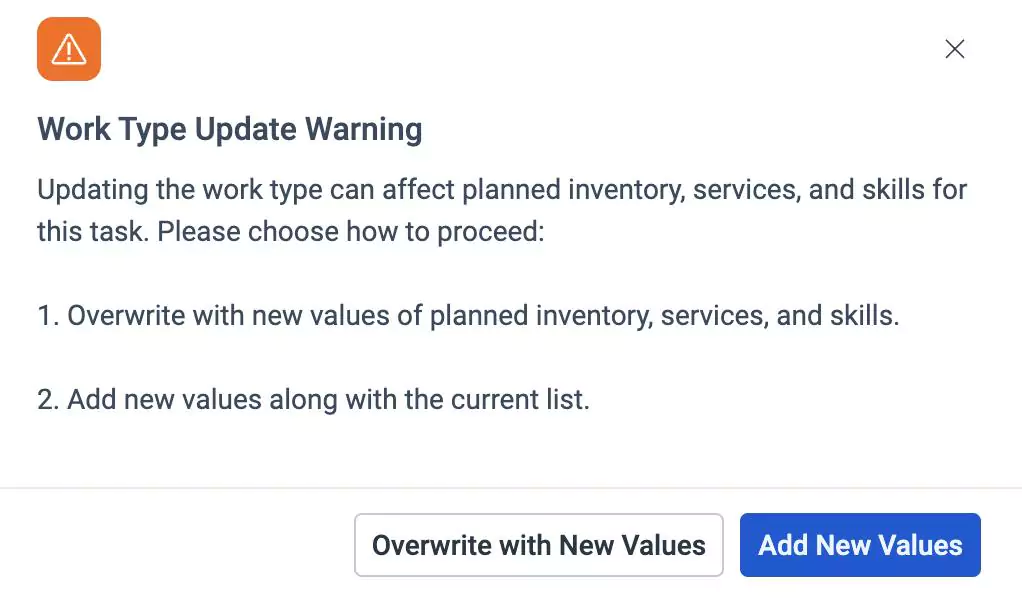
You can perform any of the following actions:
- Overwrite the planned inventory, services, and skills section with the values in the selected work type template by clicking on the Overwrite with New Values
- Add the values of the selected work type template to the existing record in the planned inventory, services, and skills section by clicking Add New Values
Click
 icon in the Skills section to add the skills required for the task. Select the required skills and click Apply.
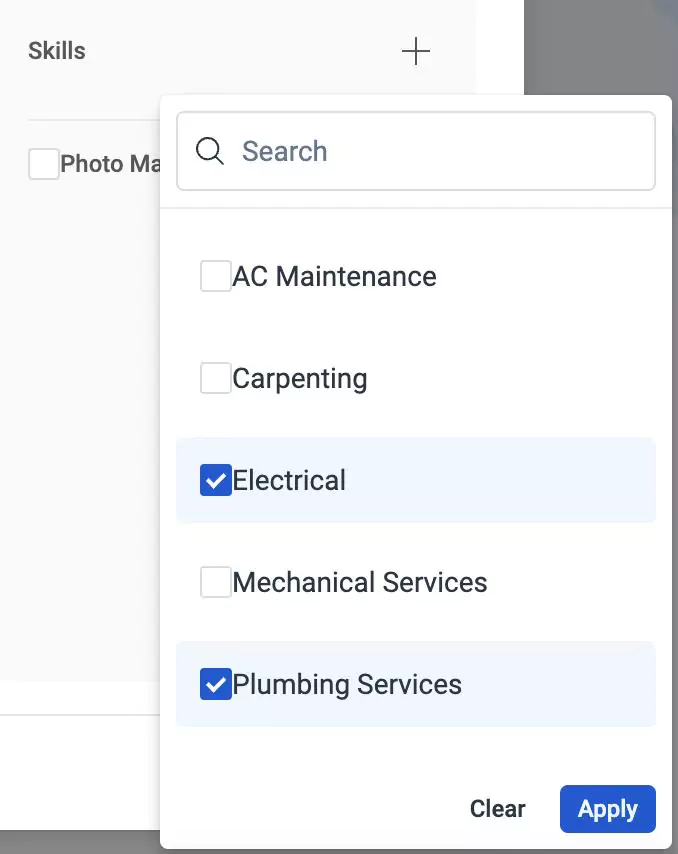
You can select multiple skills for a particular task. Click Clear to remove or clear the skills.
Enable the Photo Mandatory checkbox to make attaching images mandatory for the task.
Click Save. The task is updated successfully.
Viewing Work Order
Once the work order is created, it appears in the Work Order section. You can click on it to view the details configured under each stage of configuration and add further information.
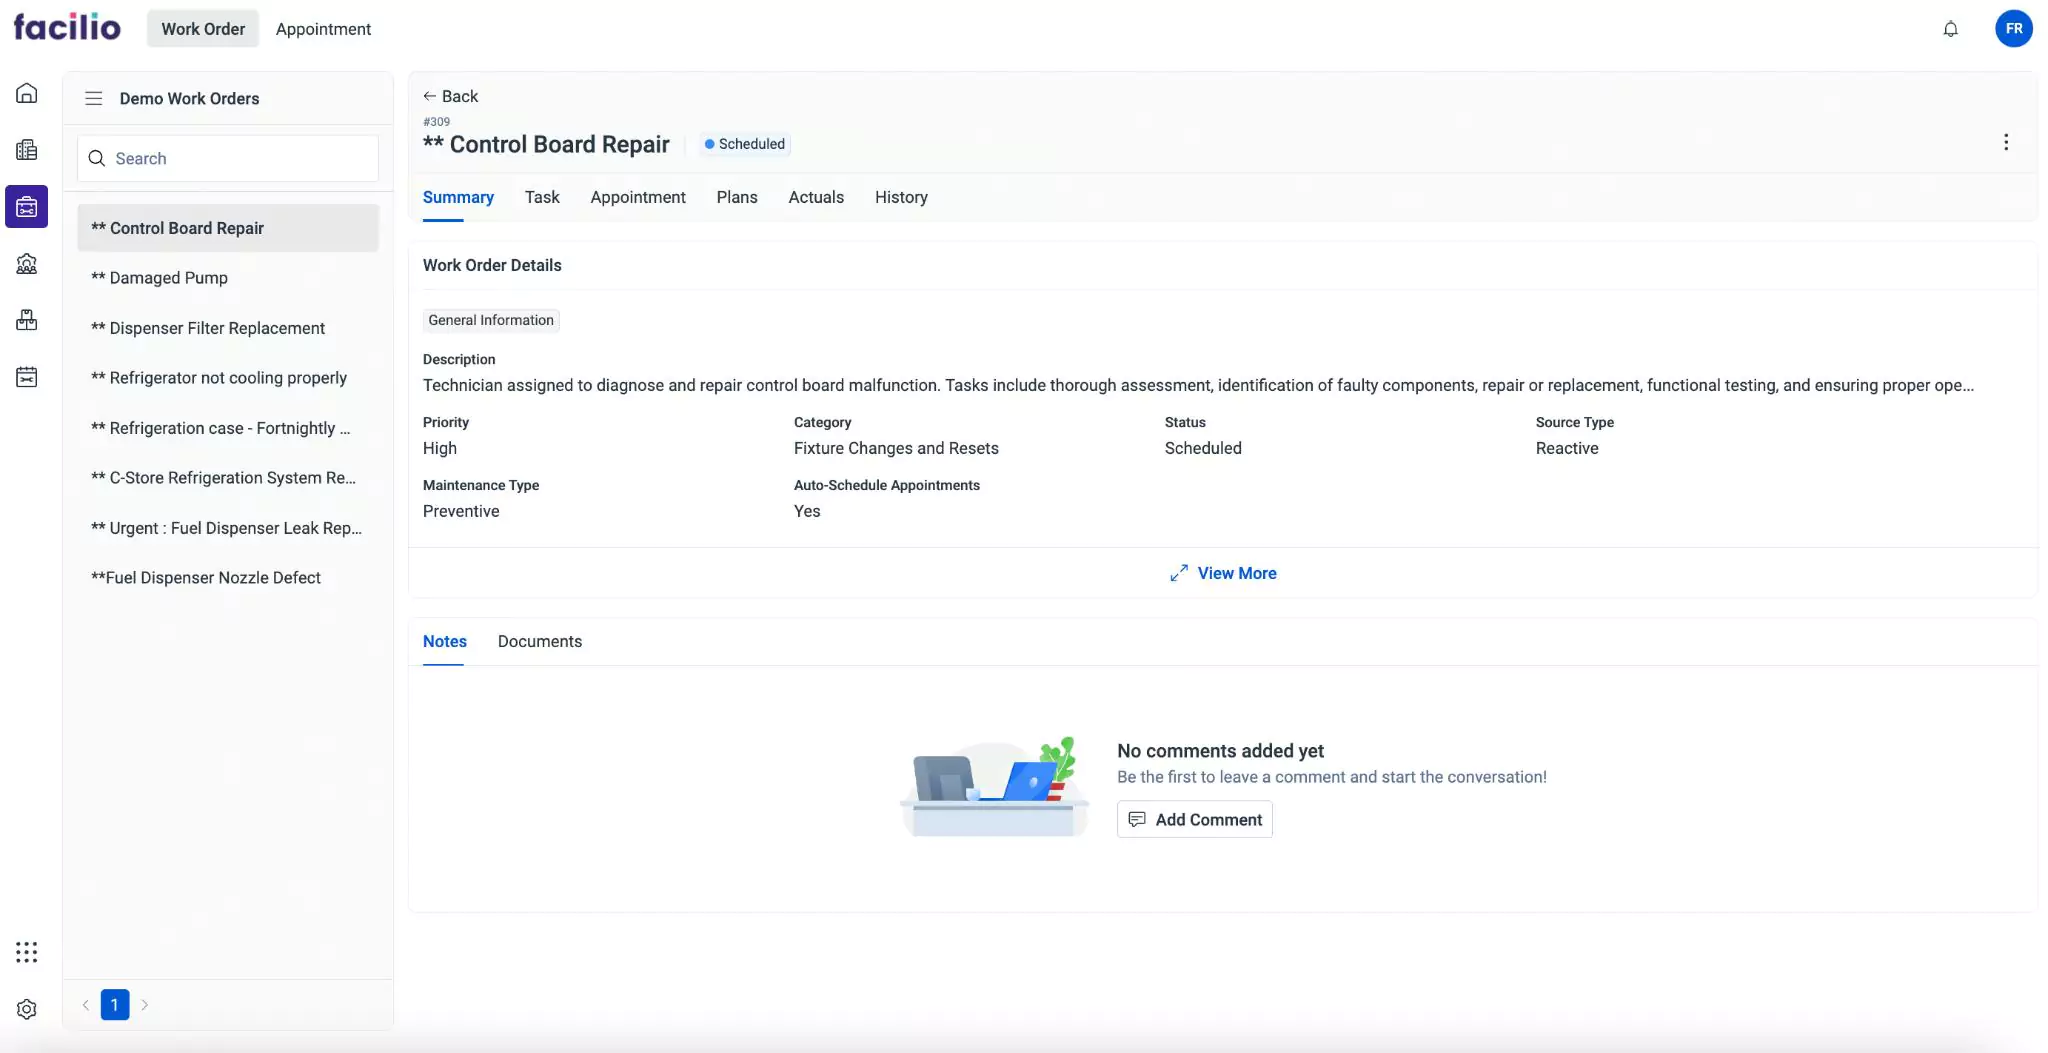
The displayed details are grouped into the following sections.
Summary
The Summary section displays the primary details associated with the maintenance activity. It includes description, priority, category, status of the work order, source type, maintenance type, and whether the appointments are auto scheduled for the work order. You can click View More to view all the available information about the maintenance activity. You can also add Notes and attach relevant Documents to include additional information.
Task
The Task section displays all the tasks configured as a part of the work order. It includes details such as the task record, items, tools, and services. You can also add tasks, items, tools, and services from this section.
Appointment
The Appointment section displays the appointments created for the work order. You can also create an appointment for the corresponding work order from this section by clicking the  button.
Plans
The Plans section provides the forecasted information about the items, tools, and service requirements necessary for work order completion. The comprehensive information about the maintenance activities can let users ensure all necessary items, tools, and services are organized and available to execute the plan. You can also add items, tools, and services from this section.
Actuals
The Actuals section displays the real-time data about the items, tools, and service requirements associated with the work order. It provides insights into the actual consumption of items, tools, and service requirements during the execution of work orders. You can also add items, tools, and services from this section.
History
The History section maintains the log of all activities that took place with respect to the maintenance activity, for future reference. The recorded information helps you understand the course of action or changes the record has undergone. The displayed details include the action that took place, the user who performed the action, and the date and time of occurrence.