Configuring Planned Maintenance
The prime objective of scheduling planned maintenance work is to reduce the efforts on corrective (reactive) work. Scheduling work also provides a steady, structured, and predictable flow of work that allows the FM to manage resources (staff, inventory, and tools) more effectively. The application provides a seamless proactive maintenance experience upon creating a smooth workflow process throughout a work order that involves the facility management team.
Creating Planned Maintenance
Planning and scheduling maintenance defines the right person, at the right time with the right materials, tools and access for work to progress from start to finish without interruption. Planned maintenance contains a job plan that is associated with work orders.
To create a planned maintenance work order,
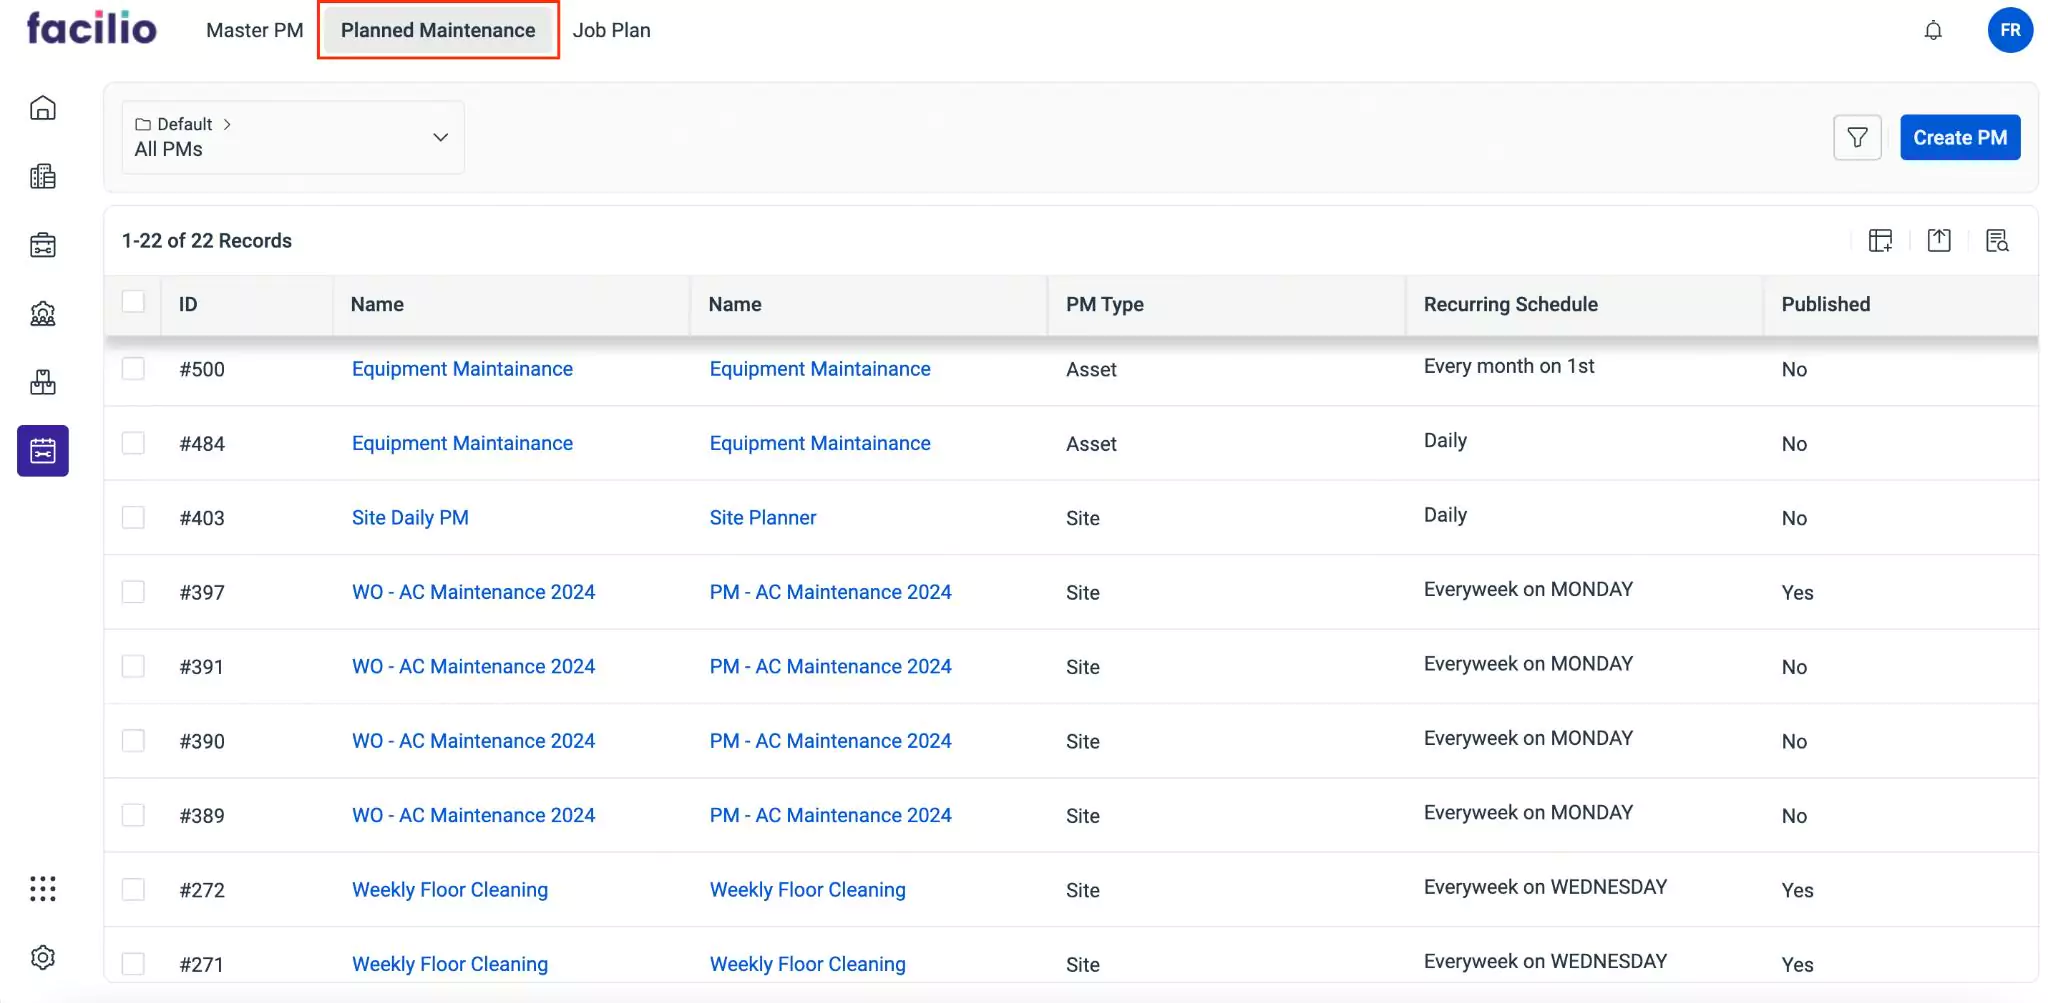
Navigate to the Planned Maintenance section. The list of planned maintenance activities created in the application are displayed by default as shown below.
Click the Create PM. The screen to create planned maintenance appears as shown below.
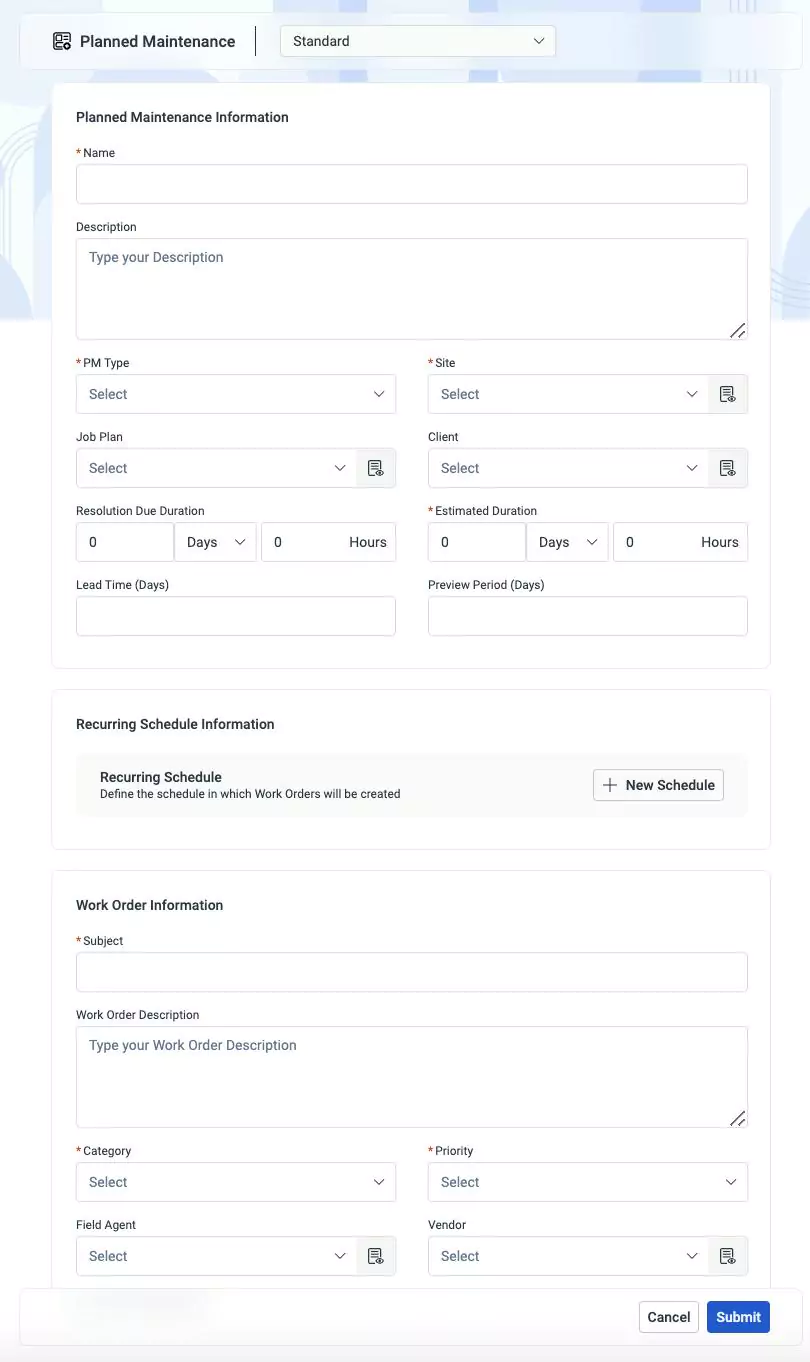
Update the following fields on the screen:
Name - A label to identify the planned maintenance template
Description - A short note describing the purpose of the planned maintenance
PM Type - The category for which the planned maintenance is being created. The category includes site, asset, space, and so on.
Site - The area where the maintenance activity is to be executed
Job Plan - The template that defines maintenance tasks, required for the execution of maintenance activities
Client - The entity for which the work order is being created
Resolution Due Duration - The time frame within which a particular task needs to be completed
Estimated Duration - The expected time required to complete a specific task or activity
Lead Time (Days) - The preparation time required before scheduled maintenance tasks are executed. For instance, if the lead time is 3 days, then scheduled maintenance will be created 3 days prior to the scheduled date. This period allows teams to adequately prepare for the upcoming maintenance activity.
Preview Periods (Days) - The duration between the creation of a maintenance task or work order and the scheduled date for its execution. This time frame is used for reviewing the maintenance request.
Recurring Schedule - Schedule for defining work order creation. Click
 button to add a recurring schedule. Read the Adding a Schedule section for more information.
Subject - A tagline that specifies the purpose of the work order
Work Order Description - A short note describing the purpose of the work order
Category - The type of the work order being created
Priority - The order in which the work order is executed. You can select from the following options:
- High
- Low
- Medium
Field Agent - The individual to whom the task will be assigned
Vendor - The third party to whom the maintenance activity is handed over
Auto Create Appointment - A checkbox to automatically create an appointment for the work order
Click Submit. The corresponding details screen appears.
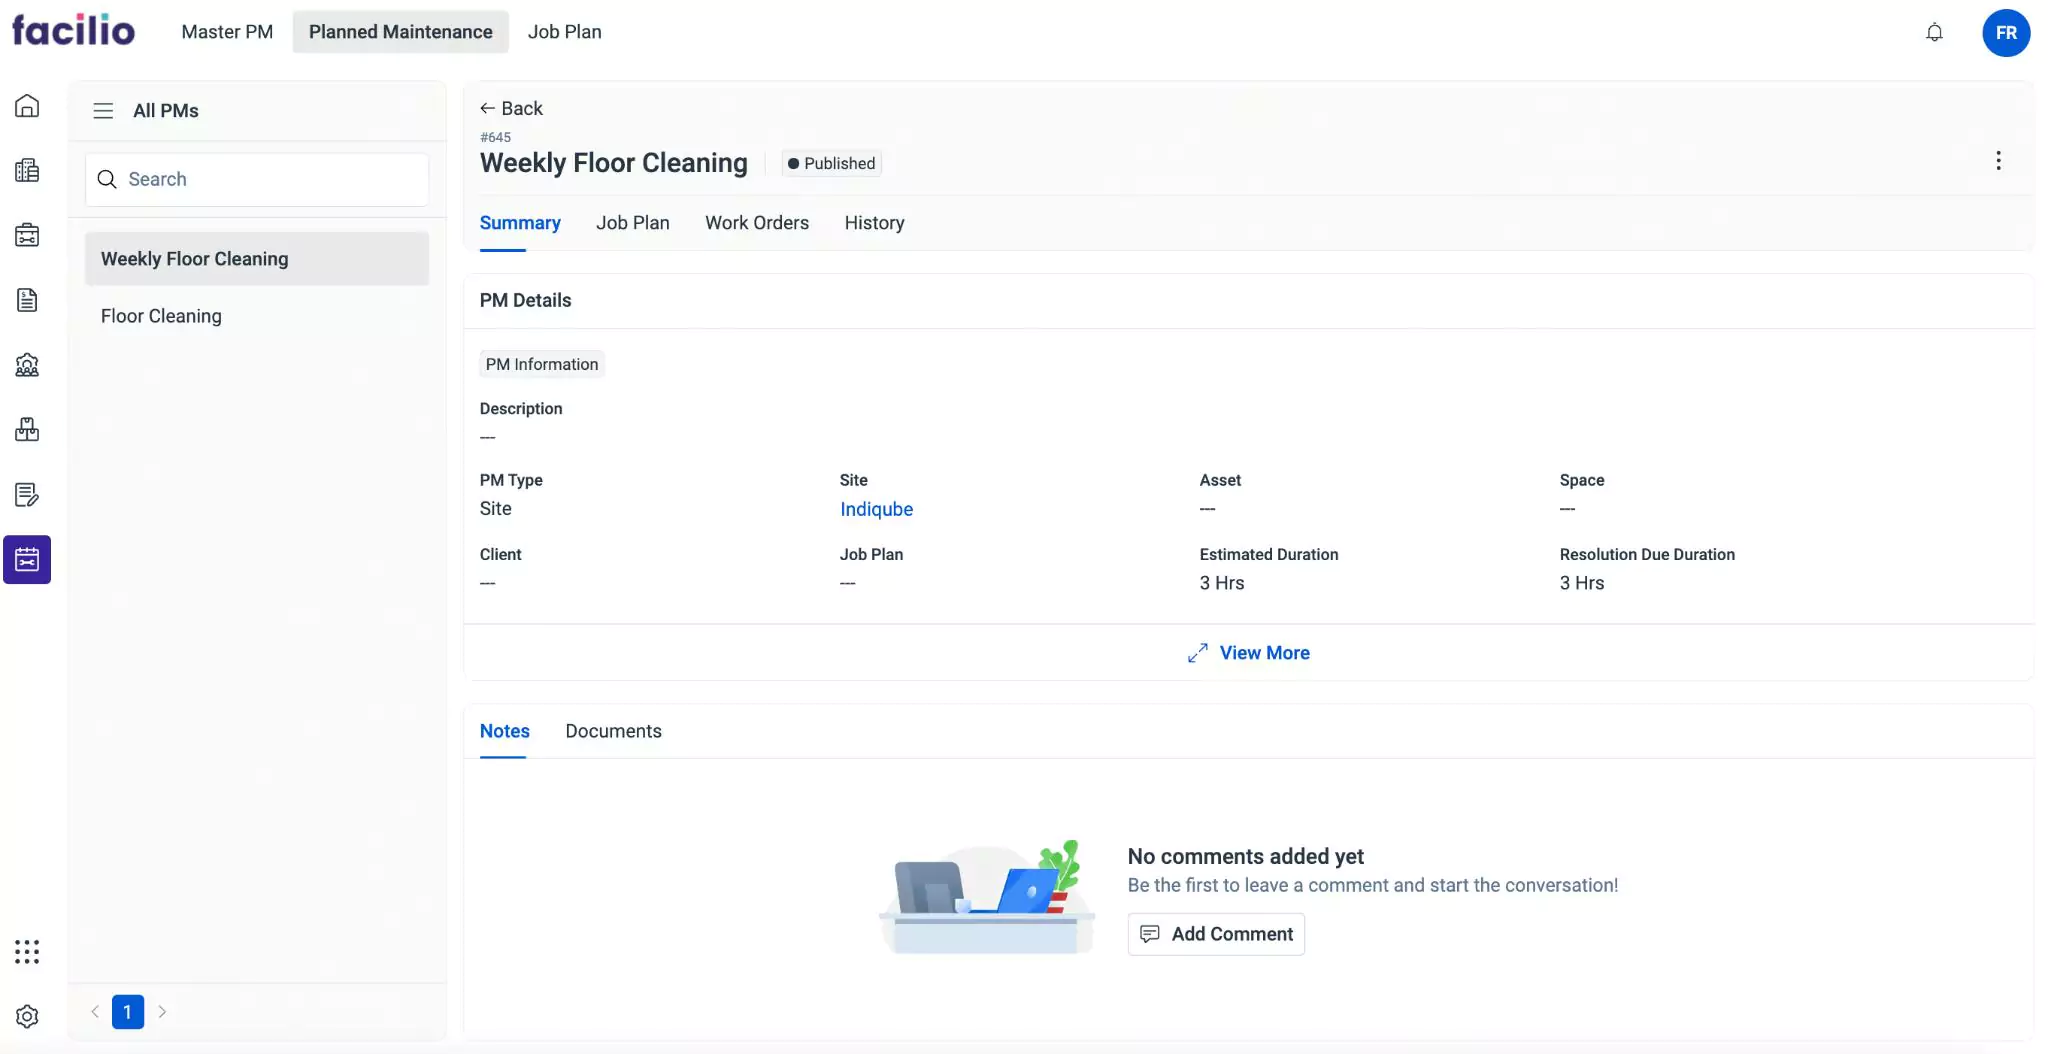
Click Publish. The planned maintenance template is published successfully.
The details configured as a part of the planned maintenance setup are reflected in the respective work orders triggered in the Services module.
Viewing Planned Maintenance
Once the planned maintenance is configured, it appears under the Planned Maintenance section. You can click on it to view the details configured under each stage of configuration.
These details are displayed under the respective sections as explained below.
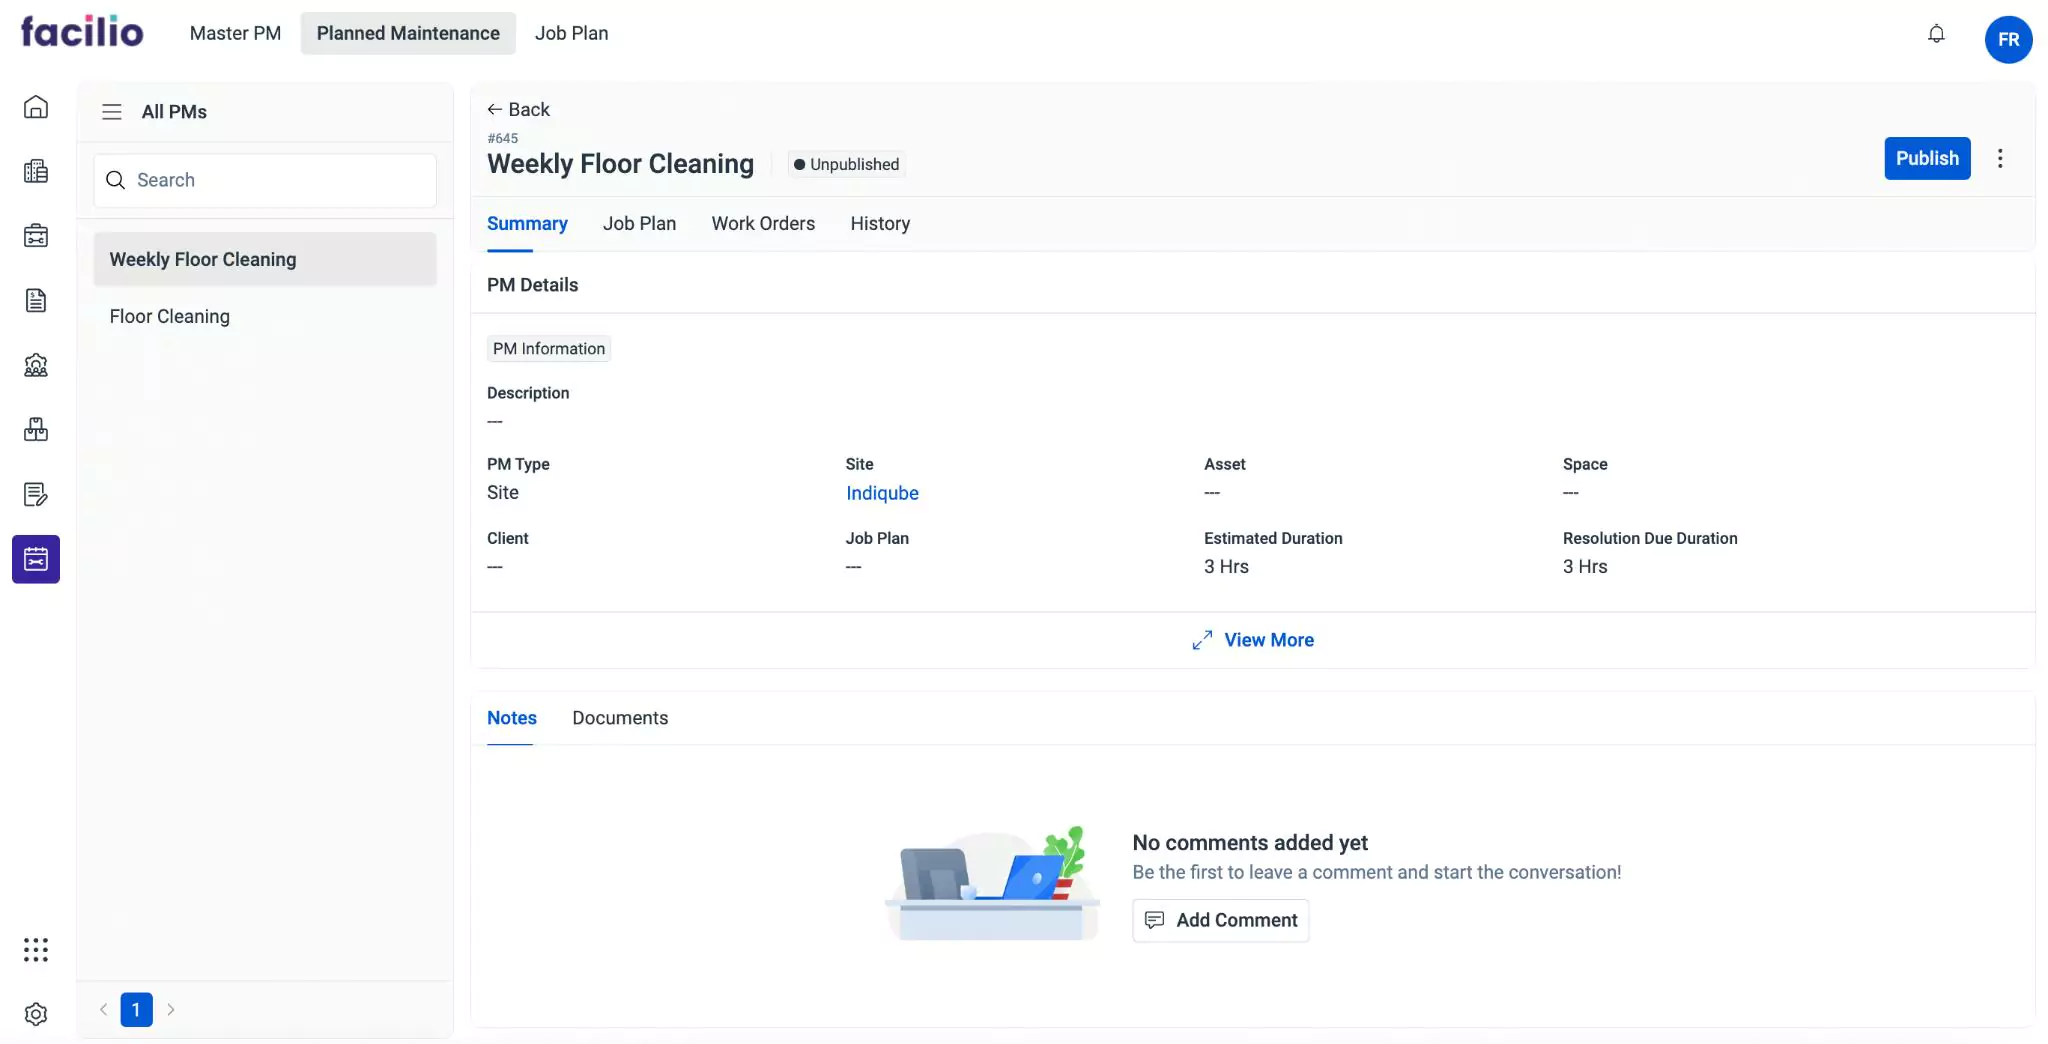
Summary
The Summary section displays the primary details associated with the planned maintenance activity. The PM information includes details such as description, PM type, site, asset, space, name of the client, job plan, estimated duration, and resolution period. You can click View More to view all the available information about the maintenance activity. You can also add Notes and attach relevant Documents to include additional information.
Job Plan
The Job Plan section displays the basic information of the job plan. It includes details such as the tasks, items, tools, and services associated with the maintenance activity.
Work Orders
The Work Orders section displays the work orders created for planned maintenance activities. When accessing the Work Orders section, all created work orders are displayed by default. Additionally, the Upcoming section displays work orders that are yet to be carried out, while the New section displays recently created work orders. You can also reschedule and cancel a planned maintenance activity by clicking the Reschedule and Cancel buttons respectively of the corresponding record. While rescheduling planned maintenance activity you can select the preferred date and enable the Reschedule Subsequent Work Orders checkbox. This checkbox gives you the option to automatically adjust the date of future maintenance triggers after the rescheduled date. The system will recalculate the schedule for upcoming maintenance tasks based on the selected frequency
History
The History section maintains the log of all activities that take place with respect to the maintenance activity, for future reference. The recorded information helps you understand the course of action or changes the record has undergone. The displayed details include the action that took place, the user who performed the action, and the date and time of occurrence.
You can click the ![]() (vertical ellipsis) icon at the top right corner of the details screen to edit the corresponding details.
(vertical ellipsis) icon at the top right corner of the details screen to edit the corresponding details.