Configuring Master PM
Master PM serves as a comprehensive framework for standardizing planned maintenance activities across various assets or equipment within an organization. Its primary advantage lies in its ability to streamline the creation of PM schedules for multiple assets by consolidating maintenance requirements and schedules into a single template. By centralizing maintenance protocols within a master PM template, organizations can enhance efficiency and effectiveness in their maintenance operations while minimizing the administrative burden associated with creating individual PMs for each asset or equipment.
Creating Master PM
Creating a master PM template provides a structured framework for optimizing PM processes, and effectively managing maintenance activities for multiple assets simultaneously. The master PM template defines maintenance tasks, frequencies, and other relevant details necessary for planning and executing planned maintenance.
To create a master PM,
Navigate to Master PM. The list of configured master PM templates appears by default as shown below.
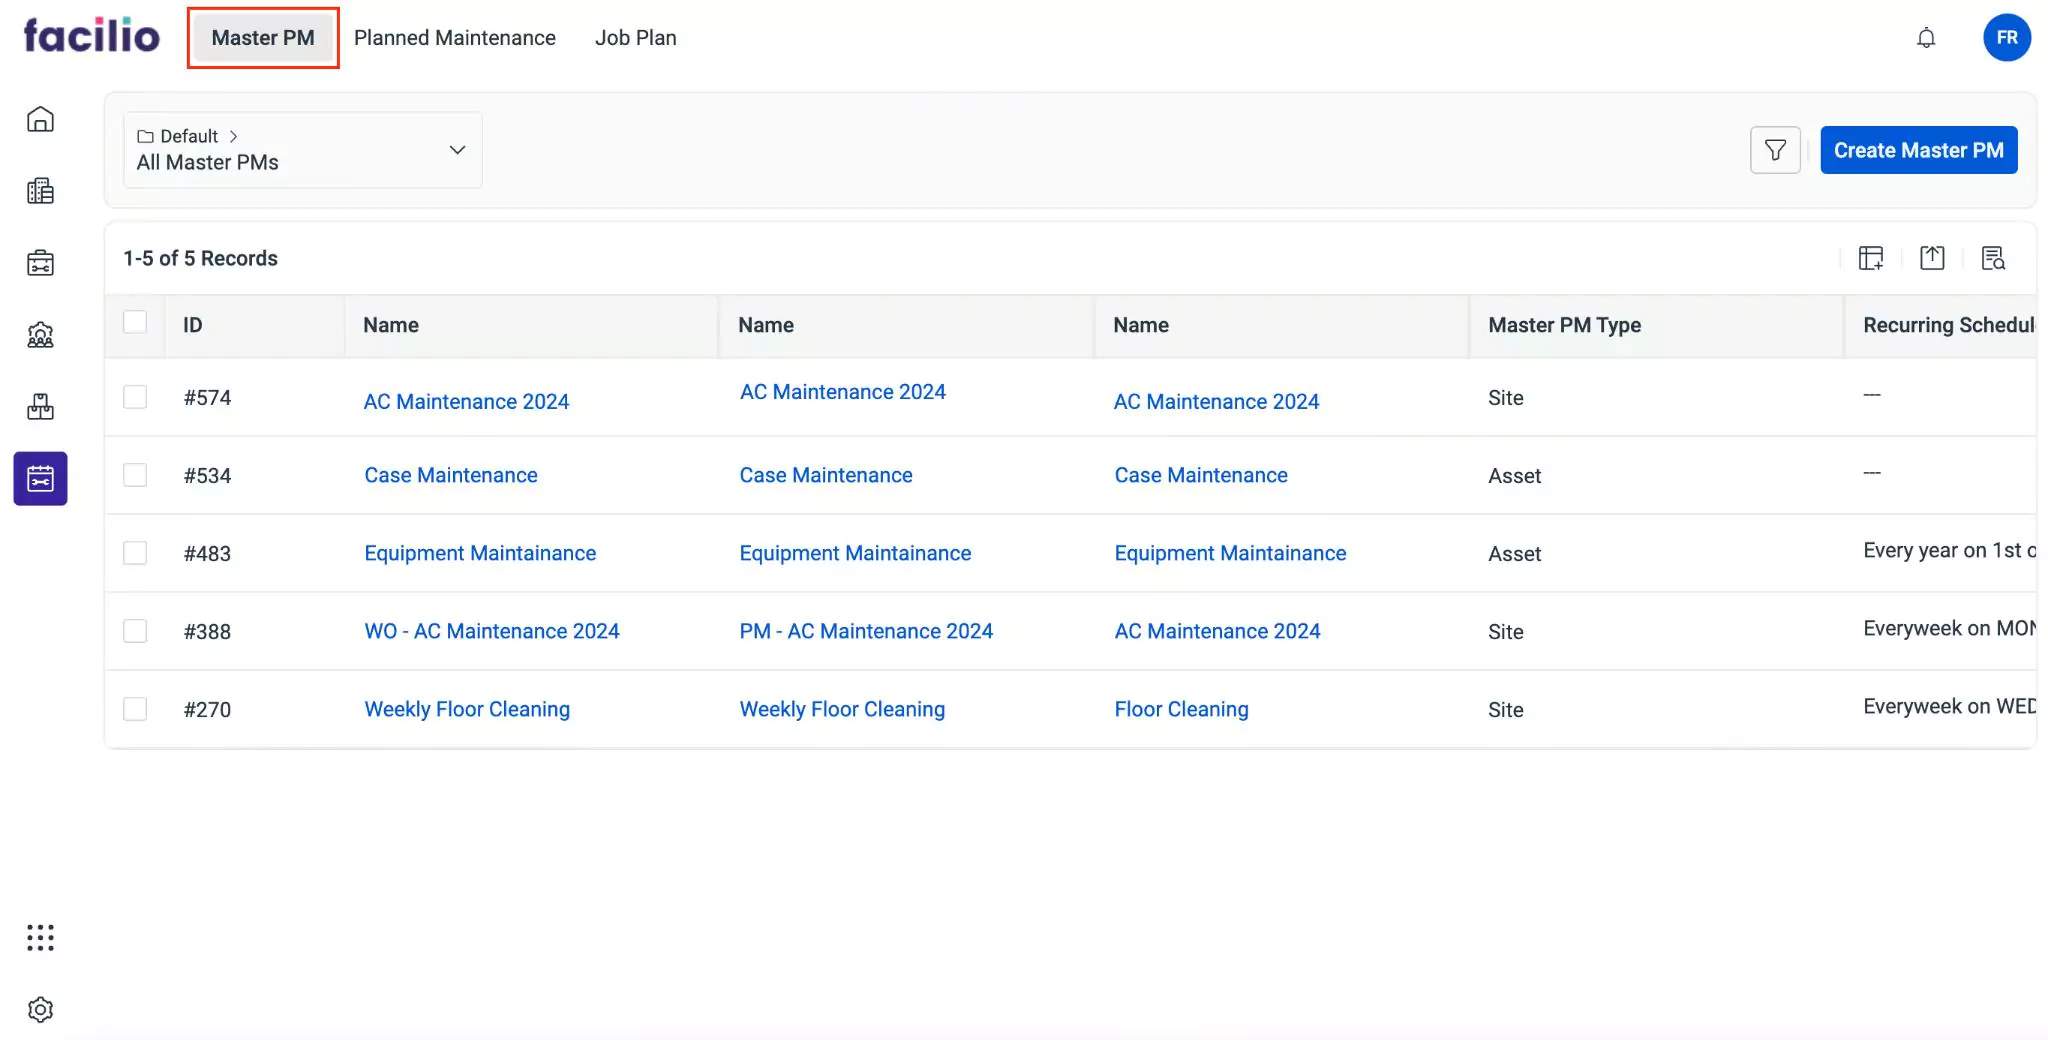
Click the Create Master PM. The screen to create a master PM appears.
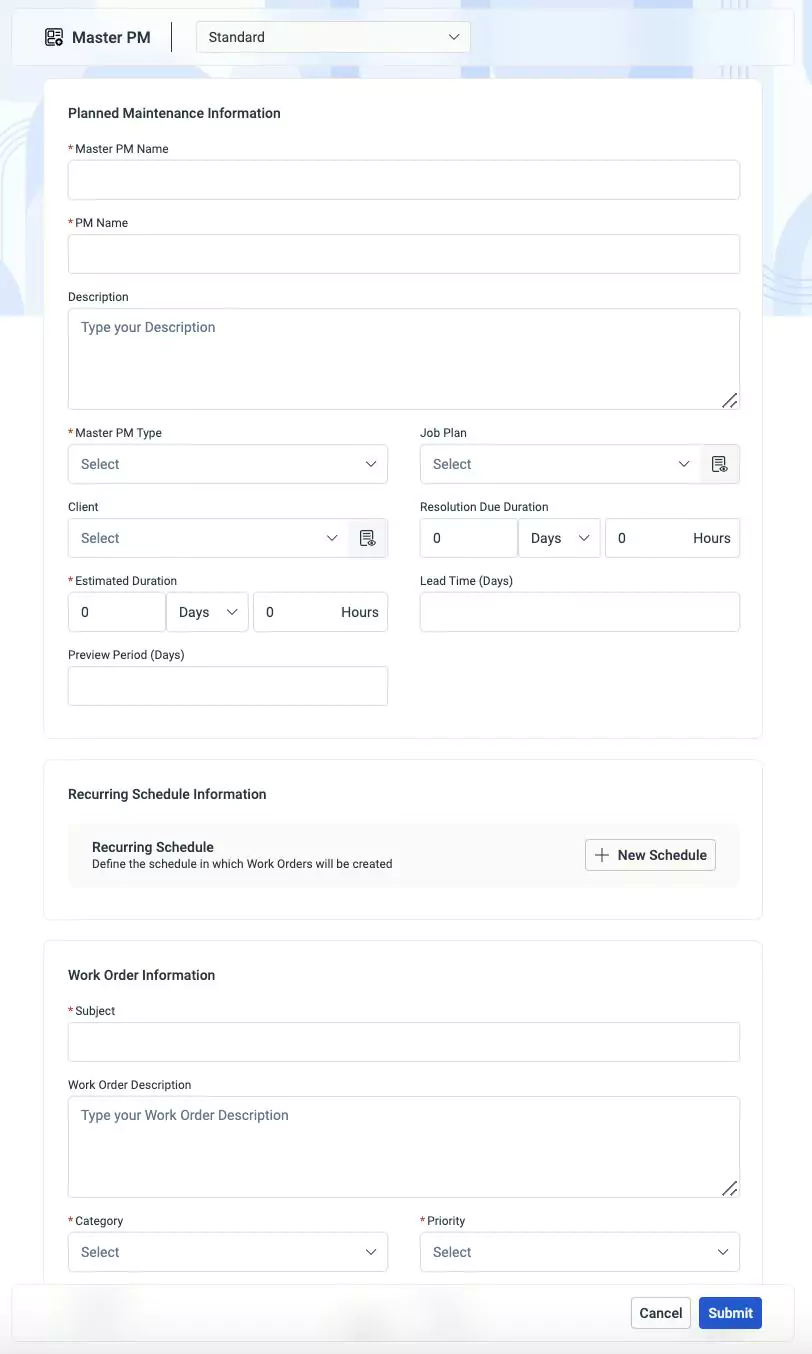
Update the following fields on the screen:
Master PM Name - A label to identify the master PM template
PM Name - A label to identify the planned maintenance template
Description - A short note describing the purpose of the planned maintenance
Master PM Type - The category for which the master PM is being created. The category includes site, asset, space, and so on.
Note: For asset and space type, you need to specify the corresponding asset and space categories.Job Plan - The template that defines maintenance tasks, required for the execution of maintenance activities
Client - The entity for which the work order is being created
Resolution Due Duration - The time frame within which a particular task needs to be completed
Estimated Duration - The expected time required to complete a specific task or activity
Lead Time (Days) - The preparation time required before scheduled maintenance tasks are executed. For instance, if the lead time is 3 days, then scheduled maintenance will be created 3 days prior to the scheduled date. This period allows teams to adequately prepare for the upcoming maintenance activity.
Preview Periods (Days) - The duration between the creation of a maintenance task or work order and the scheduled date for its execution. This time frame is used for reviewing the maintenance request.
Recurring Schedule - Schedule for defining work order creation. Click
 button to add a recurring schedule. Read the Adding a Schedule section for more information.
Subject - A tagline that specifies the purpose of the work order
Work Order Description - A short note describing the purpose of the work order
Category - The type of the work order being created
Priority - The order in which the work order is executed. You can select from the following options:
- High
- Low
- Medium
Field Agent - The individual to whom the task will be assigned
Vendor - The third party to whom the maintenance activity is handed over
Auto Create Appointment - A checkbox to automatically create an appointment for the work order
Click Submit. The master PM template is created successfully and the corresponding details screen appears, as shown below.

Adding a Schedule
Schedule involves setting up triggers for initiating maintenance activities. By configuring triggers, maintenance tasks can be automatically invoked without the need for manual intervention.
To add a schedule,
Click
button in the Recurring Schedule section. The Trigger screen appears as shown below.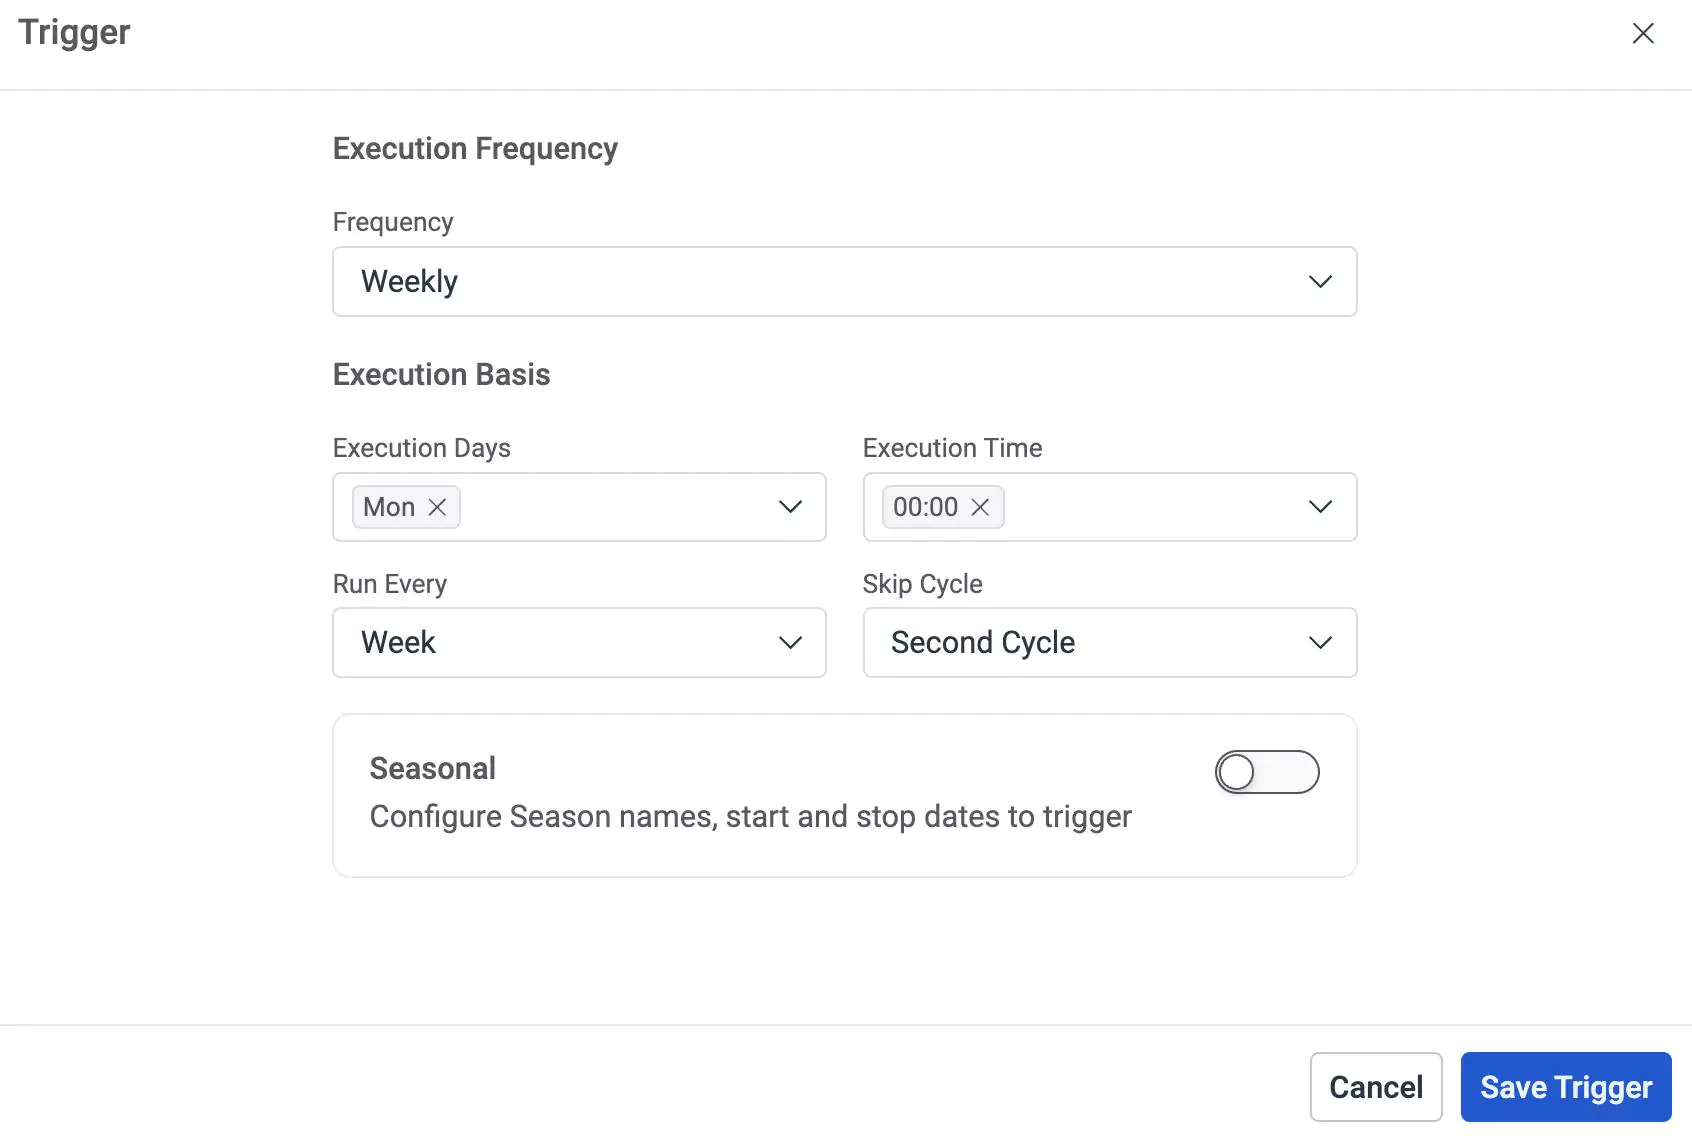
Update the following fields in this screen:
Frequency - The interval to be maintained (such as Daily, Weekly, Monthly, and so on) for executing maintenance activity.
Note: The configuration required or the further fields displayed vary based on the selected frequency. Read the Defining Frequency Settings section for more information.Execution Days - The day on which the maintenance activity must begin
Execution Time - The exact time at which the maintenance activity must be executed
Run Every - The exact interval at which the maintenance process should repeat, based on the selected frequency
Example: If the Frequency is set to ‘Weekly’, this field value is Week by default. You can change it to 2,3,4,... Weeks, as required.Skip Cycle - The specific maintenance cycle(s) to be skipped, if any
Note: You can set this field to ‘Do not skip’, if the maintenance activity can take place regularly as per the schedule.Seasonal - The configuration to generate a maintenance activity based on the requirements. If you enable this option, must update the following fields:
- Season Name
- Start Month
- End Month
- Start Date
- End Date
Click Save Trigger. The trigger is now added to the template.
Defining Frequency Settings
Facilities must undergo regular maintenance to ensure the safety and proper functioning of building operations. The frequency of maintenance activities differ based on the space or asset type. The various possible frequency settings are listed below, explaining their concerned configurations:
Daily - The Execution Time can be set from the corresponding time picker. The maintenance activity can be configured to Run Every Day or once in Two Days, Three Days, and so on.
Weekly - The Execution Days in a week can be chosen from Monday, Tuesday, Wednesday, Thursday, Friday, Saturday, and Sunday. The Execution Time can be set from the respective time picker. The maintenance activity can be configured to Run Every Week or once in Two Weeks, Three Weeks, and so on.
Monthly - The execution can be Based On specific Date (for example, 1st, i.e., first of every month) or day of a Week (for example, on the first week Wednesday of every month). The Execution Time can be set using the corresponding time picker. The maintenance activity can be configured to Run Every Month or once in Two Months, Three Months, and so on.
Quarterly - The Months of execution can be chosen from the available options (for example, January/April/July/October) that indicate the months on which the quarterly maintenance activity will be carried out. You can configure the execution Based On specific Date (for example, 1st, i.e., first of the selected months) or day of a Week (for example, on the first week Wednesday of the selected months). The Execution Time can be selected from the respective time picker.
Half Yearly - The Month of the Half field can be chosen from the available options (for example,January/July, February/August, and so on), which indicate the month on which the half yearly maintenance activity will be carried out. You can configure the execution Based On specific Date (for example, 1st, i.e., first of the selected months) or day of a Week (for example, on the first week Wednesday of the selected months). The Execution Time can be selected from the respective time picker.
Yearly - The Month of execution can be chosen from the available options (for example, January, February, March, and so on) that indicate the month on which the yearly maintenance activity will be carried out. You can configure the execution Based On specific Date (for example, 1st, i.e., first of the selected month) or day of a Week (for example, on the first week Wednesday of the selected month). The Execution Time can be selected from the corresponding time picker. The maintenance activity can be configured to Run Every Year or once in Two Years, Three Years, and so on.
Creating PMs from Master PM
Once a master PM is created, you can create multiple PMs from this template. Navigate to the master PM section and click on the preferred template name. The corresponding details screen will appear.

The above screenshot shows the master PM created for the asset.
To create PM for assets,
Click on the Create PM button at the top right corner of the screen. A new window appears with the list of available assets.
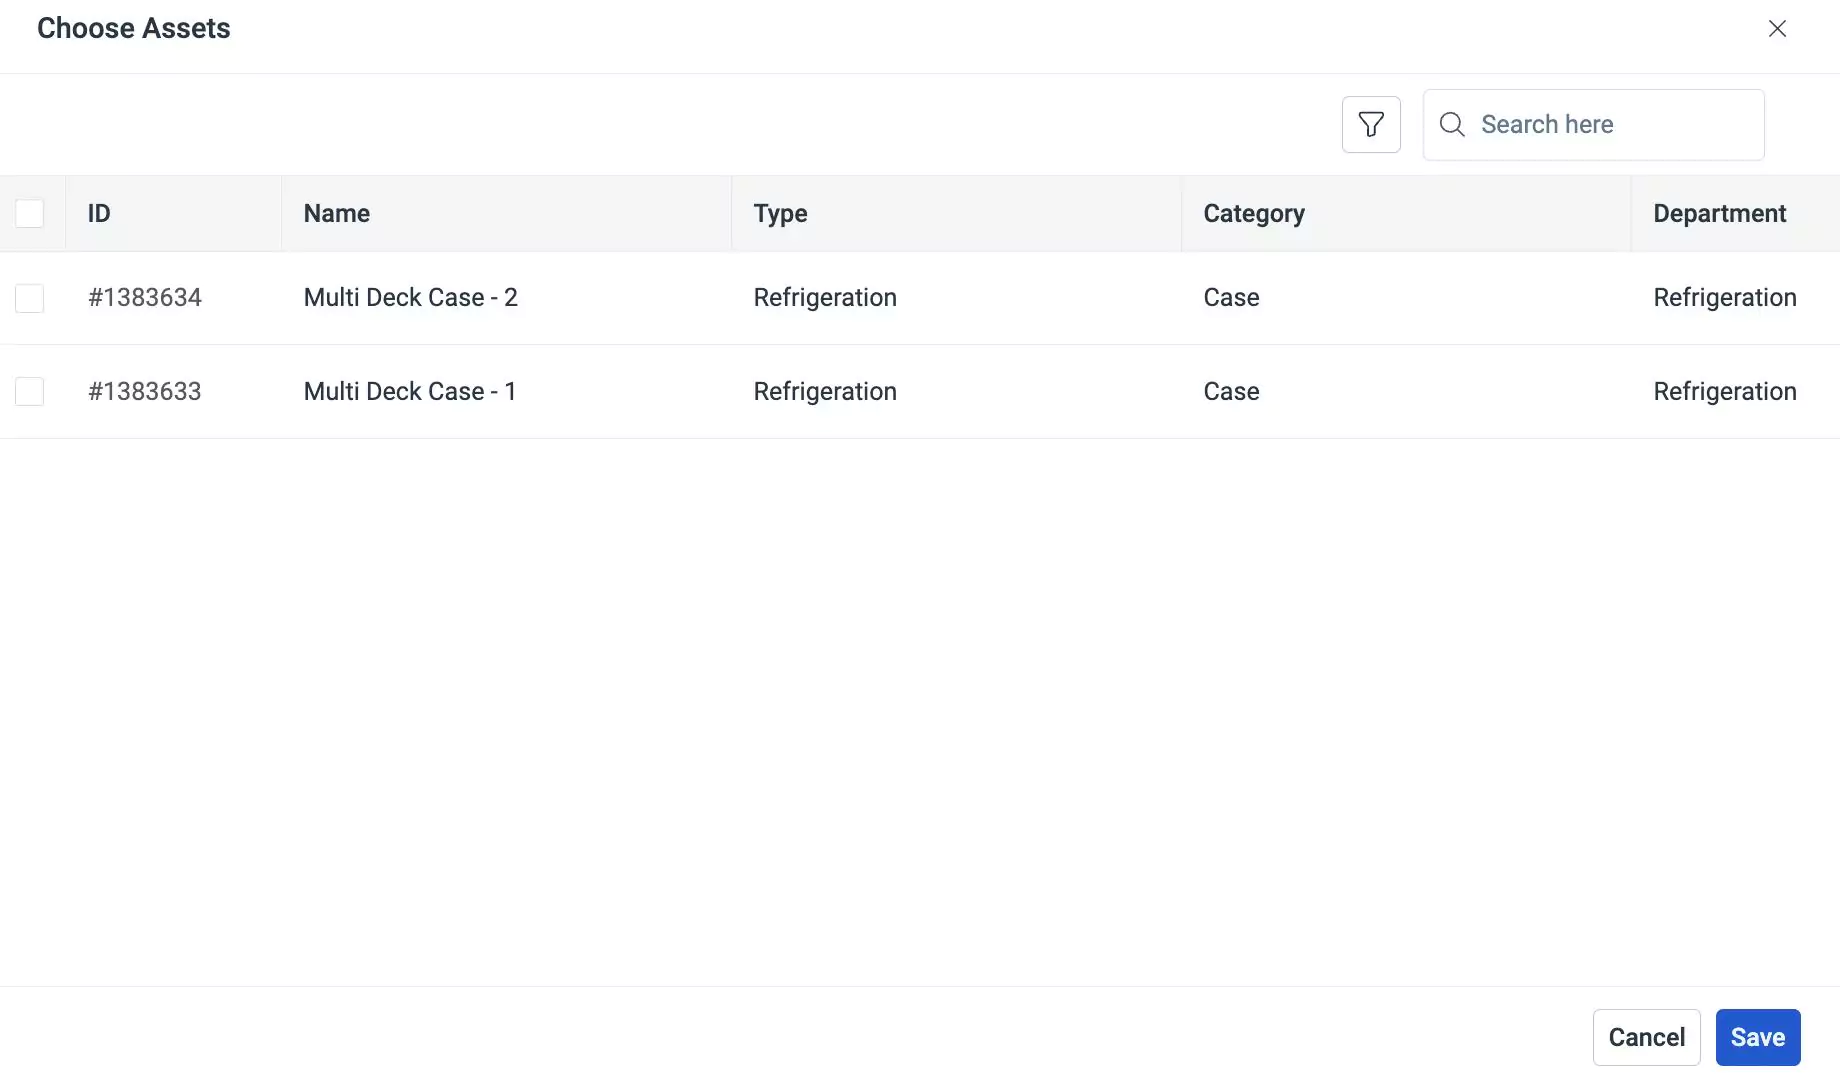
Enable the checkbox to select the assets for which PM is to be created.
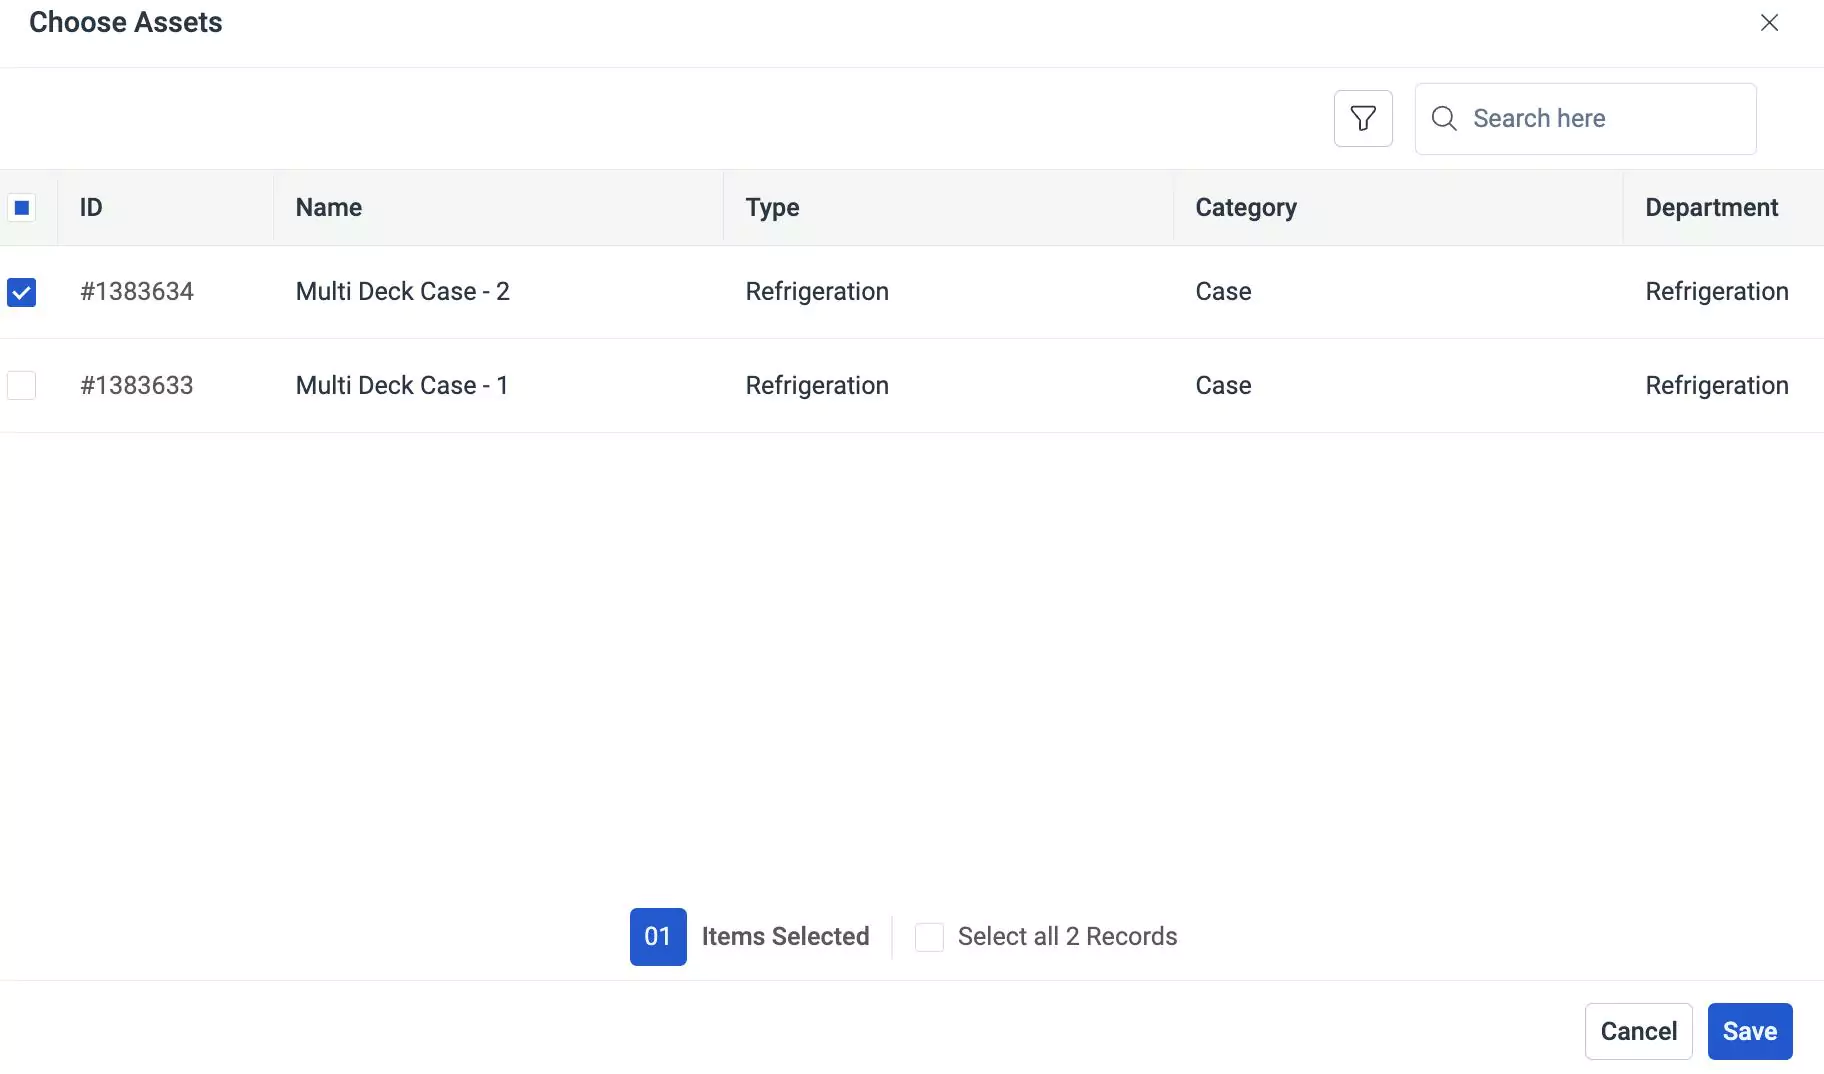
Click Save. The trigger screen appears as shown below.
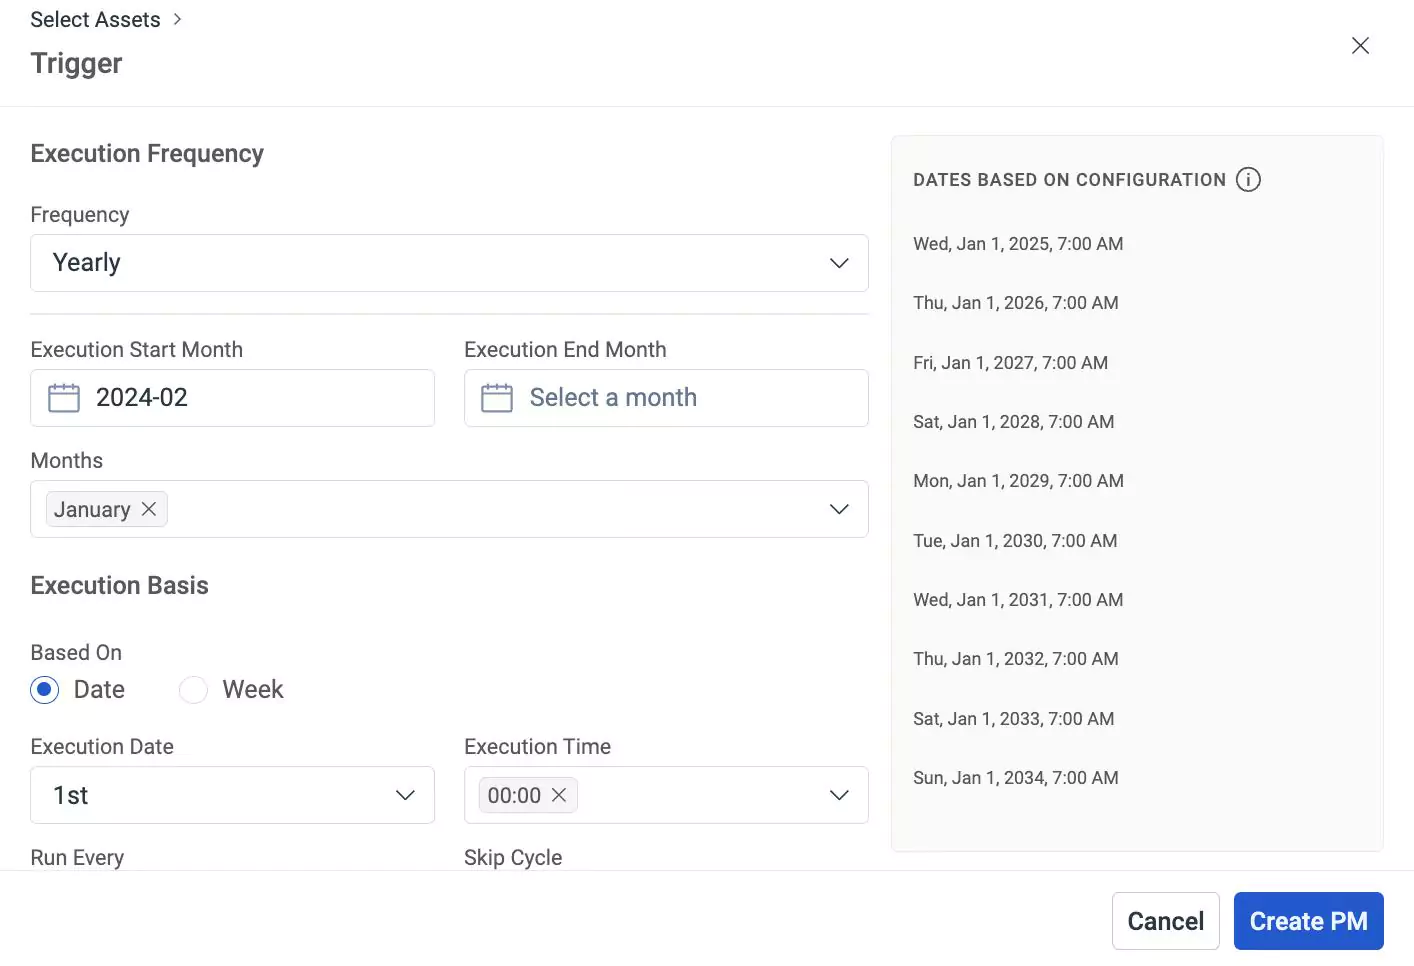
Update the trigger information and click Create PM. A pop-up window appears with two options, "Create" and "Create and Publish."
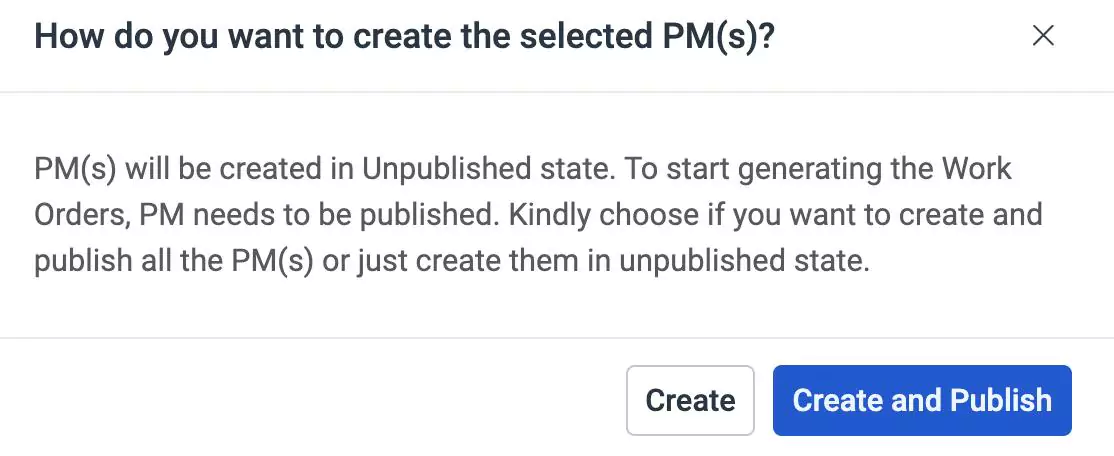
The Create option allows you to create a PM, where you can edit the details in the future and then publish the work order in the planned maintenance section. The Create and Publish option creates and publishes the work order in the planned maintenance section.
Click Create or Create and Publish. The PMs are created successfully in the planned maintenance section.
Viewing Master PM
Once the planned maintenance is configured, it appears under the Planned Maintenance section. You can click on it to view the details configured under each stage of configuration.

These details are displayed under the respective sections as explained below.
Summary
The Summary section displays the primary details associated with the master PM. The master PM information includes details such as PM name, description, master PM type, asset category, space category, and job plan. You can click View More to view all the available information about the maintenance activity. You can also add Notes and attach relevant Documents to include additional information.
Job Plan
The Job Plan section displays the basic information of the job plan. It includes details such as the tasks, items, tools, and services associated with the maintenance activity.
Planned Maintenance
The Planned Maintenance section displays the information on scheduled maintenance activity. Upon clicking the Planned Maintenance section, all planned maintenance (PM) tasks are displayed by default. Additionally, the Published section displays the PMs that have been created and published, while the Unpublished section displays the PMs that have been created but are yet to be published.
History
The History section maintains a log of all activities that took place with respect to the maintenance activity, for future reference. The recorded information helps you understand the course of action or changes the record has undergone. The displayed details include the action that took place, the user who performed the action, and the date and time of occurrence.
You can click the ![]() (vertical ellipsis) icon at the top corner of the details screen to edit the corresponding details.
(vertical ellipsis) icon at the top corner of the details screen to edit the corresponding details.