Defining Tools
Tools, as non-consumable assets, play a pivotal role in maintenance tasks and service appointments offering durability and versatility across various activities. These tools are durable equipment, machinery, or instruments that are used repeatedly in various processes but are not consumed or depleted in a single use. After their use in work locations, these tools are returned to designated storerooms. This cyclical process ensures that tools remain accessible for future tasks, promoting efficiency and resource optimization within the organization. Once stocking is done for a specific tool type, a record is created for the tool in the tools sections.
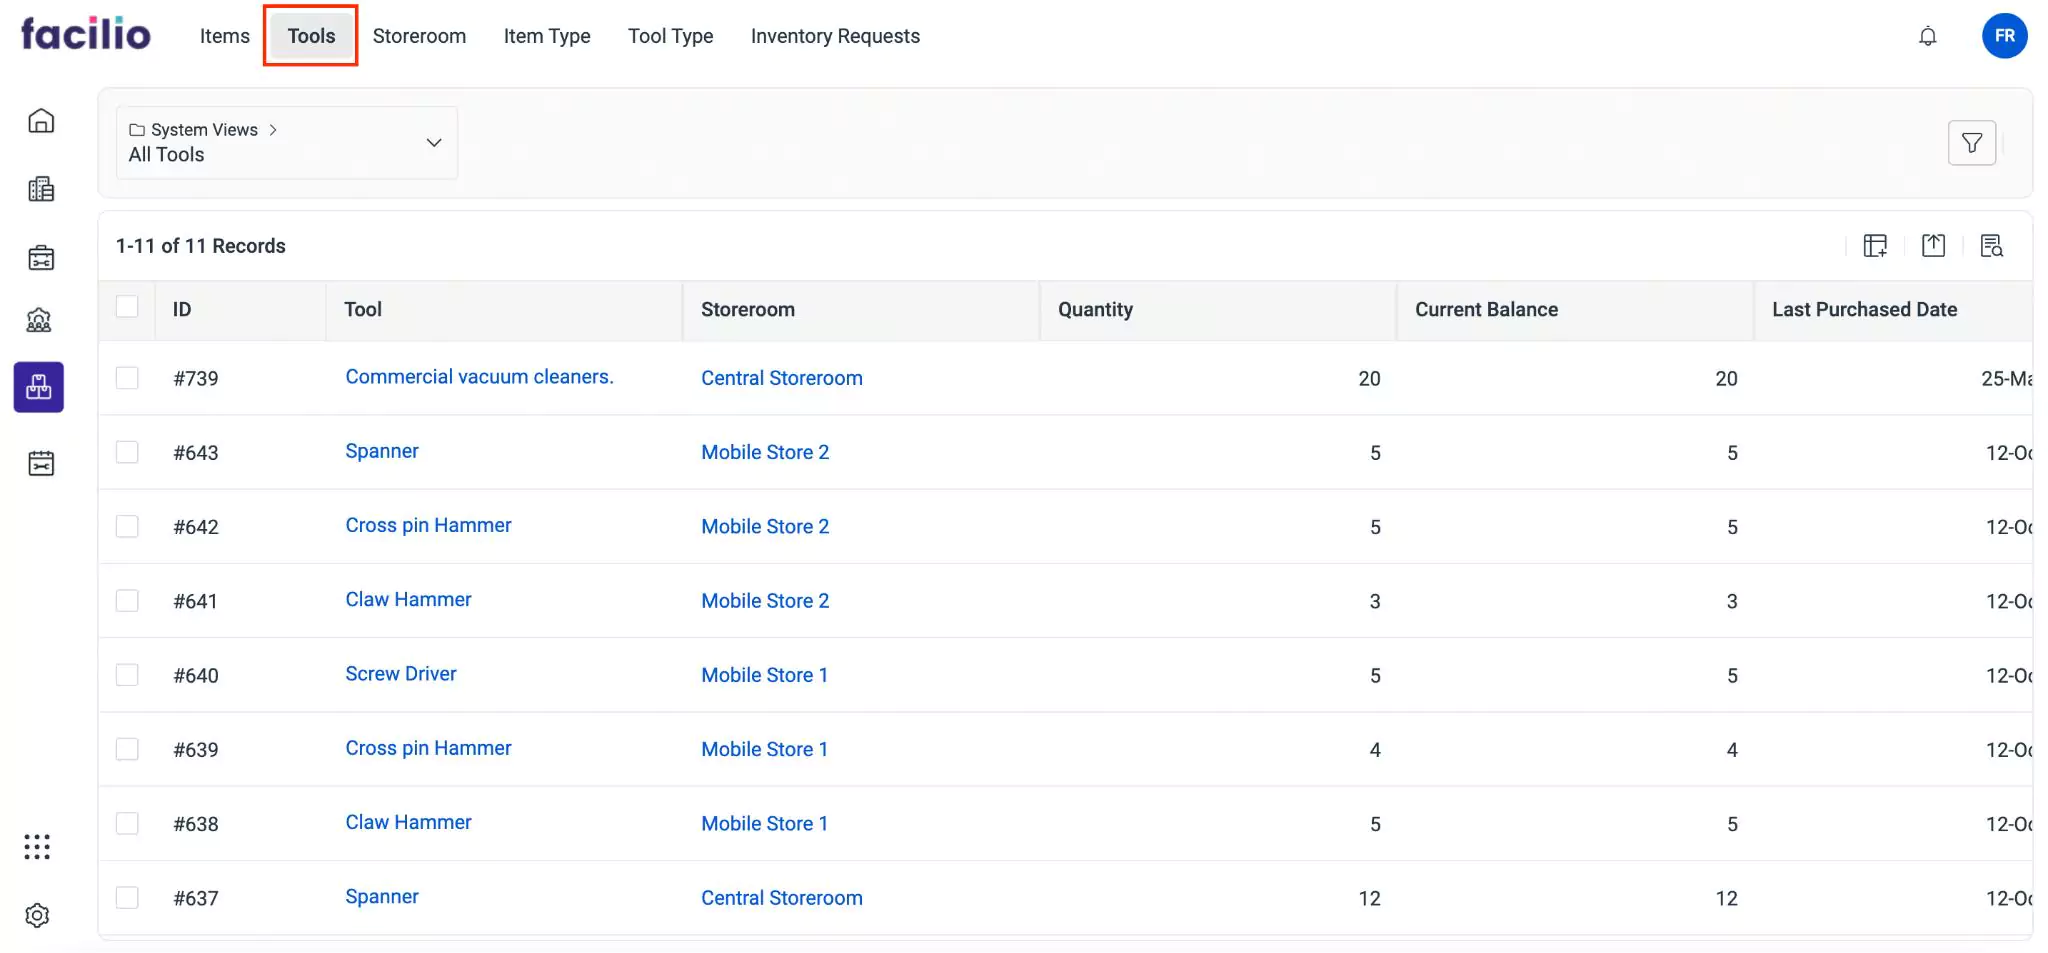
To access the tools, navigate to the Tools section. The All Tools screen appears as shown below.
The upcoming sections explain how to switch to a tool type, issue tools to users, return tools (if required), and adjust the balance of tools in case of mismatch in the recorded and actual balance of tools in the inventory.
Switching to Tool Type
For easy access, the application provides an option to navigate to the corresponding Tool Type summary section for the selected tool. To navigate to the tool type associated with a specific tool, select the ![]() (Vertical ellipsis) icon on the top right of the details page, then click on Go To Tool Type.
(Vertical ellipsis) icon on the top right of the details page, then click on Go To Tool Type.
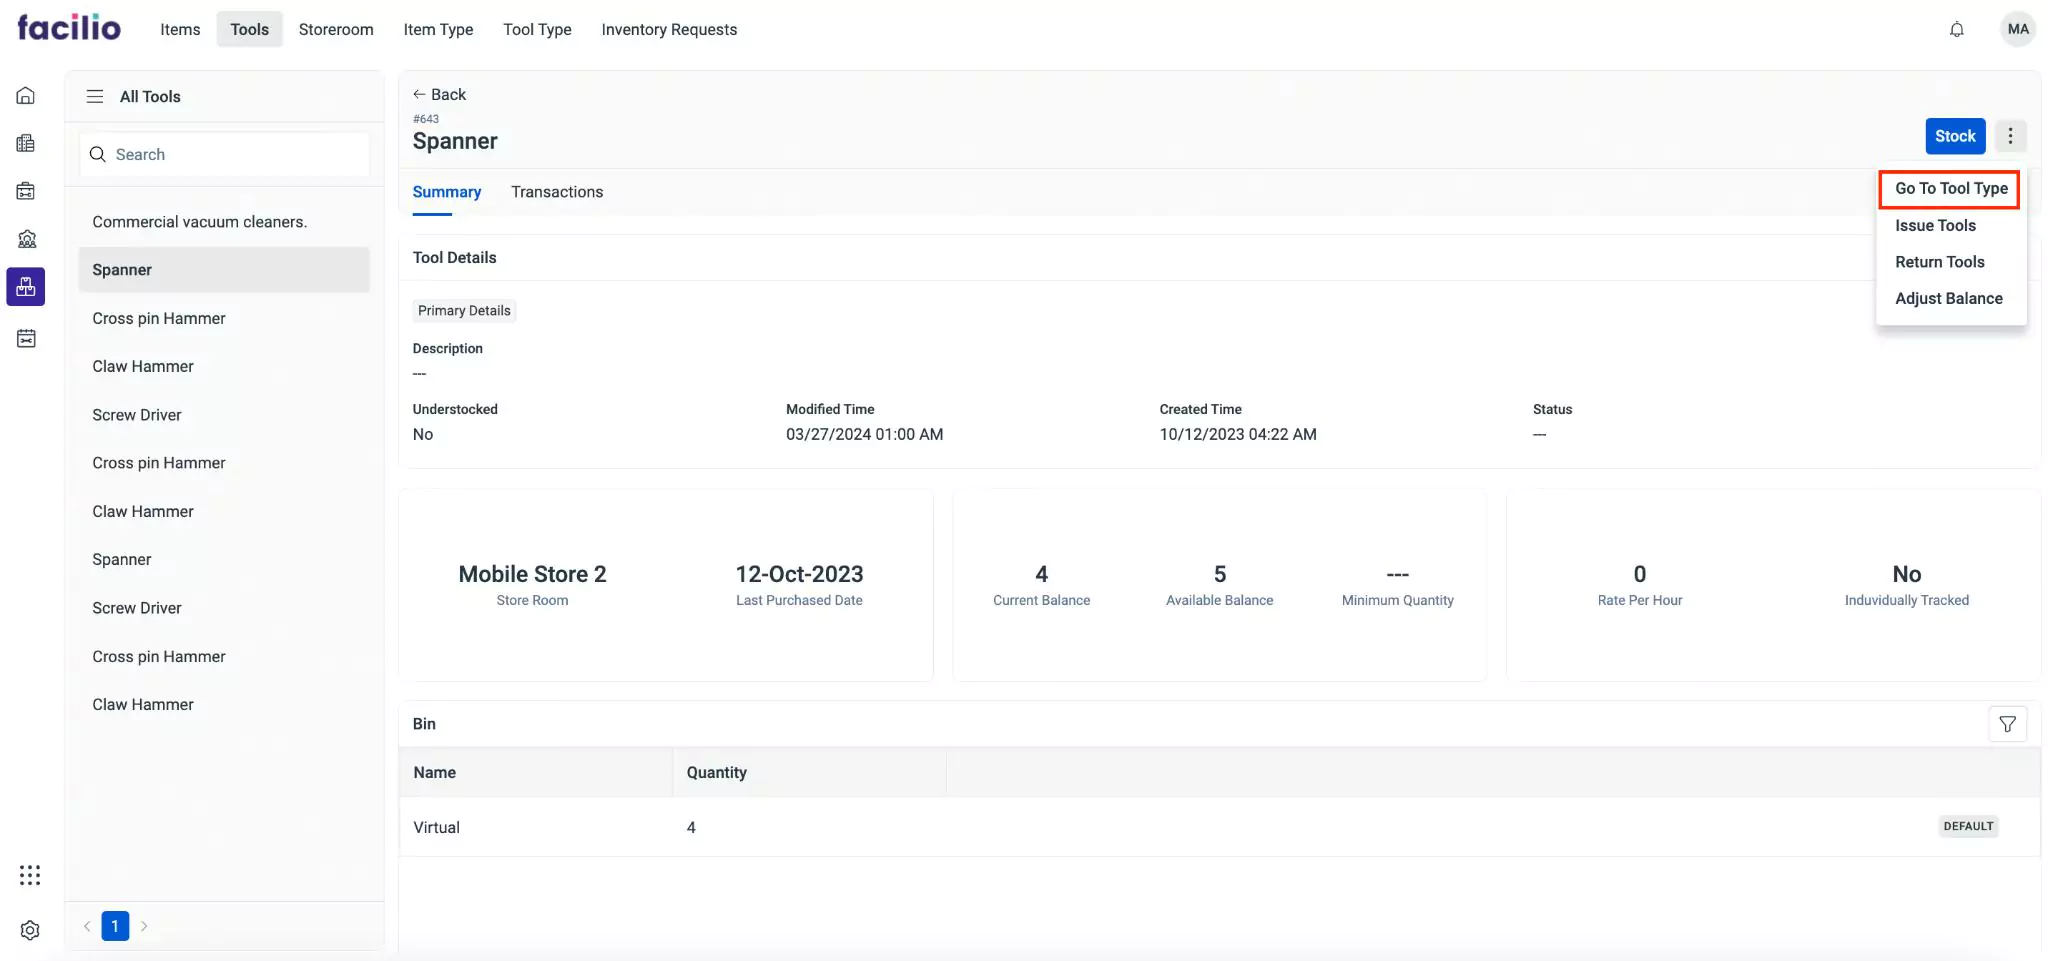
This action will direct you to the tool type details page for the selected item.
Issuing Tools
When a user requires tools to complete a task, the store manager is empowered to fulfill these requests promptly. By accessing the inventory system, the store manager can issue the requested number of tools to the user, ensuring that they have the necessary resources to complete their tasks effectively. As these tools are issued from the storeroom, their in and out movement is tracked and recorded accordingly to prevent any mismatch in the actual count of tools in the storeroom.
To issue tools,
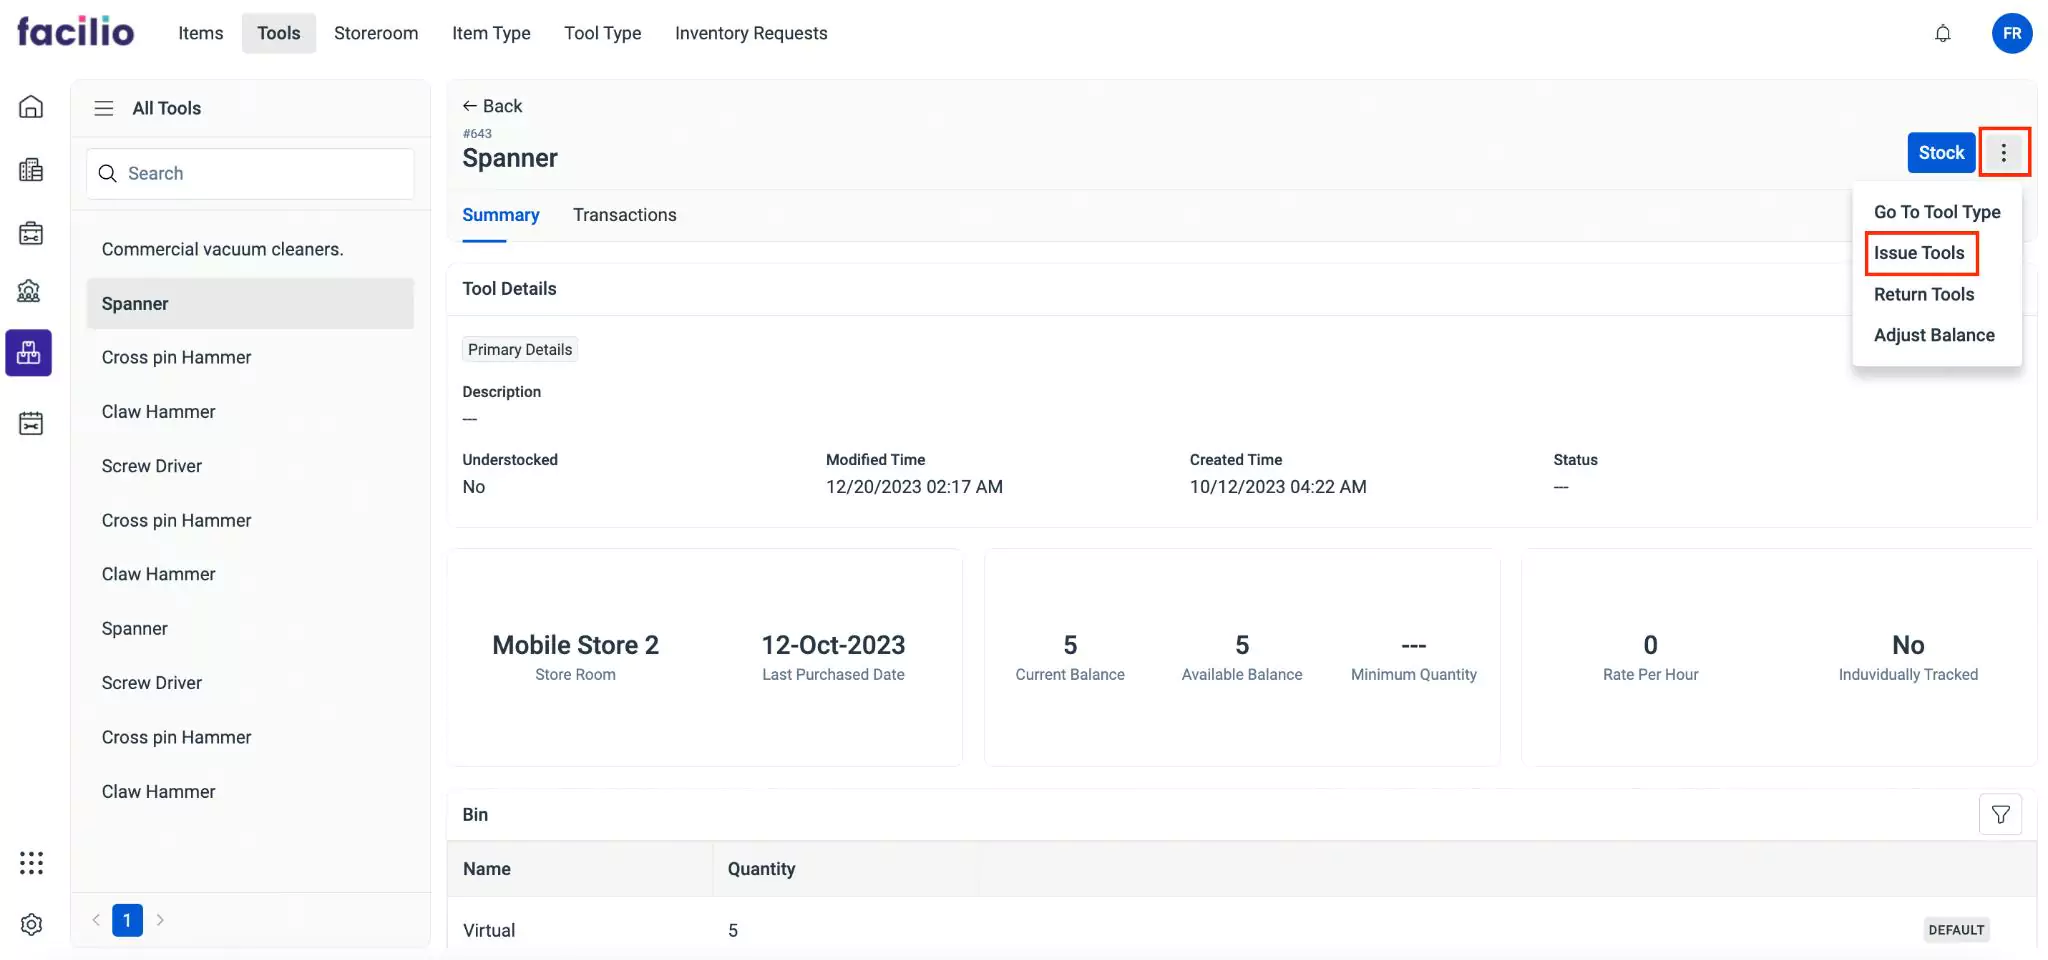
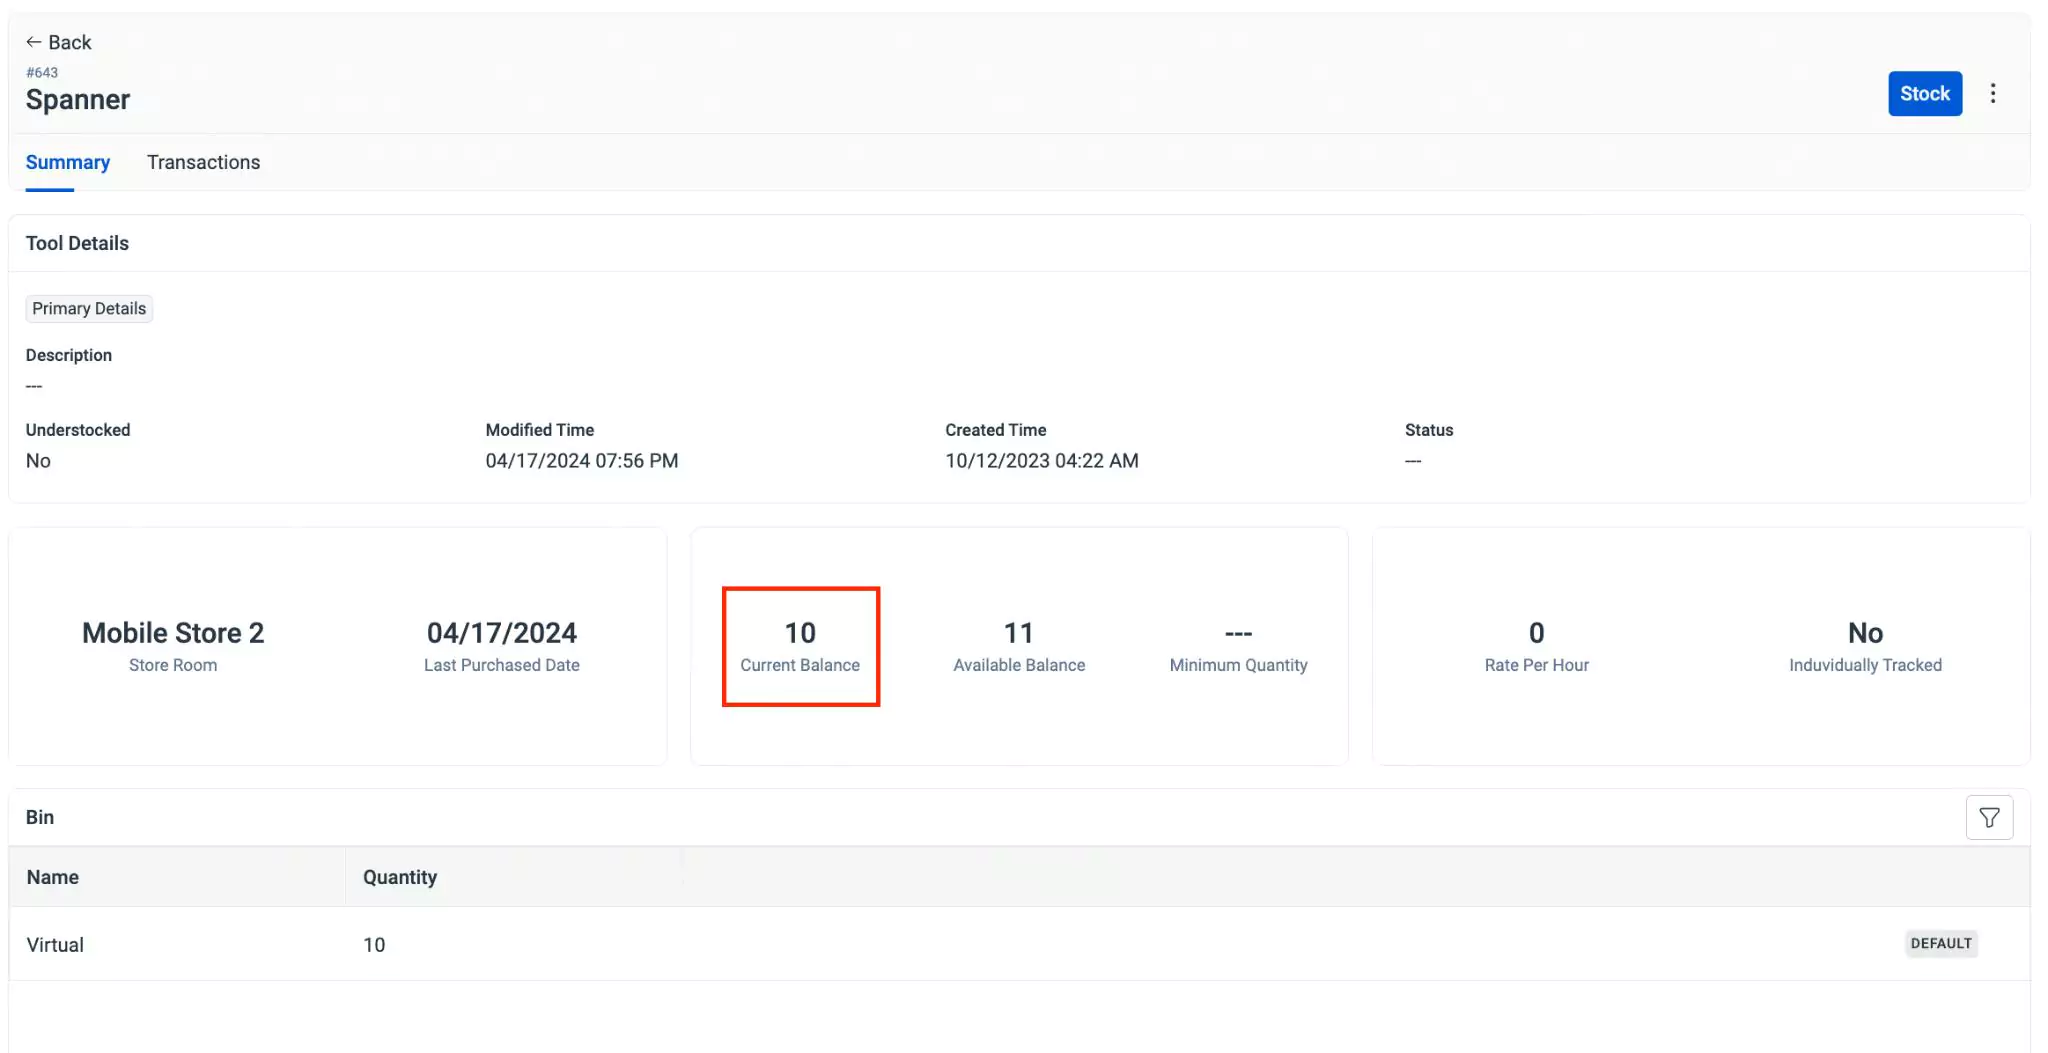
Select the required tool from the All Tools list. The details page of the tool is displayed as shown below.
Click the
 (Vertical ellipsis) icon from the top right of the screen and click Issue Tools. The Issue To User screen appears as shown below.
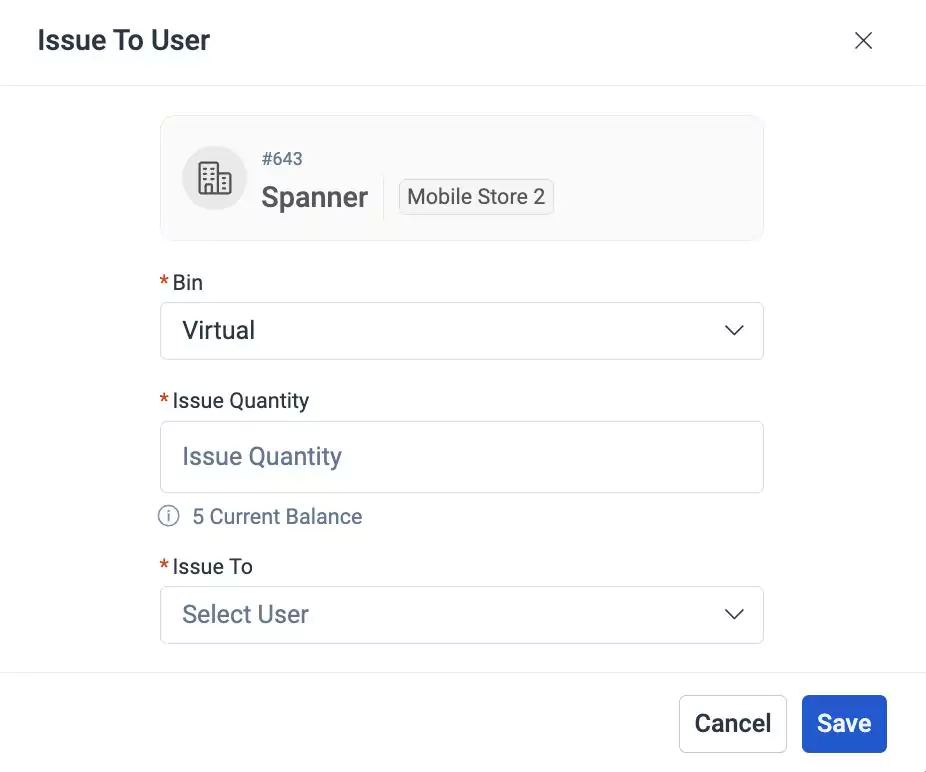
Update the following fields in this screen:
Bin - A specific subdivision within a storeroom where tools are stocked.
Note:This field is auto-filled and cannot be modified.Issue Quantity - The number of tools to be issued to the user
Note:The current balance of the tool is displayed below this field.Issue To - The user to whom the tool must be issued
The basic information such as the tool name, ID, and storeroom where the tools are stocked are displayed on top of the screen.
Click Save. The tool is issued to the user and recorded in the Transaction section of the details page.
Returning Tools
As the tools are non-consumable, after use they are returned to the storeroom by the user. It can also be returned if any defect or damage is encountered in it. The returned tools are sent back to the respective storerooms and the inventory system records the returned tools accordingly.
To return a tool(s),
Select the required tool from the All Tools list. The details page of the tool appears as shown below.
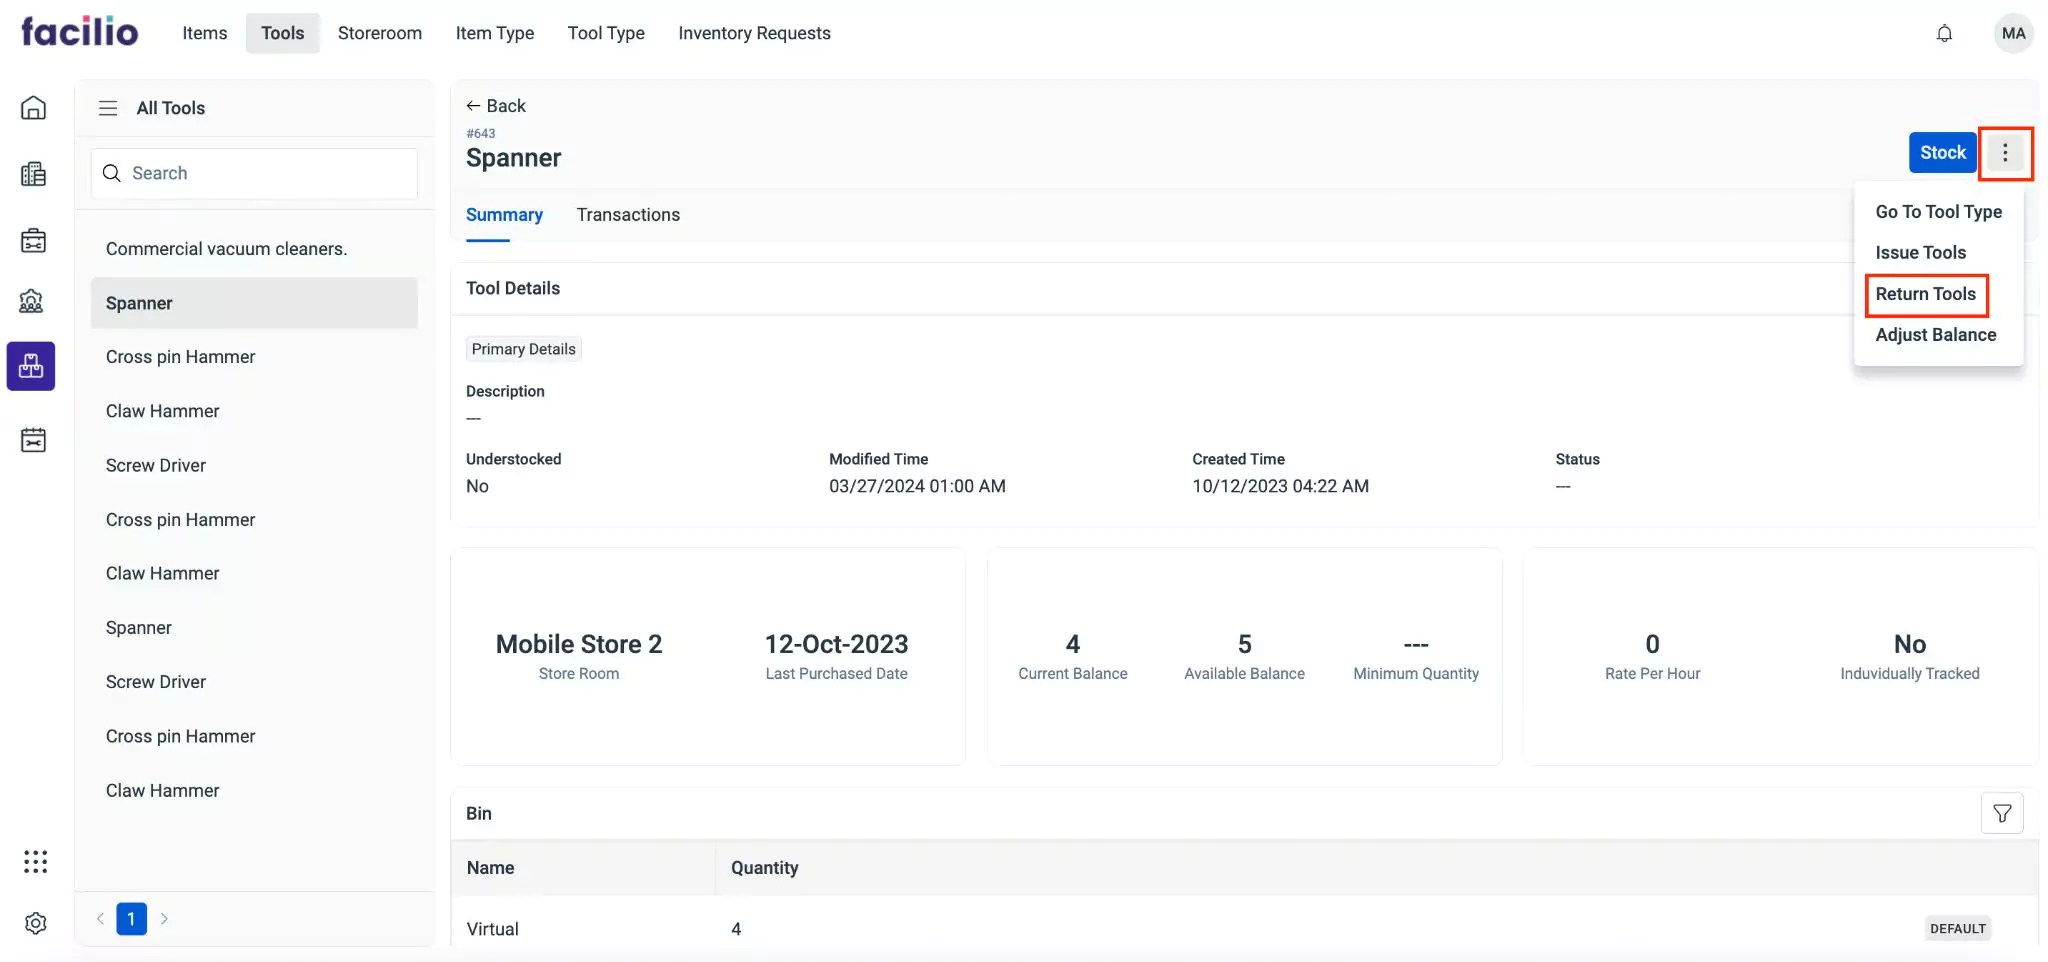
Click the
(Vertical ellipsis) icon from the top right of the screen and click Return Tools. The Return Tools screen appears as shown below.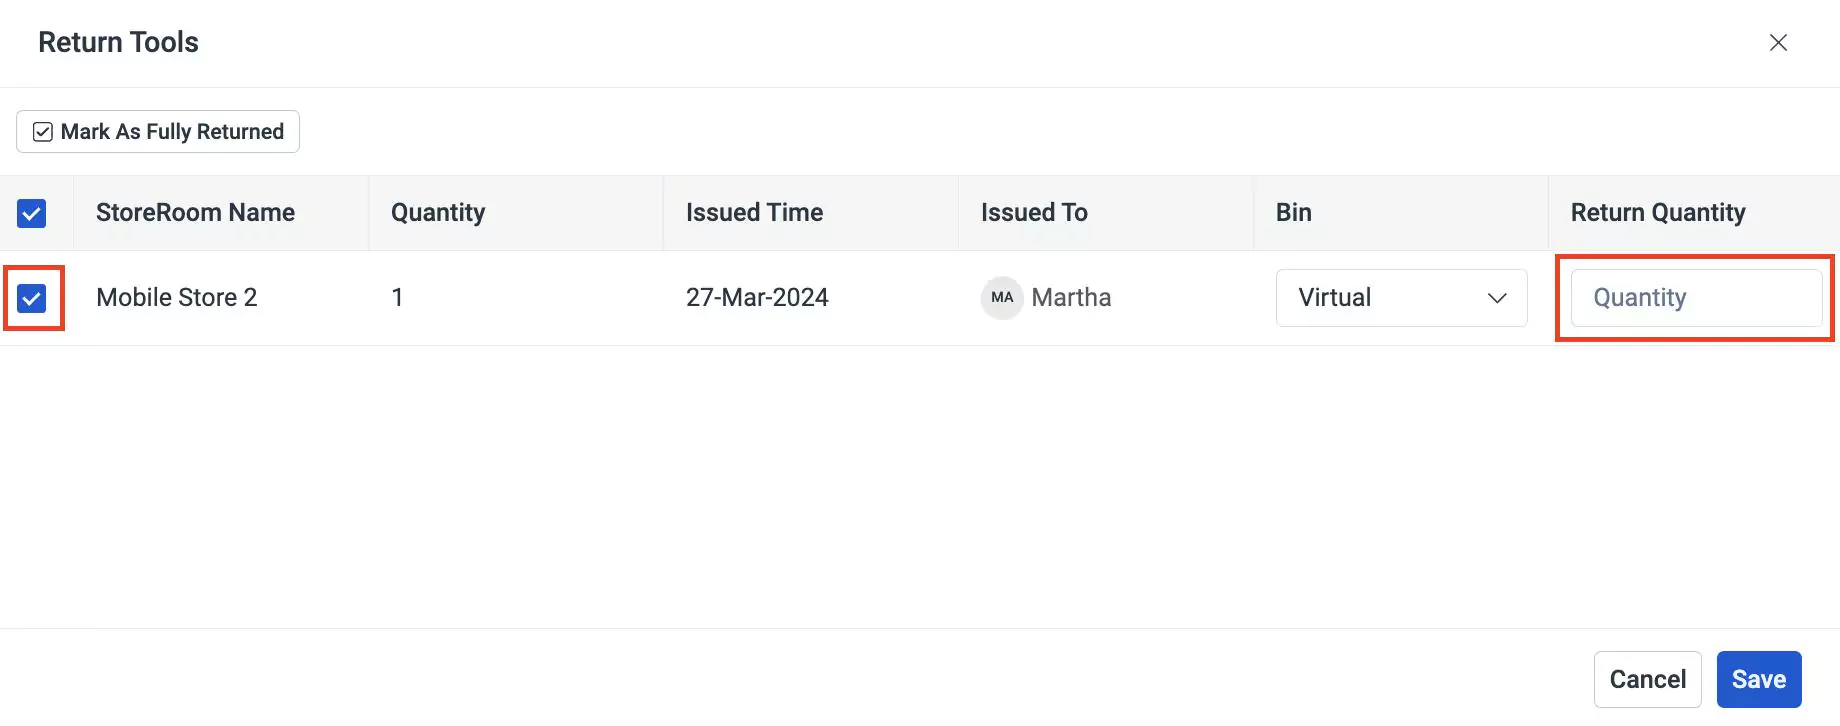
Select the required store(s) and update the number of tools to be returned in the Return Quantity field.
Note:Select Mark as Fully Returned on top left of the screen to return all tools.Click Save. The tools are stocked back to the storeroom.
Adjusting Balance
Balance adjustment is a crucial task of rectifying disparities between the recorded quantity of tools in the inventory and the actual stock levels. This process is necessary during inventory audits and cycle counts when discrepancies are detected. These discrepancies can arise from a multitude of factors, including the misplacement of tools, unrecorded transactions, or instances of theft. Updating the balance ensures the accuracy of inventory records, fostering efficient inventory management practices.
To adjust the tool balance in inventory,
Select the required tool from the All Tools list. The details page of the tool appears as shown below.
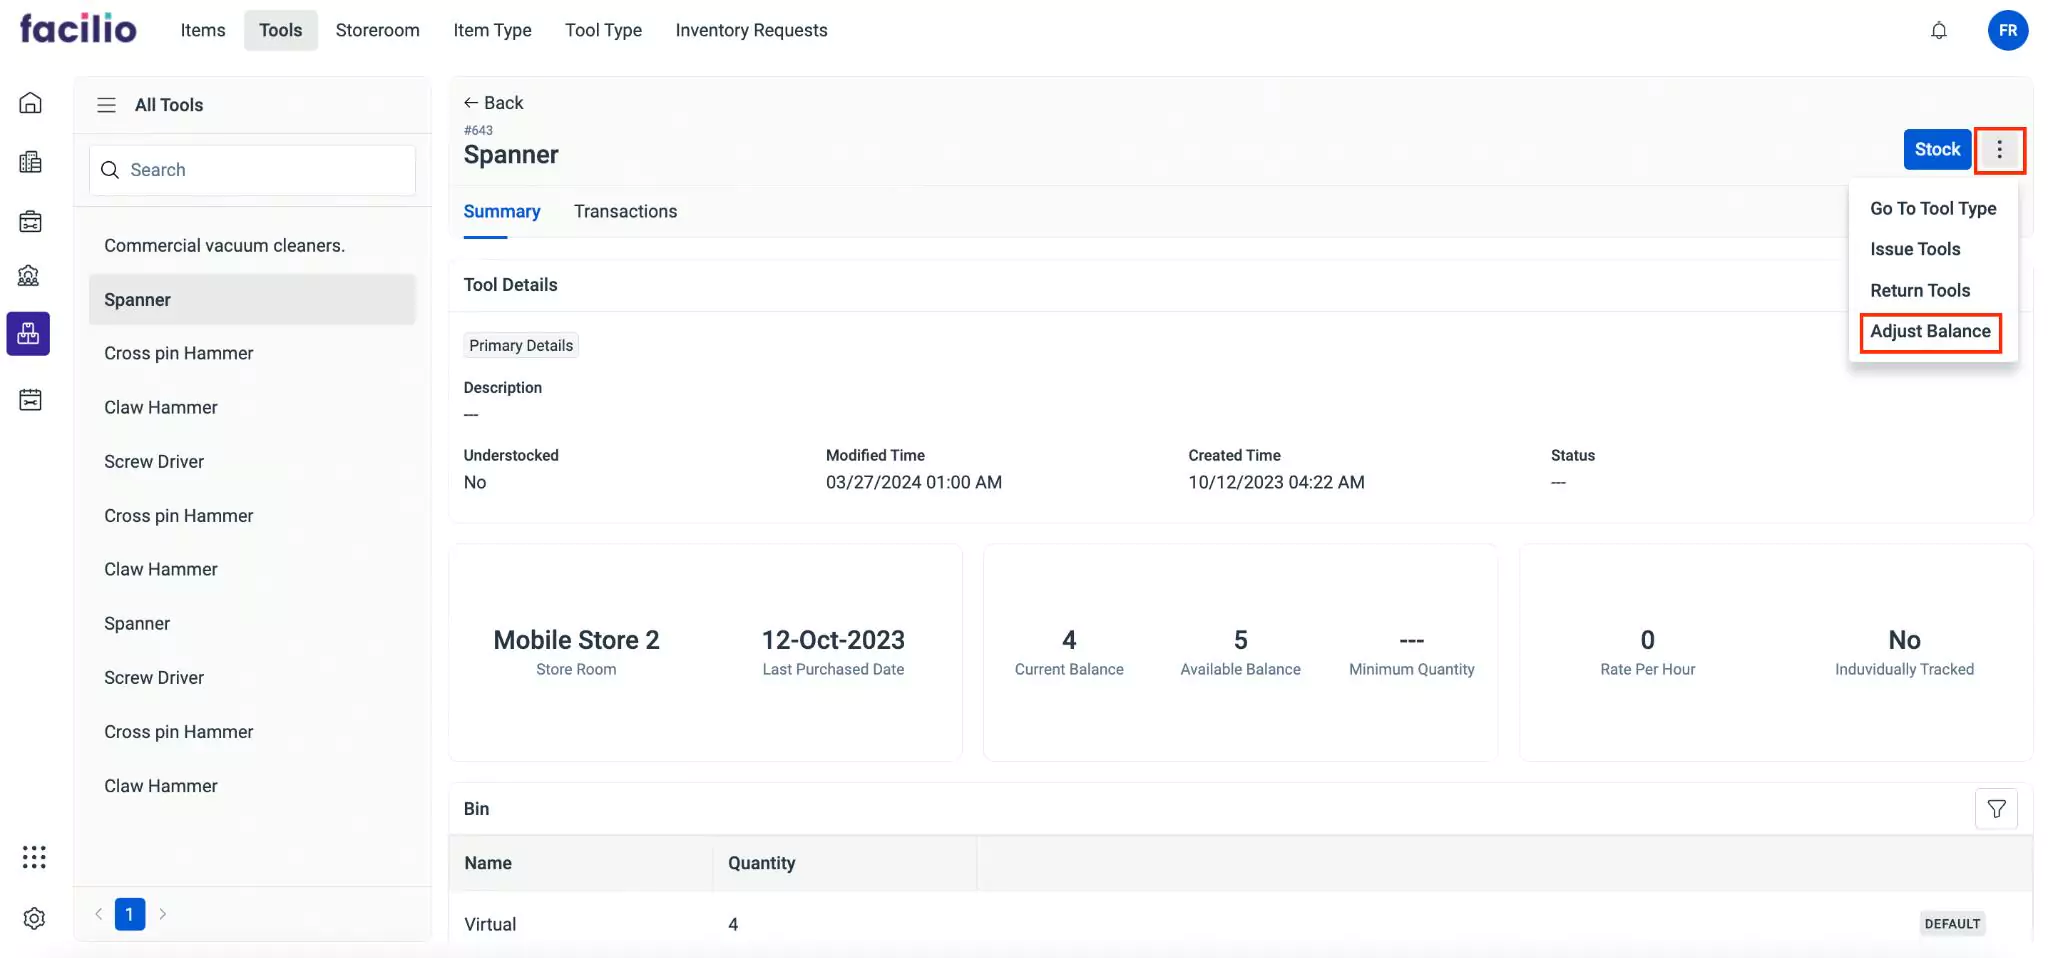
Click the
(Vertical ellipsis) icon from the top right of the screen and click Adjust Balance. The Adjust Tools screen appears as shown below. 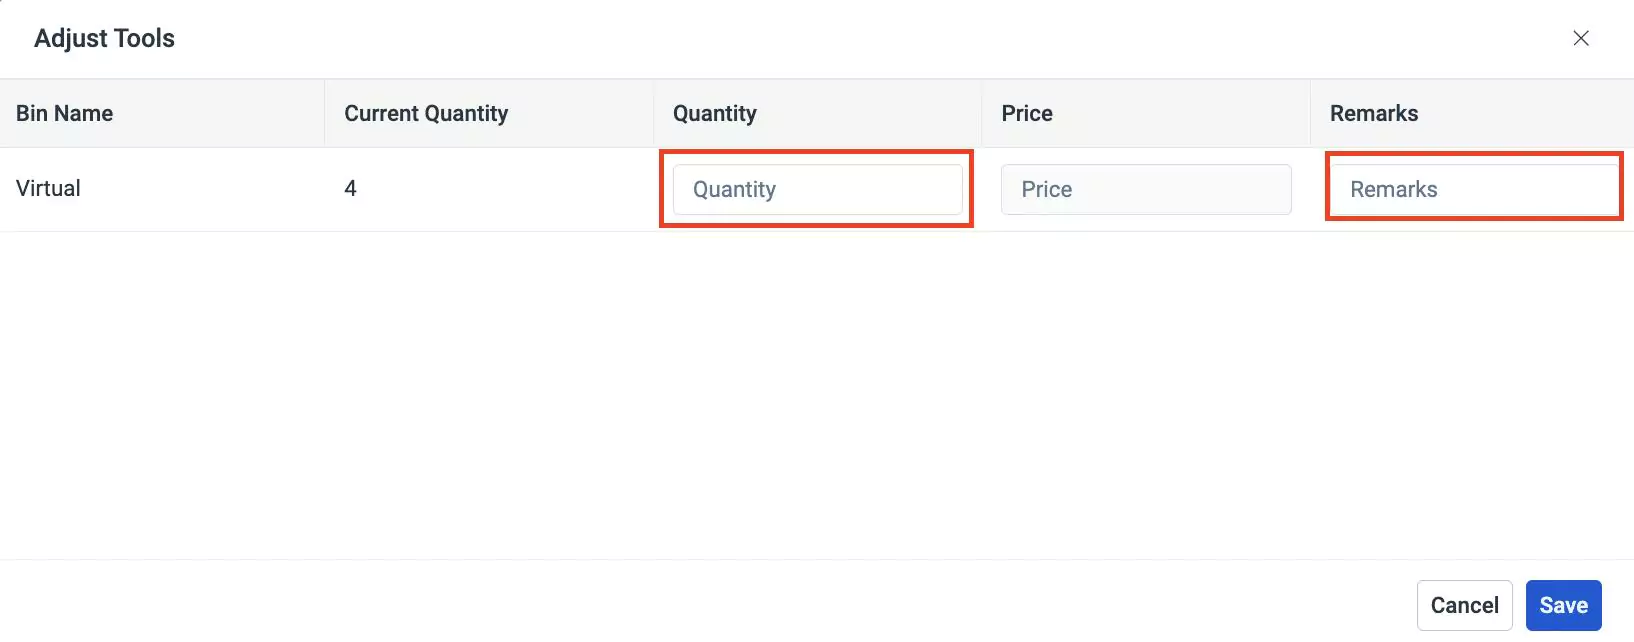
Enter the quantity which is the actual available tools and comments in the Quantity and Remarks fields respectively.
For example, If the current quantity of a tool is 4, but the available quantity of tool is 10, then you must update the quantity as 10 in the Quantity field, the amount in the Price field and comments in the Remarks field respectively.
Click Save. The tool balance is adjusted and updated in the inventory accordingly as shown below.
You can also stock tools from this section. Navigate to the details page of the corresponding tool and click the Stock button at the top right corner of the screen. Read the Stocking Tools section for more information.