Configuring Storeroom
A storeroom is a designated area or space within a facility where items and tools are stored, and then they are distributed as per the requirement. It serves as a centralized location for organizing, storing, distributing, restocking, and tracking inventory items, ensuring that they are readily accessible when needed for distribution. They are typically managed by storeroom managers to monitor stock levels, track movements, and facilitate efficient inventory renewal when stocked out. Well-organized storeroom is crucial for optimizing inventory management processes and minimizing or eliminating stockouts.
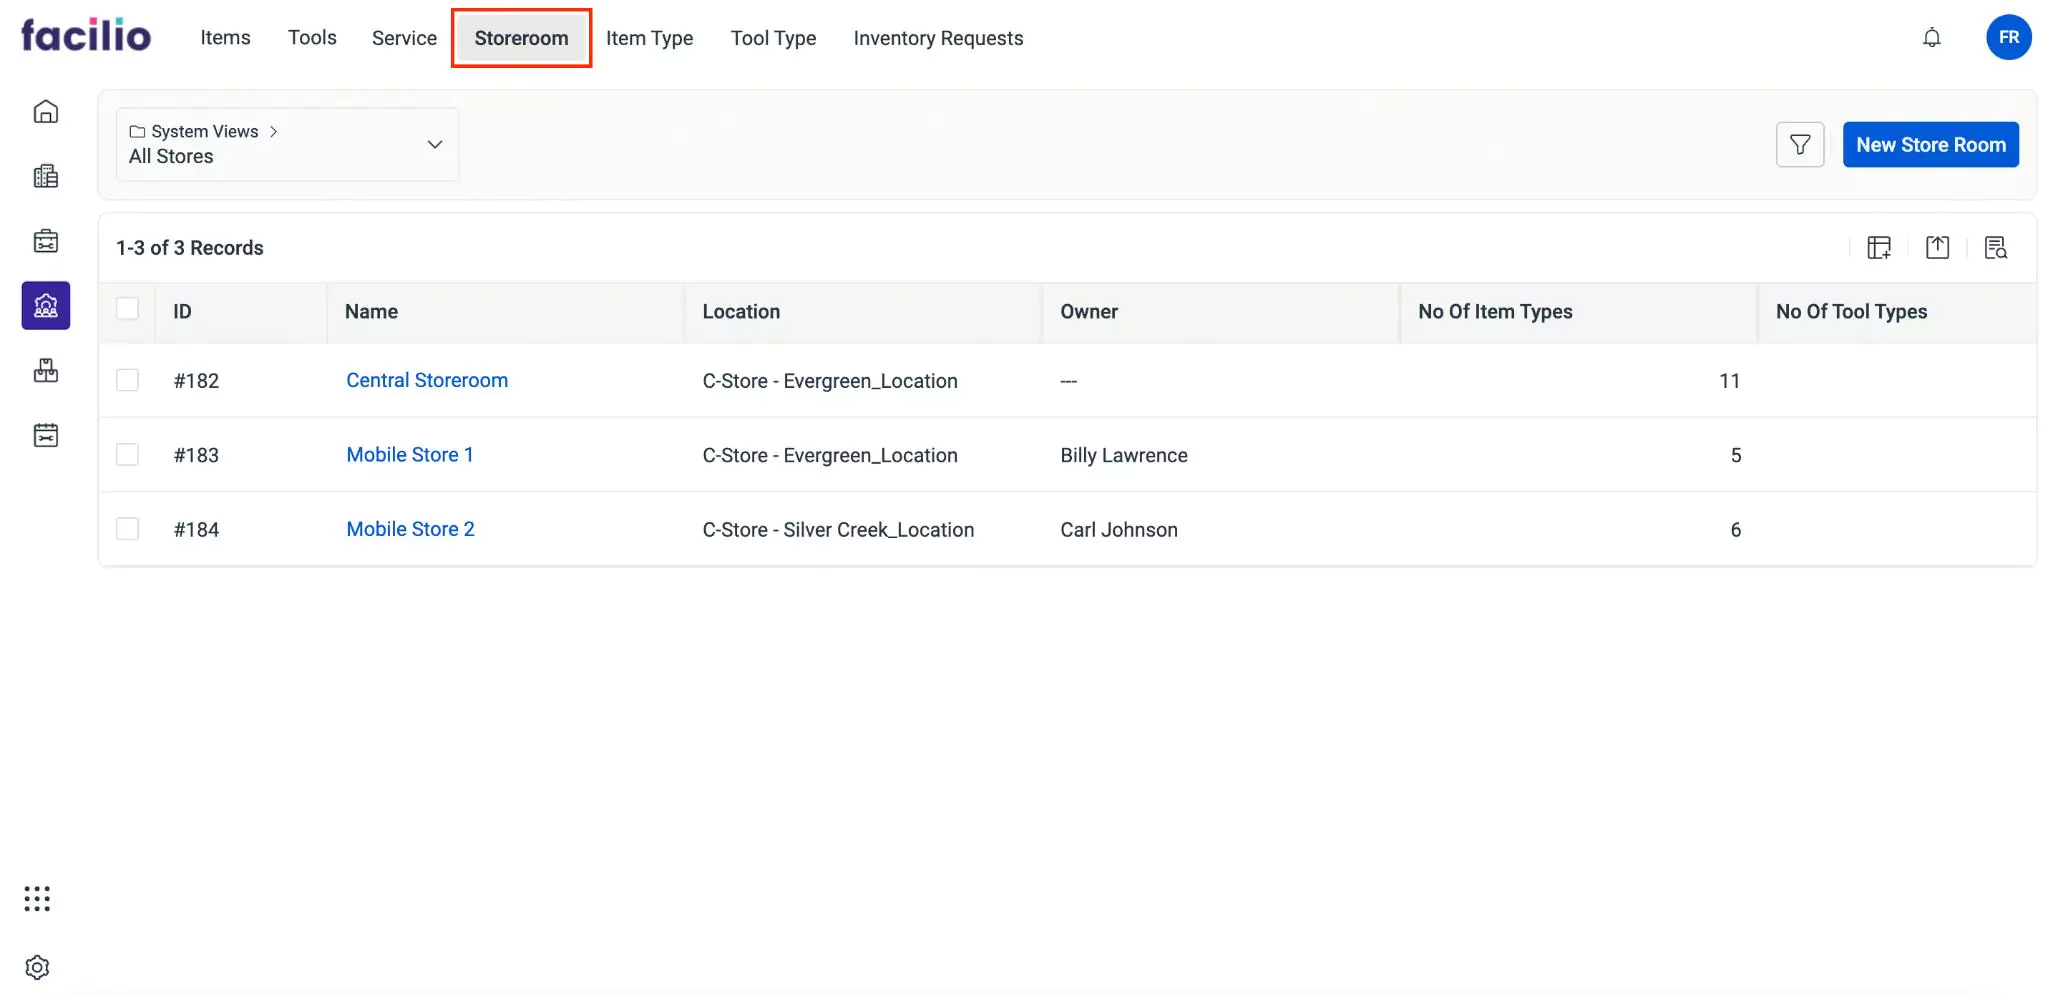
To add a storeroom,
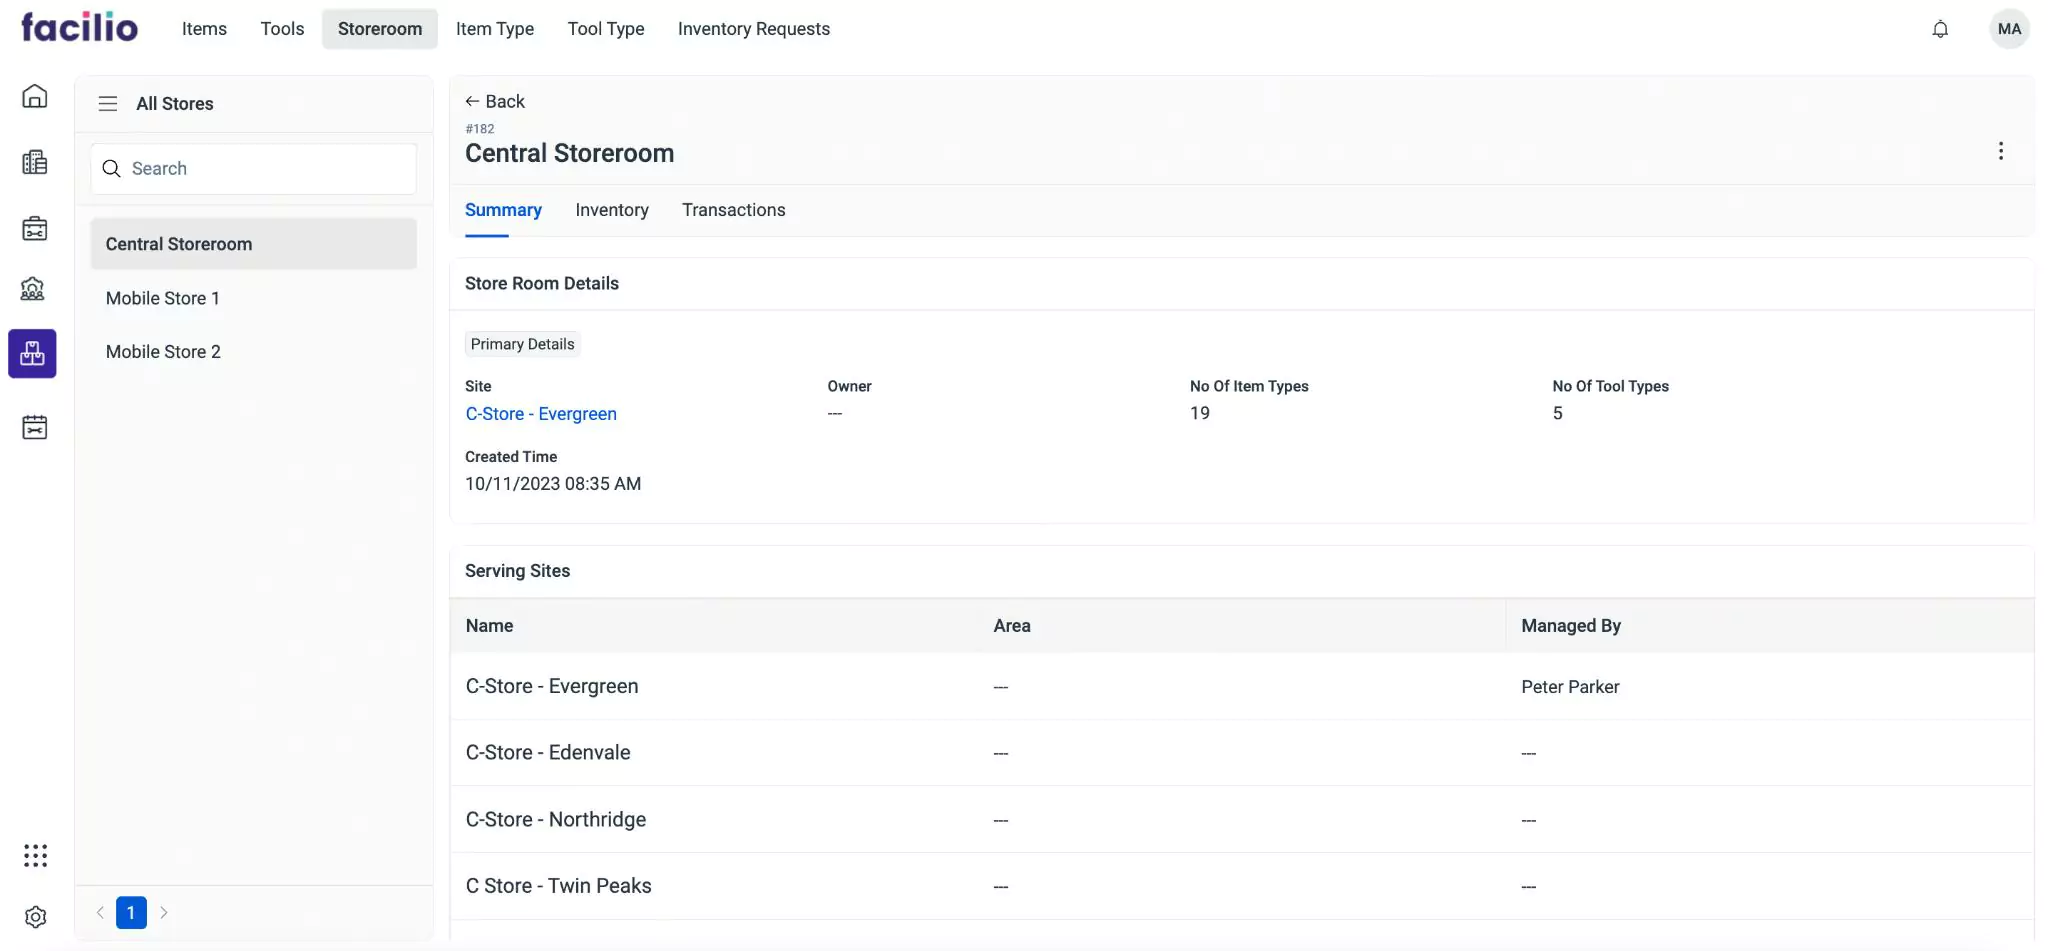
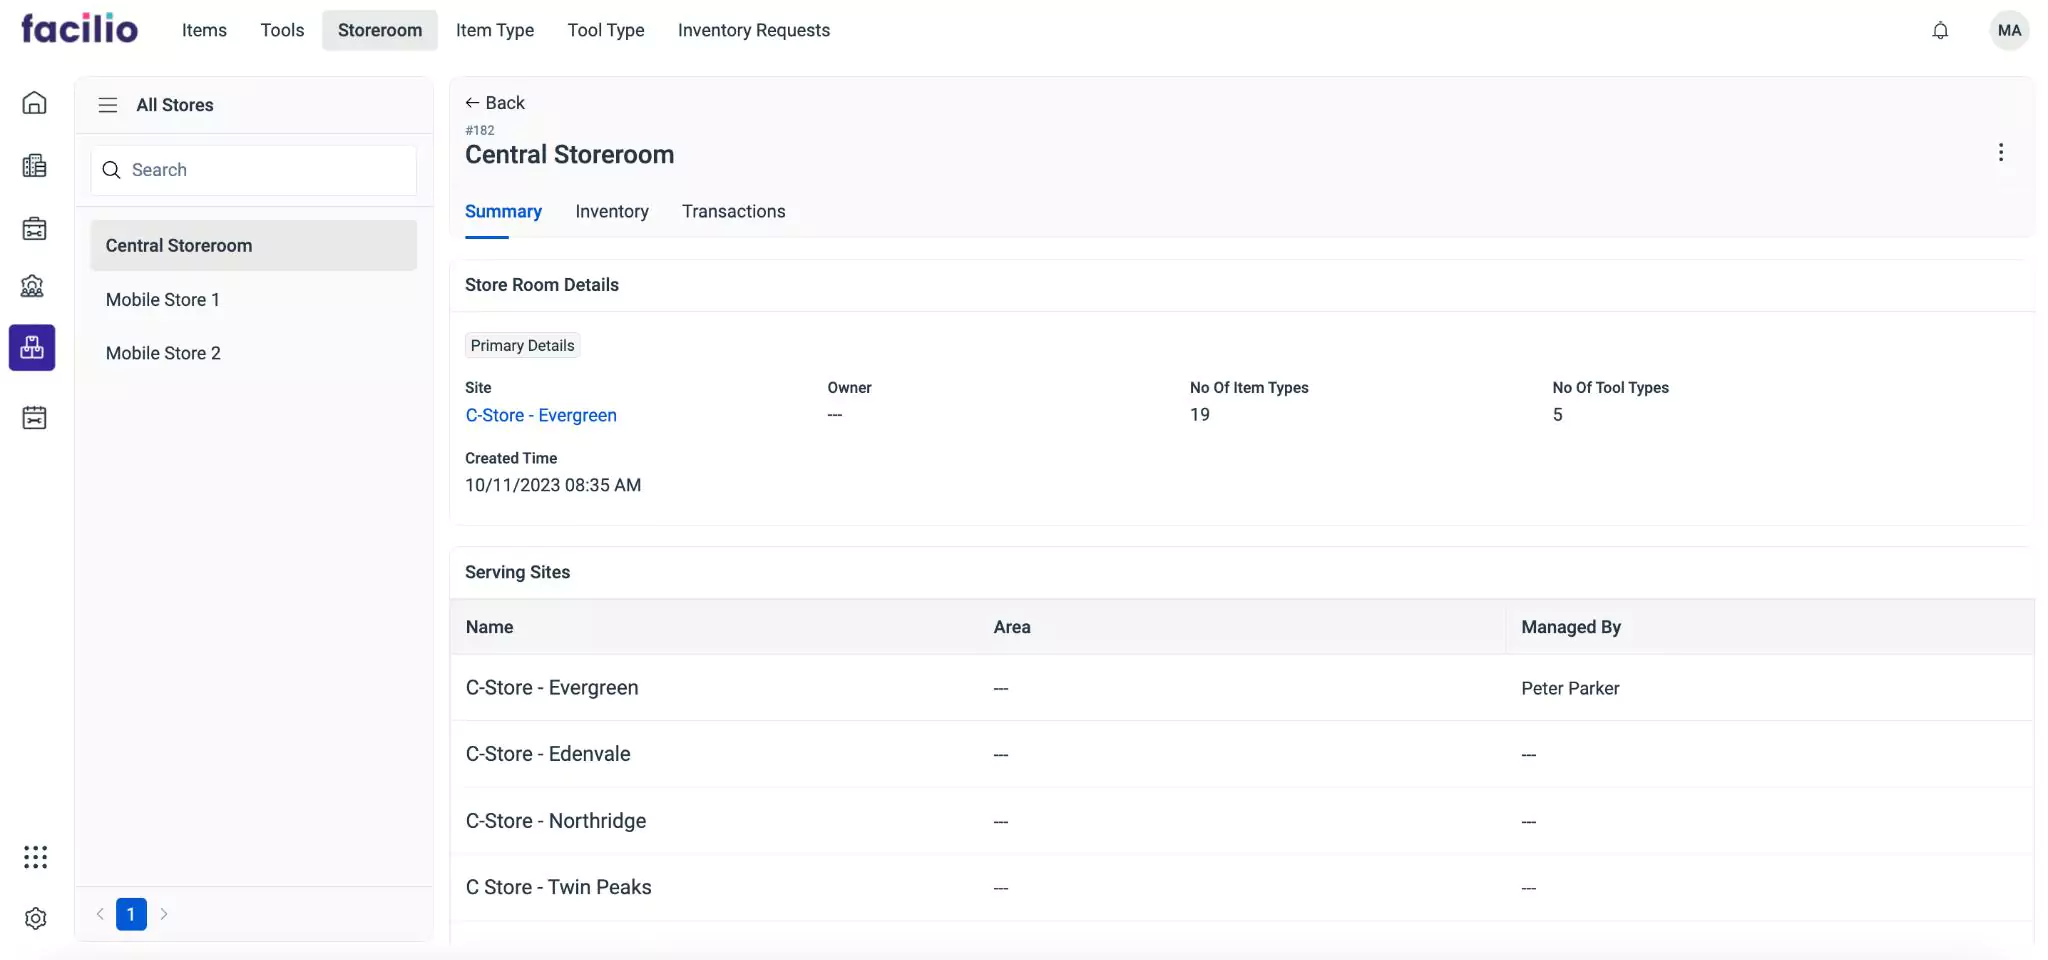
Click the Storeroom section. The All Stores screen appears with the list of available storerooms as shown below.
Click New Store Room from the All Stores screen. The Store Room screen appears as shown below.
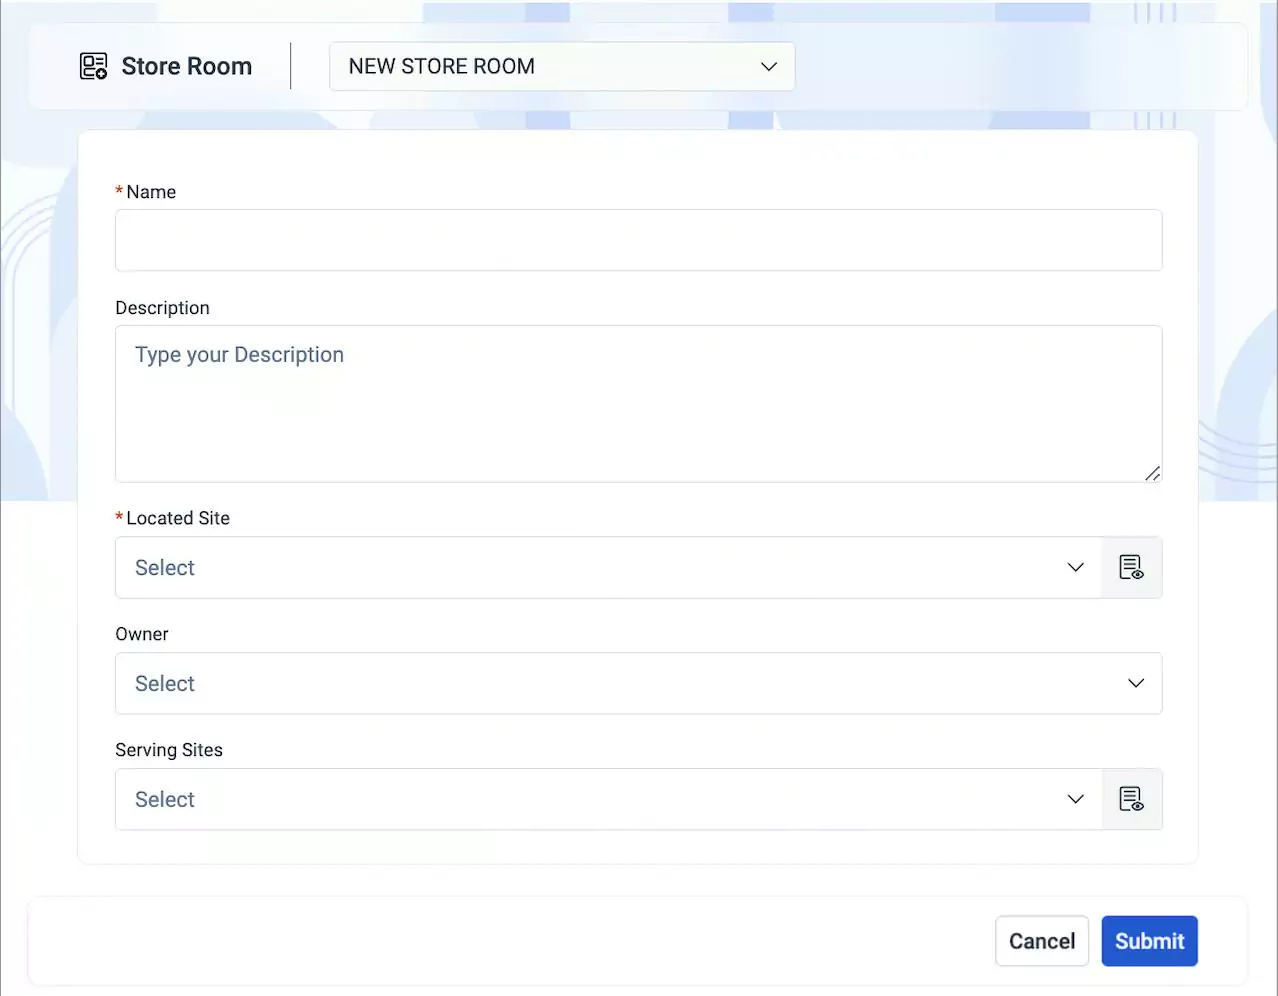
Update the following fields in this screen.
- Name - A label to identify the storeroom
- Description - A short note that specifies the information of storeroom
- Located Site - The site where the storeroom is located
- Owner - The person managing the storeroom
- Serving Sites - The sites to which the storeroom items/tools are distributed
Click Submit. The details page appears as shown below.

You can click the
 (Vertical ellipses) icon from the top right of the details page and select Edit to modify details related to the selected record.
Adding and Adjusting Inventory Materials
The process of adding materials in the storeroom can be done through individual and bulk additions. Whether it's a single item or a large quantity of items, they can be seamlessly incorporated into the storeroom inventory as needed. Each addition is meticulously recorded within the inventory system to maintain accurate records of stock levels.
Adjusting items in bulk entails rectifying any discrepancies between recorded and actual inventory counts. You can instantly adjust items in bulk by modifying the record with the correct quantity of materials in stock.
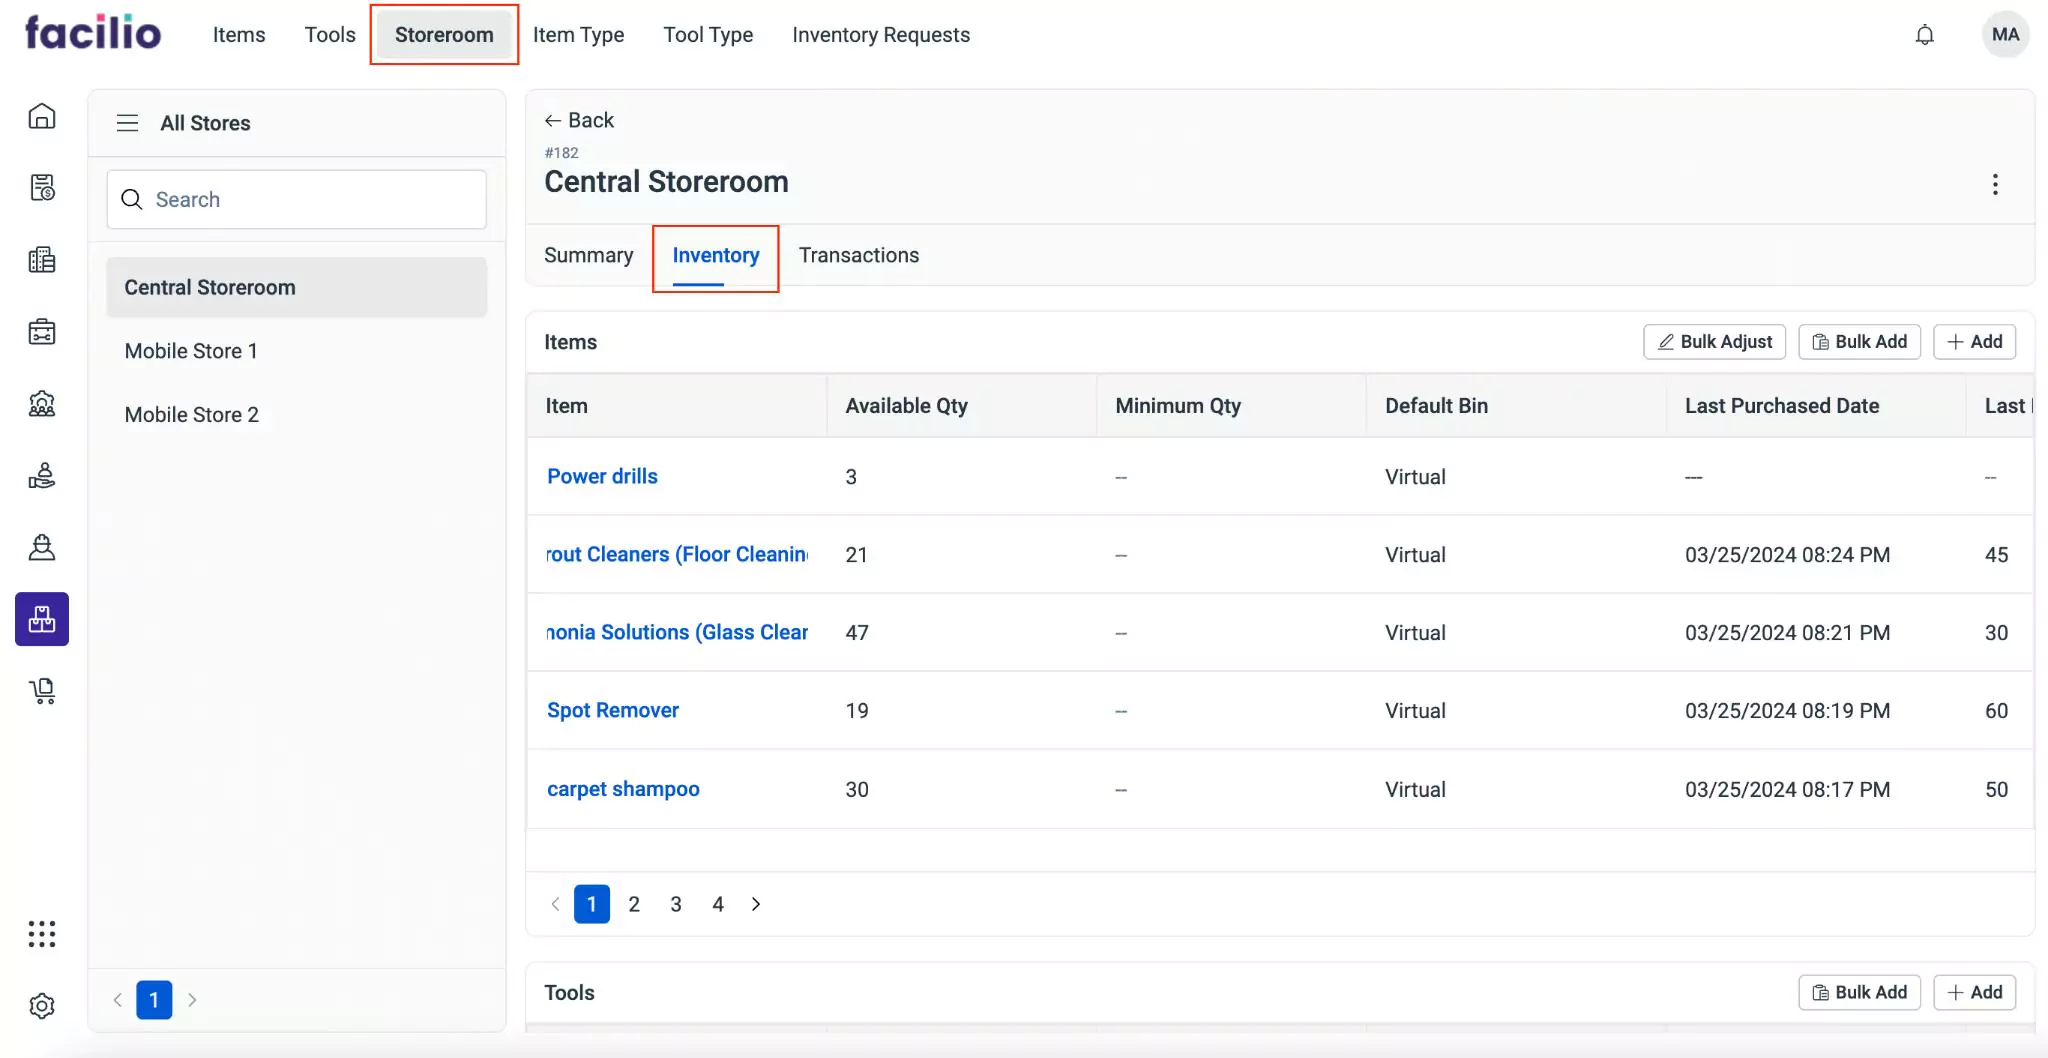
To add and adjust inventory materials, navigate to the Storeroom section and select the required storeroom from the All Stores list. The details page of the selected storeroom appears. Go to the Inventory section. The list of items and tools associated with the storeroom is displayed as shown below.
The upcoming sections explain how to adjust items in bulk and add an individual or a large number of items/tools to the inventory system.
Adjusting Bulk Items
Adjusting bulk items in inventory involves updating or making corrections to the inventory records to reflect changes in the quantity of bulk items. This adjustment process ensures that the inventory data accurately reflects the actual stock levels on hand.
Select the required storeroom from the All Stores list. The details page of the selected storeroom appears.

Navigate to the Inventory section. The list of items and tools associated with the storeroom are displayed as shown below.
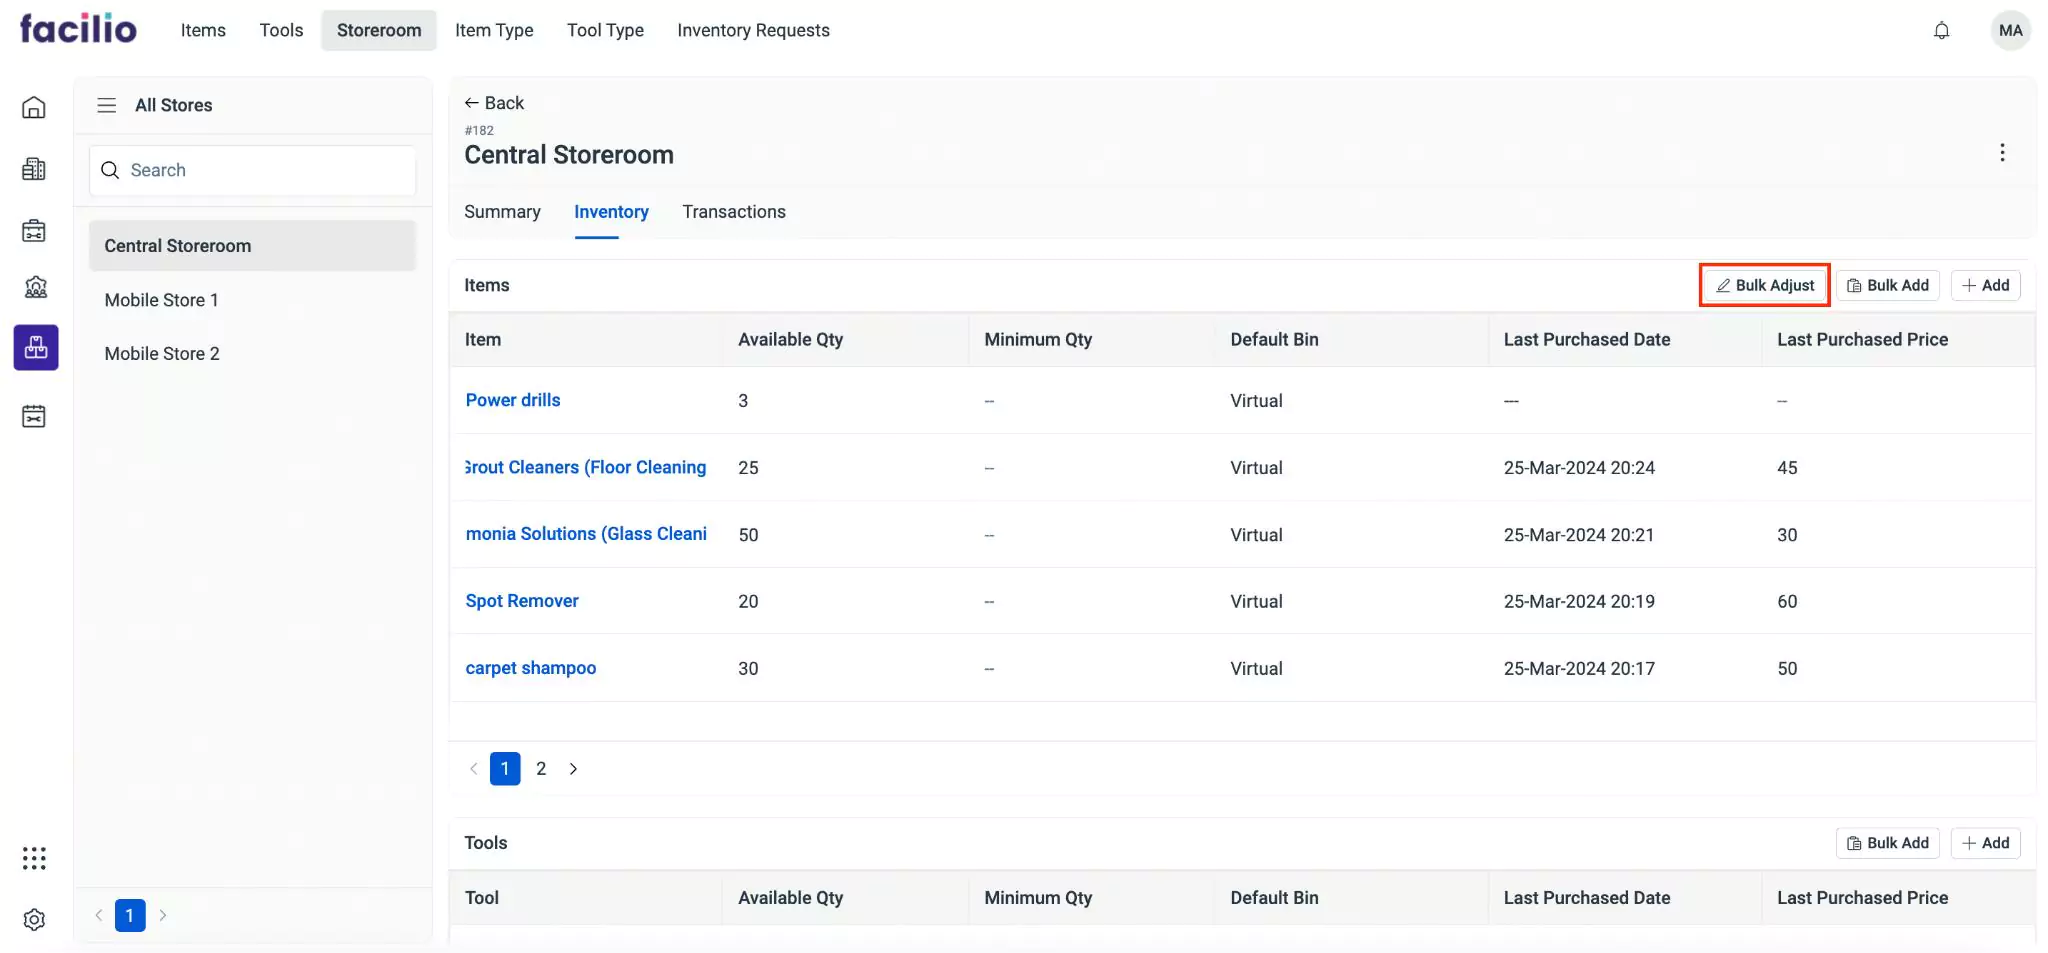
Click Bulk Adjust. The Item Bulk Adjust screen appears as shown below.
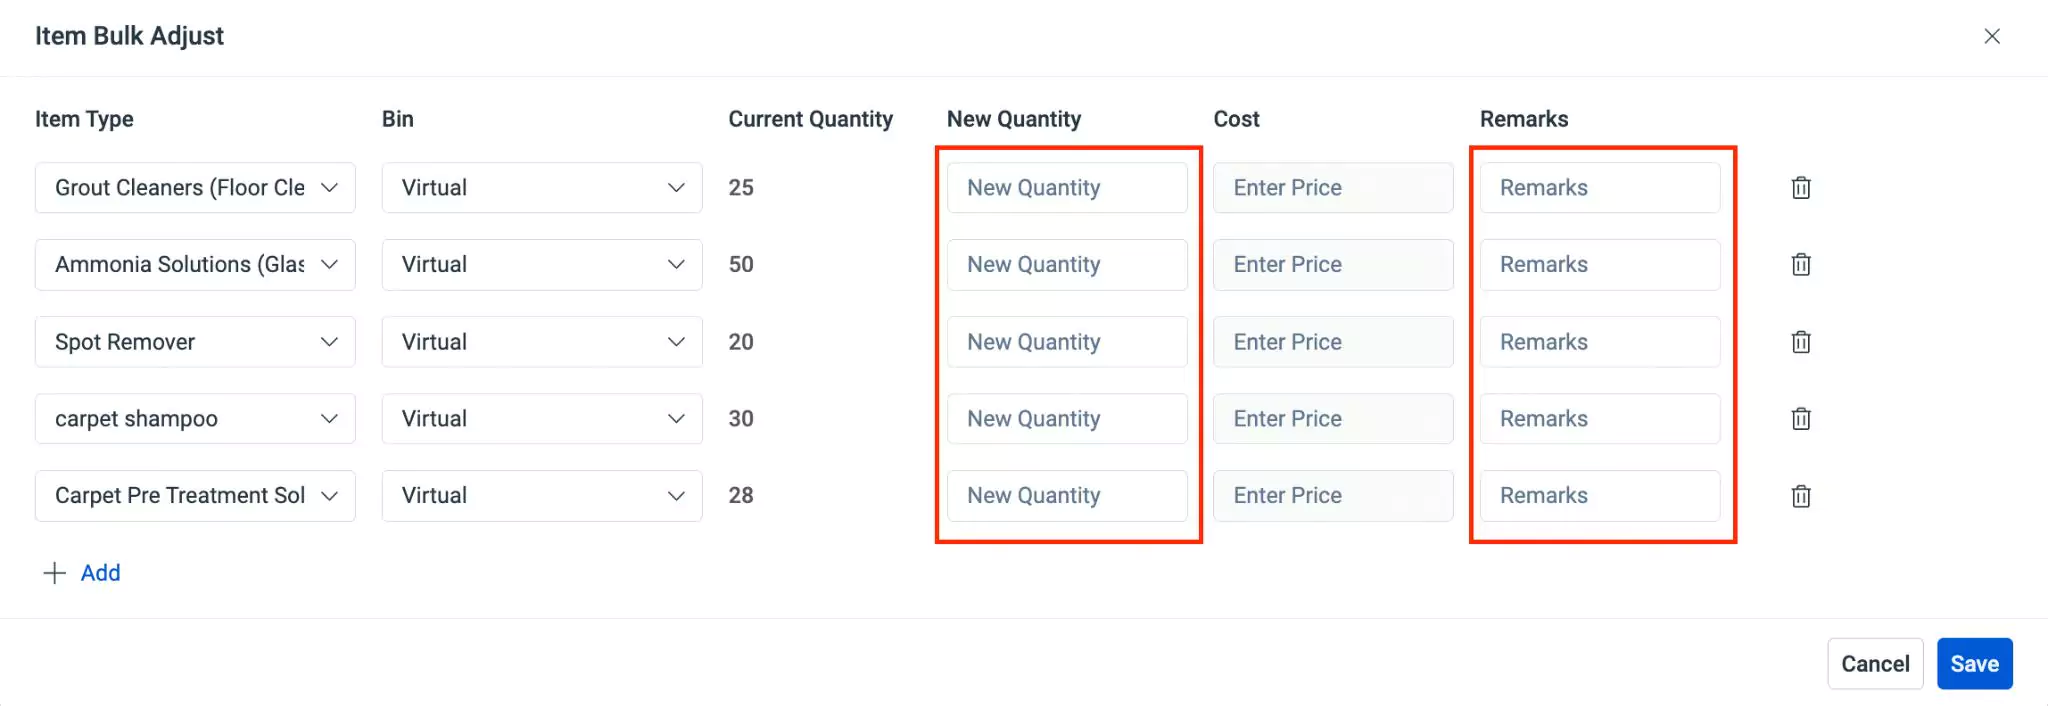
Enter the new quantity, cost, and remarks for each item in the New Quantity, Cost, and Remarks fields respectively.
Click Save. The items are adjusted and updated in bulk.
You can use the + Add button to add item type and the
 (Delete) icon to remove an item type.
Adding Bulk Items/Tools
The addition of items/tools in bulk is the process of incorporating large quantities of items/tools in the storeroom all at once, rather than adding them individually. This can be particularly useful when dealing with items/tools that are purchased or received in large quantities.
A sample illustration of adding items in bulk is illustrated below.
To add bulk items,
Select the required storeroom from the All Stores list. The details page of the selected storeroom appears.
Navigate to the Inventory section. The list of items and tools associated with the storeroom are displayed as shown below.
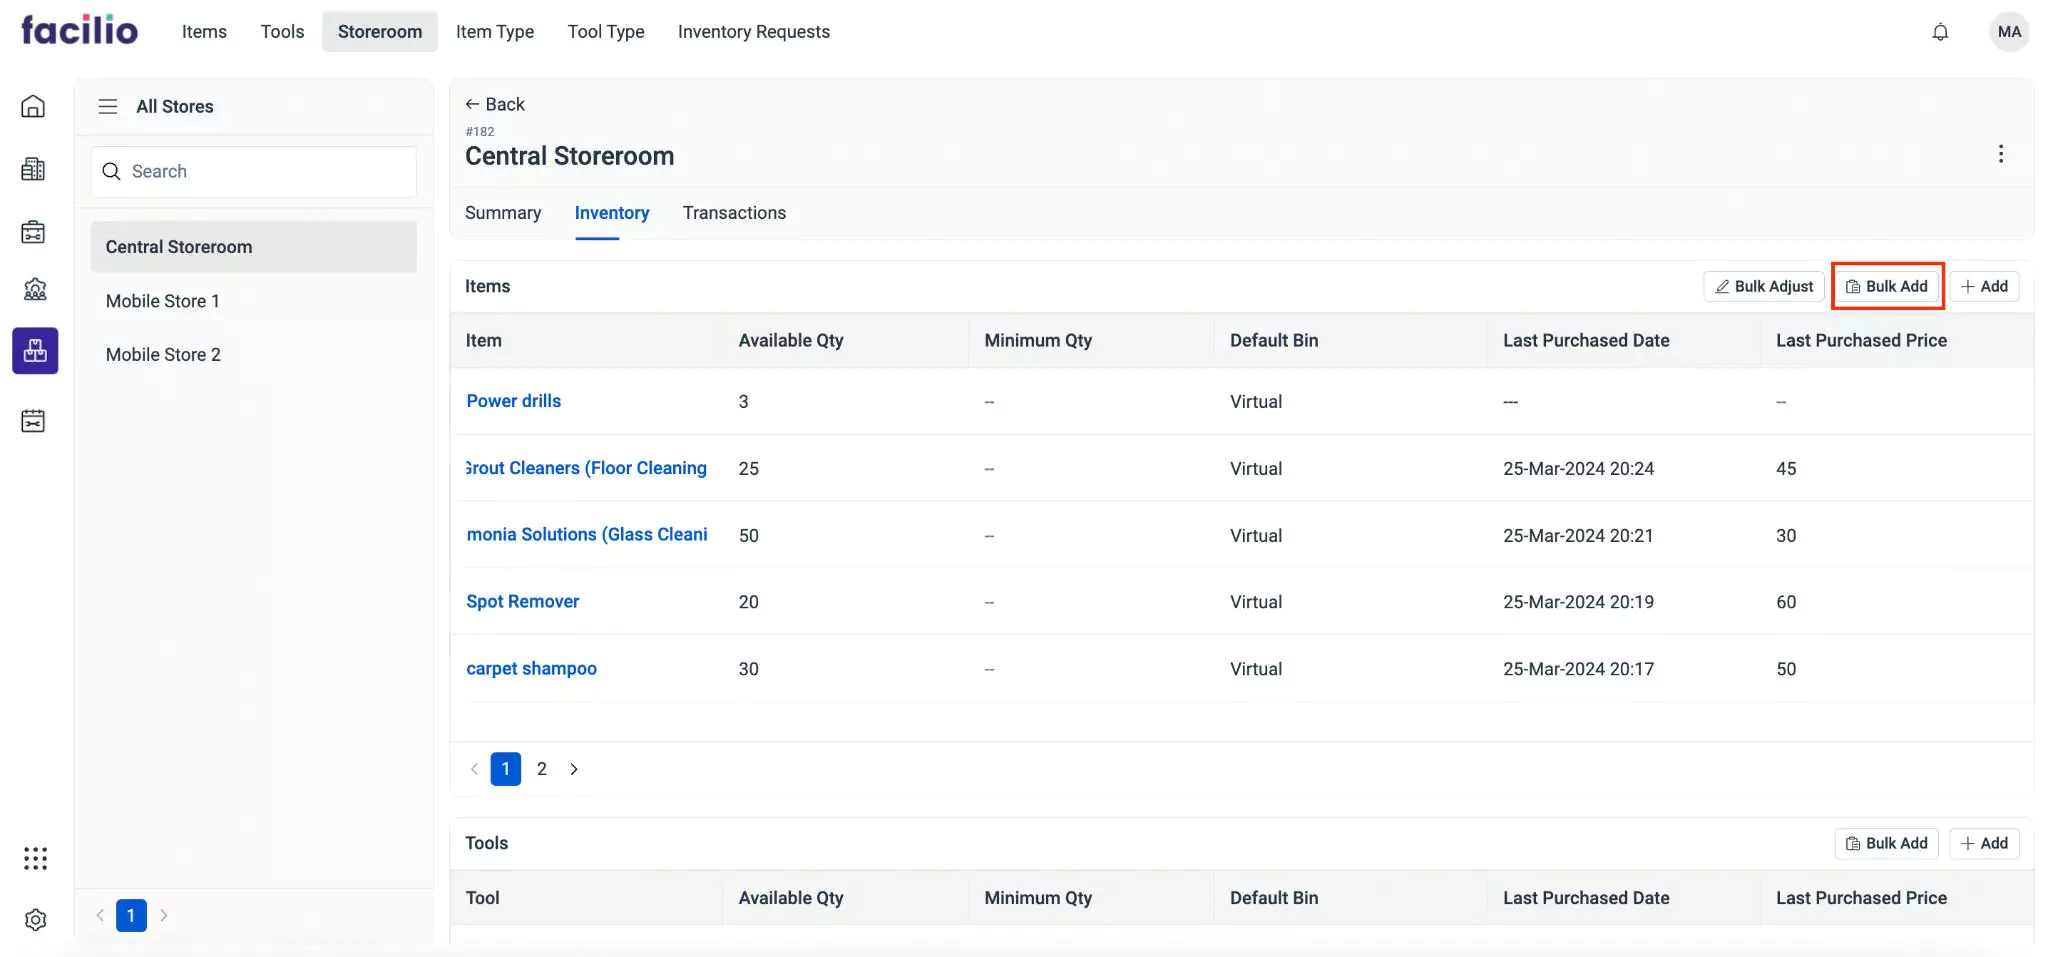
Select Bulk Add in the Items section. The Item Bulk Add screen appears as shown below.
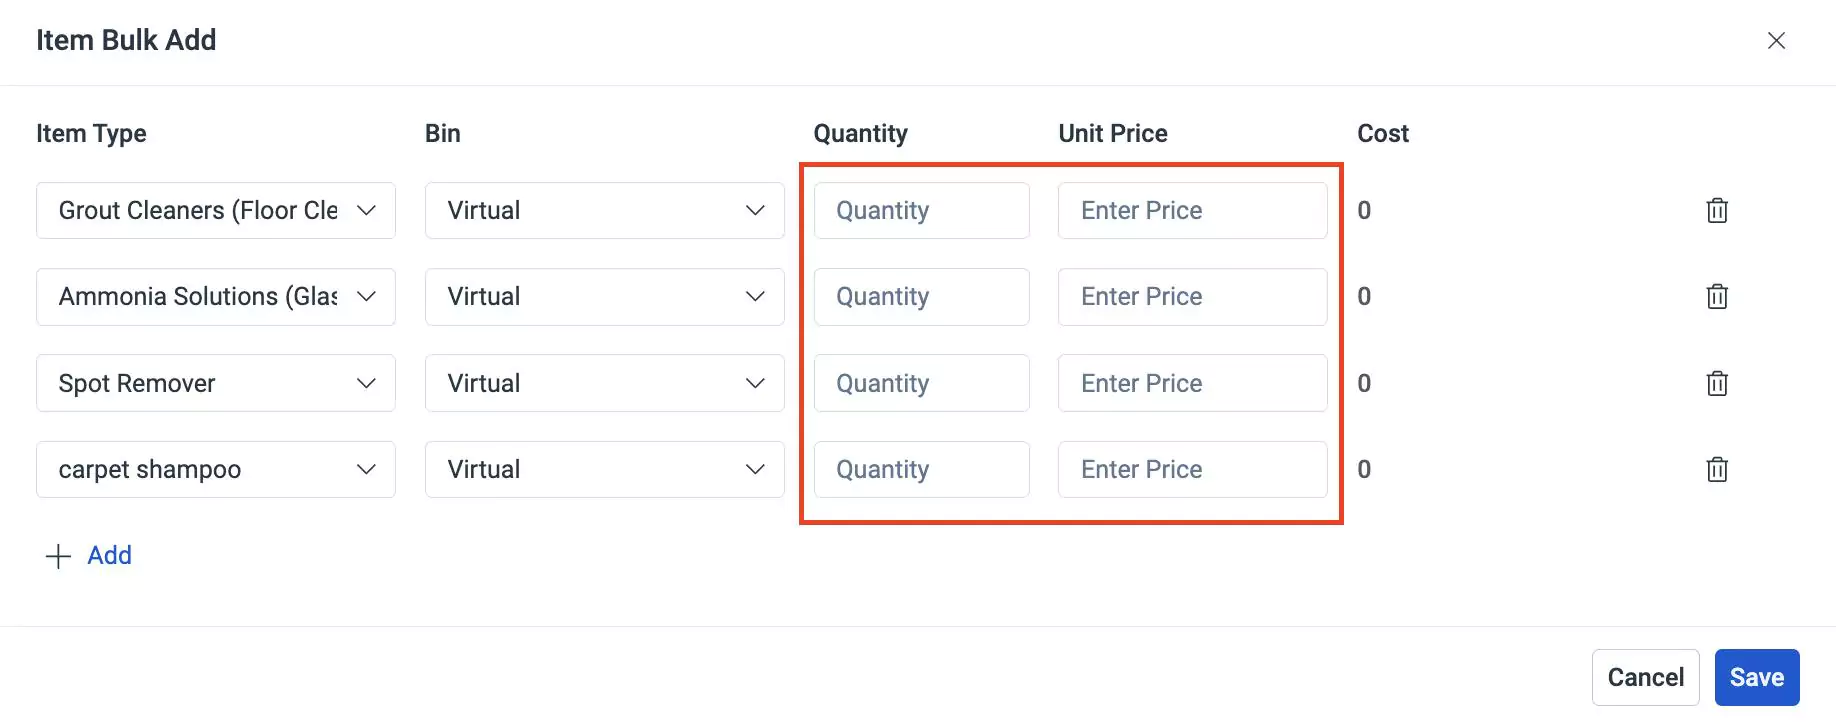
Enter the quantity and the unit price of each item in the Quantity and Unit Price fields respectively.
Note:The cost of each item type is auto updated based on the quantity and unit price.You can use the + Add button to add more item type and the
(Delete) icon to remove an item type.Click Save. The items are now added to the storeroom.
Adding Item/Tool
Adding an individual item/tool to a storeroom in the inventory enables the organization to have access to the necessary materials for potential utilization. Inventory items are stocked when there is a demand for additional items/tools.
A sample illustration of adding an item is illustrated below.
To add an item,
Select the required storeroom from the All Stores list. The details page of the selected storeroom appears.

Navigate to the Inventory section. The list of items and tools associated with the storeroom are displayed as shown below.
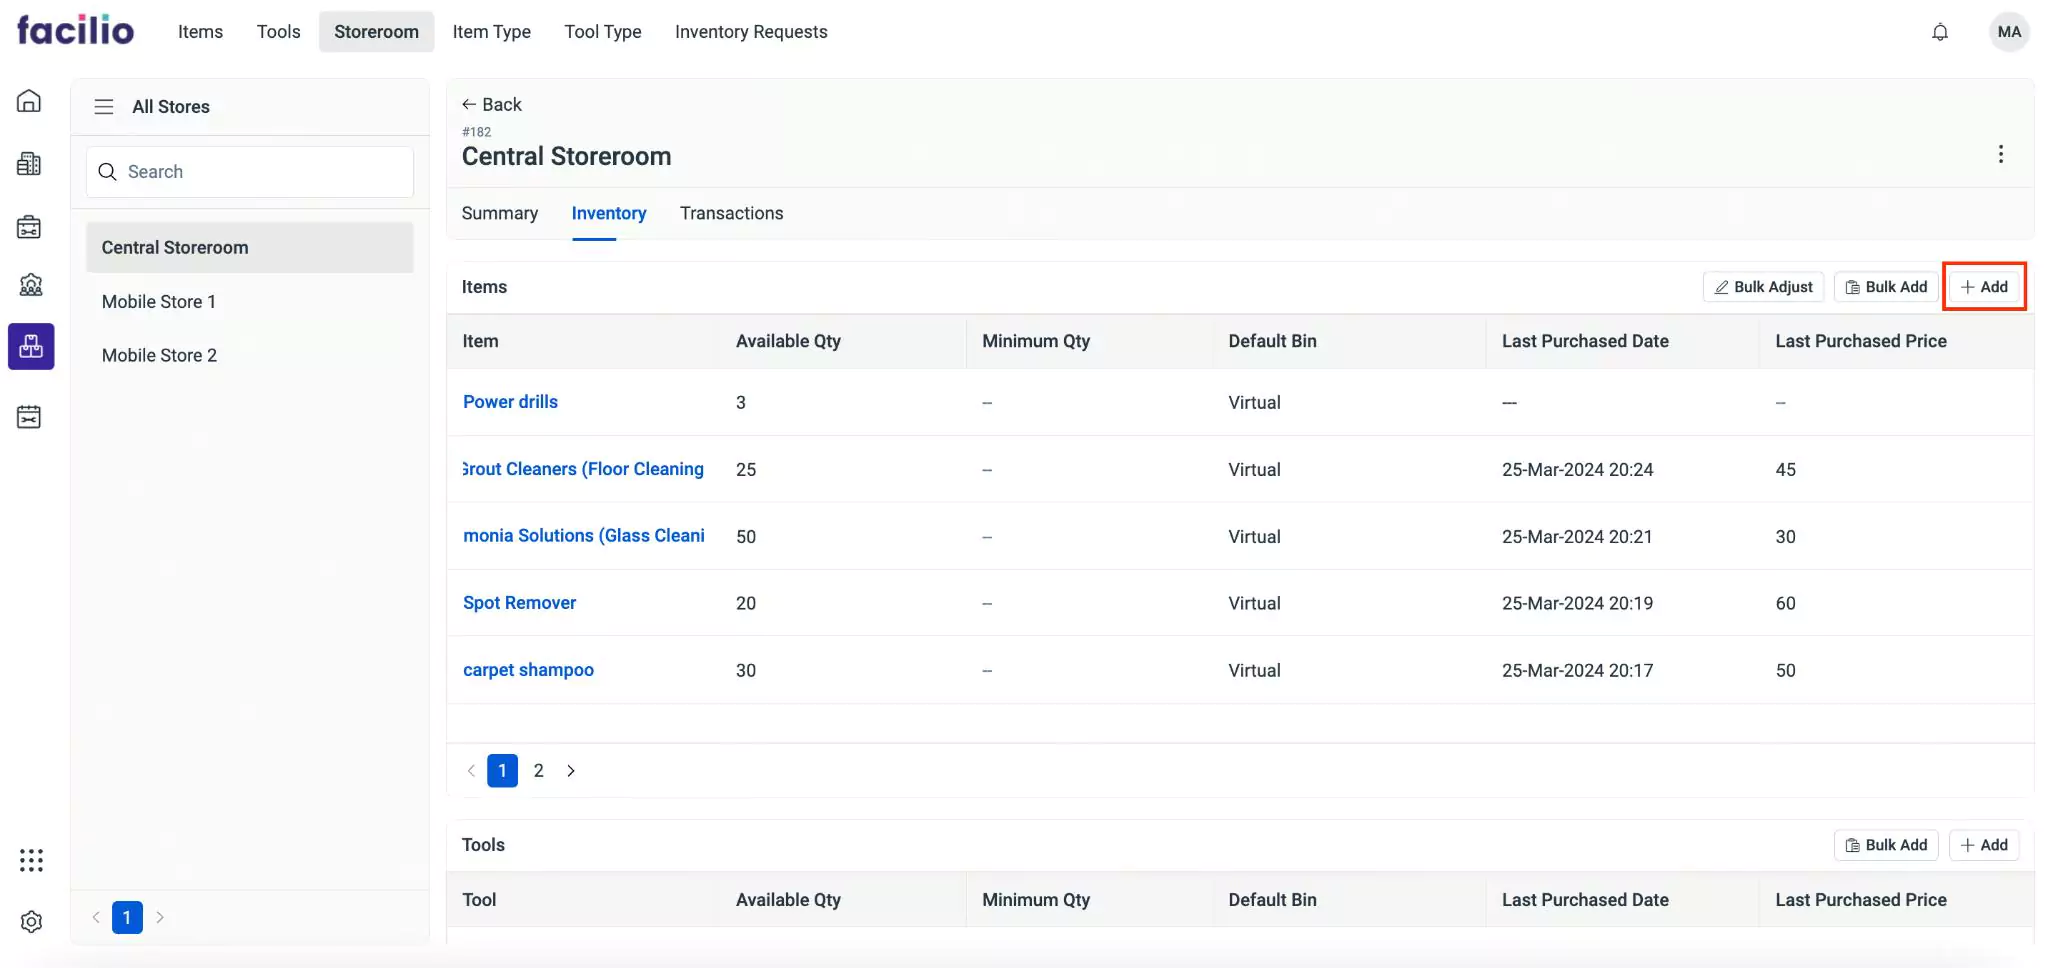
Click Add in the Items section. The Select Item Type screen appears as shown below.

Select the item type from the drop-down list and click Save. The Stock Item screen appears as shown below.
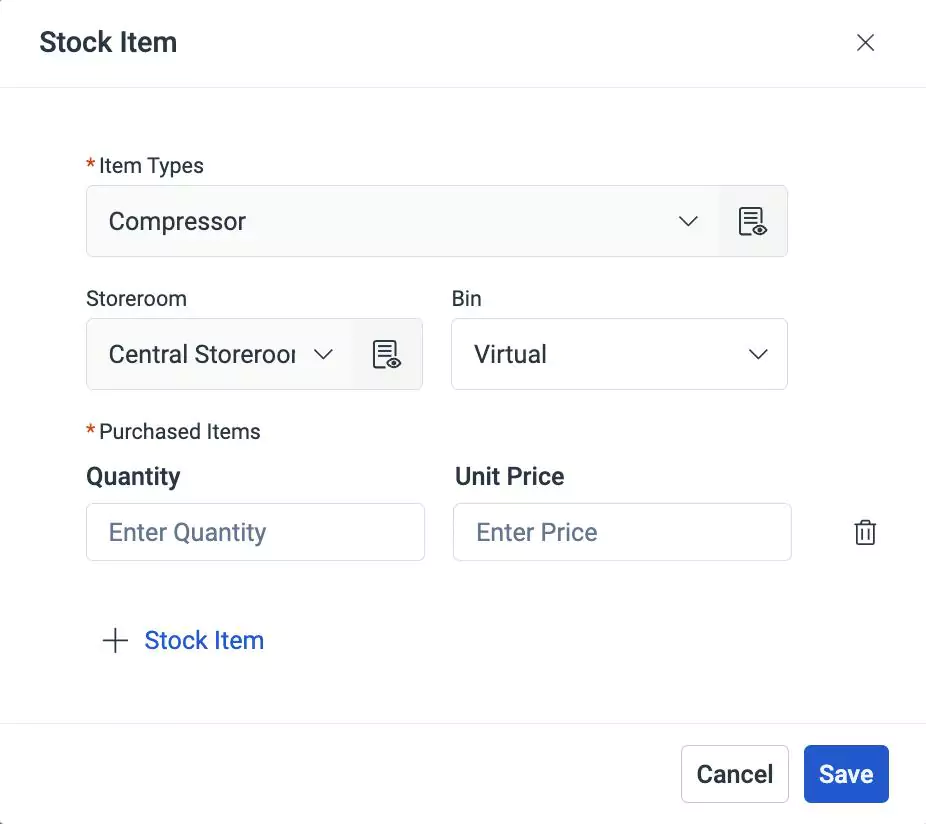
Update the required details in this screen. Read the Stocking Items section for more information.
You can use the
 button to stock more items with different unit price and the
  (Delete) icon to remove the stocked item.
Click Save. An item is added to the list of items.
Issuing and Returning Inventory Items
Inventory issuance is the process of distributing items or tools from the inventory for specific tasks or to the requested users. This can occur for various reasons, such as fulfilling work orders, or servicing equipment. Inventory issuance plays a crucial role in ensuring that the right materials are available when needed for operational activities or maintenance tasks. Returning the issued items/tools occur when there are unused materials, or they are no longer needed for their intended purpose.
To issue and return items/tools, navigate to the Storeroom section in the Inventory module. Select the required storeroom from the All Stores list. The details page of the selected storeroom appears. Go to the Transaction section. The list of items and tools transactions associated with the storeroom are displayed as shown below.
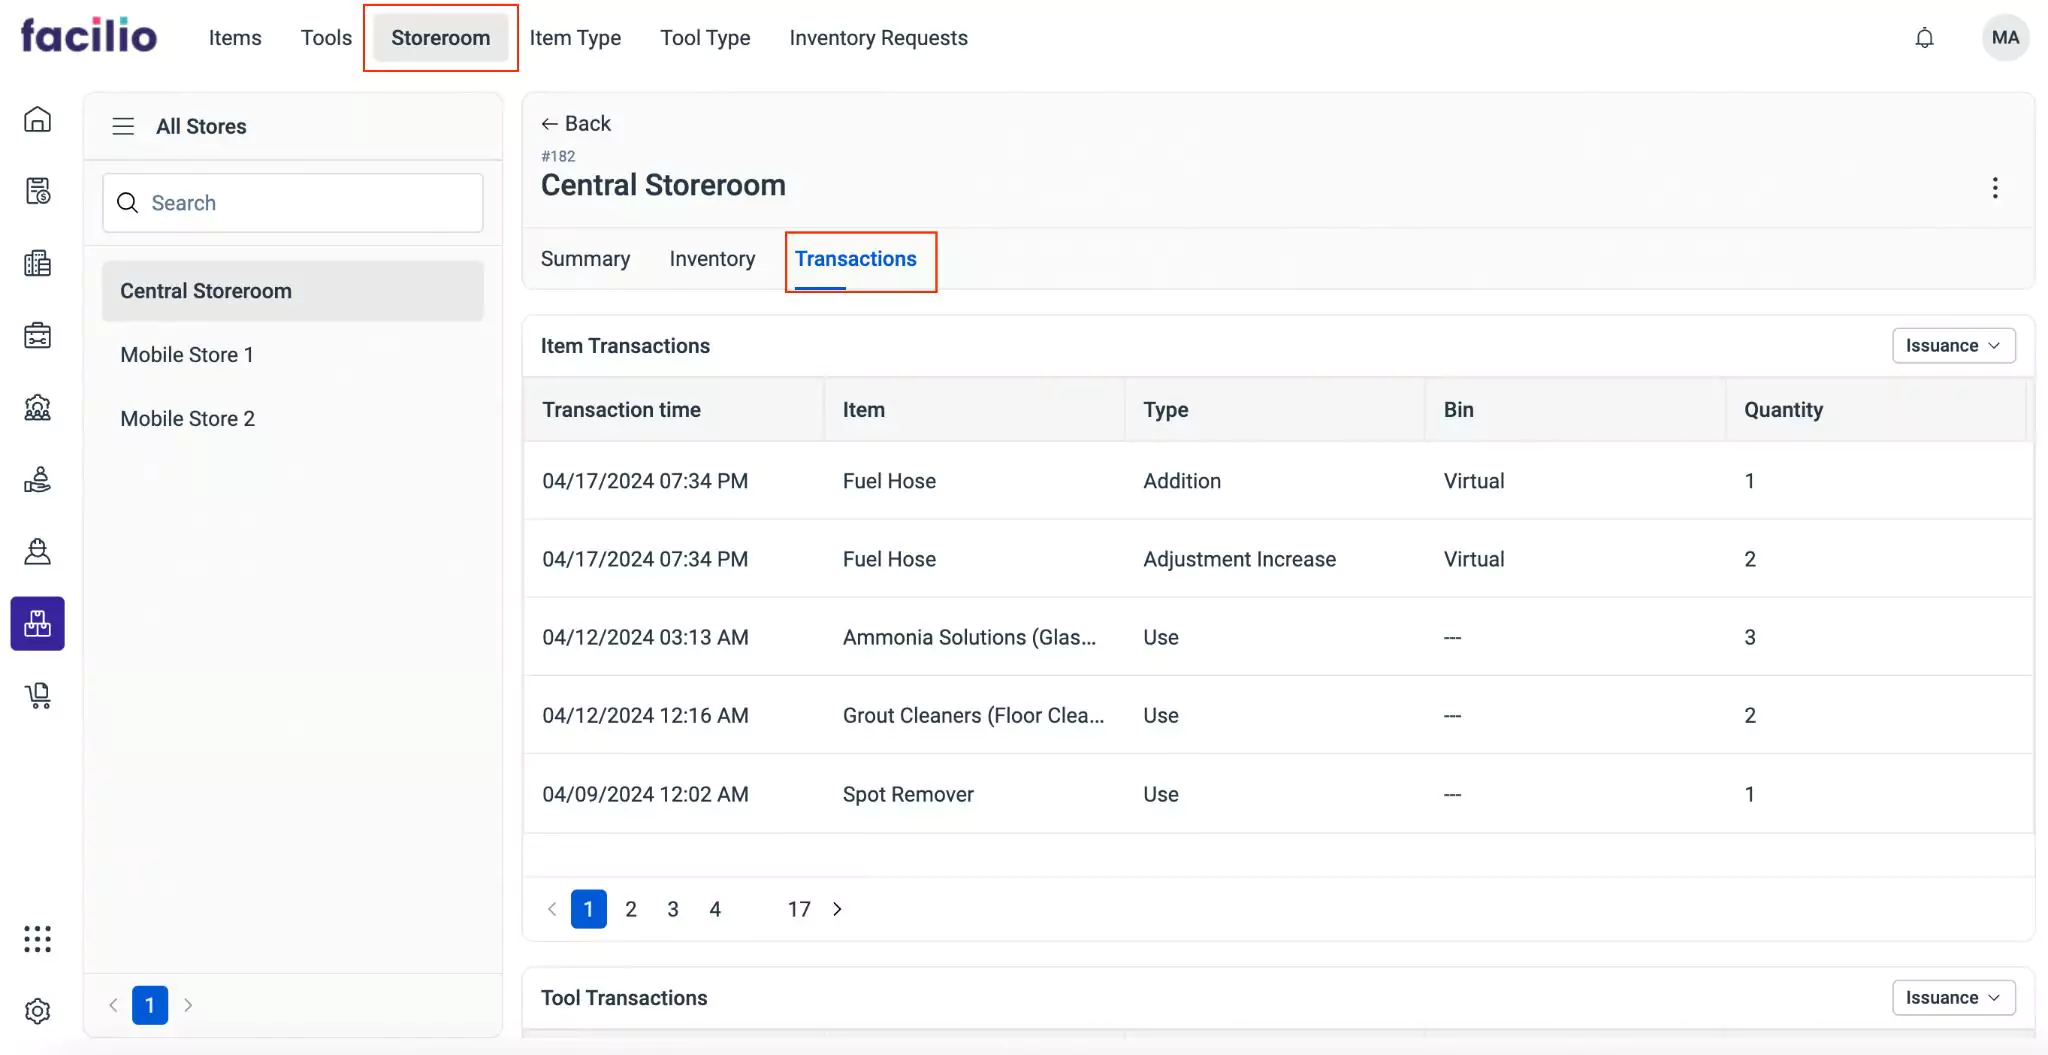
The upcoming sections explain how to issue available items/tools to the work order, issue reserved items/tools to the work order, issue items/tools to a user, and return items/tools from the Transaction section.
Issuing Available Item/tool
Issuing available items/tools is the process of allocating and assigning an item/tool from the inventory to fulfill the requirements of a specific work order or task. This action involves identifying the necessary items/tools from the available inventory stock and issuing them to the corresponding work order, which could be related to maintenance, repair, or any other operational activity.
A sample illustration of issuing an item is illustrated below.
To issue an item to a work order,
Select the required storeroom from the All Stores list. The details page of the selected storeroom appears as shown below.

Navigate to the Transaction section. The list of items and tools transactions associated with the storeroom are displayed as shown below.
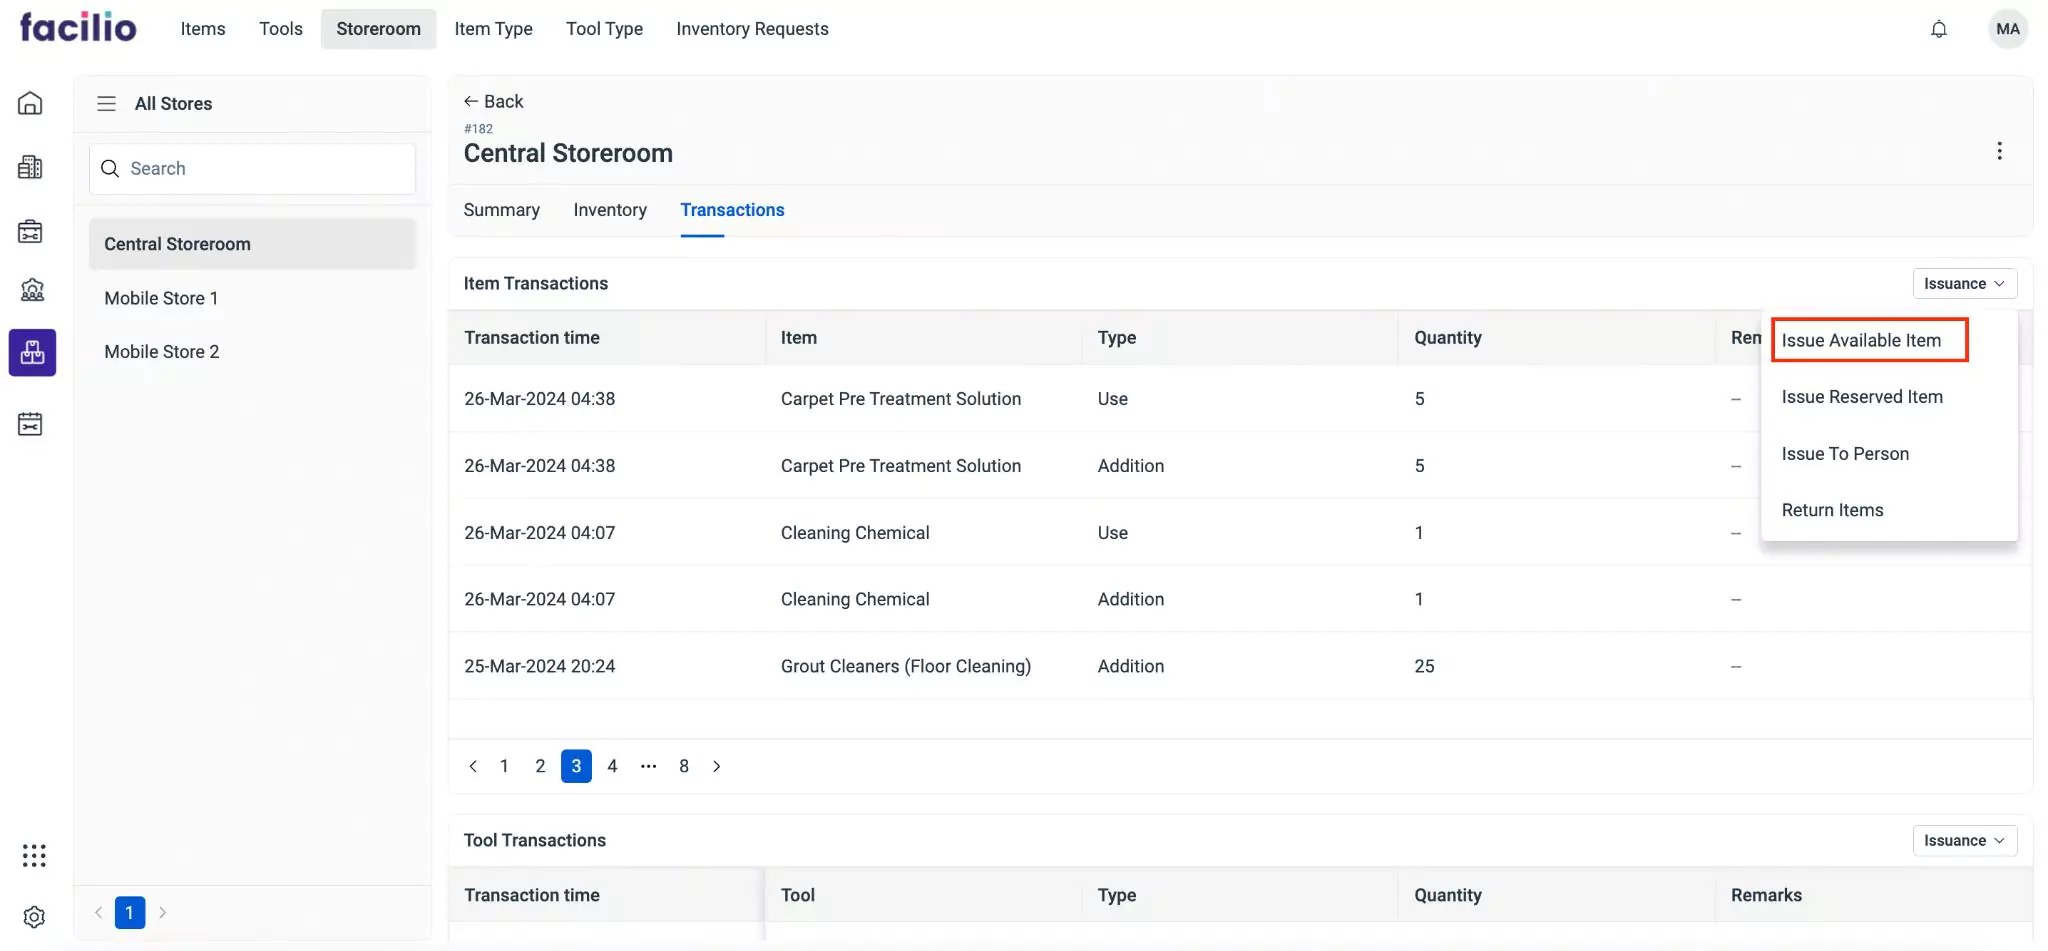
Navigate to the Issuance drop-down in Item Transactions section and click Issue Available Item. The Select Item screen appears as shown below.
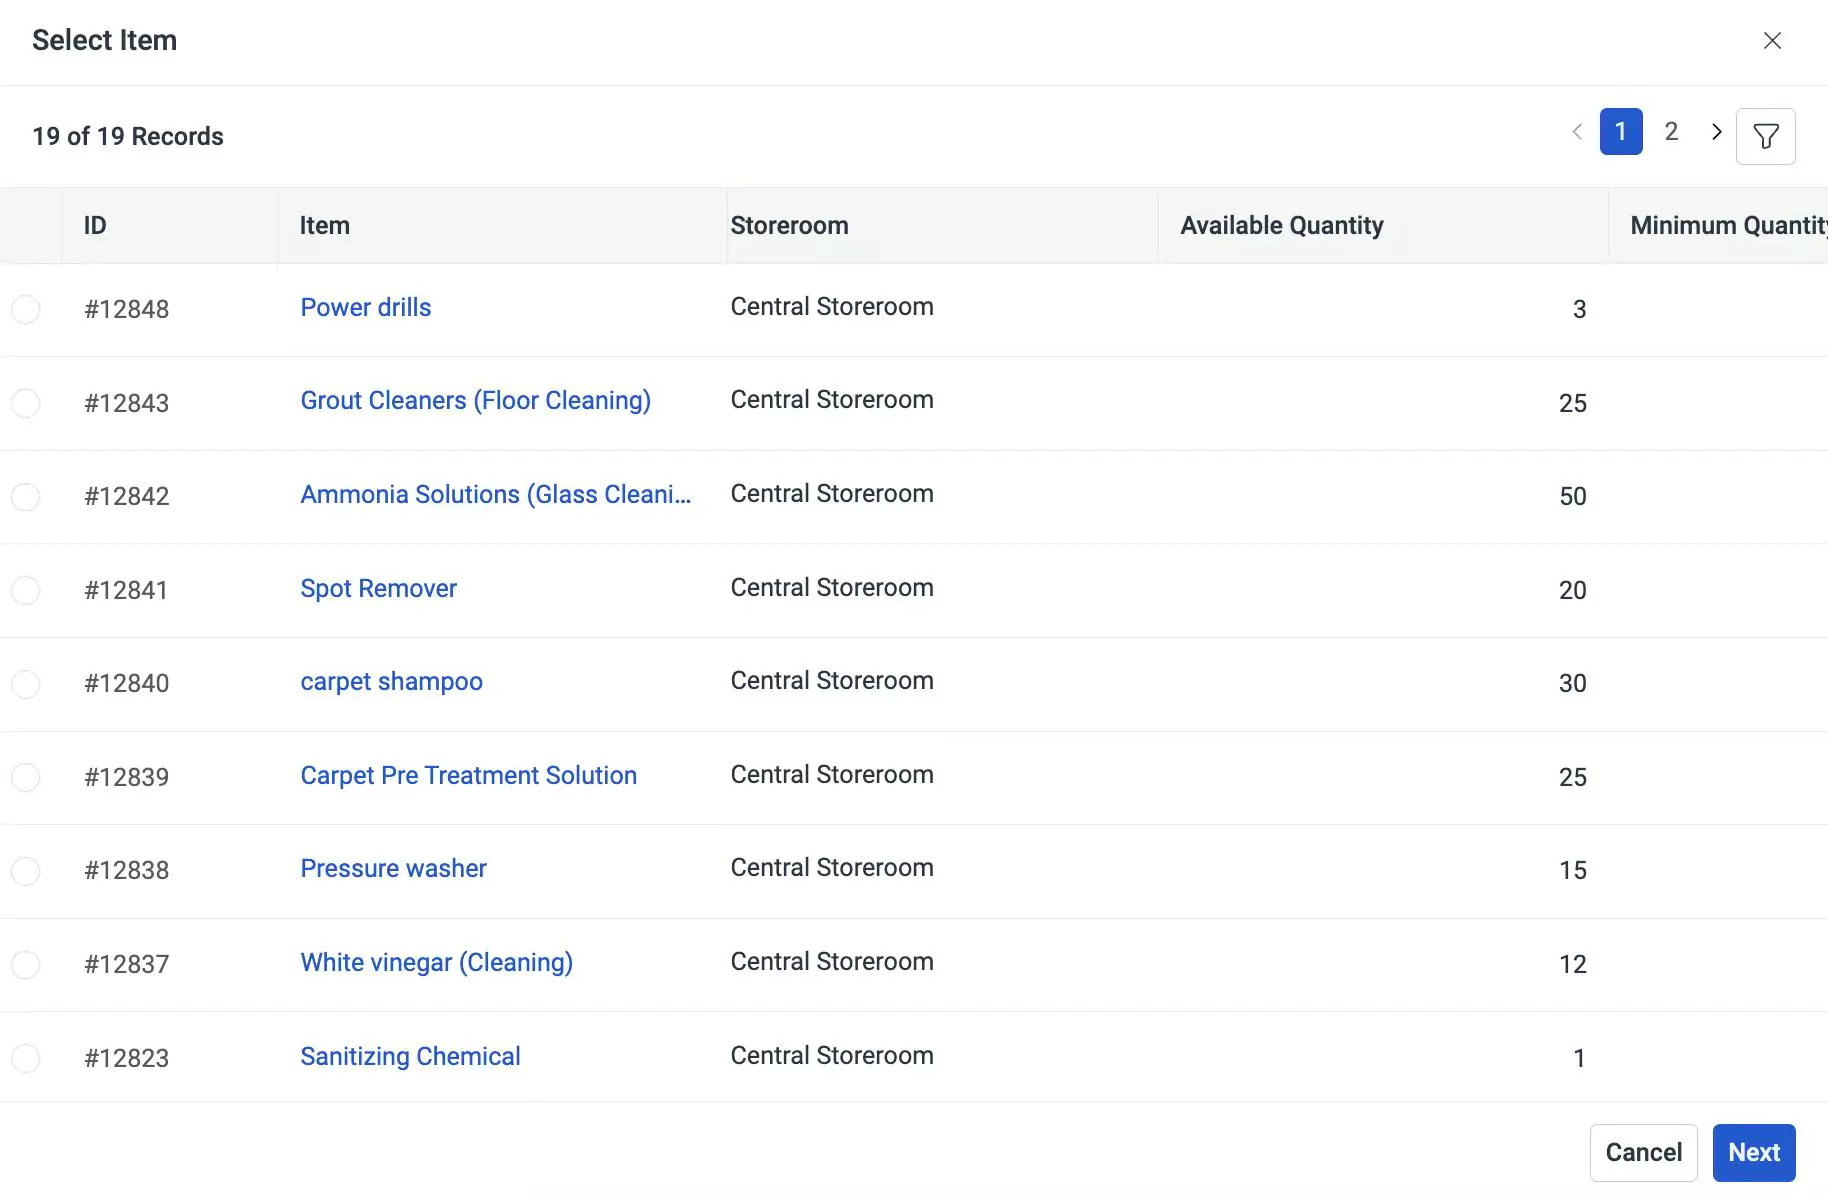
Select the item and click Next. The Issue to Workorder screen appears as shown below.
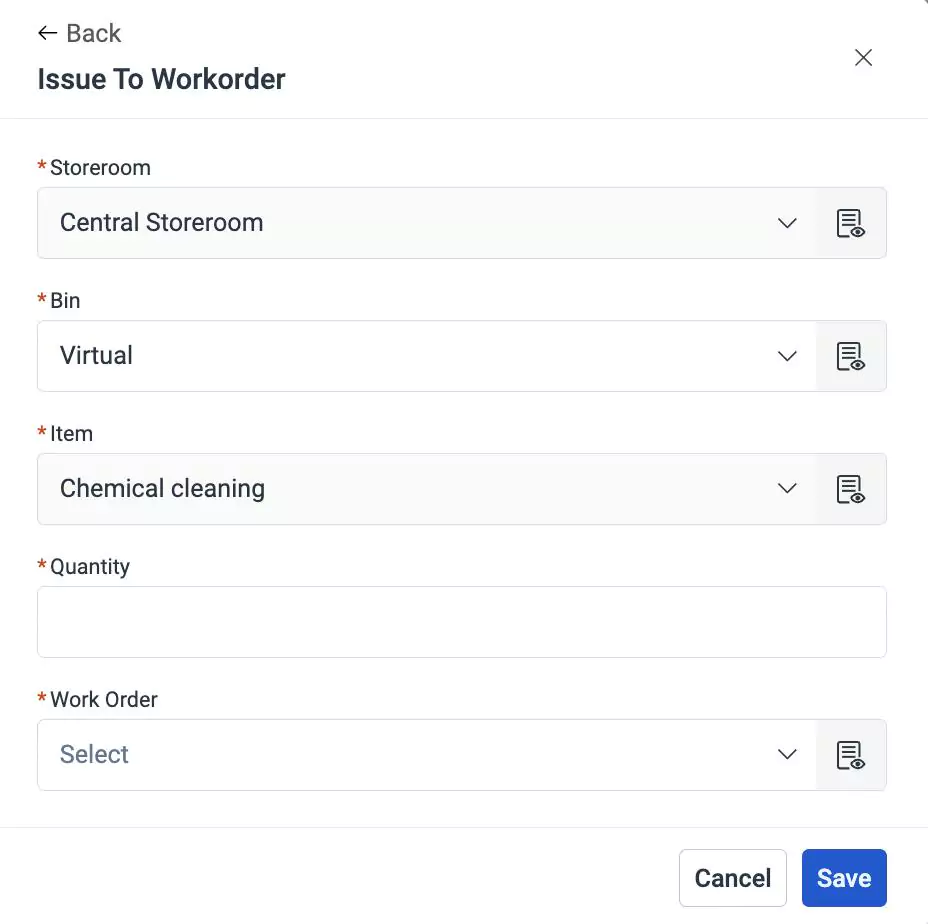
Update the following field in this screen:
Storeroom - The location from where items are issued to the work order
Note:This field is auto-filled and cannot be modified.Bin - A specific subdivision within a storeroom where items are stored
Item - The item to be issued to a work order
Note:This field is auto-filled and cannot be modified.Quantity - The number of items to be issued to the work order. Enter the required number of items.
Work Order - The work order that requires the items. Select the appropriate work order from the drop-down list.
Click Save. The item is added to the list and recorded in the Transactions section of the details page.
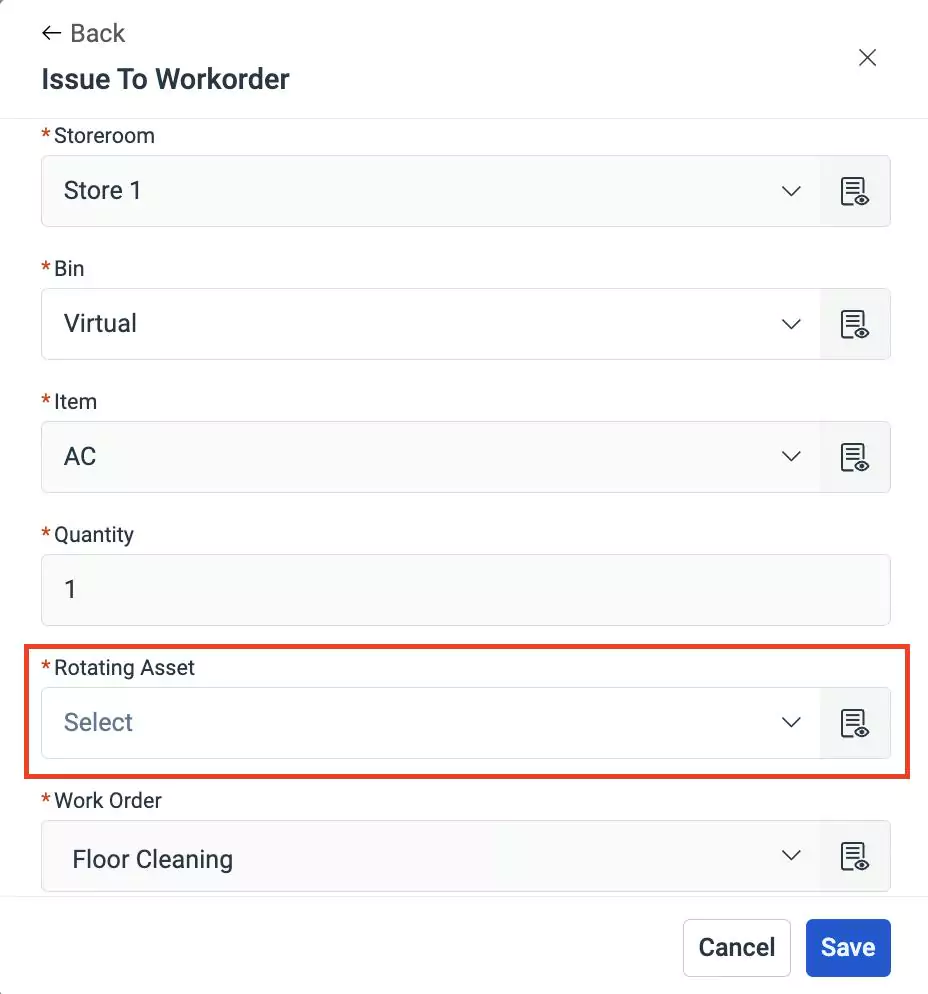
The Rotating Asset field displays assets that are mapped as rotating items. You can select the required item and complete the issuance process.
Issuing Reserved Item/Tool
Issuing reserved items/tools involves the process of supplying a reserved inventory item/tool to be used for a particular work order or task when required. Items/Tools may be reserved for a task based on anticipated need or demand. This reservation ensures that the item/tool is allocated for that particular purpose.
A sample illustration of issuing a reserved item is illustrated below.
To issue reserved item to a work order,
Select the required storeroom from the All Stores list. The details page of the selected storeroom appears as shown below.

Navigate to the Transaction section. The list of items and tools transactions associated with the storeroom are displayed as shown below.
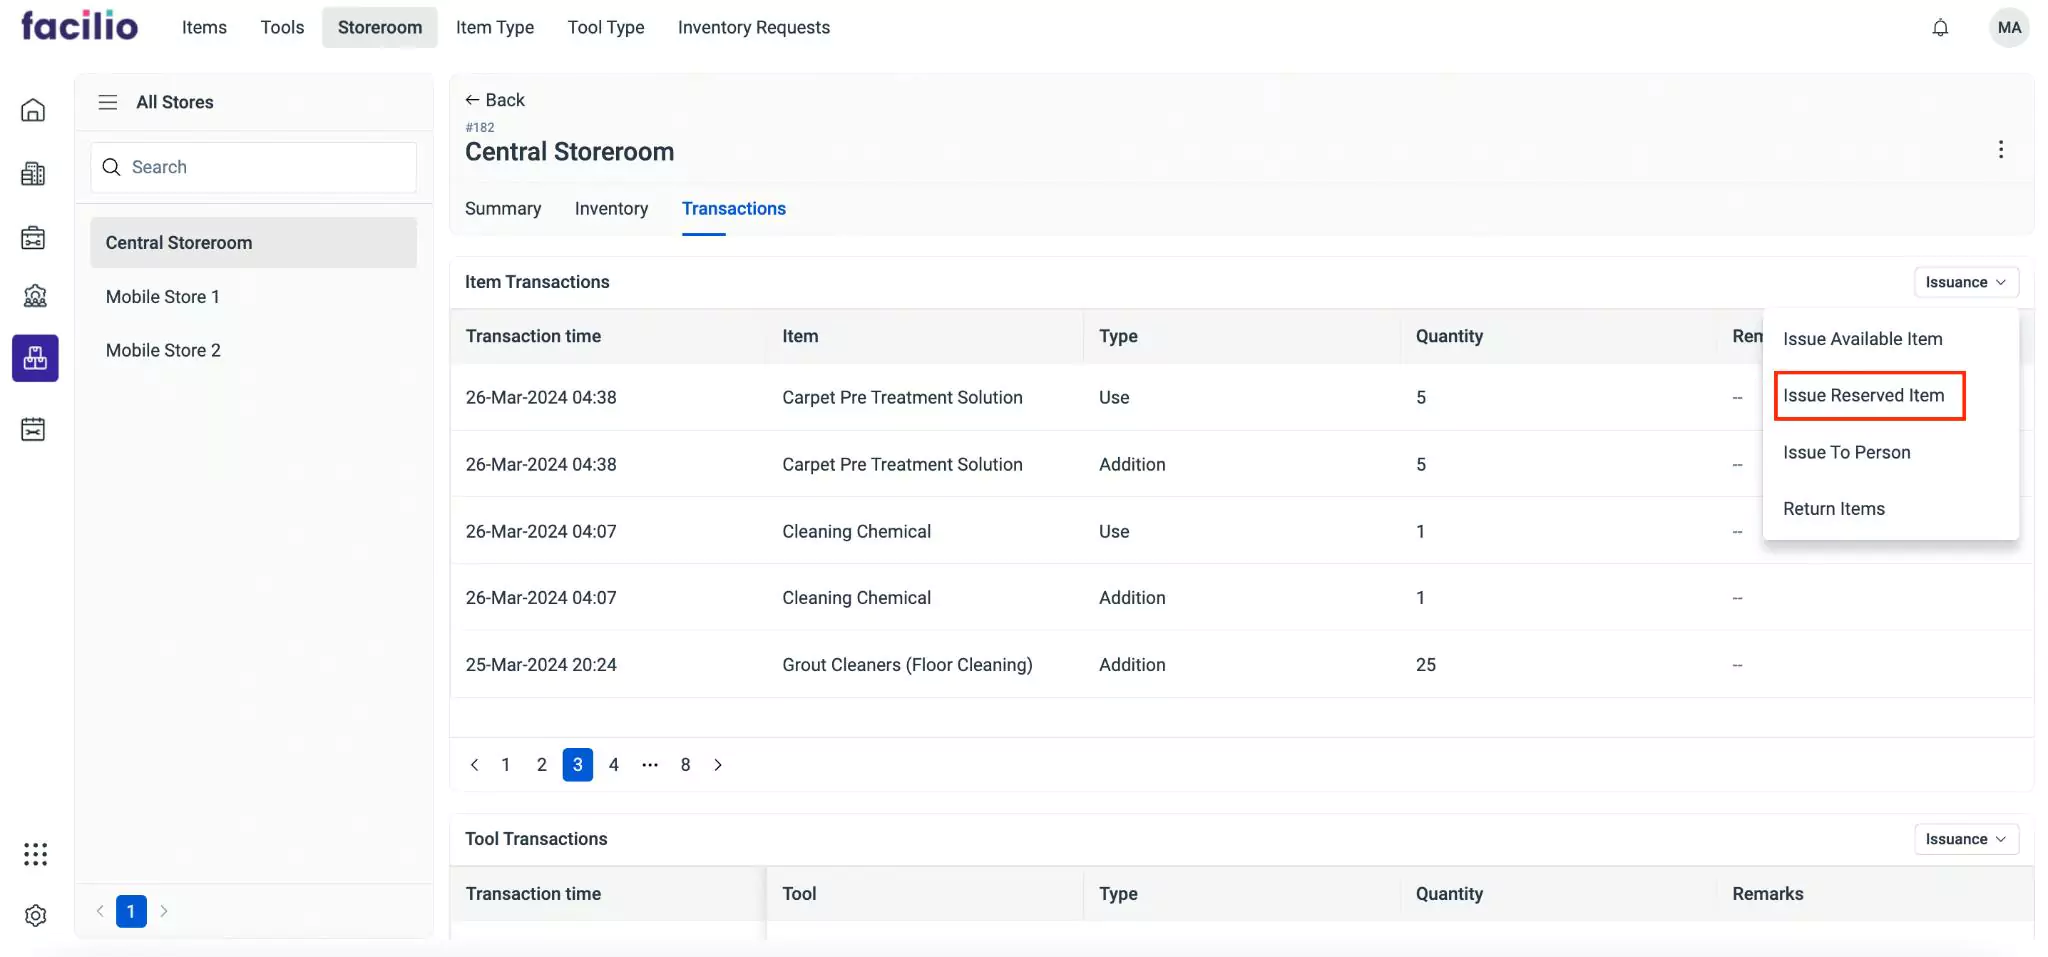
Navigate to the Issuance drop-down in Item Transactions section and click Issue Reserved Item. The Select Reserved Items screen appears as shown below.
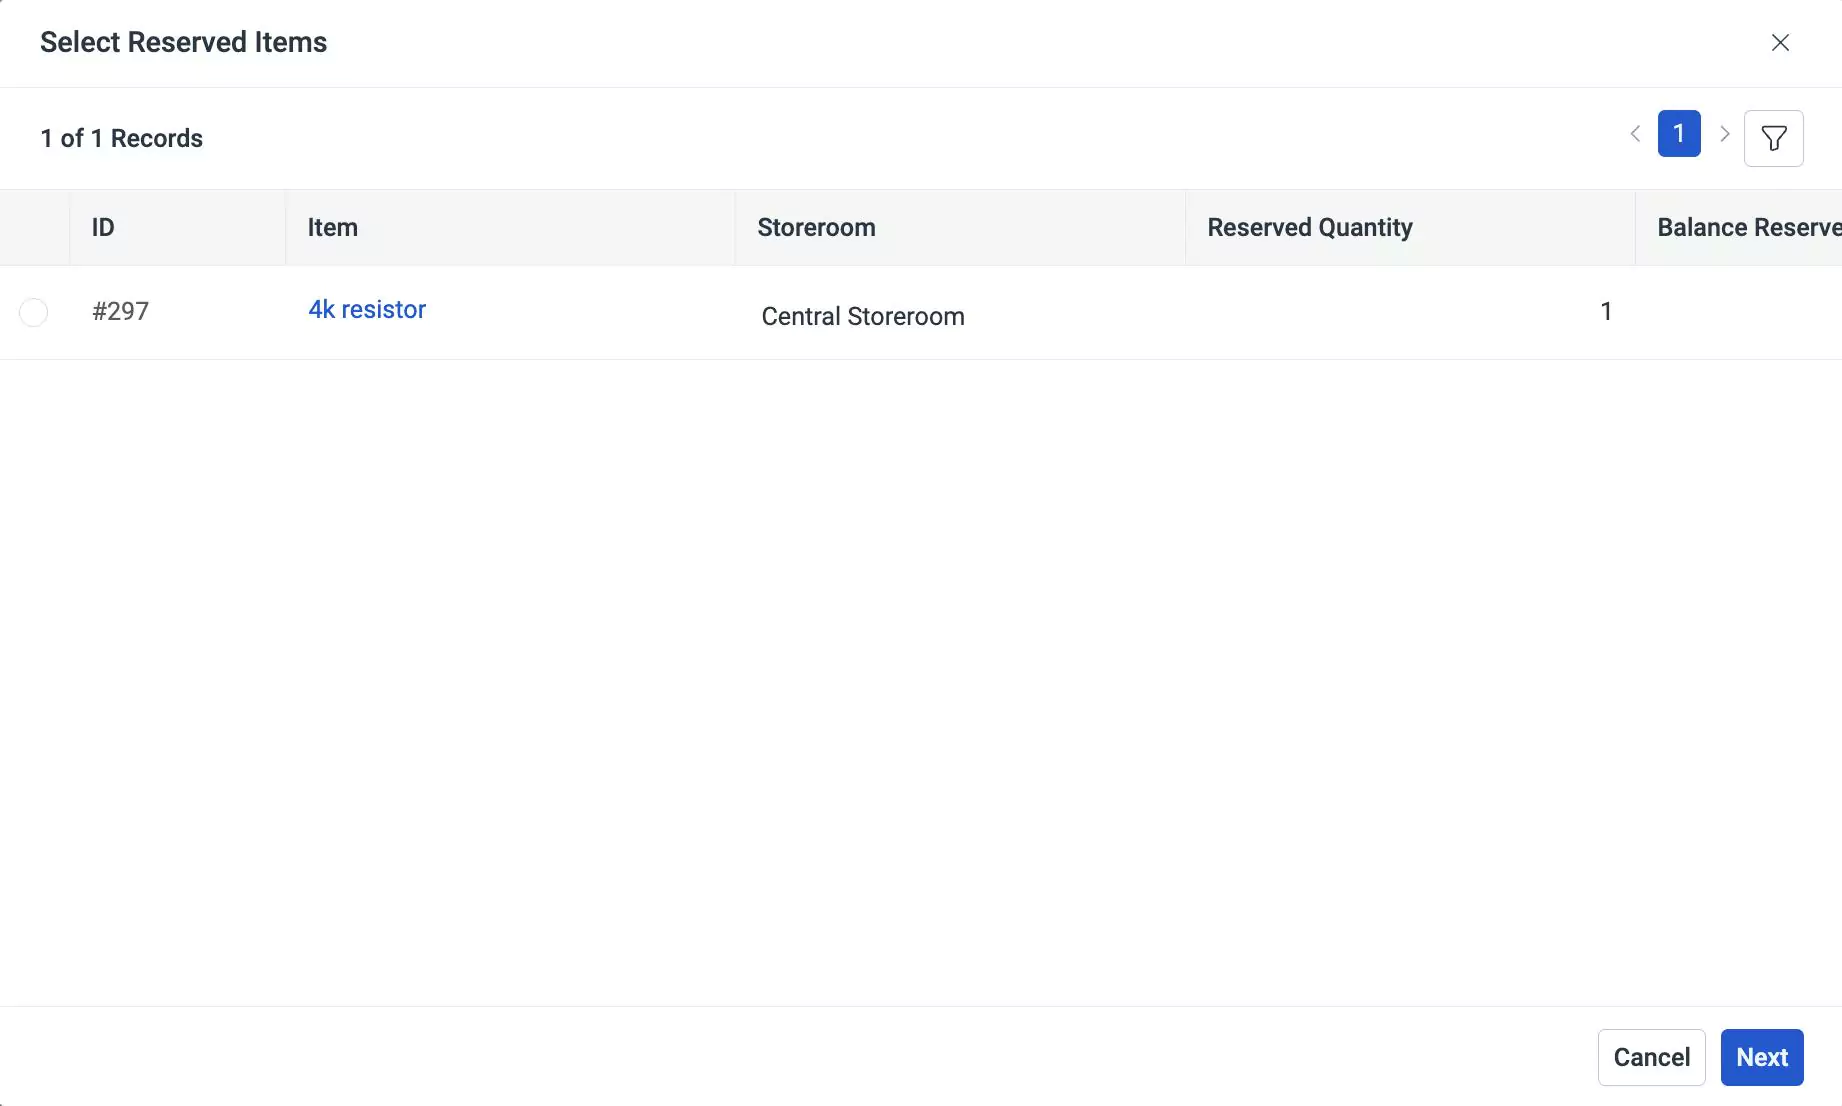
Select the item and click Next. The Issue to Workorder screen appears as shown below.
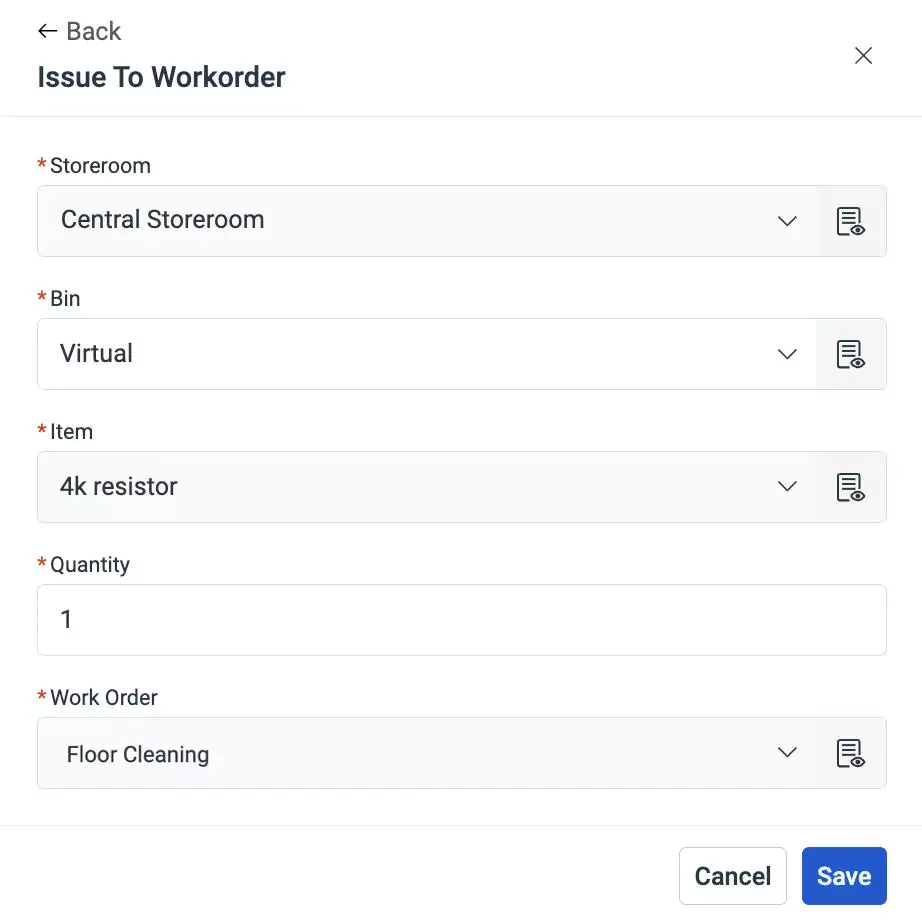
Update the following field in this screen:
Storeroom - The location from where items are issued to the work order
Note:This field is auto-filled and cannot be modified.Bin - A specific subdivision within a storeroom where items are stored
Item - The item to be issued to a work order
Note:This field is auto-filled and cannot be modified.Quantity - The number of items reserved to be issued to the work order.
Note:This field is auto-filled with the reserved number of items. You can issue only the reserved number of items.Work Order - The work order that requires the reserved items
Note:This field is auto-filled and cannot be modified.
Click Save. The reserved item is issued to the work order and recorded in the Transactions section of the details page.
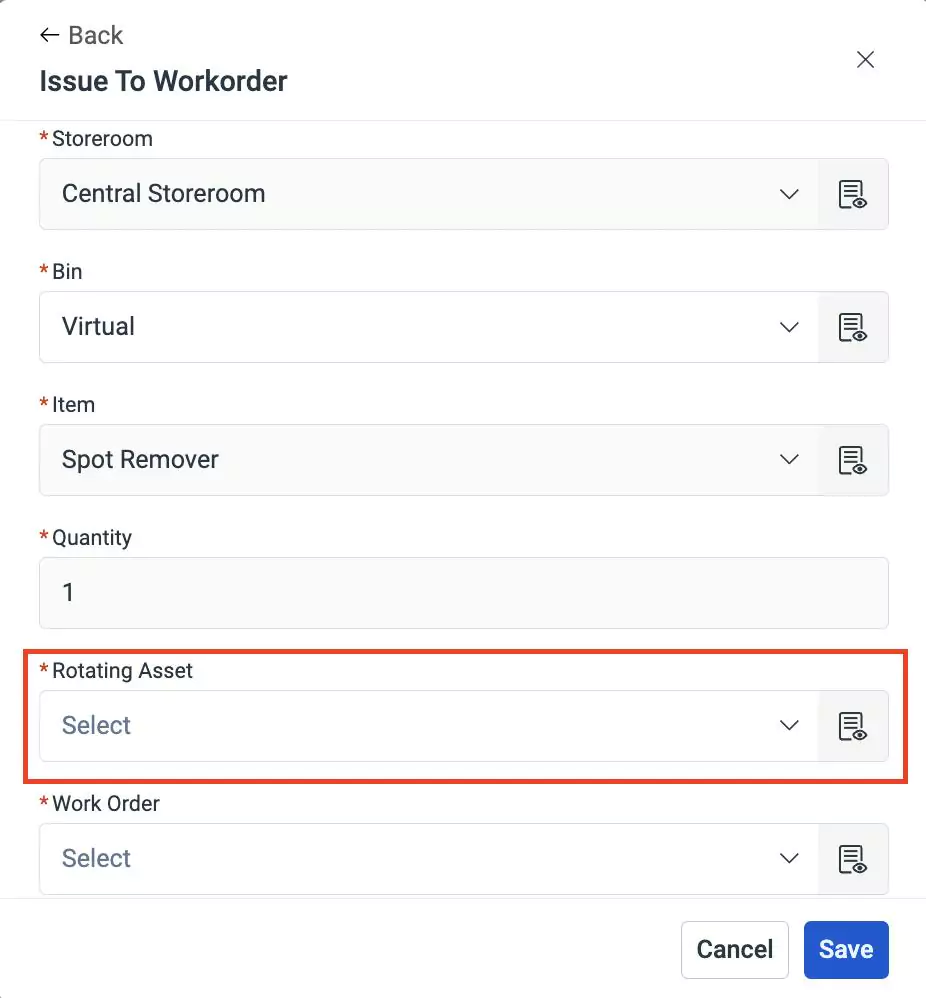
The Rotating Asset field displays assets that are mapped as selected rotating items. You can select the required item and complete the issuance process.
Issuing to Person
Issuing items/tools to a person is the process of providing a specific item/tool from the inventory to an individual for a work order or a task. This action involves fulfilling a request to issue a particular item/tool from the inventory stock and assigning it to the designated user.
A sample illustration of issuing an item to a user is illustrated below.
To issue an item to a user,
Select the required storeroom from the All Stores list. The details page of the selected storeroom appears as shown below.

Navigate to the Transaction section. The list of items and tools transactions associated with the storeroom are displayed as shown below.
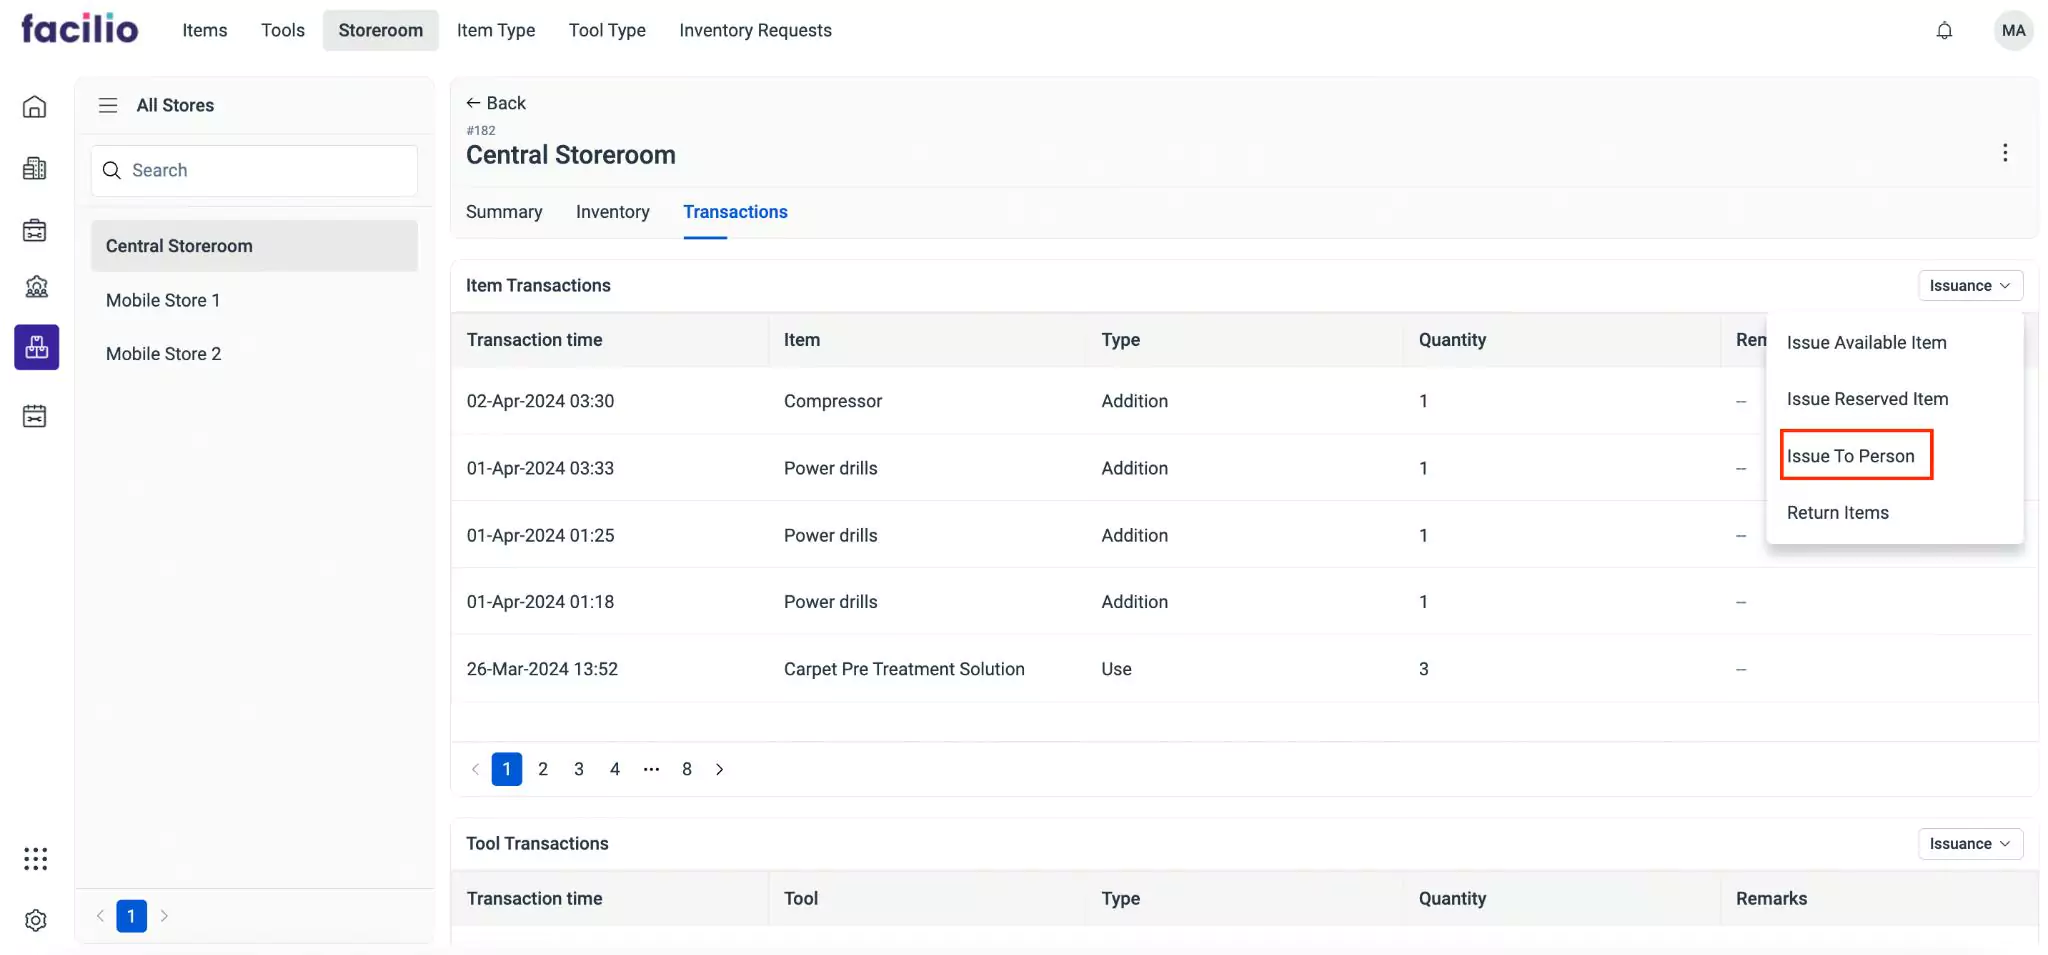
Navigate to the Issuance drop-down in Item Transactions section and click Issue to Person. The Issue To User screen appears as shown below.
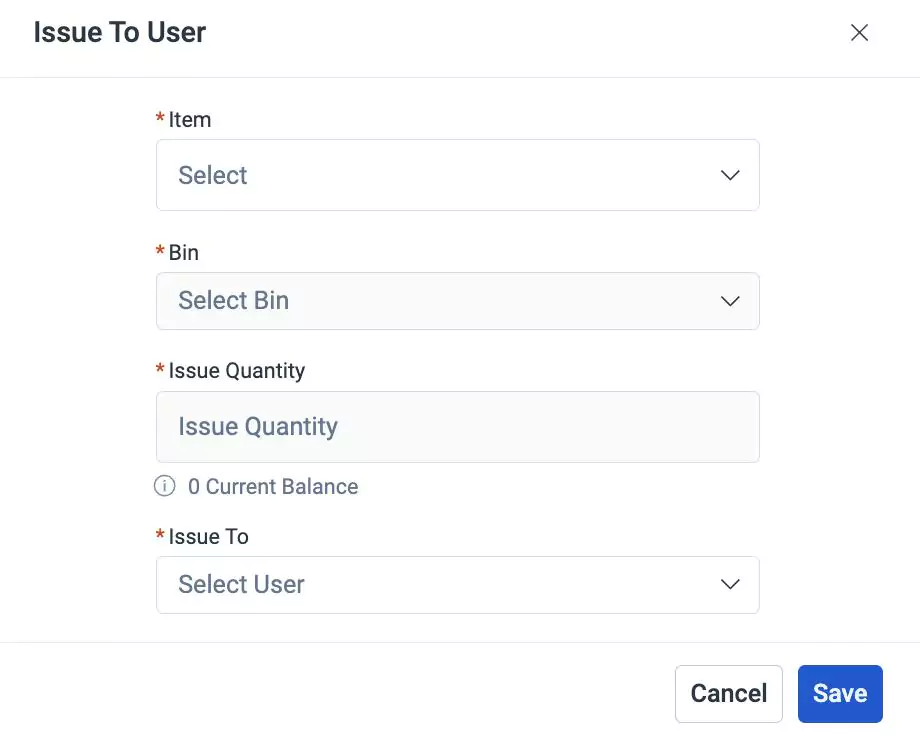
Update the following fields in this screen:
Item - The item to be issued to a user. Select the item to be issued to a user
Note:Only when an item is selected, the Bin field is enabled for editing.Bin - A specific subdivision within a storeroom where items are stored
Note:Only when a bin is selected, the Issue Quantity field is enabled for editing.Issue Quantity - The number of items to be issued to a user. Select the number of required items.
Note:The current balance of the item is displayed below this fieldIssue To - The user to whom the item must be issued
Click Save. The item is issued to a user and recorded in the Transactions section of the details page.
Returning Items/Tools
Returning items/tools is to send previously acquired items/tools back to inventory. This action is performed by the user or buyer when items/tools are no longer needed or defective. The return of items/tools ensures proper tracking and accounting of the returned items and also helps maintain inventory accuracy.
A sample illustration of returning an item is illustrated below.
To return an item,
Select the required storeroom from the All Stores list. The details page of the selected storeroom appears as shown below.
Navigate to the Transaction section. The list of items and tools transactions associated with the storeroom are displayed as shown below.
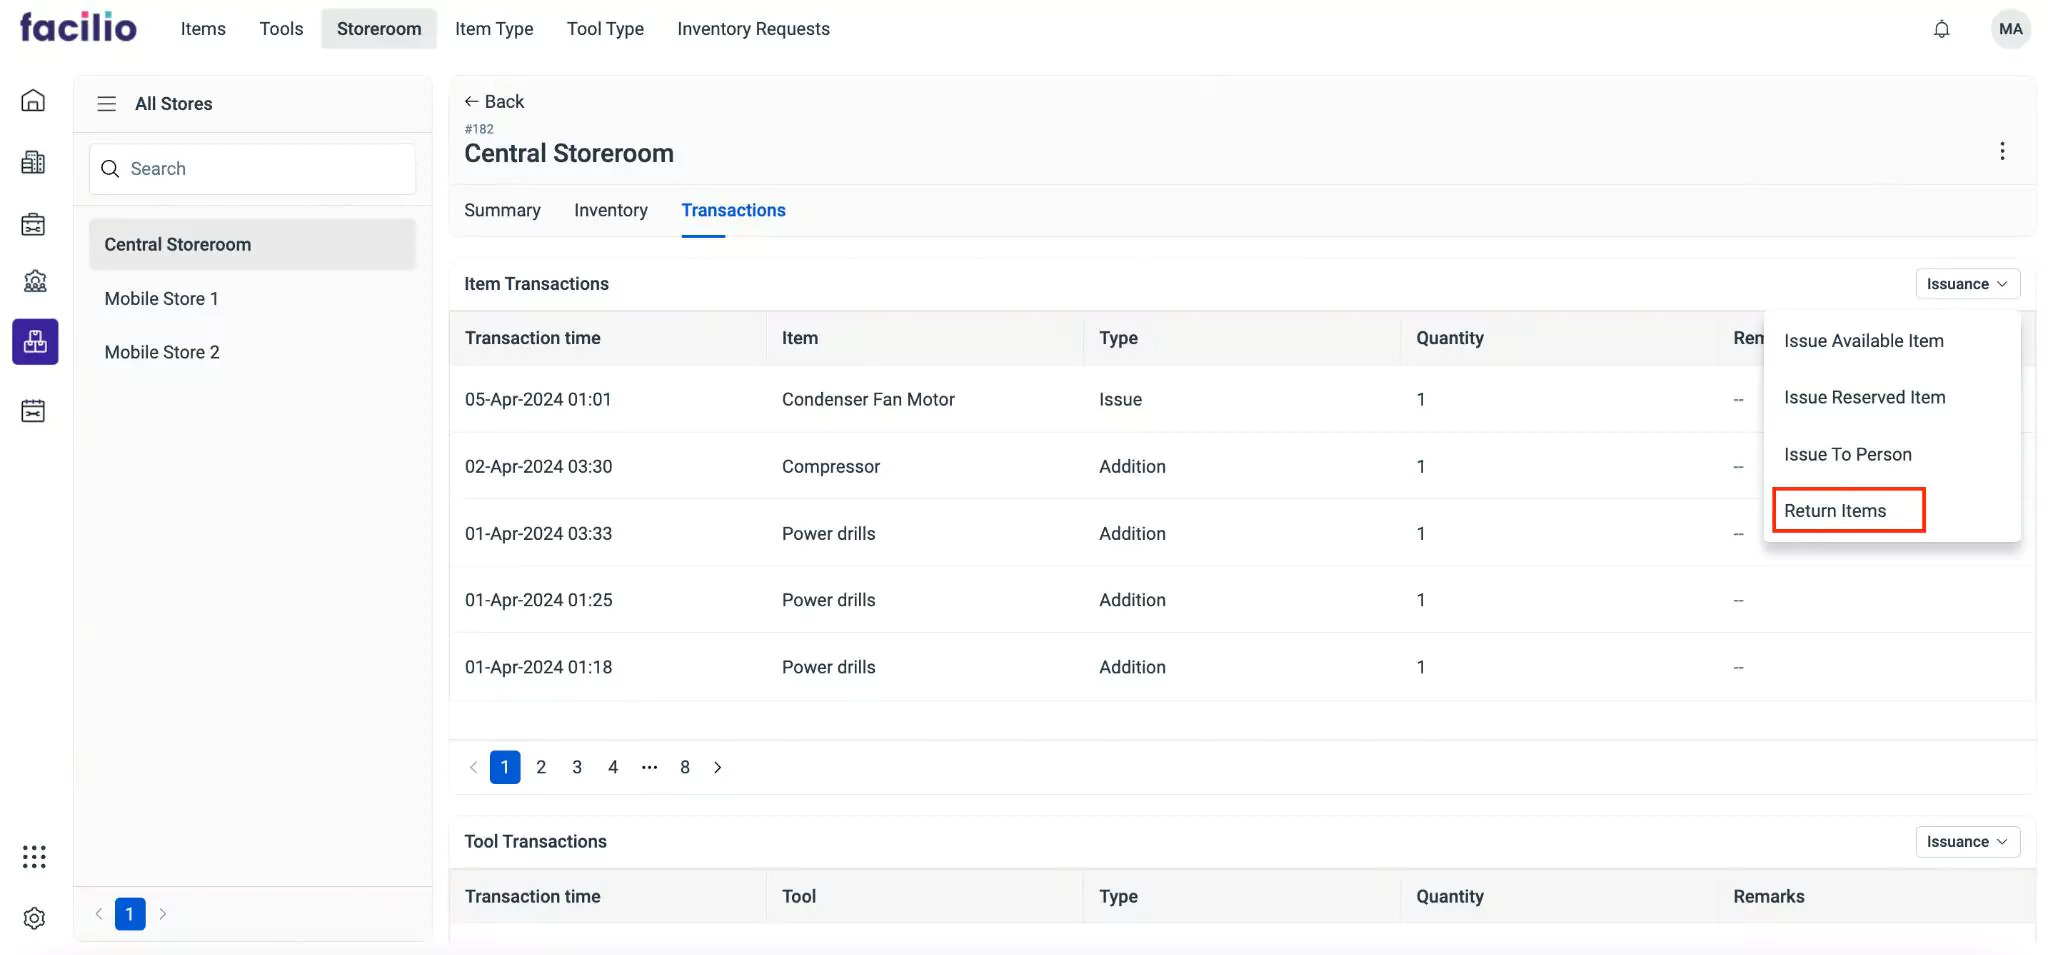
Navigate to the Issuance drop-down in Item Transactions section and click Return Items. The Return Items screen appears as shown below.

Select an item from the Select Item drop-down list at the top left of the screen. The issued item appears as shown below.
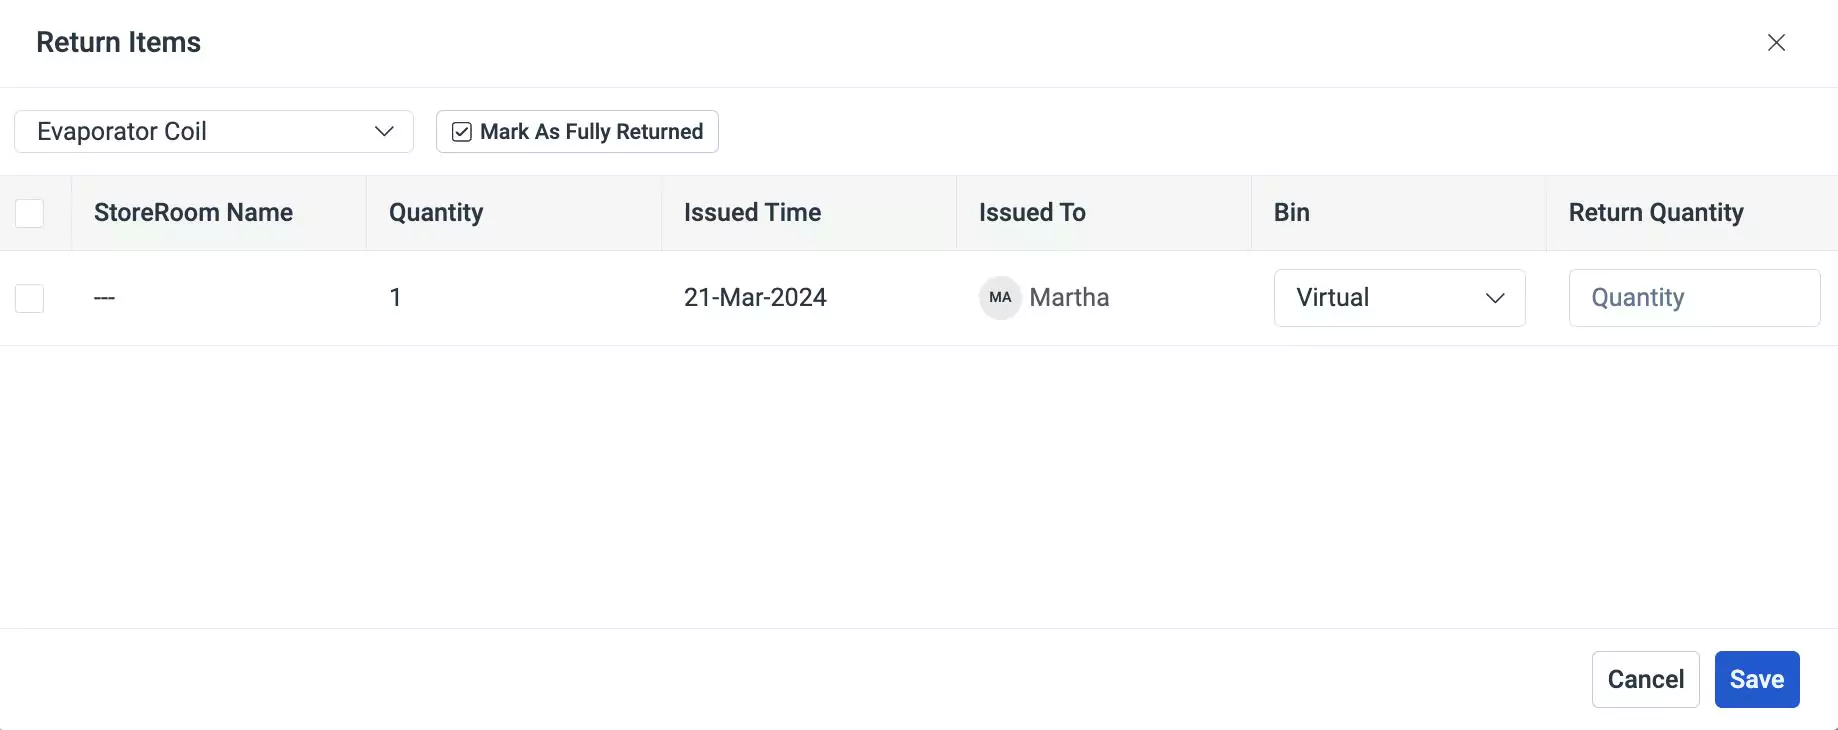
Select an item and update the number of items to be returned in the Return Quantity field.
Note:Select Mark as Fully Returned on top of the screen to return all items.Click Save. The item is returned to the storeroom and recorded in the Transactions section of the details page.