Configuring a Tool Type
Every unique tool is recorded as a tool type. These tool types serve as the cornerstone of your inventory management system, enabling systematic and organized oversight of essential equipment and resources. You can stock tools to a tool type and enhance the overall operational efficiency by ensuring that the right tools are readily available for the task at hand.
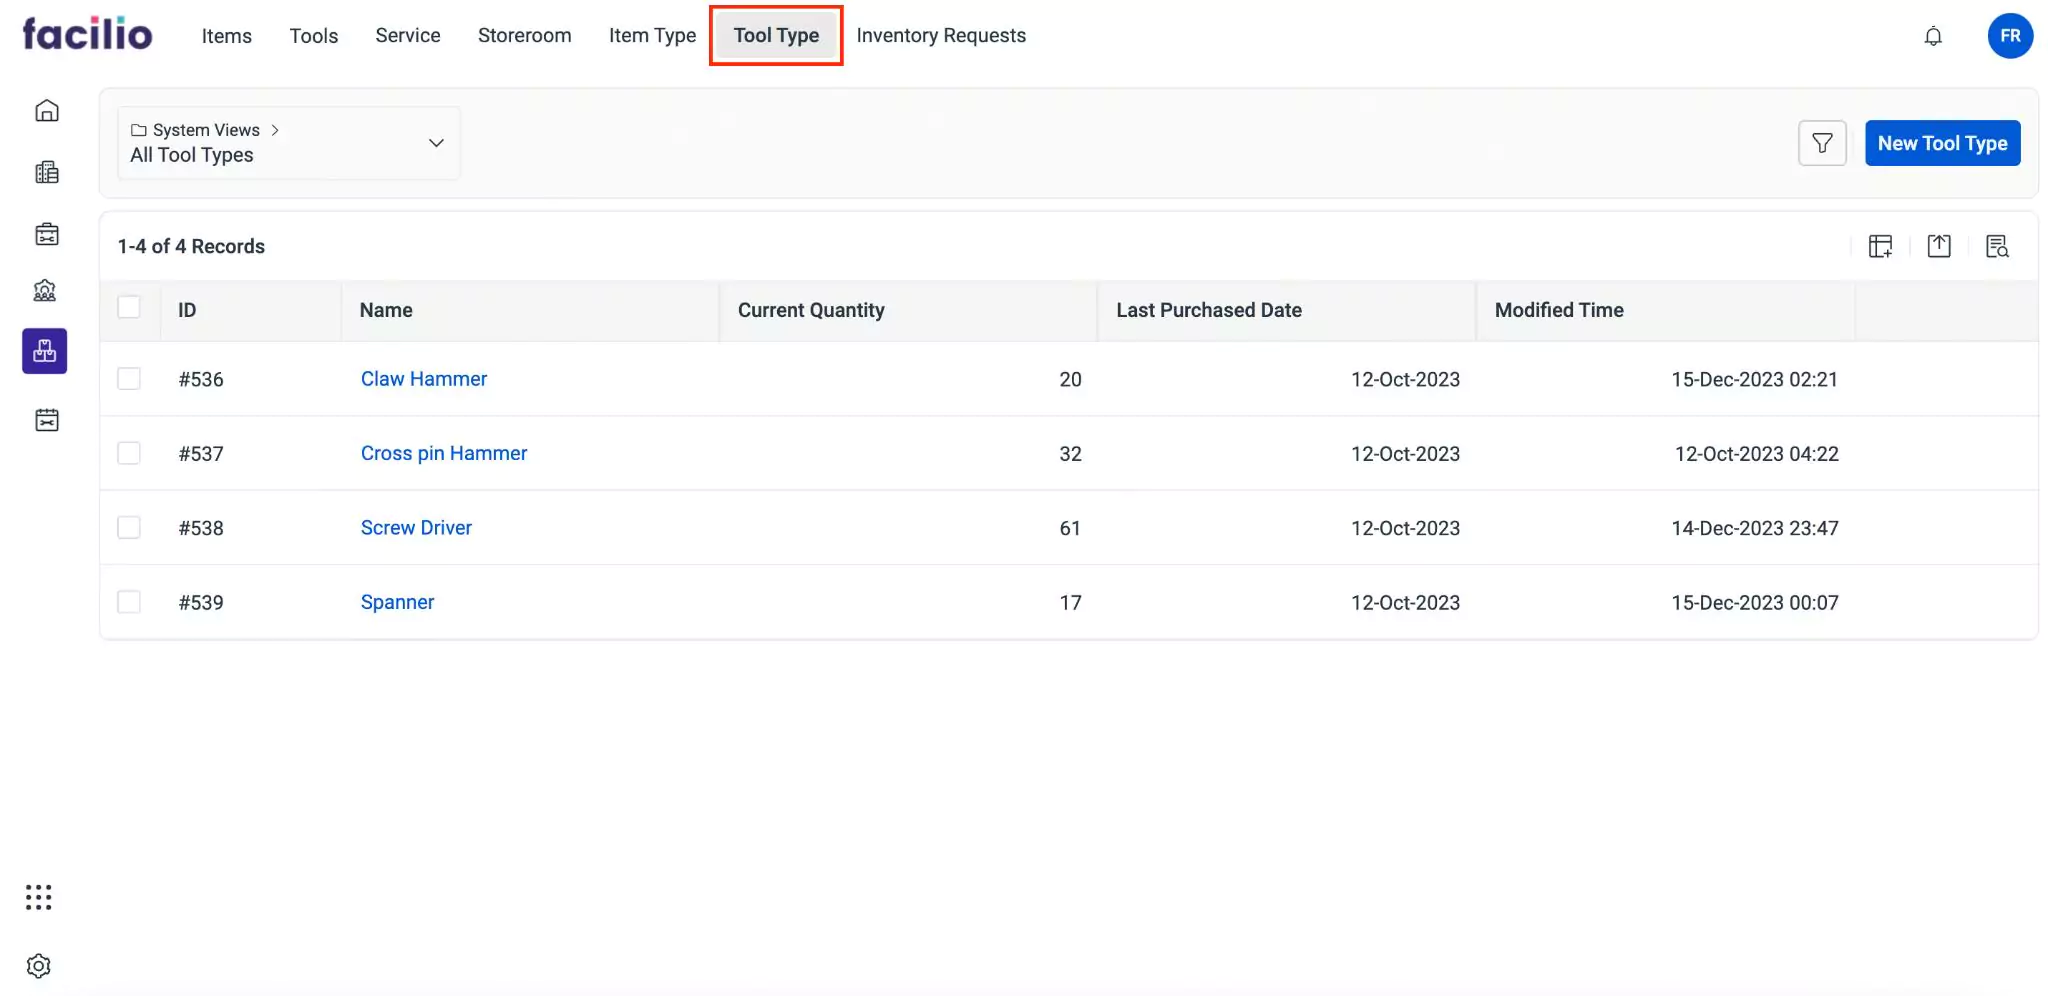
To access tools type, navigate to the Tool Type section. The All Tool Types screen appears with the list of tool types as shown below.
The upcoming sections explain how to add a tool type and stock tools.
Adding a Tool Type
The tool type serves as a fundamental cornerstone in organizing and managing stocked tools with precision and efficiency. The creation and management of tool types empower you to establish an effective system for tracking and managing the movement of inventory tools to have a better understanding of usage patterns.
To add a tool type,
Click New Tool Type from the All Tool Types screen. The Tool Type screen appears as shown below.
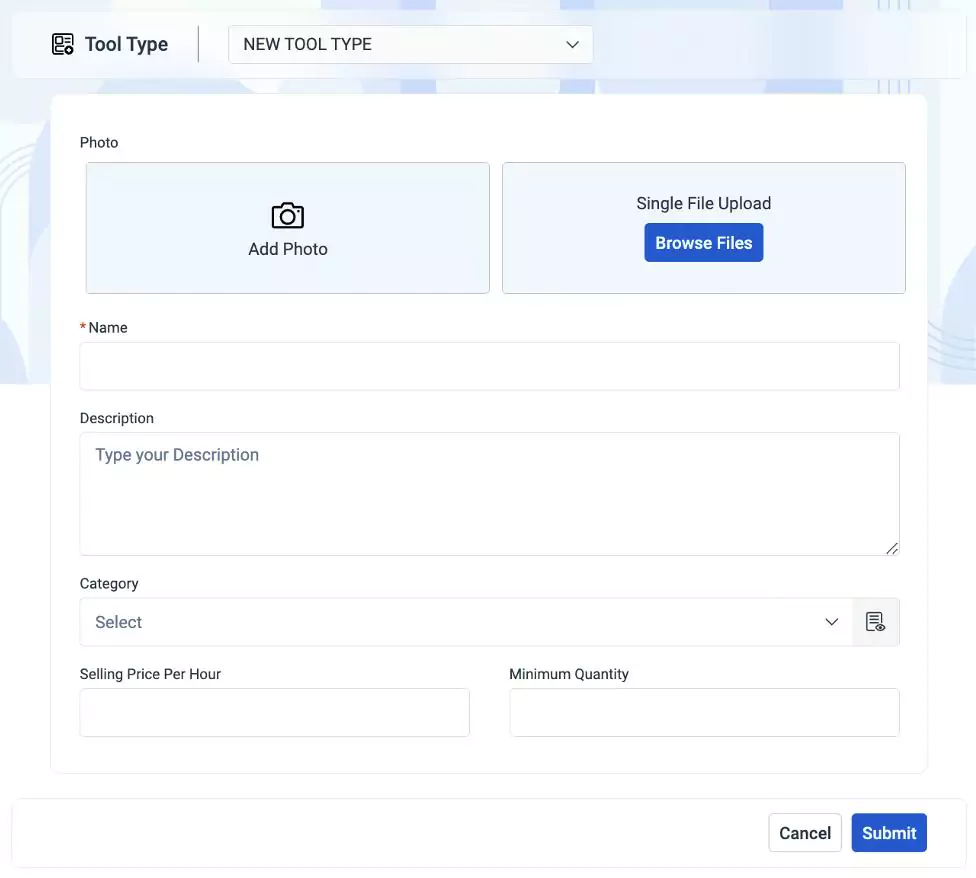
Update the following fields in this screen.
- Photo - An image that represents a specific tool type
- Add Photo - To click and upload image instantly
- Single File Upload - To browse and upload a relevant file
- Name - A label to identify the tool type
- Description - A short note that specifies the information of a tool type
- Category - The classification to which the tool belongs. For example, Power drill
- Selling Price Per Hour - The cost of the tool per hour
- Minimum Quantity - The minimum quantity of tools required in the inventory
- Photo - An image that represents a specific tool type
Click Submit. The details page appears as shown below.
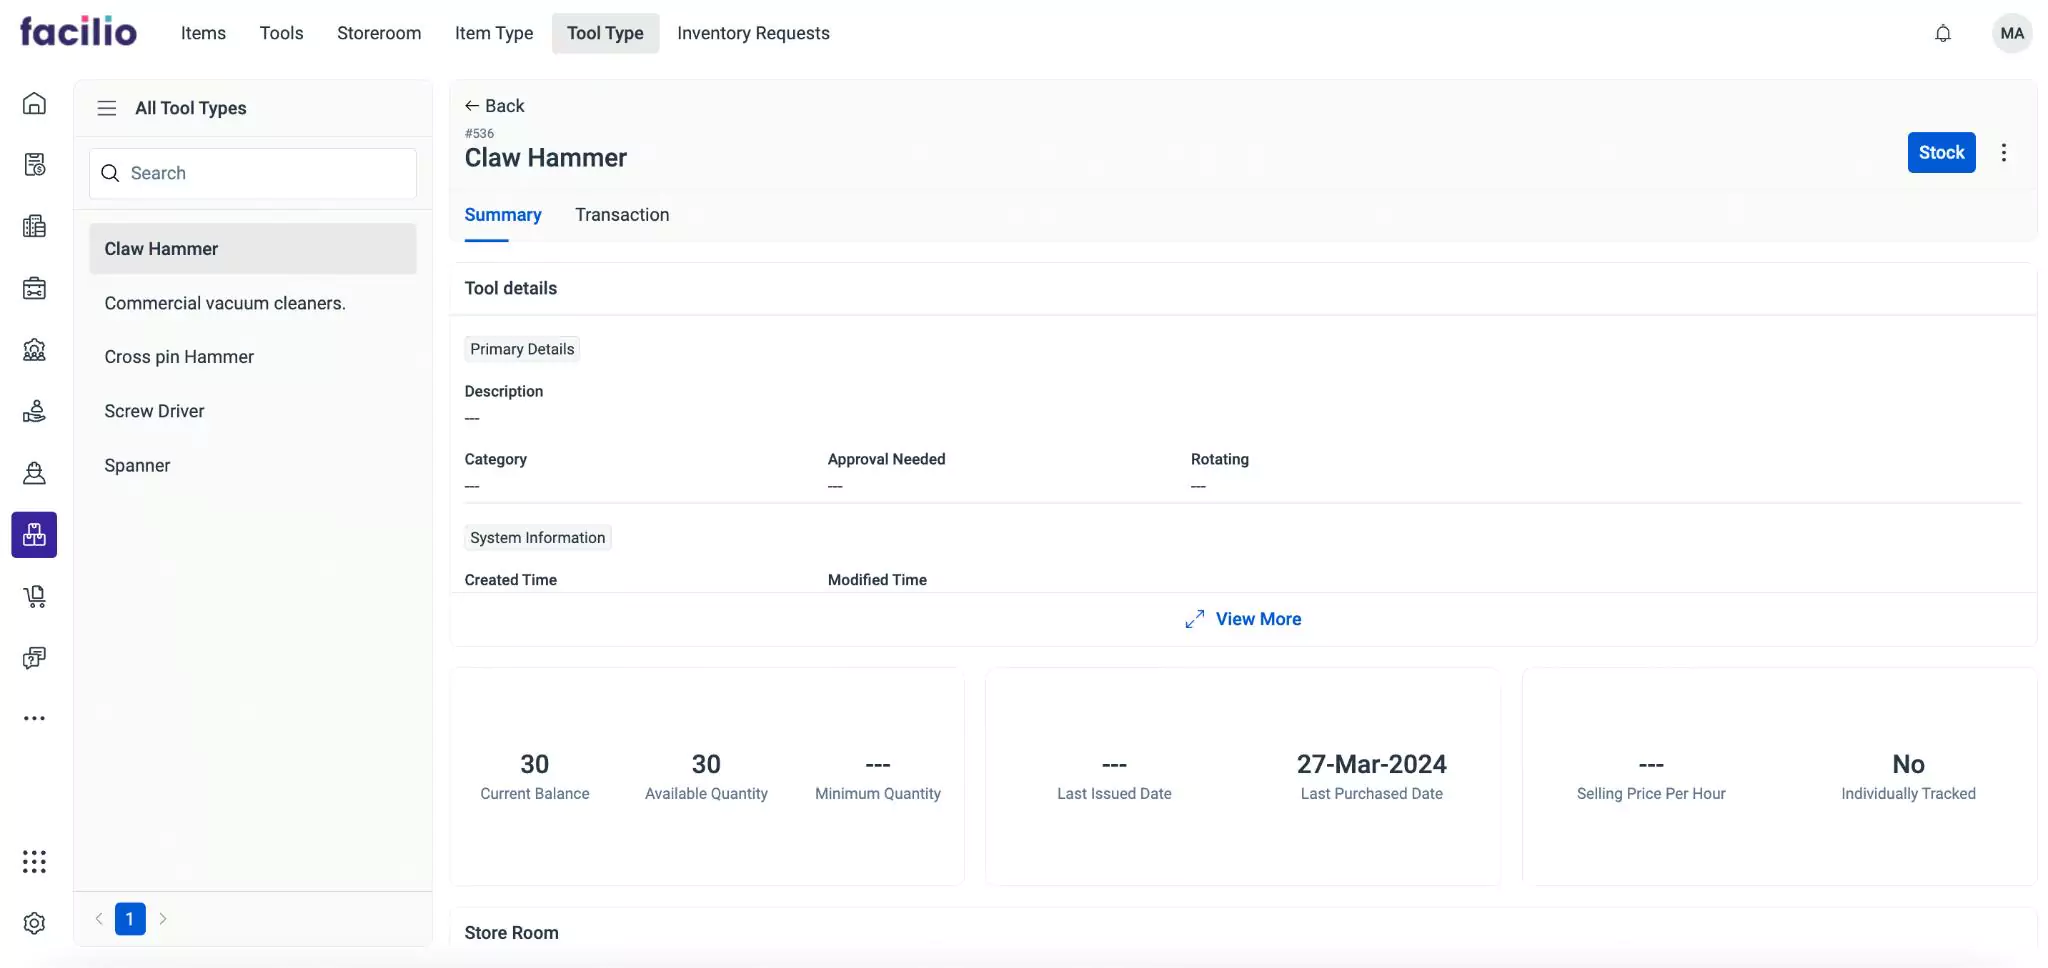
You can stock tools using the Stock button from this page. Read to the Stocking Tools section for more information.
You can click the
 (Vertical ellipses) icon from the top right of the details page and select Edit to modify details related to the selected record.
Stocking Tools
The process of storing tools in inventory involves acquiring, distributing, and managing tools within designated storage locations. By maintaining a collection of tools within the inventory system, organizations can address tasks seamlessly without encountering shortages or disruptions due to missing tools at operational sites. Storing tools enable quick response to customer demands, ensuring that field agents have access to the required tools without delay. Once the tools are no longer needed at the work location, they can be returned to the inventory, completing the cycle of usage and replenishment.
To stock tools,
Select the required tool type from the All Tool Types list. The details page of the tool type appears as shown below.

Click Stock at the top right of the screen. The Stock Tool screen appears as shown below.
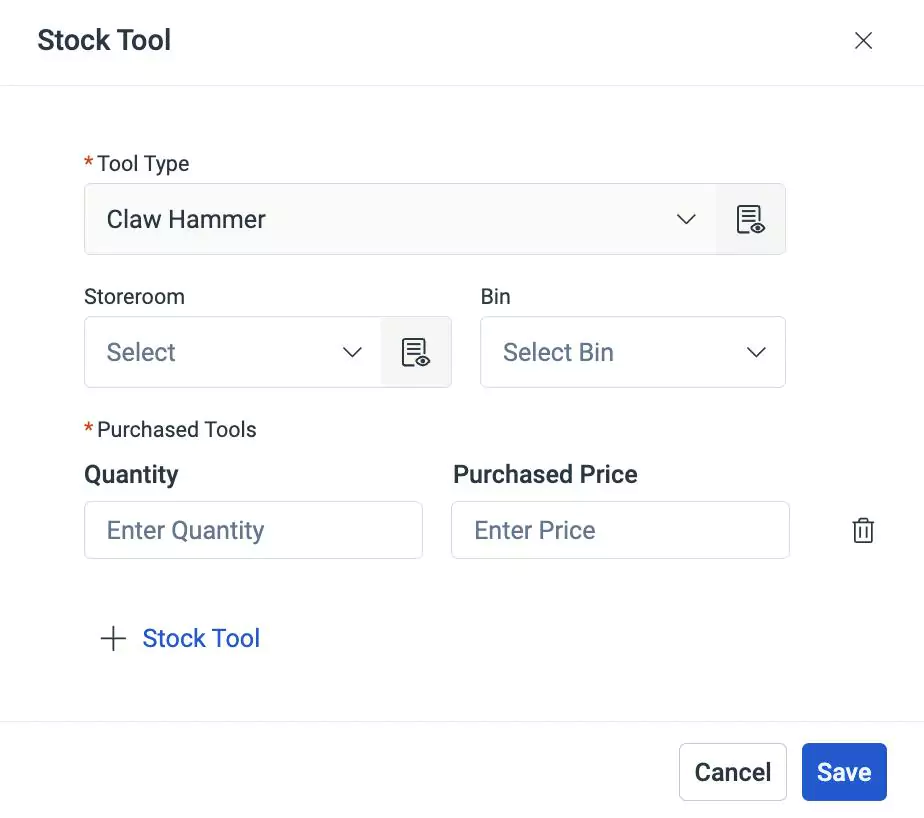
Update the following fields in this screen:
- Tool Type - The name of the tool type
Note:This field is auto-filled and cannot be modified.- Storeroom - The physical location where tools are stored within the inventory
- Bin - A specific subdivision within a storeroom where tools are stocked
- Purchased Tools - The tools that were procured from the supplier or vendor. Update the following fields:
- Quantity - The number of tools to be purchased
- Purchased Price - The cost of one unit of the tool
You can use the
 button to stock more tools with different price and the
  (Delete) icon to remove the stocked tool.
Click Save. The required number of tools are stocked for the tool type.