Adding a New Asset
Any new asset in a field service management must be registered with the application to maintain the updated list of assets that helps to track and manage their life cycle effectively.
To create a new asset,
Navigate to the Assets section. The configured asset appears as shown below.
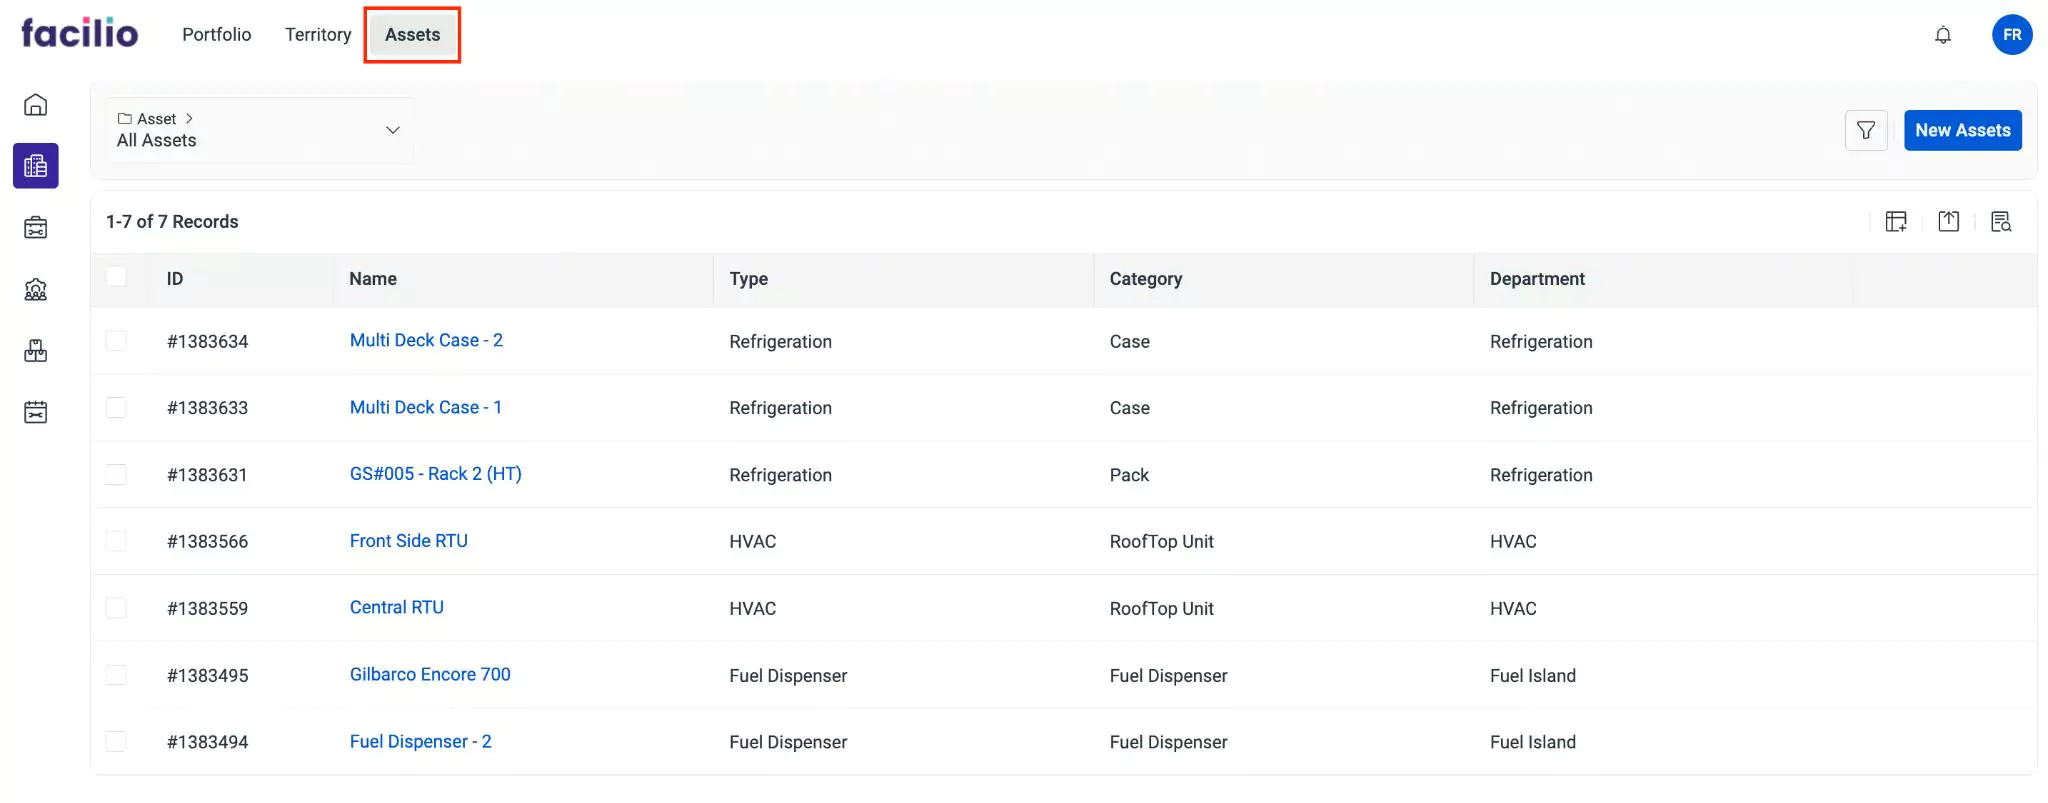
Click the New Assets at the top right of the screen.
Select the Category in the Categories window and click Confirm. The Standard form to create an asset is displayed as shown below.
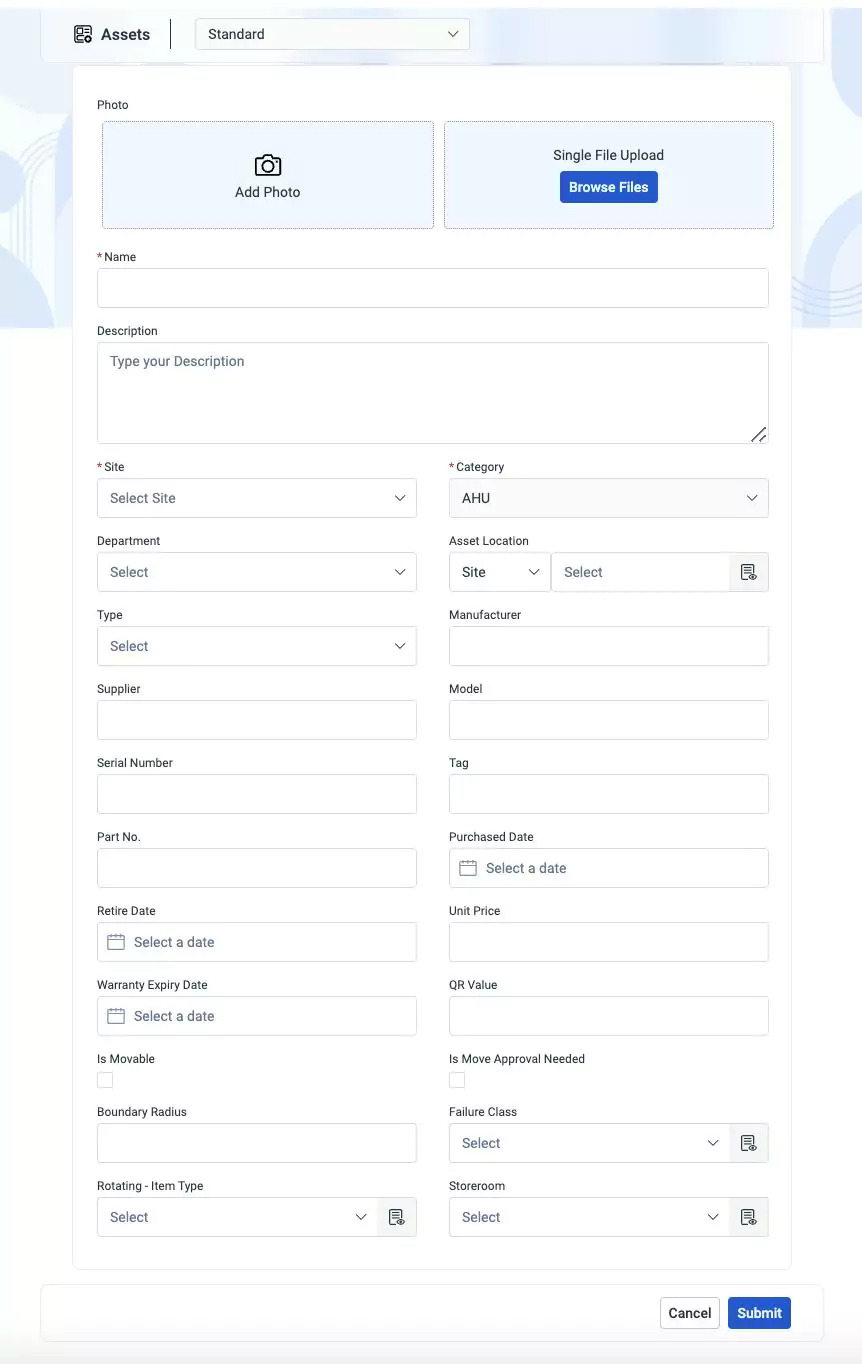
Update the required fields in this screen:
Photo - An image to identify a specific asset
- Add Photo - To click and upload image instantly
- Single File Upload - To browse and upload a relevant file
Name - A label to identify the asset
Description - A short note explaining the purpose of the asset
Site - The site where the asset is present
Category - The classification of the asset being added
Department - A group of people dealing with particular activities and respective assets
Asset Location - The location where the asset is present
Type - The classification or category of a particular asset
Manufacturer - The company or entity that produced the asset
Supplier - The entity that distributes the asset to the end users
Model - The name, code, or number that indicates the variant of the asset
Serial Number - A unique identification code assigned to an individual asset by the manufacturer.
Note: Mostly, it is a combination of letters and numbersTag - A label or badge for the asset that has the details (like, UPC/barcode or SKU) to identify the item
Part No - A unique identifier assigned to a specific part or component of an asset
Purchased Date - The date on which an asset was acquired or purchased
Retire Date - The date on which an asset is retired or taken out of service
Unit Price - The amount for which the asset was purchased
Warranty Expiry Date - The date on which the support and services for the asset ends
QR Value - The value generated on scanning the asset QR code
Note: The default value is Facilio_Asset ID. You can change the value based on organization requirements.Is Movable - Checkbox to determine whether the asset can be shifted from one place to another
Is Move Approval Needed - Checkbox to determine whether an approval is required to move an asset from one place to another
Boundary Radius - The geographical area within which the asset is expected to operate or be located
Failure Class - The categorization of asset failures based on their cause or behavior
Rotating - Item Type - An asset that serves as a temporary replacement for operational requirements. You can select an item type from the dropdown list.
Storeroom - An inventory area where an asset is stored when it is not in use
Click Submit. The new asset is added to the list of All Assets.