Illustrating Support Email Configuration
The Email Settings module allows you to configure multiple support emails so as to perform various actions. For example, in the XYZ organization, the email received at support.wo@xyz.com can be triggered as a new work order, whereas the emails to support.sr@xyz.com can be reflected as a new service request in the application.
The upcoming sections explain the processes involved in configuring support email in the application.
Step 1: Adding an Email
To begin with the configuration, you should first add the email to this module. To add a support email,
Click ADD EMAIL in the Email Settings screen. The New Email window appears as shown below.
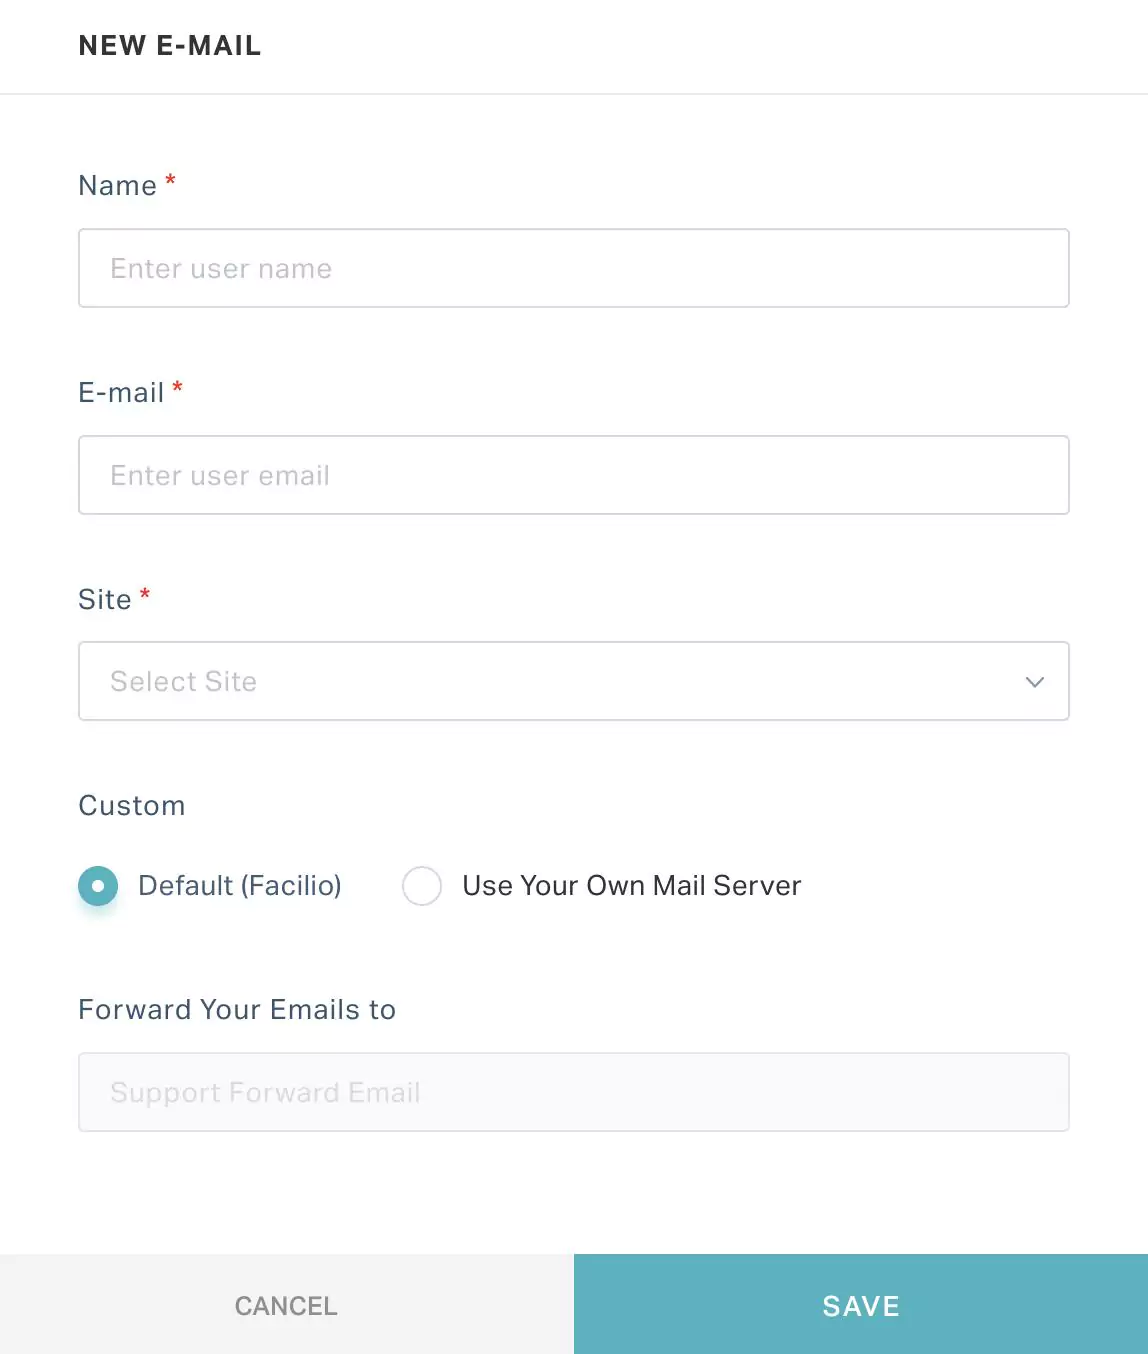
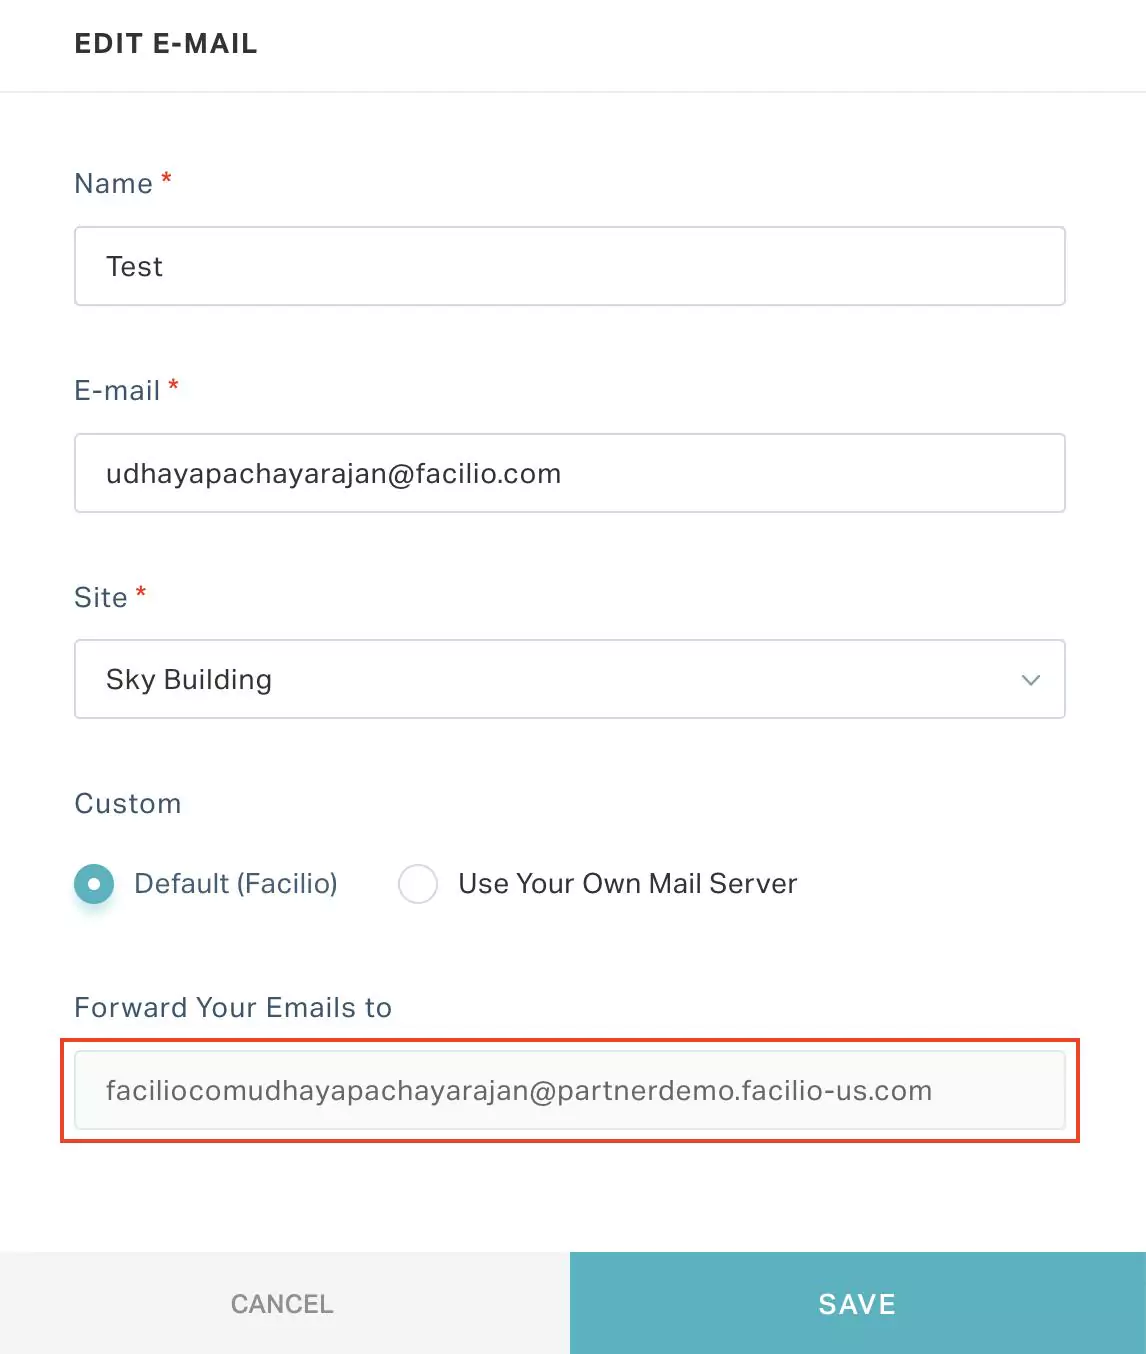
Update the following fields in this screen:
Name - A label that specifies the purpose or identity of the email
E-mail - The email address that will serve as the support email
Site - The location for which the email address is serviceable
Custom (mail server) - The mail server of the support email. You can choose any of the following options:
Default (Facilio) - To choose Facilio as the mail server whose details are configured by default
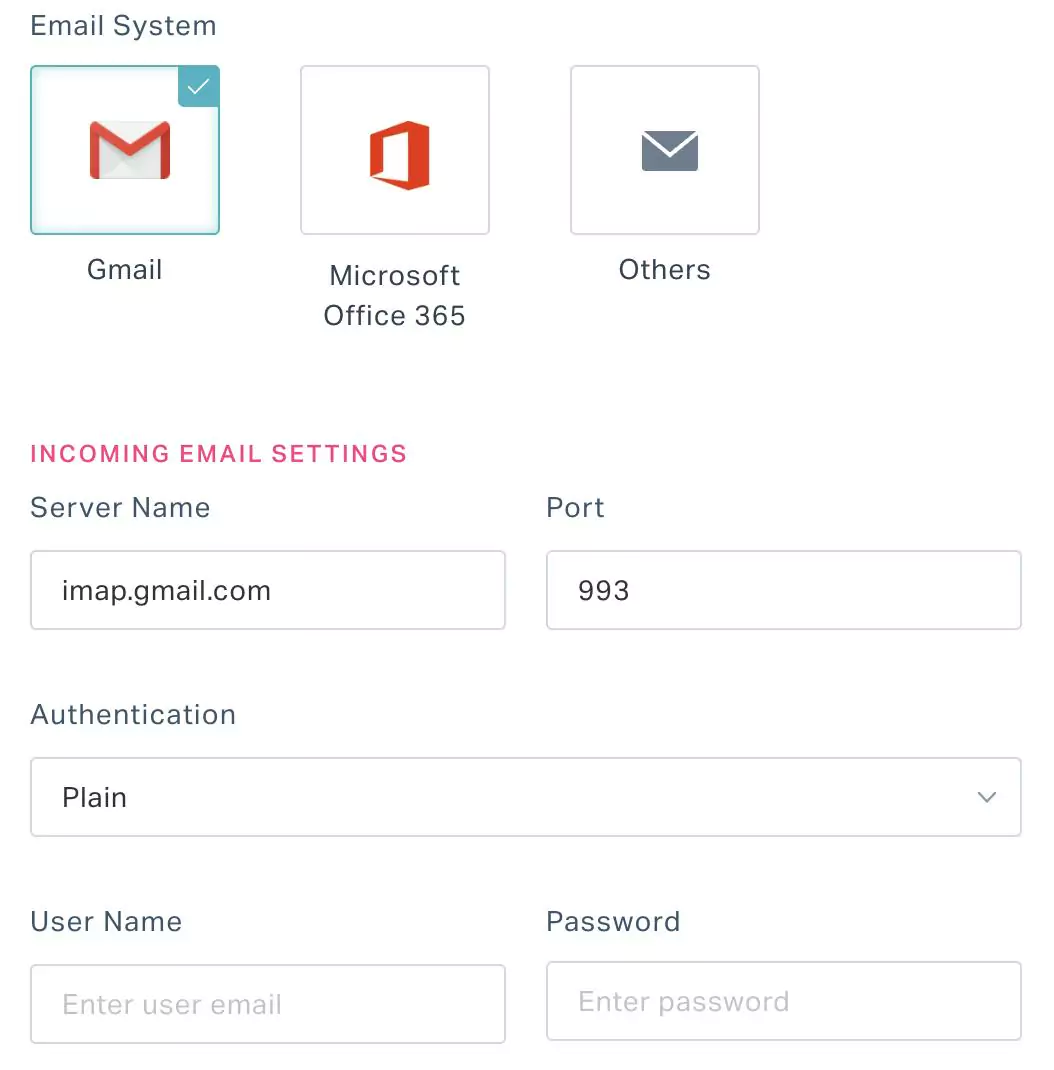
Use Your Own Mail Server - To set up a mail server other than Facilio. If you select this option, you must specify the details such as the server name, port number and other information (as shown in the screenshot below) to complete the mail server configuration.
Forward Your Emails to - The forwarding email address generated as a part of the support email configuration process.
Note: This field is auto-populated on updating the Email field. Read the Configuring Email Forwarding section for more information.
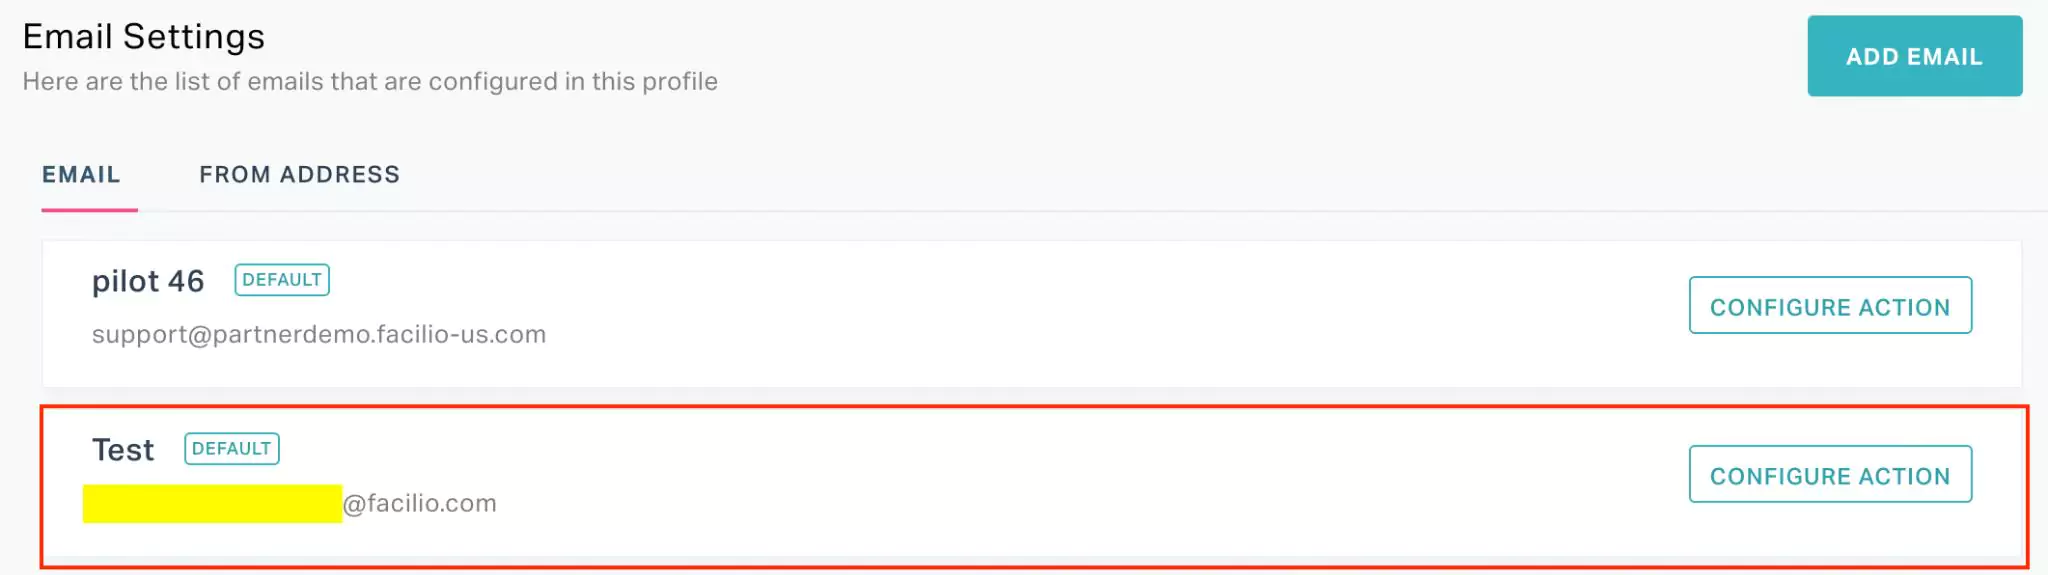
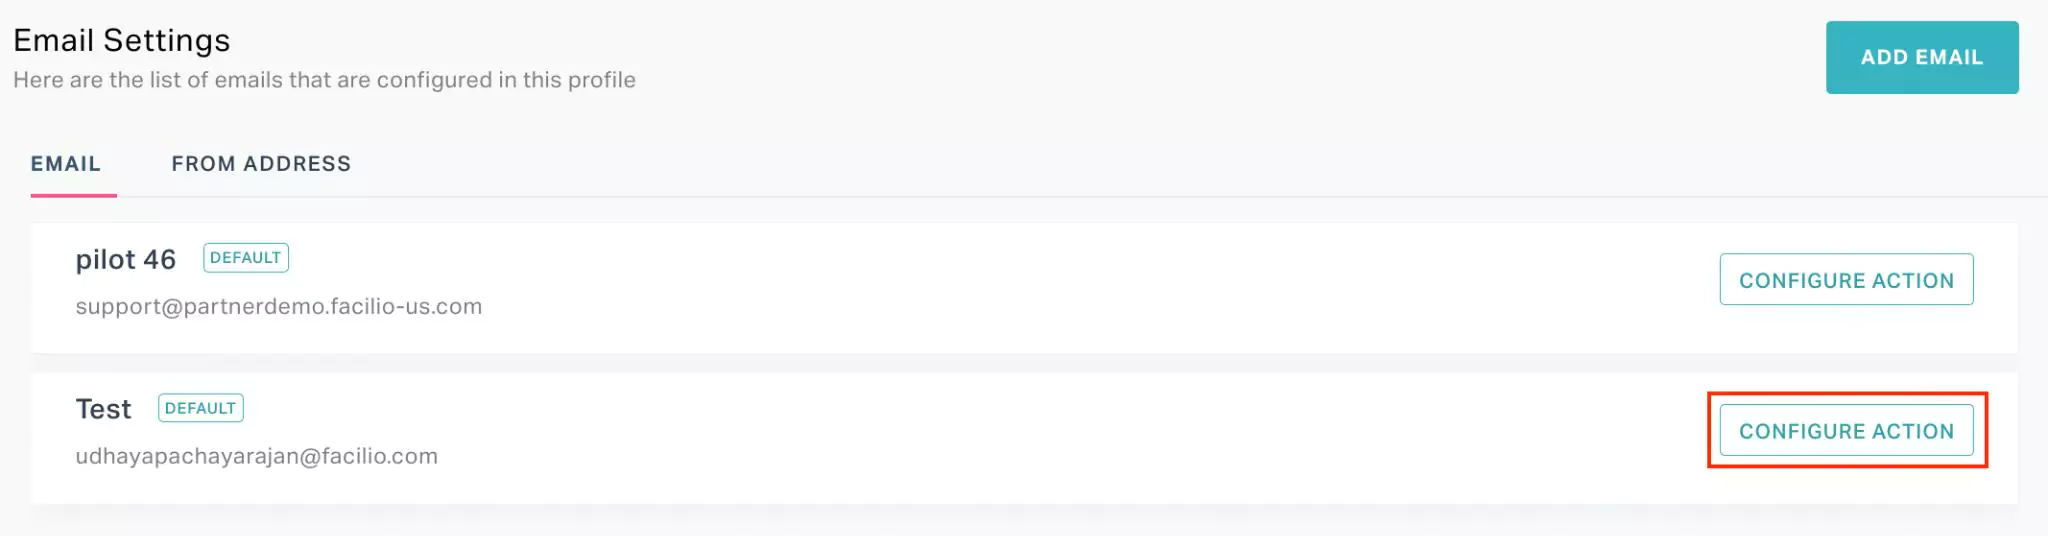
Click SAVE. The email is now added to the Email Settings screen as shown below.
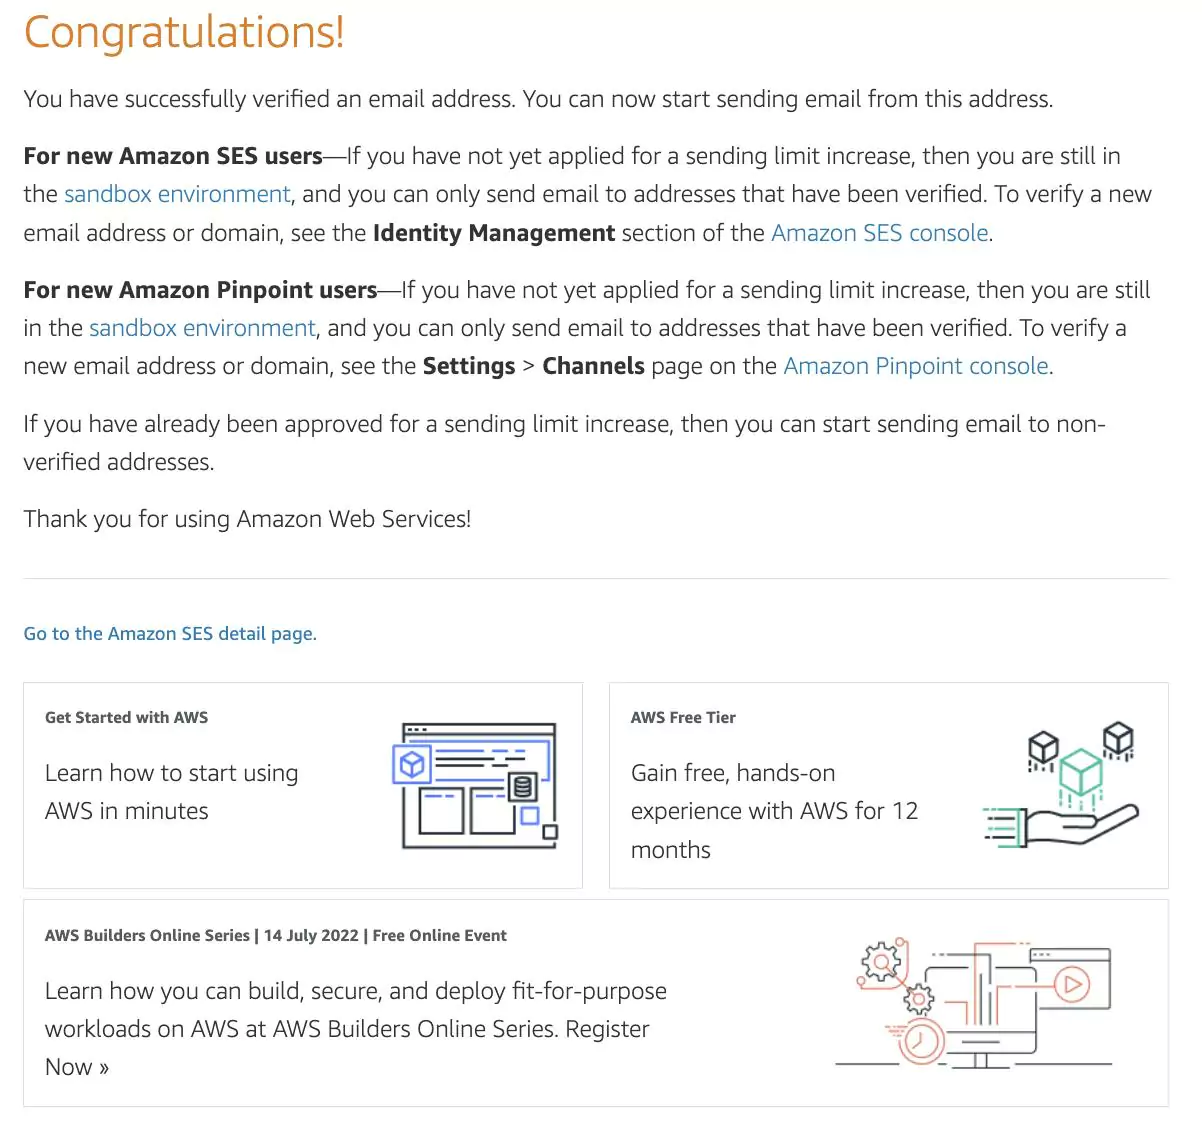
Also, a verification email is triggered as shown below.
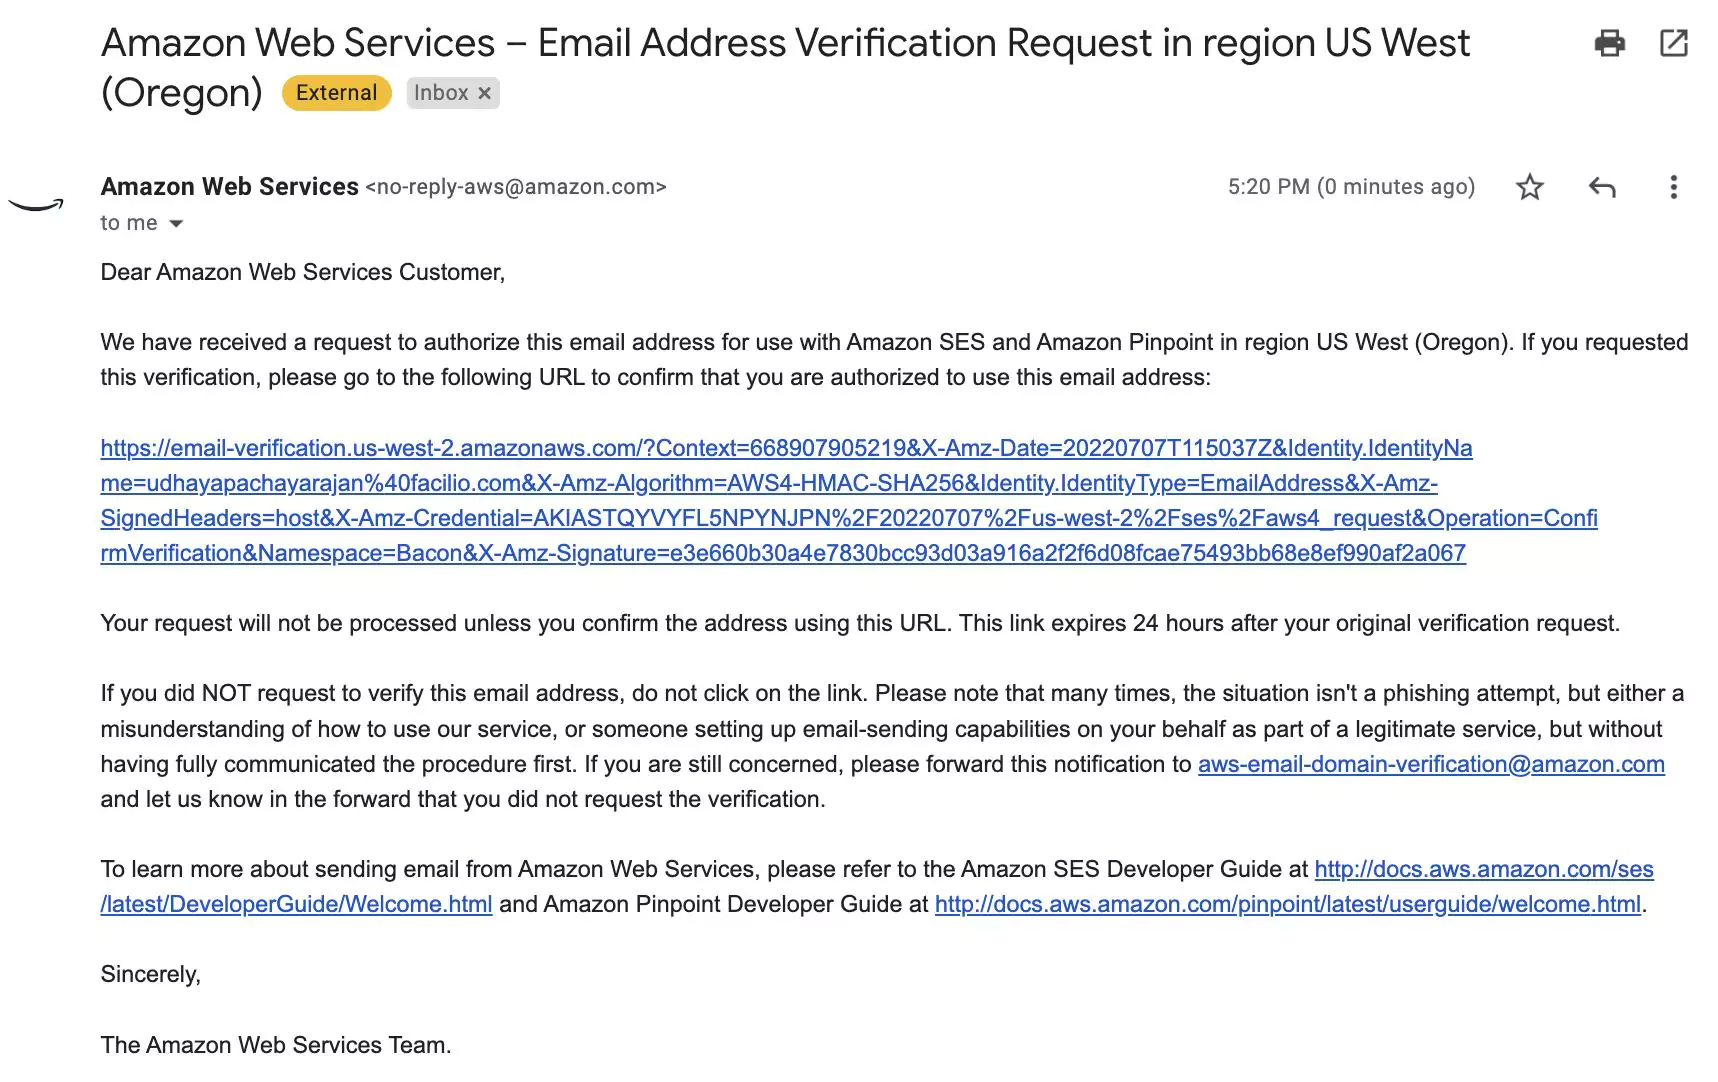
Follow the link in the email to complete the verification. The below message is displayed upon successful verification.
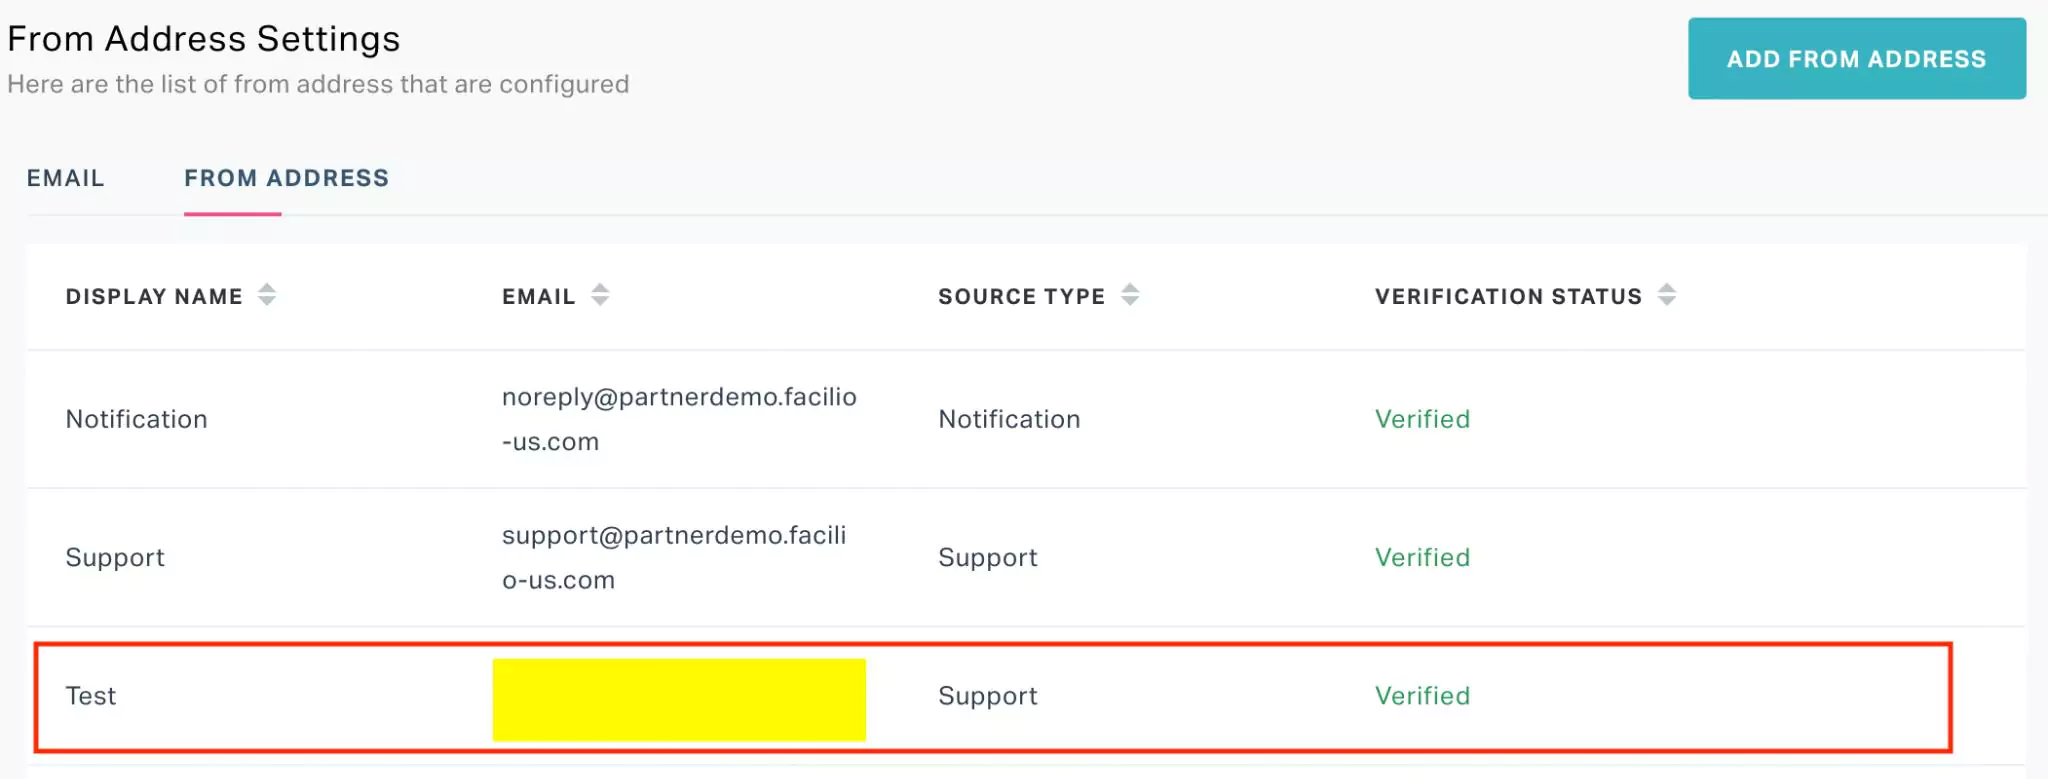
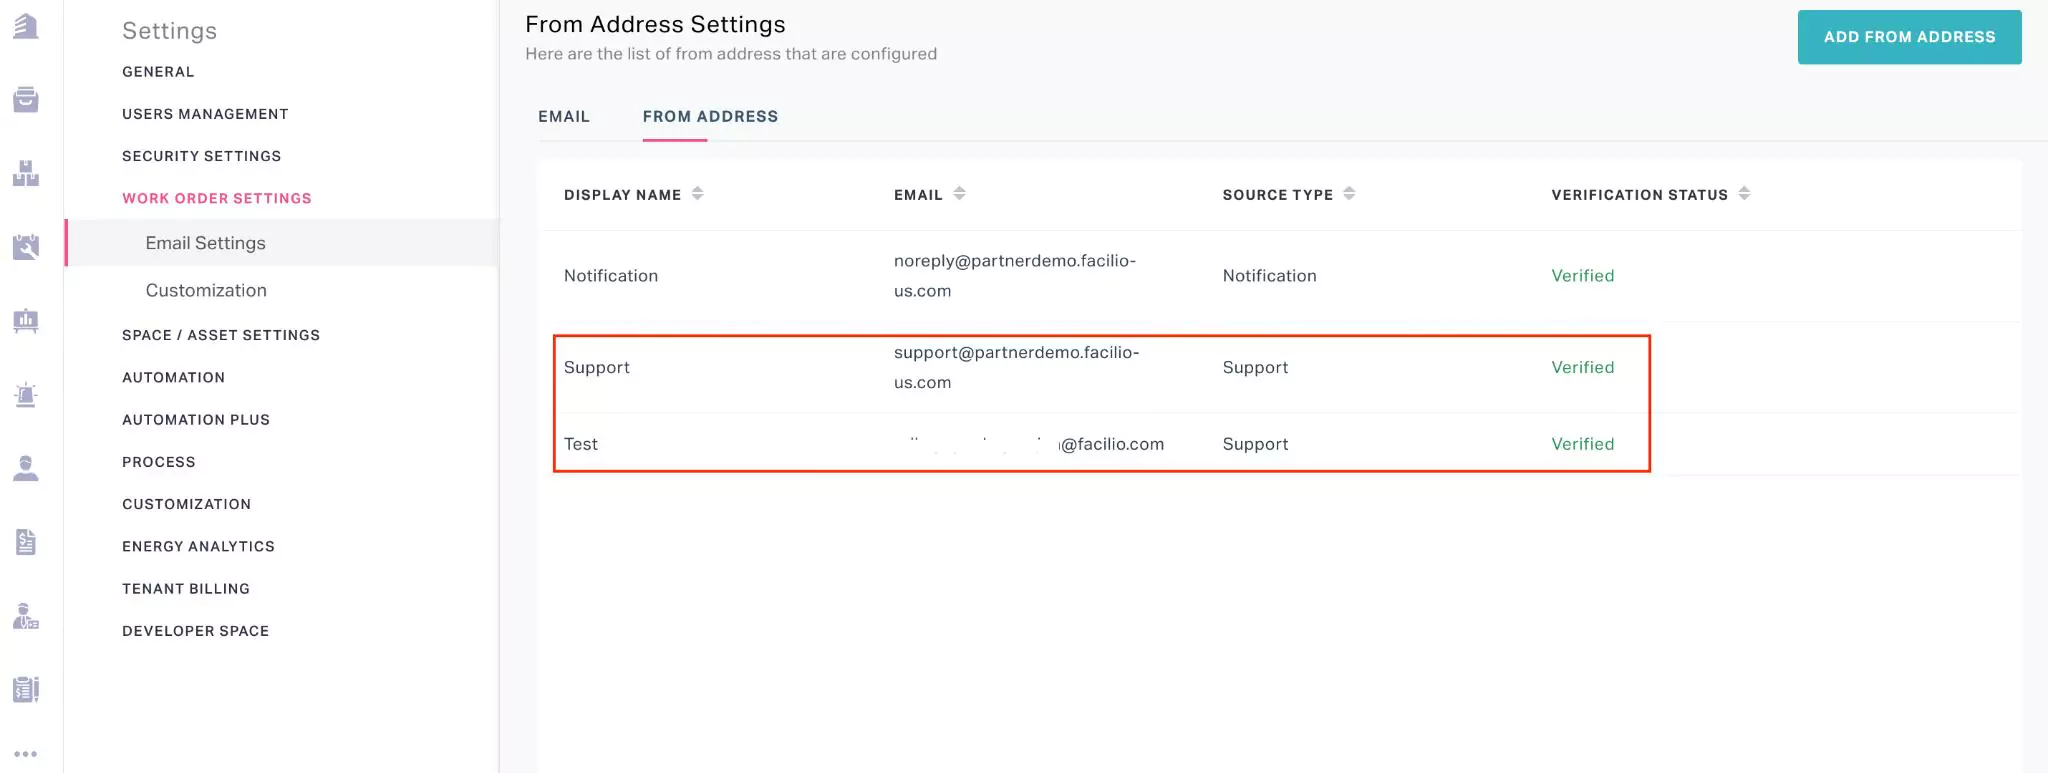
After the verification is complete this email is added to the list of support emails in the FROM ADDRESS section as shown below.
You can use the ![]() and
and ![]() icons corresponding to the support email (either in the EMAIL or the FROM ADDRESS section) to modify and permanently delete the email configuration.
icons corresponding to the support email (either in the EMAIL or the FROM ADDRESS section) to modify and permanently delete the email configuration.
Step 2: Configuring Action
Once the email is added to the application, the respective action must be set up to complete the purpose of the support email configuration. To configure the action corresponding to the support email,
Click CONFIGURE ACTION against the support email in the Email Settings screen.
The NEW CONFIGURE ACTION window appears as shown below.
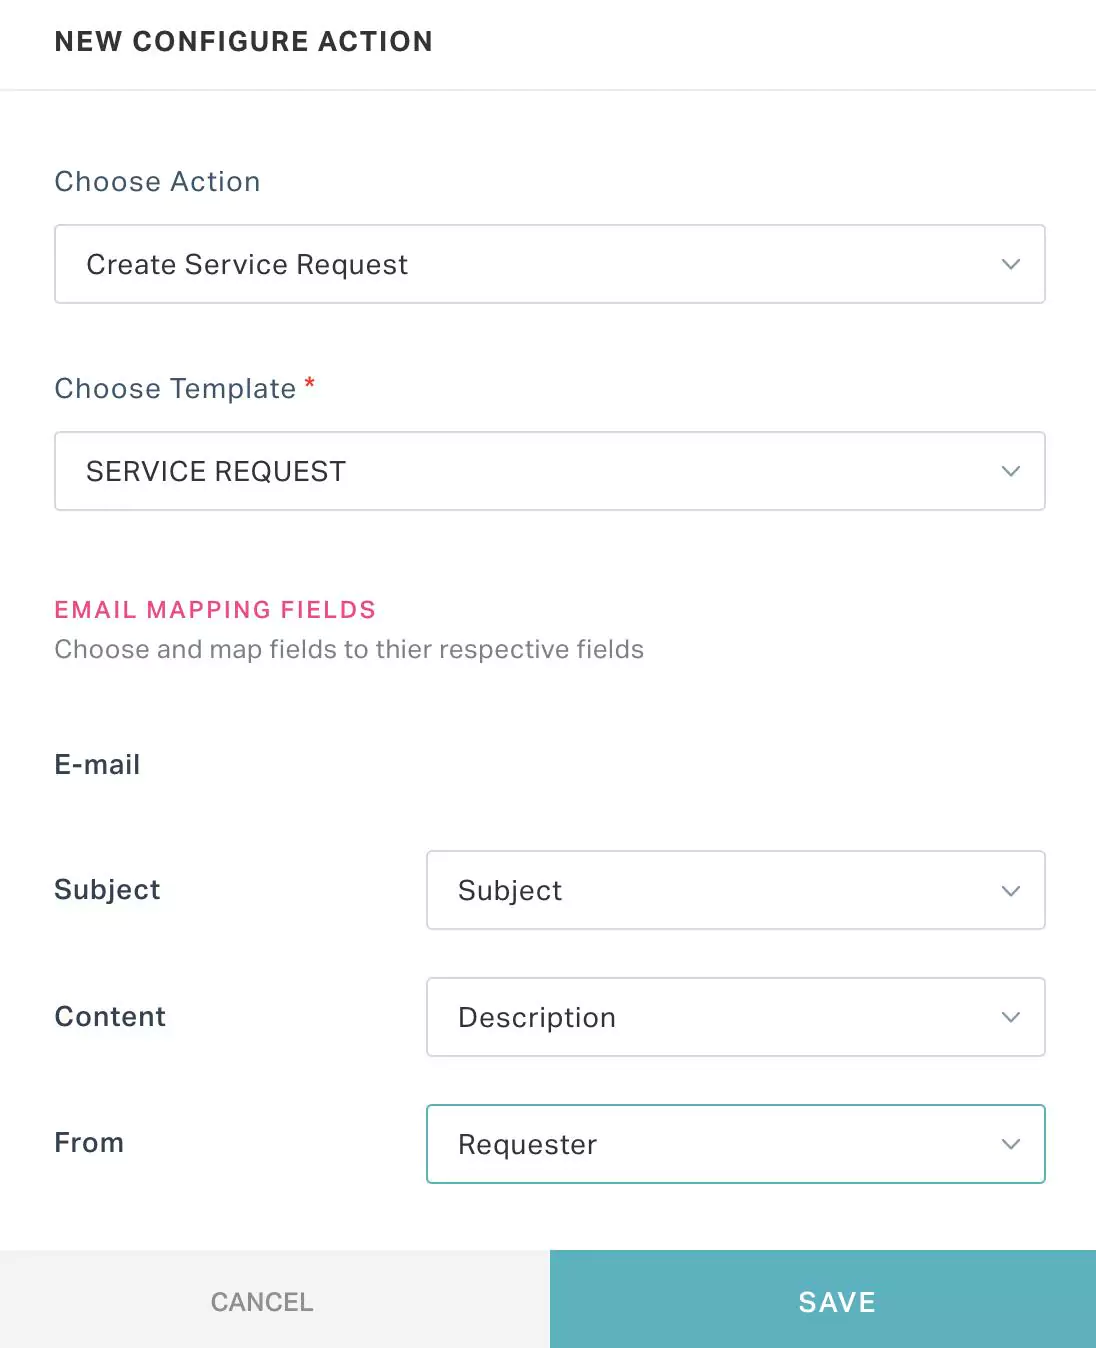
Update the following fields in this screen:
- Choose Action - Indicates the action to be performed on the receipt of an email to the support email configured
- Choose Template - Indicates the form to be used while performing the action chosen. For example, if the Choose Action field is set to 'Create Service Request', the template set in this field will be used to create the service request.
- Email Mapping Fields - Define to which field in the template the following parts of the client's email must be mapped.
- Subject
- Content
- From
Click SAVE. The selected action is configured against the support email as shown below.
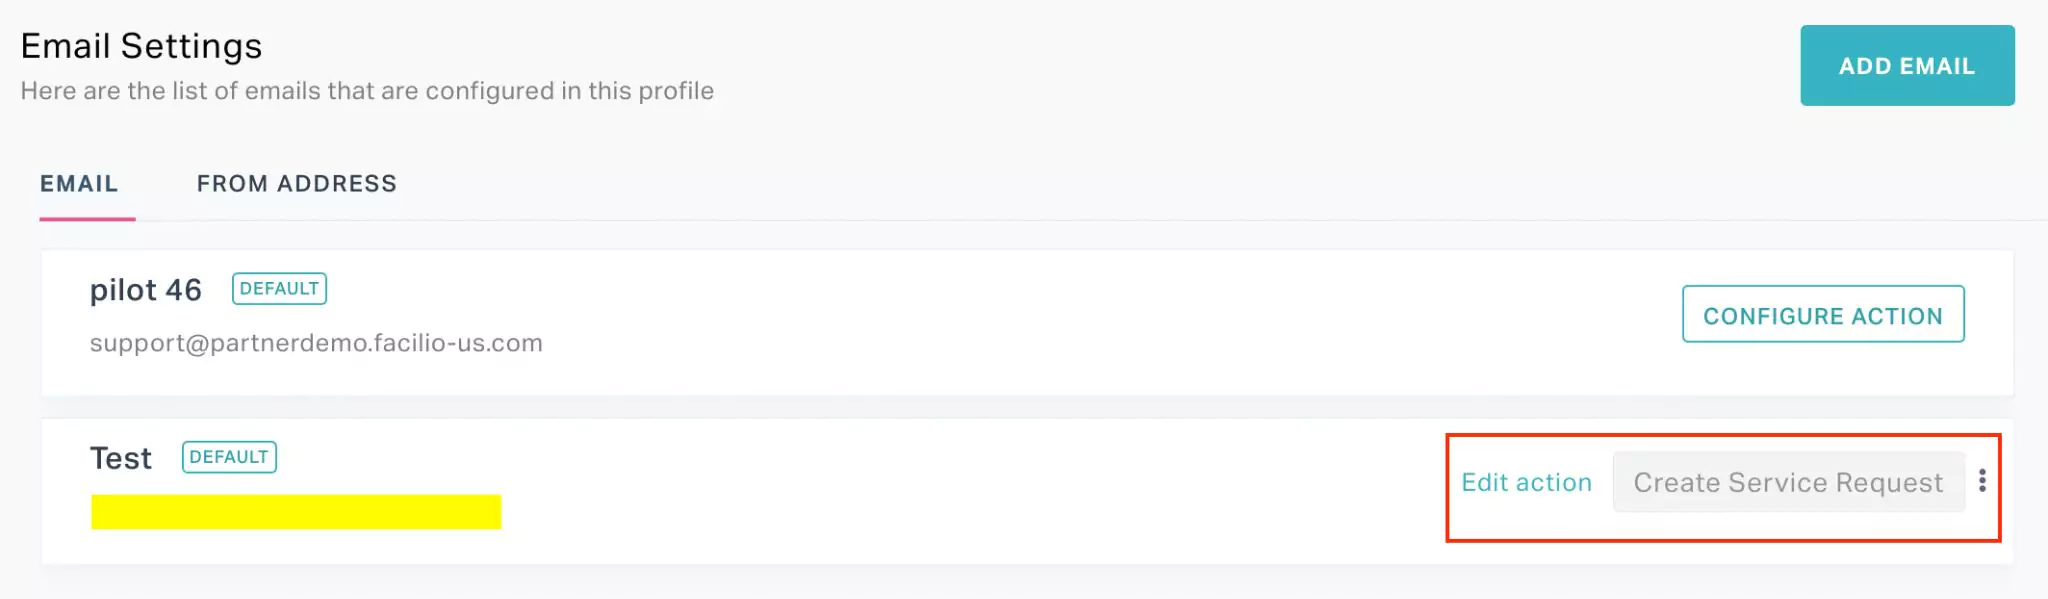
You can click Edit action or use the ![]() icon to modify or delete the configured action.
icon to modify or delete the configured action.
Step 3: Configuring Email Forwarding
After the required action is configured, email forwarding functionality must be activated in the original email settings to enable the configured action in the application. A sample configuration in the Facilio domain is illustrated below. To activate email forwarding,
Copy the system generated forwarding email from the application.
 Note: You can directly copy the forwarding email from the NEW E-MAIL screen while adding the email address or click the
 corresponding to the record in the Email Settings screen to copy it.
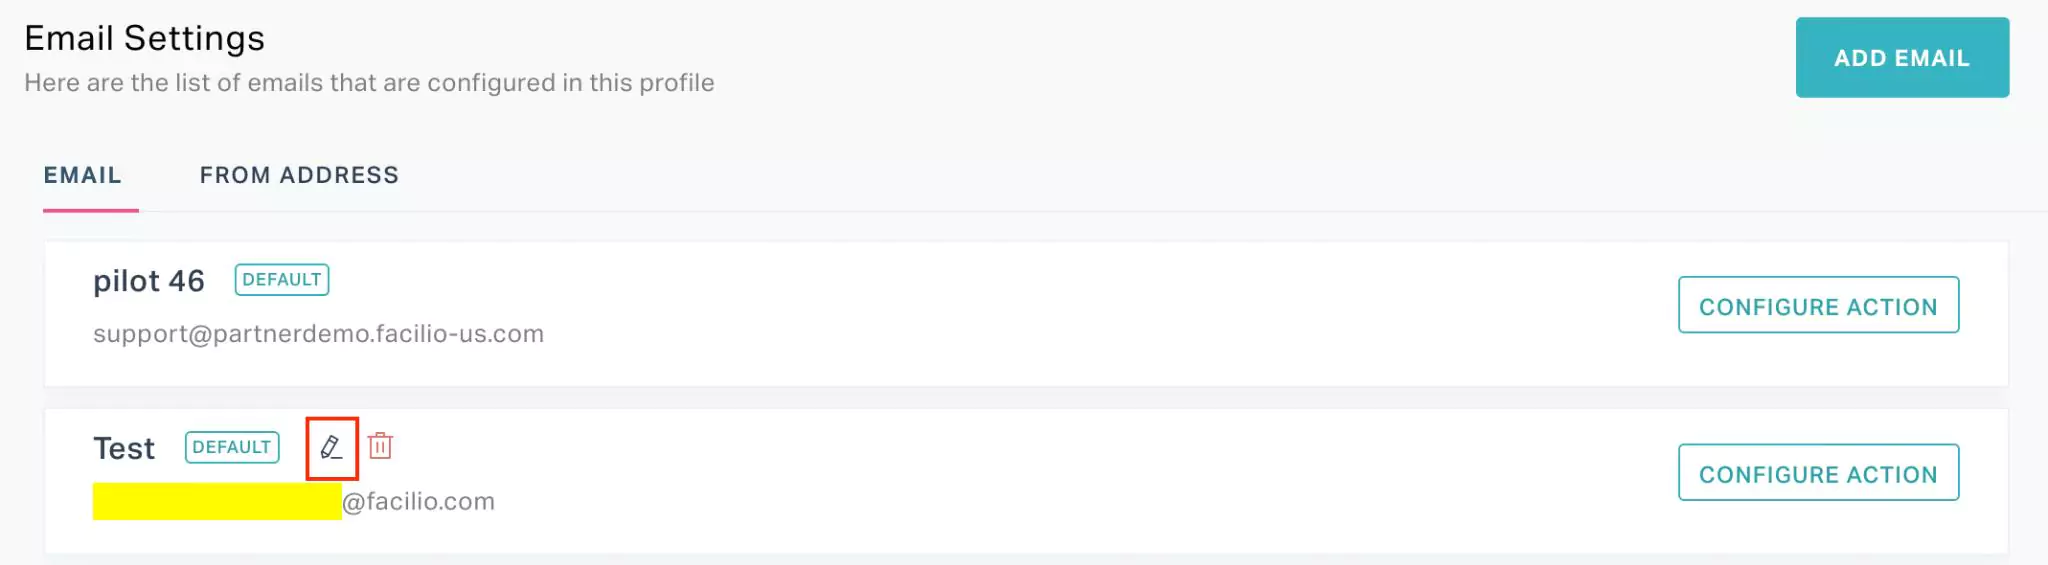
Login to the support email account.
Click the
 (Settings) icon and select See all settings.
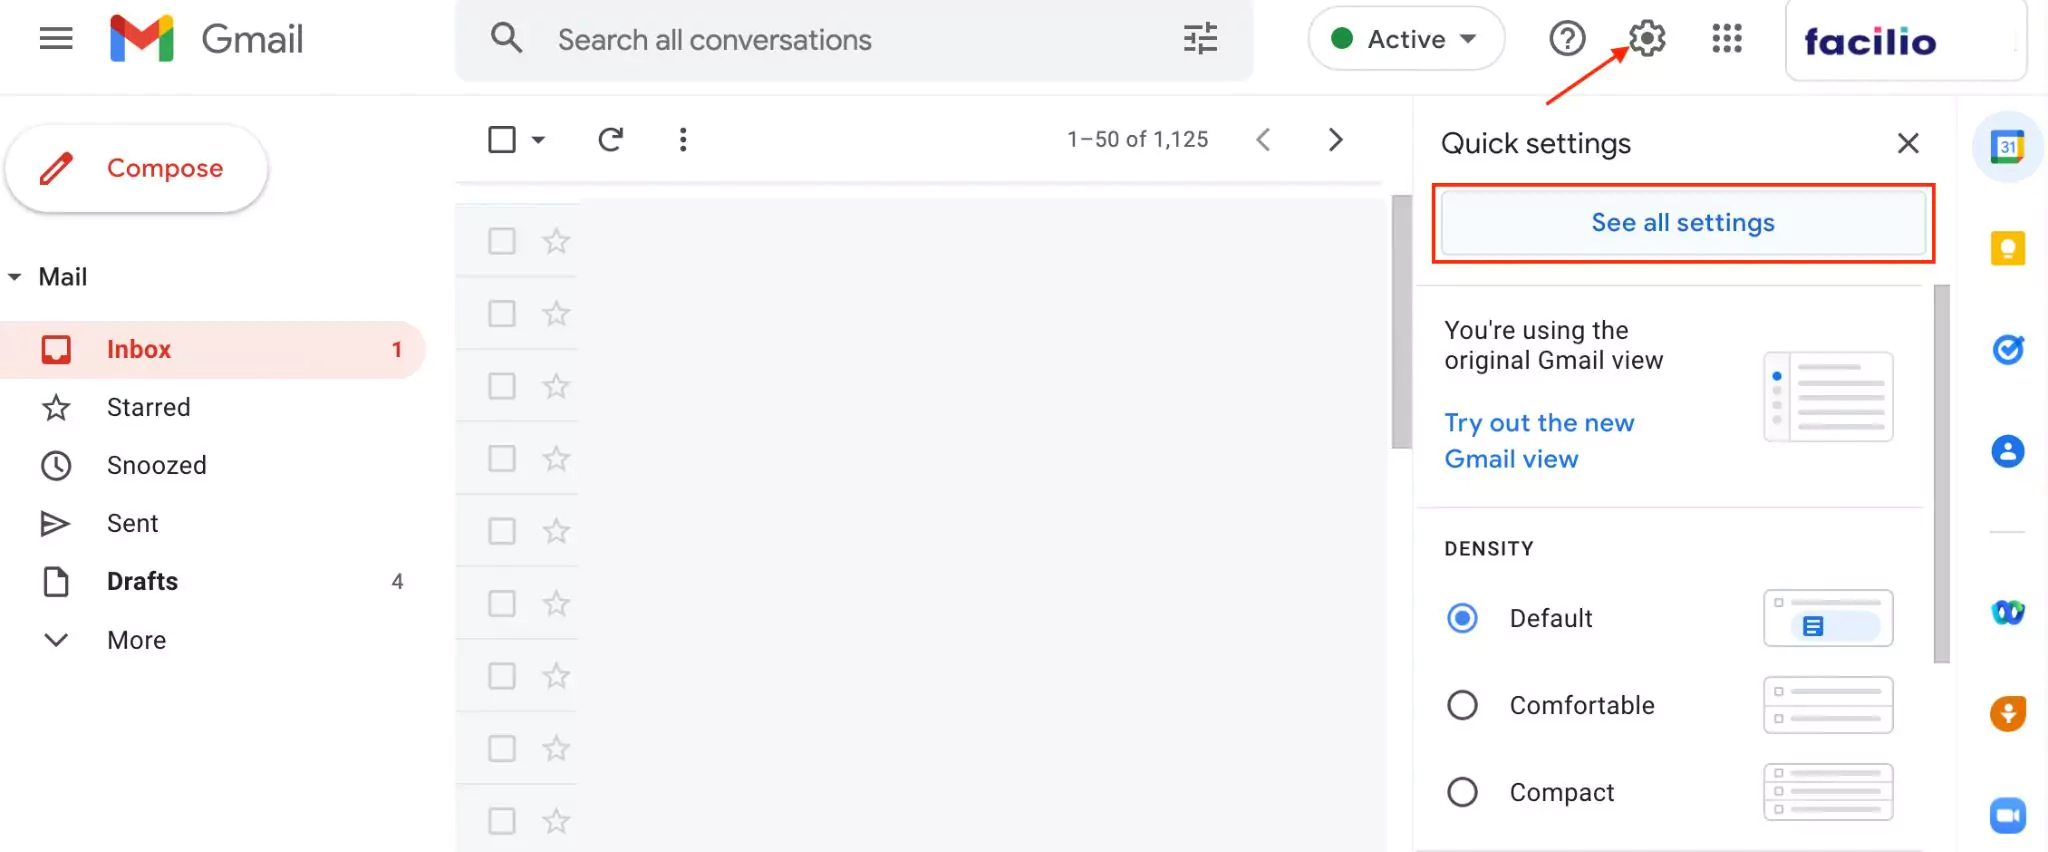
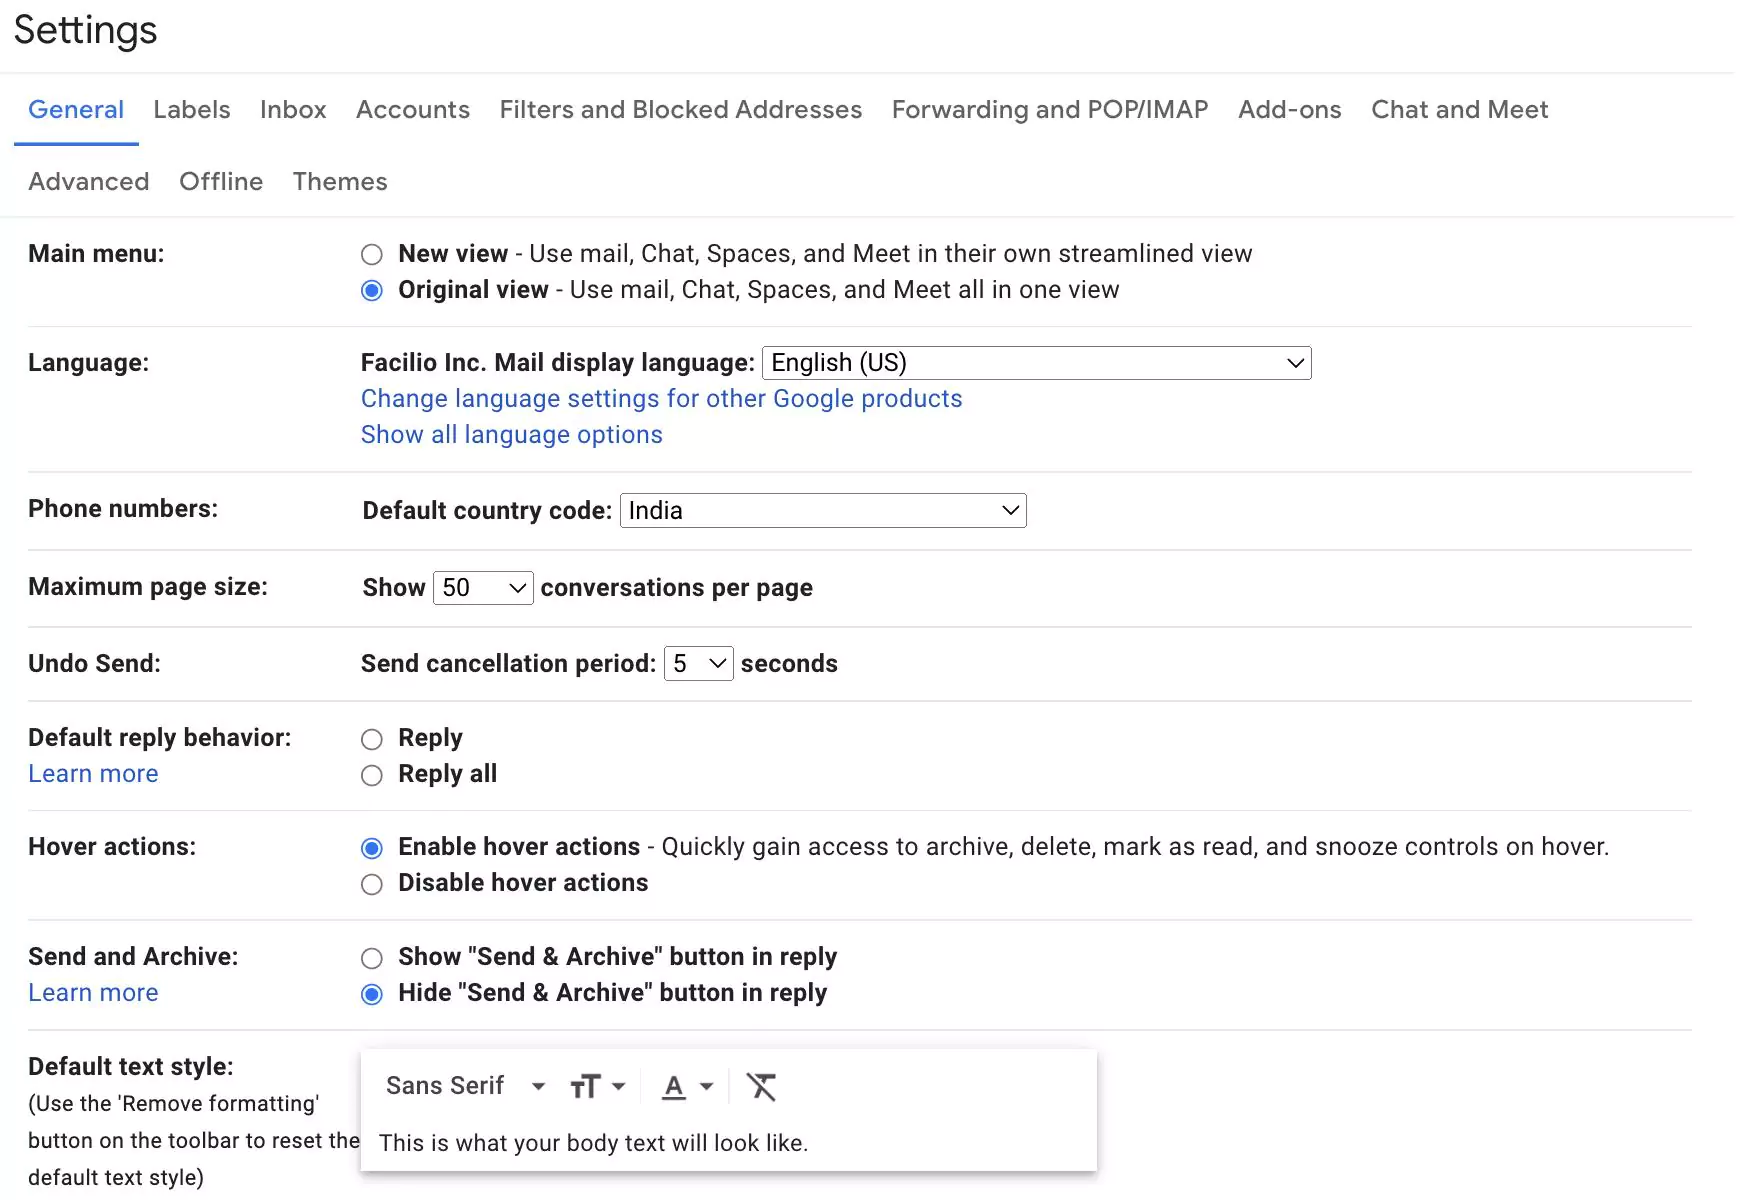
The Settings screen appears as shown below, where the general settings are displayed by default.
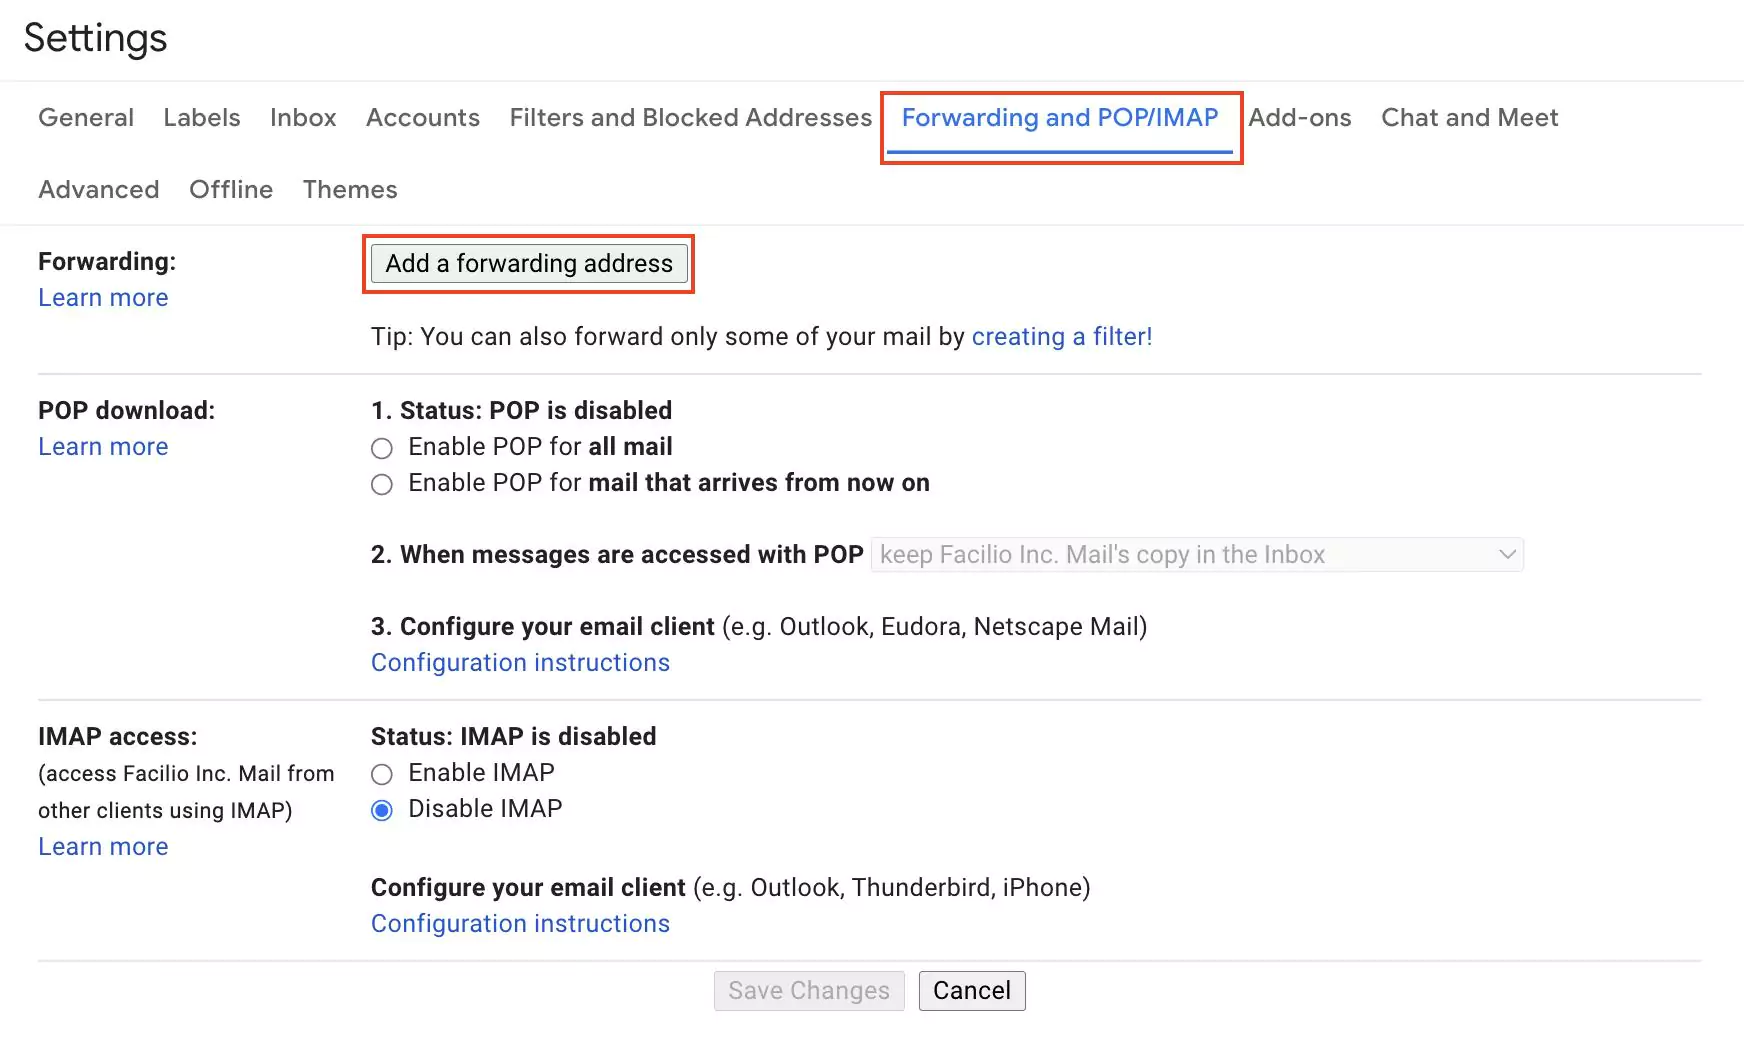
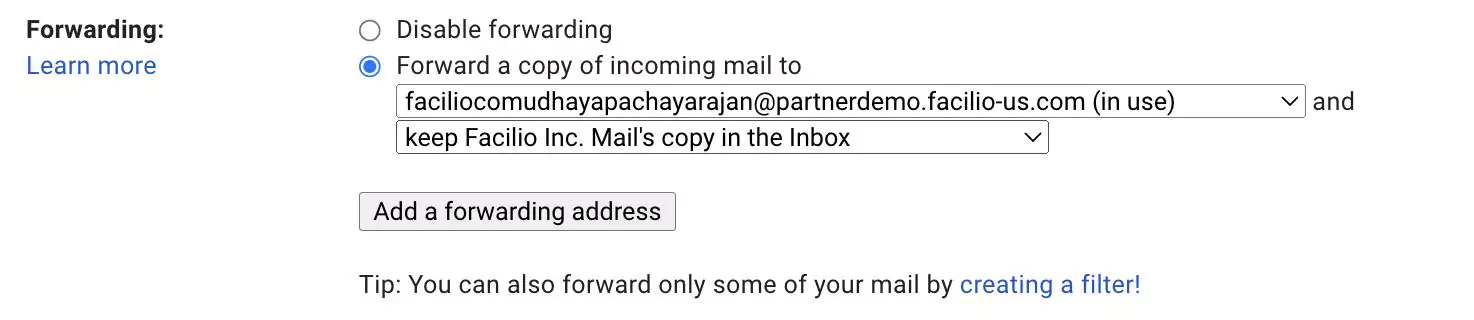
Navigate to the Forwarding and POP/IMAP section and click Add a forwarding address.
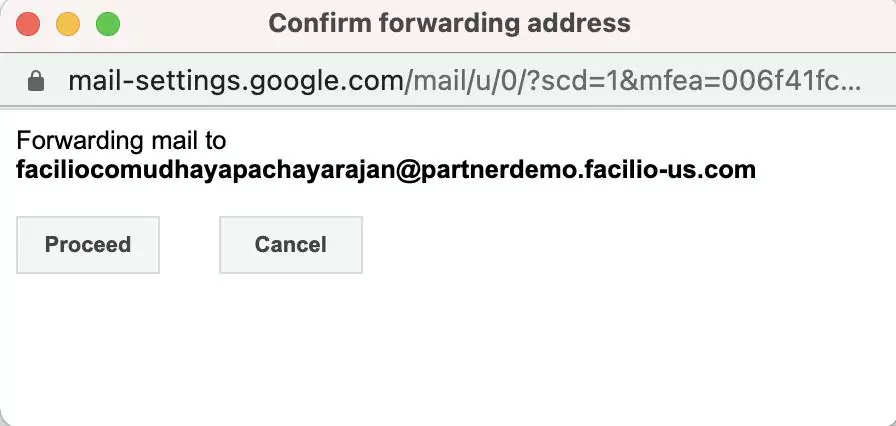
Enter (paste) the copied forwarding address in the window that appears and click Next. A confirmation window appears as shown below.
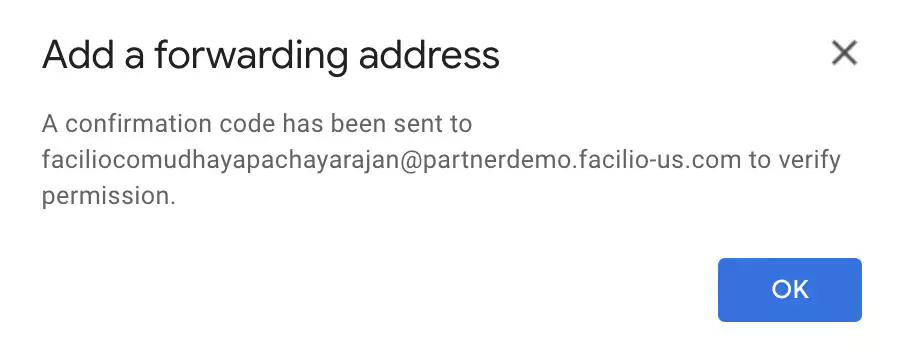
Click Proceed. The following message is displayed to notify that a code has been sent to the forwarding email account for verification.
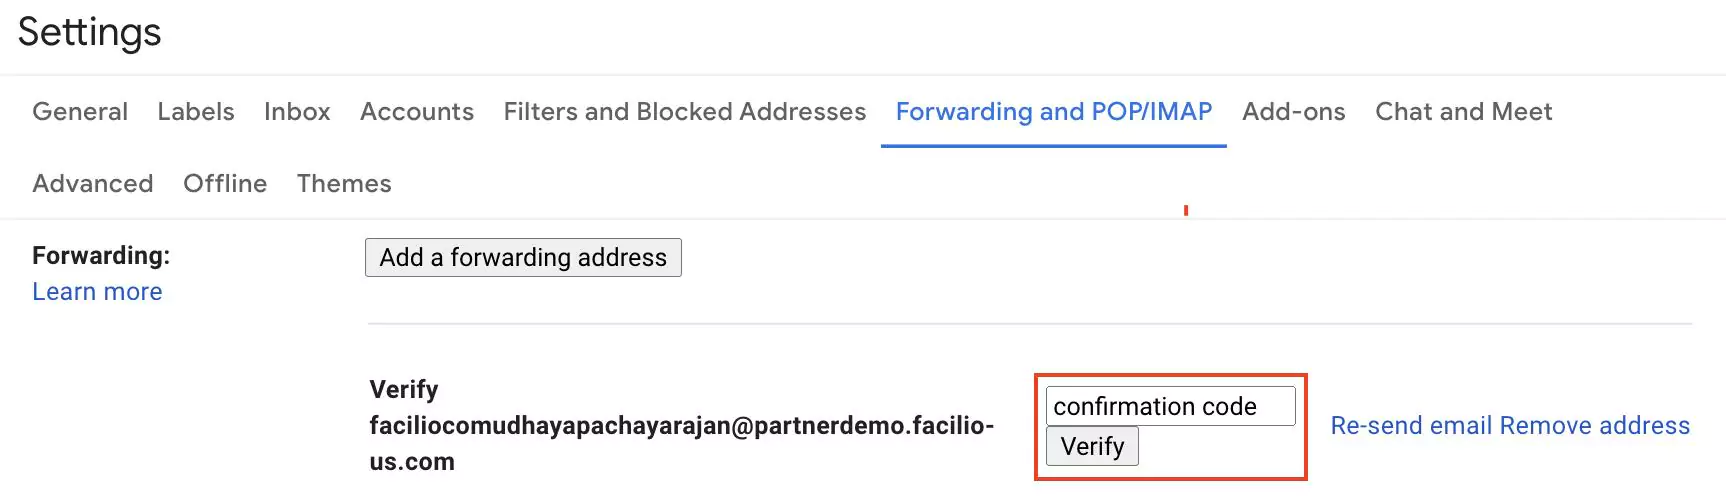
Click OK. You are now prompted to verify the forwarding email as shown below.
 Note: The confirmation code is triggered in the application as per the configured action. For example, If the action configured is "Create Service Request", the code is triggered as a service request as shown below.
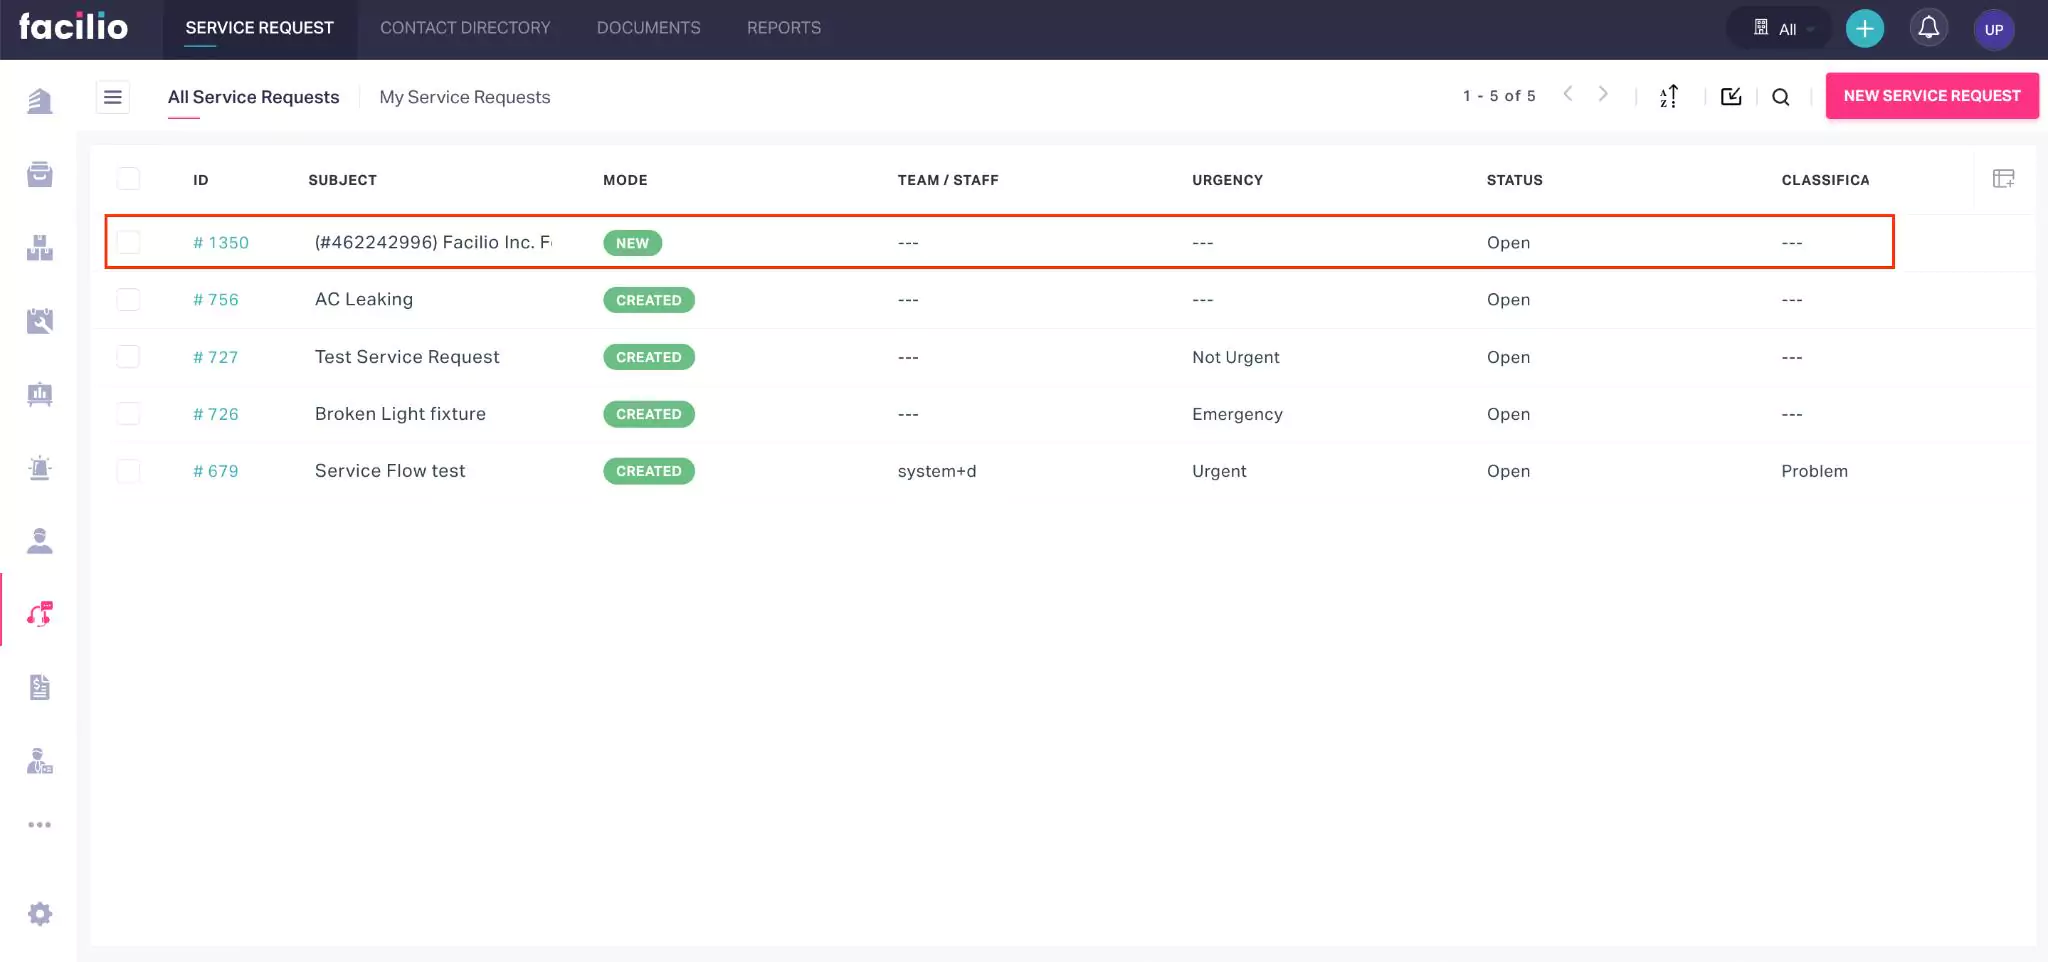
Read the Configuring Action section for more information.
Enter the confirmation code in the text box and click Verify. The email forwarding feature is now successfully configured as shown below.
Forwarding settings - To enable the email forwarding settings configured
IMAP settings - To allow other clients to access this email using IMAP

Once the configuration is complete, the support email will be ready to receive requests from the user. Let us say, the user has sent the following email to the support email address.
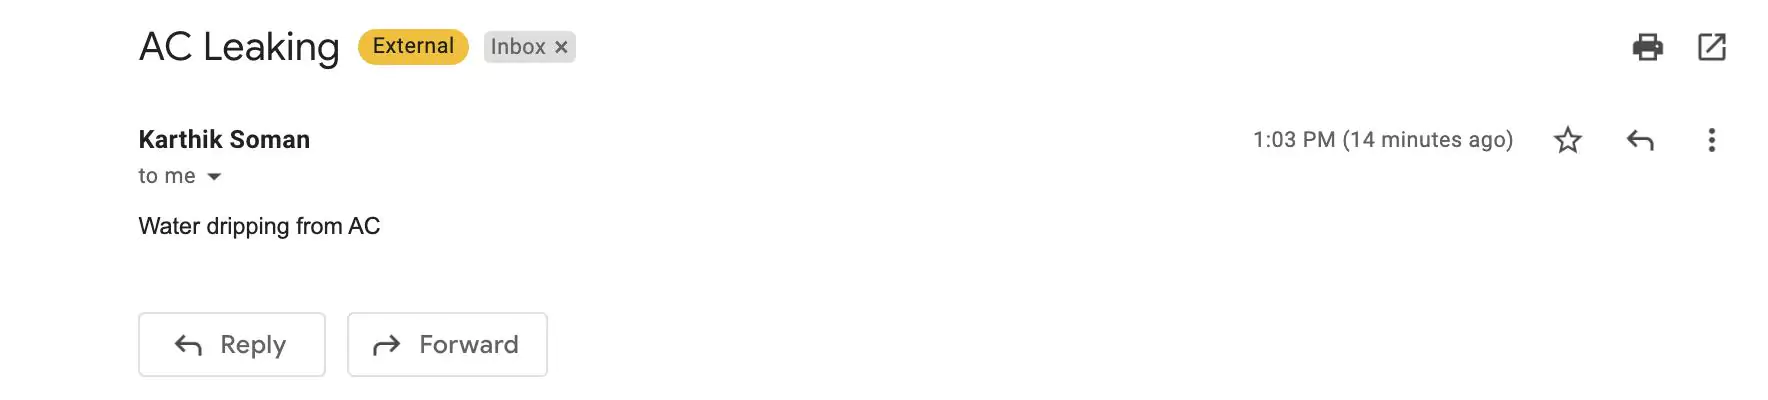
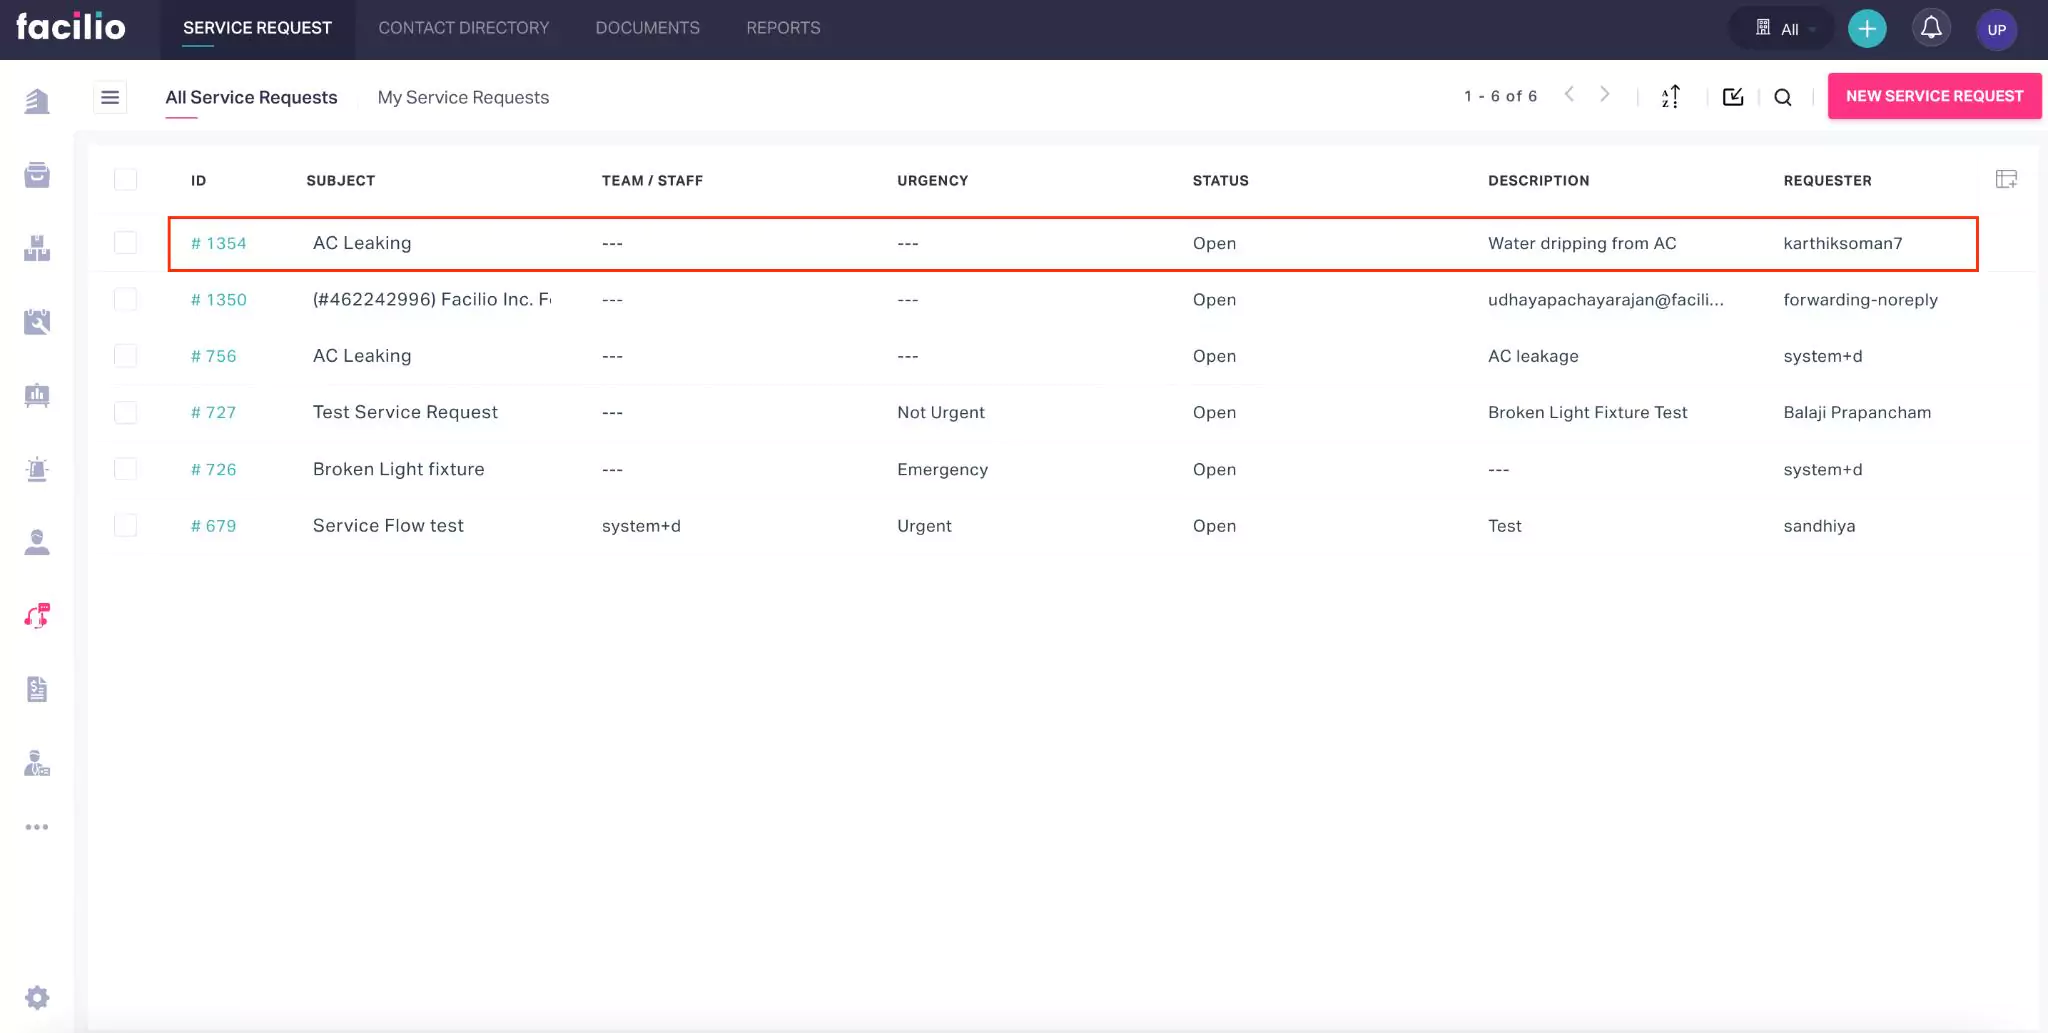
This email is reflected in the application as a service request (as configured).
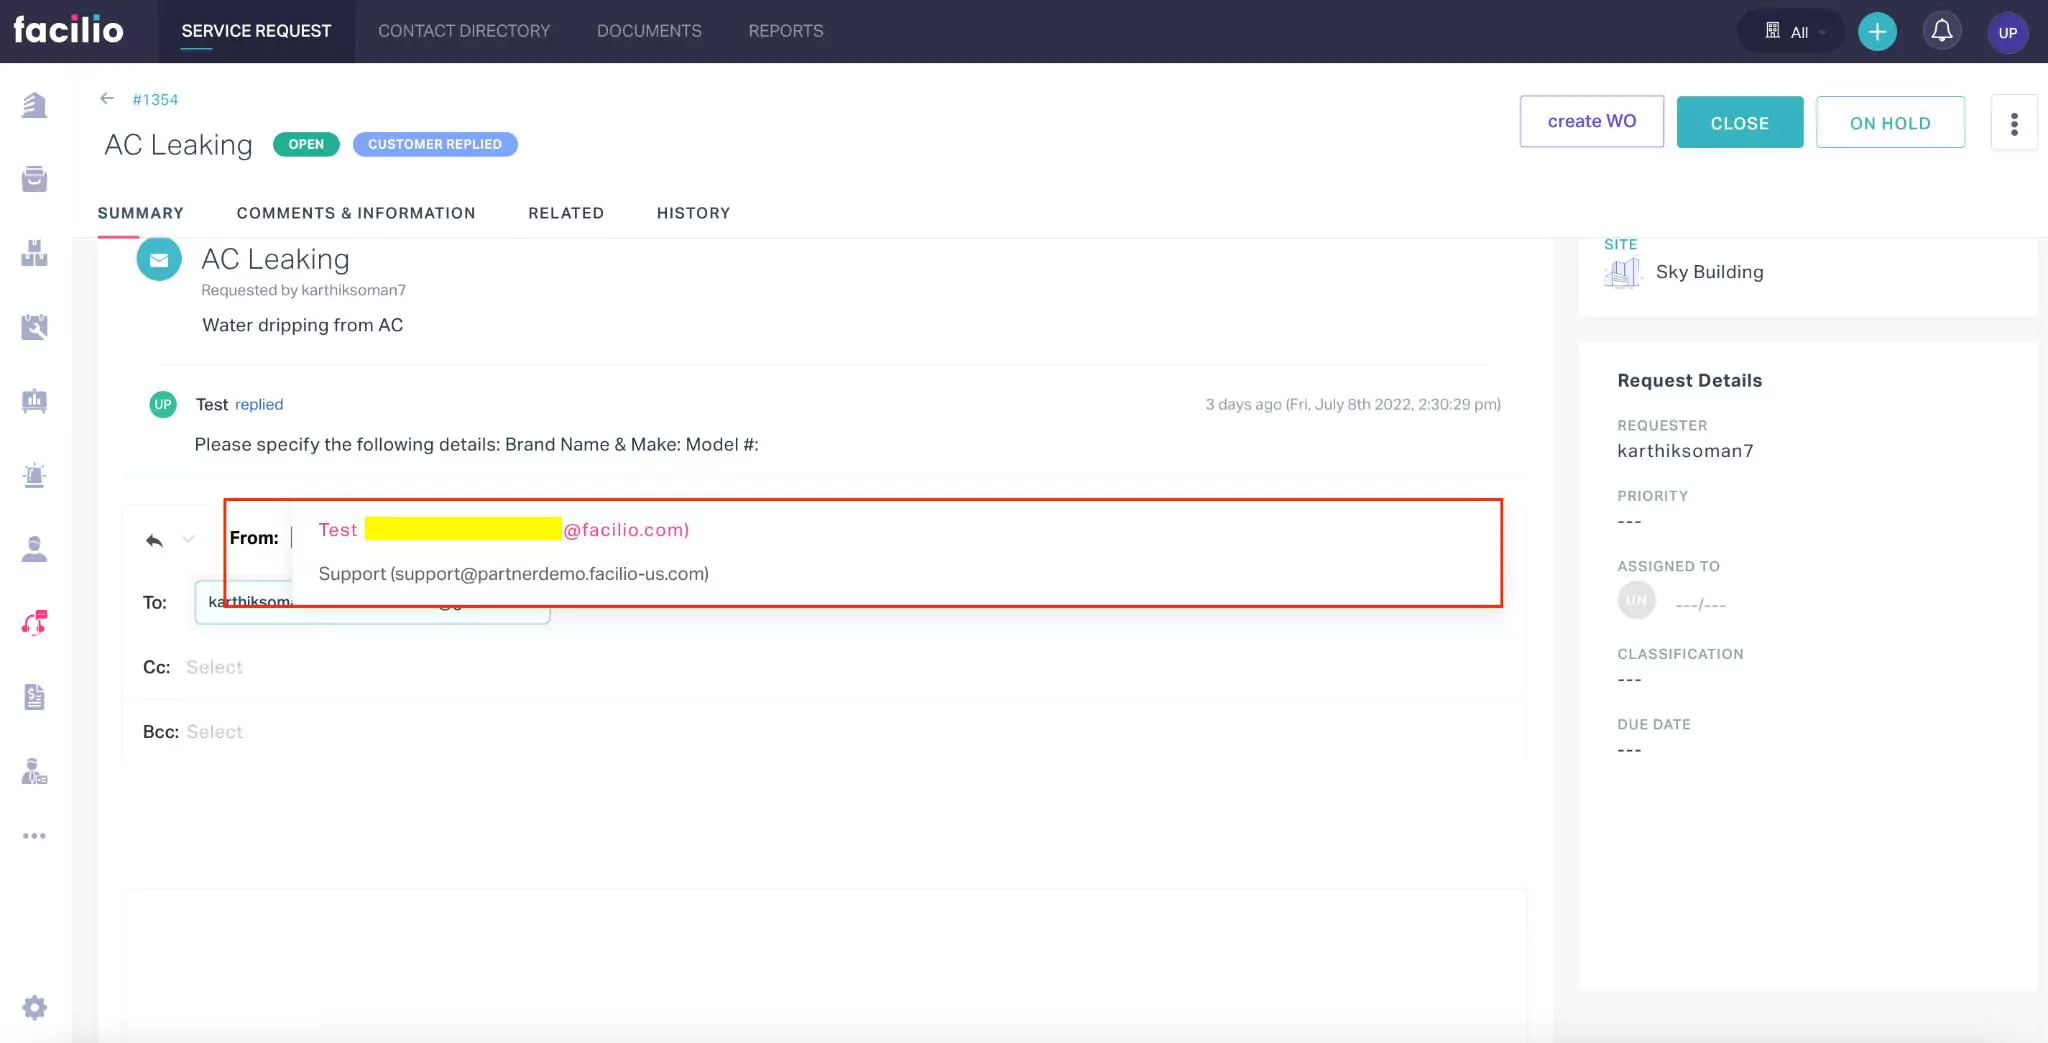
Upon clicking Reply in the ticket summary the service personnel can send an email to the user. He can always choose the 'From' address (typically the support email) from which the reply must be sent.
In case the user replies, it will also be reflected in the SUMMARY page as shown below.
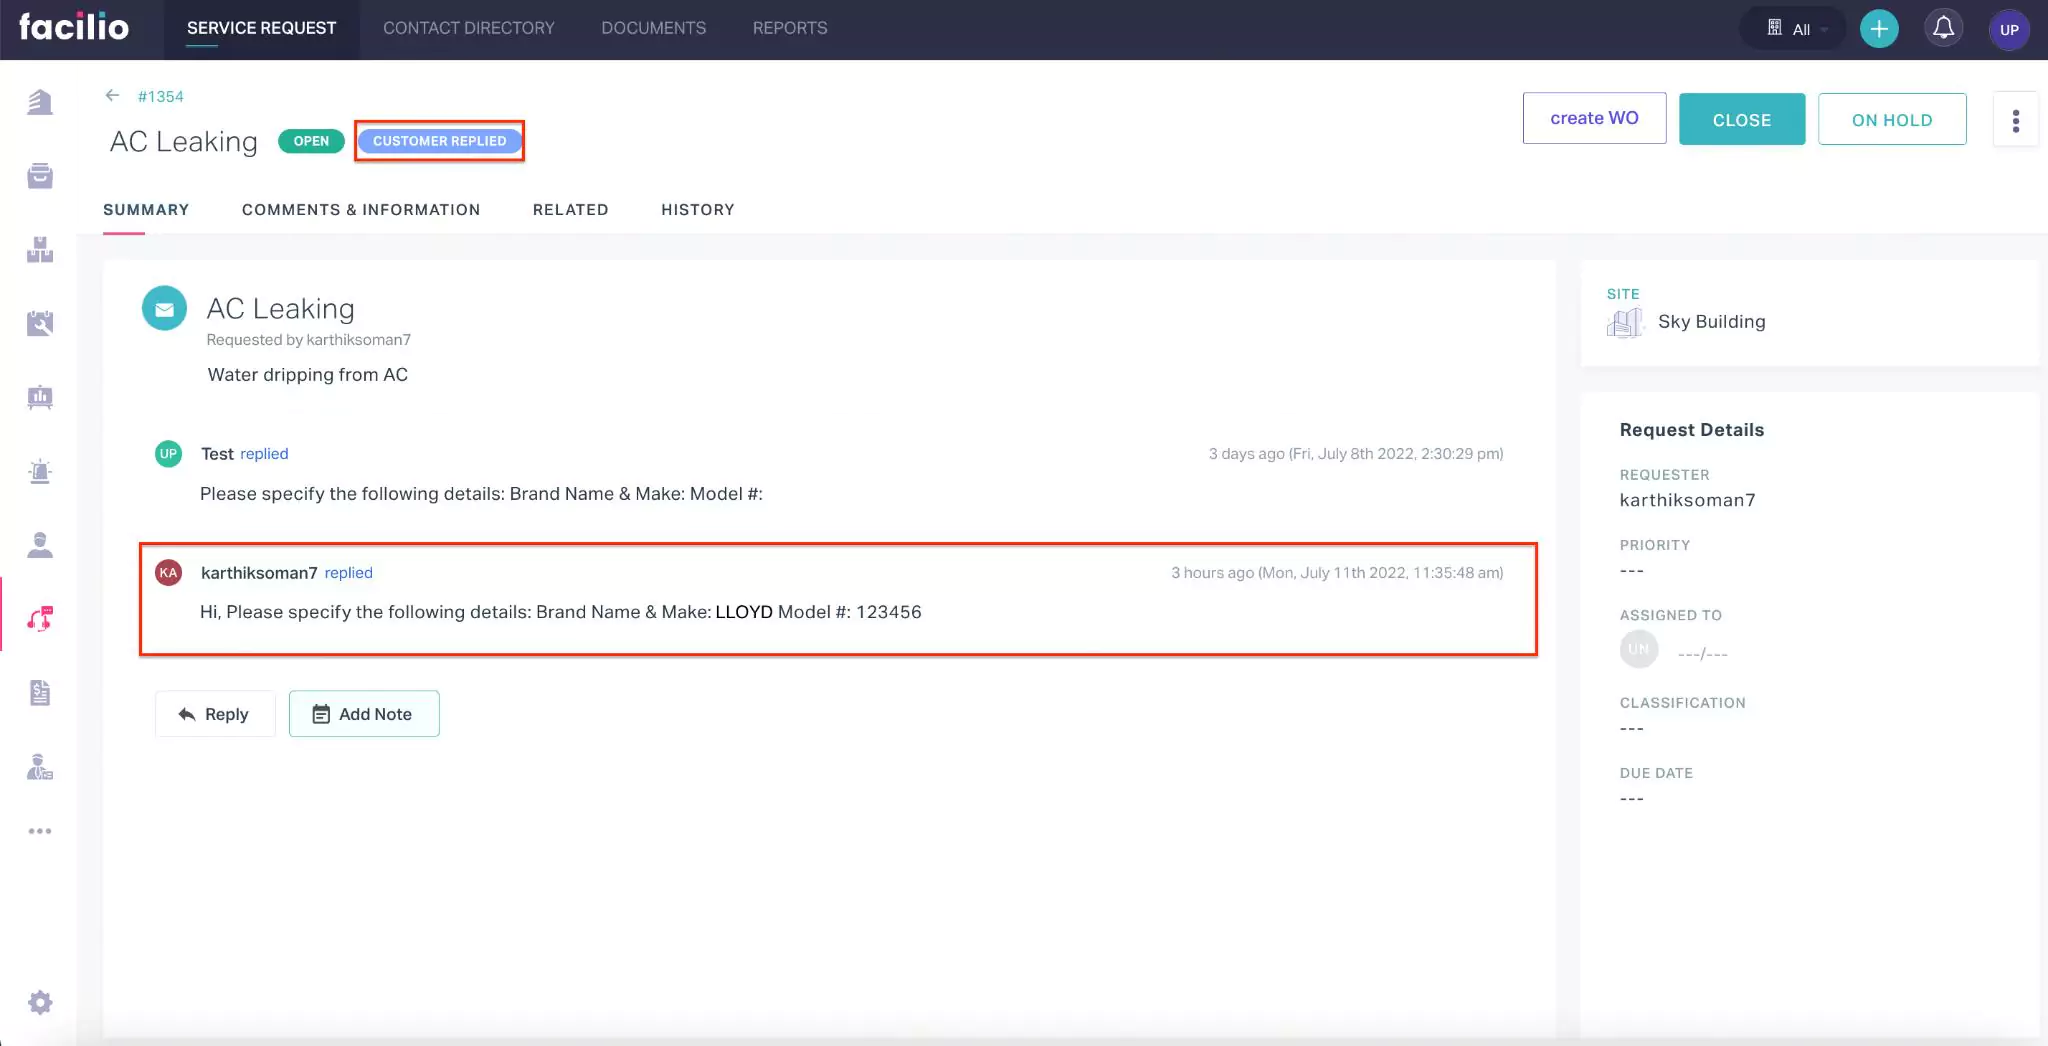
This way of communication between a service agent and the customer can help the other agents effortlessly comprehend the progress of the request and acquire any necessary information in the future. Also, it makes it easy for the customer to understand that the communication is from the particular support.