Basic Features & Functionalities
This section covers the basic features and functionalities that are common across the modules in Facilio. The following are the various features of the application.
Searching the Application
This feature acts as a filter to narrow down the data to the desired set of results. In other words, this feature allows you to qualify and display only the data that is required. This feature operates across all modules that deal with huge data.

Note: Although the search is a common feature, the filters displayed will vary with respect to the modules.
Using the Search Feature
Perform the following steps to apply the search filter for the data within a module:
Click the
 (Search) icon at the top right of the dashboard header. The list of module filters are displayed as shown in the screenshot below.
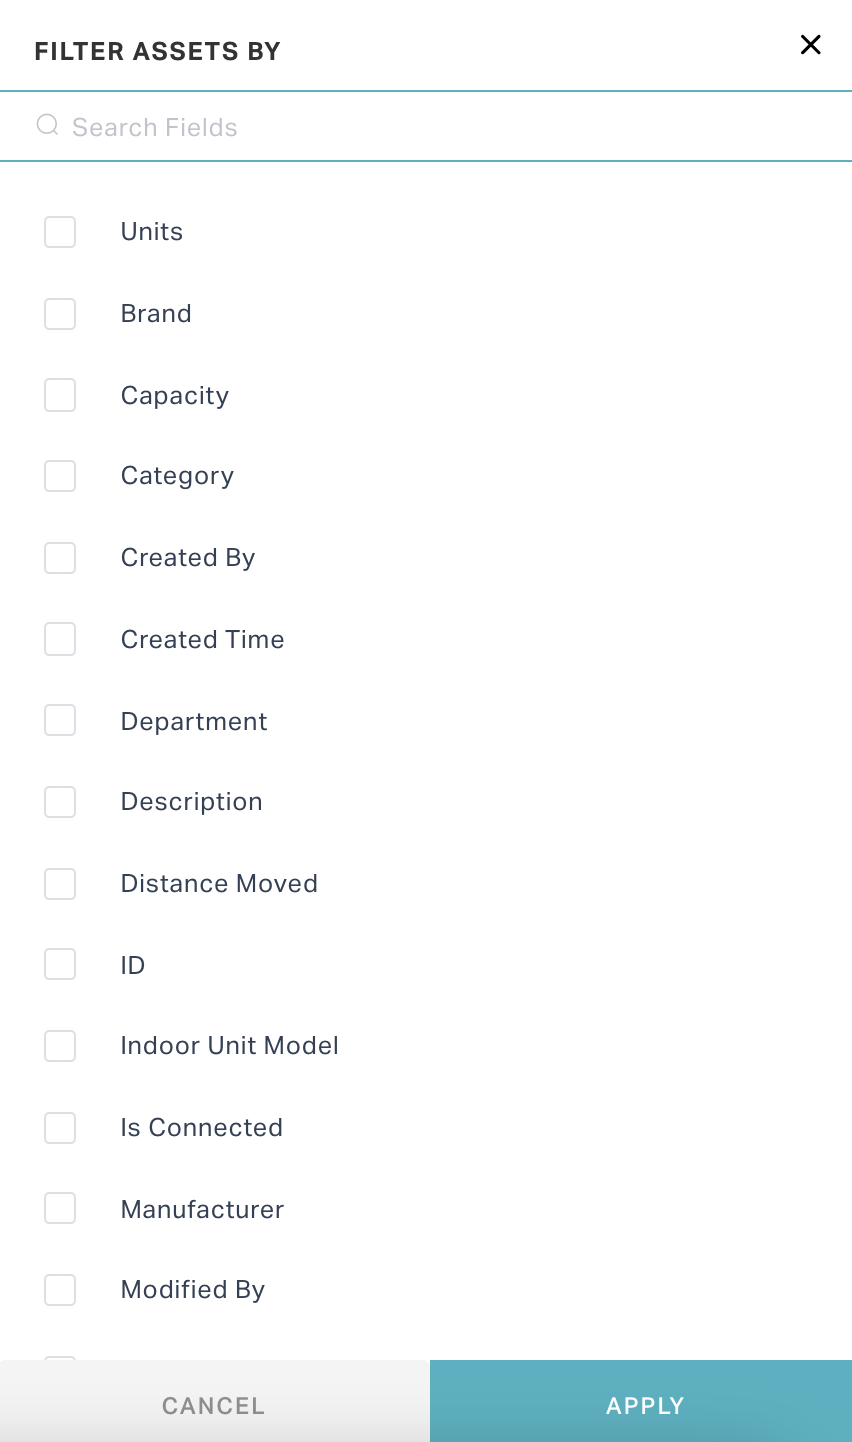
Perform any of the following actions to apply the search filter:
Select the required module filter(s)
Start typing some text in the search field and select the required module filter(s) from the suggestions fetched.
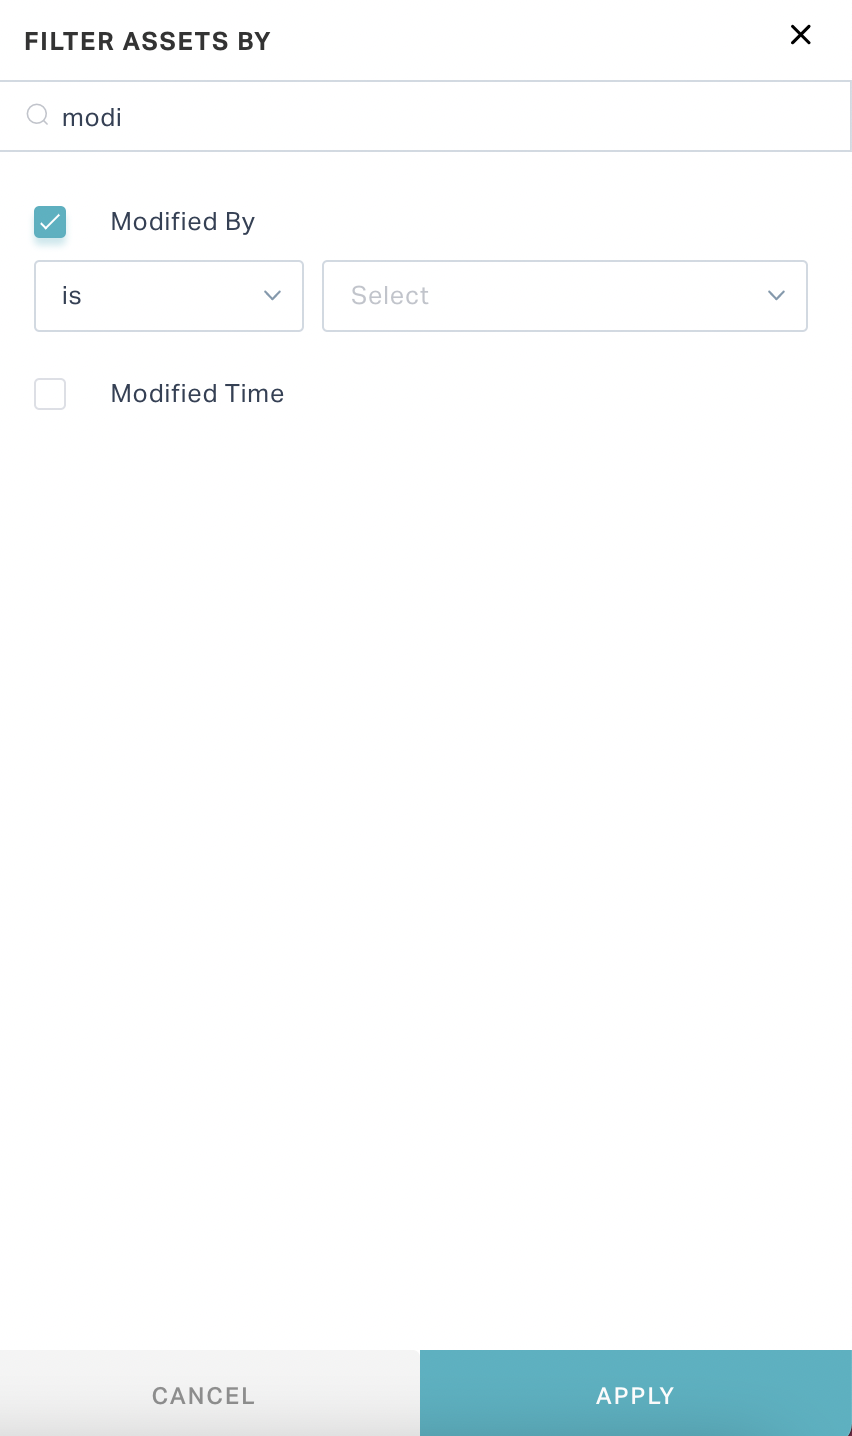
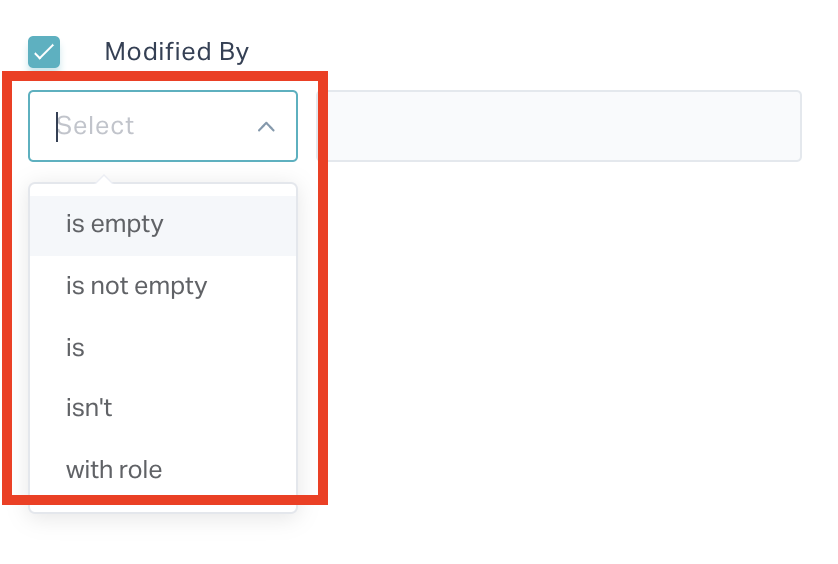
Further filter the results using the next level filters as shown in the screenshot below.
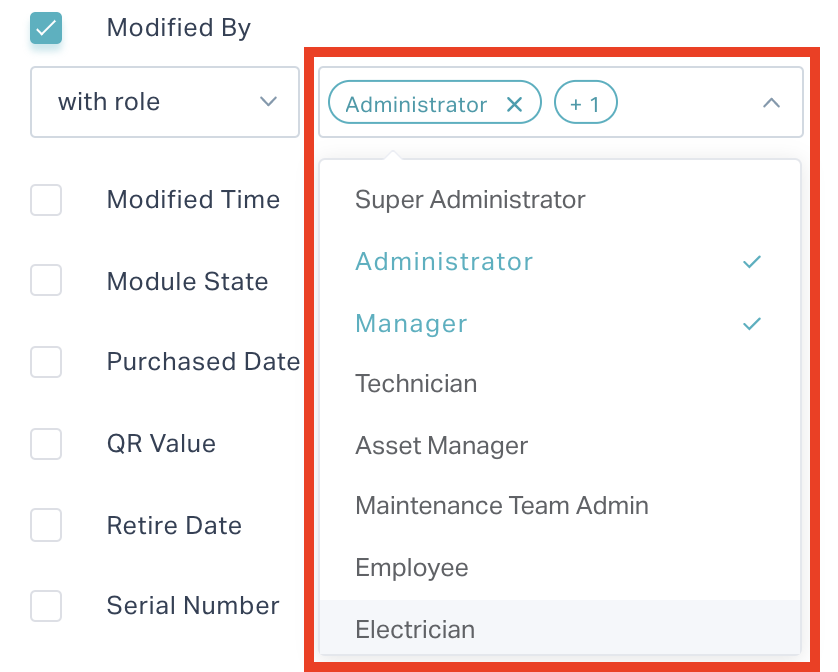
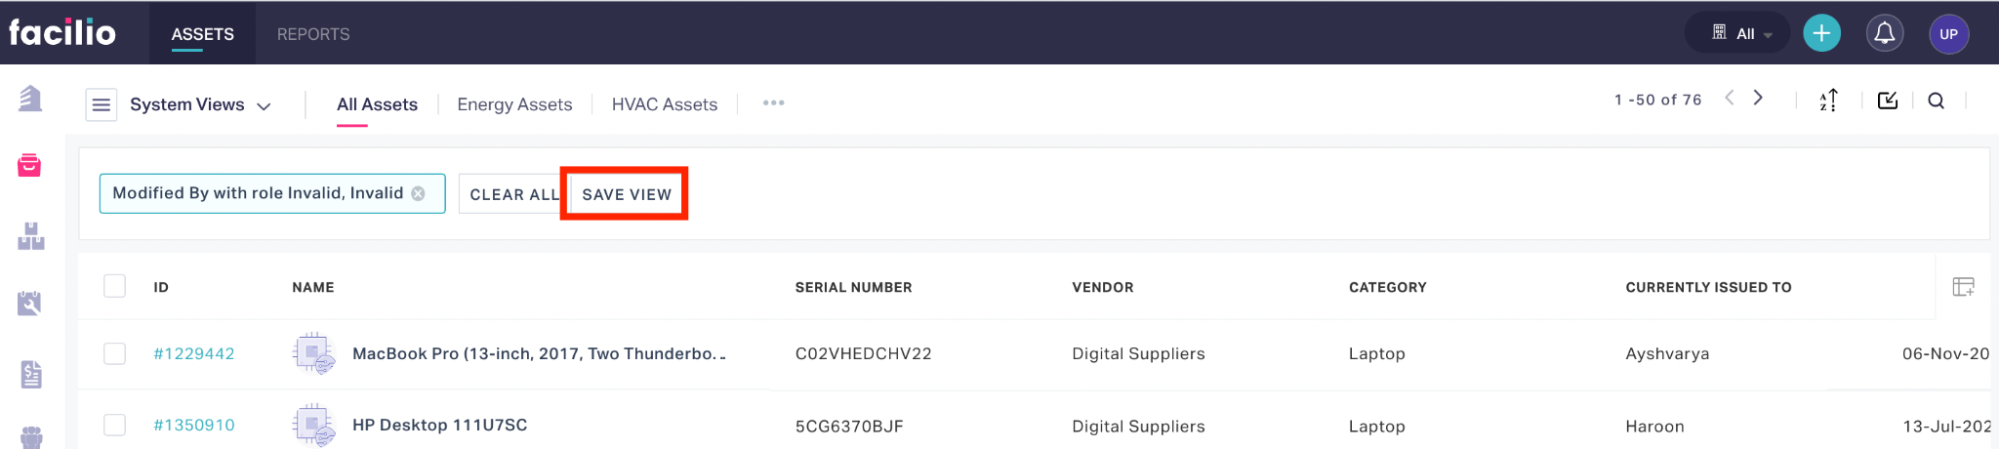
Click APPLY or CANCEL to apply or cancel the filter, respectively. If you click APPLY , The dashboard is populated with the search result. In this above scenario, all the assets modified by the administrator and manager will be populated in the dashboard as shown in the screenshot below.

Saving Search Results as a View
The application allows you to save the search results as a view, which can be accessed later to view the updated results.
To save the search results as a view,
Click SAVE VIEW.
The SAVE AS NEW VIEW window is displayed as shown below.
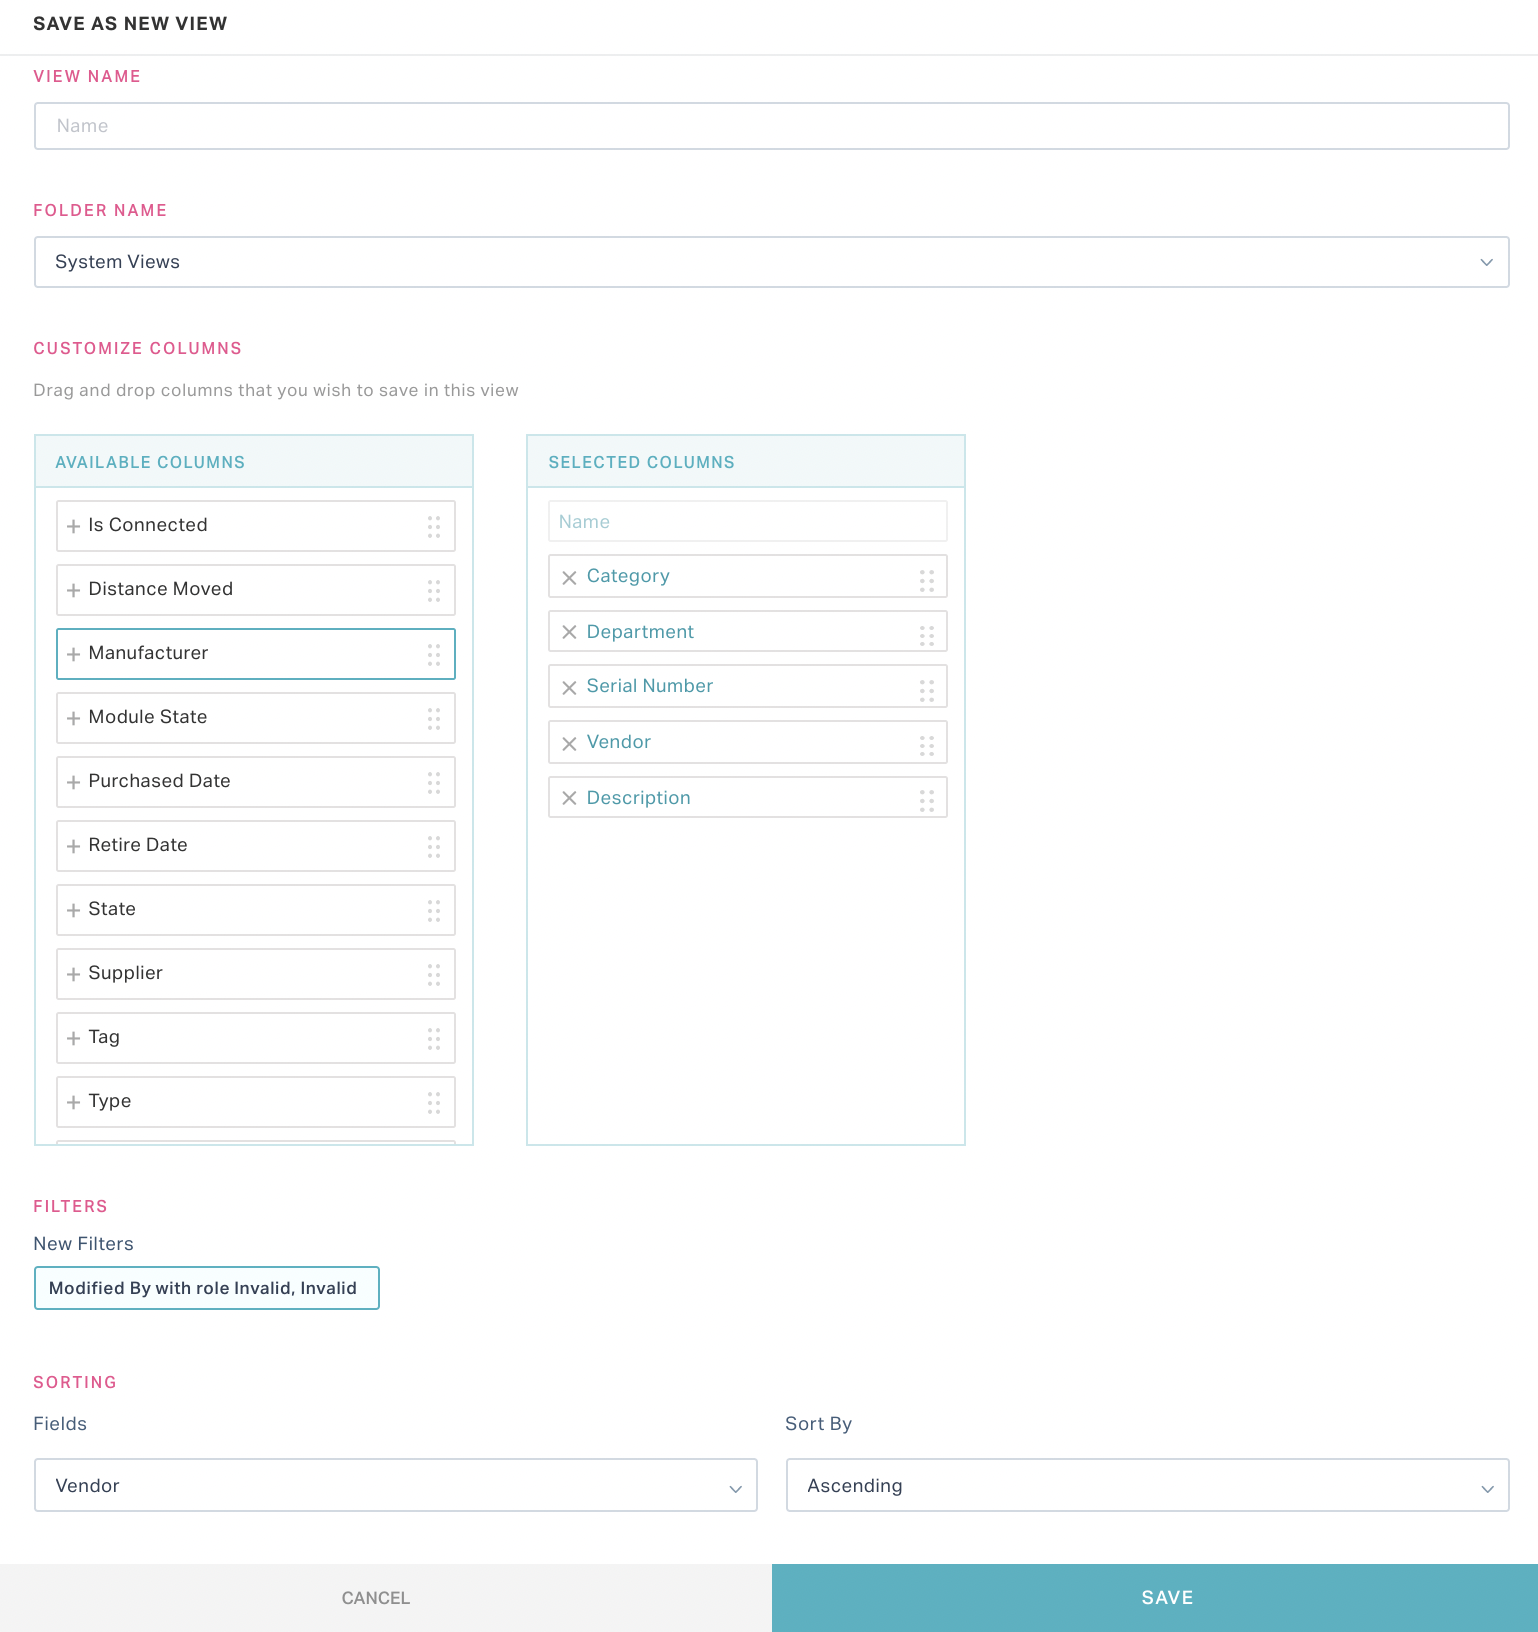
Update the following fields in this screen.
Field Description View Name Create a display name for the new view Folder Name Select the folder in which the view must be saved. Customize Columns Customize the columns that must be displayed in the new view.
Note: Update the SELECTED COLUMNS section corresponding to this field to modify the columns to be displayed.Filters The new filter(s) that you created are auto-populated here.
Note: This field is read-only.Sorting Sort the search results as required. Update the Field to be sorted .You can choose to Sort By either Ascending or Descending order. Click SAVE or CANCEL to save or abort the view creation process, respectively. If you click SAVE, the new view will be saved in the selected folder. Read the Working with Views section for more information.
If you do not want to save the search results, click CLEAR ALL.
Sorting Data
Sorting is required to arrange huge data (for example, work orders, assets, tenants and so on) into meaningful order so as to analyze it more effectively. This feature operates across all modules in Faclio. You can sort the data upon sorting the required columns.
Example: Work orders can be sorted by created time or status, asset information can be sorted by the manufacturer’s name, and so on.
To sort the data in a dashboard,
Click the
 (Sort) icon at the top right of the dashboard header. The list of columns are displayed as shown in the screenshot below.
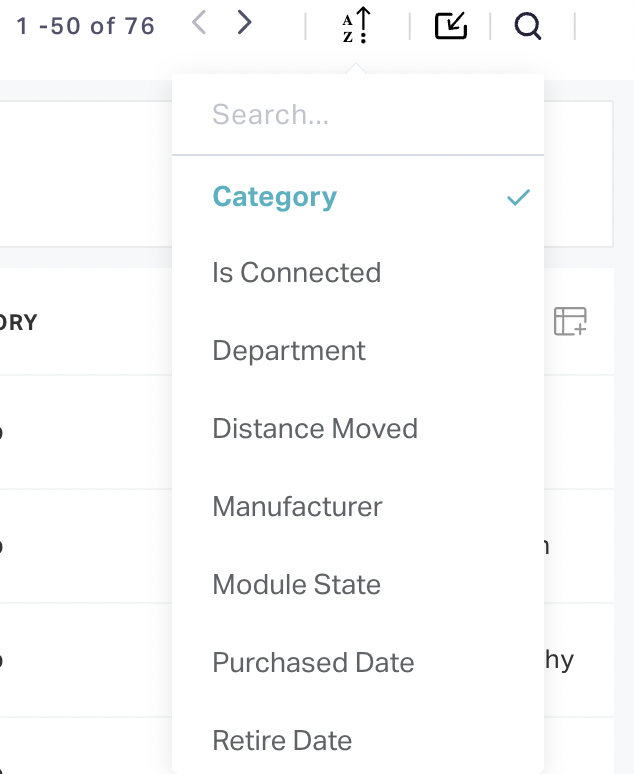
Perform any of the following actions:
- Select the column to be sorted.
- Start typing some text in the search field and select the required column from the suggestions fetched.
Scroll till the end of the column list and choose to sort either by Ascending or Descending order.
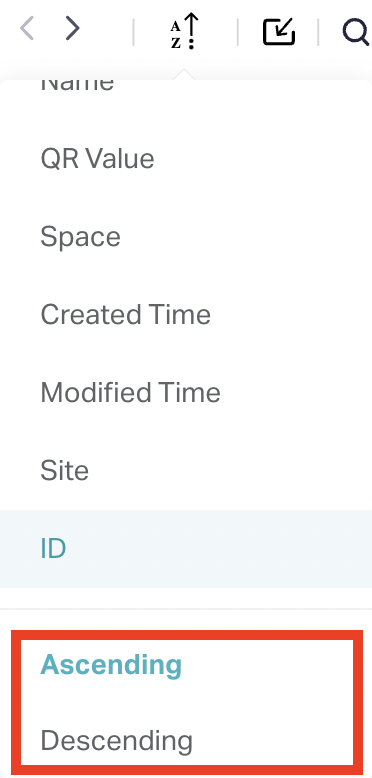
The dashboard is automatically refreshed and the data is arranged in the selected order.
Exporting Data
The application allows you to export the data from the dashboards in various formats. This feature can be used along with the search, sort and customize column functions, that is, you can create views, sort the data with respect to the available columns, customize the columns to be displayed and extract it as and when required.
In facilio, the following exporting options are available:
Exporting to CSV
To export the data into a CSV file,
Create the required data view to be extracted (read the Searching the Application, Sorting Data and Customizing Column Settings sections for more information).
Click the
 (Export) icon at the top right of the dashboard header and select Export as CSV.
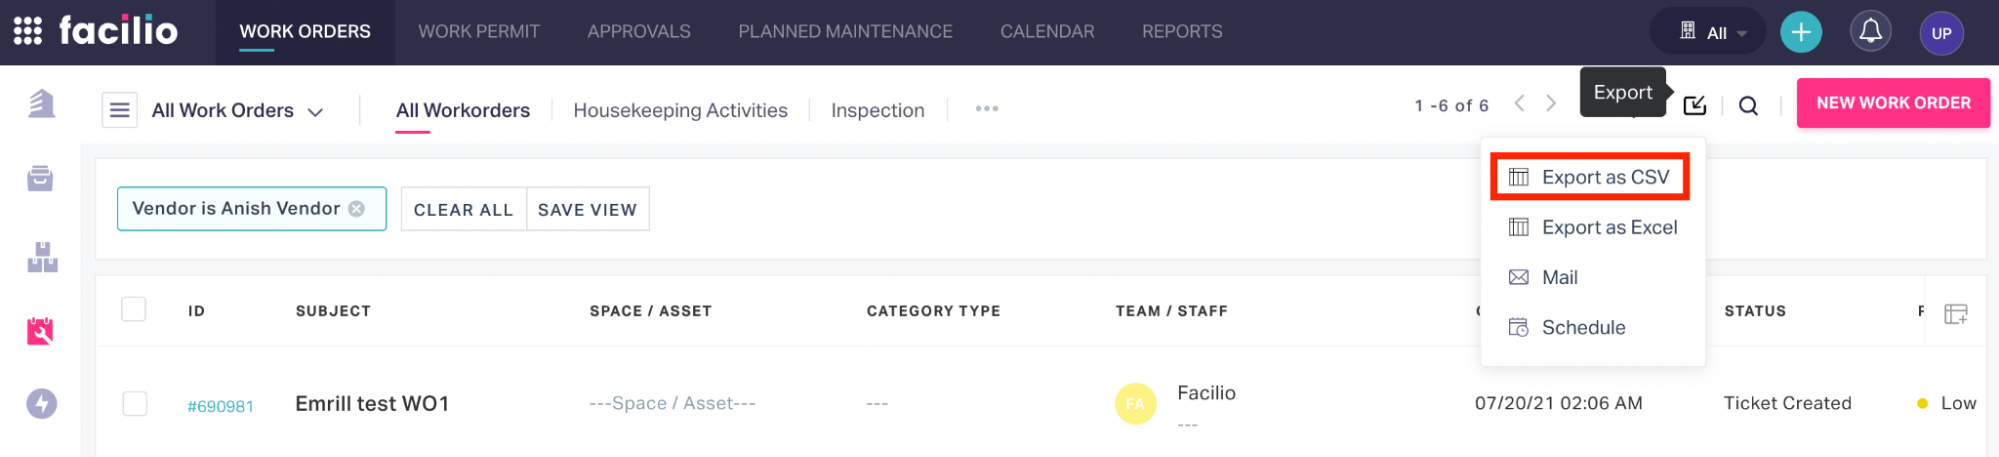
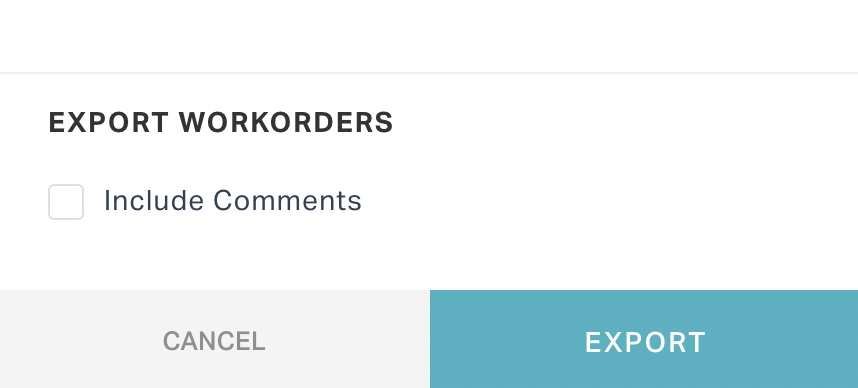
Click EXPORT in the dialog box that appears.
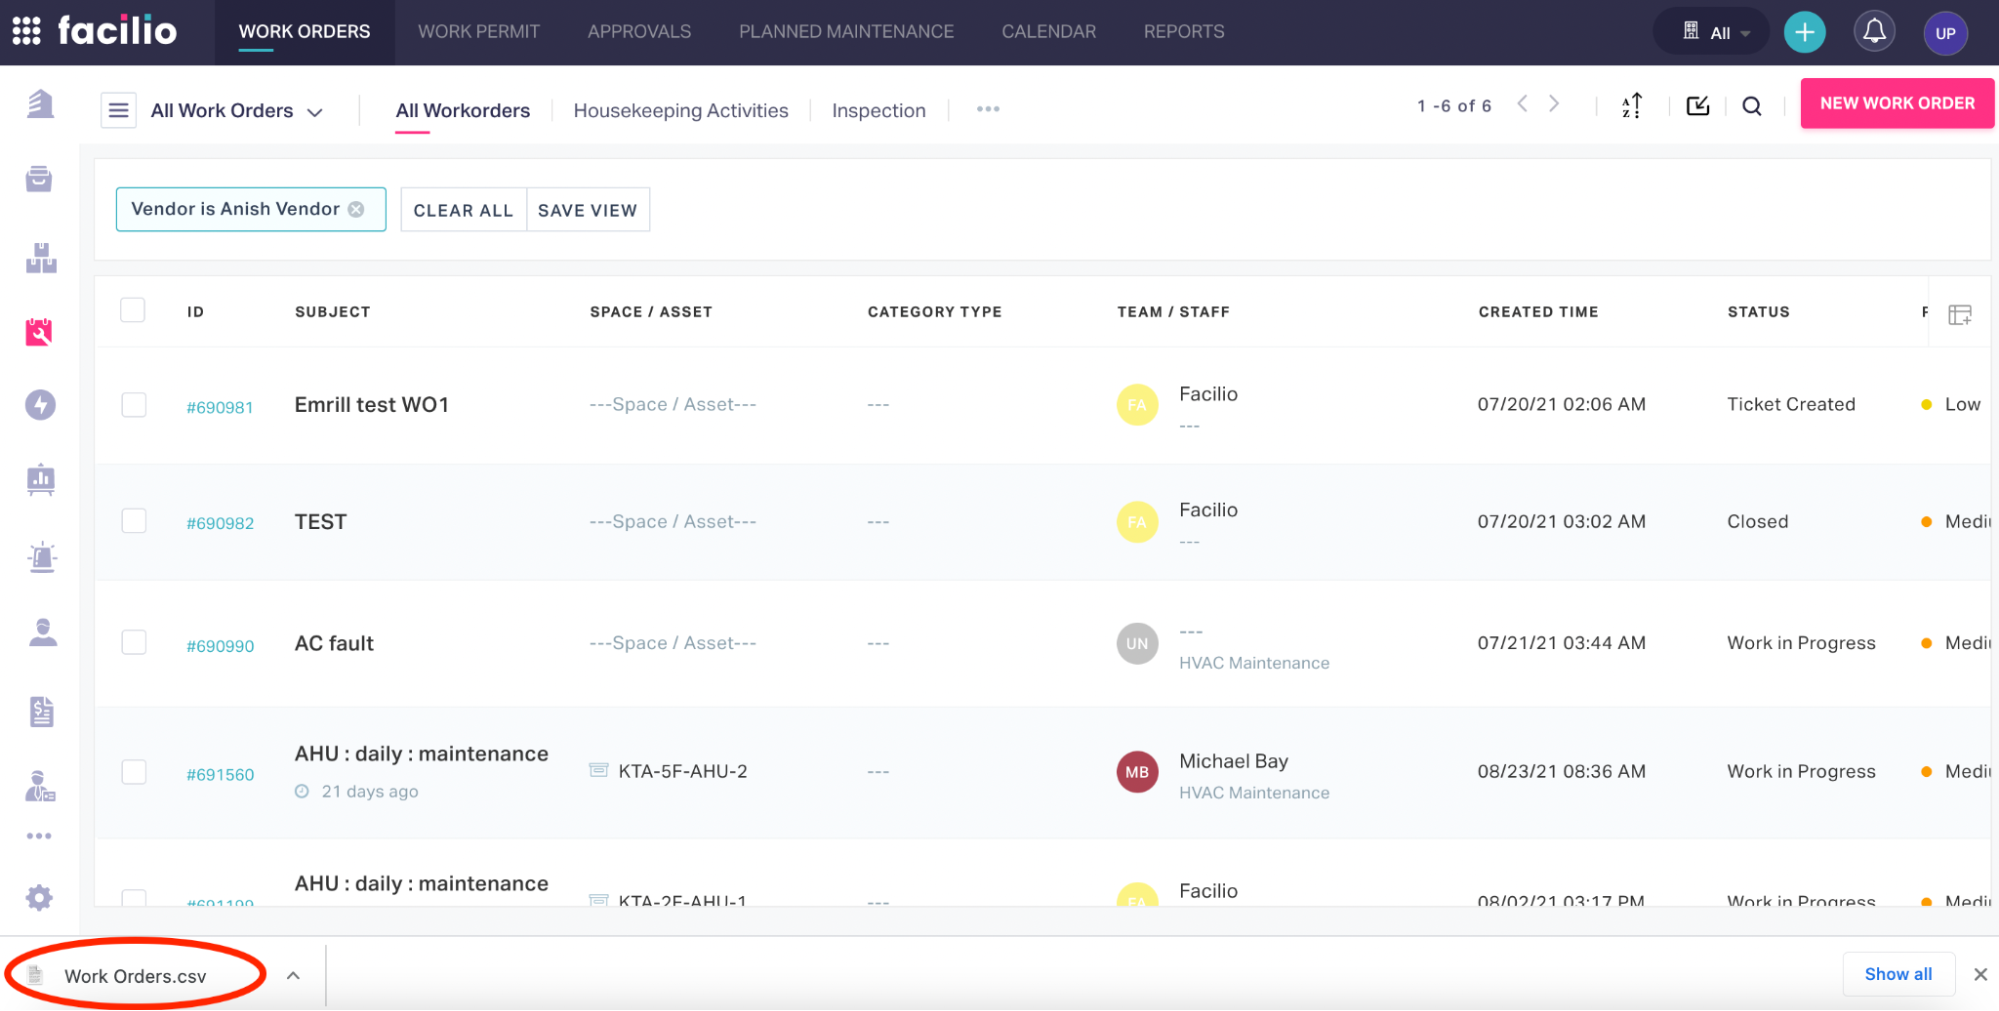
The data in the dashboard is now exported in CSV format.
note
The downloaded data will be saved in the Downloads folder by default and the file will be named after the data being exported. For example, if you export the list of work orders, the file name will be ‘Work Orders’.
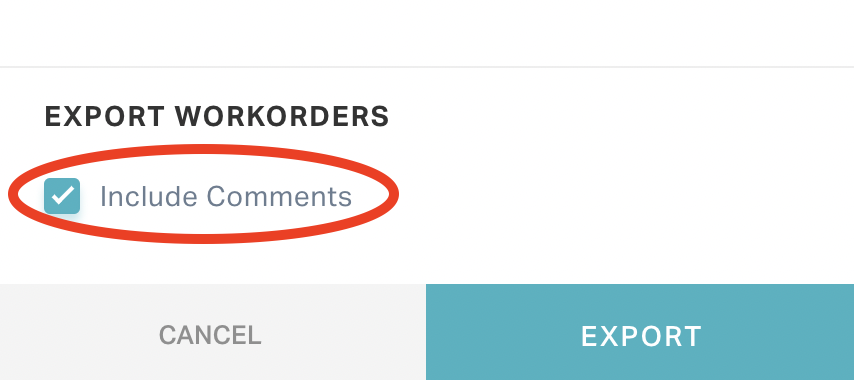
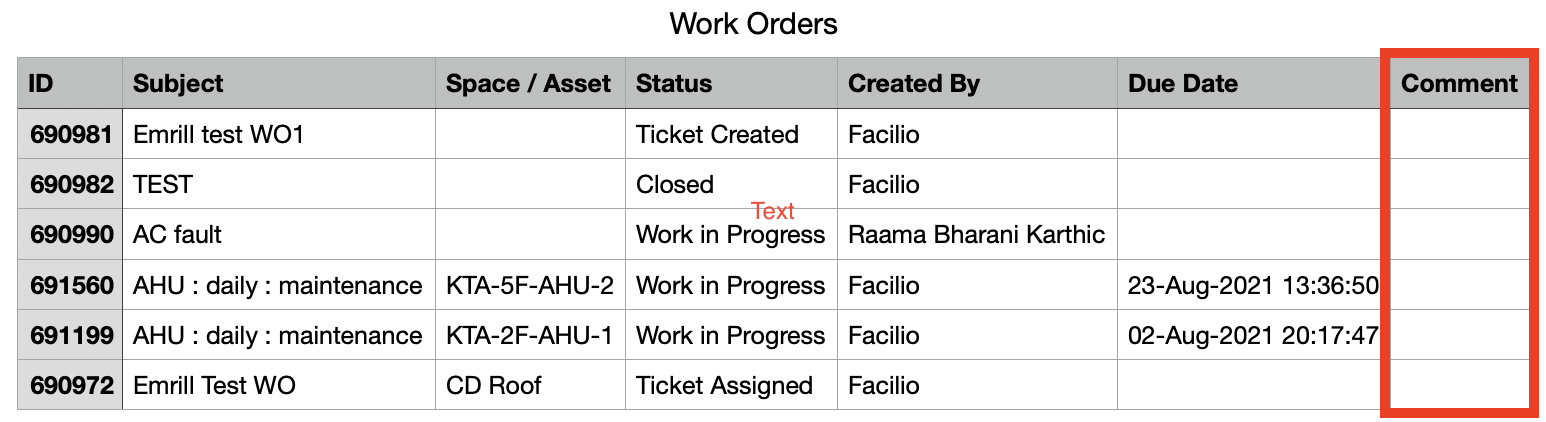
If you had clicked the Include Comments check box, an additional column (Comment) will be displayed in the exported CSV file as shown below.
Exporting to Excel
To export the data into a CSV file,
Create the required data view to be extracted (read the Searching the Application, Sorting Data and Customizing Column Settings sections for more information).
Click the
 (Export) icon at the top right of the dashboard header and select Export as Excel.
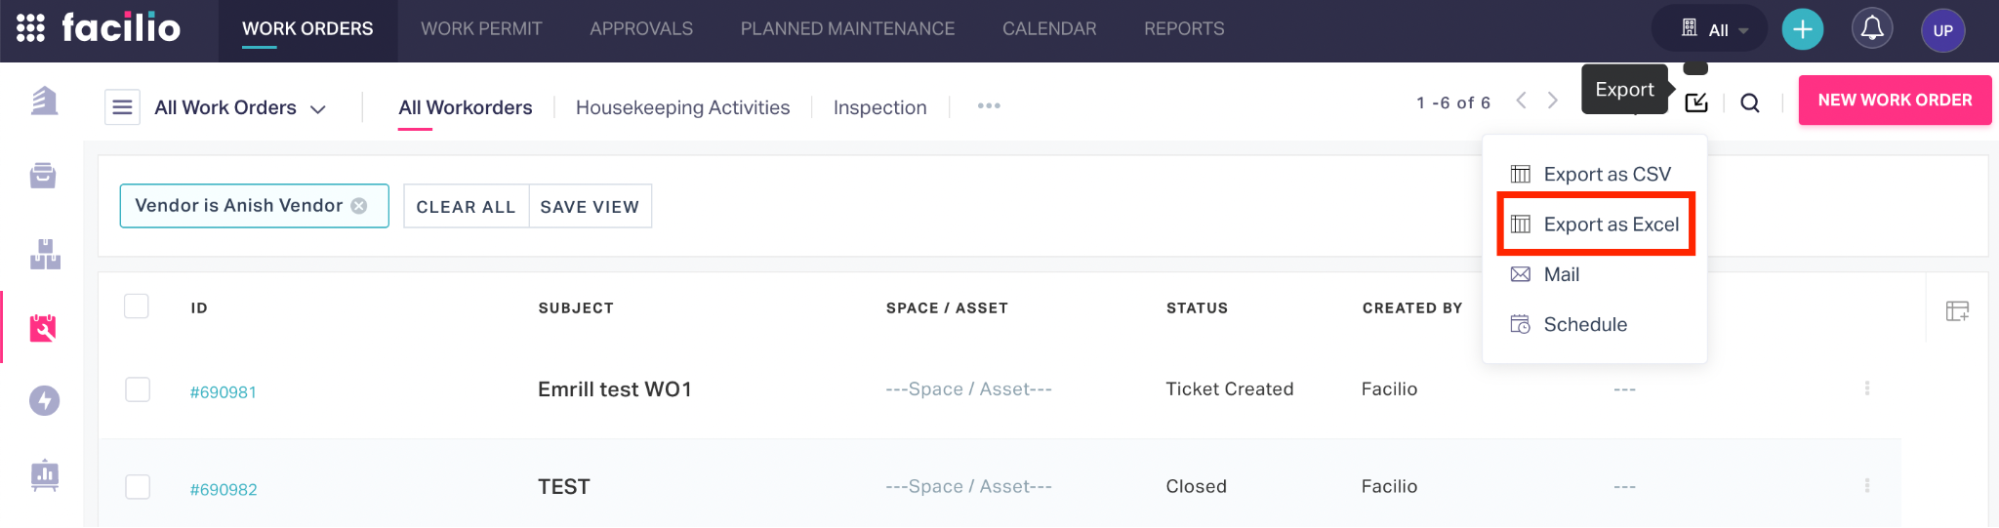
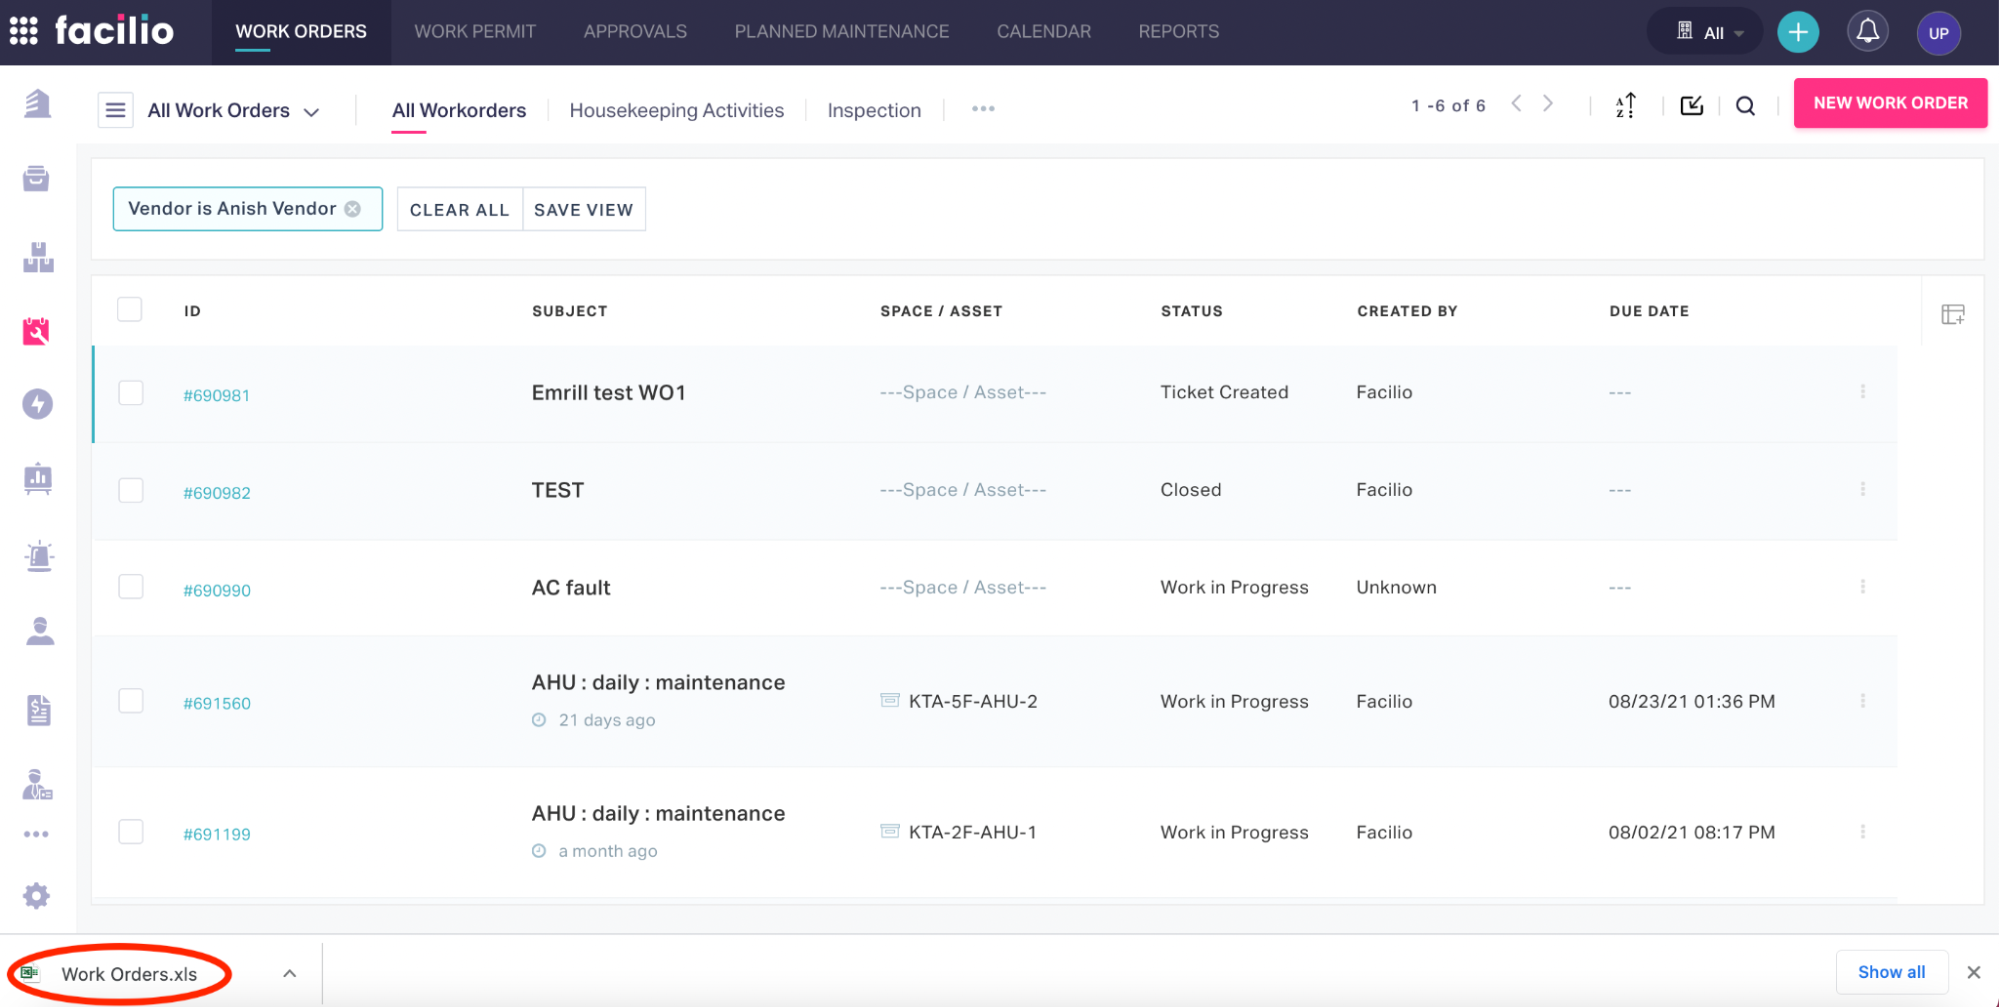
Click EXPORT in the dialog box that appears.

The data in the dashboard is now exported in XLS format
note
The downloaded data will be saved in the Downloads folder by default and the file will be named after the data being exported. For example, if you export the list of work orders, the file name will be ‘Work Orders’.
If you had clicked the Include Comments check box, an additional column (Comment) will be displayed in the exported CSV file as shown below.
Sending Email
To extract the data and send email instantly,
Create the required data view to be extracted (read the Searching the Application, Sorting Data and Customizing Column Settings sections for more information).
Click the
 (Export) icon at the top right of the dashboard header and select Mail.
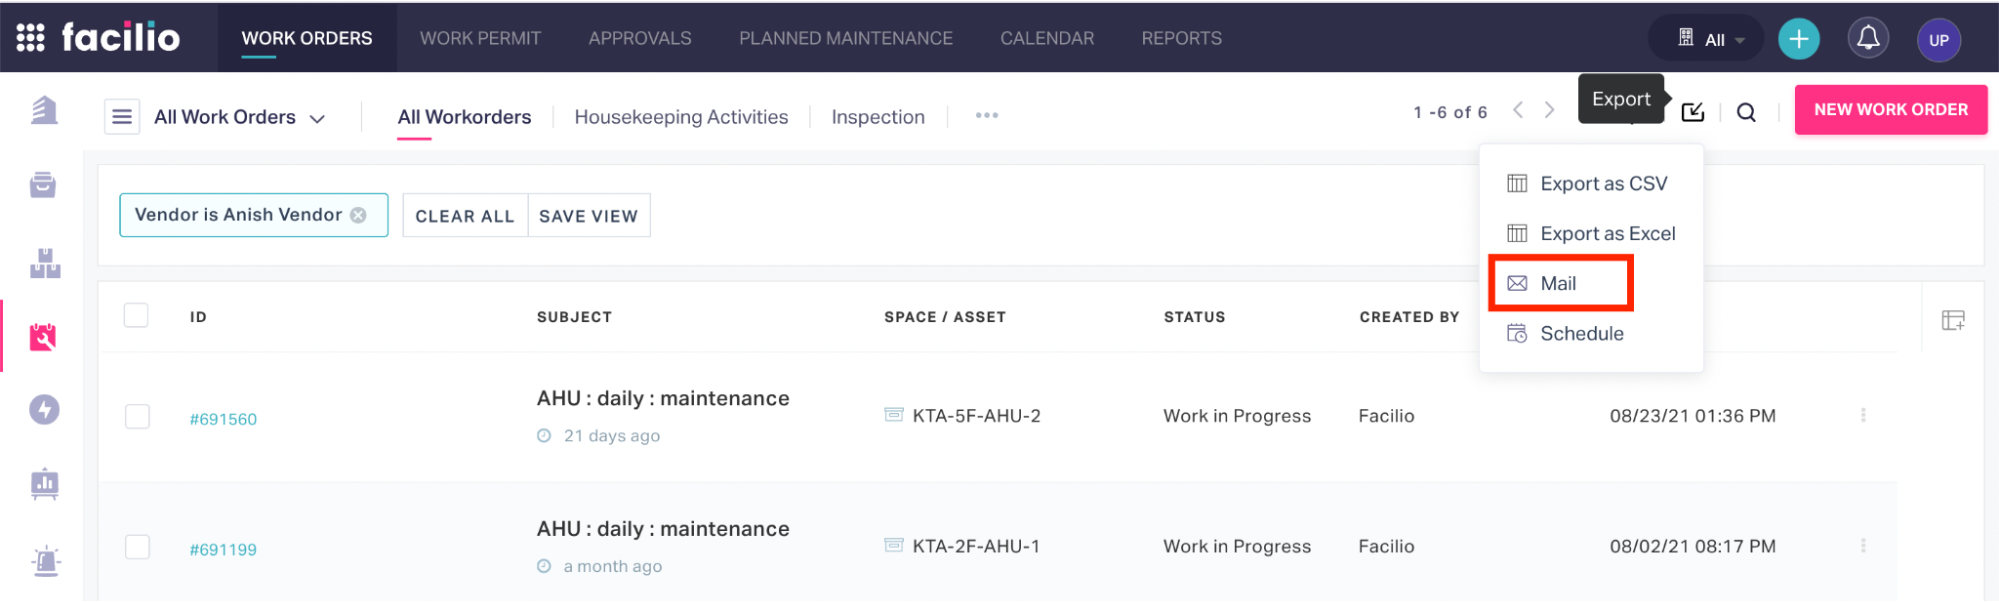
The EMAIL dialog is displayed as shown below.
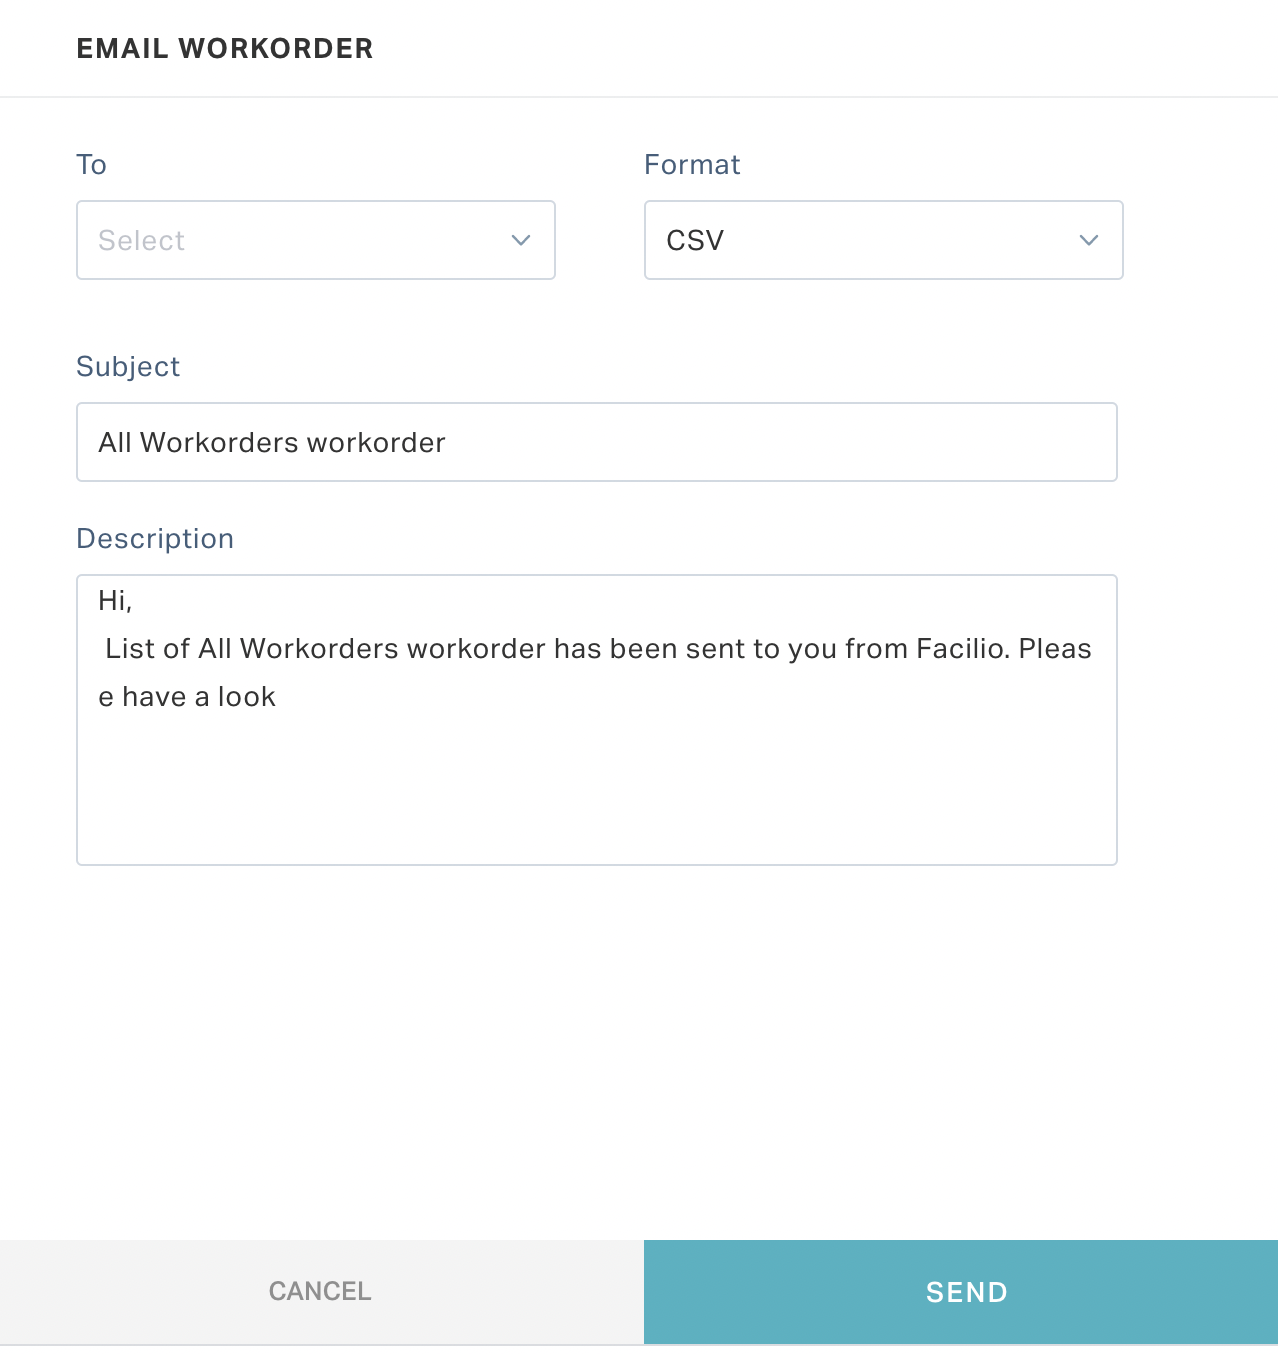
Update the following fields in this screen.
Field Description To Recipients' email address Format The format in which the data must be extracted. You can choose from the following options: - CSV
- Excel
Subject Subject of the email to be sent.
Note: This field will be auto-populated based on the report being exported.Description Content of the email to be sent.
Note: This field will be auto-populated based on the report being exported.Click SEND. An email is immediately triggered to the recipient(s).
note
This feature is available only for selected modules (for example, Planned Maintenance).
Scheduling Reports
To extract the data and schedule the email trigger,
Create the required data view to be extracted (read the Searching the Application, Sorting Data and Customizing Column Settings sections for more information).
Click the
 (Export) icon at the top right of the dashboard header and select Schedule.
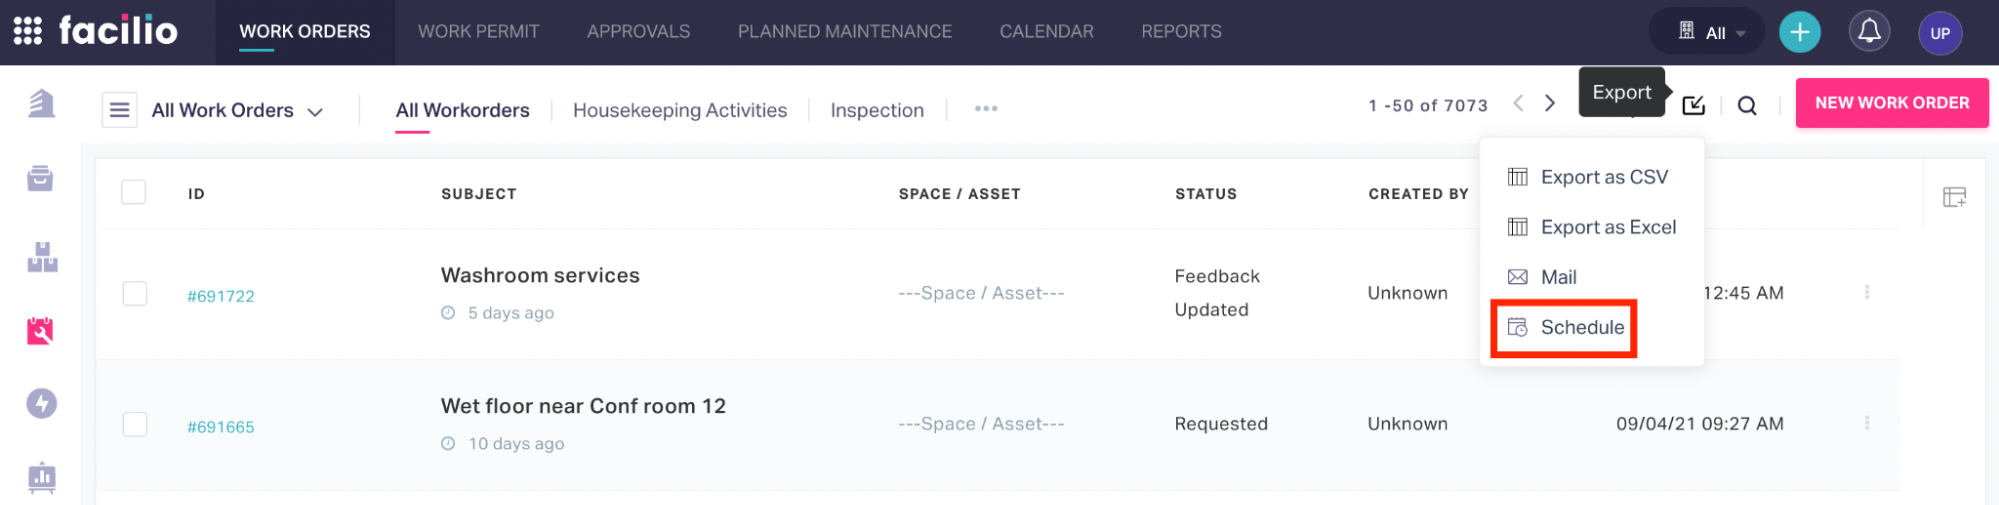
The SCHEDULE THIS VIEW dialog appears as shown in the screenshot below.
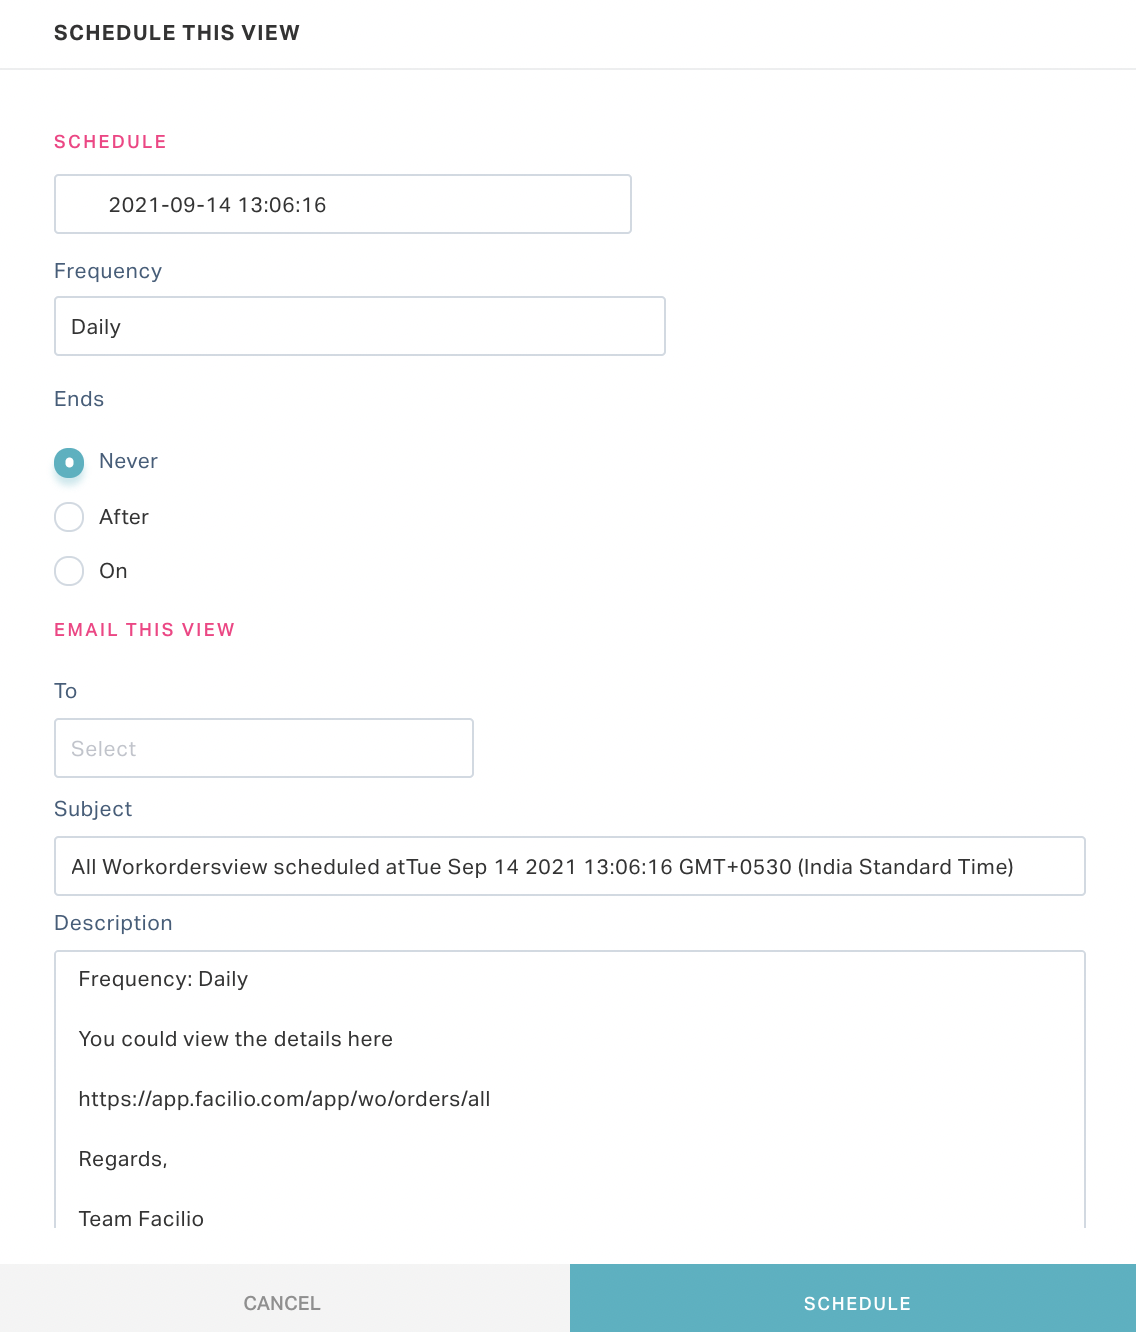
Update the following fields in this screen.
Section Filed Description SCHEDULE Date & Time The date and time at which the report has to be triggered Frequency The frequency of the email trigger. You can choose from the following options: - Daily
- Weekly
- Monthly
- Yearly
Ends Recurrence of the email trigger. You can choose from the following options: - Never - Recurring event with respect to the frequency selected
- After - Number of recurrences (for example, 3 times)
- On - Date of occurrence
EMAIL THIS VIEW To Recipients' email address Subject Subject of the email to be sent.
Note: This field will be auto-populated based on the report being exported and the details updated in the above fields.Description Content of the email to be sent.
Note: This field will be auto-populated based on the report being exported and the details updated in the above fields.Click SCHEDULE. An email is triggered to the recipient(s) with the updated report on the scheduled date and time in scheduled frequency.
note
This feature is available only for selected modules (for example, Planned Maintenance and Diagnostics).
Customizing Column Settings
In addition to creating views and sorting data, the application allows you to customize the columns displayed in the list view for all the modules. Using this functionality you can always filter the required columns, rearrange and rename them, and hide the other columns temporarily.
To customize the columns displayed in the list view,
Click the
 icon at the top right of the list view. The COLUMN SETTINGS window appears as shown below.
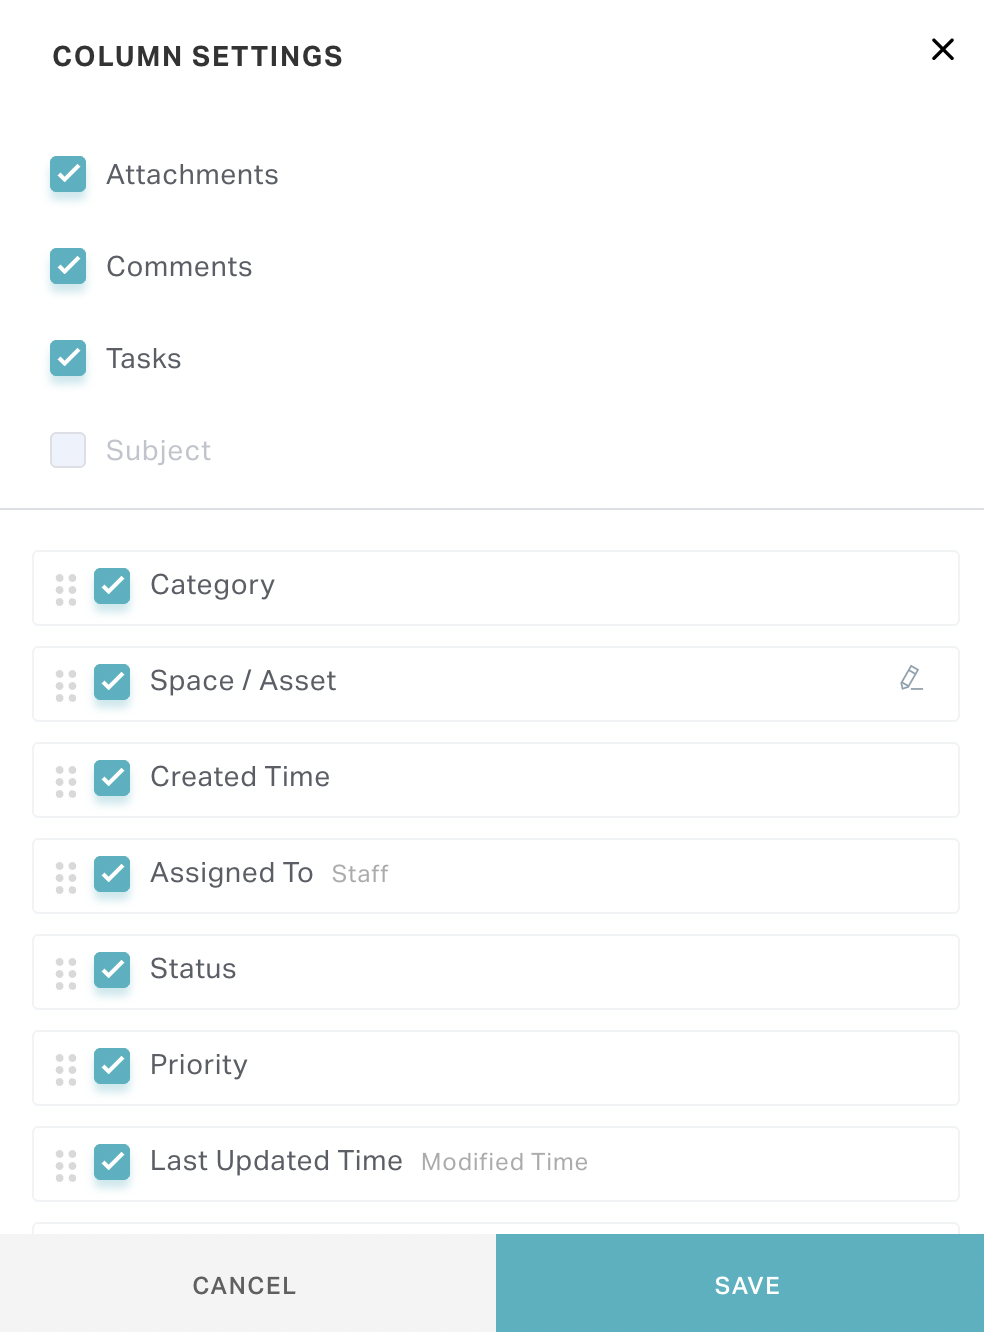
Select the required columns from the list.
Note: The Subject column will be displayed by default and cannot be hidden.
You can perform the following actions, if required:
- Click and drag
 icon corresponding to a column to reposition it.
 - Click
 icon corresponding to a column to rename it.
Note: The views can have certain views that can neither be repositioned nor renamed. In the above screenshot, the following columns are fixed:
- Attachments
- Comments
- Tasks
- Subject
- Click and drag
Click SAVE. The selected columns are displayed and the respective changes are reflected in the list view.