Tenant Portal
Tenants are the residents and stores occupying certain spaces in a building. Nowadays, the property managers rely on web applications to provide the tenants with extra convenience and expanded services. This in turn propagtes the requirement of a dedicated portal for the tenants, which could promote seamless living experience.
Introduction
Facilio provides an exclusive interface for tenants that serves as a platform for them to voice their concerns and receive solutions within agreed turn-around-times (TATs). In addition, using the tenant portal the residents and stores can register their occupants, manage visitors, book and utilize the facilities, get notified on latest announcements and ongoing offers in the neighborhoods, and so on.
Getting Started
This product guide is intended mainly for tenants who would like to make effective use of the Facilio Tenant Portal. This section elaborates the basic requirements, configurations and functionalities of the Tenant portal.
System Requirements
The following table depicts the system requirements for the Facilio Tenant application to work.
| Type | Requirement | Specification |
|---|---|---|
| System | Browser | Safari 9 and above, Chrome 49 and above, Opera 45 and above |
| Others | JavaScript and cookies must be enabled to operate the application | |
| Mobile | Android | Android version KitKat to latest (Api-19) |
| iOS | iOS version11.0 to latest |
Configuring Portal Access
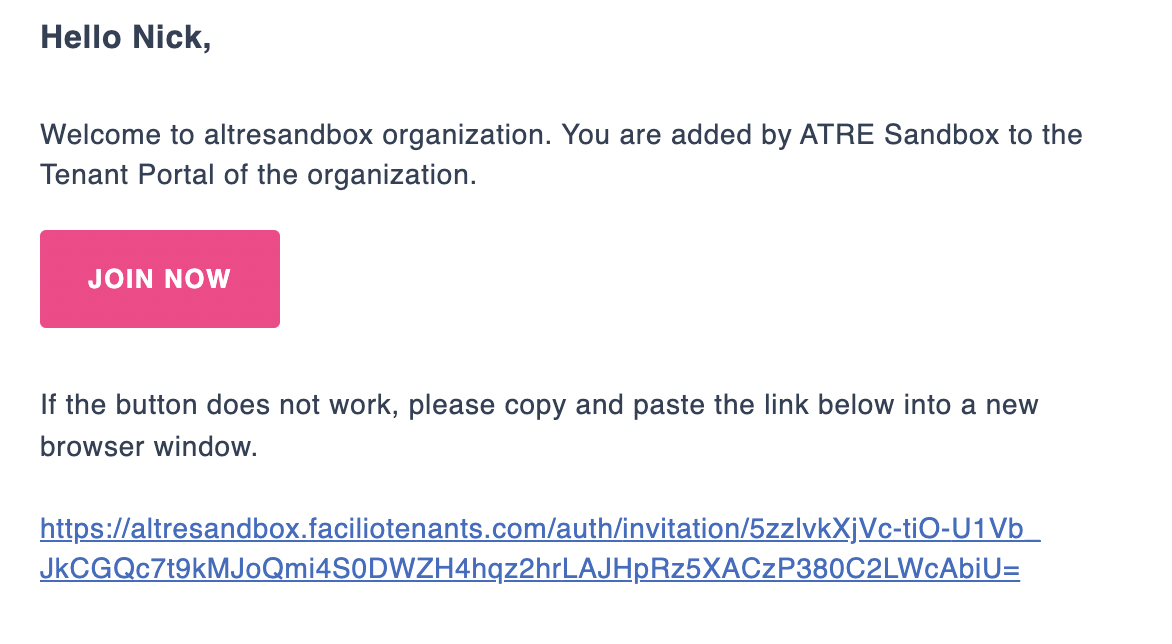
In order for a resident to utilize the tenant portal, access must be enabled by the Facility Manager (FM). That is, an FM enables portal access for a tenant to be able to sign in to the tenant portal. Once the access is enabled, an email is triggered to the tenant contact with a link to activate the portal access as shown below.
Perform the following steps to activate the portal access:
Follow the link in the email and create a password for the account as shown below.
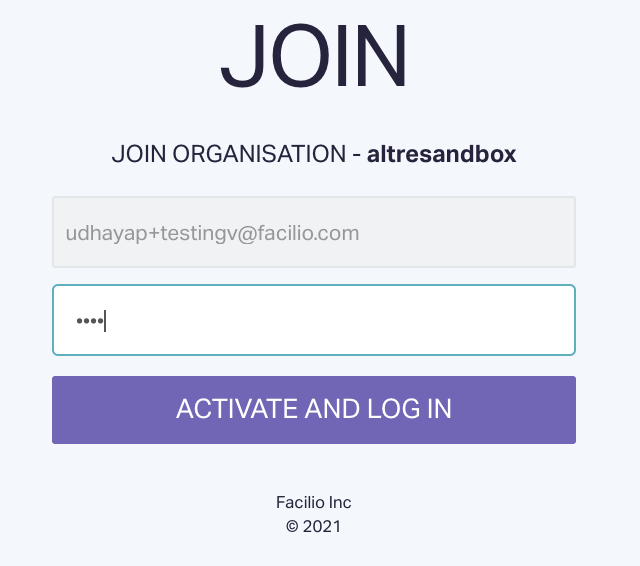
Note: The username field in the above activation screen is auto filled and cannot be modified. You can note down the username in this screen for future reference.
Click ACTIVATE AND LOG IN and sign in to your account. The portal access is now successfully configured.
Note: The email id provided by the FM while enabling portal access, serves as the user id for the tenant account by default.
Understanding Basic Features and Functionalities
This section covers the basic features and functionalities that are common across the modules in the Tenant portal.
Searching the Application
This feature acts as a filter to narrow down the data to the desired set of results. In other words, this feature allows you to qualify and display only the data that is required. This feature operates across all modules of the tenant portal.
Note: Although the search is a common feature, the filters displayed will vary with respect to the modules.
Perform the following steps to apply the search filter for the data within a module:
Click the
 (Search) icon at the top right of the dashboard header. The list of module filters are displayed as shown in the screenshot below.
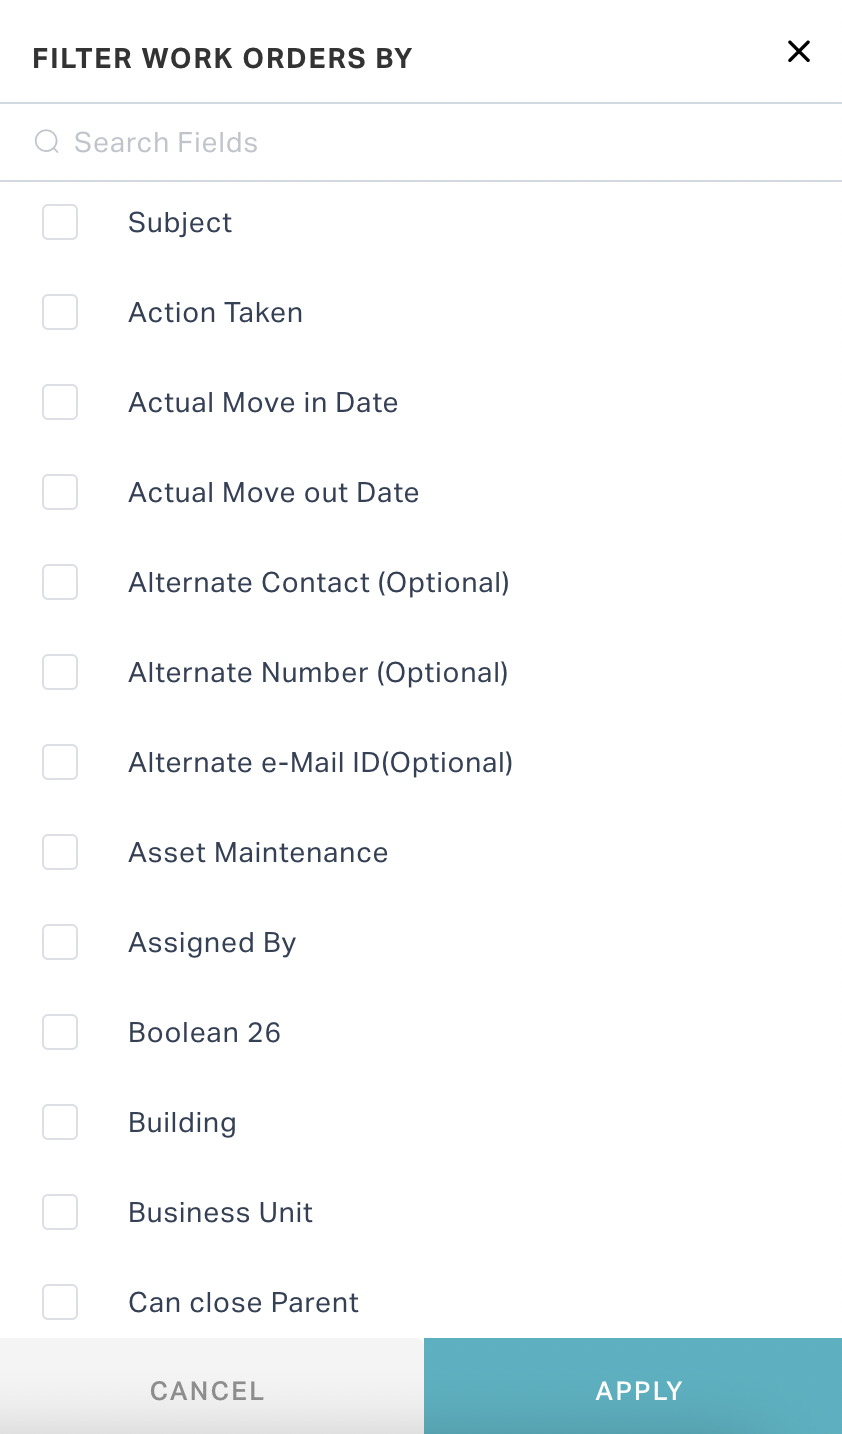
Perform any of the following actions to apply the search filter:
Select the required module filter(s) directly from the list
Start typing some text in the search field and select the required module filter(s) from the suggestions fetched.
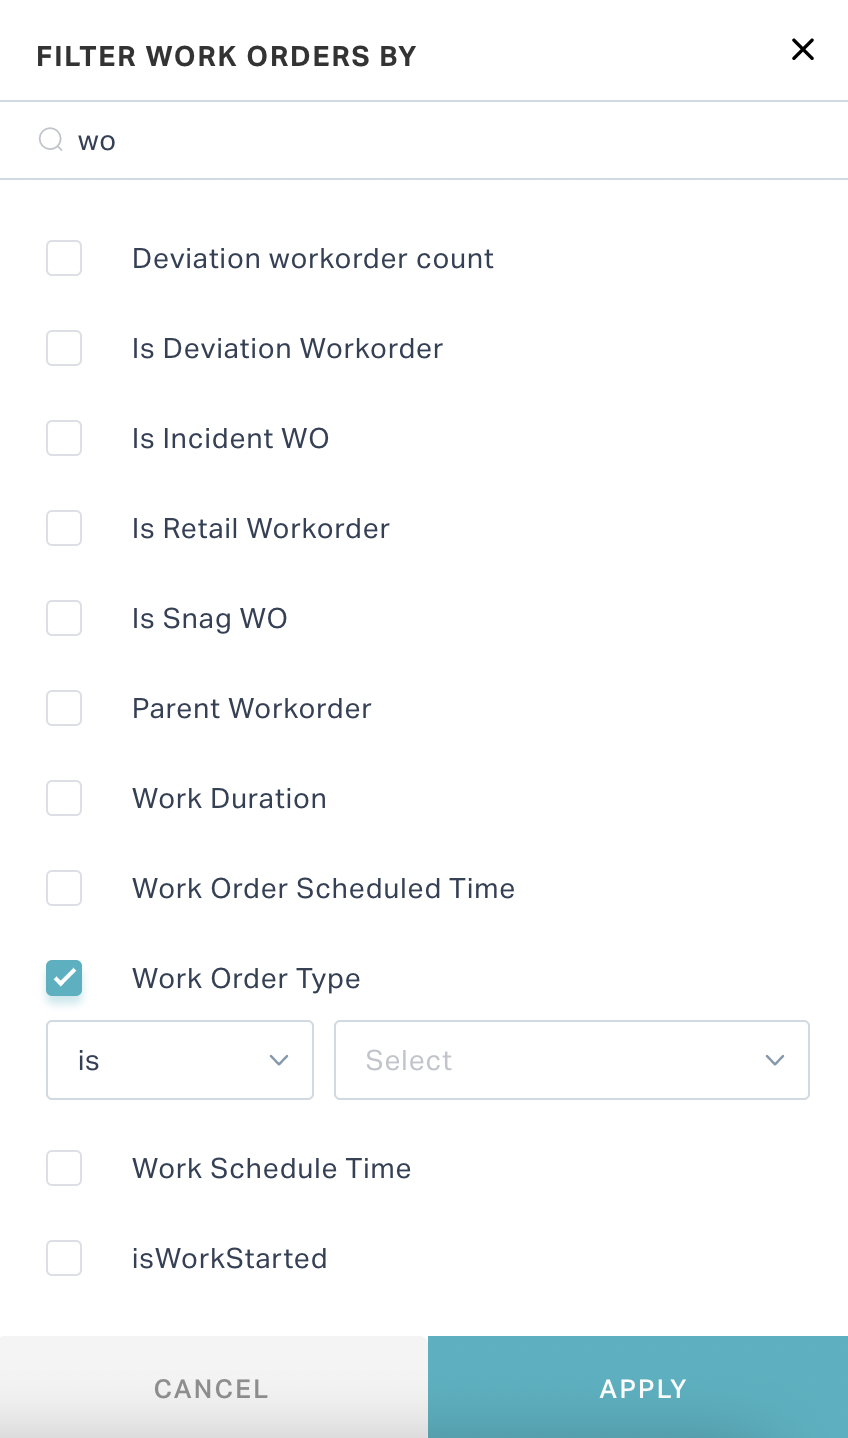
Further filter the results using the next level filters as shown in the screenshot below.
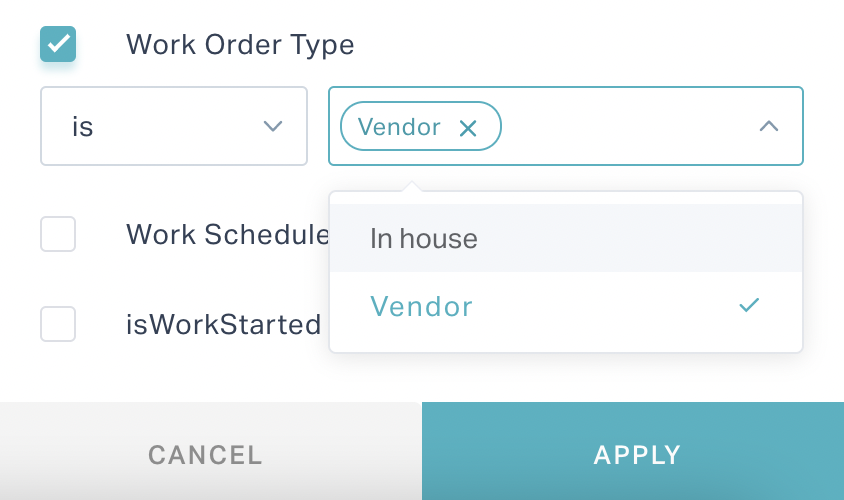
Click APPLY or CANCEL to apply or cancel the filter, respectively. If you click APPLY, The dashboard is populated with the search result. In this above scenario, the work orders handled by the vendors are populated in the dashboard as shown in the screenshot below.

Sorting Data
Example: Work orders can be sorted by created time or status, booking information can be sorted by number of attendees, and so on.
To sort the data in a dashboard,
Click the
 (Sort) icon at the top right of the dashboard header. The list of columns are displayed as shown in the screenshot below.
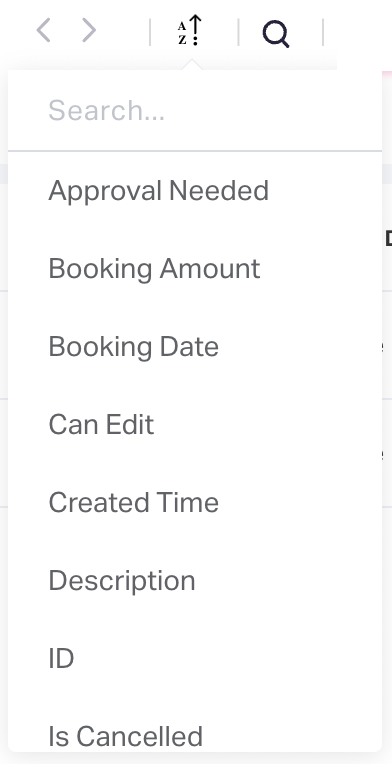
Perform any of the following actions:
Select the column to be sorted.
Start typing some text in the search field and select the required column from the suggestions fetched.
Scroll till the end of the column list and choose to sort either by Ascending or Descending order.
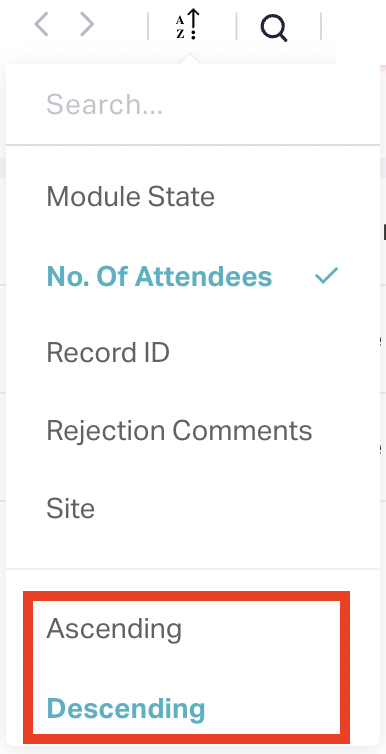
The dashboard is automatically refreshed and the data is arranged in the selected order.
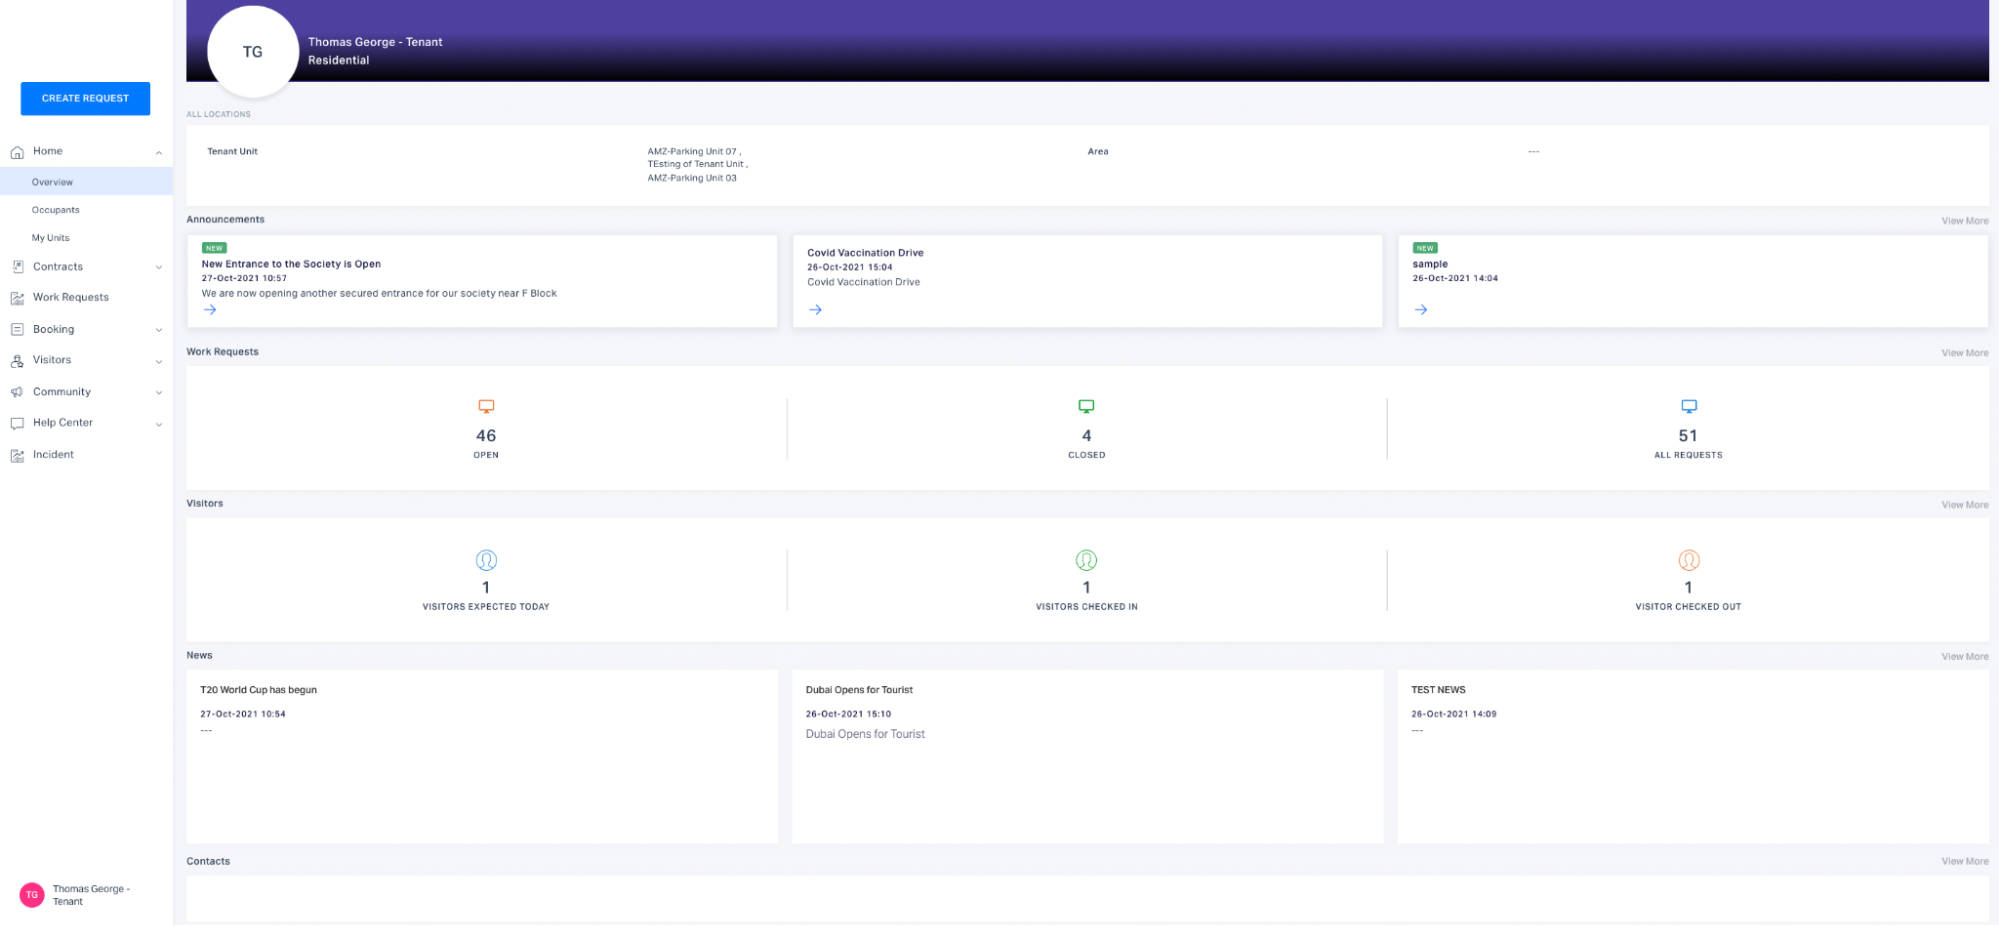
Tenant Portal Homepage
The homepage is the landing page of the tenant portal that provides an overview of all details respective to the tenant.
When you log in to the tenant portal, you are actually directed to the Overview section of the home page that displays the basic details, announcements and other information specific to you.
Working with Associated Components
The occupants and tenant units are the major components that can be associated with a tenant. This section explains how to handle the occupant and tenant unit related activities from the tenant portal.
Managing Occupants
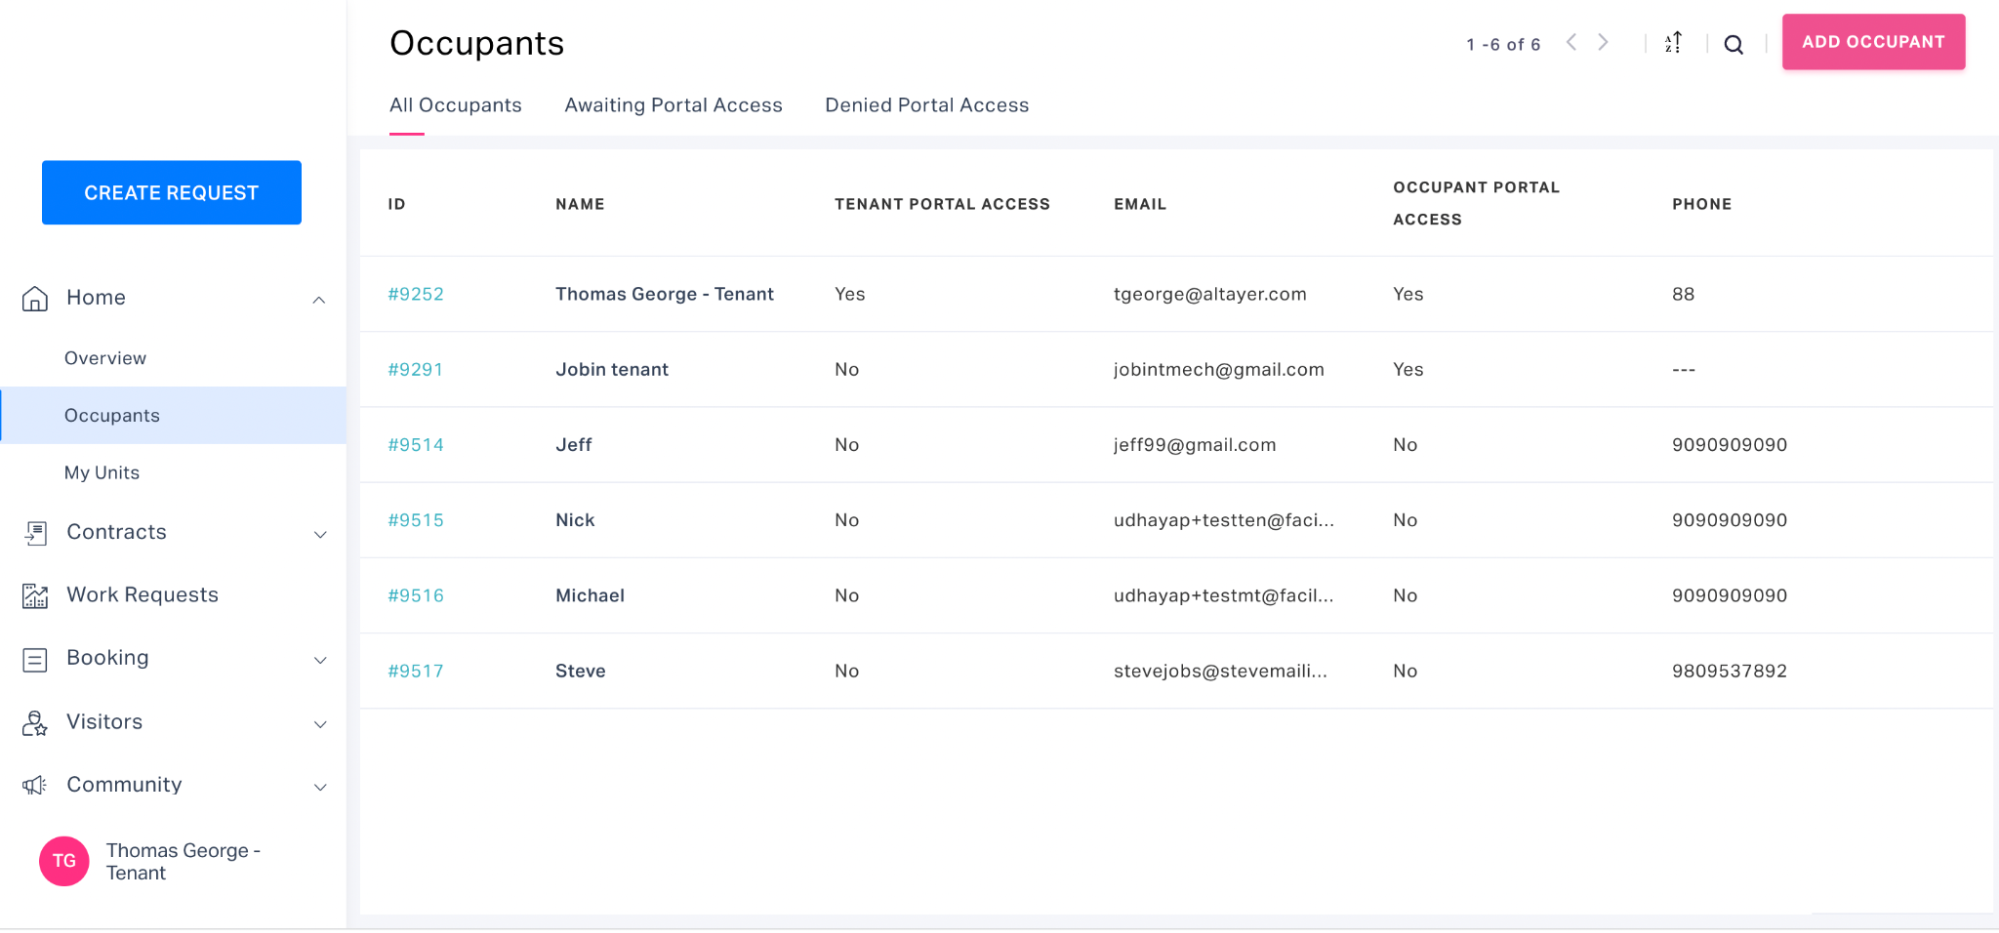
Adding Occupants
To add occupants to your account from the tenant portal,
Navigate to the Occupants section under Home in the side panel. All the occupants associated with the tenant are displayed as shown below.
Click ADD OCCUPANT. The Create Tenant Contact screen appears as shown below.
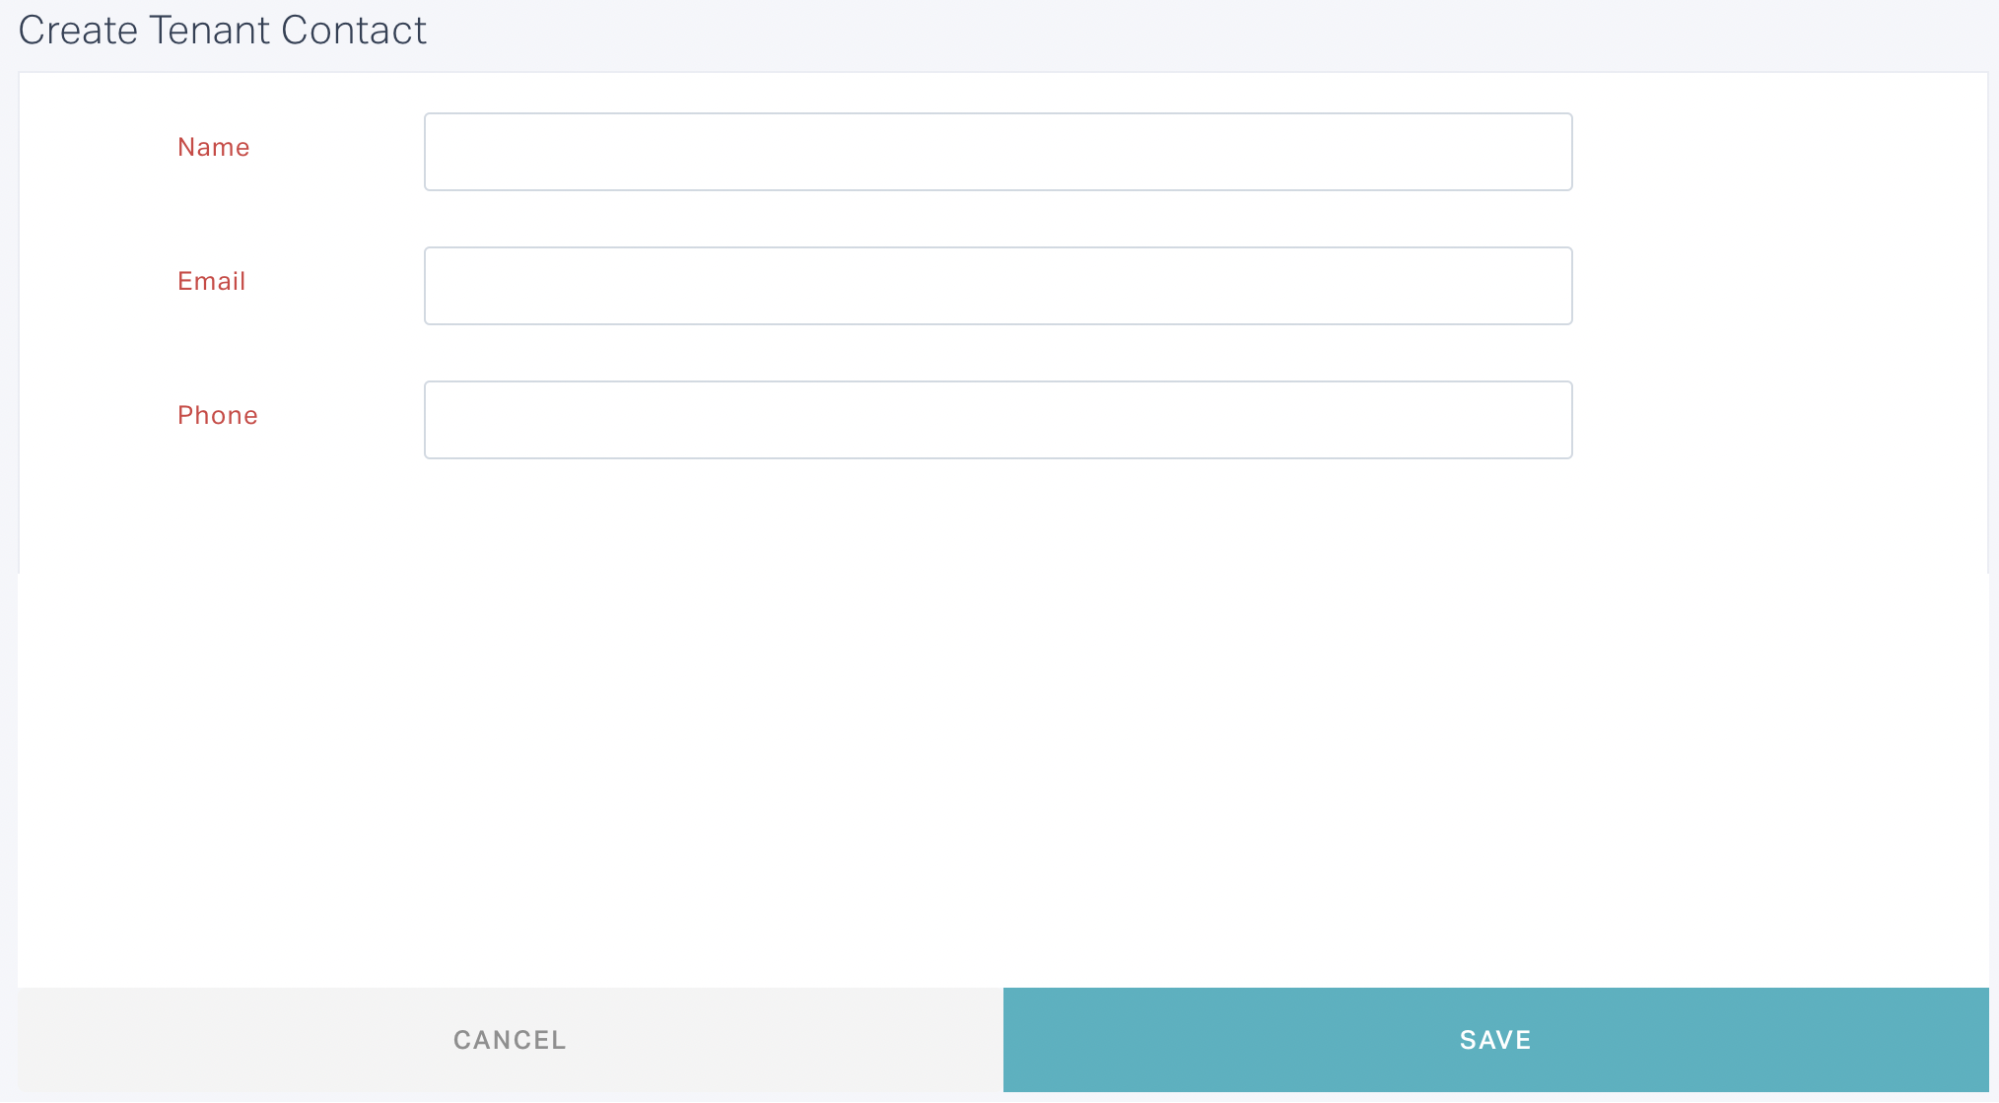
Update the contact information of the occupant in this screen and click SAVE. The new occupant is now added as your tenant contact.
Modifying Details
To make changes to the contact details of an existing occupant from the tenant portal,
Navigate to the Occupants section under Home in the side panel. All the occupants associated with the tenant are displayed as shown below.
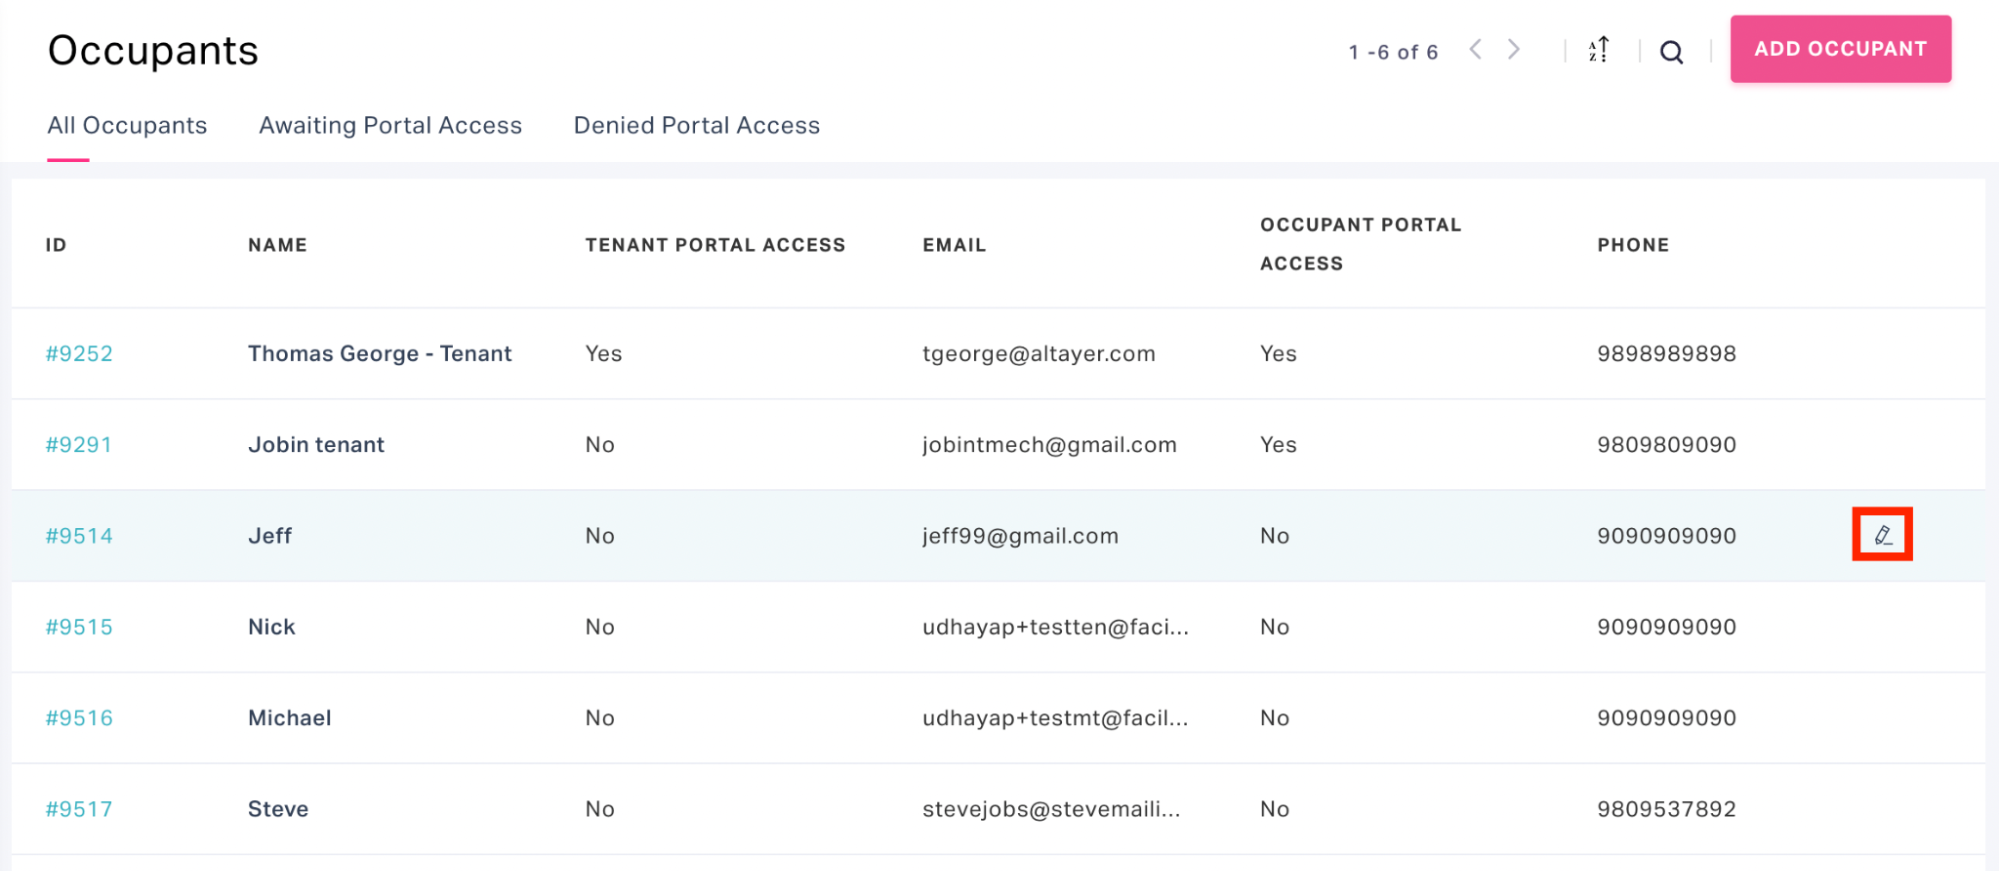
Click the
 icon respective to the tenant in the dashboard. The Edit Tenant Contact screen appears as shown below.
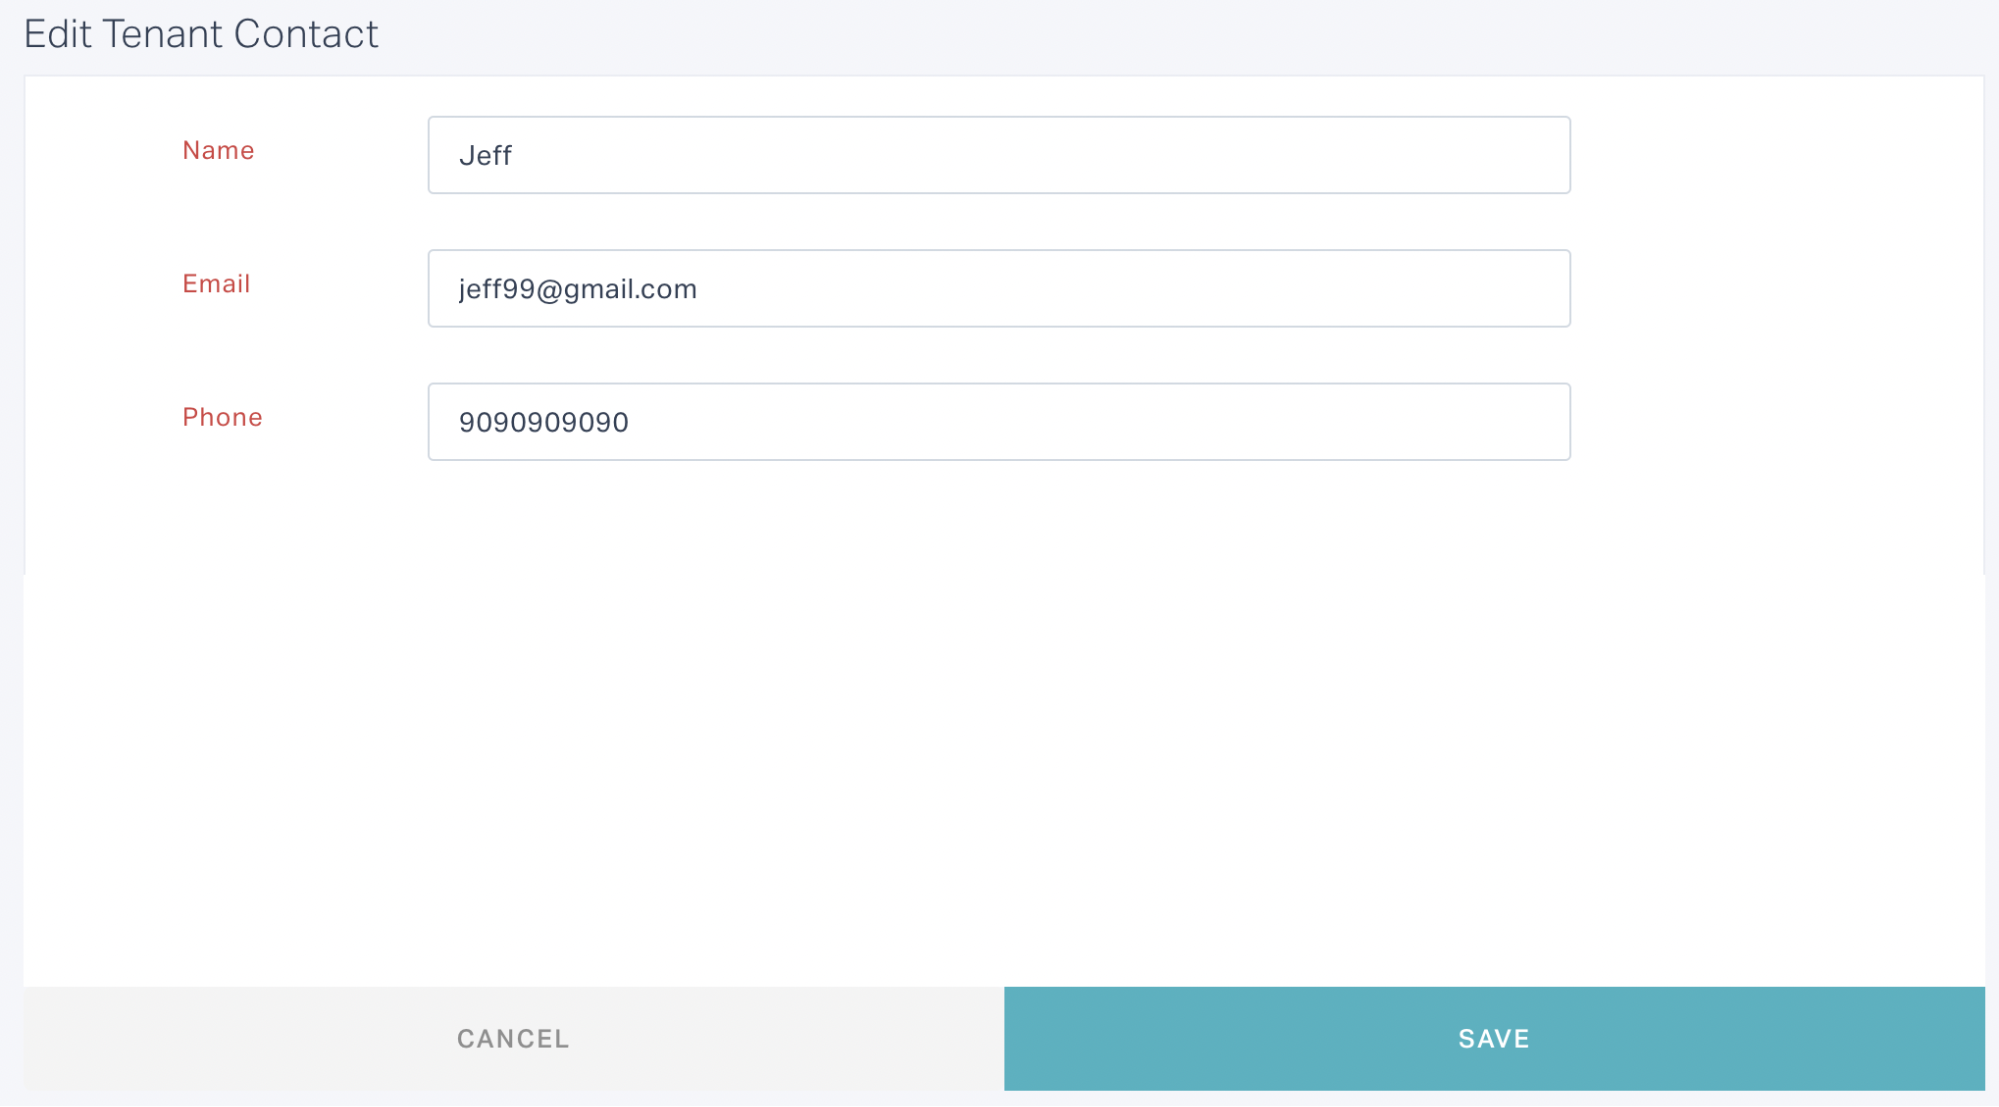
Modify the required details and click SAVE. The changes are now updated to the dashboard.
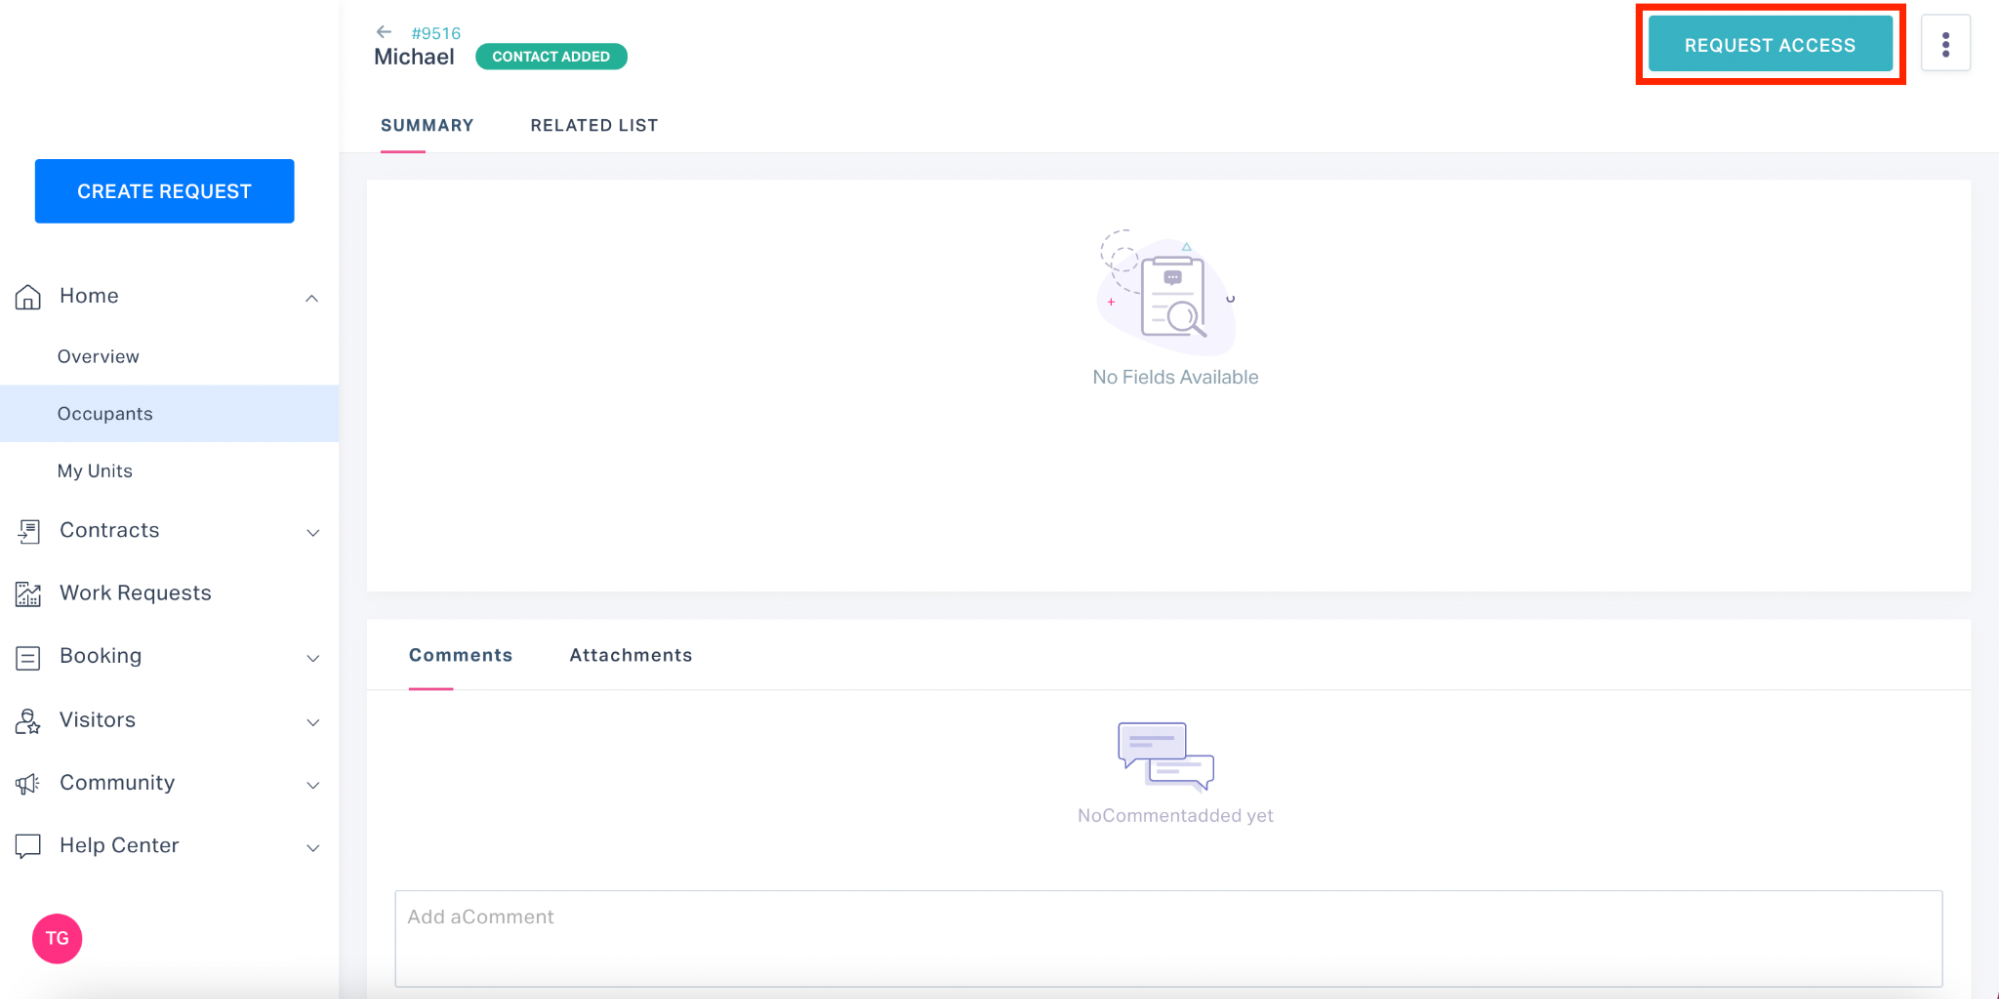
Requesting Portal Access for Occupants
A tenant can also raise a portal access request for an occupant associated with him. To raise a portal access request from the tenant portal,
Navigate to the Occupants section under Home in the side panel. All the occupants associated with the tenant are displayed.
Select the tenant contact for whom the portal access is to be raised.
Managing Tenant Units
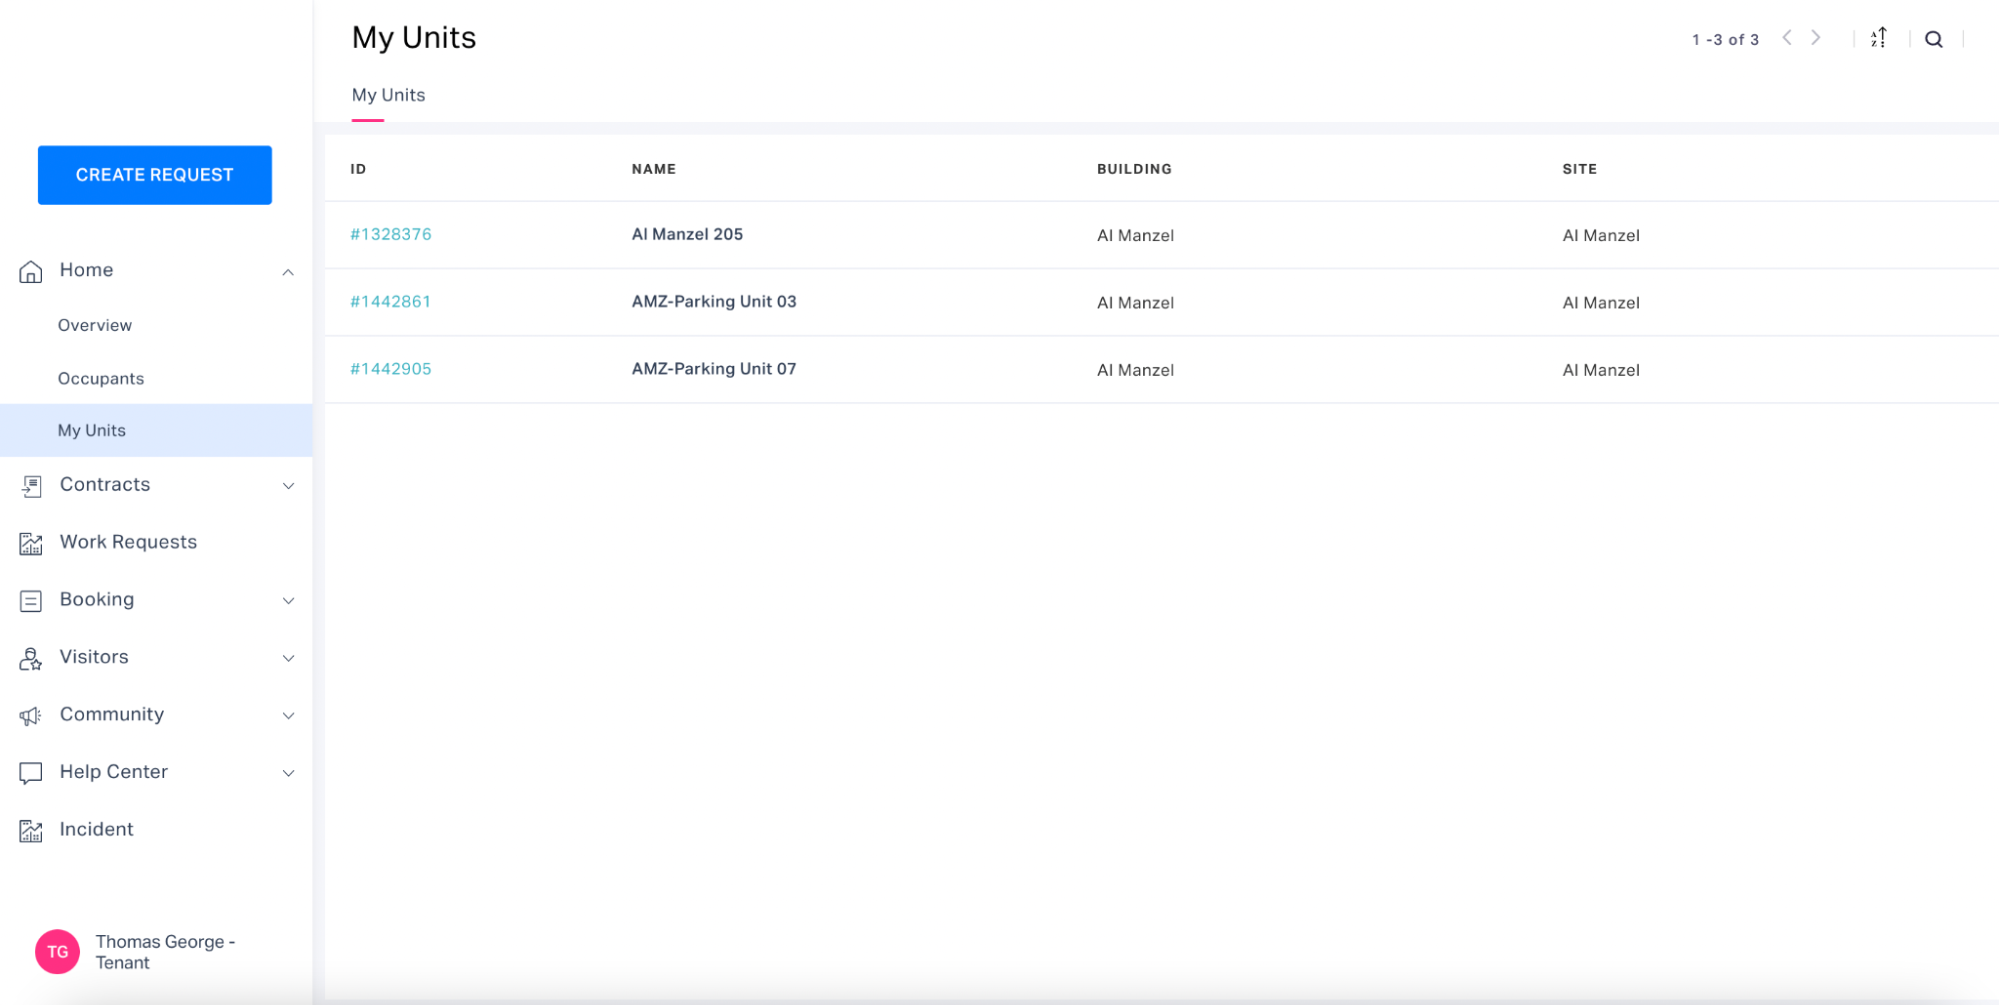
You should select a tenant unit from the list to view more detailed information about it.
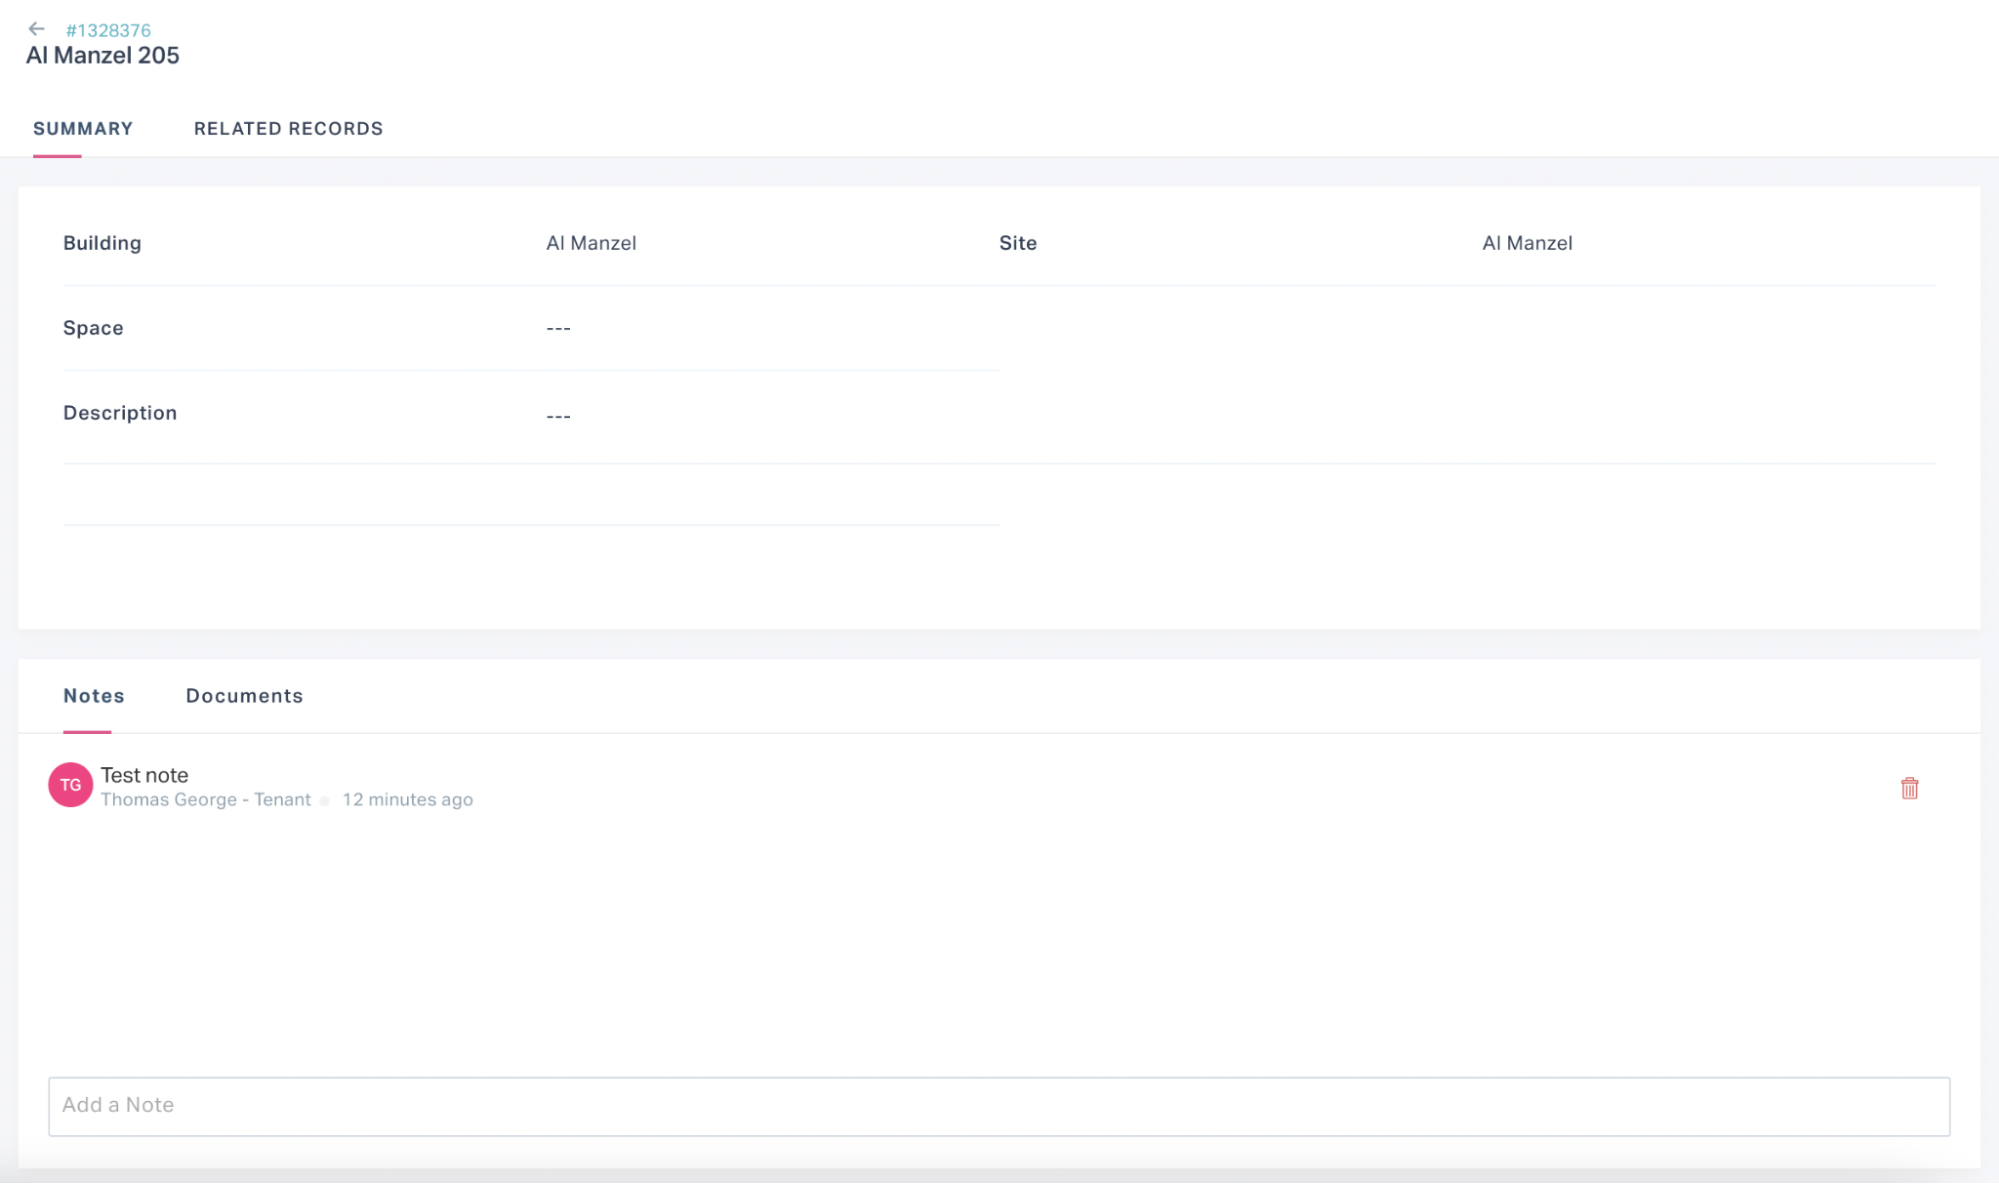
Tenant Unit Summary
Note: You can use the ![]() icon corresponding to the note or attachment to delete it.
icon corresponding to the note or attachment to delete it.
Related Records
The related records of a tenant unit are the records or dashboard items associated from various modules of the application that are specific to the selected tenant unit. This section allows you to access the assets, work orders, service requests, contracts and contract units, and referrals concerning the tenant unit.
Working with Other Tenant Modules
The application provides the tenants with a wide range of services that are grouped into modules. This section explains the various modules configured in the tenant portal.
Handling Work Requests
The Work Request module of the application allows you to raise work requests, process requests awaiting approval, view all the standard and retail requests and the requests in different states (that is, open, awaiting approval and closed) of the workflow and so on. From this module, you can raise both standard and retail requests.
Managing Standard Requests
The day to day issues faced by the tenants are termed as standard requests. This section explains how to create a standard work request and the role of a tenant in processing the request.
Creating a Work Request
You can raise a work request for a space or a particular asset. To raise a standard work request,
Login to the Tenant portal.
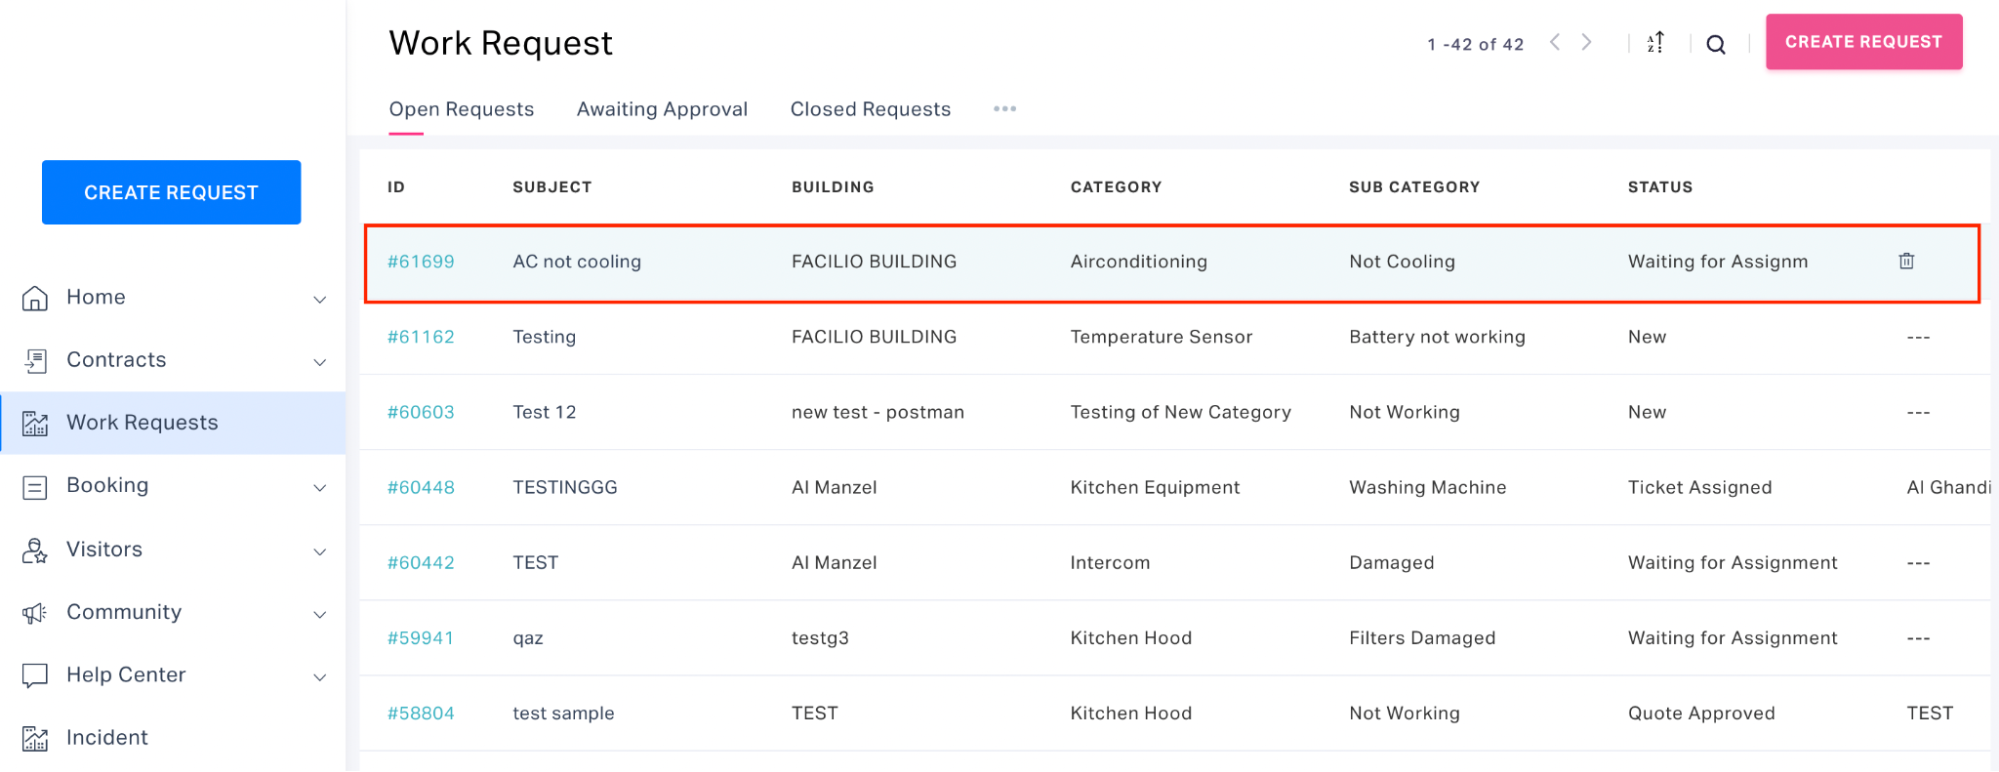
Click Work Requests in the side panel. All the open requests are displayed by default.
Click CREATE REQUEST. The Create a request page is displayed as shown below.
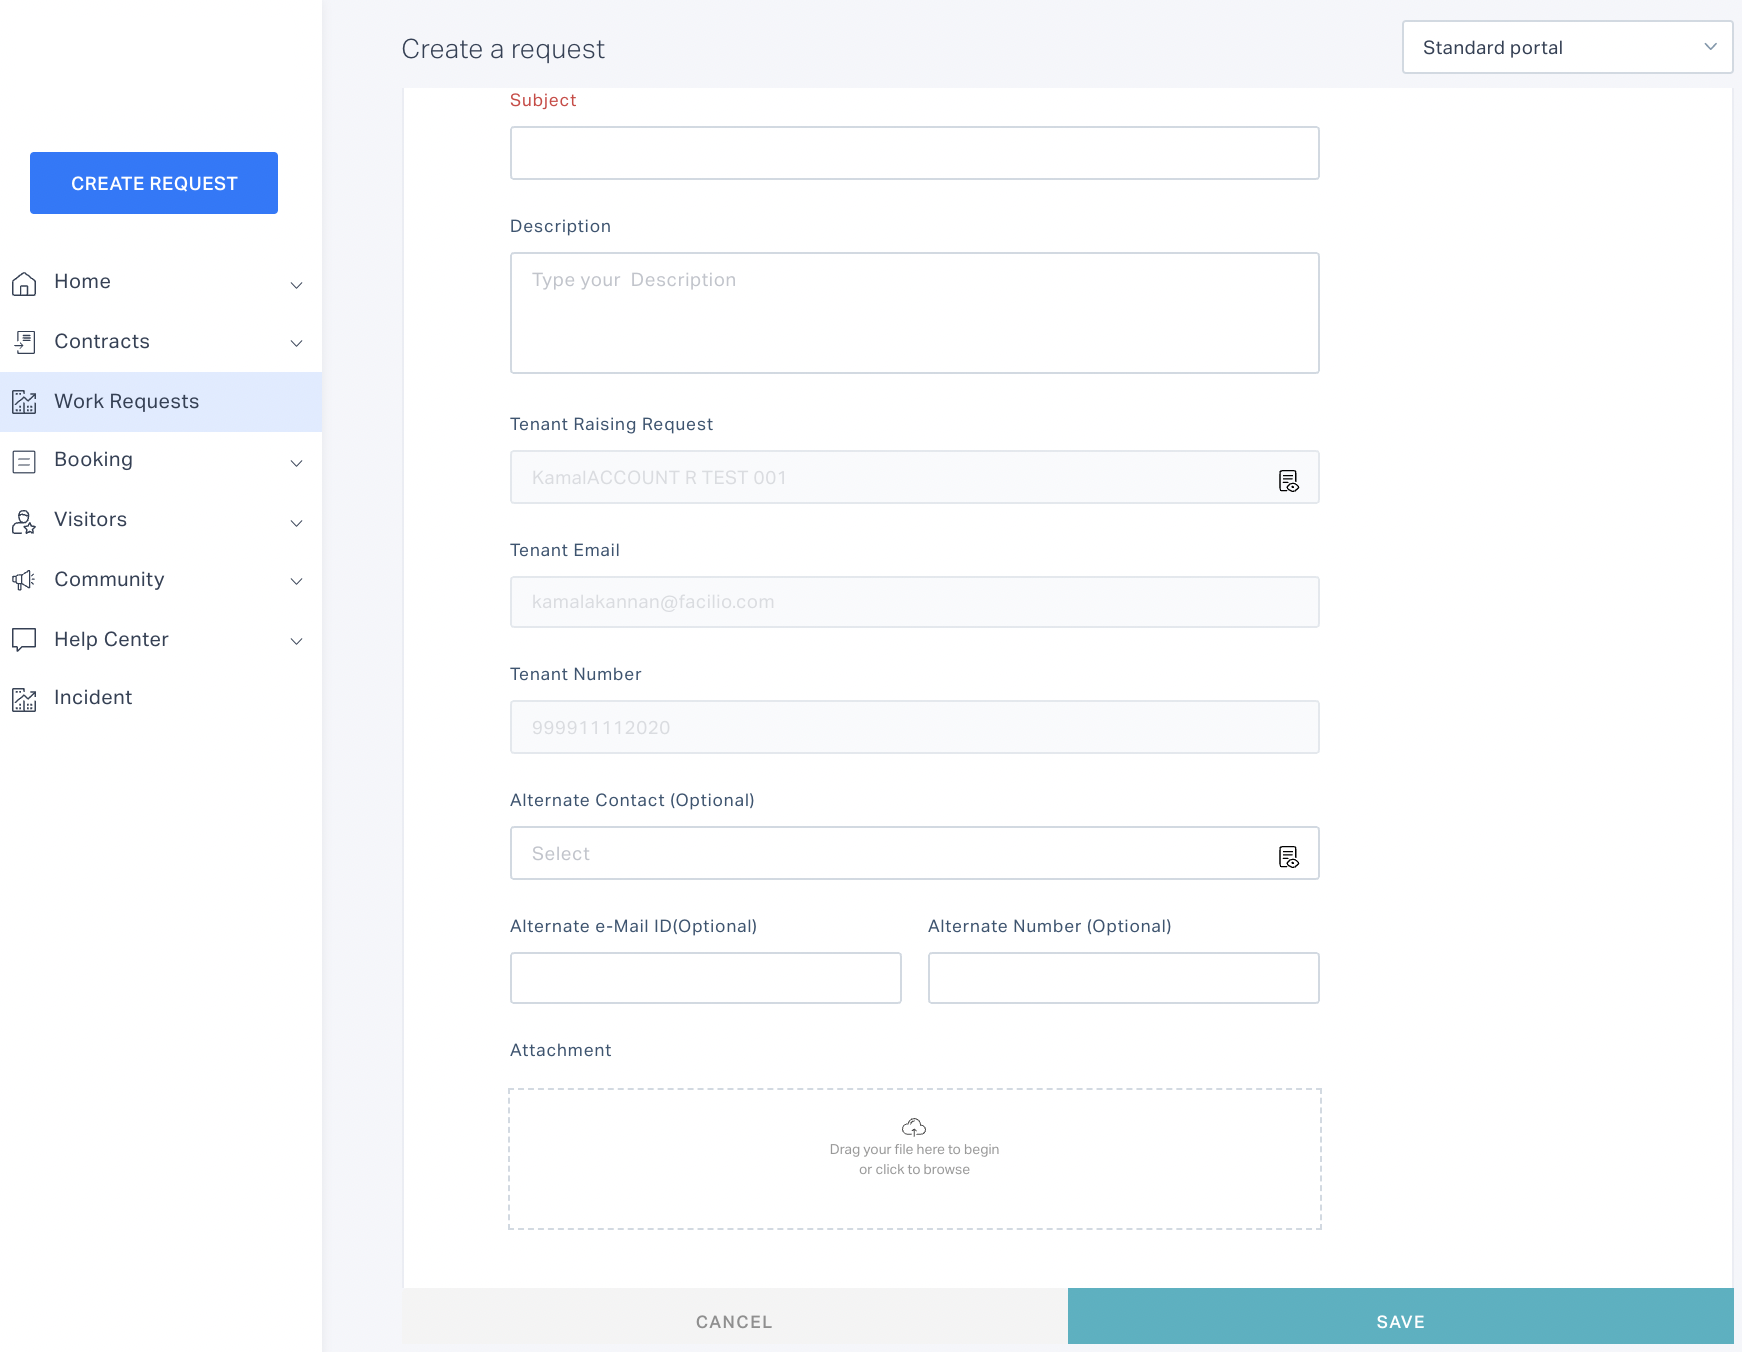
Alternatively, you can directly click on the CREATE REQUEST button in the side panel.
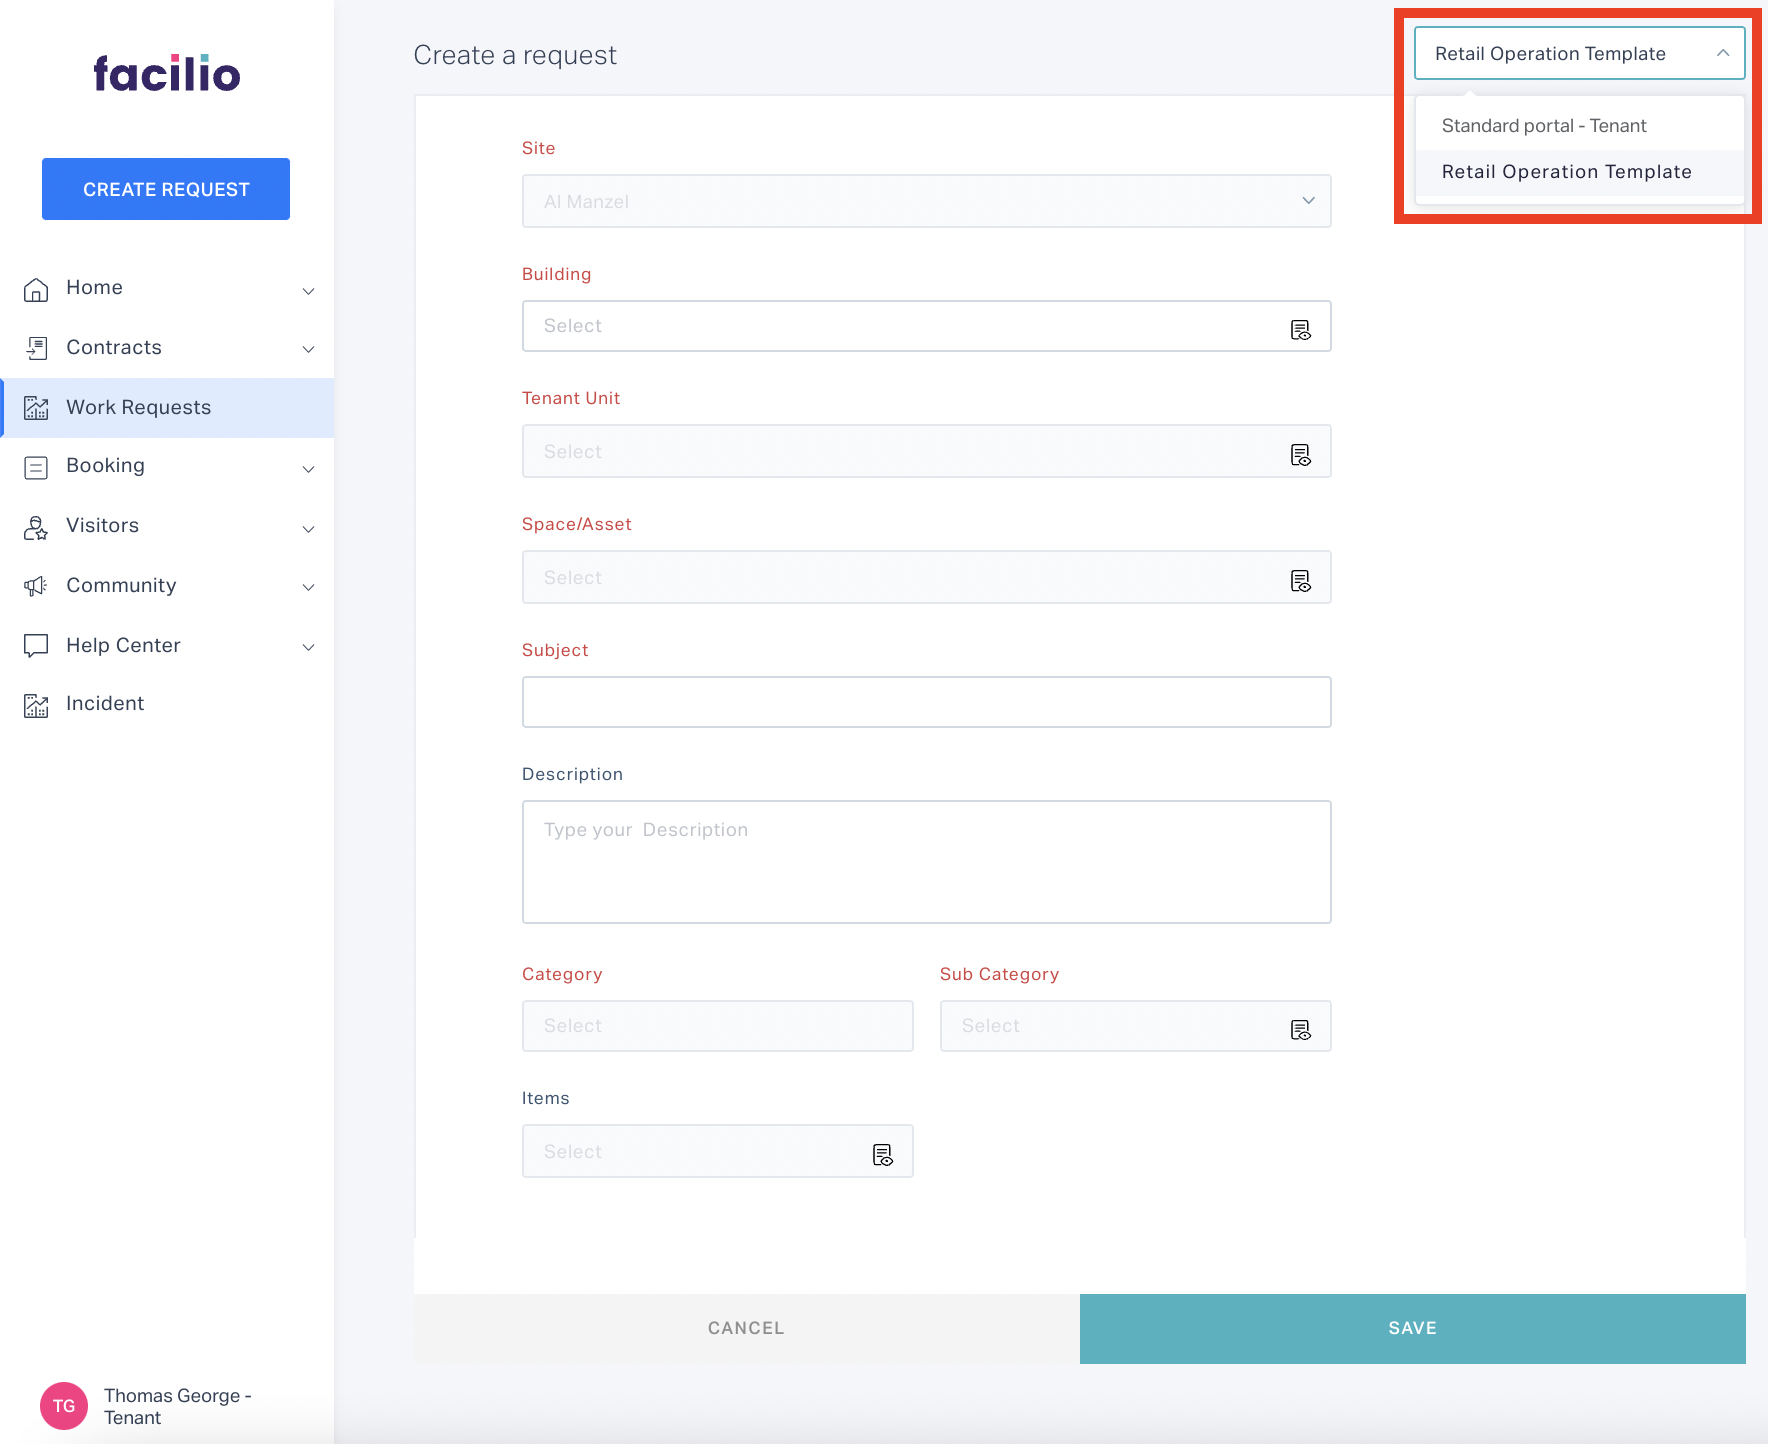
Switch to the Retail Operation Template from the dropdown at the top right of this screen.
Note: The Standard portal form is displayed by default.
Update the required fields in this section and click SAVE. The request is now reflected in the Open Requests view in the Work Request screen as shown below.
A notification is triggered to the respective stakeholders, at once a work request is created.
Processing the Vendor Request
In order to visit the tenant unit for inspection or work, tenant approval is required for the vendor on the inspection or work schedule. To process a request from the vendor or FM
Login to the Tenant portal.
Click Work Requests in the side panel and navigate to the Awaiting Approval view.
Select the request from the list of requests waiting for tenant approval.
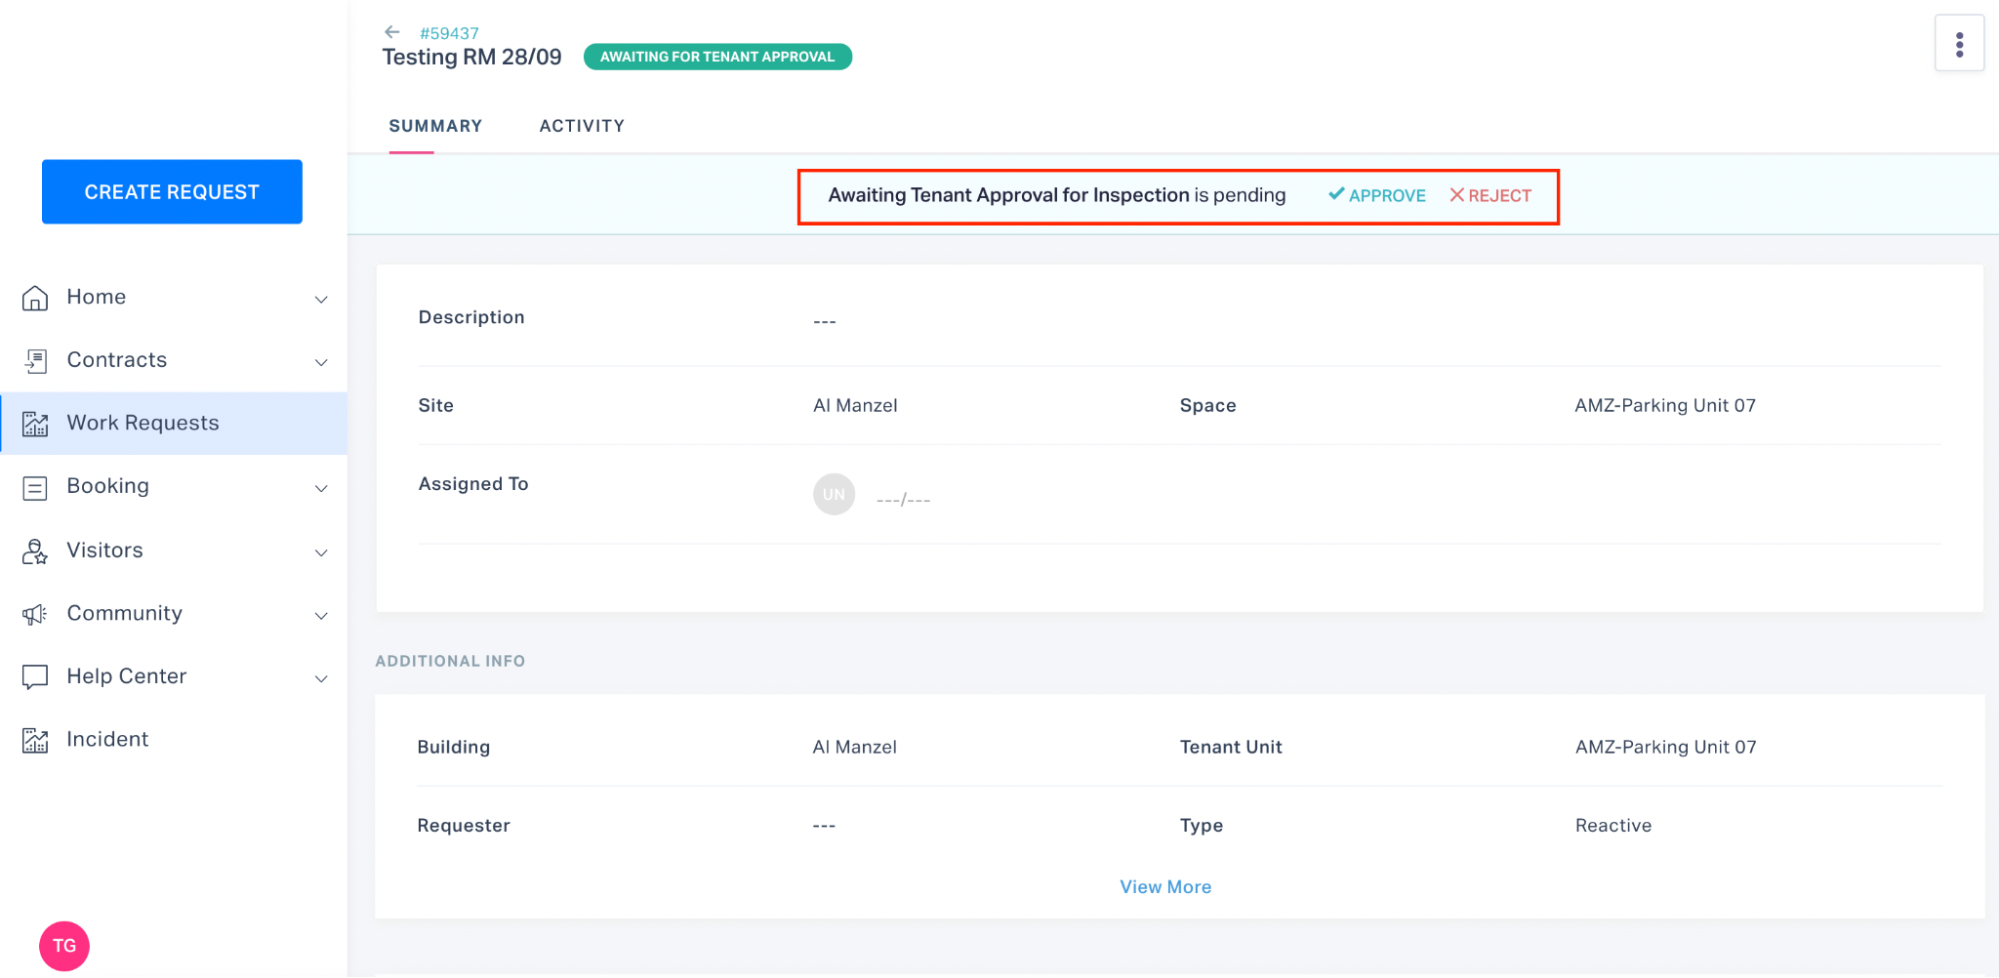
Click either one of the following options:
APPROVE - To approve the vendor request.
Note: While approving a request, the tenant has an option to attach a document (For example, visitor pass, work permit and so on).
REJECT - To reject the vendor request with a reason.
Note: If the request is rejected, the vendor will have to reschedule the inspection or work. You can mention your availability in the comment section to help the vendor reschedule the inspection as you prefer.
The ticket is now returned to the vendor for further action.
Note: Usually, the tenant approval for inspection or work is skipped for emergency and high priority tickets.
Managing Retail Requests
Retail operations involve managing day to day functions of retail establishments. This section explains how to create a retail work request and the role of a retail tenant in processing the request.
Creating a Work Request
The application also allows the retail tenants in a building to raise tickets from the tenant portal. To raise a retail work request,
Login to the Tenant portal.
Click Work Requests in the side panel. All the open requests are displayed by default.
Click CREATE REQUEST. The Create a request page is displayed as shown below.
Alternatively, you can directly click on the CREATE REQUEST button in the side panel.
Note: The Standard portal form is displayed by default.
Switch to the Retail Operation Template from the dropdown at the top right of this screen.
Update the required fields in this section and click SAVE. The request is now reflected in the Open Requests and Retail Requests views in the Work Request screen.
Note: A notification is triggered to the respective stakeholders, at once a work request is created.
Confirming the Resolution
Once the request is resolved you can update the status of the ticket from the Tenant portal. To confirm the resolution,
Log in to the Tenant portal.
Click Work Requests in the side panel. All the open requests are displayed by default.
Select the retail request from the dashboard and click MATERIAL DELIVERED at the top right of the request details screen that appears. The status of the ticket is now updated to MATERIAL RECEIVED.
Note: After you confirm the resolution, the FM team shall close the request and you will be notified on the same.
Taking Survey
After the issue is resolved and the work order is closed, the application triggers a customer satisfaction survey by default, which you can answer to share your feedback on the work done. To take the survey,
Login to the Tenant portal.
Click Requests in the side panel. All the requests you raised are displayed by default.
Select the recently closed work order. The toaster notification prompting you to take the survey appears as shown below.
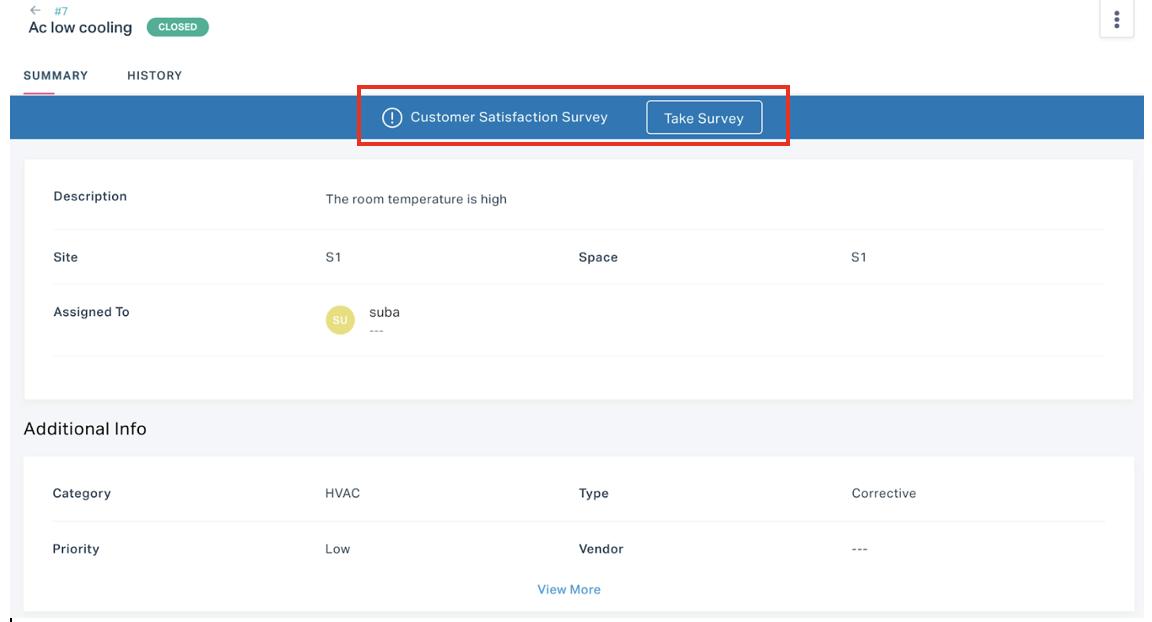
Click Take Survey. The survey questionnaire is displayed.
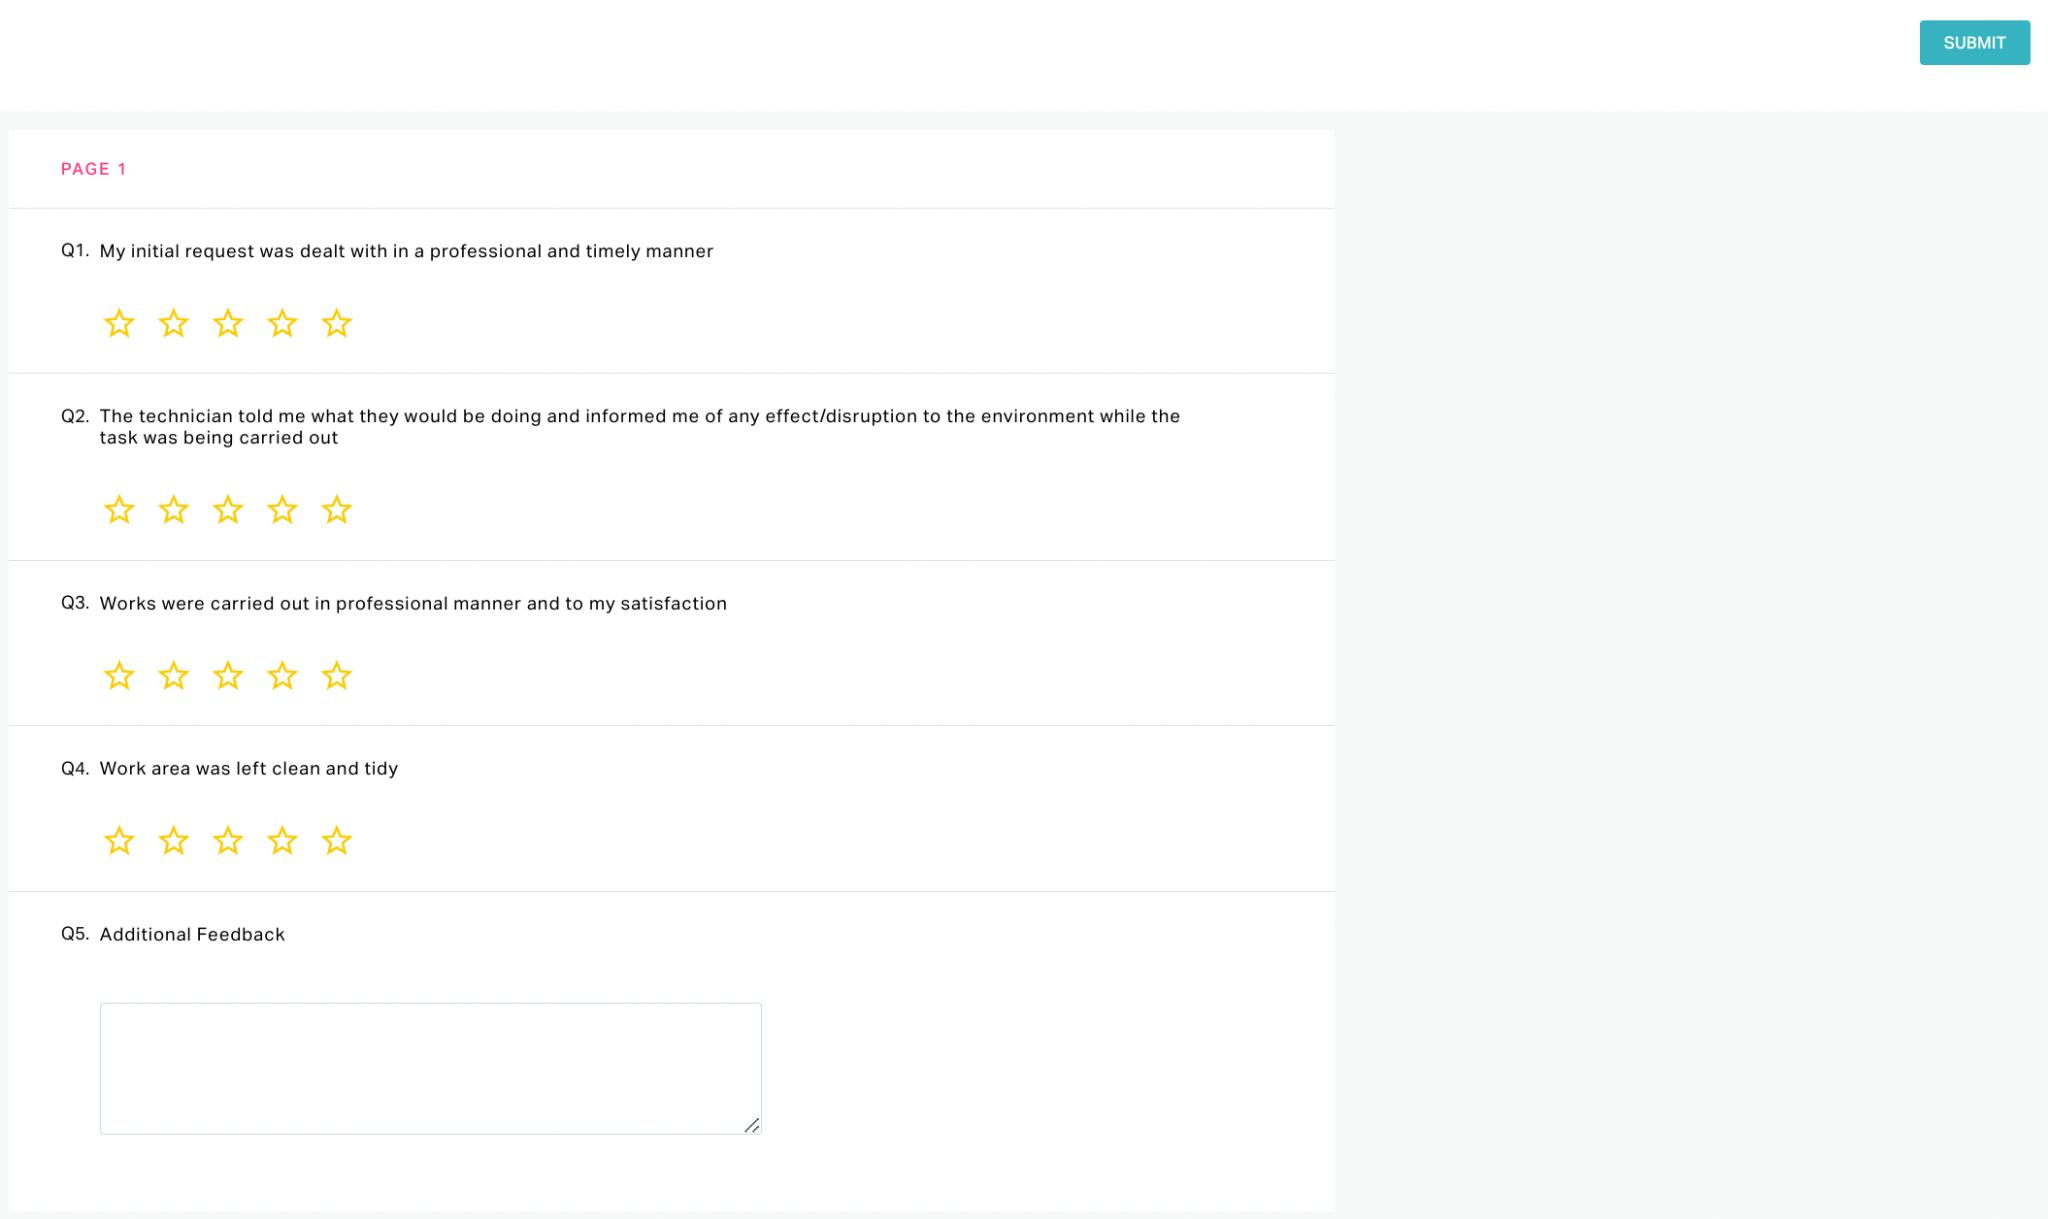
Answer the survey and click SUBMIT. Your responses are saved successfully.
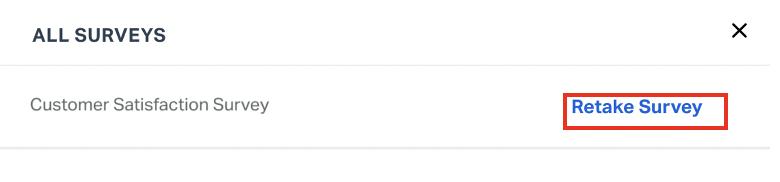
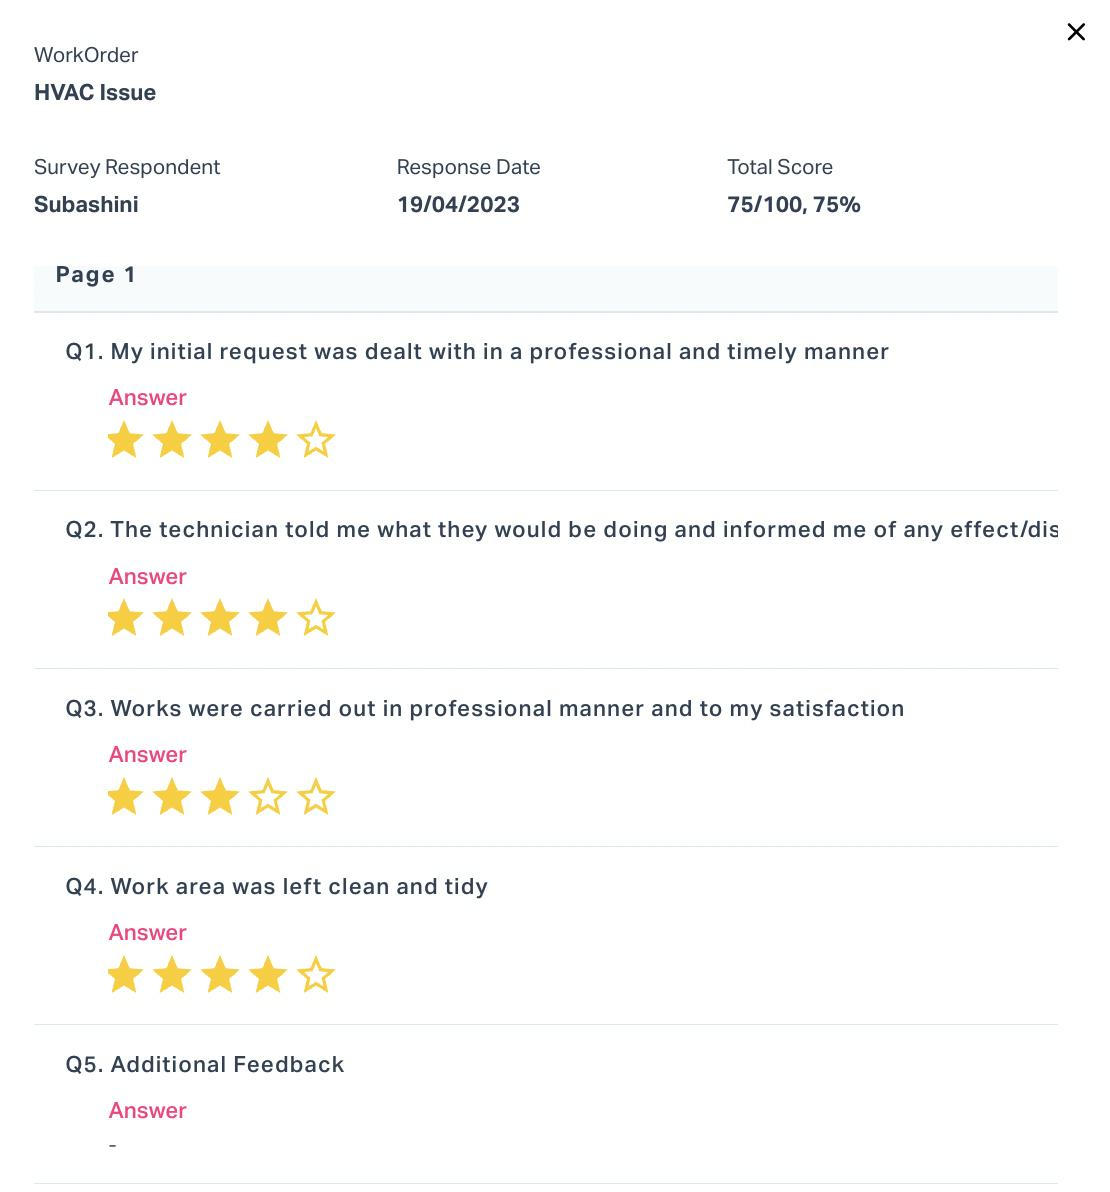
Apart from the toaster notification for a survey, the application offers certain other options to access the surveys and their related info. You can click the  (vertical ellipses) icon at the top right of the work order details screen and select any of the following options:
Show My Surveys - Displays all the surveys related to the particular work order.
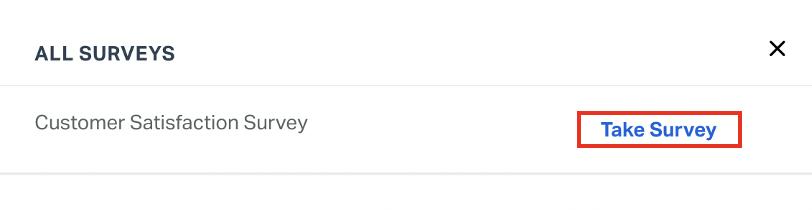
Only the unanswered and active surveys are listed in this dialog. If the survey is already answered but eligible for a retake, it appears with a Retake Survey link, as shown below.
Show Survey Responses - Displays the survey info, such as the respondent who answered the survey and the recorded responses.
You can have multiple surveys initiated in the course of a work order execution. In this case, the toaster notification displayed indicates the latest survey triggered. The rest of the surveys can be accessed using the Show My Surveys option. A survey is unavailable to respond to once expired.
Additional Features
The Work Request module of the application also allows you to perform the following actions:
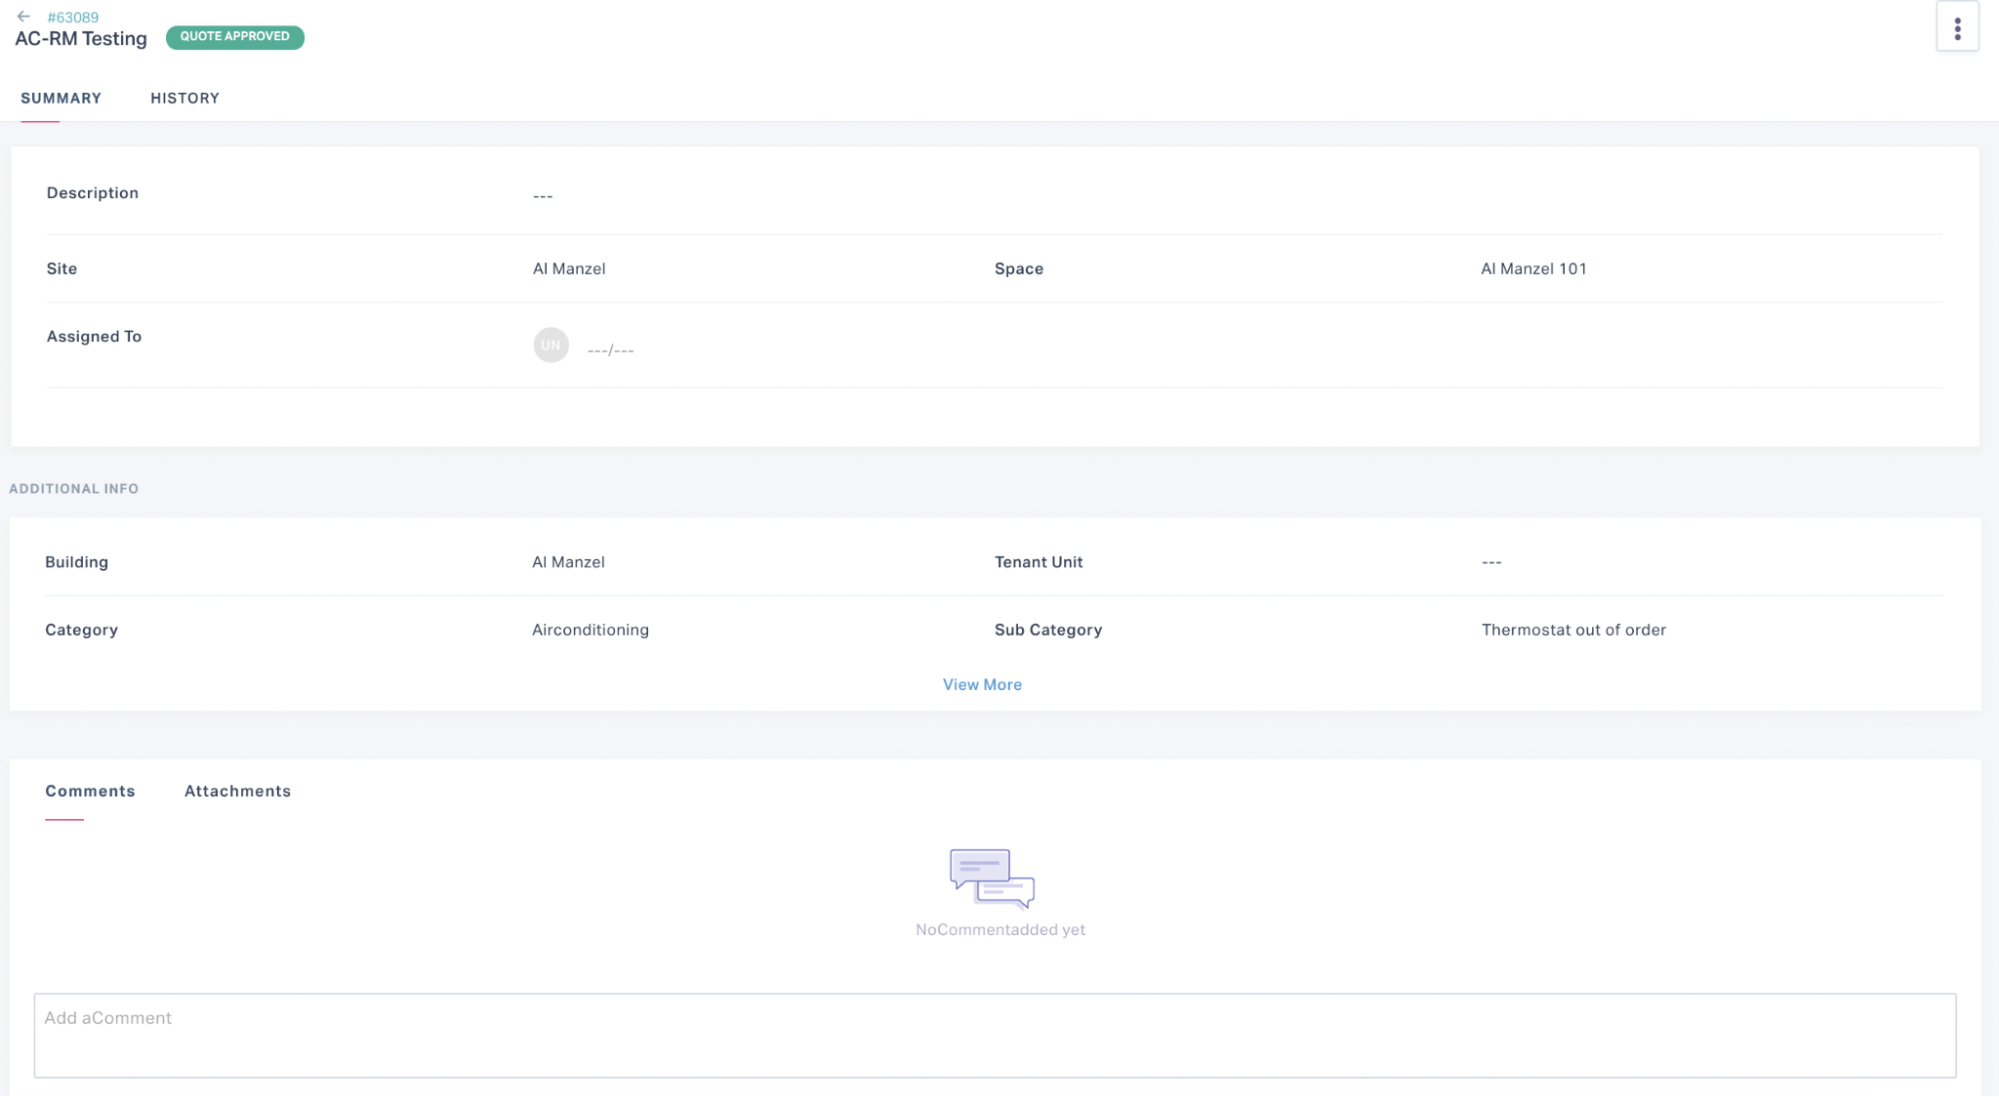
View Summary - Clicking a work request in the dashboard displays all the details of the request in the SUMMARY section.
Add comments - You add comments and attachments to a work request from the SUMMARY section at any point of the workflow.
Note: Both the FM and vendor are notified of your comments and the attachments are
accessible for them. You can use the
 icon corresponding to the note or attachment to delete it.
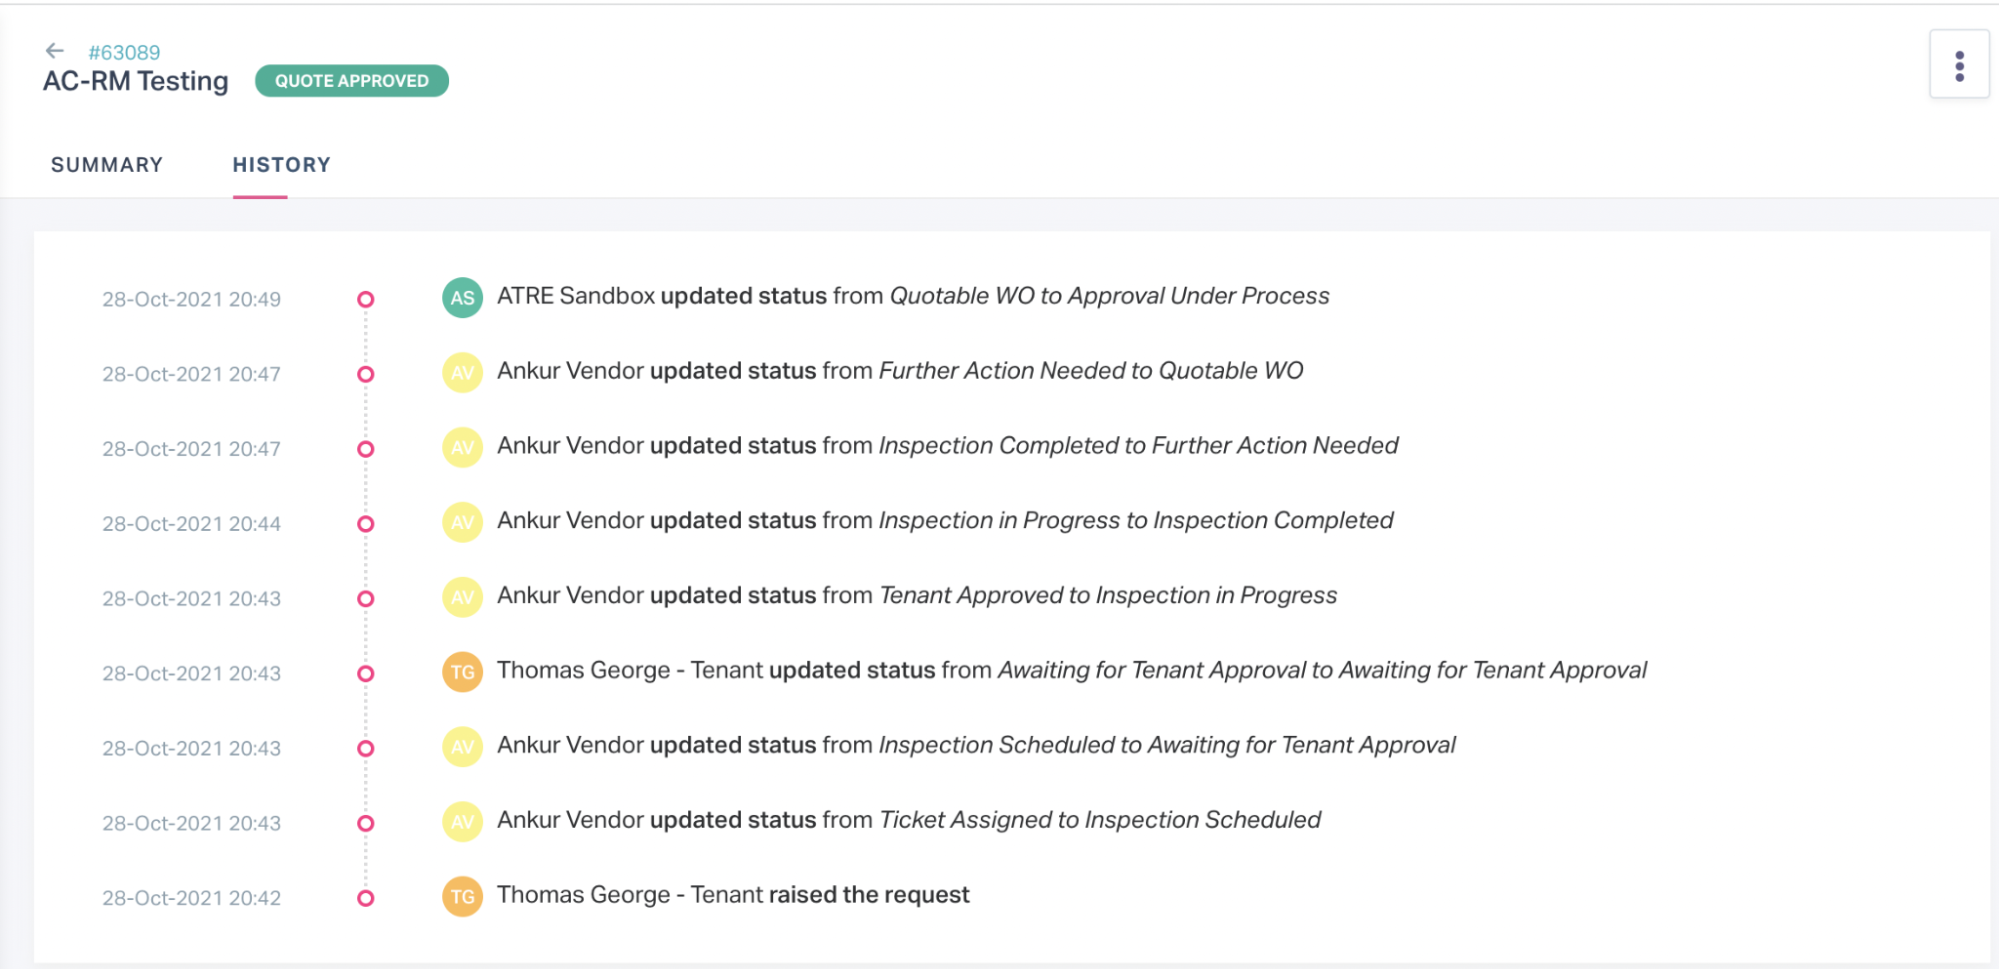
View History - All activities respective to a work request are notified to the stakeholders through email. Also, they are recorded in the History section of the request as shown below.
Deleting a Request
To delete a work request from the dashboard,
Select the request from the dashboard. The work request details are displayed as shown below.
Click the
 (vertical ellipsis) icon at the top right and select Delete. A confirmation window appears to confirm the deletion.
Click DELETE again. The request is now removed from the dashboard.
Note: You can also use the
 (Delete) icon respective to the request in the dashboard to delete it.
Managing Bookings
Booking a Facility
In order for the tenant to utilize a facility in a building it is mandatory to book the space or asset in advance. To book a facility,
Login to the Tenant portal.
Click Bookings in the side panel and select Facilities. All the available facilities are displayed by default.
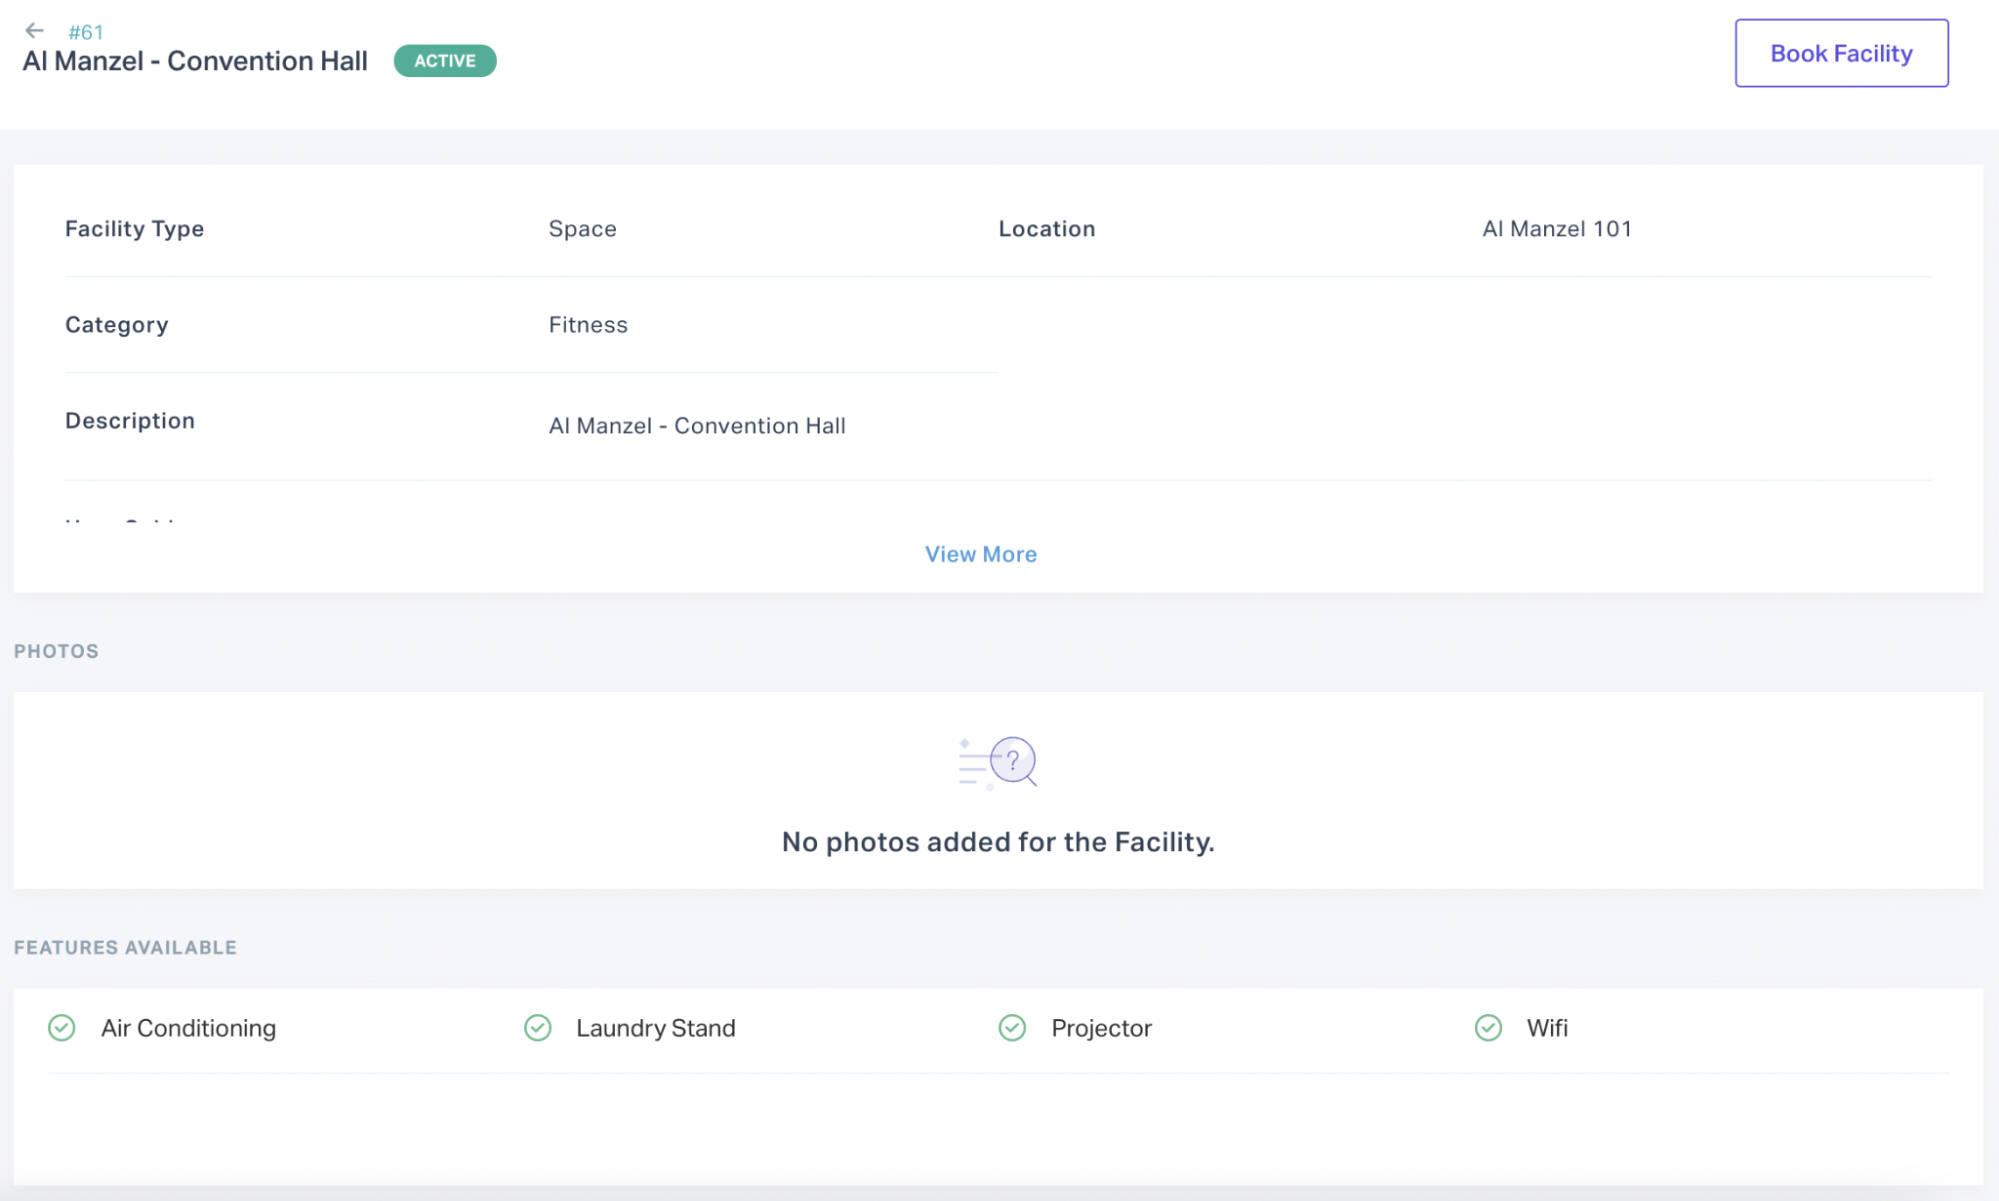
Select the required facility from the list. The details of the facility are displayed as shown below.
Click Book Facility at the top right. The Create Booking screen appears as shown below.
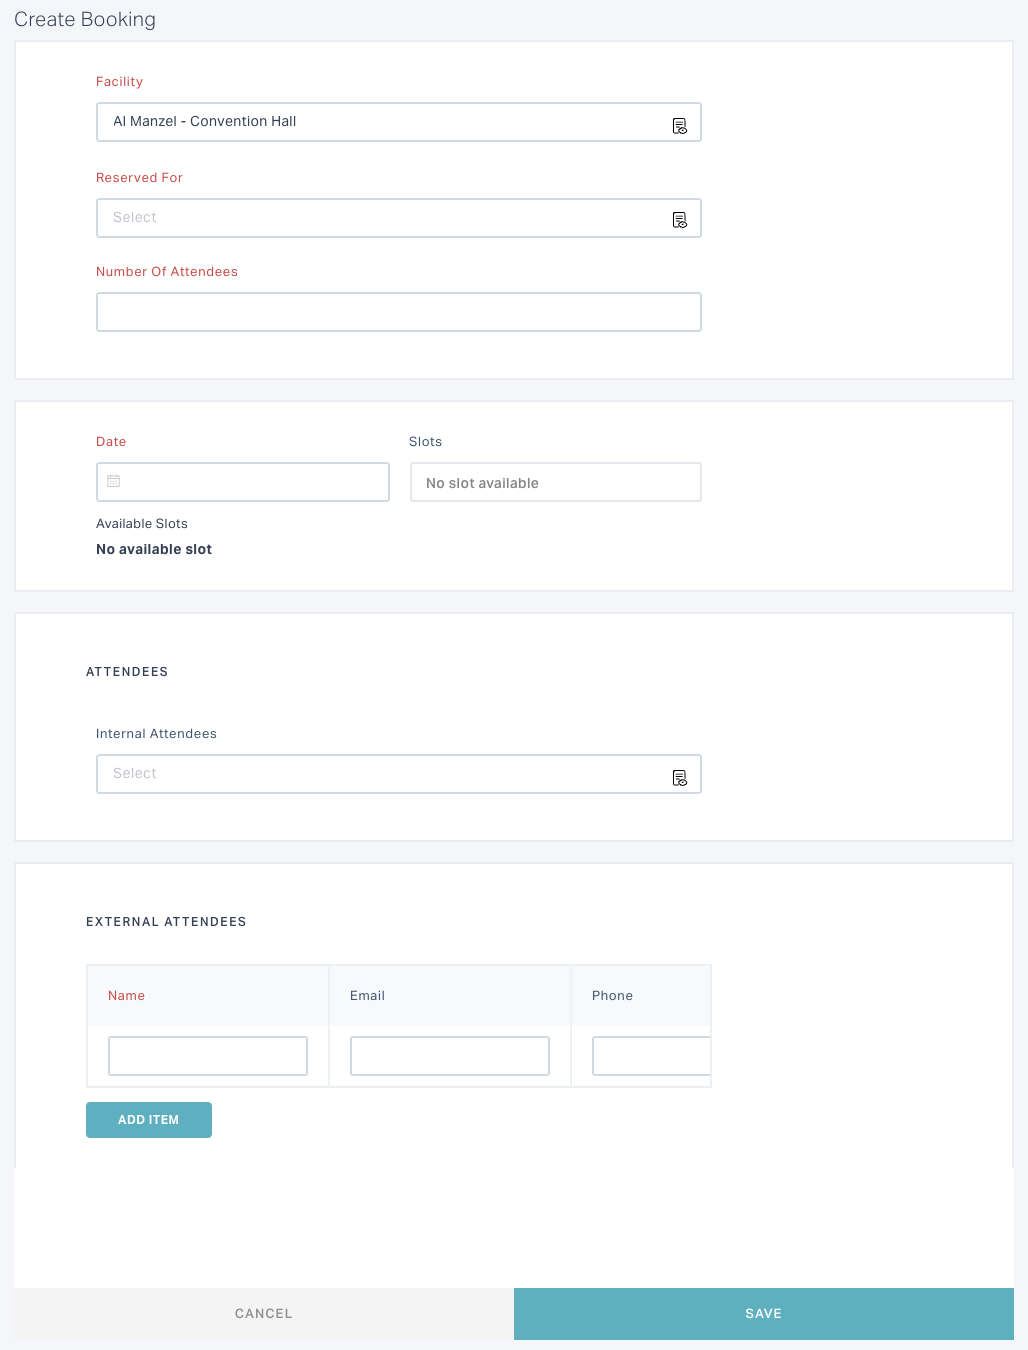
Update the required fields in this screen and click SAVE. An approval is triggered to the facility manager and the status of the booking is updated to WAITING FOR FM APPROVAL. The booking confirmation depends on the request being approved or rejected.
Note: If no approval is configured for the facility, the booking is confirmed immediately.
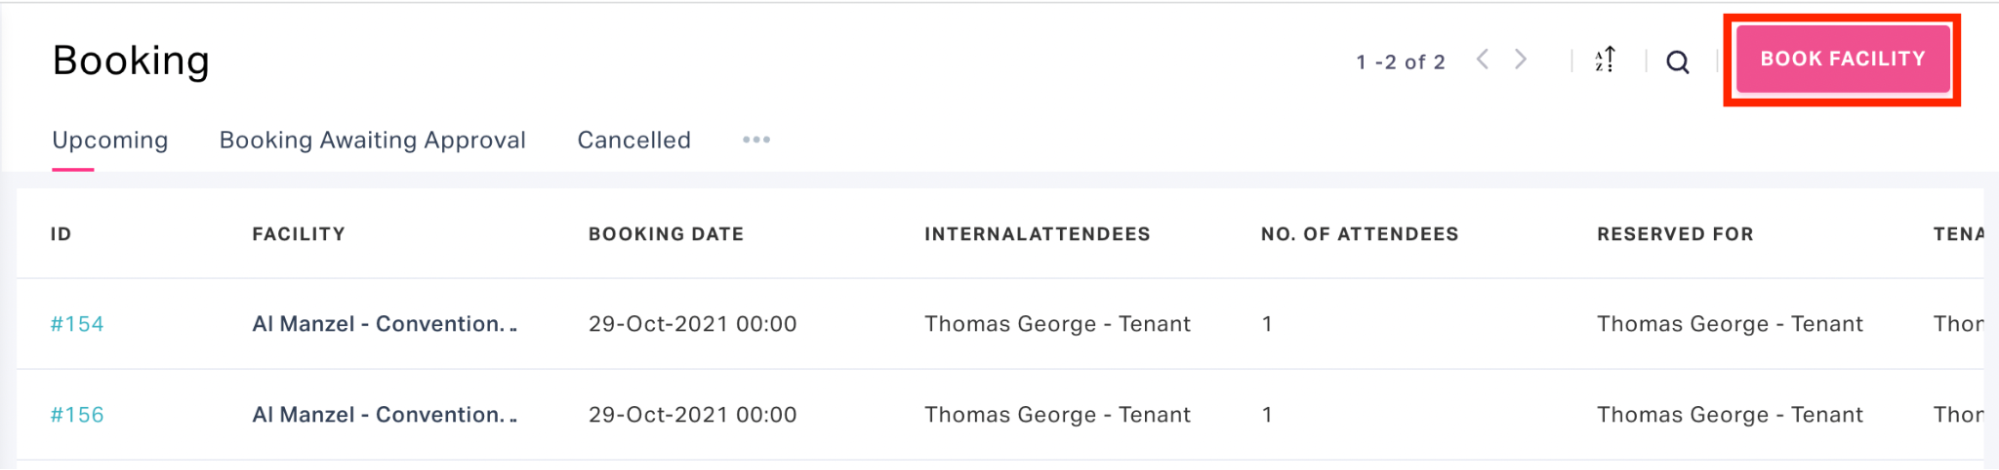
Alternatively, a facility can be booked using the Book Facility option in the Booking section as shown below.
Also, the FM can book facilities against the tenants on behalf of them, using the Book Now option in the respective facility details screen.
Note: It is important to note the following conditions while booking a facility:
The number of slots and the total number of attendees per booking may vary (depending on the values configured by the FM) with respect to the facility being booked.
A booking request is subject to approval, only if approval is configured for the facility by the FM.
By default, the application does not allow booking any facility earlier than 60 days. Also, You cannot book a facility, whose status is INACTIVE.
Canceling a Booking
Both the tenant and the FM are authorized to cancel a booking at any stage of the booking cycle. To cancel a booking against a facility,
Log in to the Tenant portal.
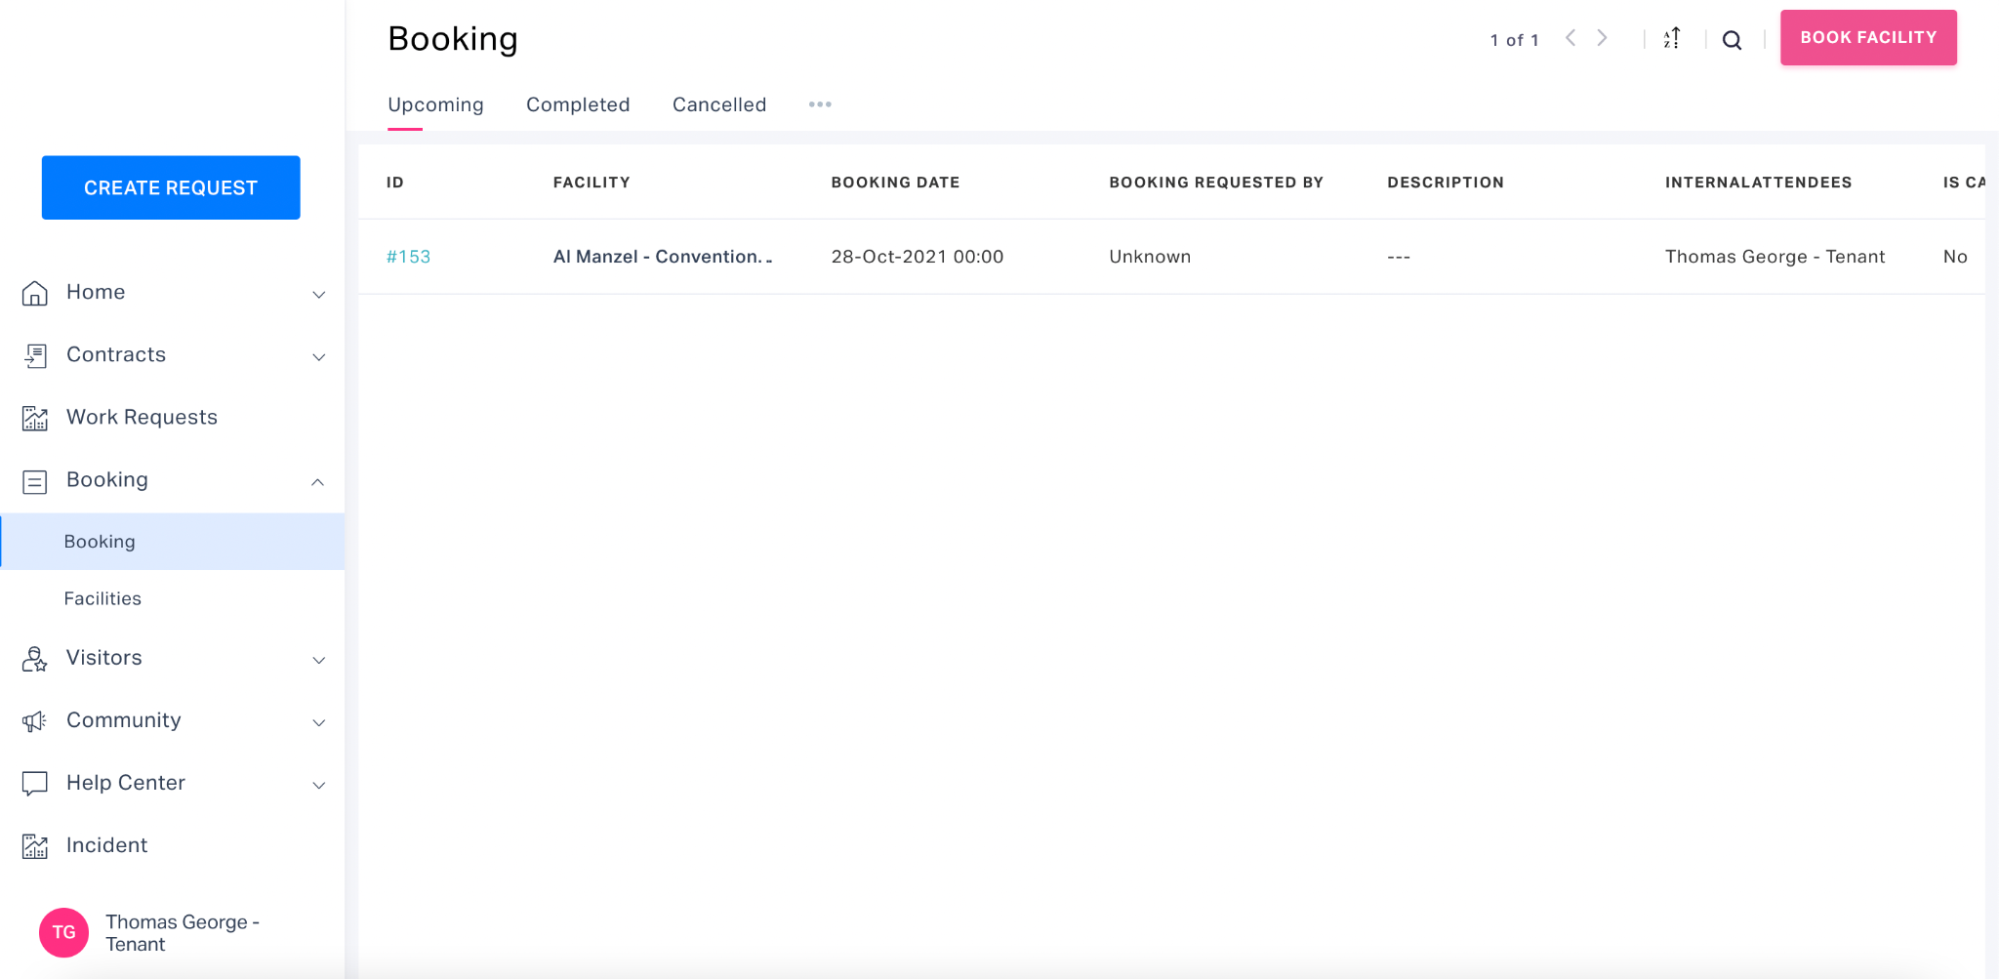
Click Bookings in the side panel. The upcoming bookings are displayed as shown below.
Select the booking to be canceled. The booking details are displayed as shown below.
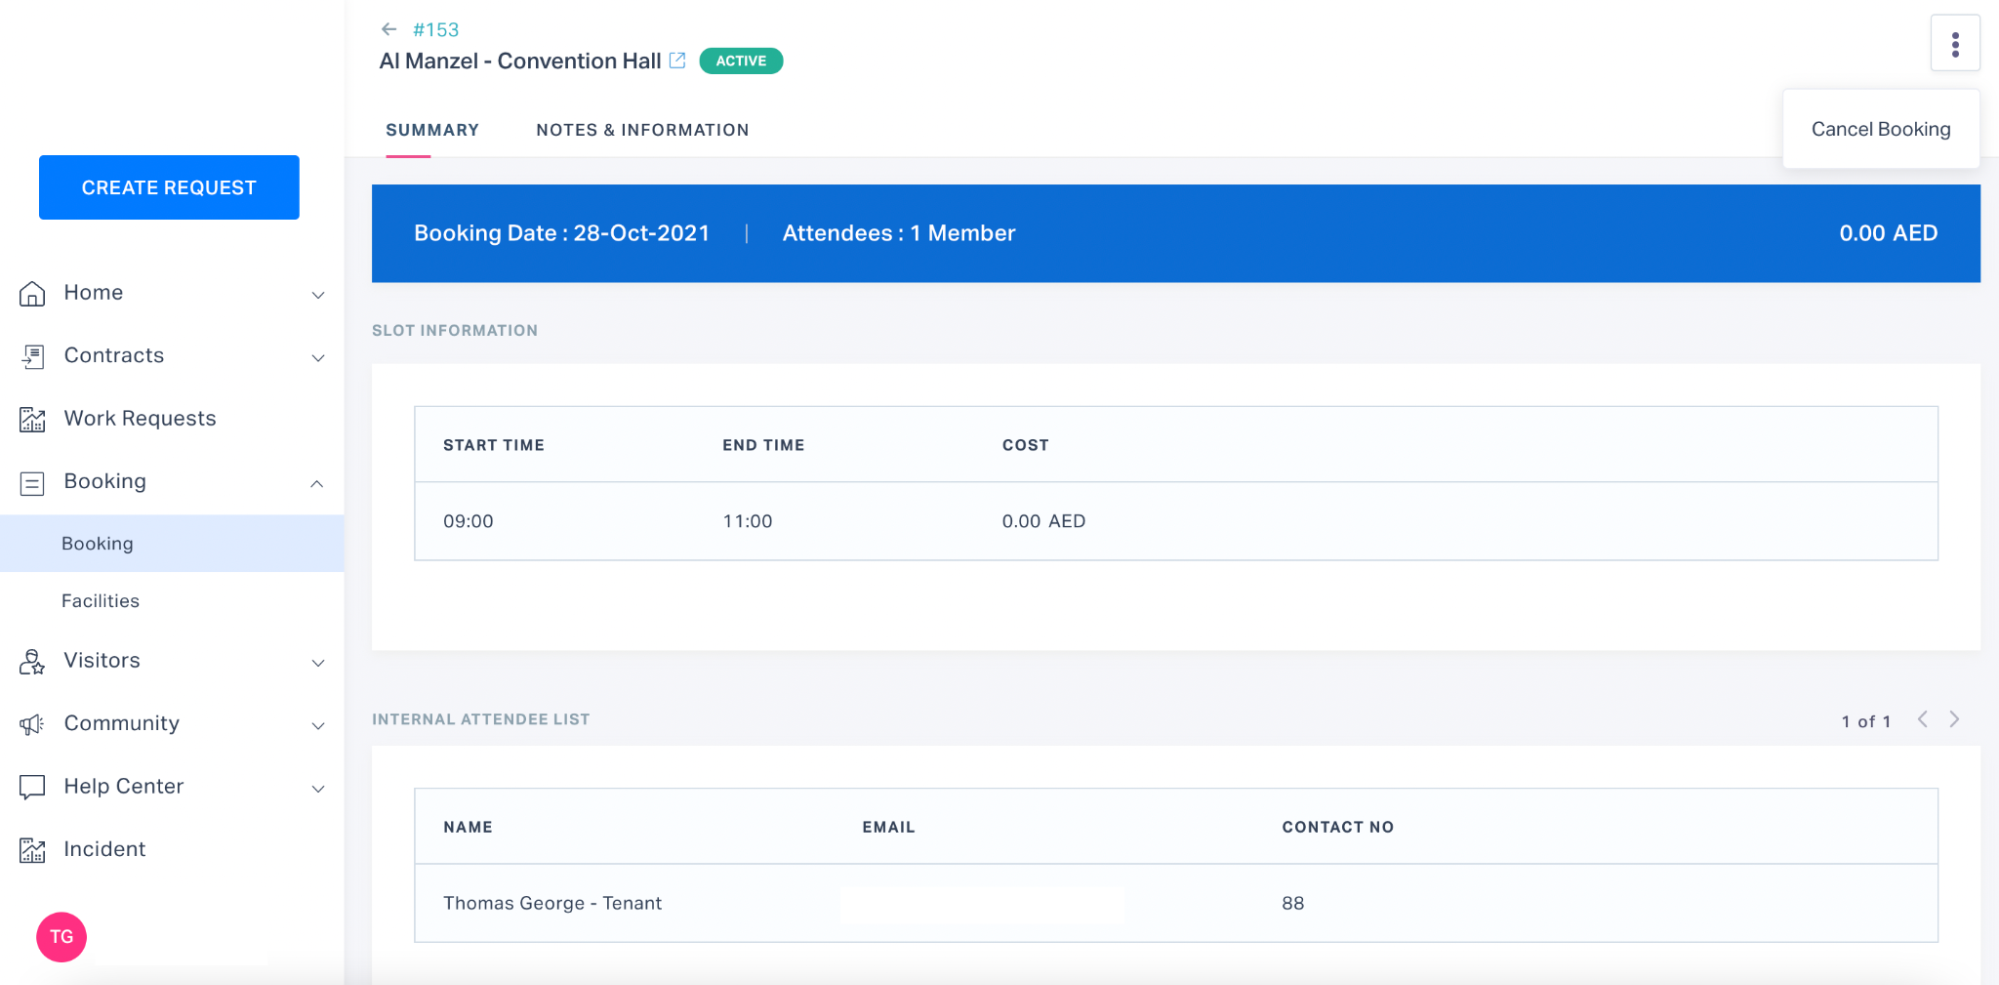
Click the
 (vertical ellipsis) icon at the top right and select Cancel Booking. The booking is canceled and the status of the booking is updated to CANCELED.
Validations
There are certain validations configured to confirm the bookings. The booking validations can be categorized as follows:
General Validation - When you book a Facility, Number of Attendees is the sum of internal attendees and external attendees.
Example: If the number of attendees are two, the booking possibilities are, two internal attendees, two external attendees, or one external and one internal attendee. Where,
Internal attendees are the occupant or tenant contact and
External attendees are the non-resident members of the building
Headcount Validation - When a facility is open for booking, the number of bookings cannot exceed the Usage Capacity.
Example: If the Usage Capacity of a facility is 50 and Maximum Attendee Count Per Booking is 1, 50 bookings are allowed for that slot with 1 attendee each. However, if the Maximum Attendee Count Per Booking is not specified, bookings are open for that slot until the usage capacity is exhausted.
Note: If the Usage Capacity of a facility is exhausted with bookings, error is thrown for further attempts to book that slot.
Handling Visitors
Managing Invites
Creating an Invite
To create a new invitation,
Login to the Tenant portal.
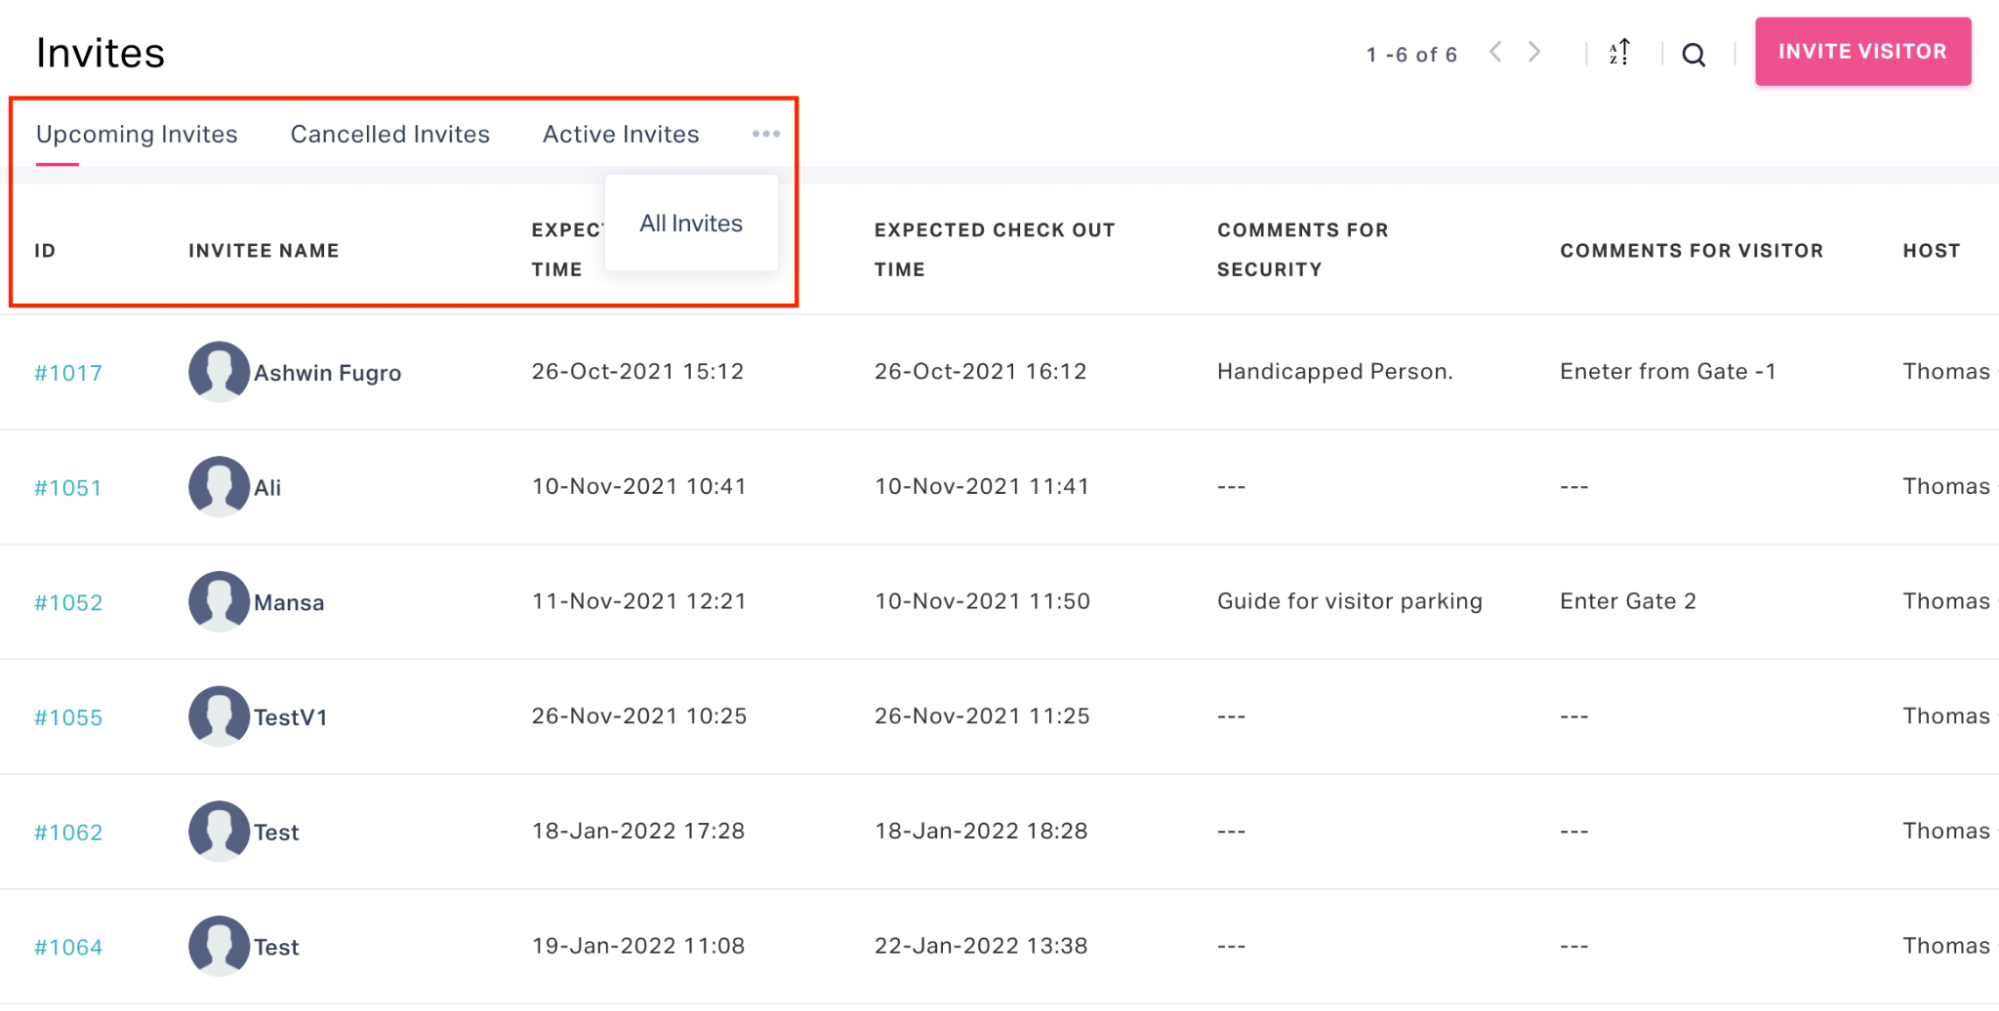
Select Invites under Visitors in the side panel. All the upcoming invites are displayed by default.
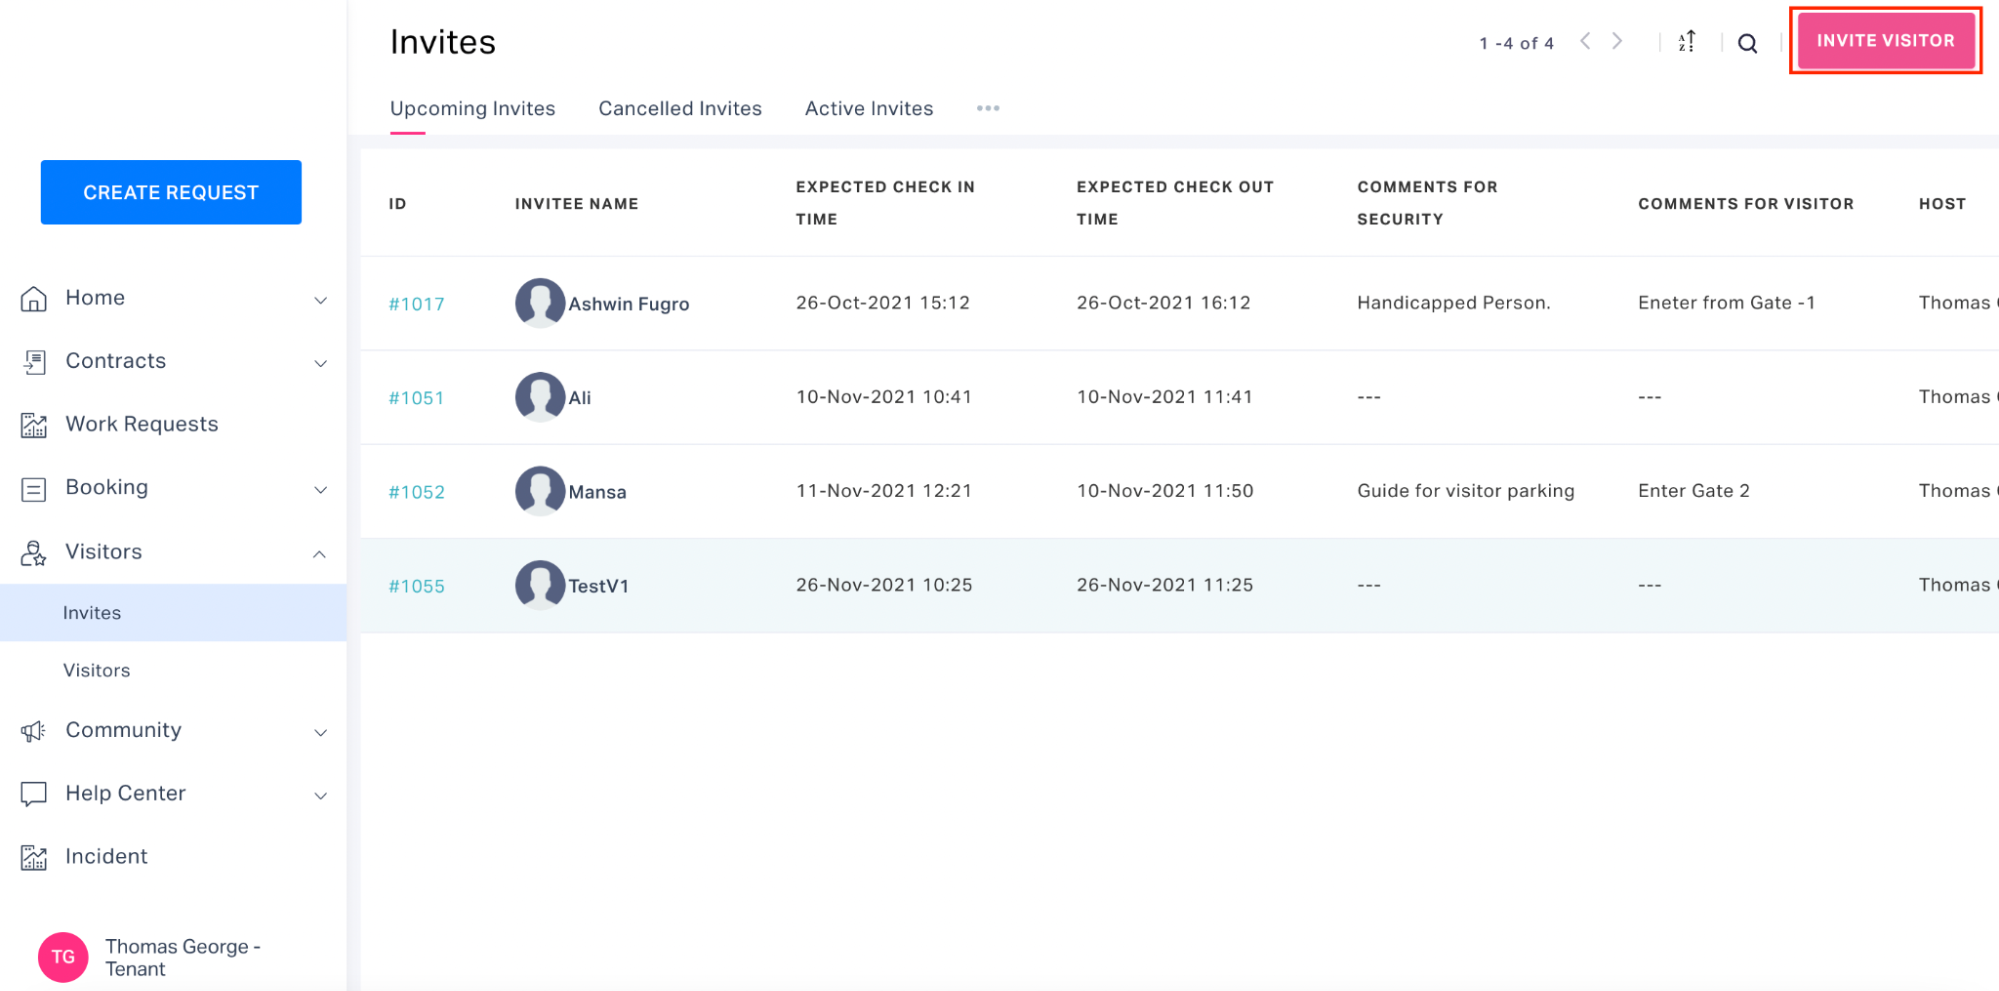
Click INVITE VISITOR at the top right and select the type of visitor. Note: You can choose if the visitor is a Vendor or Guest. The Create Invites screen appears as shown below.

Update the Visitor Phone, Visitor Name, Visitor Email and other required fields in this screen and click SAVE. The invite is now reflected in the dashboard as shown below.
Also, notification will be triggered to both the visitor and the security. A sample email to the visitor is shown in the screenshot below.
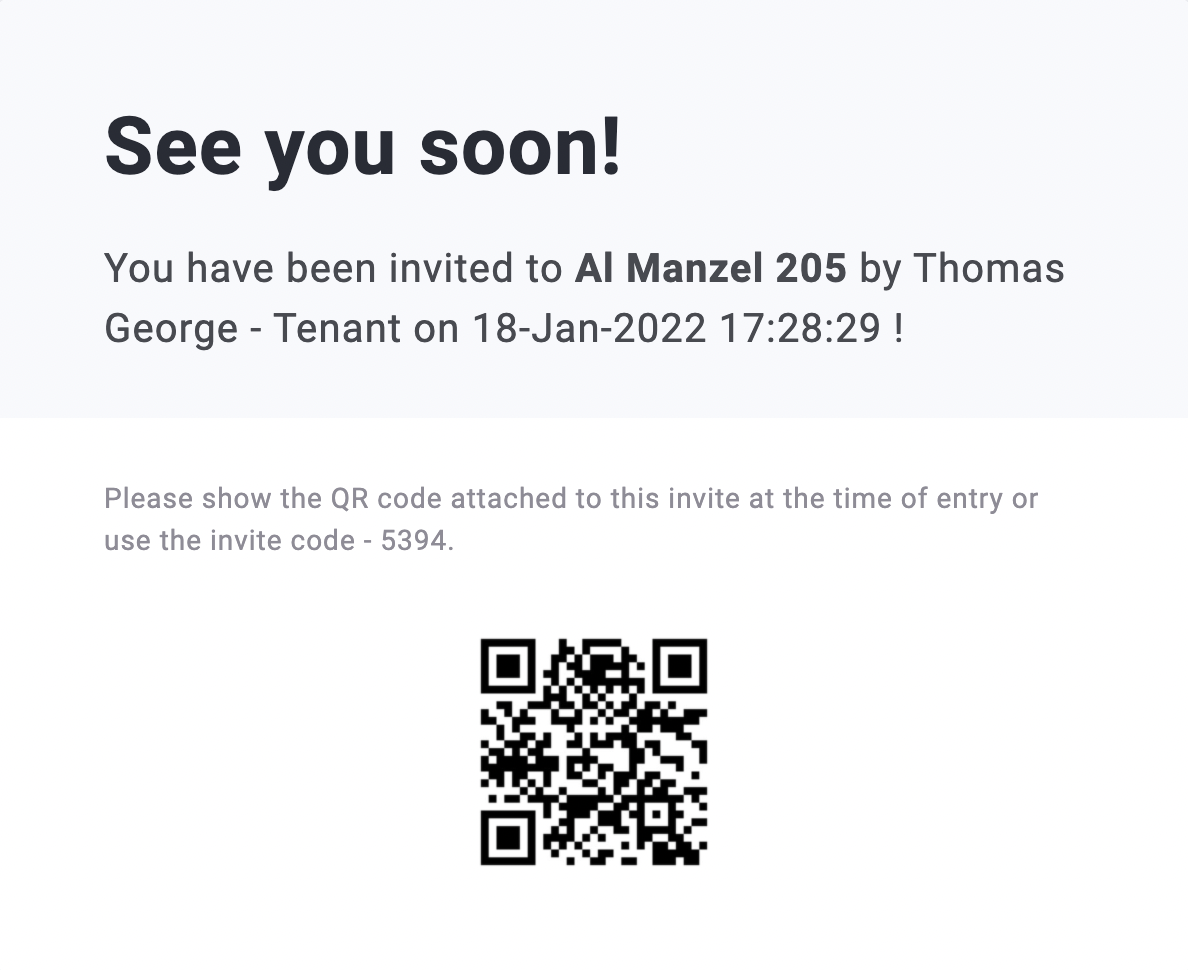
The visitor can use the invite code or the QR code in the email while checking in to the facility.
Modifying Invites
To make changes to an invite that is created already,
Login to the Tenant portal.
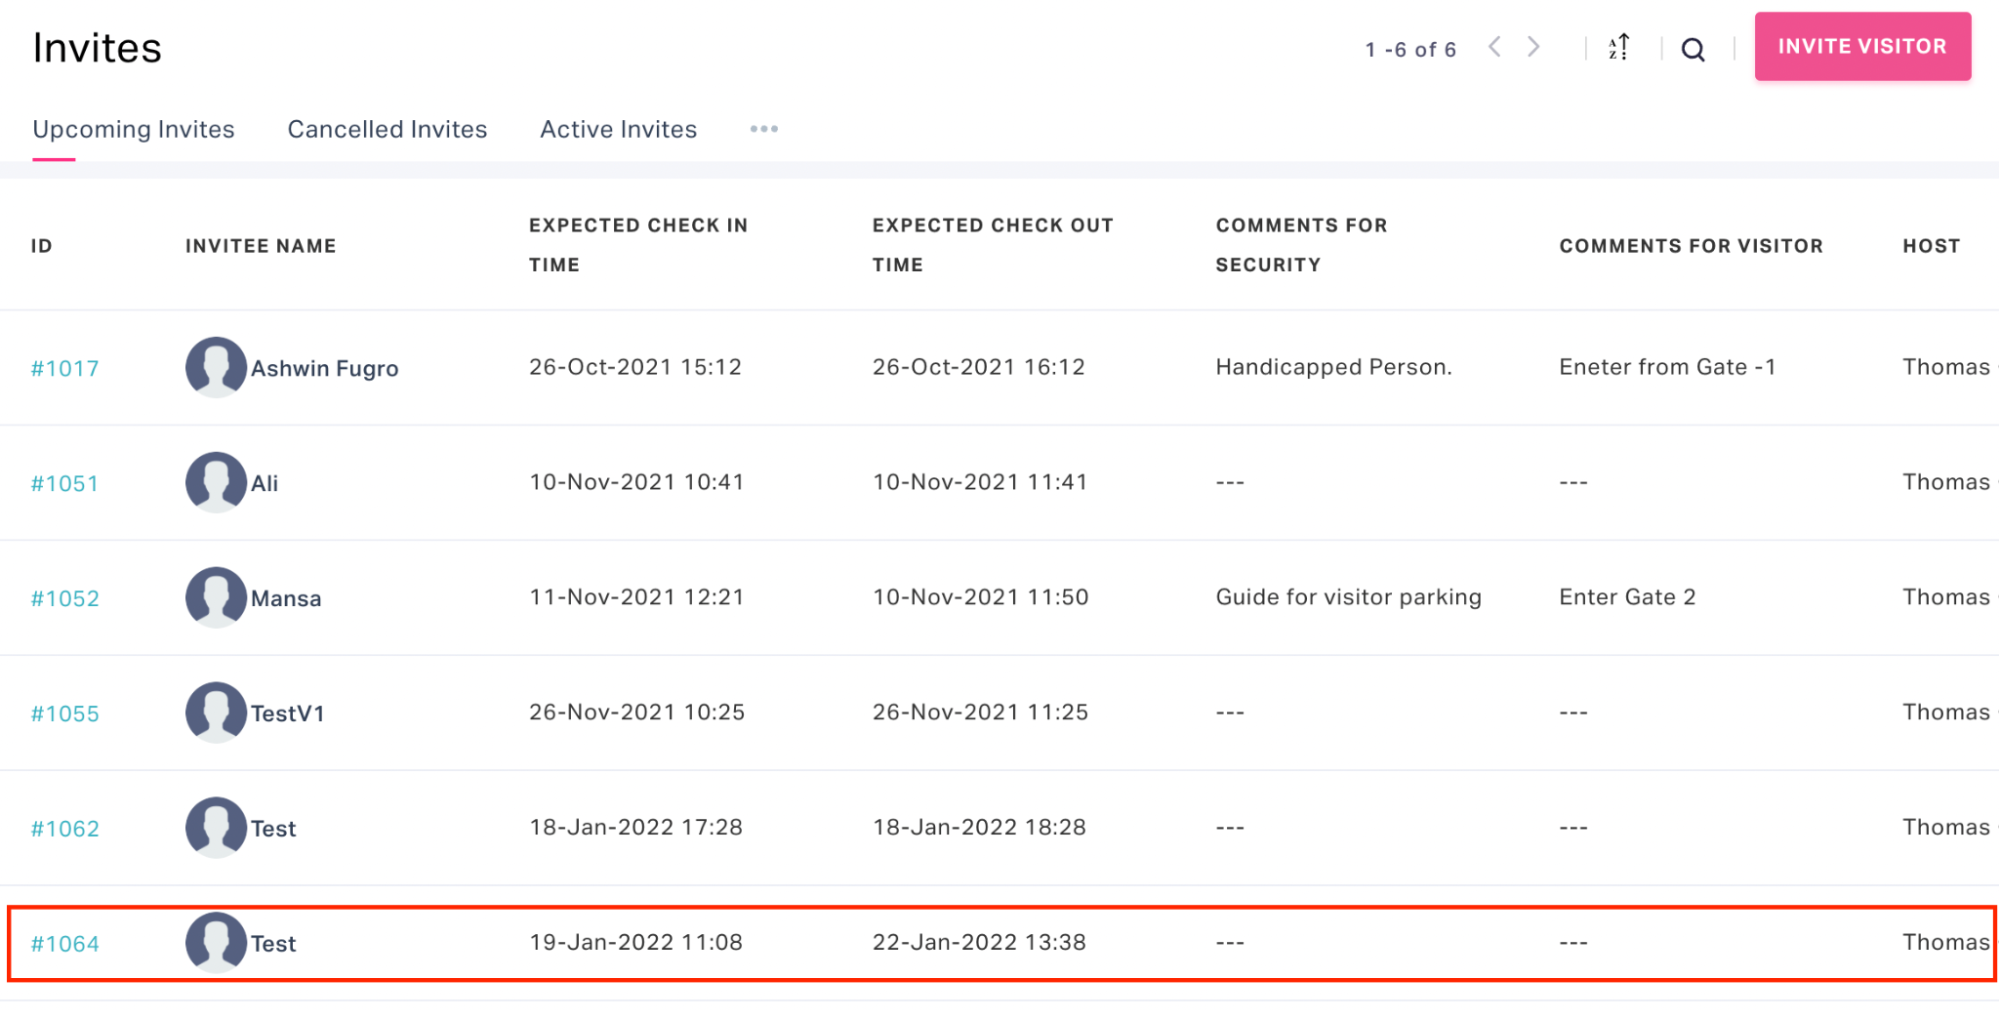
Select Invites under Visitors in the side panel. All the upcoming invites are displayed by default
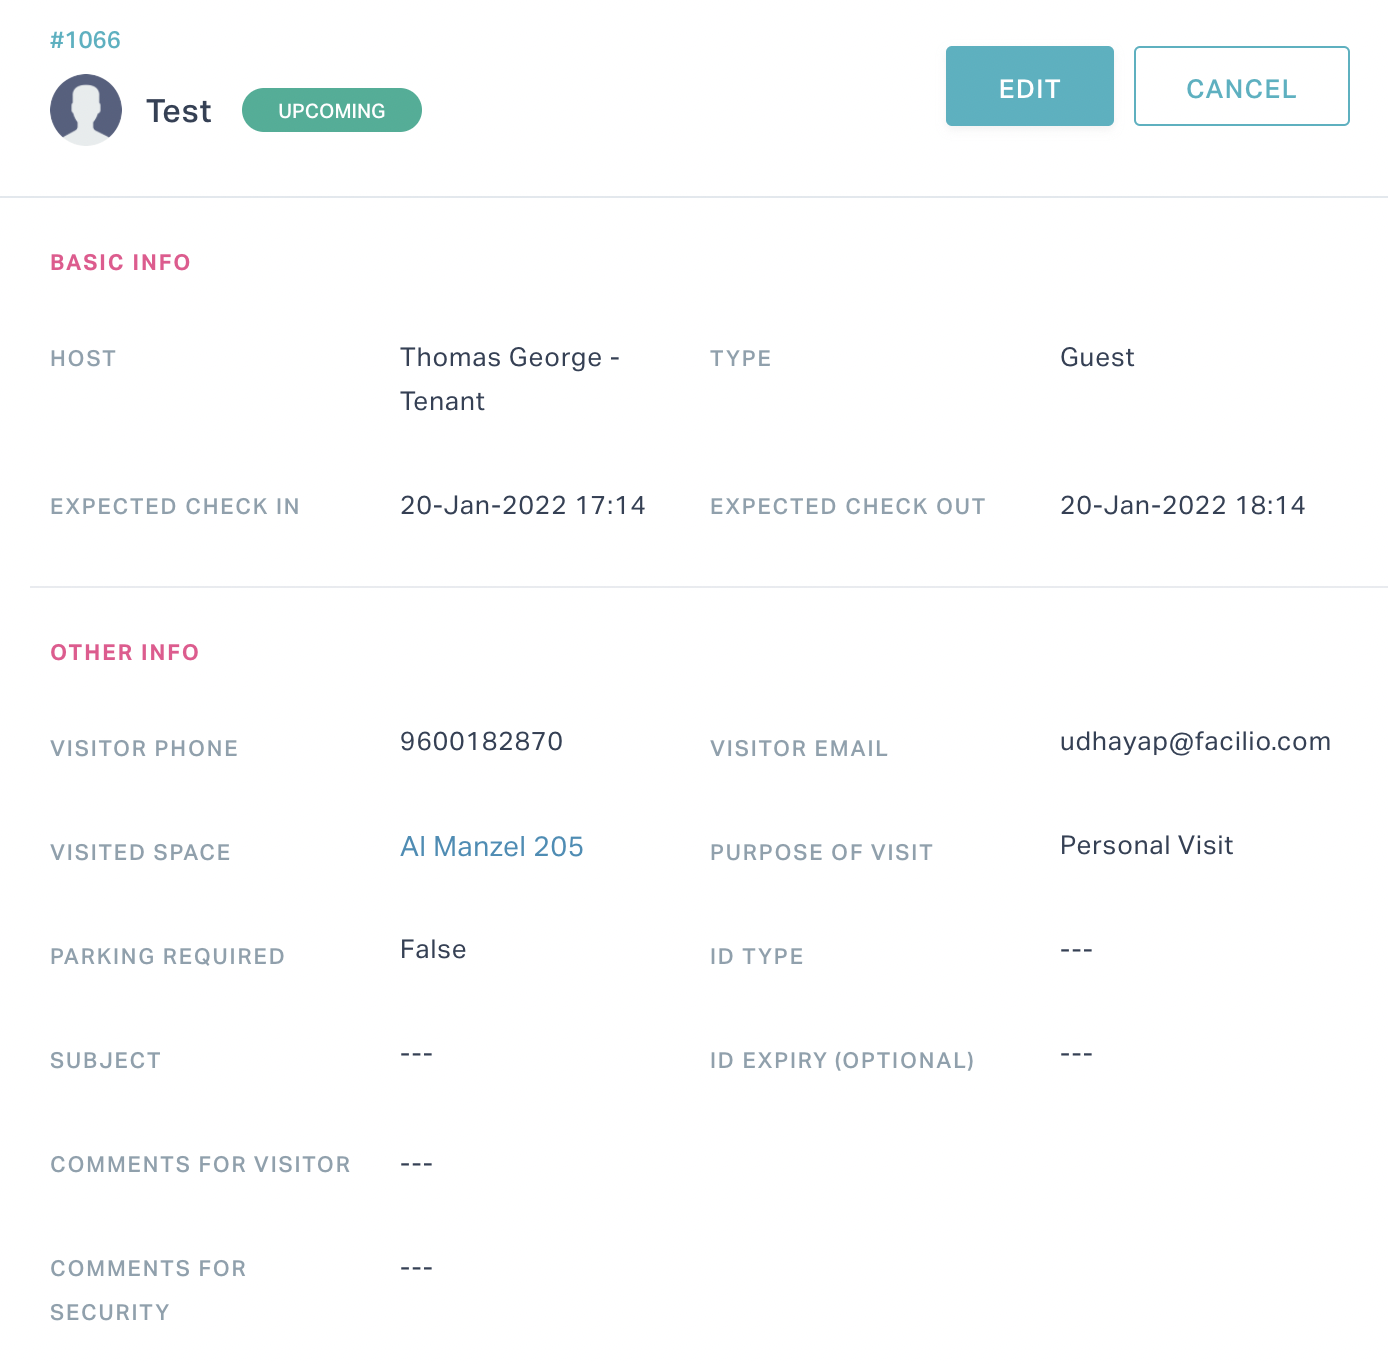
Select the invite from the dashboard that you want to modify. The invite details appear as shown below.
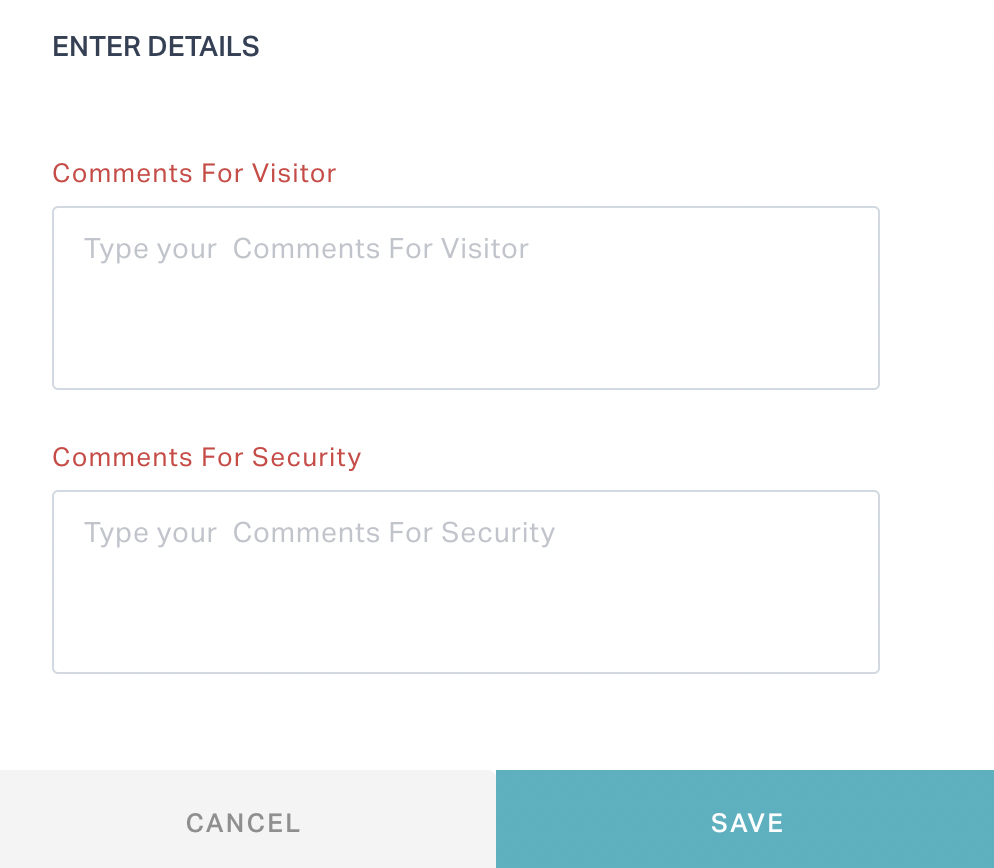
Click EDIT at the top right of the screen. The ENTER DETAILS screen appears where you can make the required modifications.
Click SAVE after all the changes are made. The updated invite is now saved to the dashboard.
Cancelling Invites
Login to the Tenant portal.
Select Invites under Visitors in the side panel. All the upcoming invites are displayed by default.
Select the invite from the dashboard that you want to modify. The invite details appear as shown below.
Click CANCEL at the top right of the screen. The ENTER DETAILS window appears, where you can leave a comment on cancellation to the visitor and security.
Enter the comments and click SAVE. The invite is now cancelled and a notification is triggered to the visitor and security on the same.
The Visitors module has distinct views configured to check all the invites and the upcoming, active and cancelled invites separately.
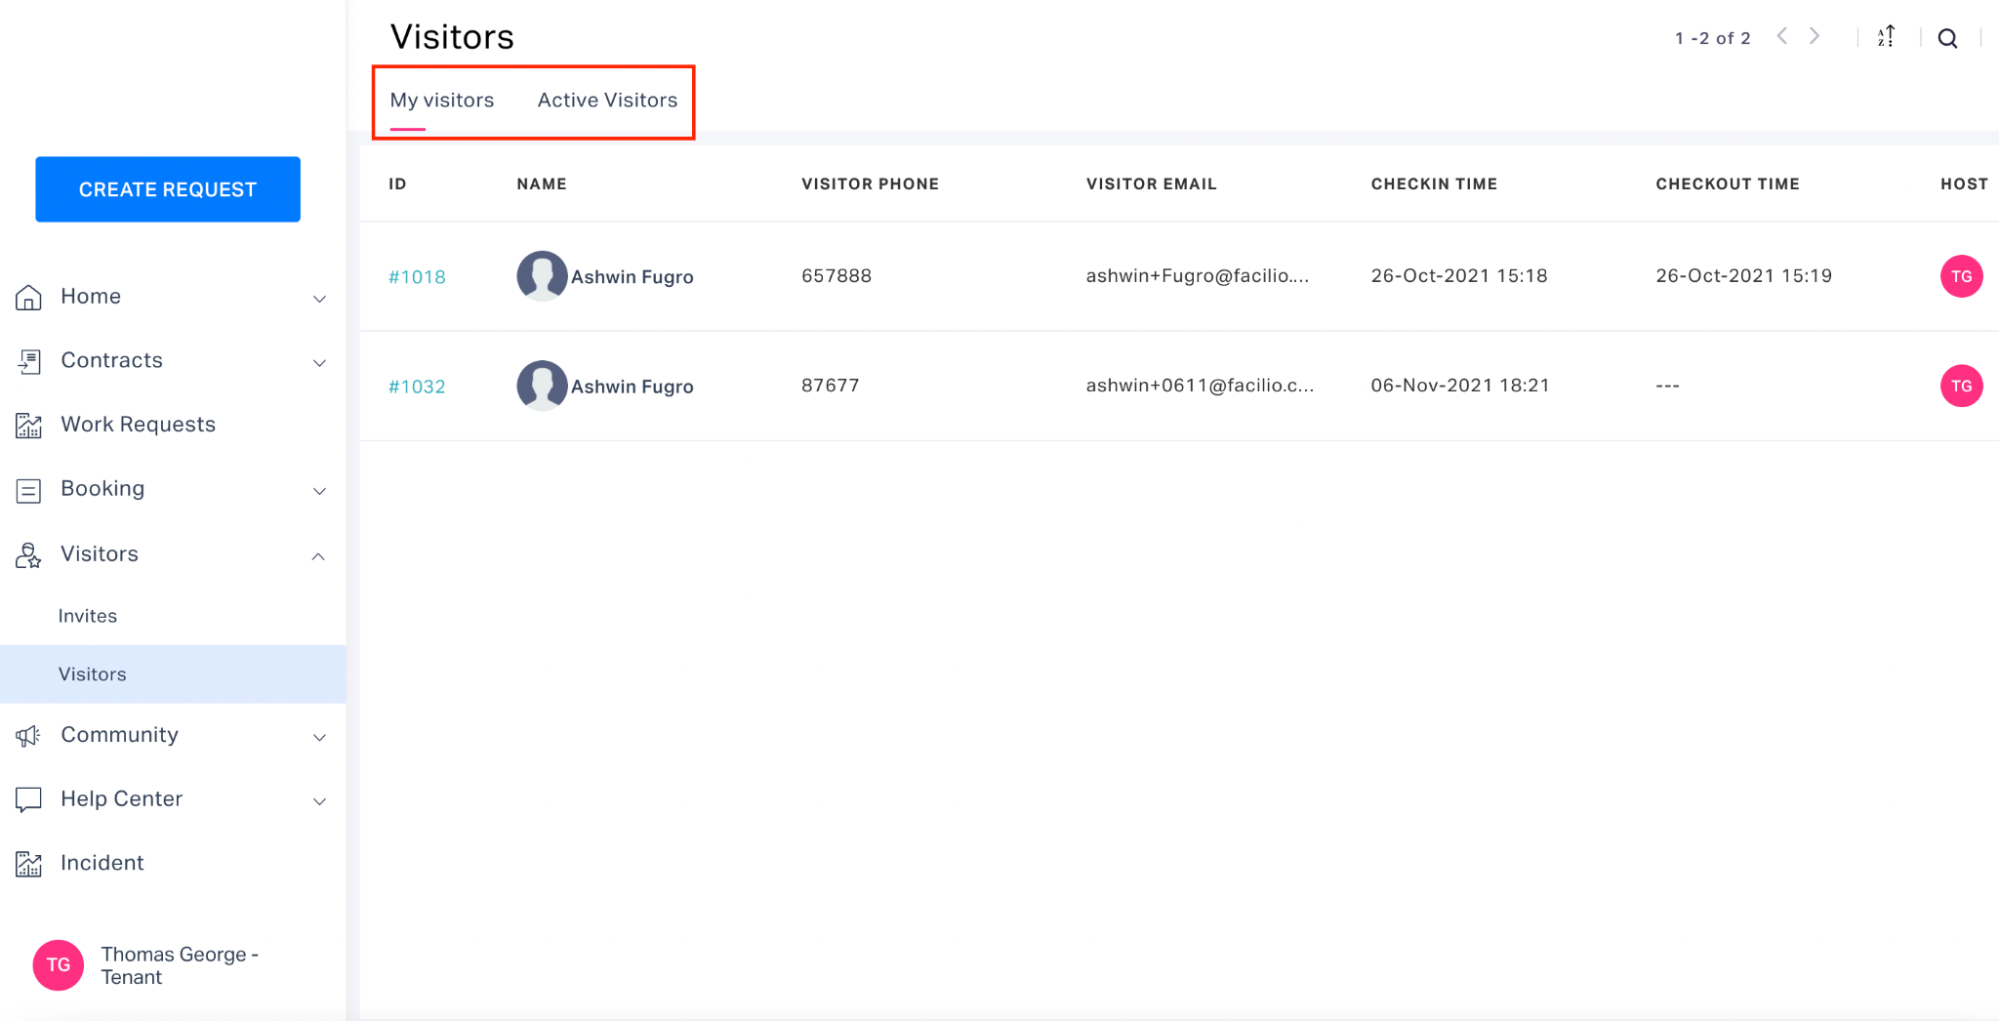
Viewing the Visitors
Managing Communities
Announcements
Announcements are the internal updates from the facility management team to the tenants. To view the latest announcements you can navigate to the Announcements section in the Community module as shown below.
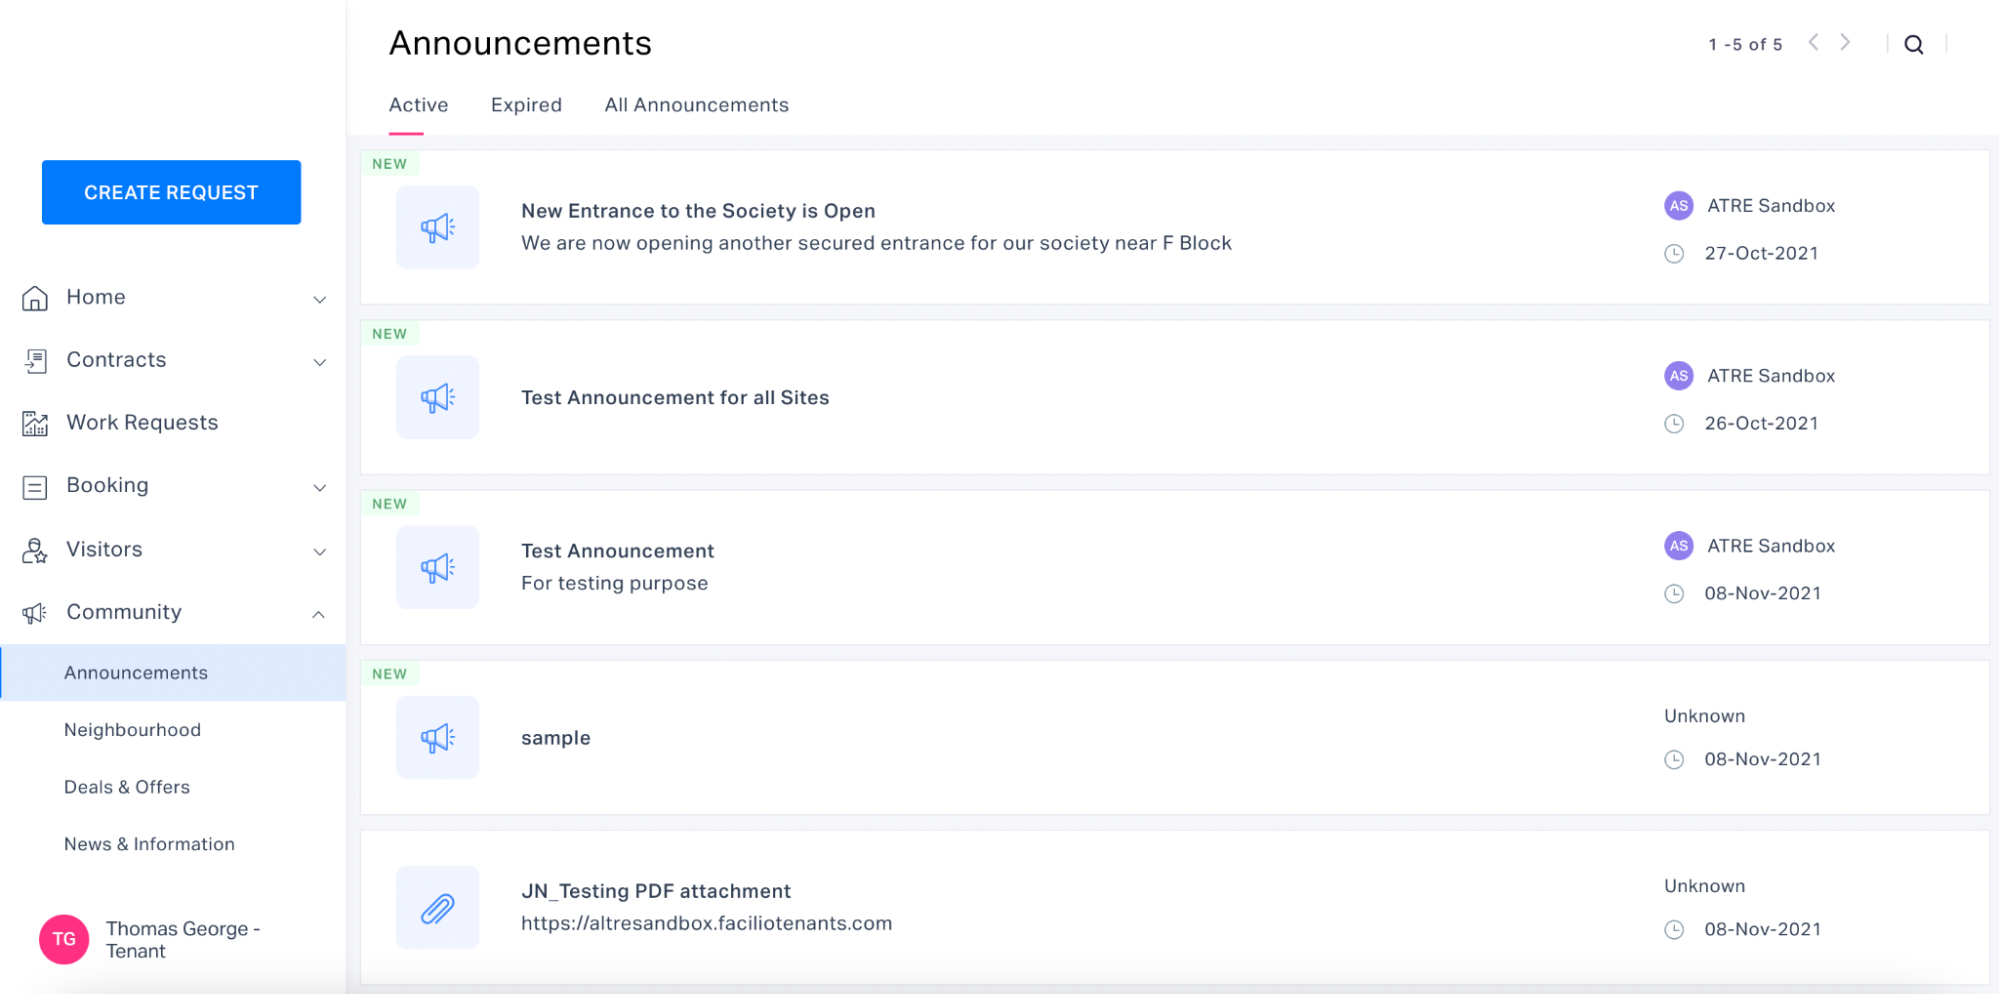
Note: Only the active announcements are displayed by default. Separate views are available to check all and expired announcements.
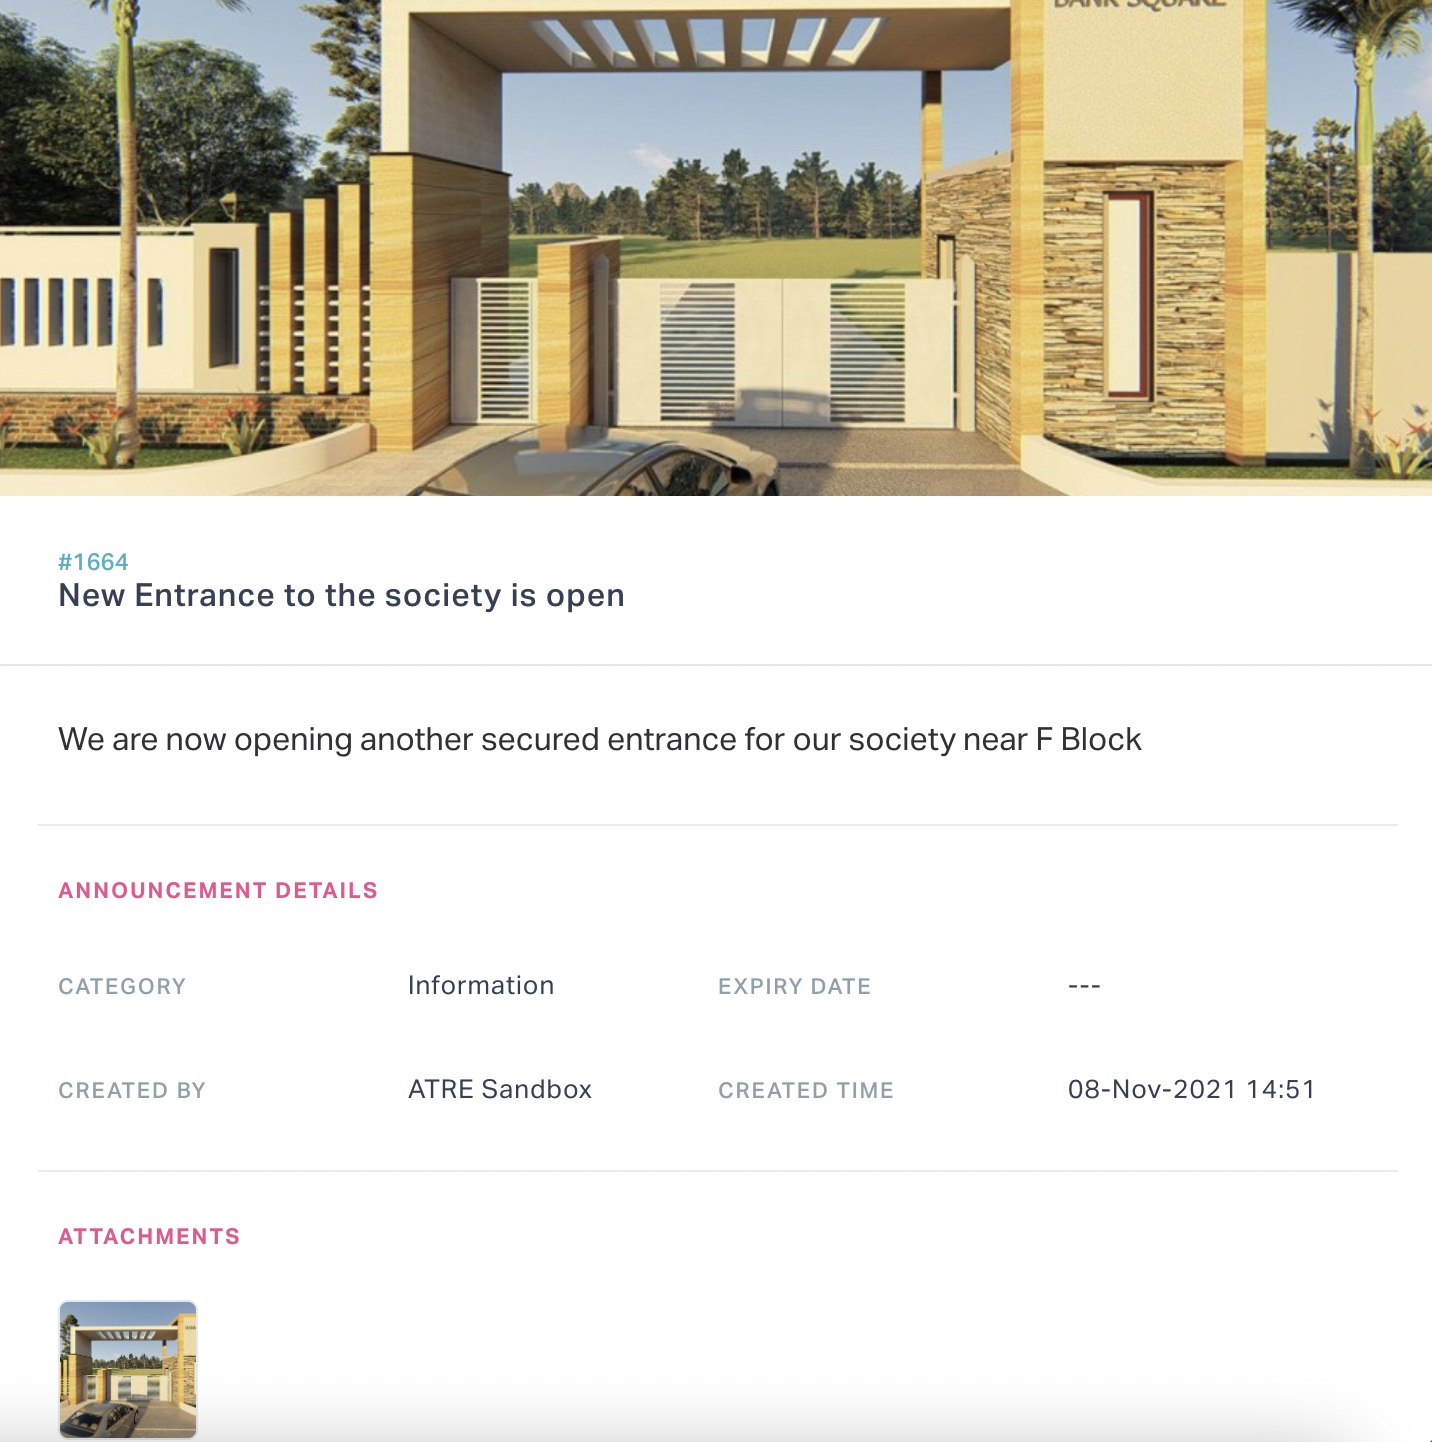
You can click an announcement in the dashboard to view further details of it as shown below.
Neighborhood
Neighborhood refers to the social environment, which includes schools, hospitals, shops, parks and recreational facilities that operate close to the building. To view the neighborhood places you can navigate to the Neighborhood section in the Community module as shown below.
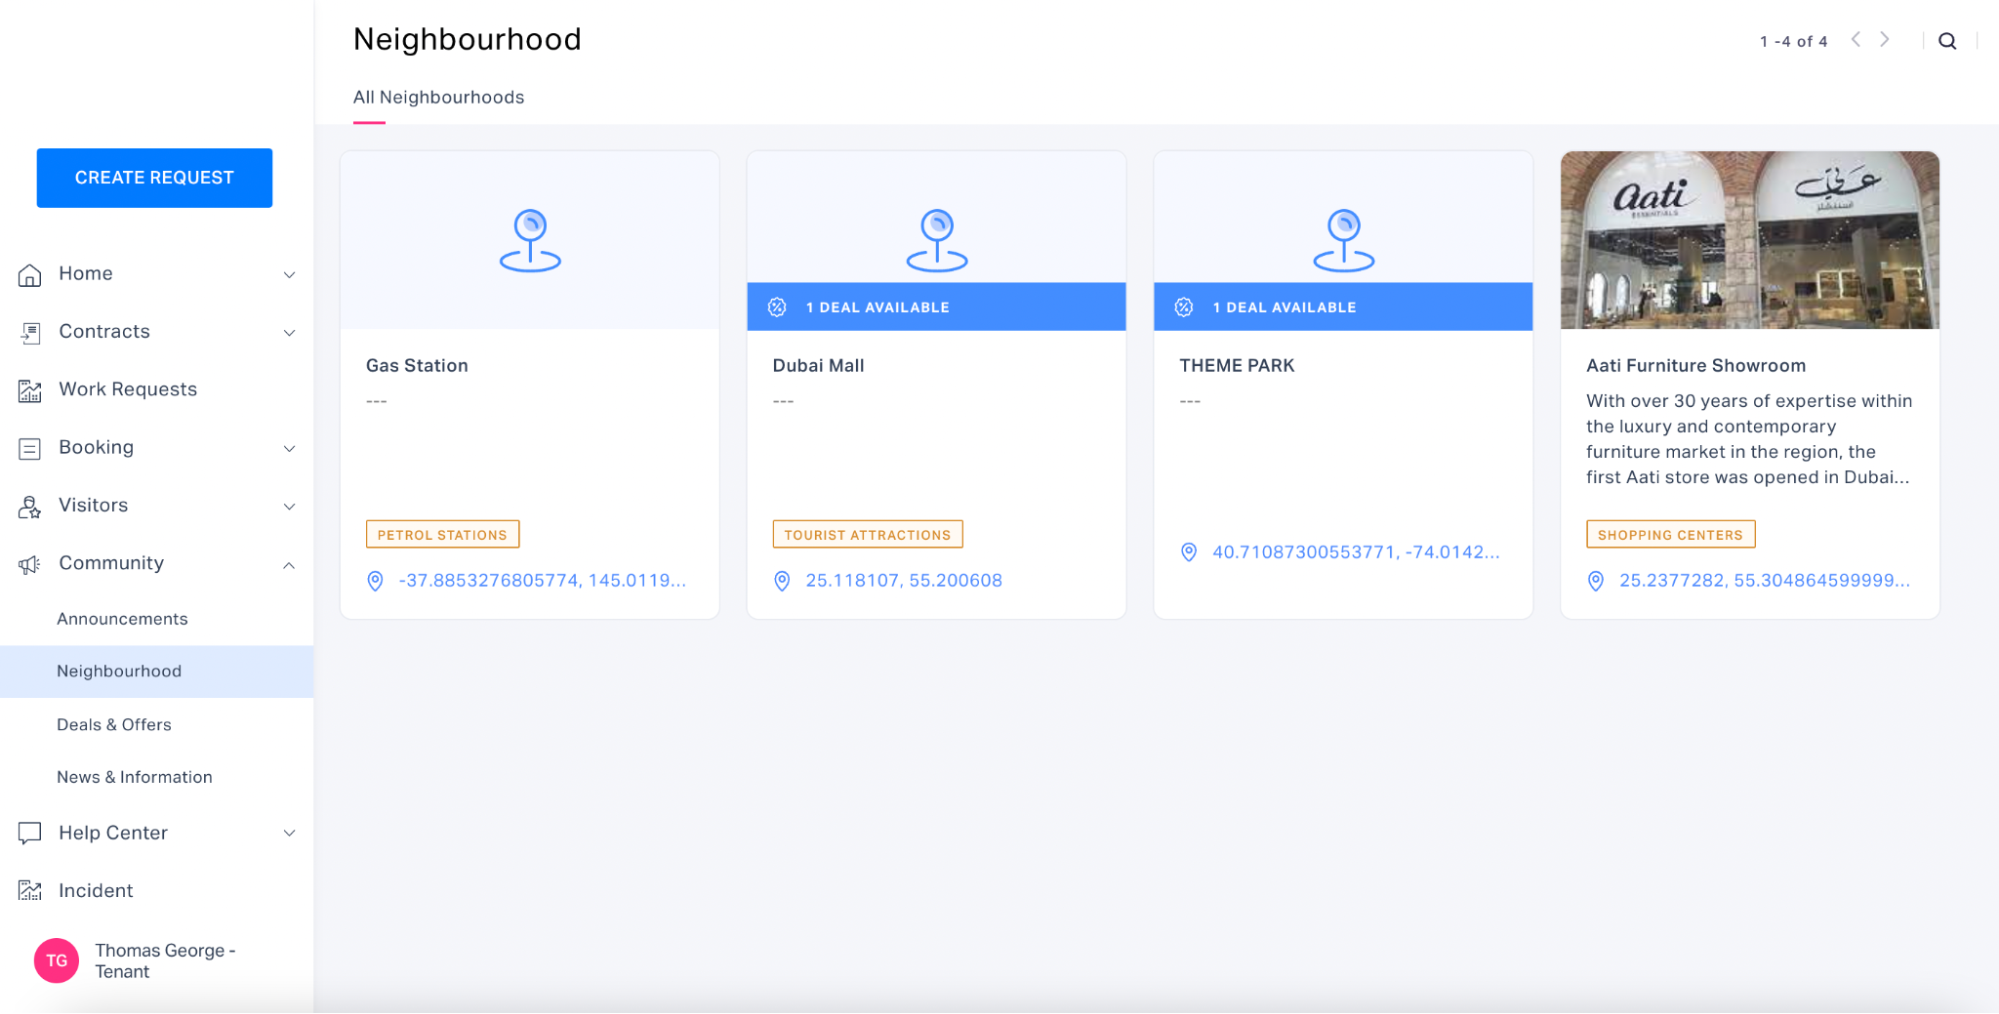
You can click a neighborhood facility in the dashboard to view the location of the neighborhood, associated deals and other details of it as shown below.

Deals and Offers
Deals and offers are the discounts offered on the selected products and services. To get updated on the ongoing deals and offers you can navigate to the Deals & Offers section in the Community module as shown below.
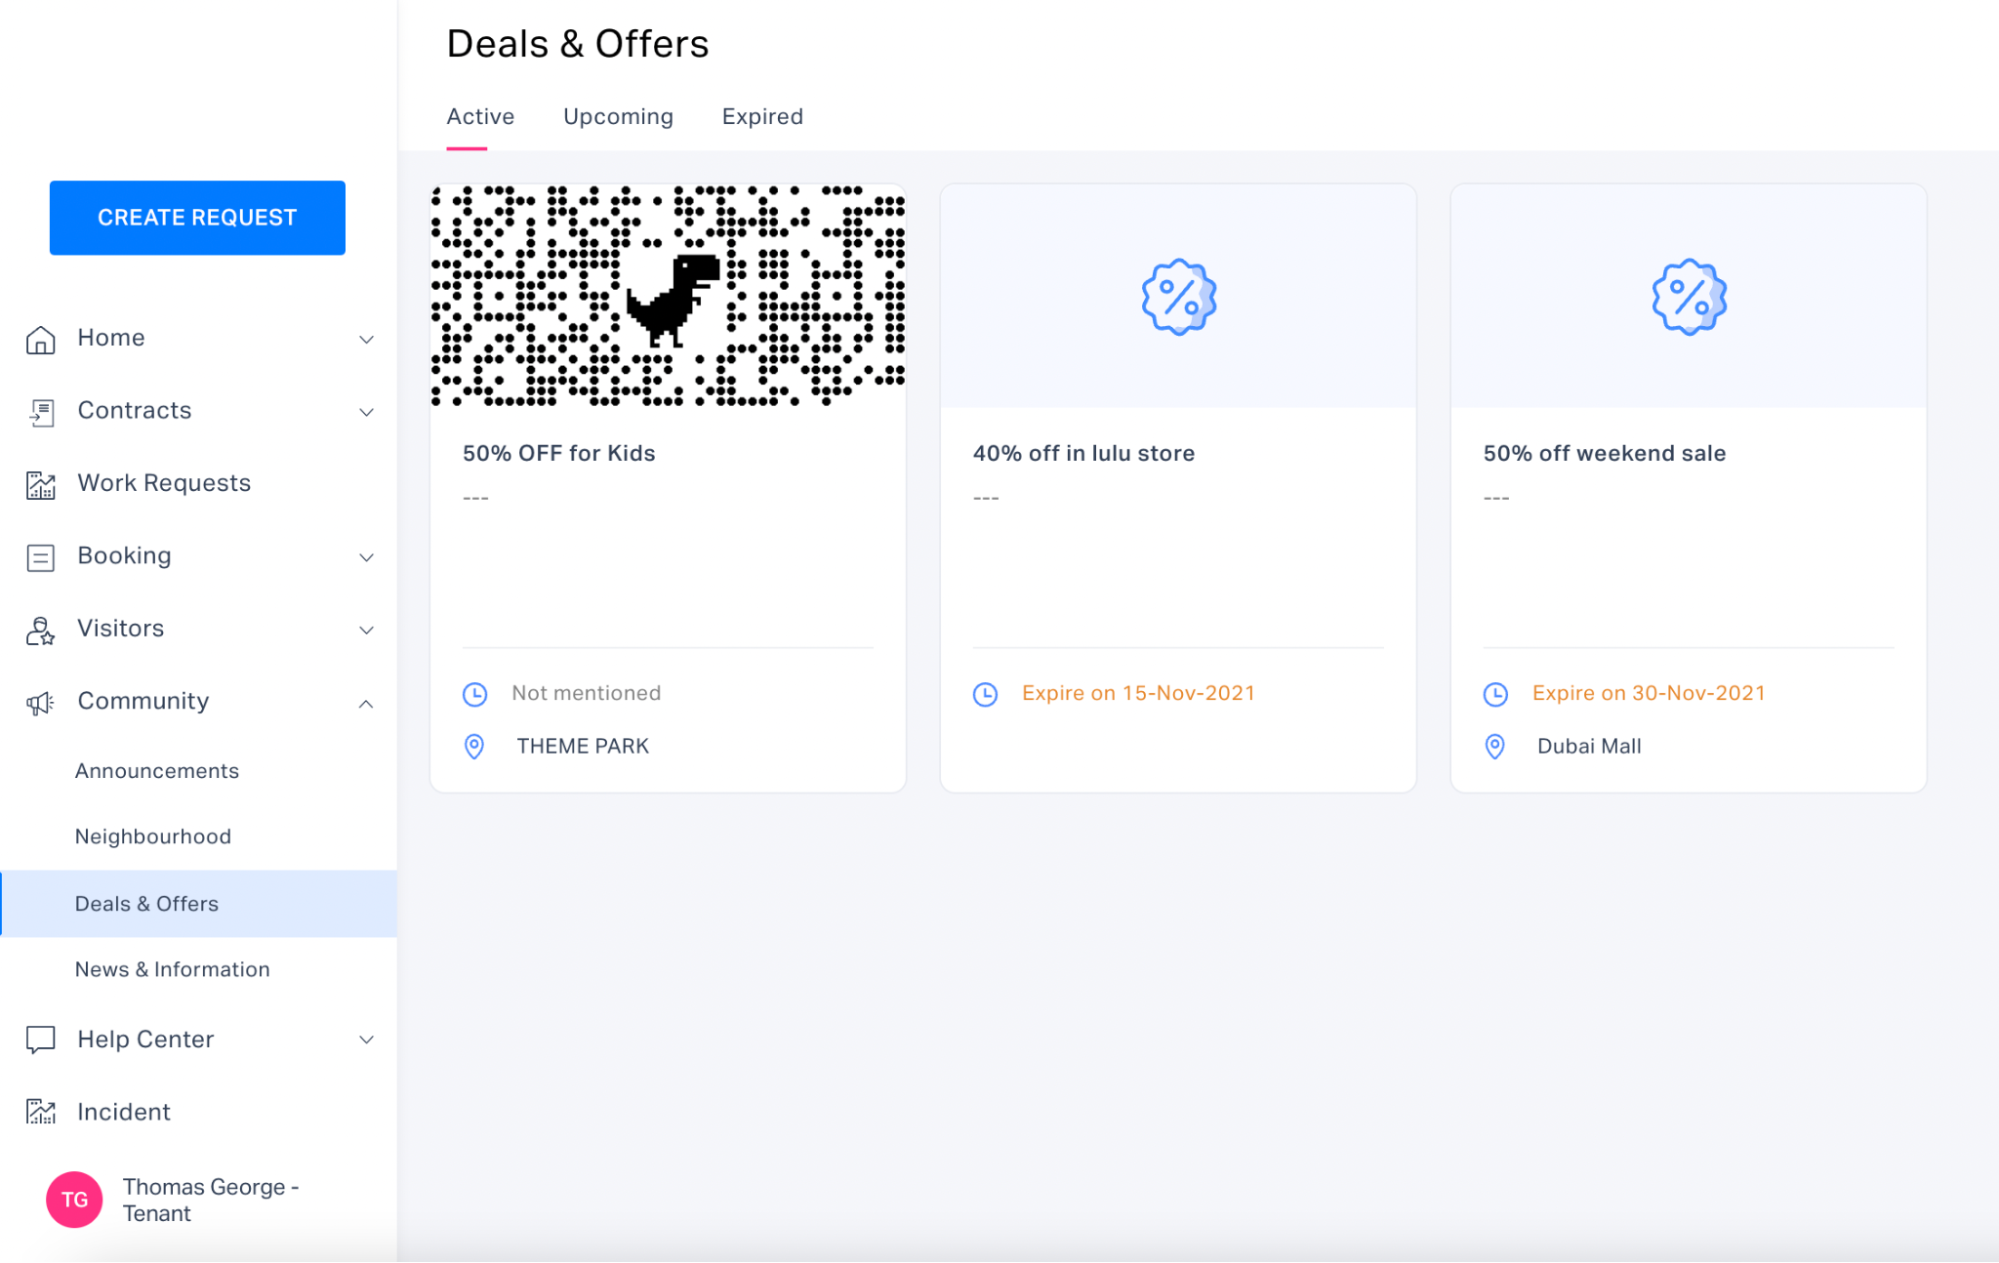
Note: Only the active deals and offers are displayed by default. Separate views are available to check upcoming and expired offers.
You can click on a deal in the dashboard to view further details of it as shown below.

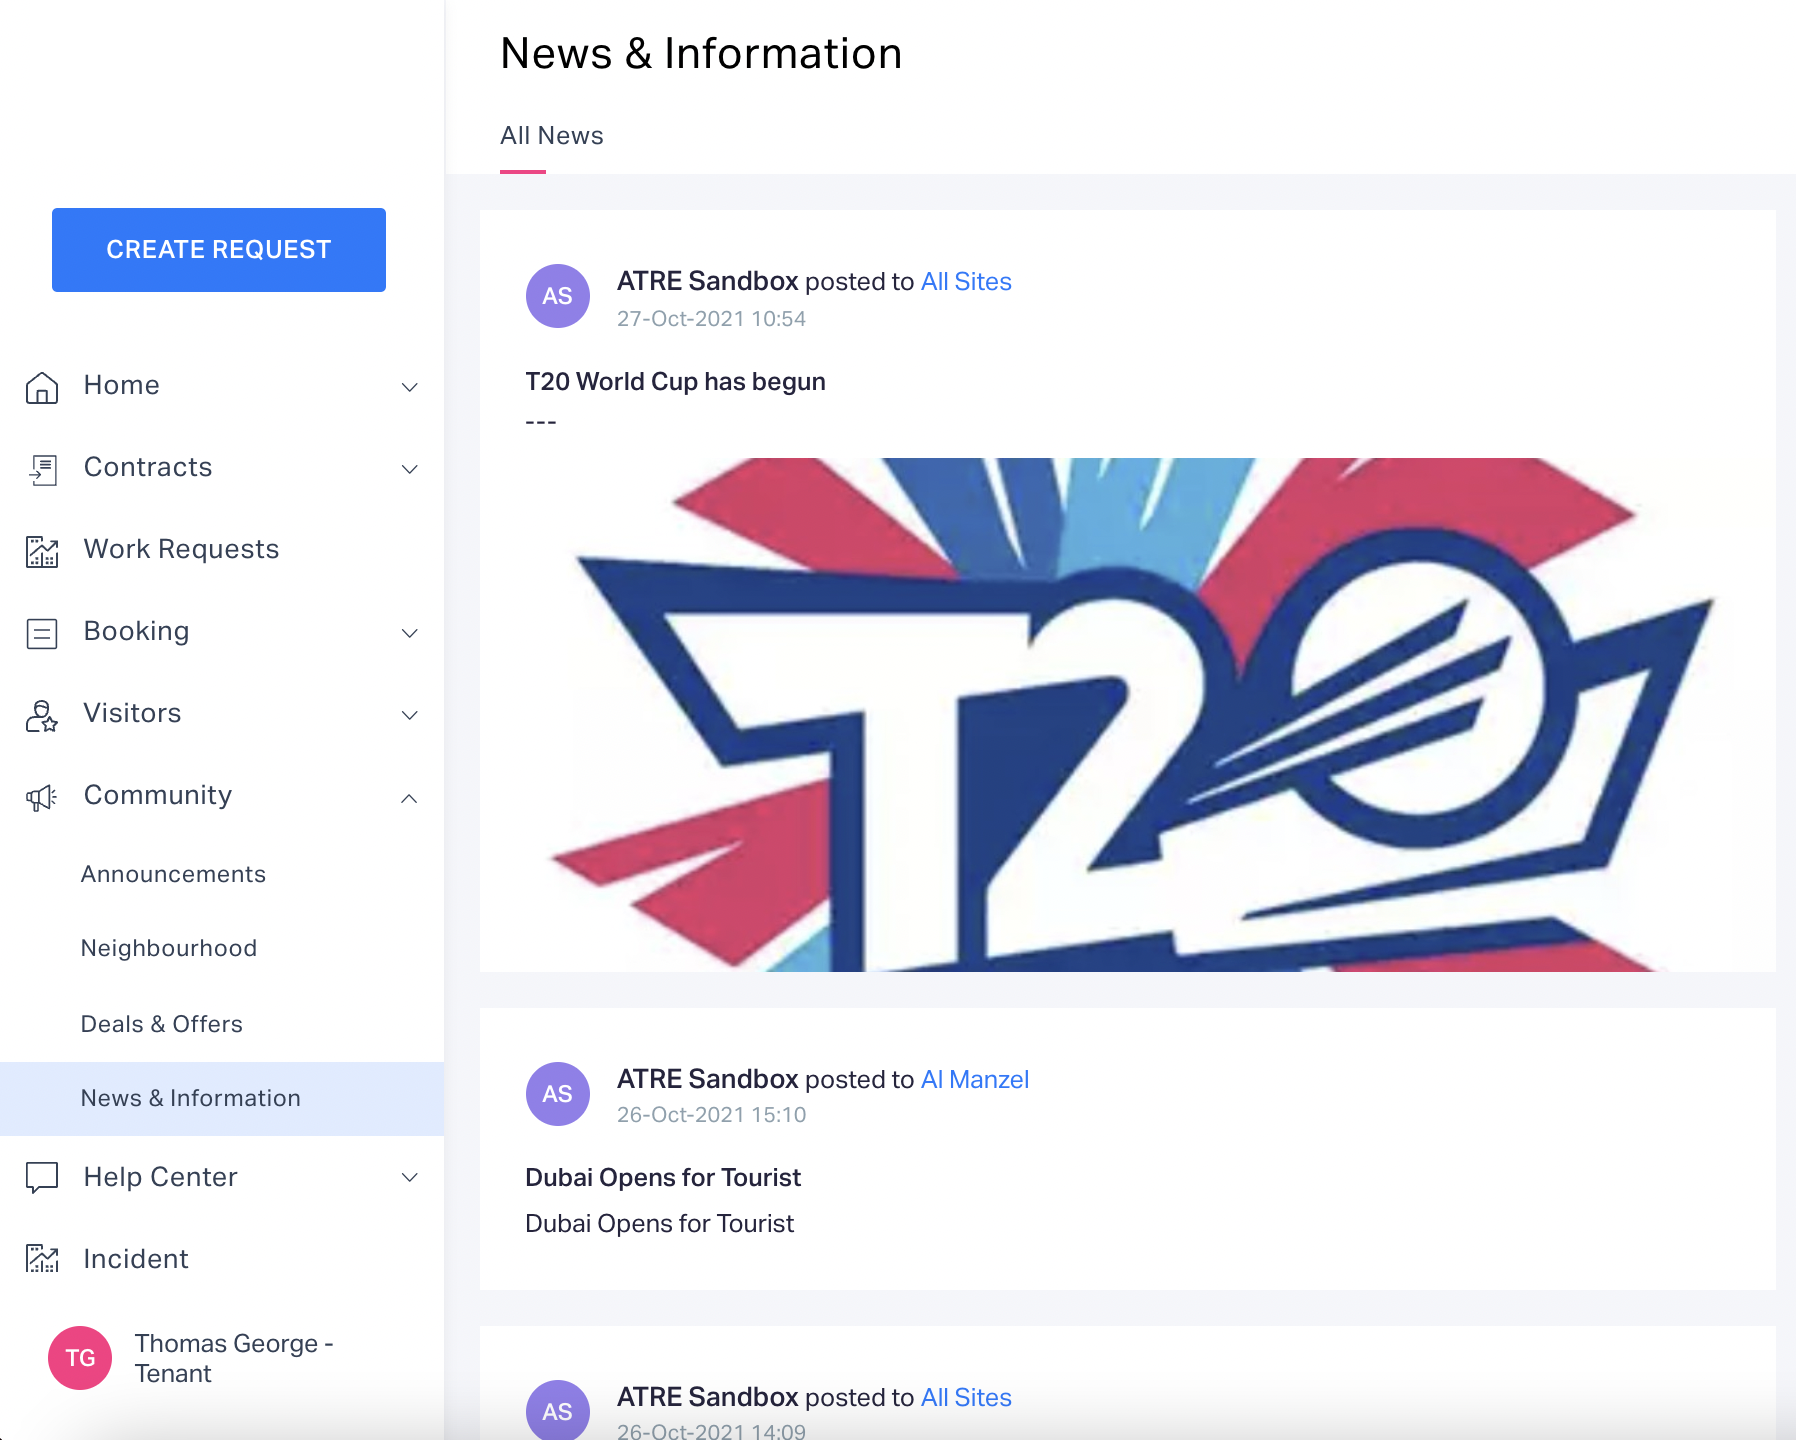
News and Information
Help Center Utilization
Documents - Help documents and user manuals in various formats (viz. DOC, PDF, PPT, PNG, JPG and so on) are available in this section
Contact Directory - Helplines and contact information of other mandatory services are available in this section
Referrals - The primary contact details of the recommended products and various service agencies are available in this section.
Note: You can create referrals using the NEW REFERRAL option at the top right of the Referrals screen
FAQs - Responses to the frequently asked questions are available in this section
Logging Incidents
You can log an incident ticket yourself and also on behalf of other affected individuals. Perform the following steps to create an incident:
Login to the Tenant portal.
Click Incident in the side panel. All the open incidents are displayed by default.
Click NEW INCIDENT MANAGEMENT. The Create Incident Management screen is displayed as shown below.
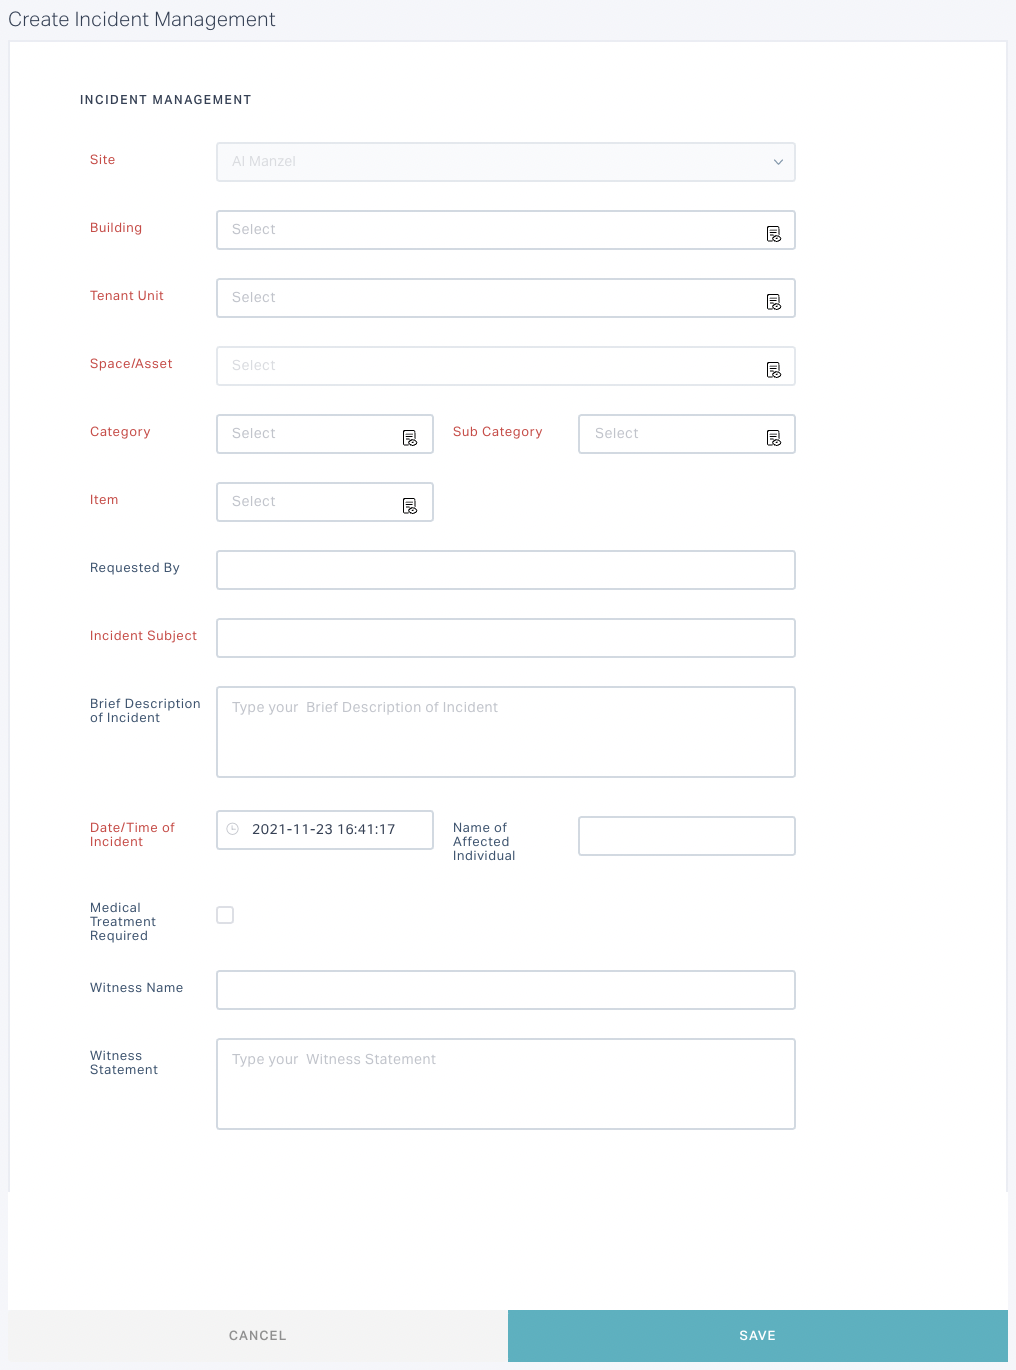
Update the required details in this screen and click SAVE. The incident is now reflected in the Open view in the Incidents screen as shown below.
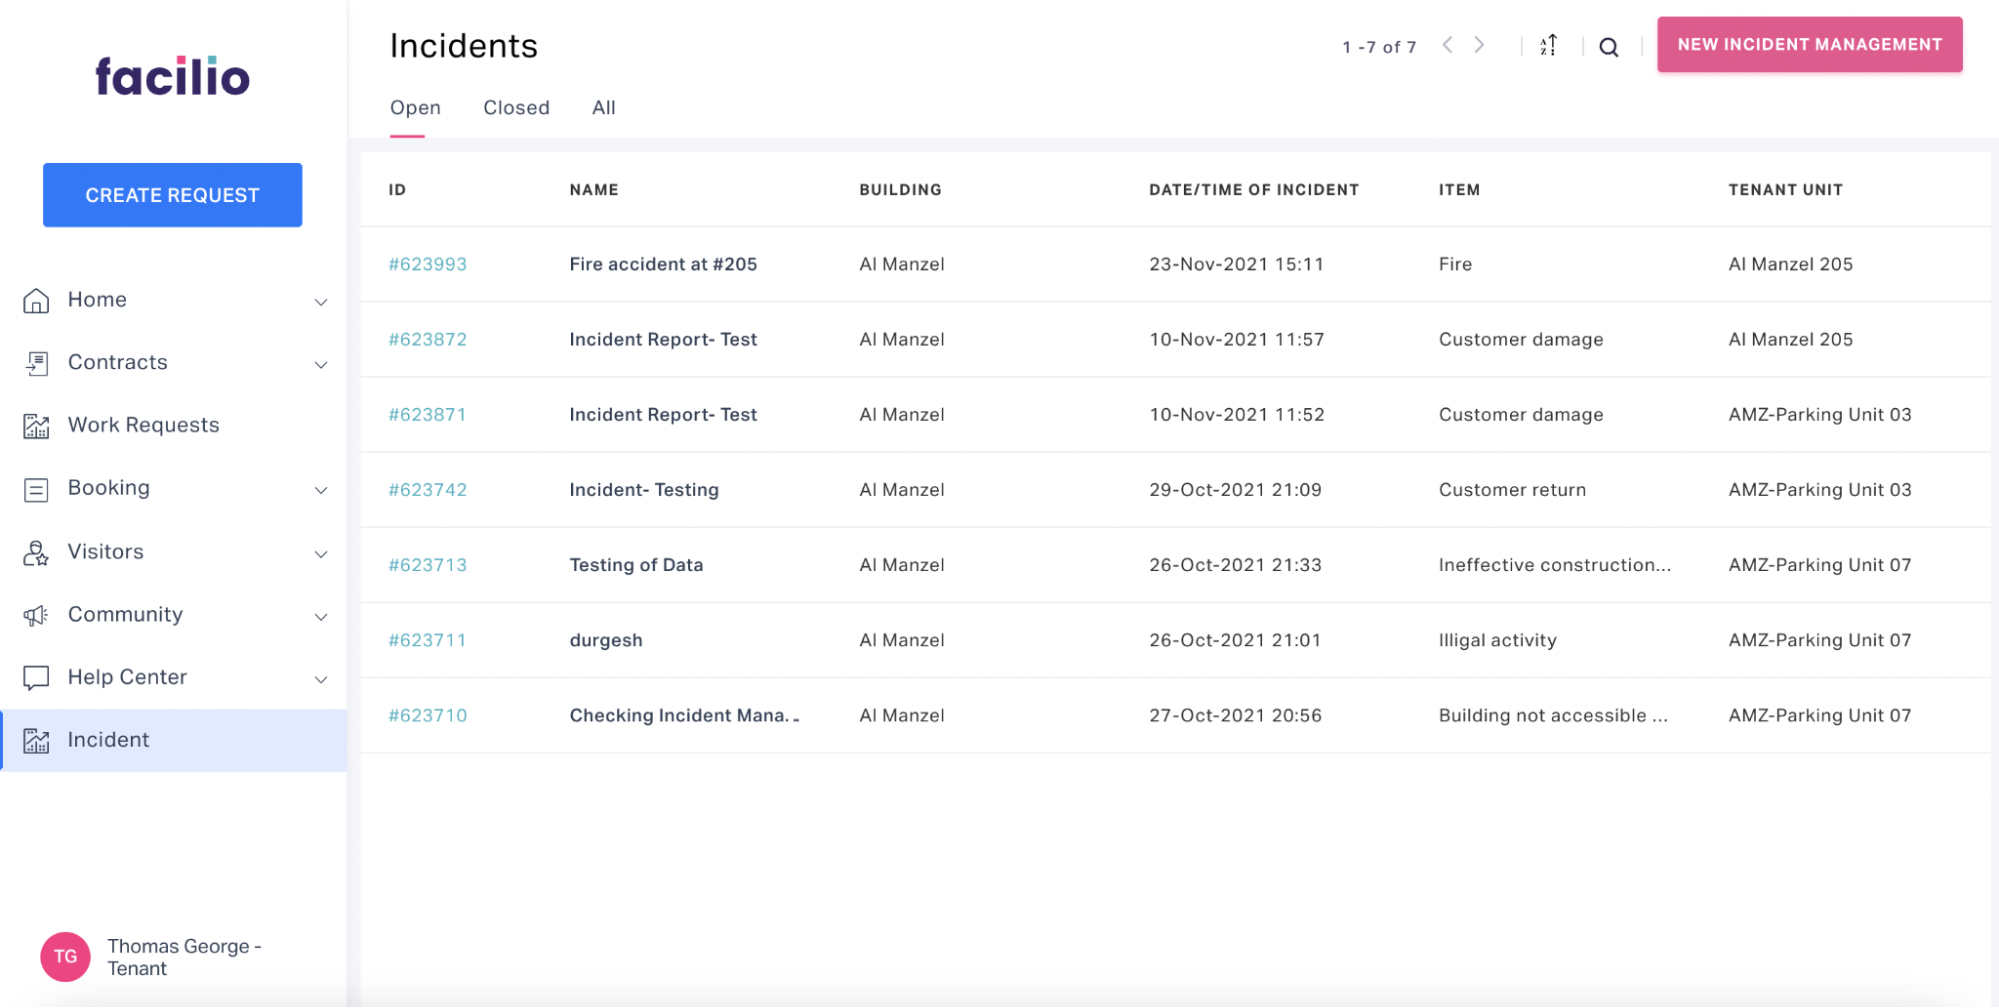
A notification is triggered to the respective stakeholders, at once an incident is logged. After the incident is addressed, the status of the ticket is updated from OPEN to CLOSE.
Managing User Account
The application allows the tenants to make limited changes to their account with respect to the user role assigned to them.
Modifying Account Details
Click the profile photo at the bottom left of the portal and select My Profile.

The My Profile section is displayed as shown below.
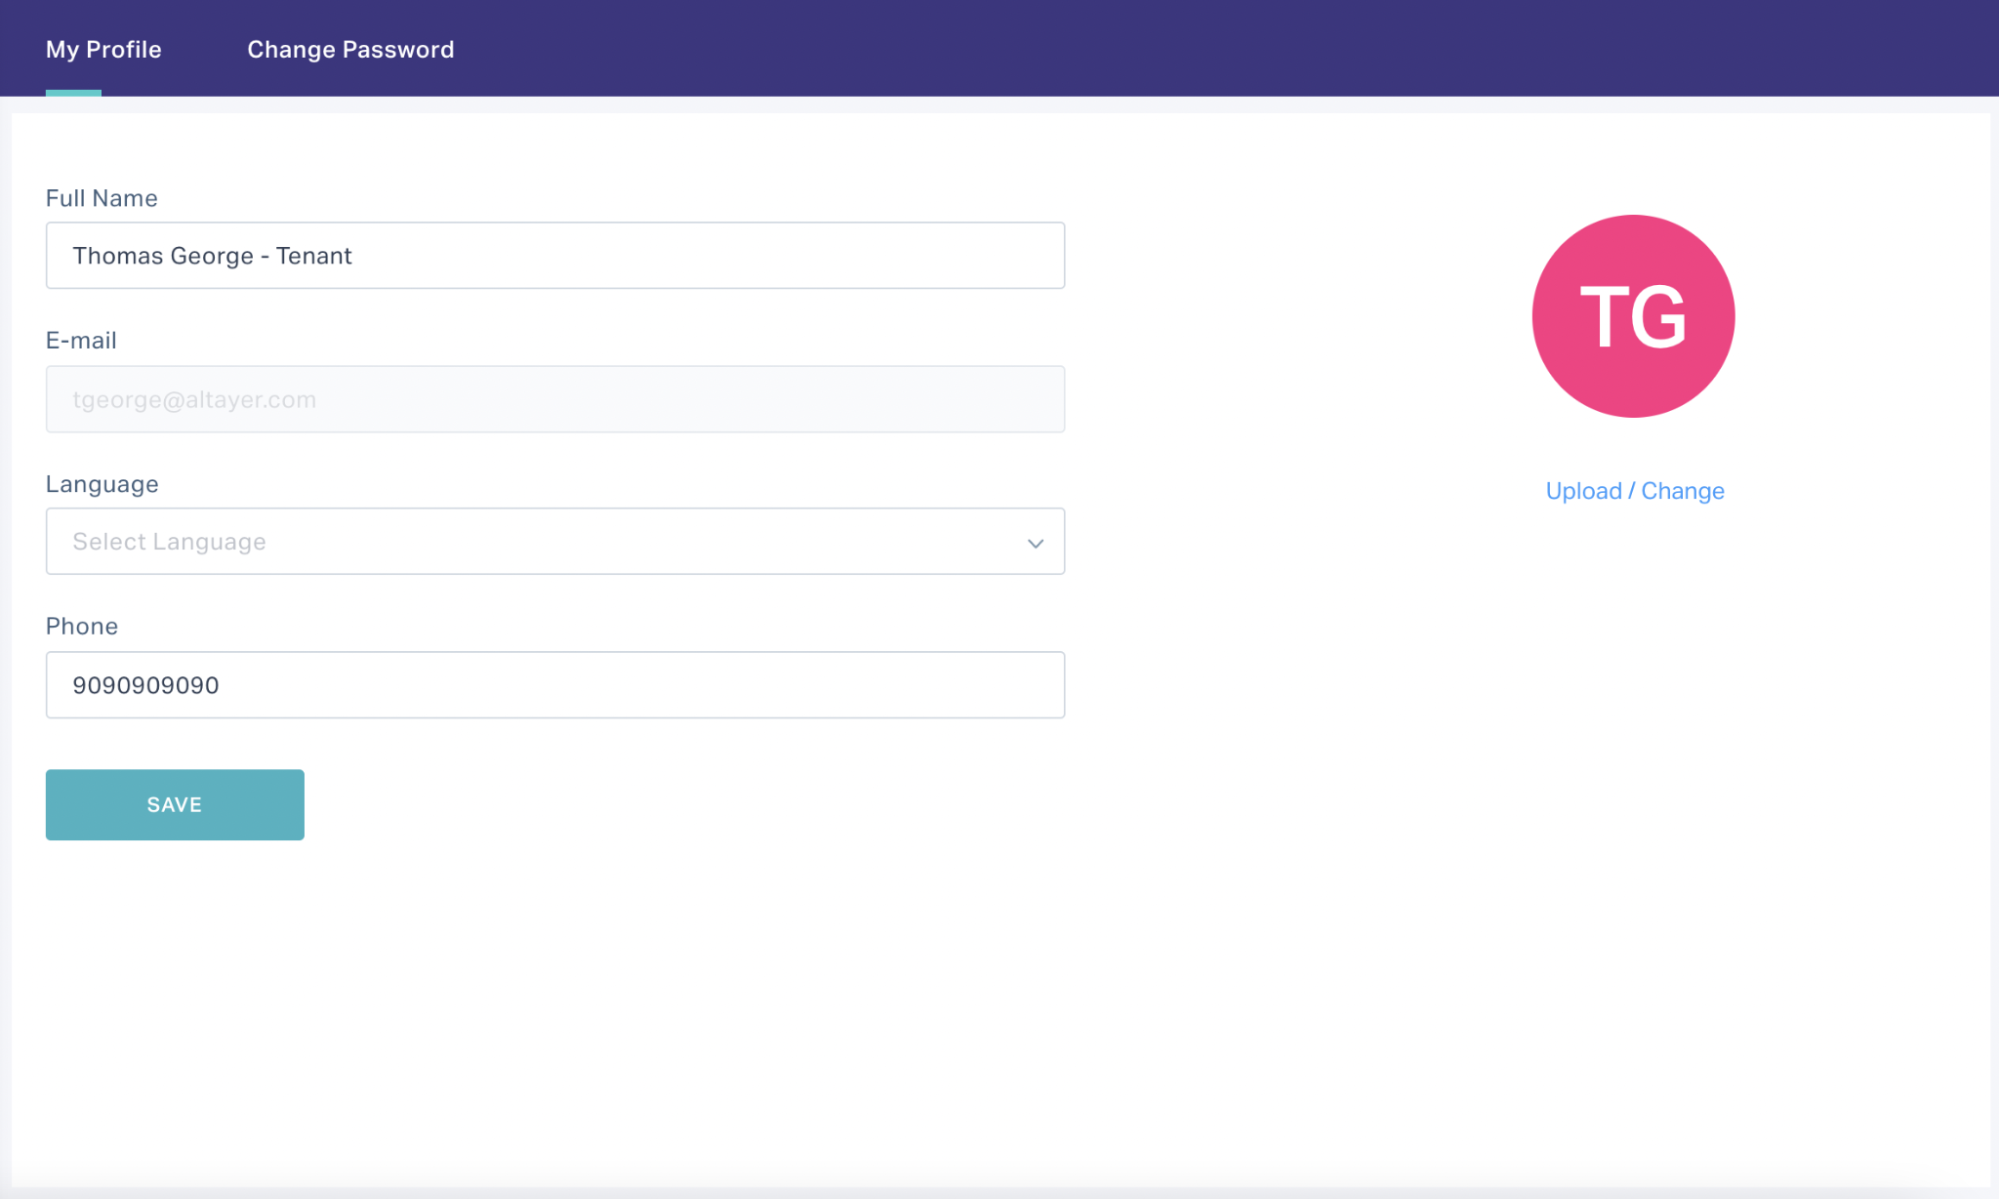
Update the required details in this screen.
Note: You can also upload or change the profile picture.
Click SAVE. The changes are now saved to the user profile.
Changing Account Password
Click the profile photo at the bottom left of the portal and select My Profile.
The My Profile section is displayed by default.
Navigate to the Change Password section.
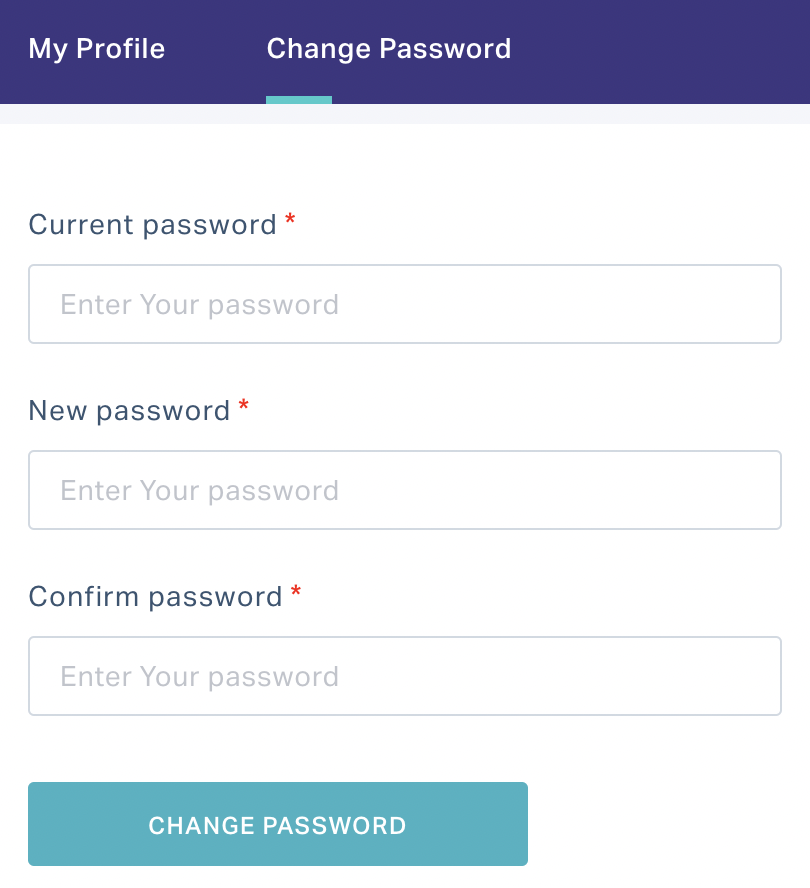
Update the Current password, New password and Confirm password fields and click CHANGE PASSWORD. The account password is now updated to the new password.
Logging Out
To log out of the user account, click the profile photo at the bottom left of the portal and select Logout.
You are instantly logged out of the tenant portal.